
What to do with virgin 01? Look Tugly


#47
 10-28-2014, 06:22 PM
Things are going good. Rust is setting in slowly. Today I stripped, wire vbrushed, and painted the original section of frame. I brushed on the paint this time, boy that takes some time. I sprayed the last truck and was done within an hour. I have most of the day into just the rear section of frame already.
Pulled out the brake lines for the rear as well today. The brake lines are like new yet but that wouldn't last long around here. They will all be replaced with nicopp.
Pulled out the brake lines for the rear as well today. The brake lines are like new yet but that wouldn't last long around here. They will all be replaced with nicopp.

#49
10-28-2014, 07:16 PM
Hotshot
Snowseeker, that is a nice find! I wish I had that bed on my truck! Mine is full of rust and holes! It's even the right color!
That should make a nice service truck. And I like the way you patched the frame together. I can't tell you how many frame jobs I've seen where they just butt weld them together.
That should make a nice service truck. And I like the way you patched the frame together. I can't tell you how many frame jobs I've seen where they just butt weld them together.
#50
10-29-2014, 07:57 AM
Snowseeker, that is a nice find! I wish I had that bed on my truck! Mine is full of rust and holes! It's even the right color!
That should make a nice service truck. And I like the way you patched the frame together. I can't tell you how many frame jobs I've seen where they just butt weld them together.
That should make a nice service truck. And I like the way you patched the frame together. I can't tell you how many frame jobs I've seen where they just butt weld them together.
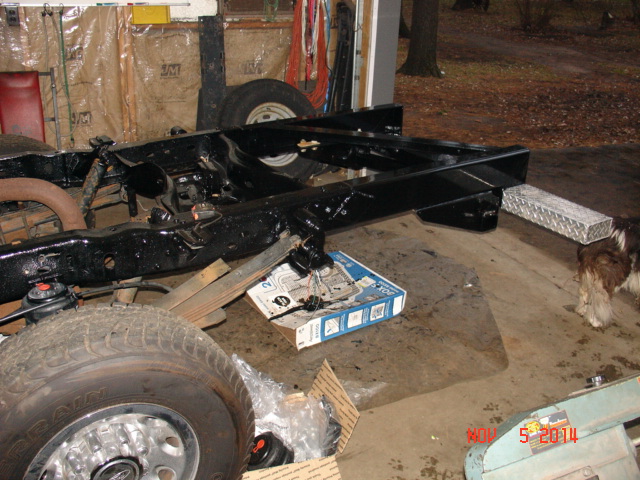
The bed is going into storage next to our other "take off" beds. We talked about selling it but I would hate to try and find a nice bed 15 years from now when this truck is taken out of service.
Both of our original trucks that were extended were butt welded by some other company. I never did like it, was always nervous when towing anything, just bad. One of our trucks the extended section rotted out and had to be replaced. After cutting off the section I could not believe it just didn't fall off. Comes down to that deal of do it yourself or... lol
This is the truck I had to replace the rusted rear section on:

Also an interesting thing. The OBS trucks had a 3/32ish thick frame and the superduty has a 1/4" thick frame.
#51
10-29-2014, 10:51 AM
Postmaster
Very nice job Andy  That is the correct way of doing it and not only that but very nice welds also. Butt welding a frame rail is a huge No No for many reasons which I won't get into here. I spent many years working in body shops and seen all kinds of things that weren't right and unsafe. Mind you I have many little pieces of papers from ASE, I-CAR, CarOliner, Chief and few others that say I know what I am talking about on this subject. Also I have seen many frame techs that couldn't do as good a job as you did.
So thanks for showing us the correct way of doing it !
Keep up the good work and keep the photos coming.
That is the correct way of doing it and not only that but very nice welds also. Butt welding a frame rail is a huge No No for many reasons which I won't get into here. I spent many years working in body shops and seen all kinds of things that weren't right and unsafe. Mind you I have many little pieces of papers from ASE, I-CAR, CarOliner, Chief and few others that say I know what I am talking about on this subject. Also I have seen many frame techs that couldn't do as good a job as you did. So thanks for showing us the correct way of doing it !
Keep up the good work and keep the photos coming.
#52
10-29-2014, 05:24 PM
Thanks very much for all the kind words Ed(?)!
It is scary to see and just knowing there is worse out there on the road all the time. Just like vehicle maintenance, some people just let stuff go until there is a total failure and some times that failure causes an accident and we can only hope it only involves just them.
Anyhow, I slathered on the chassis saver in every nook and cranny. This sucks with a brush btw. I stopped at the edge of the new section, going to wait till the last minute to coat that section to get as much rust as possible.

The on to the tank mods.
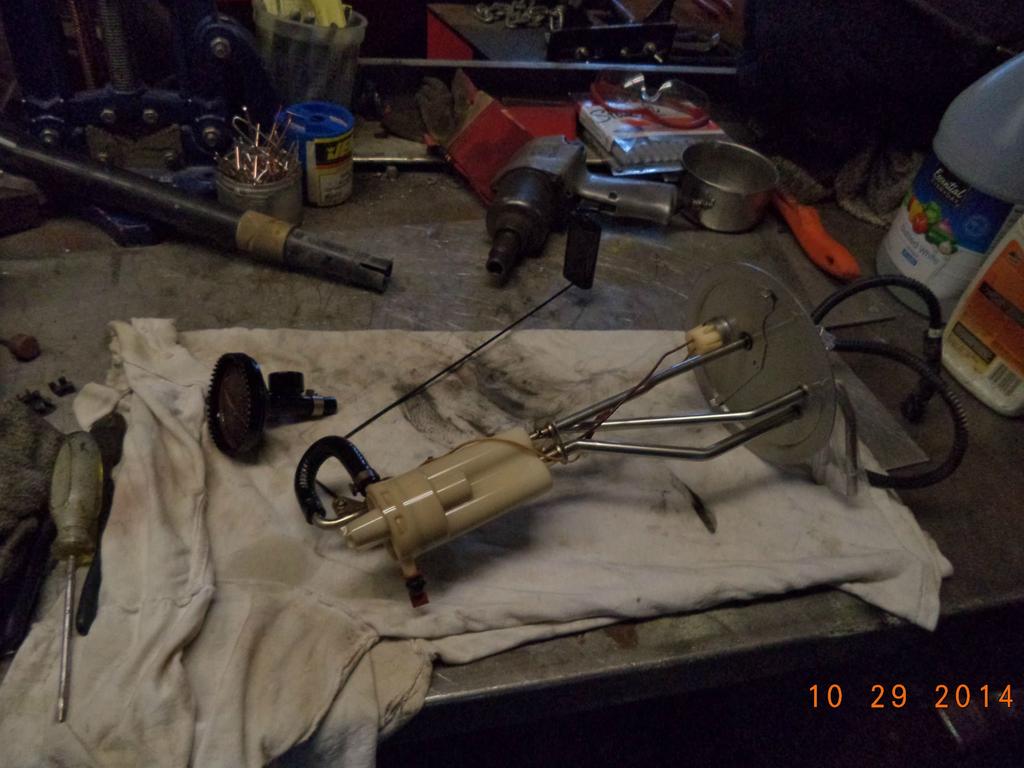
Not to dirty, just a little rust on the upper screen.
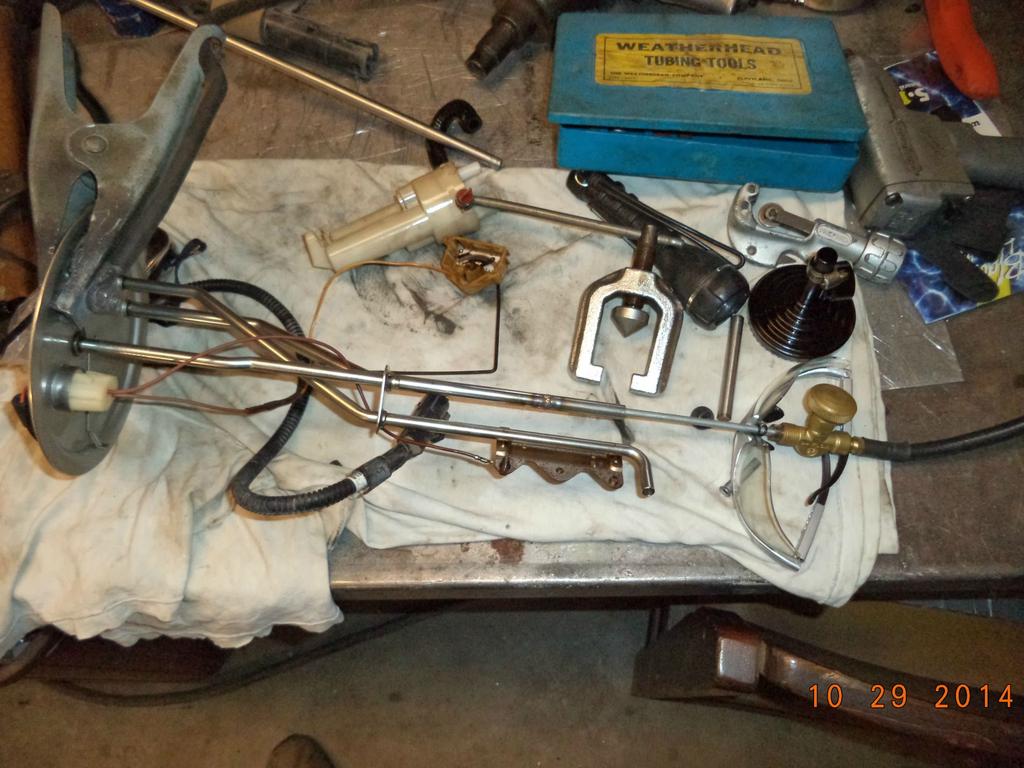
Welding in the missing section.
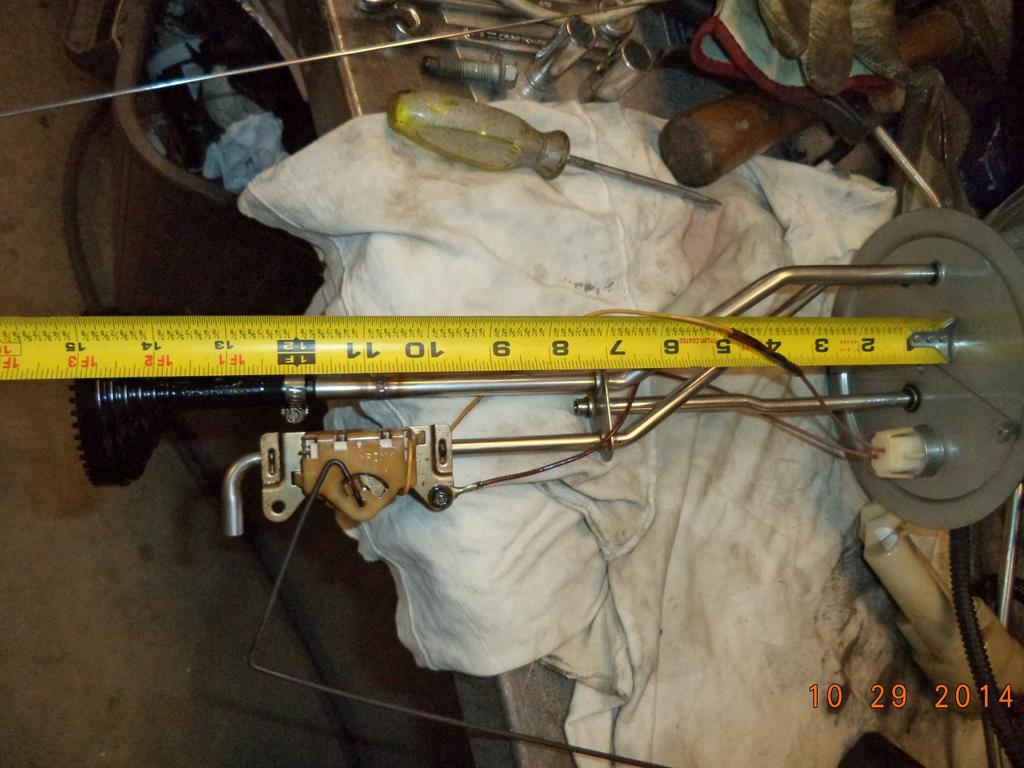
Right on 15"
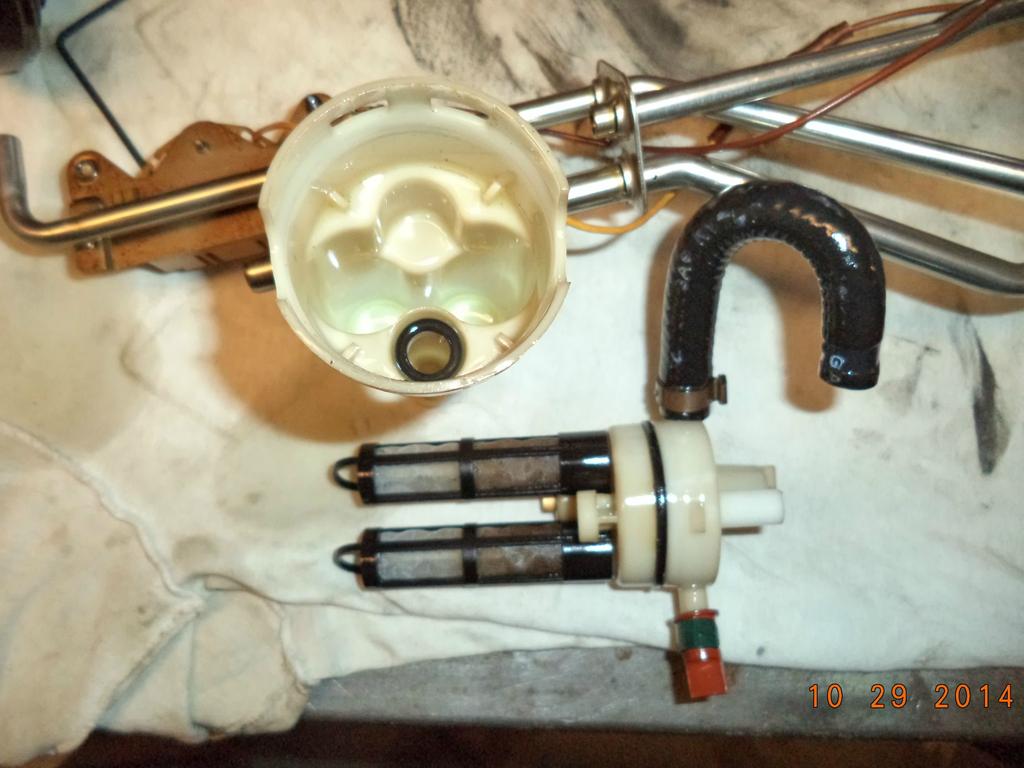
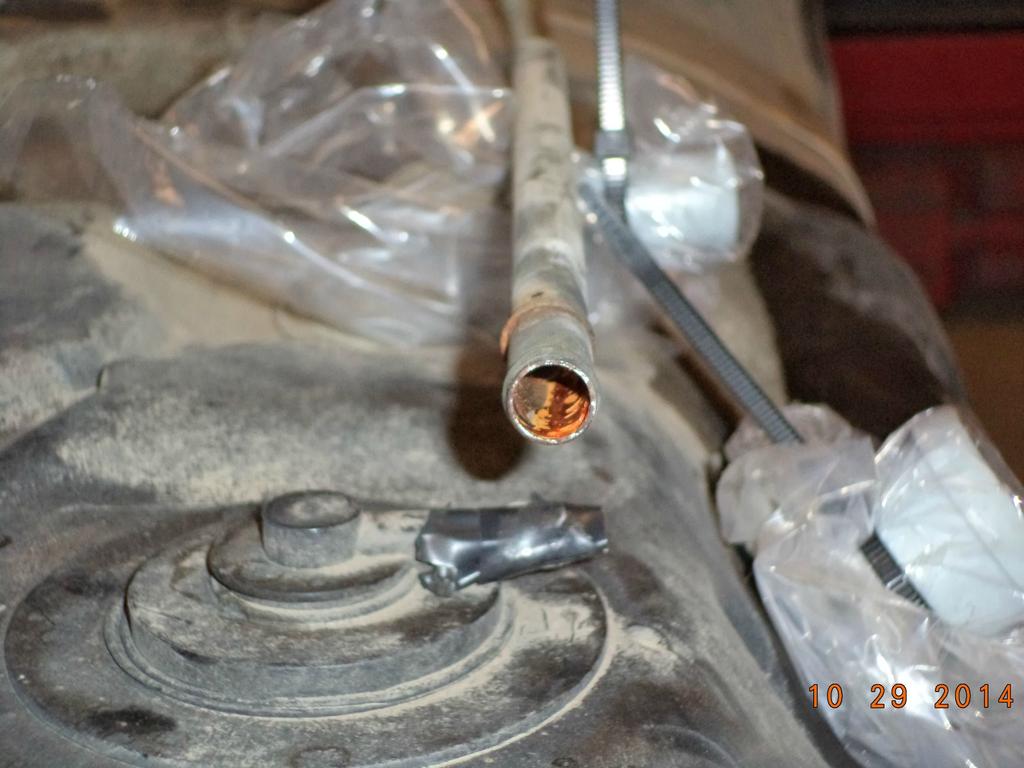
Won't be reusing this vent tube. Installed an all rubber line.
It is scary to see and just knowing there is worse out there on the road all the time. Just like vehicle maintenance, some people just let stuff go until there is a total failure and some times that failure causes an accident and we can only hope it only involves just them.
Anyhow, I slathered on the chassis saver in every nook and cranny. This sucks with a brush btw. I stopped at the edge of the new section, going to wait till the last minute to coat that section to get as much rust as possible.
The on to the tank mods.
Not to dirty, just a little rust on the upper screen.
Welding in the missing section.
Right on 15"
Won't be reusing this vent tube. Installed an all rubber line.
#53
10-29-2014, 05:31 PM

#54
10-30-2014, 12:28 AM
Posting Guru
#56
10-30-2014, 06:21 PM
I will get them. I figure the lower stuff I can get after the flatbed is on and the truck is up on the lift. Like the hinge on the one gas tank strap you can see the little spot I missed in the pic. I have to go back over everything to check for missed areas and stuff.
Yup, new stainless tube tig welded on.
#57
11-06-2014, 06:29 PM
Did some stuff. Haven't had much time to work on the truck.
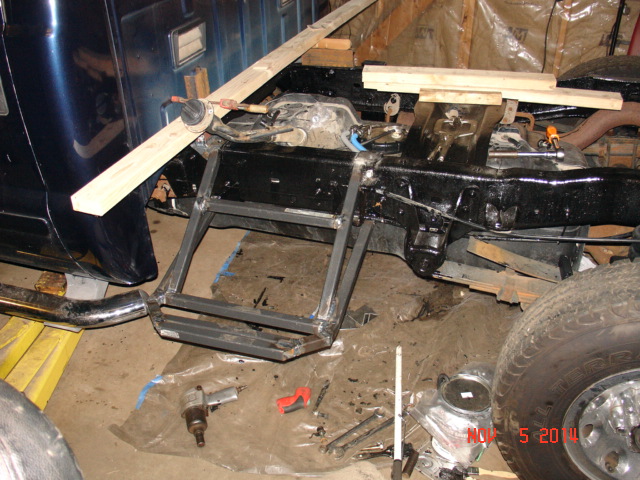
Finally got enough rust to lay down the chassis saver. Threw on the aluminum covers I made up while waiting for the chassis saver to harden. There will be more aluminum diamond plate coverings as I go on the build.
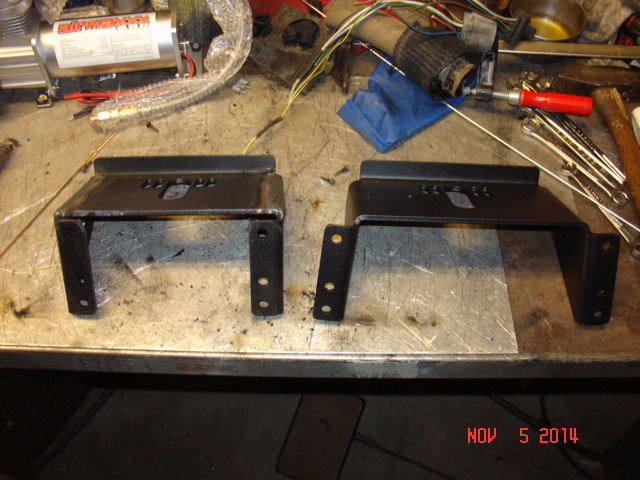
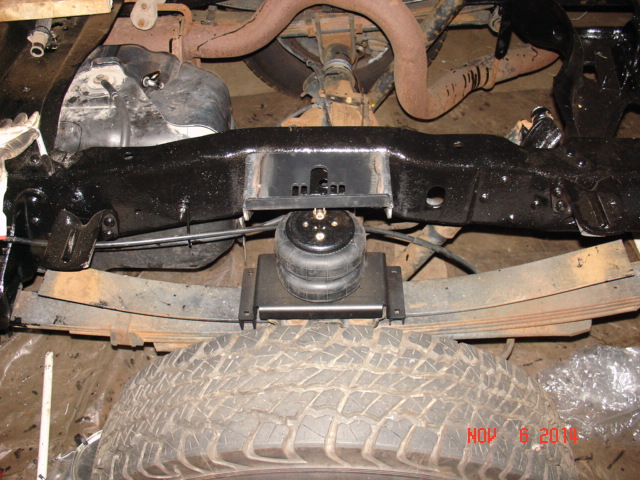
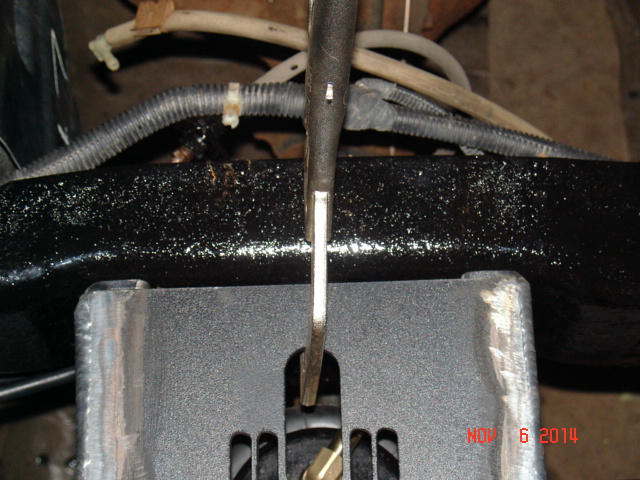
The airbag brackets lined up to a bend on the frame so I had to rearrange them bit to fit better.
You can see the "step" in the frame that would interfere with how they would have mounted before with the ears out.
The skeleton of a step to get onto the flatbed. This will also be covered with diamond plate.
More later.
Finally got enough rust to lay down the chassis saver. Threw on the aluminum covers I made up while waiting for the chassis saver to harden. There will be more aluminum diamond plate coverings as I go on the build.
The airbag brackets lined up to a bend on the frame so I had to rearrange them bit to fit better.
You can see the "step" in the frame that would interfere with how they would have mounted before with the ears out.
The skeleton of a step to get onto the flatbed. This will also be covered with diamond plate.
More later.
#58
11-09-2014, 06:39 AM
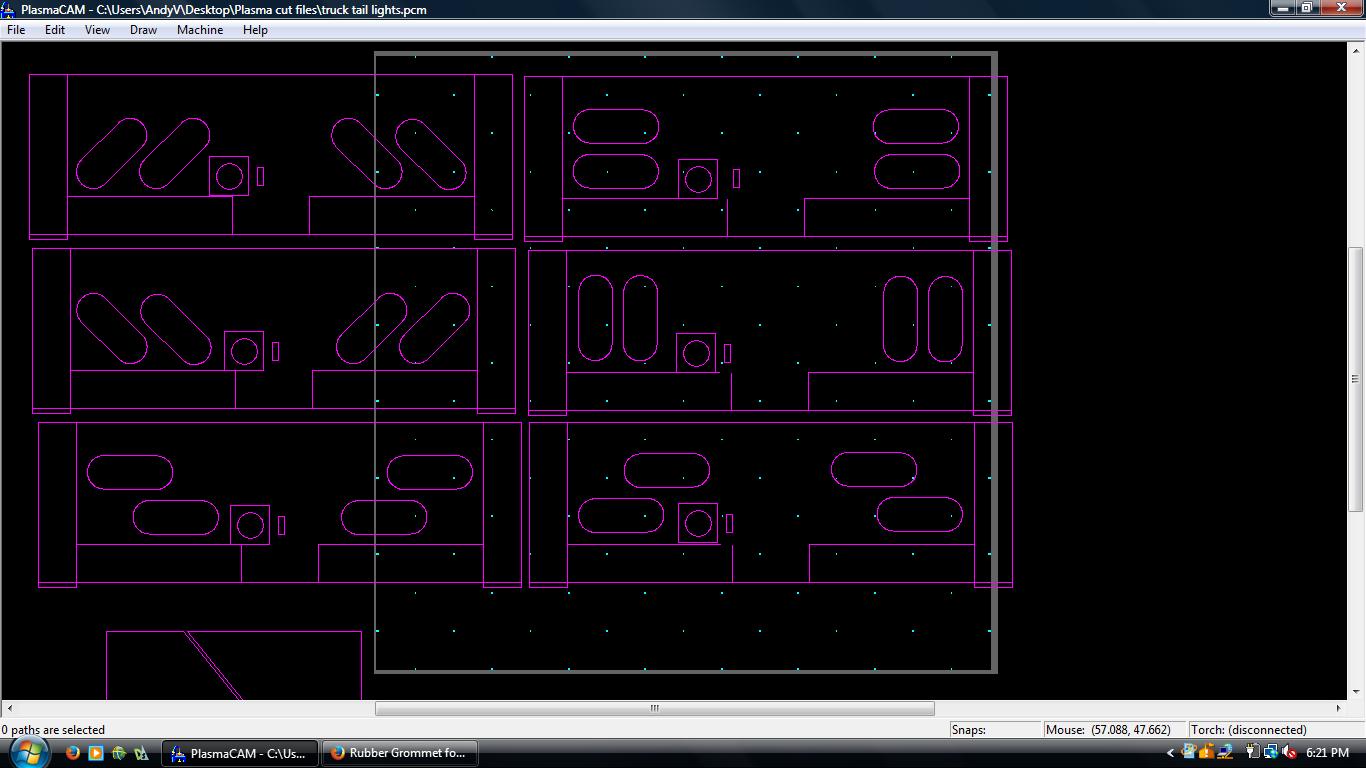
Stumped on tail light layout design. Below is just 6 out of endless possibilities. What looks better? Other ideas? Drinking all night last night didn't help. The rectangles surrounding the boarder are the frame sections of the truck that will be behind the diamond plate that the lights will be mounted in. I just put the background framing in so I know where to light boards are.
#59
11-09-2014, 07:06 AM
Fleet Mechanic
#60
11-09-2014, 07:49 AM
Senior User
Join Date: Apr 2012
Location: Huntington WV
Posts: 269
Likes: 0
Received 0 Likes
on
0 Posts