When you click on links to various merchants on this site and make a purchase, this can result in this site earning a commission. Affiliate programs and affiliations include, but are not limited to, the eBay Partner Network.
With half ton style trucks your usually better off going with drum brakes on the rear end as the back half of the truck is so light. If your truck is carrying a load or pulling a trailer more than half the time that your driving it, then you should start considering going to disc brakes. Whether or not you go to a hydroboost system or stick with the vacumn system is a can of worms subject and is best left to the discretion of the truck builder.
Rear Axle: Clean, Paint & Measure for New Axles etc.
The Ford 9-inch rear axle found under 1974-1986 F-150s and 1978-1986 Broncos features legendary strength, the 5-on-5.5 lug pattern (same as older Jeep), a 65-inch width at the wheel mounting surfaces, large-bearing semi-floating axles and many can be found with hefty 31-spline axle shafts. Another bonus is that the axle shafts are of equal length.
Here, I disassemble, clean and paint the rear axle housing while taking measurements that will be used to order a new third member and axles.
As expected, the rear axle assembly was thoroughly encrusted with oil and dirt. Cleaning all these parts was a nasty job.
A second wire bushing and wipe down with lacquer thinner readies the housing for paint.
Here is the back side.
This housing end is the Big Ford - Old Style which is one of three possibilities. The other two are Small Ford and Big Ford - New Style.
The Big Ford - Old Style housing ends are designed for large-bearing semi-floating bearings as shown here.
Although I plan to replace the axles and center section later on I�ve painted the old stuff to look decent while I am prototyping the exhaust system and getting any fitment issues resolved ahead of that time.
Satin Canyon Black on the housing will match the frame.
The old center section is in place. There its not a lot of slop between the studs in the housing and the holes on the third member so one has to take care to keep it parallel to the housing during install.
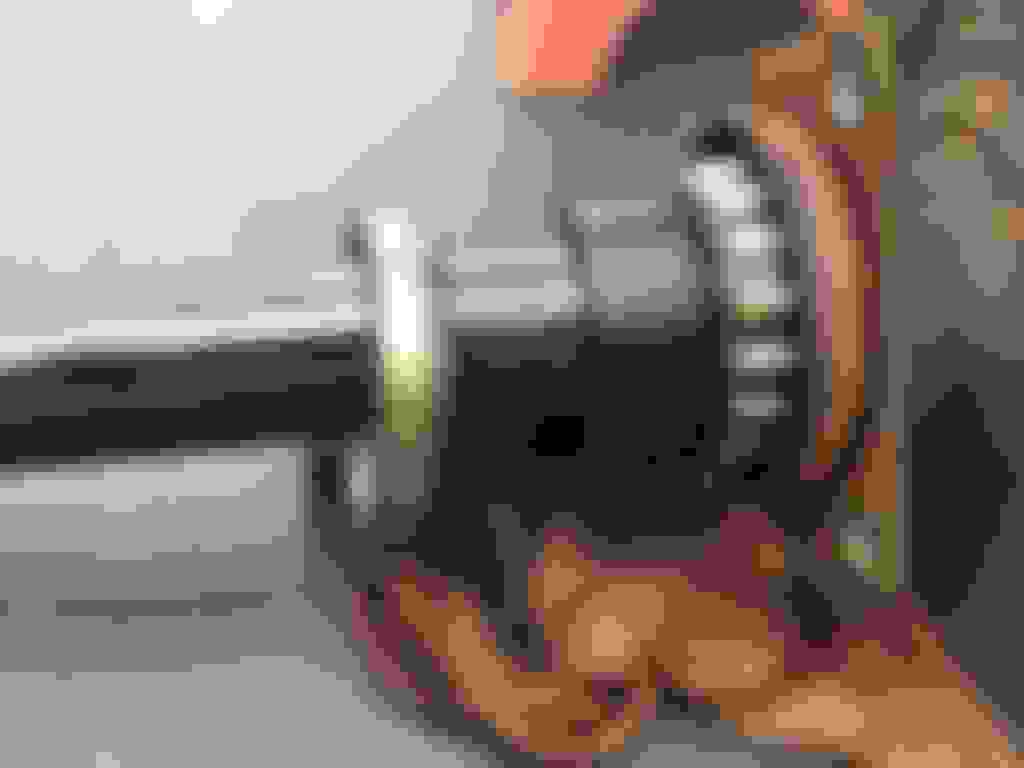
I assembled the drum brakes (see previous post for details) and attached them and the axles to the housing.
The original drums were in very good shape so didn�t need to be turned down this time around. A little wire brushing and paint was all that was needed.
Mounting the wheels and placing them onto the dollies is the last step before attaching the rear axles to the springs. When the new center section and axles arrive in August, I will need to decide whether to install them while the housing is still attached to the chassis or remove it again in order to use the more convenient workbench.
I�ll be purchasing the new components from Currie Enterprises via Summit which will be less expensive than buying directly from Currie. Free shipping. I�ve been saving for some time now but needed to defer a bit longer in order to have sufficient funds. The axles will be the CE-0012 Performance Custom Axle Package and the center section will be the 9TT370S 9� unit (nodular Iron, 31-Spline Axle, 3.70:1 Ratio, Detroit Truetrac).
Key to getting the right parts is providing the data that Currie requires. Doing this accurately can be quite a challenge because measuring in a straight line requires some special tools. I used a couple of those magnetic tool holders on the axle flanges to get the Y, X, A, B and PO values. I also used a large divider to get the distance between Y and X (10�) which was helpful in cross checking some measurements (e.g. B = Y+X+10� and A = B +2(BS + DR) and so on). Brake Space (BS) is tricky because one has to measure with the axle installed. The backing plate precludes measuring to the flange so one has to know that the backing plate is 0.125 thick and add that number to the measured value.
Identifying the housing end is relatively straightforward with basic measurement tools. The check mark indicates the type of housing end on my axle. The half inch bolts made this ID a cinch.
I used dividers to confirm the bolt circle and a digital caliper for everything else. The 5 X 5.5 bolt circle on our trucks is apparently not widely known. One of the Currie folks I corresponded with tried to convince me that I was in error on that point. He also thought that the axle lengths would be different L to R and that just isn�t so. I measured 32� but I�ve seen others say that the length is 31-15/16. This difference shouldn�t matter much but it does point out that measuring precisely is tricky business.
So if I�ve done my homework correctly, I should get parts that I can simply bolt in, add 2-3 quarts of gear oil and call it done. We shall see.
In the meantime, I have reattached the rear axle to the springs so that CalTrack and other measurements can be taken. I may also be able to make some more progress on the exhaust system which will need to be routed over the rear axle in order to exit just under the rear bumper.
If I opt for CalTracks, the aux spring will have to go. I have already deleted the short, fat spring at the bottom of the main spring pack that was a part of this option.
The CalTrack kit will use square U-bolts and will retain the stock axle position (under springs). They have another, different kit for those who have done an axle flip where the axle is above the spring.
Any updates on this project Frank? Also, I'm very interested in your F100 project. When do you think you will be starting on that?
Unfortunately I have been unable to do anything but buy a few parts. I've been stuck in Florida on pressing family business since the beginning of August. I may even have to relocate here from middle Georgia. That would require building a new shop and hauling all or most of the stuff I've collected in 30 years but family comes first.
Unfortunately I have been unable to do anything but buy a few parts. I've been stuck in Florida on pressing family business since the beginning of August. I may even have to relocate here from middle Georgia. That would require building a new shop and hauling all or most of the stuff I've collected in 30 years but family comes first.
Your totally right about family coming first, I do not get to work on my trucks as often as I would like due to taking care of my mom who is now 92.
Unfortunately I have been unable to do anything but buy a few parts. I've been stuck in Florida on pressing family business since the beginning of August. I may even have to relocate here from middle Georgia. That would require building a new shop and hauling all or most of the stuff I've collected in 30 years but family comes first.
However one more thing I might mention, FLORIDA is Hurricane Country, best to move everyone up to Georgia.
Frank,
Wishing you the best with family issues. It took me the better part of two days to look at your restoration photographs and read the posts. Just a awesome, and VERY detailed job you have done on your white and light blue Ford Truck! My eyes can see it but my brain just doesnt go to that level of detail. You at least have the truck so you can roll it if you have to move it. I cant imagine moving all that stuff, but I know you can do it.
Regards,
Chris
Thanks for all the kind words. I am working on various schemes that will enable me to be with Zelda (the '76 F-150) from time to time. I'll be sure to document whatever I am able to accomplish if and when that happens. In the meantime, I continue to mentally work on her.
Flowney what were the issues people have had with the original rocker setup you had? I'm wanting to do a budget 390 build and don't want to drop a grand on rockers with a bigger than mild cam and edelbrock heads. Were they pro comp you say?
Flowney what were the issues people have had with the original rocker setup you had? I'm wanting to do a budget 390 build and don't want to drop a grand on rockers with a bigger than mild cam and edelbrock heads. Were they pro comp you say?
See the short answer in BOLD TEXT and the long answer as follows: In my case (decked 447 stroker), going with high end roller rockers was appropriate because of the Edelbrock top end kit I used. I want to get all of the power that kit makes possible without breaking right away. The cam in that package has valve lift at 0.572 int./0.572 exh. Anything over 0.50 will stress the stock rocker stands and eventually break the unsupported ends. There are a number of solutions to this, including new rocker stands that have better support. You can read more about that here.
The other factor to consider is related to the fact that FEs use a use a single shaft-mounted rocker assembly per cylinder head and are non-adjustable (except exotic 427 models). Thus, setting up the heads requires giving special attention to the height of the valves where they come into contact with the rocker arm. This needs to be uniform across all the valves on each cylinder head. Edelbrock ships their aluminum FE heads with this all taken care of. Still, I took the time to confirm it just to be sure. So, a stock 390 using a cam with less than 0.50" lift should do fine with the stock rocker stands and non-adjustable rockers if the valve job was done correctly with same height valves. Adding a higher lift cam with commensurately stronger valve springs will require new, improved rocker stands. That can be sufficient unless you plan on tuning for max power.
Initially, I purchased the cheap ProComp roller rockers for FE and even installed them. The rocker stands in this kit are better than stock but feedback from folks on the FE Forum suggested that the rollers will disintegrate and send needle bearings throughout the engine. Thus, I turned to the more expensive Harland Sharp kit for the FE. Note the bronze bushings (no needle bearings) which is better for street/strip. This also required ordering custom length pushrods.
I was able to visit my home base in Georgia for two weeks. Although home repair and maintenance were the primary objectives, I did get to spend a little time with my beloved Zelda (�76 F-150). The following text and images chronicle that brief visit. I really wanted to get her to �roller� status by completing the rear axle upgrade just in case I have to move to Florida for good.
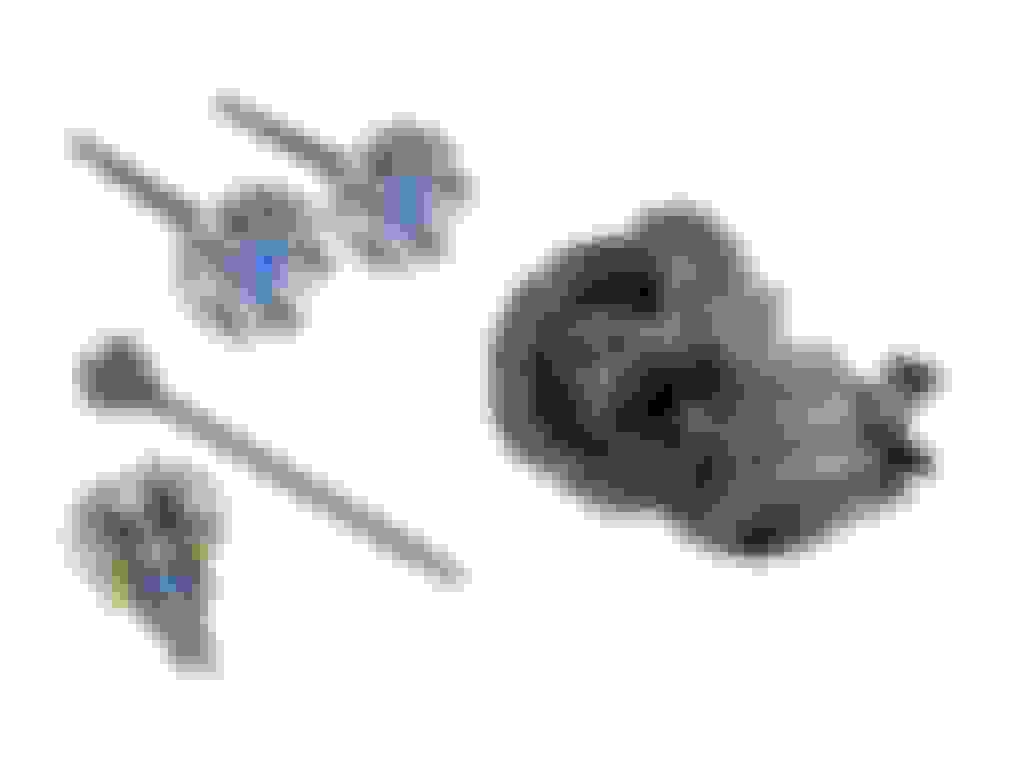
Currie ships their fully assembled third members in rugged plastic boxes that look like this on the outside and �
� like this on the inside. The little brown packet is a desiccant to ward off moisture and rust. The unit is also wrapped in a strong plastic bag. Good thing for all that protection since this part and the axles have been sitting on my shop floor since last August.
The label on the outside tells what is inside. True-trac is a Helical gear limited slip differential (LSD). These are the modern replacement for the classic clutch style limited slip differential. Under normal driving conditions, HGLSDs operate as a standard or open differential, allowing one wheel to spin faster or slower as necessary without the noise or harsh operation of a clutch style limited slip. When a drive wheel begins to slip, the helical gears inside the differential automatically engage, transferring torque to both rear wheels to maximize traction. When the wheels regain traction, the differential resumes normal operation. Unlike traditional clutch type limited slip differentials, HGLSDs require no special oil additive or maintenance to replace worn and tired clutches, as these units have no wearable parts, require no special maintenance and maintain their torque bias for the life of the unit.
The old 28 spline axles are replaced by two custom length Currie Performance forged 1541 alloy heat treated axles with:
� 31 Splines
� Large Wheel Bearing
� 5 X 5.5� Lug Wheel Bolt Pattern
� 1/2� Wheel Stud Size
� Oil Seals and Heavy-Duty Bearing Retainers are included
According to the axle tag, all this new stuff is replacing a stock 3.25:1 ratio limited slip differential unit which accepts 28 spline axles.
Ace Hardware sells a plastic bucket with a 10.5� diameter opening, just right for painting the third member without also painting the gears. Note that the bucket is riding on a small Harbor Freight furniture dolly. My shop is so crowded that I need to put as many things as possible on wheels. It also helps with the painting
The N stands for nodular iron, which is made by adding magnesium to molten iron. What this does is change the grain structure from flakes to nodules - much stronger and less likely to fail under shear load.
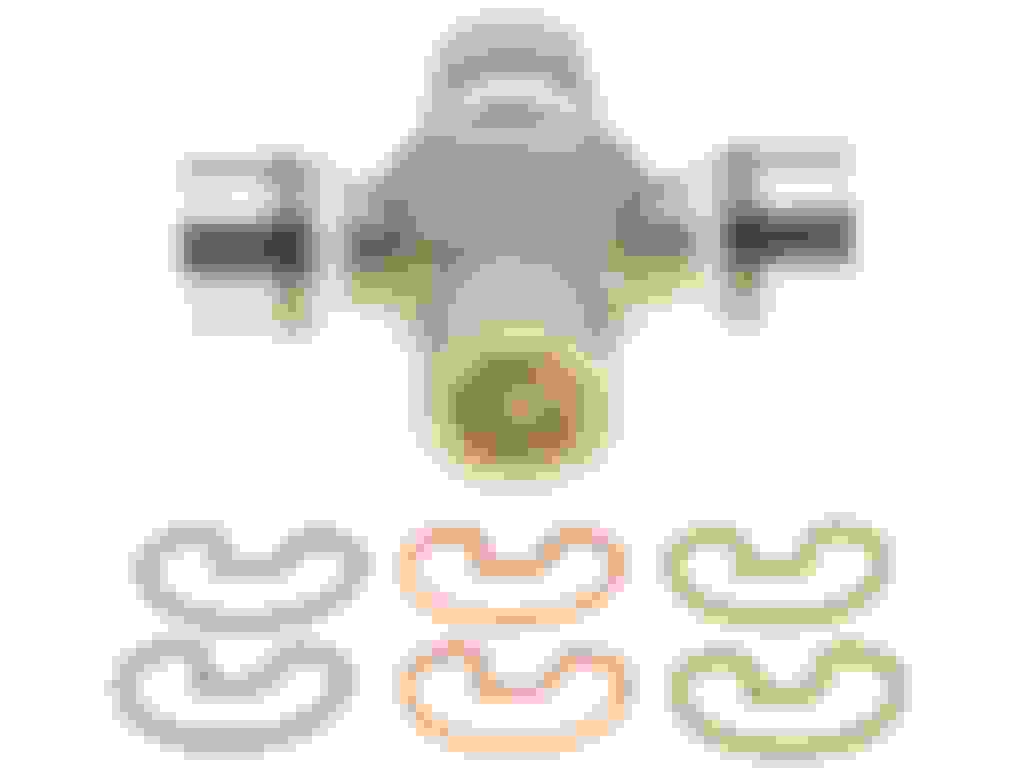
Currie supplies a gasket that comes with washers and locking nuts. No need to seek out those obsolete copper washers that are so hard to remove once they have been crushed.
Here is the part number.
Currie recommends that all machined surfaces be free of paint or powder coat so as to assure proper mating surfaces and help avoid leaks.
The gasket gets a thin coat of black RTV on both sides.
I used a floor jack to get close but ultimately wound up doing a dead lift to get it onto the studs. This thing weighs 194 pounds so I�m sure that I couldn�t have done this with the bed still on. This is really a two person job. Perhaps there is some sort of jack adapter for this or even a purpose specific jack as there is for transmissions.
Nonetheless, I �got �er done.� The Currie supplied washers and lock nuts get torqued down to 40 ft/lbs.
Next came the axles. These custom axles were purchased fully assembled with bearings, seals and all pressed on in the proper order. Grease was liberally applied to splines, seal and bearing.
I found it necessary to stabilize and align the backing plate by tightening down one T bolt before inserting the axle so that the bearing could more easily pass through the backing plate and go squarely into the axle housing. Once the bearing was 90% in, I carefully removed that T bolt nut, guided the retainer plate over all four T bolts and added nuts finger tight all �round. A hefty dead blow hammer completed the seating of the bearing as I tightened the four retainer nuts in a cross-wise fashion. Final torque setting is 75 ft/lbs for these 1/2� T bolts. Ford 9� axles are interchangeable side-to-side so there is no worrying about which ones fit which side.
This being an Eaton Truetrak differential, no clutch friction additives are necessary. Three quarts of Currie�s 9+ racing gear oil should fill �er up an do well.
The Currie 9� pumpkin comes with a fill/check plug on the driver side. A bit of 3/8� fuel line can be used to form a tolerable filling solution.
Just add a funnel to that 3/8� hose and clamp it in place. It took a while to download the three quarts of heavy weight oil so not having to hold the funnel all that time was a good thing.
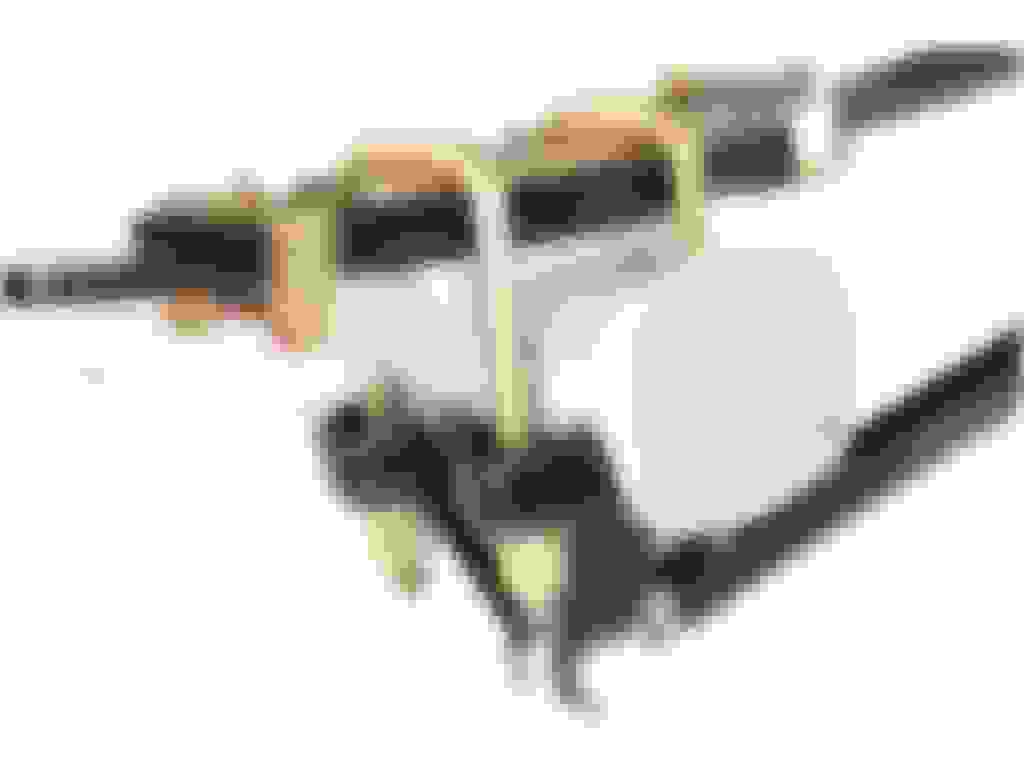
Brake lines painted silver attached to new wheel cylinders and this new junction which also serves as a breather for the rear axle housing.
-Some spare fuel hose routed to a dead space on the frame protects the vent from dust and water. Note the zip tie that secures it under the fuel line.
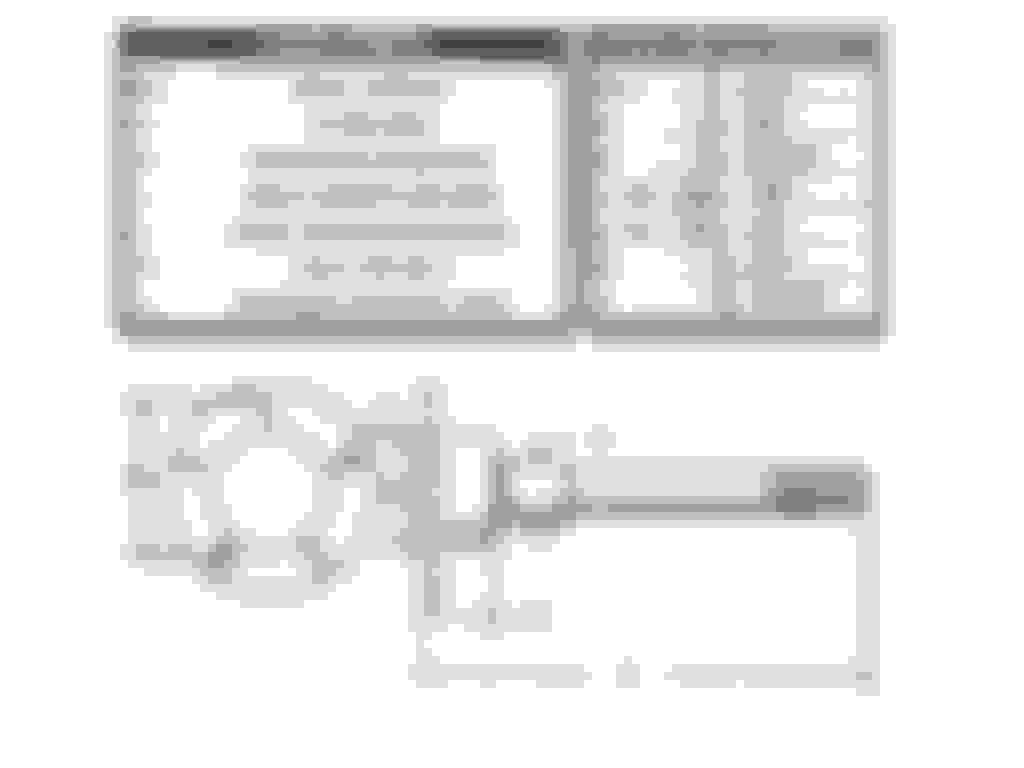
The Currie third member has a bigger, tougher pinion yoke (1330) which requires a big cap U-joint such as the Spicer 5-7438X pictured above. The stock, light duty, yoke is a 1310 series.
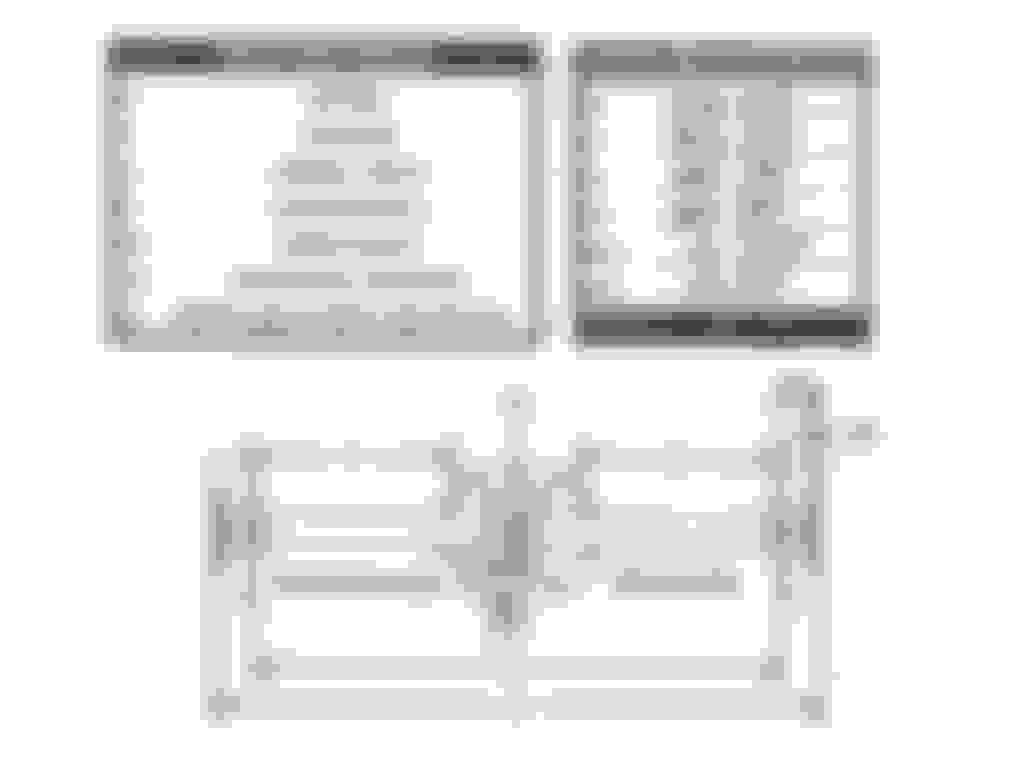
The dimensions are:
� A = 3.625 inches (3 5/8 inches )
� B = 3.625 inches (3 5/8 inches )
� C = 1.062 inch ( 1 1/16 inch ) diameter to fit slip yoke
� D = 1.125 inch ( 1 1/8 inch ) diameter to fit pinion yoke (the big cap)
Spicer says: This is the one you want for High Horsepower High Performance and Racing applications.
All done! Now I can leave Zelda having gotten her rear end into really good shape. She can now roll. We�ll work on the rock-ability later on as time and geography permits.
It would be cool if they sent you a new 3rd member tag.
As always, looks nice. I have been painting inside and out of house and cleaning up my "storage yard" on the side of the house. I'm hoping to get back to installing my dealer installed Deluxe Air in my '73 F100 in the next month or so. Took it apart in May of 2018. so I hope I can find all the parts!!!
I'll try and take pics and do a how to about half as good as yours. As I'm reassembling, I'll take some "disassembly pics" for the first part that I forgot to take photos. It was supposed to be a month long job, but life gets in the way sometimes.
If I am seeing correctly. The brake shoes on the driver side( The picture of the new axle) are on wrong, I think. Long shoe should be in the rear of the vehicle. Might want to check.
If your planning to race this I would have thought you might have put a drain plug in the housing. Also a 3/4 fill hole in the rear of the housing.
You are doing one great job on this truck though. Good luck with the family stuff.

 07-10-2018, 10:54 AM