First door panel mockup complete!! (break out your reading glasses folks)
#1
 08-10-2014, 06:42 PM

Join Date: Jan 2012
Location: Redneck Paradise
Posts: 331
Likes: 0
Received 0 Likes
on
0 Posts
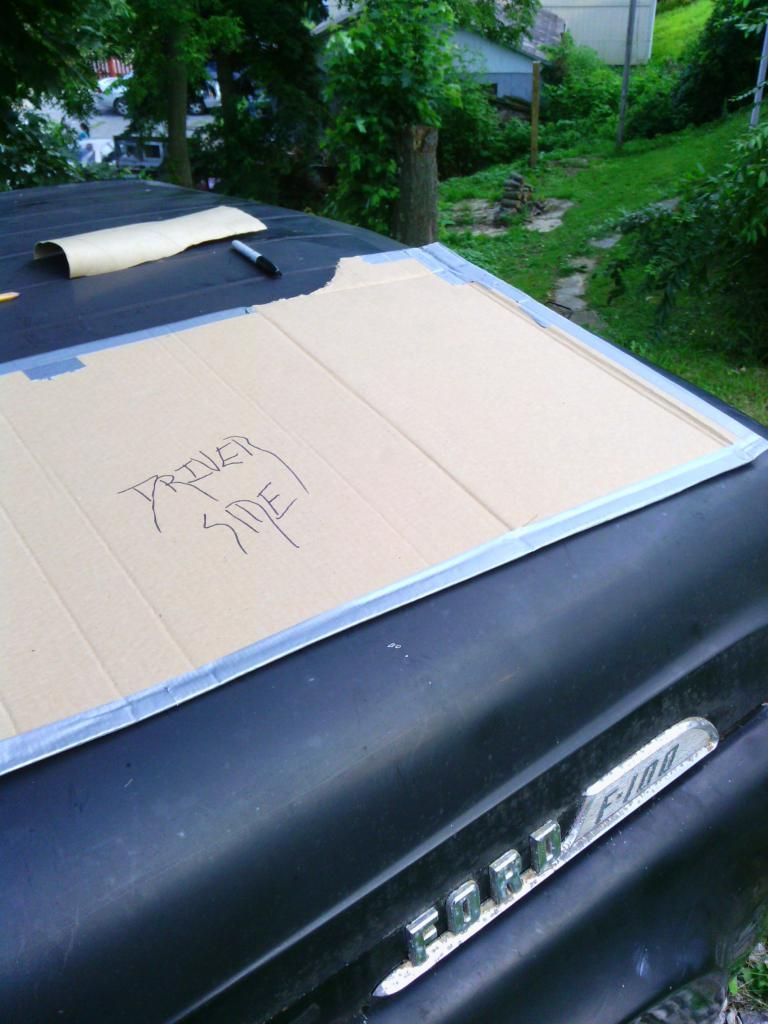
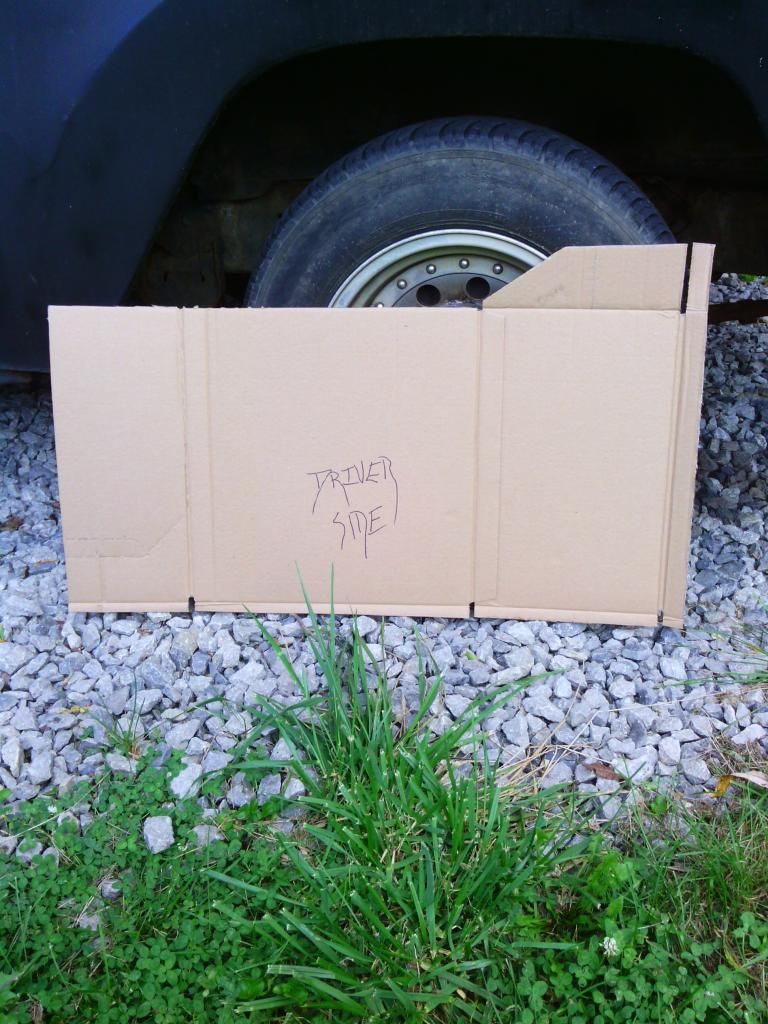
Hey y'all Dan here. Today I made my first set of 1957 door panel replacements...well out of cardboard that is. I had trouble finding originals or repros online and decided like many other people to make my own as I was tired of staring into the empty abyss which was my doors. I am by any means not a professional when it comes to working with metal, cardboard, and other tools of the trade except for duct tape and a 12 pack of Pabst.
After a quick procurement of some fine quality (free) cardboard from the Dollar General up the street, I made my first measurement and my very first step into making Ol' Valentina into a classy gal, aka my first steps into the restoration. Now I know everyone's opinion of a restoration varies from factory, like new again or for the hard core out there the concourse level of whatever tickles your fancy. Me on the other hand, I want the truck to on some level still be able to function as a truck (light duty such as getting groceries of course lol) and still look better than any shebby or dudge out there at the local Salem cruise night car shows.
Wanna hear my vision of a nice working restoration? Sure you do!
Take a 57' thats been factory restored and add modern convienances like under dash AC, nice cushy bench seat, electronic power assist steering, seatbelts, digital gauges, LED markers where needed and nice bright headlights. Music, need a decent audio player and speakers to play my AC/DC when I go get a gallon of milk. Modern performance Ford motor and transmission, updated suspension all the way around and power brakes with discs on four corners. I'm sure this list will be added to and taken down some as the years go by but its my vision for what Valentina will look like when I'm ready to hand the keys over to my son 20yrs from now.
Back at the topic at hand.
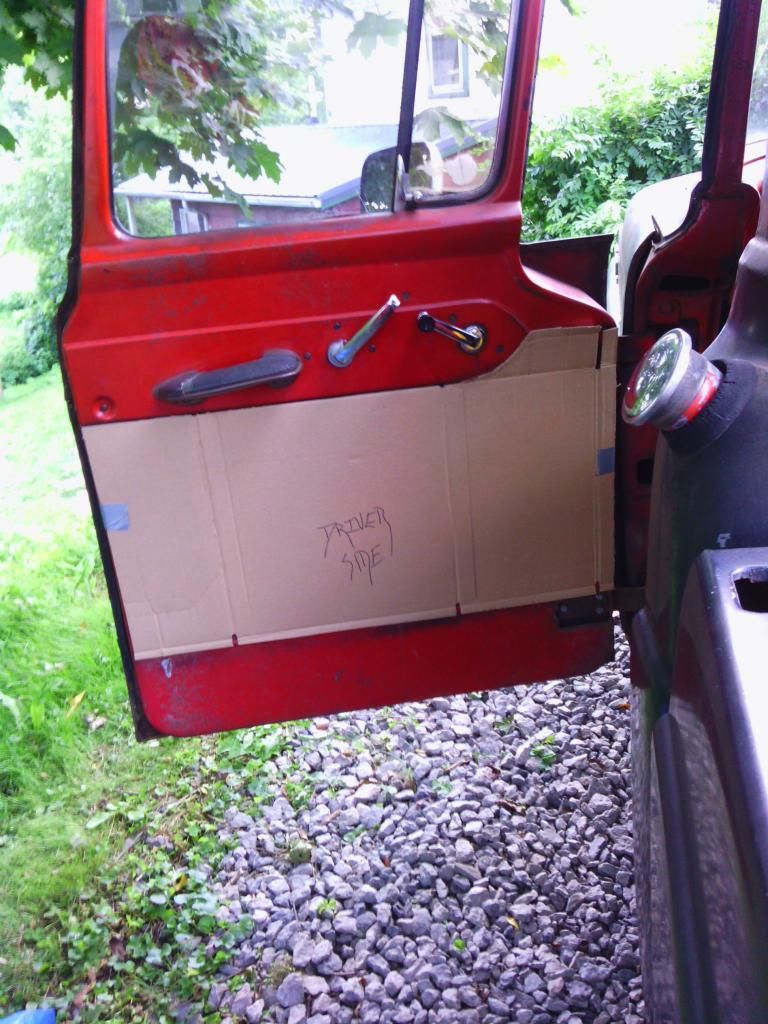
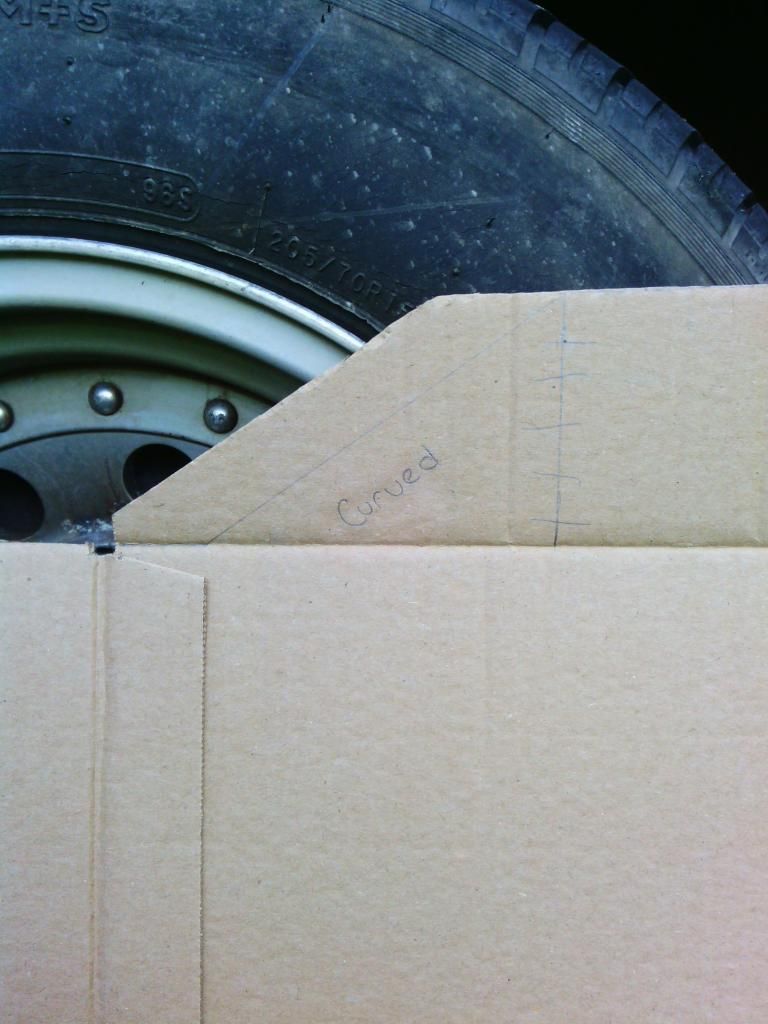
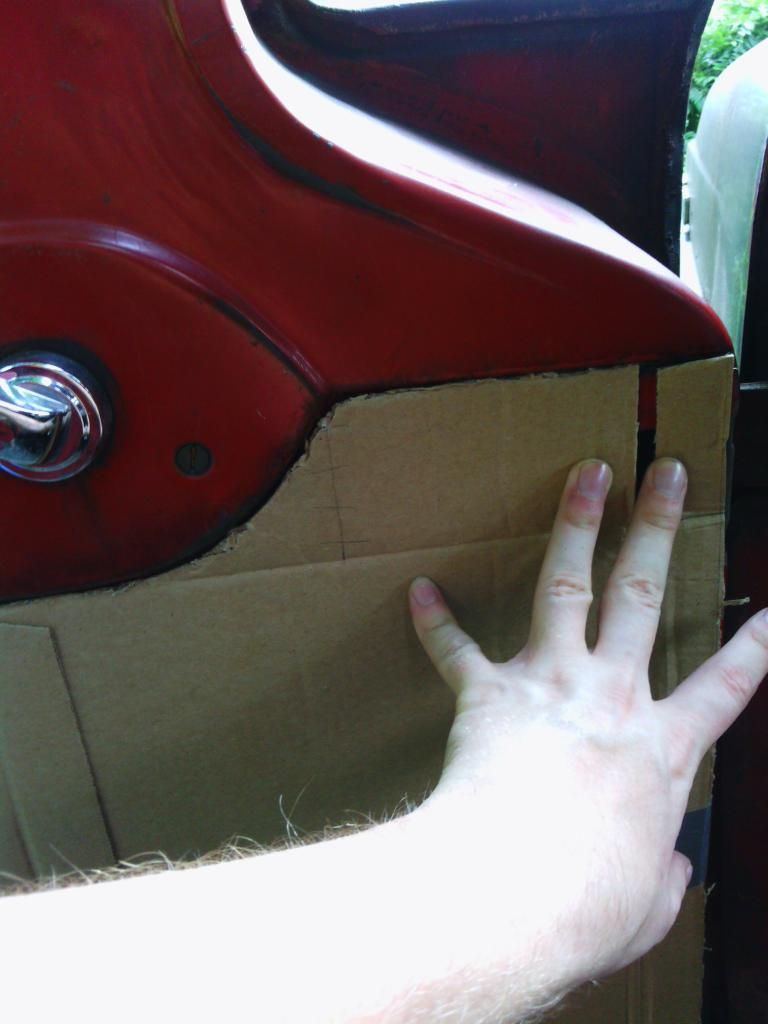
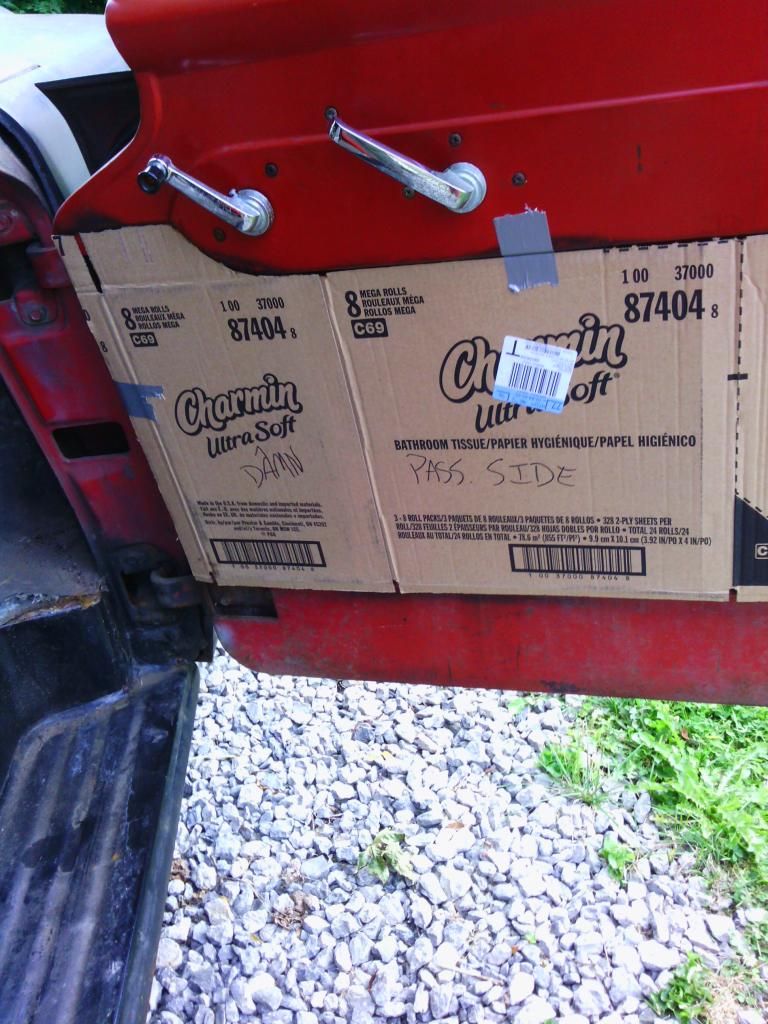
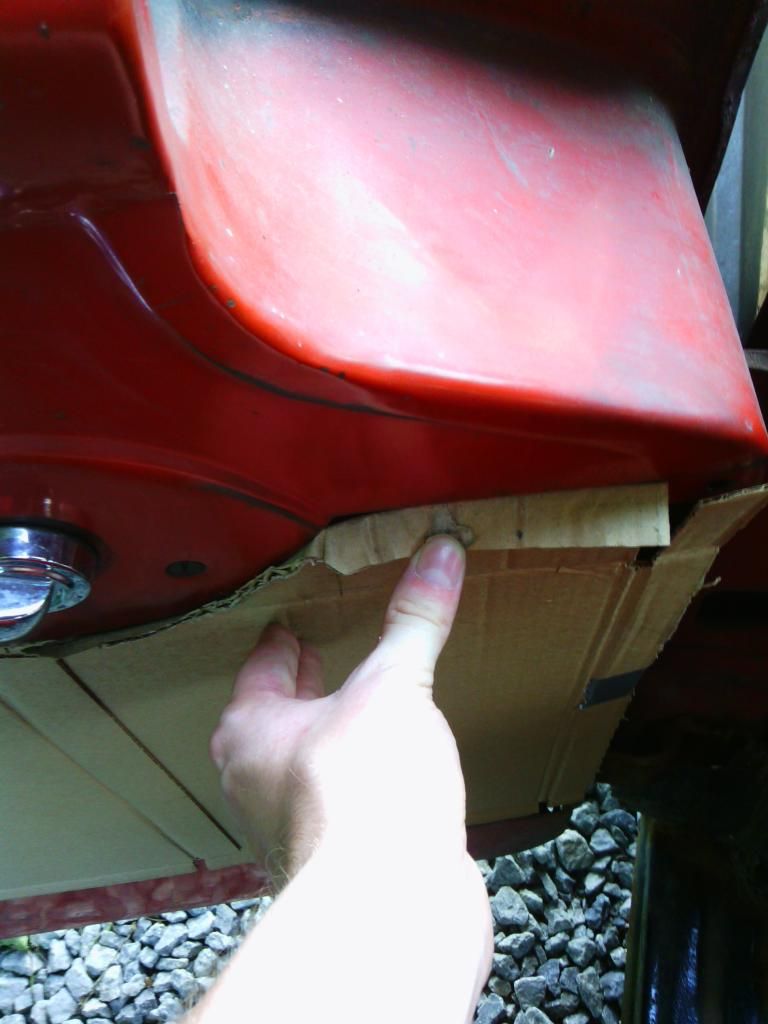
The door panel measured 34" long straight at the bottom. Short side high was 16.5" and high side towards the hinges are 19" even. To make the curve in the panel, I grabbed a piece of paper, some duct tape and my exacto knife from my art projects. I ductedtaped that sucker to the door and carefully cut the curve into it to transfer to the cardboard template, after I made my first rough cut to see if I measured right to the doors panel dimensions. It fit, not like a glove but it works for now until I can refine it.
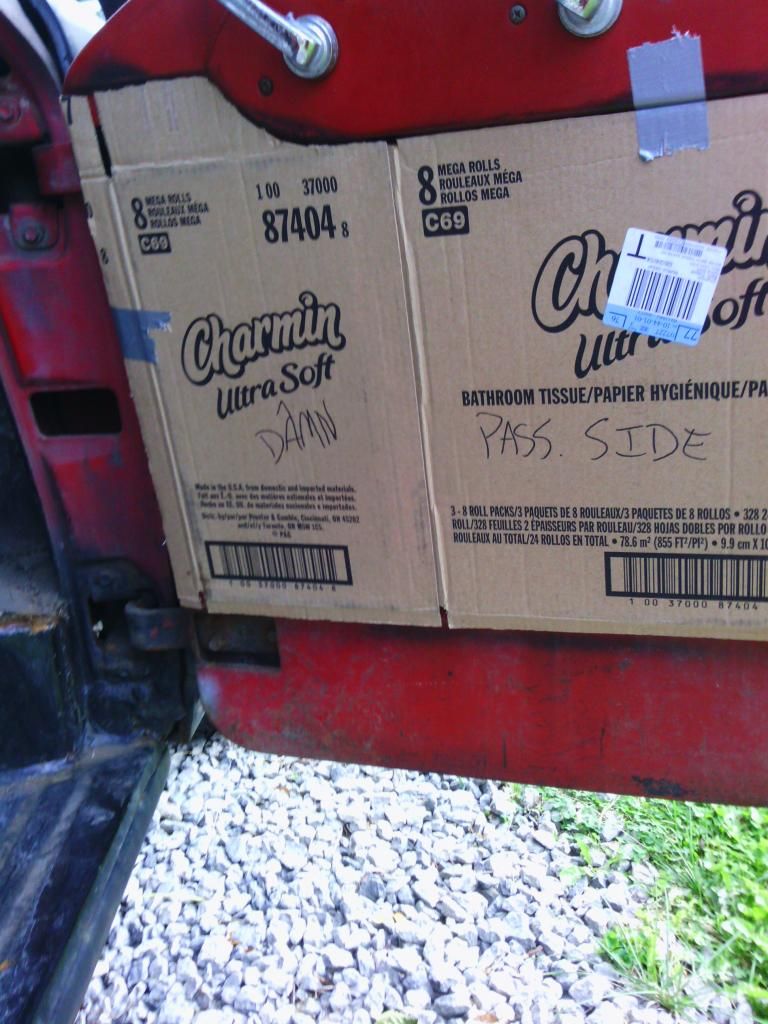
After I transferred the curve to the mock, there was some excess and easily trimmed away, slowly not to cut the metal on the door mind you. It looks good and fits nicely onto the passenger side.
After making sure it fits good, I reinforced the edges with some fancysilver reinforcement tape because its gonna take a beating until I get my holes for the sheet screws made into place, because there are 18 screw holes in the door by the looks of it for the panel.
That's gonna be the hard part, making sure I have all the holes lined up properly and I haven't figured out how I'm gonna McGuyver that. Baby steps y'all.
The metal I'm using? Well I wanted to use some really cool cosmetic grade diamond plate but settled for some sheet aluminum because it was cheaper and this is my first rodeo with making metal parts. Got some fancy ANSI level 5 cut resistant gloves with a nice grip to keep me from cutting myself and needing expensive doctoring to fix any lacerations.
Pics!! Here's some pics. Sorry for this being a very long winded post and if it turned into some sort of weird story time and that maybe someone fell asleep while reading this on the toilet. Enjoy the pics y'all and any feedback to help me in this journey would be highly welcomed and appreciated.
See y'all on the dark side of the moon

After a quick procurement of some fine quality (free) cardboard from the Dollar General up the street, I made my first measurement and my very first step into making Ol' Valentina into a classy gal, aka my first steps into the restoration. Now I know everyone's opinion of a restoration varies from factory, like new again or for the hard core out there the concourse level of whatever tickles your fancy. Me on the other hand, I want the truck to on some level still be able to function as a truck (light duty such as getting groceries of course lol) and still look better than any shebby or dudge out there at the local Salem cruise night car shows.
Wanna hear my vision of a nice working restoration? Sure you do!
Take a 57' thats been factory restored and add modern convienances like under dash AC, nice cushy bench seat, electronic power assist steering, seatbelts, digital gauges, LED markers where needed and nice bright headlights. Music, need a decent audio player and speakers to play my AC/DC when I go get a gallon of milk. Modern performance Ford motor and transmission, updated suspension all the way around and power brakes with discs on four corners. I'm sure this list will be added to and taken down some as the years go by but its my vision for what Valentina will look like when I'm ready to hand the keys over to my son 20yrs from now.
Back at the topic at hand.
The door panel measured 34" long straight at the bottom. Short side high was 16.5" and high side towards the hinges are 19" even. To make the curve in the panel, I grabbed a piece of paper, some duct tape and my exacto knife from my art projects. I ductedtaped that sucker to the door and carefully cut the curve into it to transfer to the cardboard template, after I made my first rough cut to see if I measured right to the doors panel dimensions. It fit, not like a glove but it works for now until I can refine it.
After I transferred the curve to the mock, there was some excess and easily trimmed away, slowly not to cut the metal on the door mind you. It looks good and fits nicely onto the passenger side.
After making sure it fits good, I reinforced the edges with some fancysilver reinforcement tape because its gonna take a beating until I get my holes for the sheet screws made into place, because there are 18 screw holes in the door by the looks of it for the panel.
That's gonna be the hard part, making sure I have all the holes lined up properly and I haven't figured out how I'm gonna McGuyver that. Baby steps y'all.
The metal I'm using? Well I wanted to use some really cool cosmetic grade diamond plate but settled for some sheet aluminum because it was cheaper and this is my first rodeo with making metal parts. Got some fancy ANSI level 5 cut resistant gloves with a nice grip to keep me from cutting myself and needing expensive doctoring to fix any lacerations.
Pics!! Here's some pics. Sorry for this being a very long winded post and if it turned into some sort of weird story time and that maybe someone fell asleep while reading this on the toilet. Enjoy the pics y'all and any feedback to help me in this journey would be highly welcomed and appreciated.
See y'all on the dark side of the moon


Last edited by siloketh; 08-10-2014 at 06:44 PM. Reason: trouble copy/paste pics from mobile version
#3
08-14-2014, 08:18 PM

Senior User
Join Date: Nov 2008
Location: Lake Havasu City, AZ
Posts: 297
Likes: 0
Received 0 Likes
on
0 Posts
Hey y'all Dan here. Today I made my first set of 1957 door panel replacements...well out of cardboard that is. I had trouble finding originals or repros online and decided like many other people to make my own as I was tired of staring into the empty abyss which was my doors. I am by any means not a professional when it comes to working with metal, cardboard, and other tools of the trade except for duct tape and a 12 pack of Pabst.
Steve
#4
08-15-2014, 10:37 PM
Join Date: Jan 2012
Location: Redneck Paradise
Posts: 331
Likes: 0
Received 0 Likes
on
0 Posts
Progress Update
Thanks Maltman and Steve for yourwords of eencouragement. I'm learning the whole world of fabrication as I go and once I acquire better tools and techniques I'll eventually make myself a whole new set of door panels and keep my very first ones as spares.
I started a new job this week with 4WheelDrive Hardware here in Columbiana County and haven't had the time I wanted to spend on my door panels but have turned a few heads at the warehouse from some of the employees because I'm the only one driving a classic truck to work
Anywho, I have finished cutting my very first set of door panels tonight and they don't look too shabby in my opinion. Needs work and some detail work but the rough edges from the hand snips give them character but I'm covering those edges with some weather stripping once I find the thickness I want and that won't interfere with the bolts/screws once they are set in place.
Which is another problem I've ran into:
How am I going to make sure I have all 18 holes (I doing every hole around the door where the sheet will be attached) lined up and spaced properly? My biggest fear is tapping these holes and they don't line up and I end up with buckles in my sheet metal from forcing them to fit. Granted once I have one finished I can mirror measurements onto the other because they are nearly identical but its getting those initial measurements in place and getting the holes centered in a precise manner, this is where I want the most precision.
Pics.
My tablet is not wanting to cooperate with me tonight uploading new pictures of the cut metal so hopefully when I get home from work tomorrow it will work then. Included is the specs for the sheet metal I used, such as thickness, size and finish with those pics. There will be pics of the almost halfway finished product soon.
See y'all on the dark side of the moon
#5
08-16-2014, 07:31 AM
Elder User
Which is another problem I've ran into:
How am I going to make sure I have all 18 holes (I doing every hole around the door where the sheet will be attached) lined up and spaced properly? My biggest fear is tapping these holes and they don't line up and I end up with buckles in my sheet metal from forcing them to fit. Granted once I have one finished I can mirror measurements onto the other because they are nearly identical but its getting those initial measurements in place and getting the holes centered in a precise manner, this is where I want the most precision.
Get your self some masking tape to put around the outside of where the panel will be mounted. Then take a combination square and mark the location of the holes on the tape and measure the distance from the edge to the center of the hole. This is where a combination square will be handy because you can get a really good measurement by sliding the square into position and recording the measurement. Now put you piece of metal or whatever in position and transfer the numbers to the new panel.
Or..
Put holes in your cardboard template that correspond to the screw hole, transfer those holes to the work piece and use washers when you mount the panel.
Clear as Mud right?
Good luck.
#6
08-16-2014, 09:30 AM
#7
08-16-2014, 11:31 AM
Join Date: Jan 2012
Location: Redneck Paradise
Posts: 331
Likes: 0
Received 0 Likes
on
0 Posts
Haha clear as mud yes but helpful in any aspect to all those ideas, but I'm doing my best to refrain from making new holes in the doors in case one day I stumble upon some factory ones at a swap meet or on the interwebz. For now I'll try the making holes in my cardboard idea and see how well that works.
I do know I will be using flush mount Phillips head slotted screws for the door panels, like a nickel finish maybe, from what I can tell in pics of other users here that have the original panels it looks like a Phillips head screw, but I can be wrong and not ashamed to admit when I am.
I do know I will be using flush mount Phillips head slotted screws for the door panels, like a nickel finish maybe, from what I can tell in pics of other users here that have the original panels it looks like a Phillips head screw, but I can be wrong and not ashamed to admit when I am.
Trending Topics
#8
08-16-2014, 04:04 PM
Senior User
Join Date: Nov 2008
Location: Lake Havasu City, AZ
Posts: 297
Likes: 0
Received 0 Likes
on
0 Posts
#9
08-16-2014, 06:19 PM
Elder User

Thread
Thread Starter
Forum
Replies
Last Post
codys50ford
1948 - 1956 F1, F100 & Larger F-Series Trucks
2
10-04-2007 08:47 AM
jstandle
1973 - 1979 F-100 & Larger F-Series Trucks
12
04-28-2005 10:35 PM