1948 - 1956 F1, F100 & Larger F-Series Trucks Discuss the Fat Fendered and Classic Ford Trucks

1949 F4 V8 to Mercedes diesel build thread

Thread Tools
 
Search this Thread
 
  #136  
Old 08-03-2015, 08:20 PM
49fordv8f4's Avatar
49fordv8f4
49fordv8f4 is offline
Cargo Master
Thread Starter
Join Date: Aug 2014
Location: North Central Arkansas
Posts: 2,594
Received 69 Likes on 40 Posts
Scott, Thank you for the kind words. I am sorry that I haven't replied sooner, the forum pages have been freezing and not responding on my computer, since Saturday evening. Yes I am a machinist. I am a self employed machine and welding shop owner/operator.
Thanks again, Mark
 
  #137  
Old 08-03-2015, 08:27 PM
49fordv8f4's Avatar
49fordv8f4
49fordv8f4 is offline
Cargo Master
Thread Starter
Join Date: Aug 2014
Location: North Central Arkansas
Posts: 2,594
Received 69 Likes on 40 Posts
Thanks Ross for the tip. This pickup is supposed to be set at 1mm +or- .01mm. The instructions say to turn it in until it touches the geartooth and back it off 1/2 turn. Your cardboard tip would work too if I can find some metric cardboard.
Thanks again, Mark
 
  #138  
Old 08-31-2015, 08:28 PM
49fordv8f4's Avatar
49fordv8f4
49fordv8f4 is offline
Cargo Master
Thread Starter
Join Date: Aug 2014
Location: North Central Arkansas
Posts: 2,594
Received 69 Likes on 40 Posts


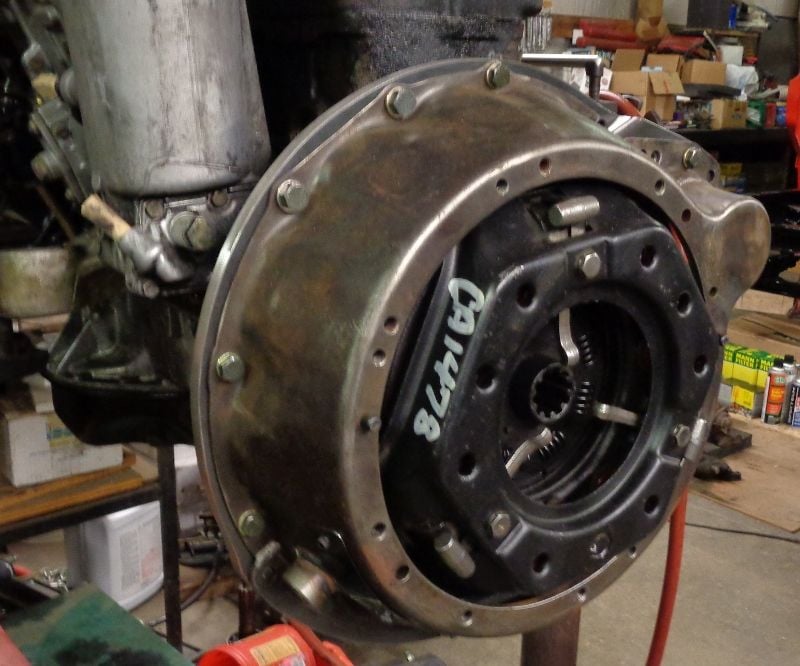
I was also able to get the flywheel, clutch and bellhousing installed. The valves are adjusted and the front main seal is installed. The pan gasket, vacuum pump gasket and the valvecover gasket to go and its ready to paint and put back in the truck.
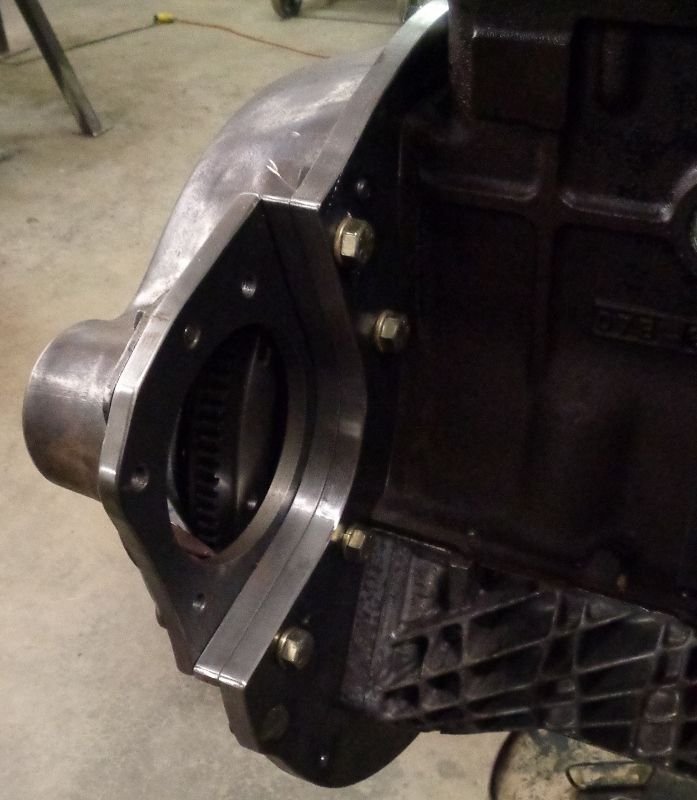
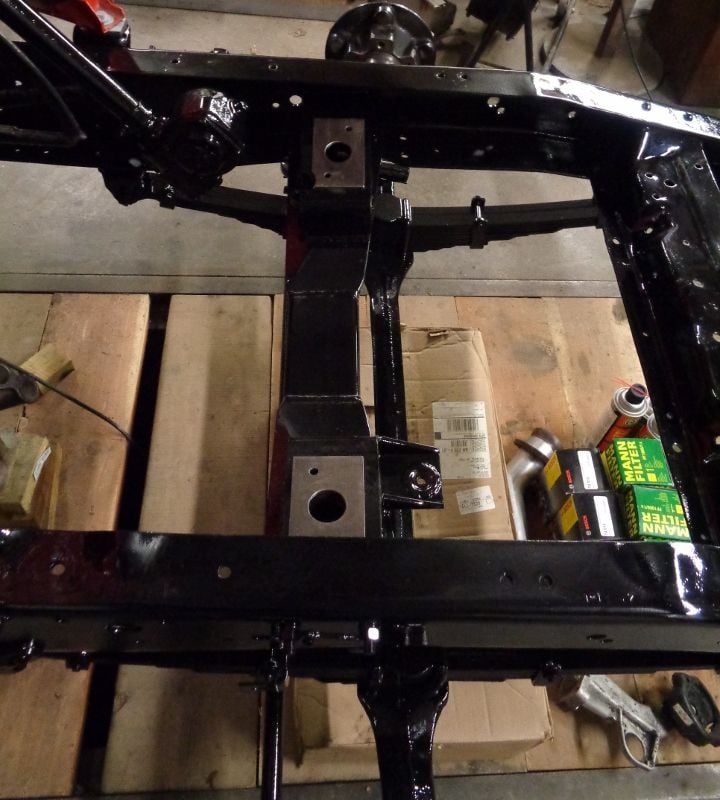
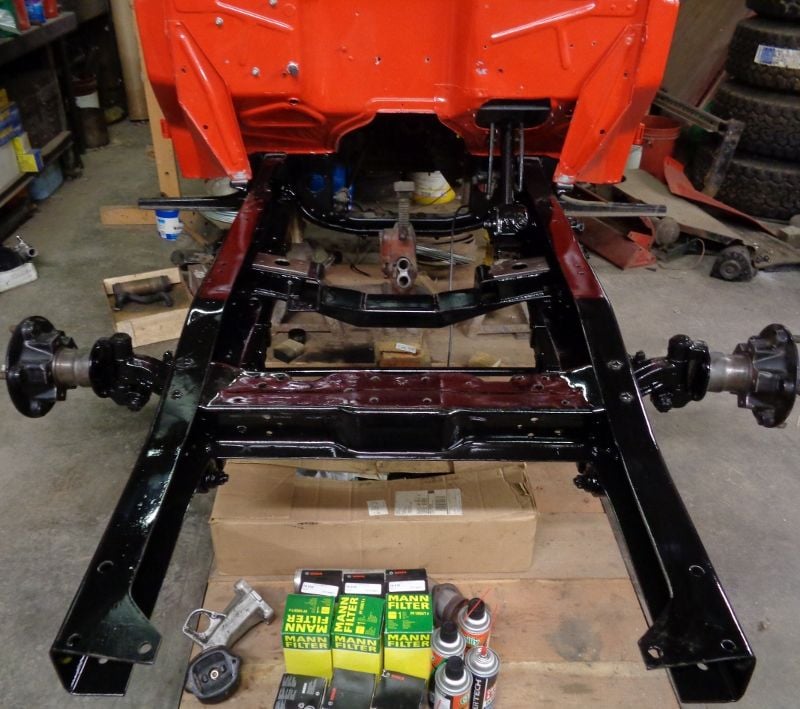


Things were a little slow in the shop the first 3 weeks of August, so I was able to get a little done on the truck. I had messed up the paint on the frame from the firewall forward removing the original engine mounts and building a crossmember for the diesel engine. I had to pull the front axle out to be able to drill all of the crossmember mounting holes. After they were drilled I machined new bushings for the spring shackle bolts and reinstalled the axle. I primed the crossmember and bolted it in permanently with grade 8 bolts. I scuffed up the paint that I had previously applied to the frame and axle and repainted it. Here are some photos for proof:
I never have figured out why it loads my photos above my text, Oh well.
 
  #139  
Old 08-31-2015, 10:31 PM
tinman52's Avatar
tinman52
tinman52 is offline
Welder User

Join Date: Feb 2009
Location: northwest MT
Posts: 5,261
Received 30 Likes on 19 Posts
Looks really great, nice progress!

If you move the cursor down below your text before you hit submit, your pics will be below....
 
  #140  
Old 09-02-2015, 04:32 PM
38 coupe's Avatar
38 coupe
38 coupe is offline
Cargo Master
Join Date: Aug 2010
Location: Houston
Posts: 2,903
Likes: 0
Received 109 Likes on 57 Posts
Thanks for the update.
 
  #141  
Old 09-02-2015, 10:08 PM
49fordv8f4's Avatar
49fordv8f4
49fordv8f4 is offline
Cargo Master
Thread Starter
Join Date: Aug 2014
Location: North Central Arkansas
Posts: 2,594
Received 69 Likes on 40 Posts
Thanks Scott and thank you for the tip on getting my photos in the right place. I will do that next time.
Thanks again, Mark
 
  #142  
Old 09-02-2015, 10:09 PM
49fordv8f4's Avatar
49fordv8f4
49fordv8f4 is offline
Cargo Master
Thread Starter
Join Date: Aug 2014
Location: North Central Arkansas
Posts: 2,594
Received 69 Likes on 40 Posts
Thank you Fred for your continued interest.
Mark
 
  #143  
Old 09-07-2015, 07:52 PM
49fordv8f4's Avatar
49fordv8f4
49fordv8f4 is offline
Cargo Master
Thread Starter
Join Date: Aug 2014
Location: North Central Arkansas
Posts: 2,594
Received 69 Likes on 40 Posts


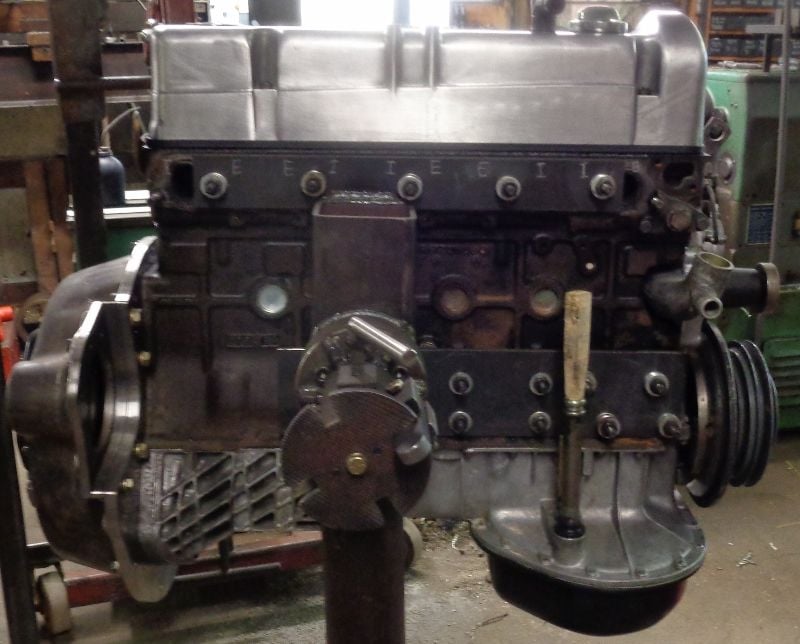
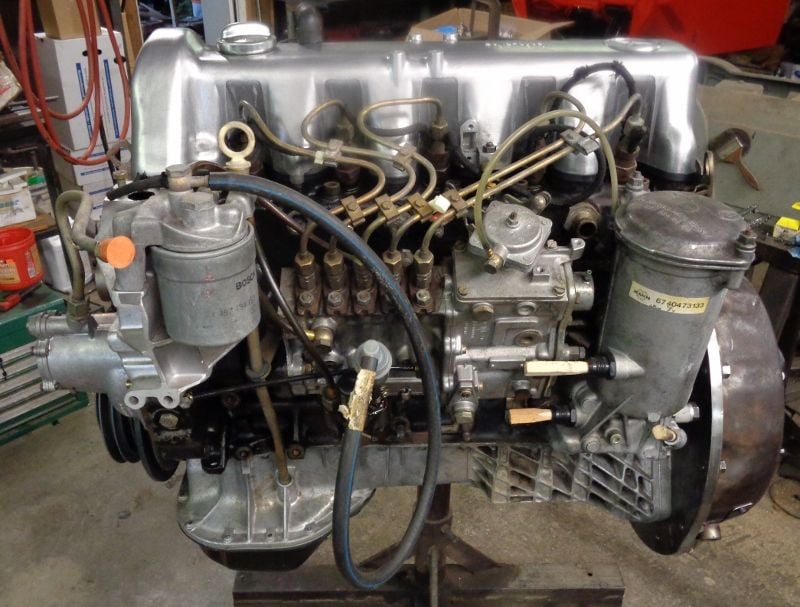
I worked a couple of hours this afternoon on the engine. The oil pan on the Mercedes is aluminum with a pressed steel sump in the front. The sump had been hit from underneath when the engine was in the donor car and bent it up pretty badly. When I ordered all of the seals and gaskets for the engine from Autohaus Arizona, they had a new sump for about $24.00, so I ordered one. I got the new sump installed, some more cleaning on the aluminum part of the pan and cleaned and polished the valve cover. I may do a little more polishing on the valve cover, then I will spray it with some high temp clear.
Well, my photos still came out on top. I moved the curser to the bottom before I load the photo. When I go to upload the photo it automatically moves the curser back to the top of the text.
 
  #144  
Old 09-07-2015, 09:06 PM
mechmagcn's Avatar
mechmagcn
mechmagcn is offline
Logistics Pro
Join Date: Dec 2005
Location: Moro Bay, AR
Posts: 4,630
Received 46 Likes on 32 Posts
Originally Posted by 49fordv8f4


I worked a couple of hours this afternoon on the engine. The oil pan on the Mercedes is aluminum with a pressed steel sump in the front. The sump had been hit from underneath when the engine was in the donor car and bent it up pretty badly. When I ordered all of the seals and gaskets for the engine from Autohaus Arizona, they had a new sump for about $24.00, so I ordered one. I got the new sump installed, some more cleaning on the aluminum part of the pan and cleaned and polished the valve cover. I may do a little more polishing on the valve cover, then I will spray it with some high temp clear.
Well, my photos still came out on top. I moved the curser to the bottom before I load the photo. When I go to upload the photo it automatically moves the curser back to the top of the text.
When you get done with that valve cover I have another for you. ;-) jk
That is one good looking OM617.951 engine, gonna look great in the truck.
 
  #145  
Old 09-08-2015, 12:02 PM
49fordv8f4's Avatar
49fordv8f4
49fordv8f4 is offline
Cargo Master
Thread Starter
Join Date: Aug 2014
Location: North Central Arkansas
Posts: 2,594
Received 69 Likes on 40 Posts
Thank you for the reply. I am pleased with how it is cleaning up. If you are ever up in the north central part of the state, drop in.
 
  #146  
Old 09-08-2015, 06:22 PM
38 coupe's Avatar
38 coupe
38 coupe is offline
Cargo Master
Join Date: Aug 2010
Location: Houston
Posts: 2,903
Likes: 0
Received 109 Likes on 57 Posts
You might try loading the pictures first, then adding text above them.

The engine is cleaning up nicely.
 
  #147  
Old 09-08-2015, 09:07 PM
mechmagcn's Avatar
mechmagcn
mechmagcn is offline
Logistics Pro
Join Date: Dec 2005
Location: Moro Bay, AR
Posts: 4,630
Received 46 Likes on 32 Posts
Originally Posted by 49fordv8f4
Thank you for the reply. I am pleased with how it is cleaning up. If you are ever up in the north central part of the state, drop in.
I might have to take you up on that offer sometime soon. ;-)
 
  #148  
Old 09-08-2015, 09:18 PM
harleymsn's Avatar
harleymsn
harleymsn is offline
FTE Chapter Leader

Join Date: Dec 2001
Location: Crossville, Tn
Posts: 3,627
Received 7 Likes on 5 Posts
Originally Posted by mechmagcn
I might have to take you up on that offer sometime soon. ;-)
Jeff, you could stop there on your way to Truckstock next week...hint hint.
 
  #149  
Old 09-08-2015, 10:04 PM
mechmagcn's Avatar
mechmagcn
mechmagcn is offline
Logistics Pro
Join Date: Dec 2005
Location: Moro Bay, AR
Posts: 4,630
Received 46 Likes on 32 Posts
Originally Posted by harleymsn
Jeff, you could stop there on your way to Truckstock next week...hint hint.
I wish Joe, I wish.
 
  #150  
Old 09-24-2015, 12:35 PM
49fordv8f4's Avatar
49fordv8f4
49fordv8f4 is offline
Cargo Master
Thread Starter
Join Date: Aug 2014
Location: North Central Arkansas
Posts: 2,594
Received 69 Likes on 40 Posts


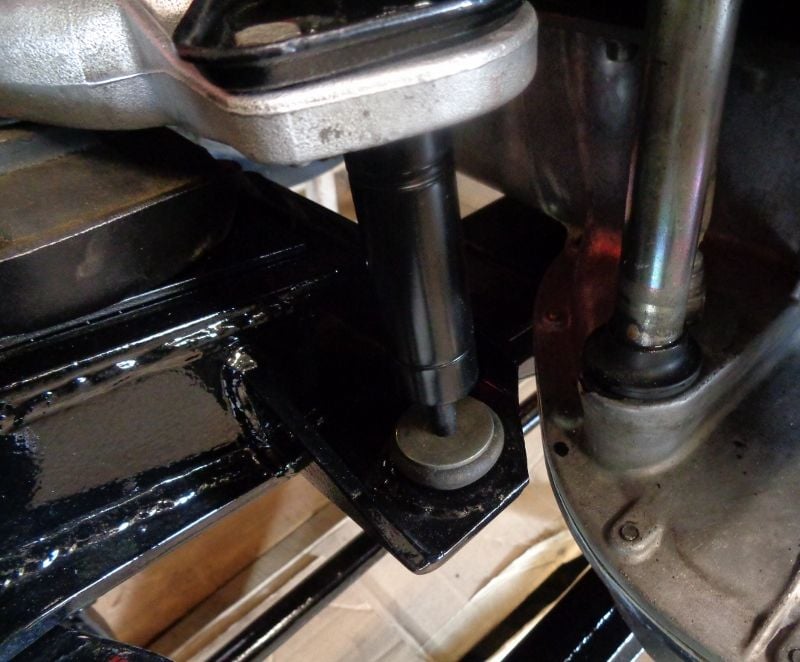
We had to trim the corner of the motor mount shock mount to clear the pan
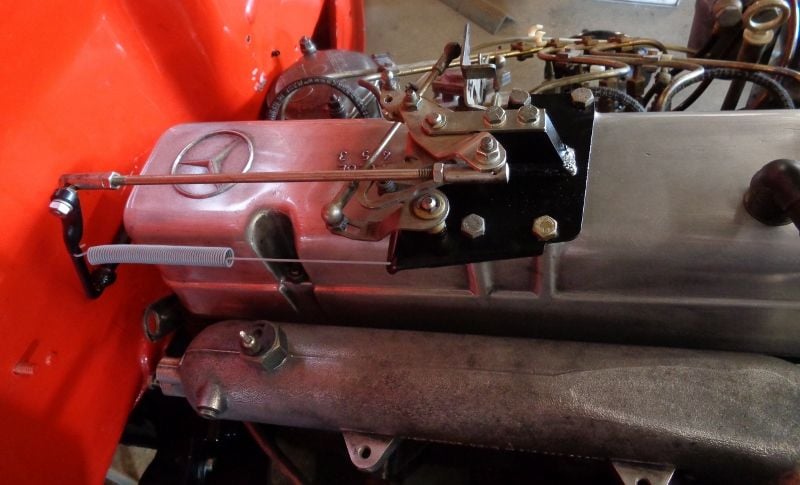


throttle linkage connected

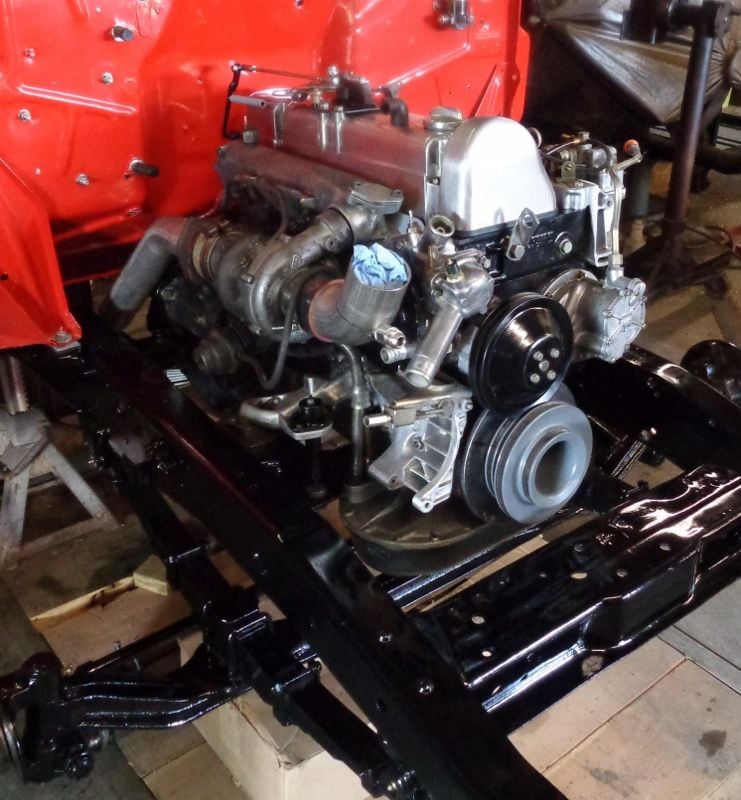
My son and I installed the engine and transmission Tuesday afternoon. I did scratch the firewall in a couple of places that I will have to touch up, otherwise everything went back in easily. I did have to remove the shifter for the Brownie. I installed it with the T9 spur gear transmission in place. With the T98 being longer, the parking brake arm on the transmission was hard against the shifter not allowing the transmission to line up with the mount. So, I will have to remount the shifter.


Quick Reply: 1949 F4 V8 to Mercedes diesel build thread


All times are GMT -5. The time now is 07:15 PM.