My '85 F150 4x2 project/build log.
#1
 07-29-2010, 03:47 PM

My '85 F150 4x2 project/build log.
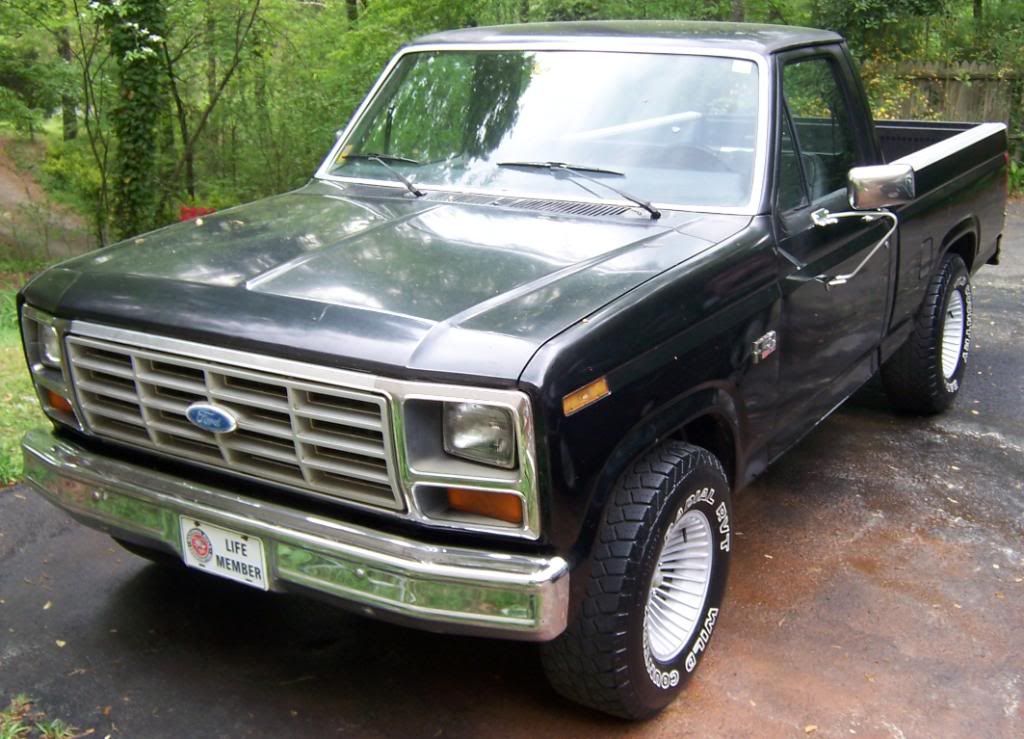
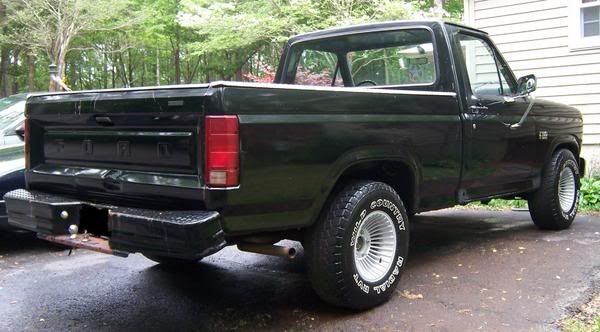
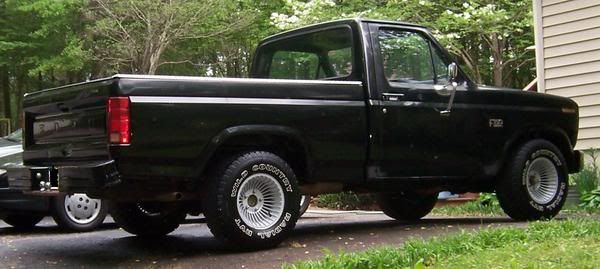
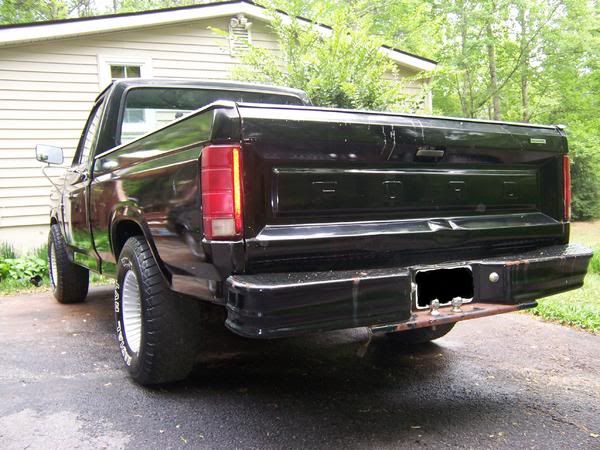
This is going to be project/build log for my ’85 F150 4x2. Since my truck is going to have its 25th birthday this year, it is high time that I took care of some issues. I will post pictures as I go along, because I know that everyone likes pictures as much as I do.
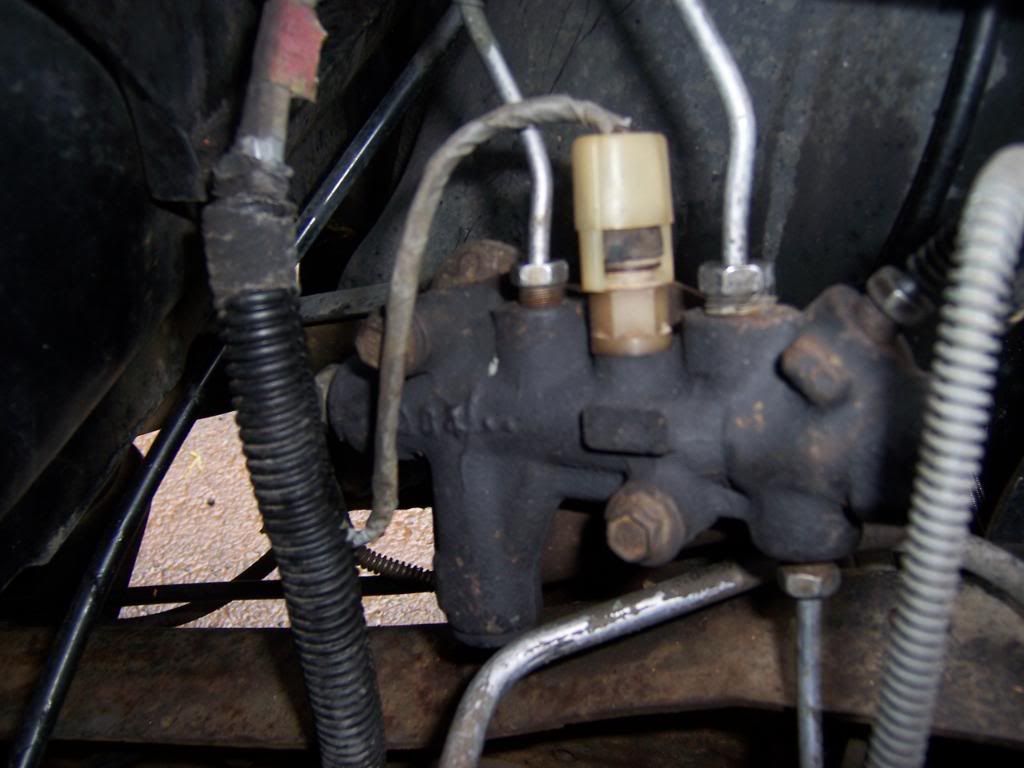
First on this list was a completer brake job. We had a hairy slide down a hill, through a stop sign and into another road in the rain earlier this year. It scared the wife pretty good, good enough for her to say OK to the price of about $700-$800 in parts. I’ve wanted to do this for some time (the brake rebuild, not the slide), and this seemed like a good opportunity. I replaced all of the brake parts except the master cylinder, brake booster and hard lines. The master cylinder and brake booster I replaced about 5 years ago. The list of parts included; proportioning valve with switch, rotors, calipers, bearings, pads, stainless brake hoses, drums, wheel cylinders, shoes, springs, and all supporting brake hardware.
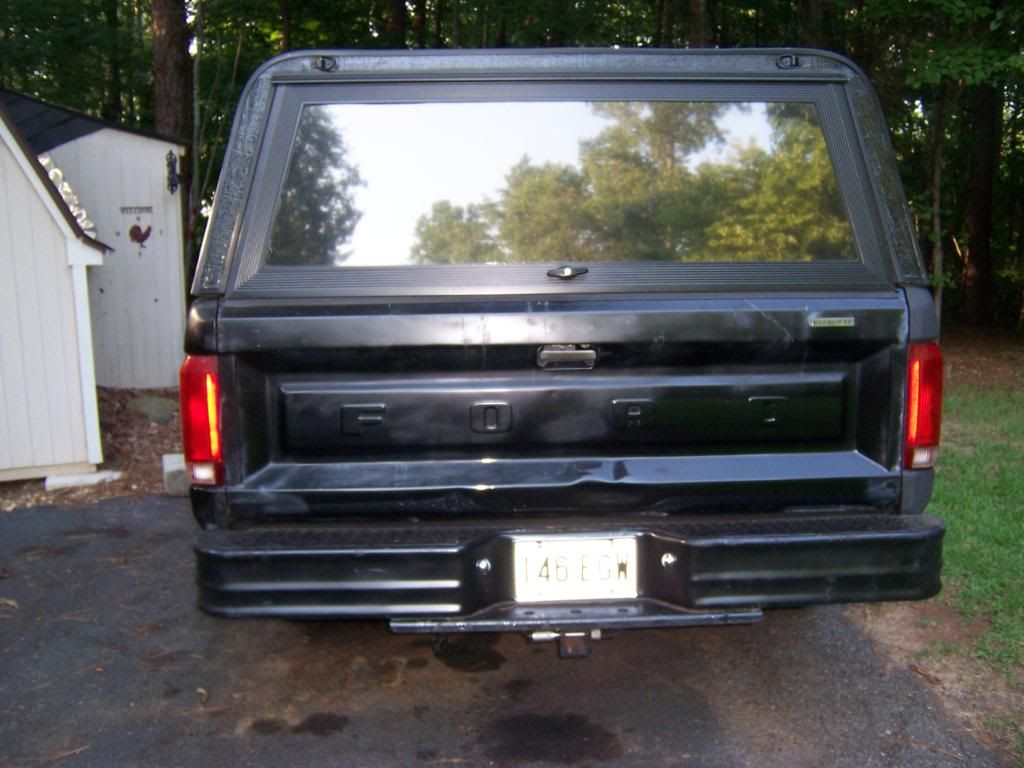
Next on my list was the receiver that my son gave me off of his ’95 F150.

While I was at it I straightened the bumper somewhat.
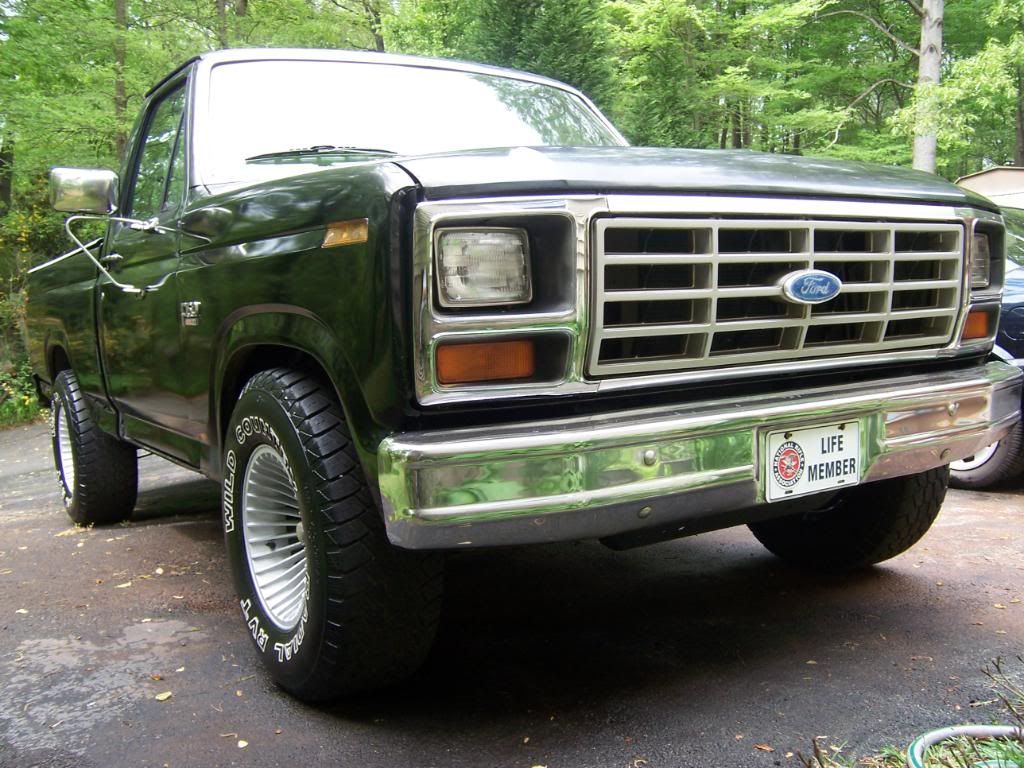
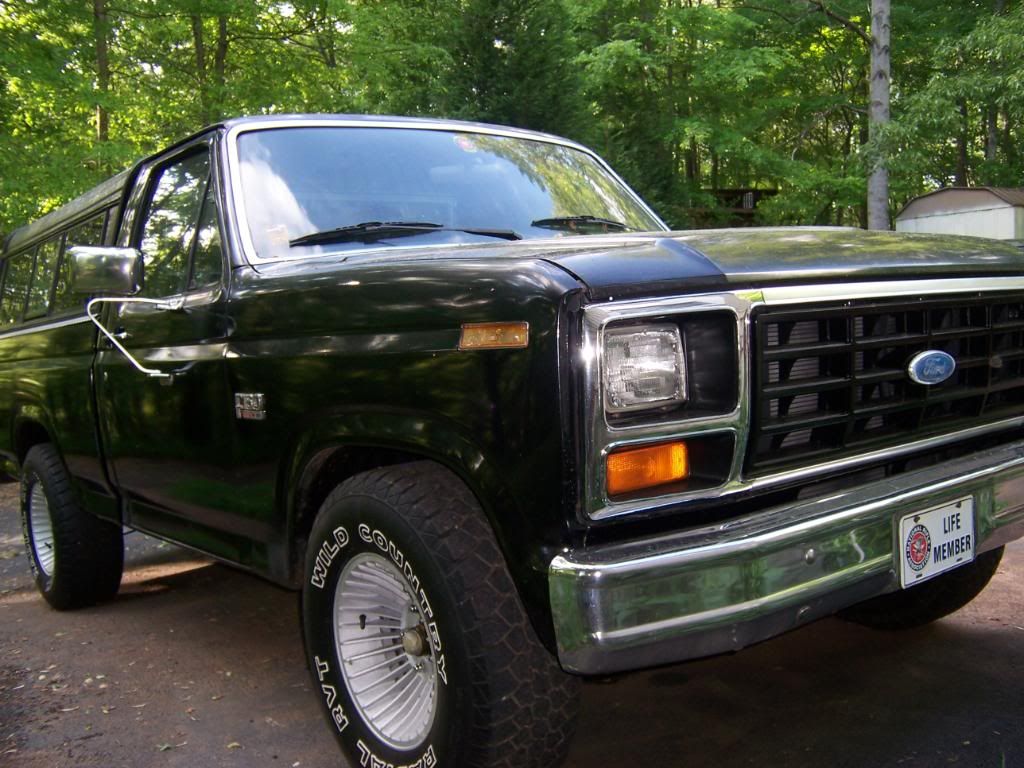
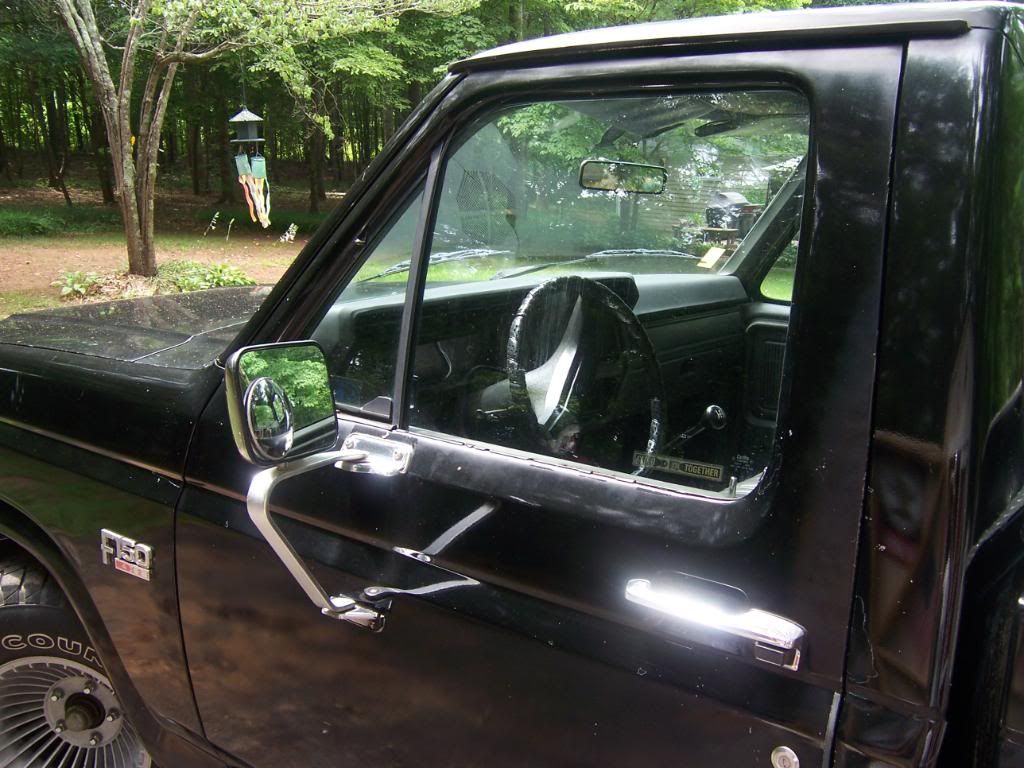
Another thing on my list was changing the color of the grill from silver to black.

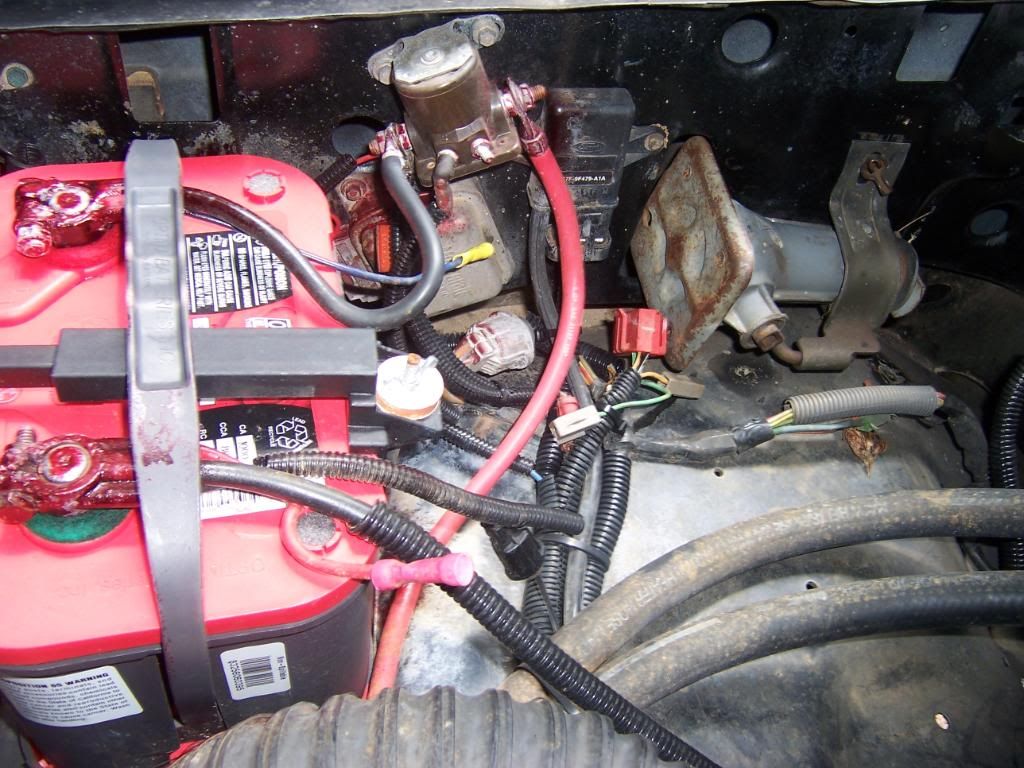
* A new battery added itself to the list sort of unexpectedly.
First on this list was a completer brake job. We had a hairy slide down a hill, through a stop sign and into another road in the rain earlier this year. It scared the wife pretty good, good enough for her to say OK to the price of about $700-$800 in parts. I’ve wanted to do this for some time (the brake rebuild, not the slide), and this seemed like a good opportunity. I replaced all of the brake parts except the master cylinder, brake booster and hard lines. The master cylinder and brake booster I replaced about 5 years ago. The list of parts included; proportioning valve with switch, rotors, calipers, bearings, pads, stainless brake hoses, drums, wheel cylinders, shoes, springs, and all supporting brake hardware.
Next on my list was the receiver that my son gave me off of his ’95 F150.
While I was at it I straightened the bumper somewhat.
Another thing on my list was changing the color of the grill from silver to black.
* A new battery added itself to the list sort of unexpectedly.
#2
07-30-2010, 09:51 AM
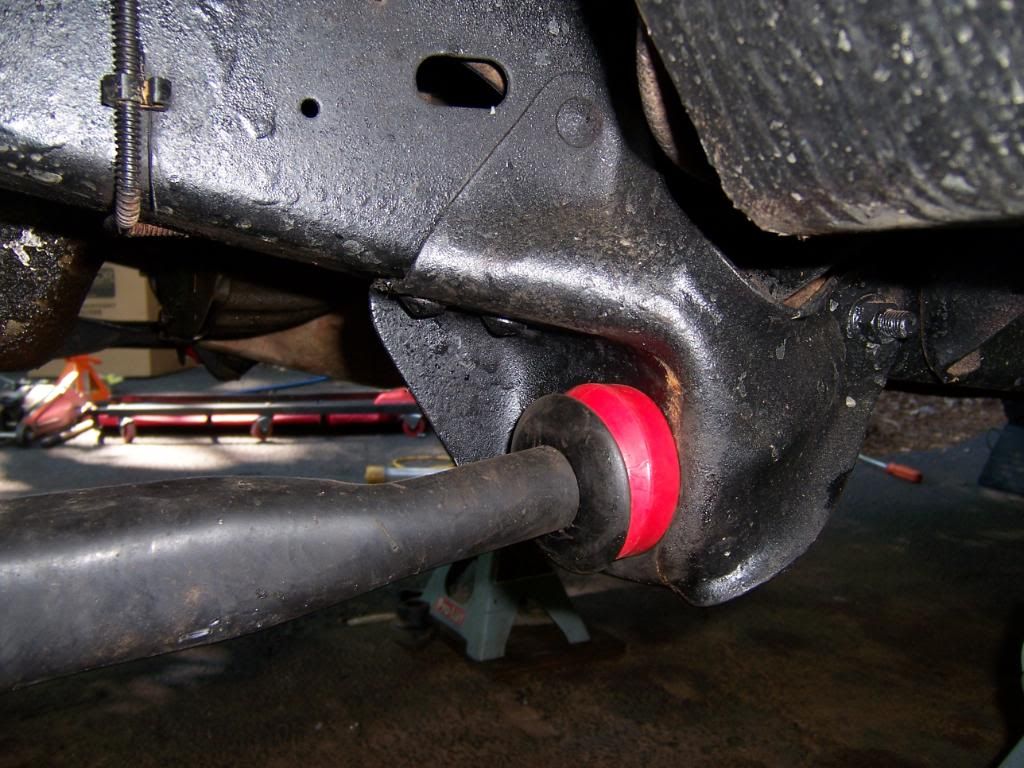
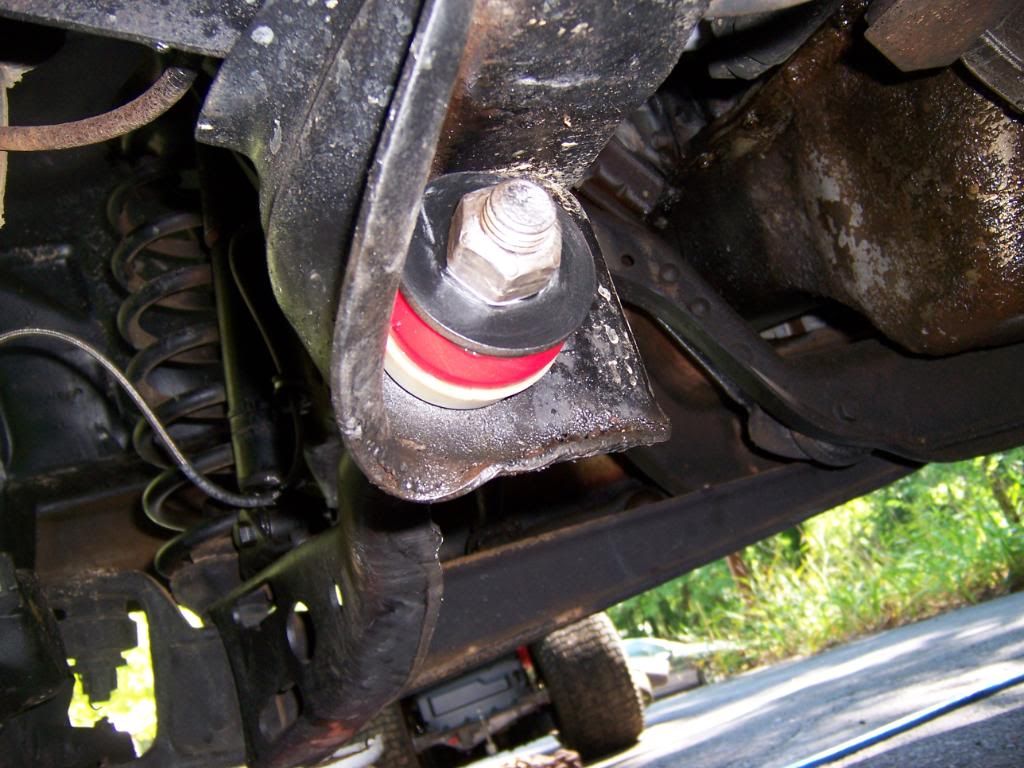
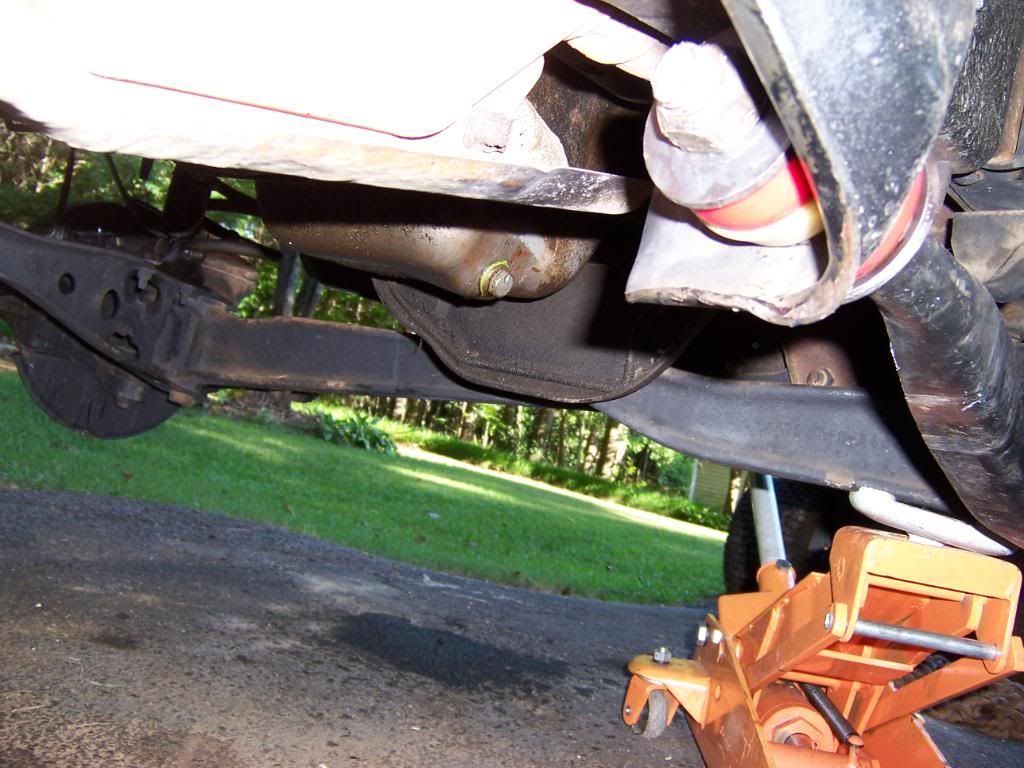
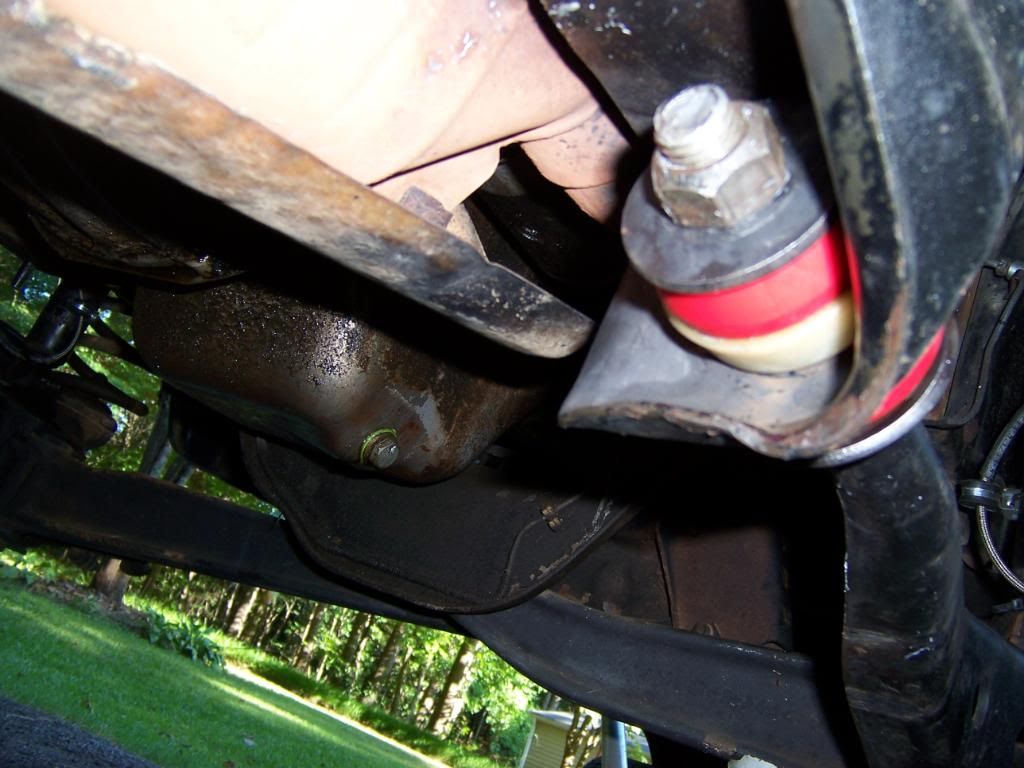
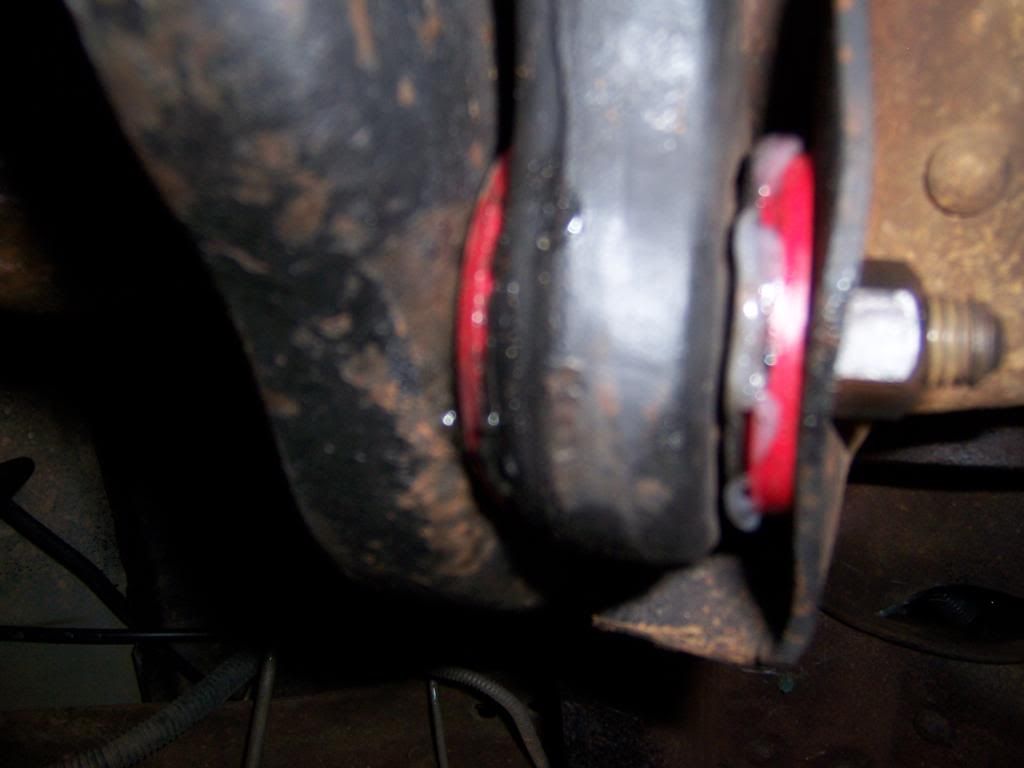
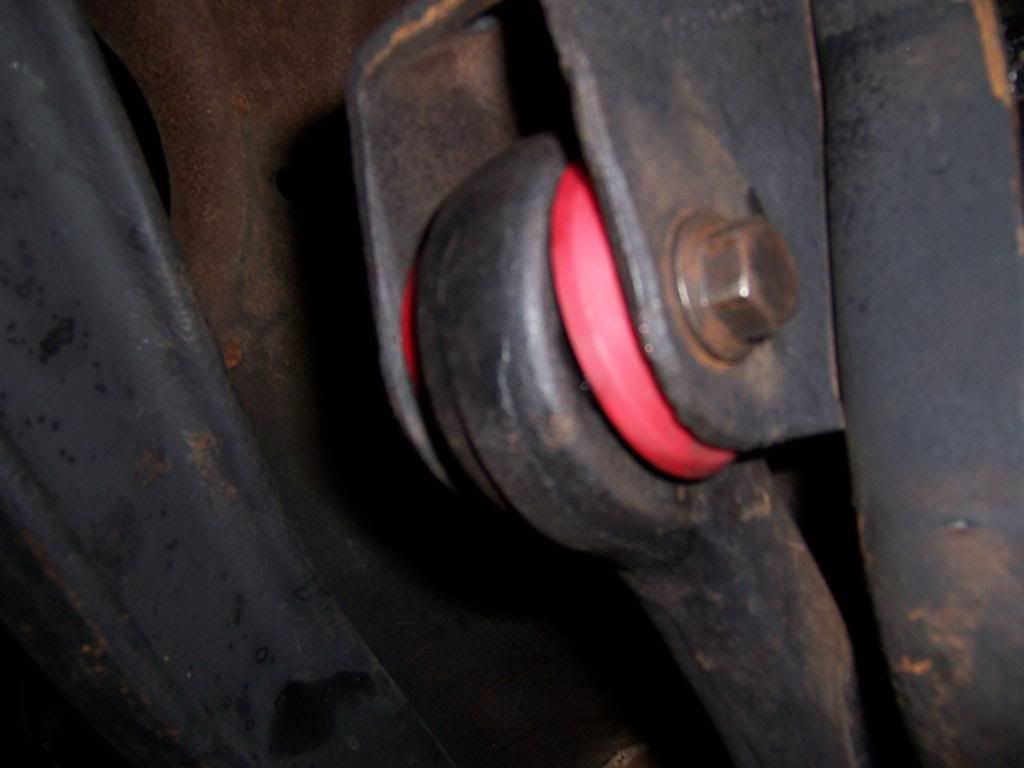
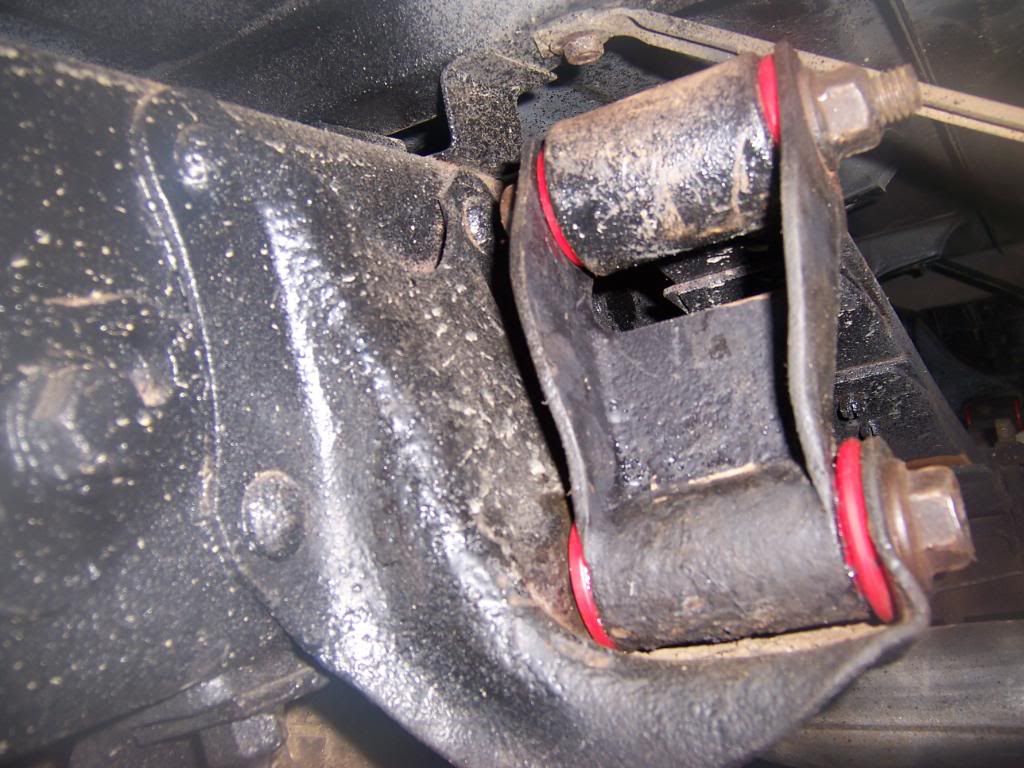
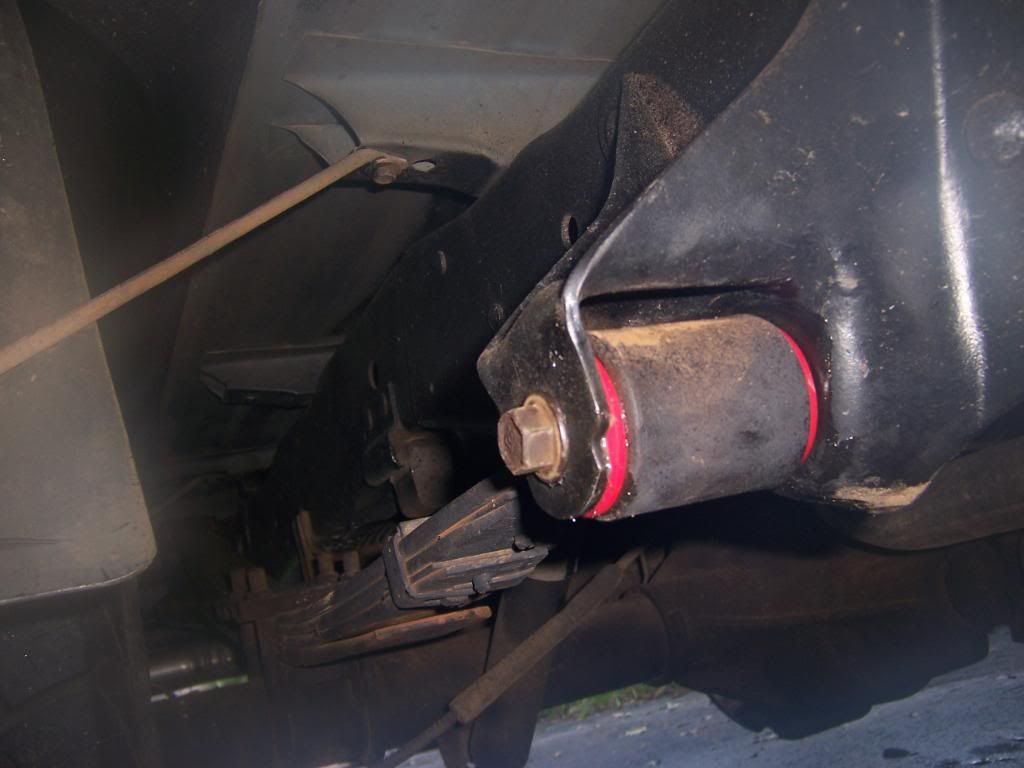
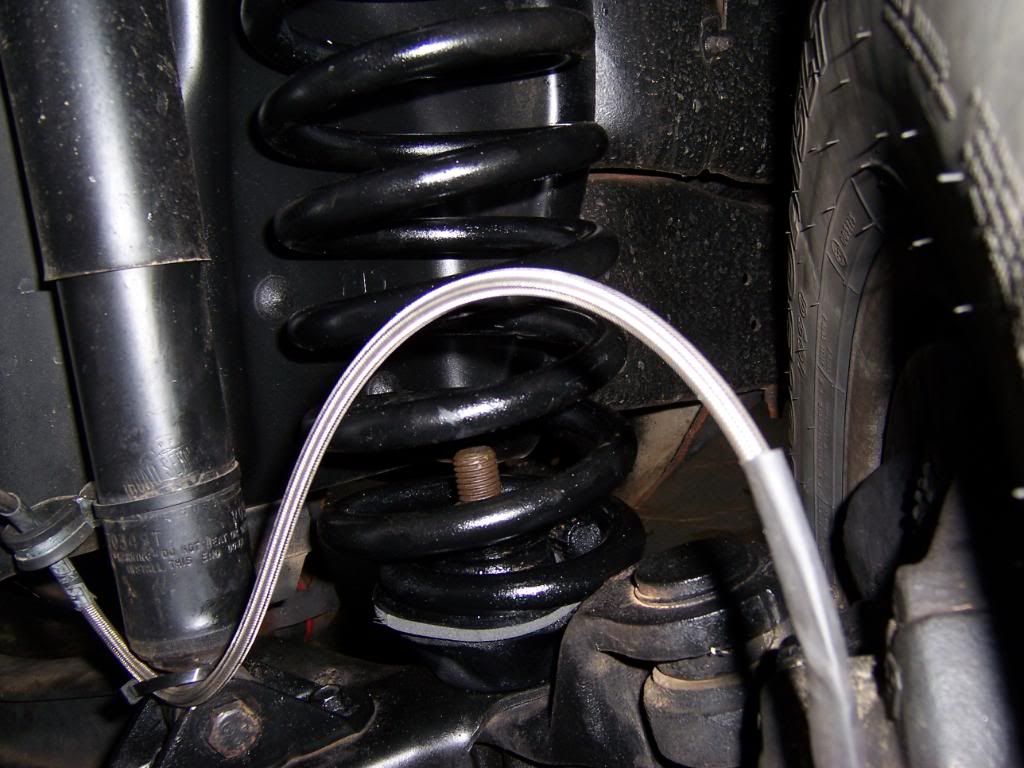
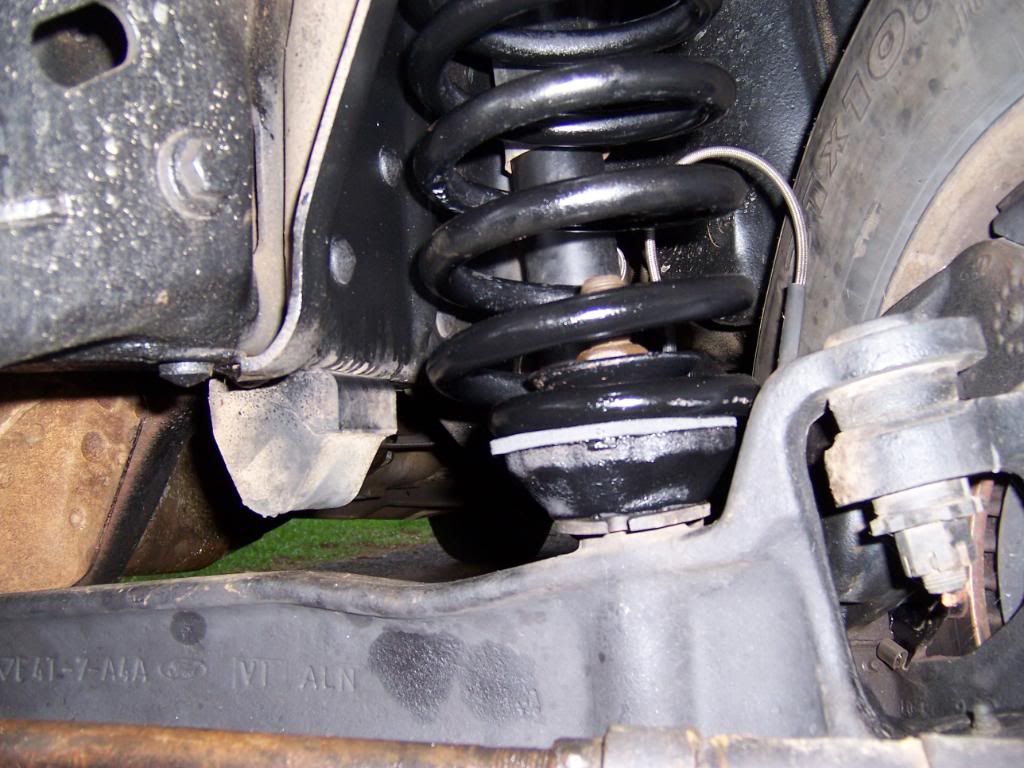
The next thing on my list was replacing all of the suspension bushings with polyurethane ones. And new coil spring isolators.
Out with the old,
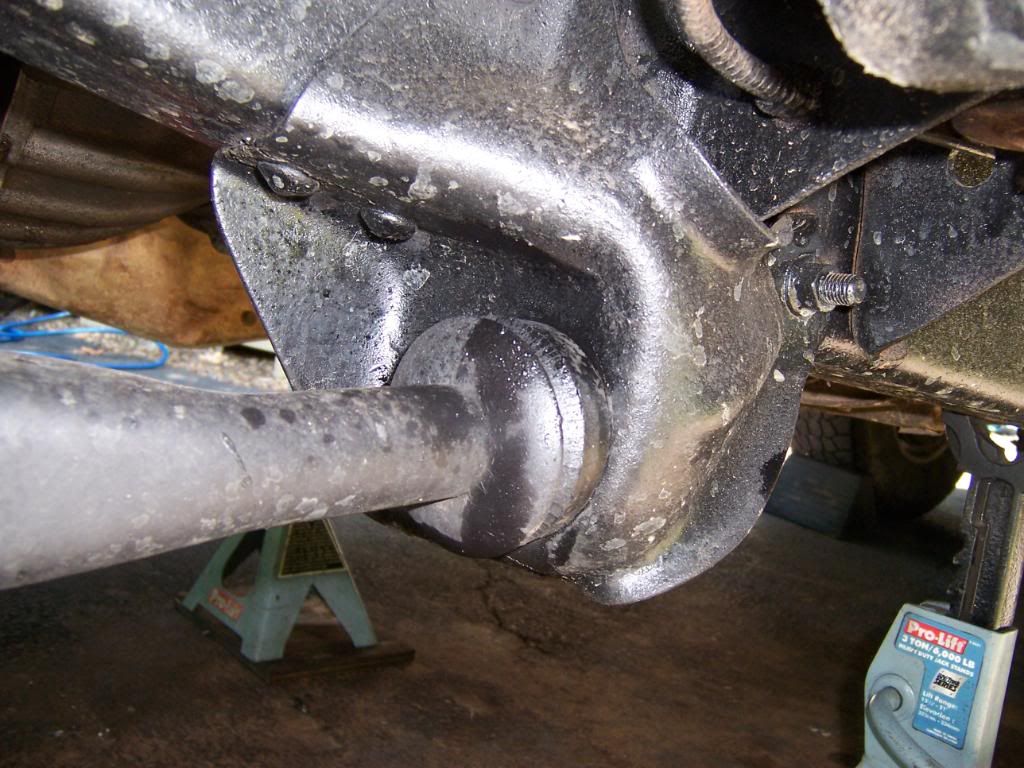
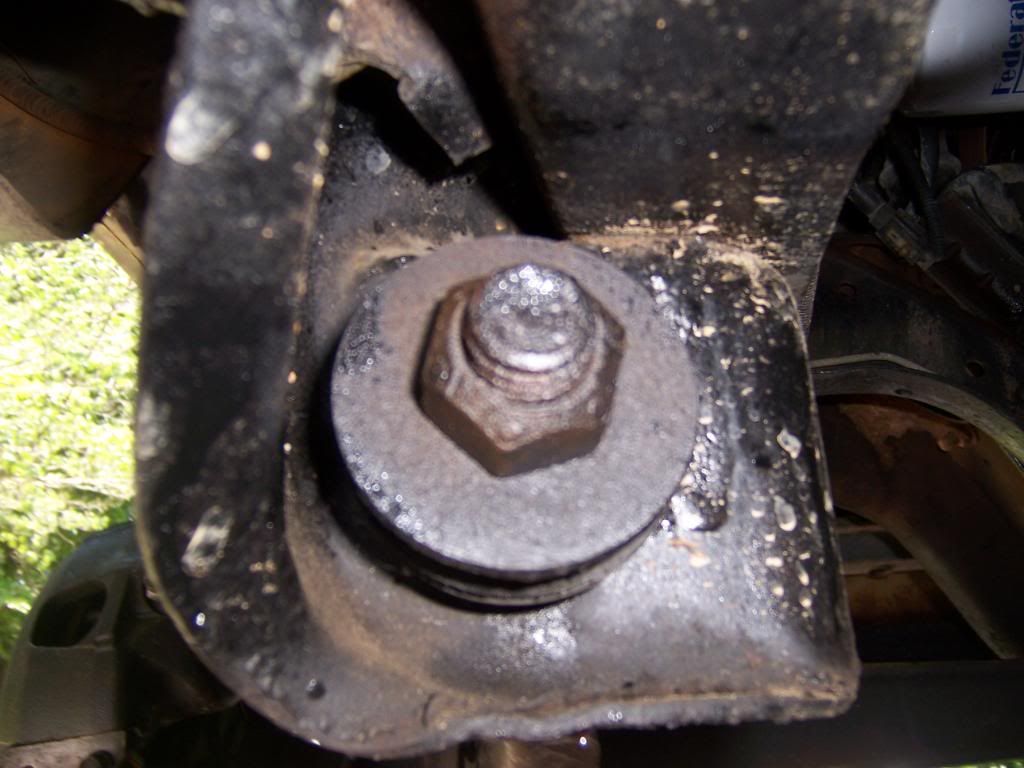
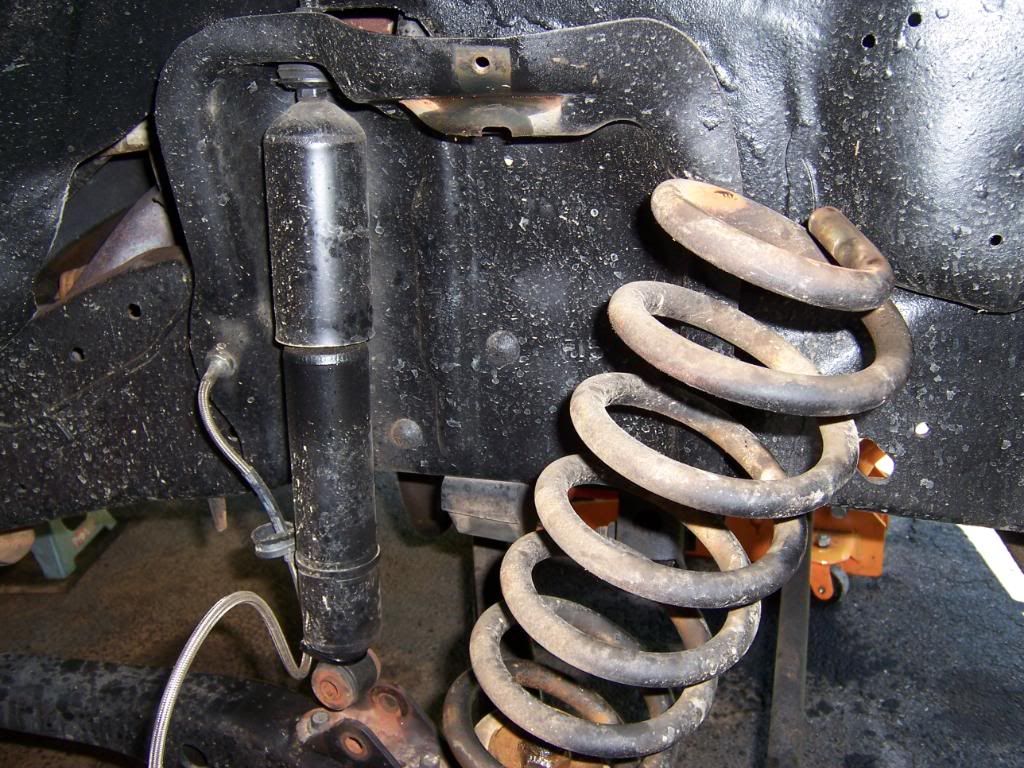
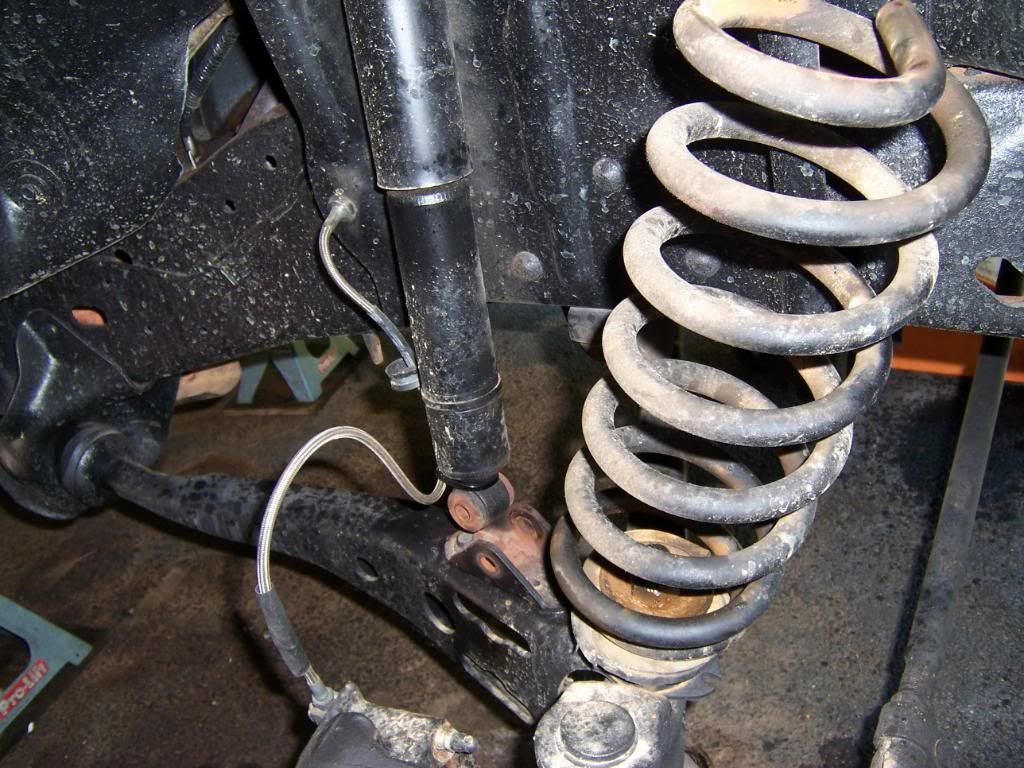
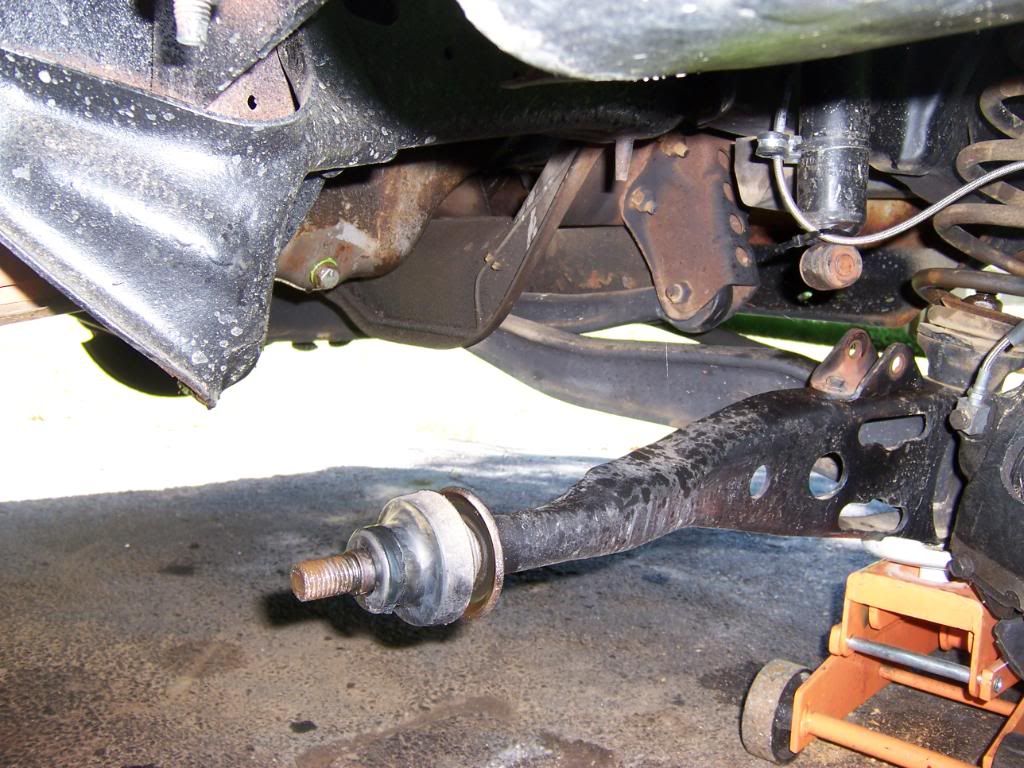
and in with the new.


I really want a new paint job within the next 2 years. So, I started on some of the body work that will need to be done.
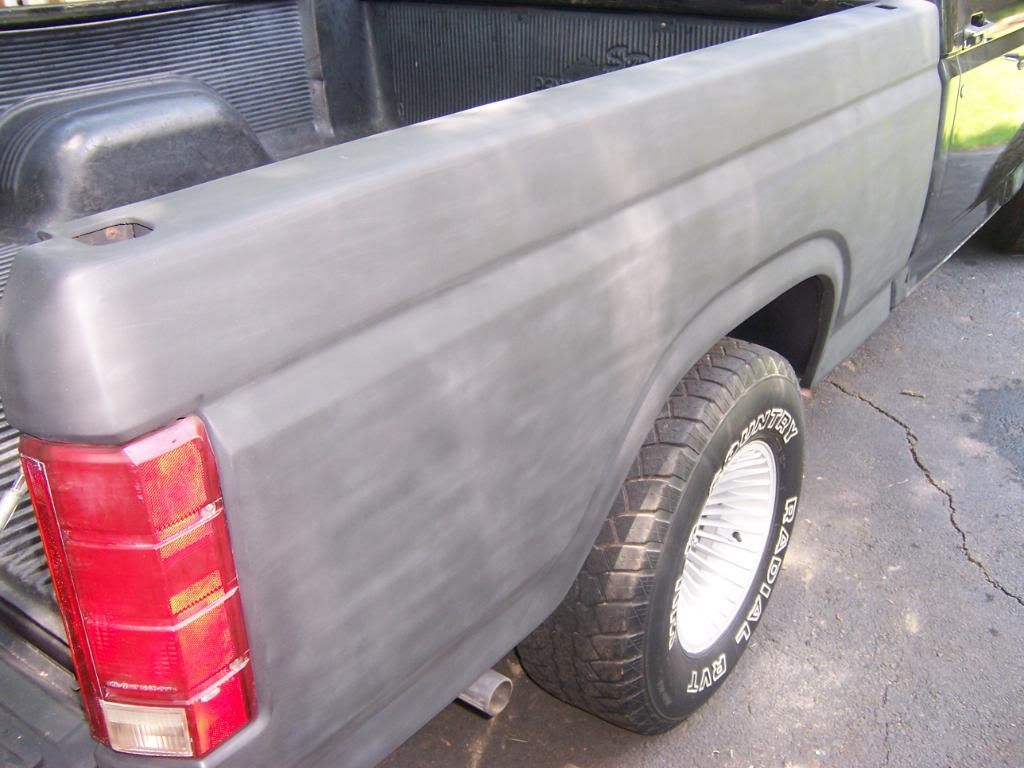
A shopping trip to the junkyard netted me some much needed upgrades;
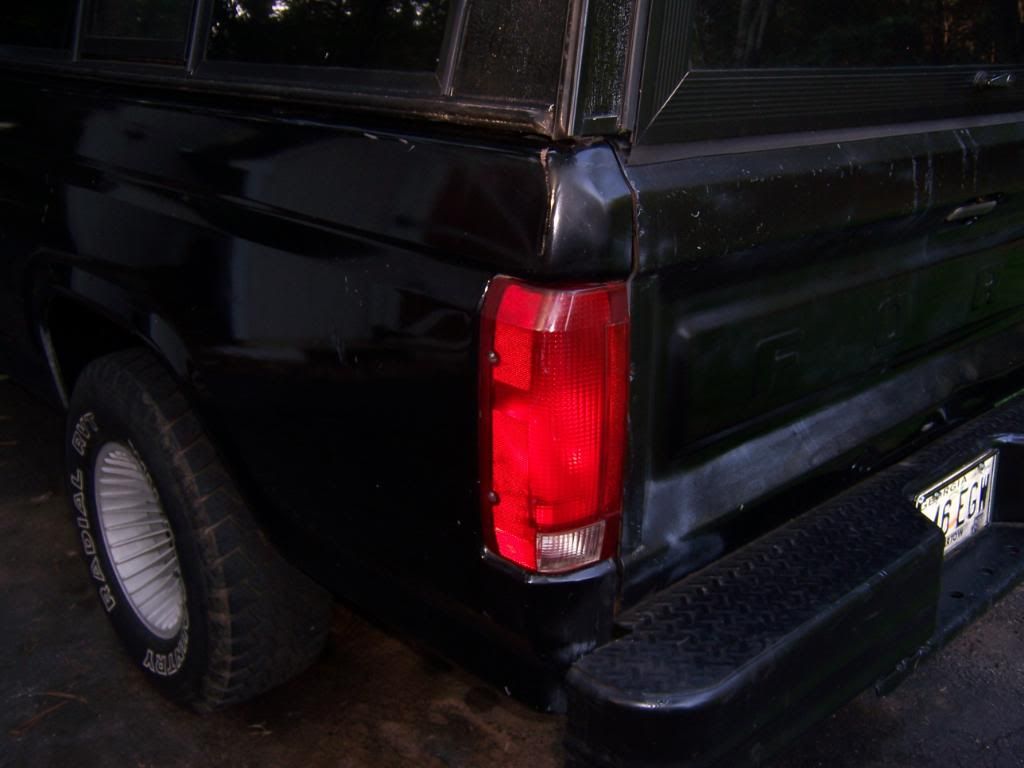
A set of ’92-‘96 taillights,

A set of ’87-’91 sun visors,
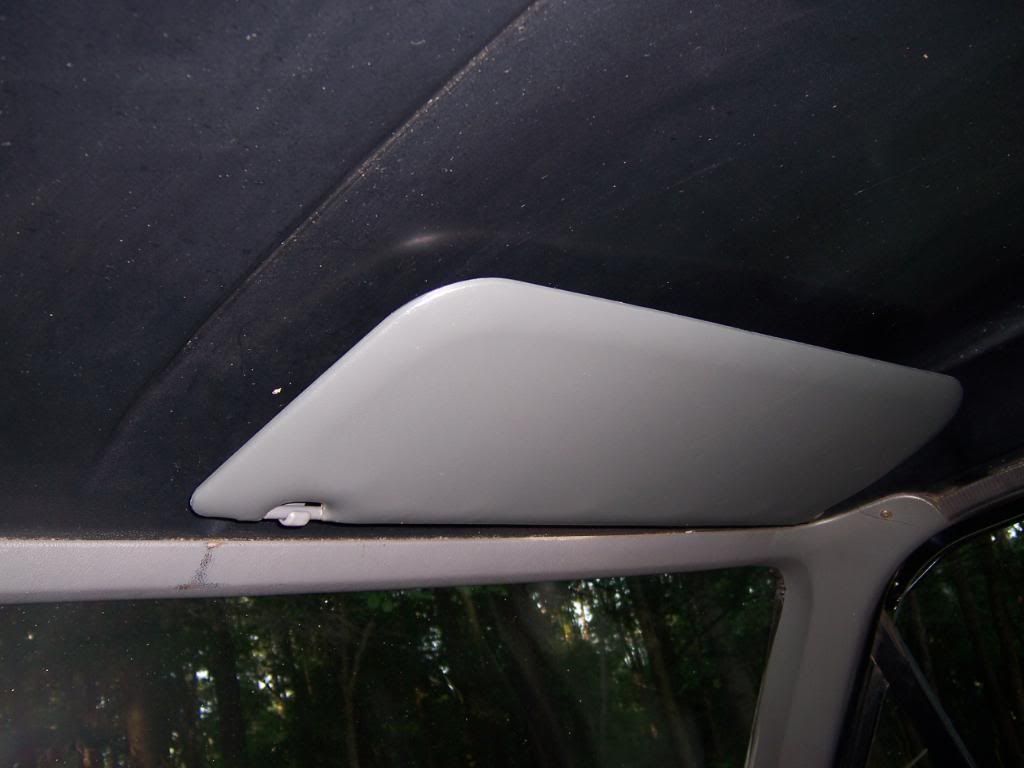
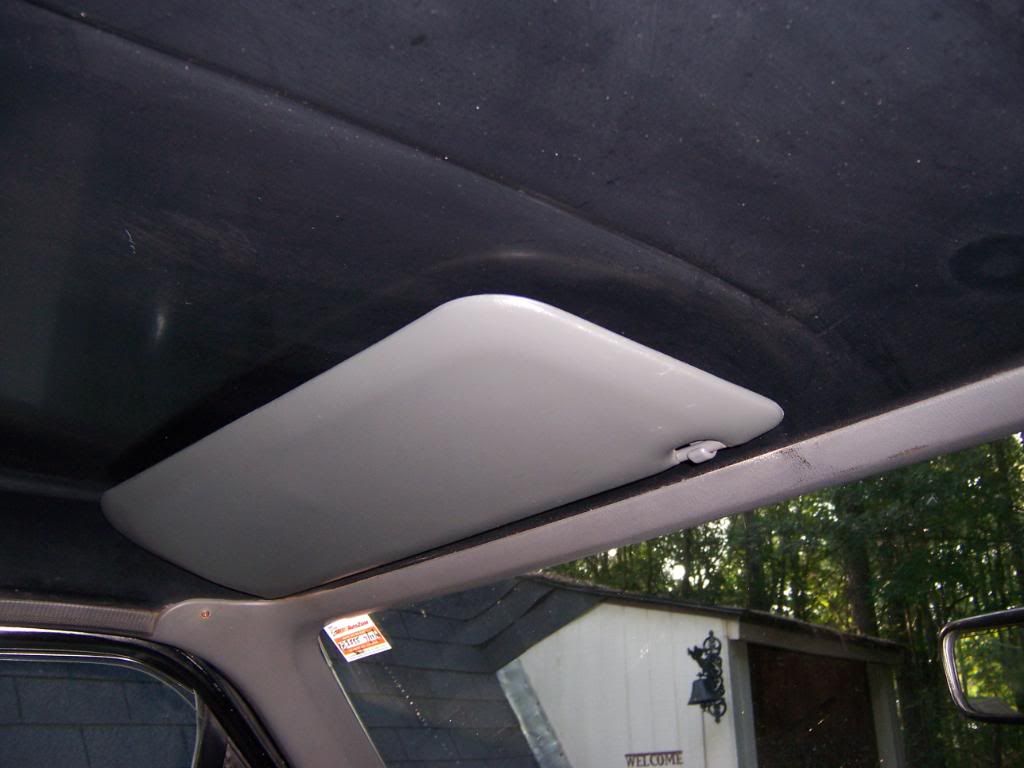
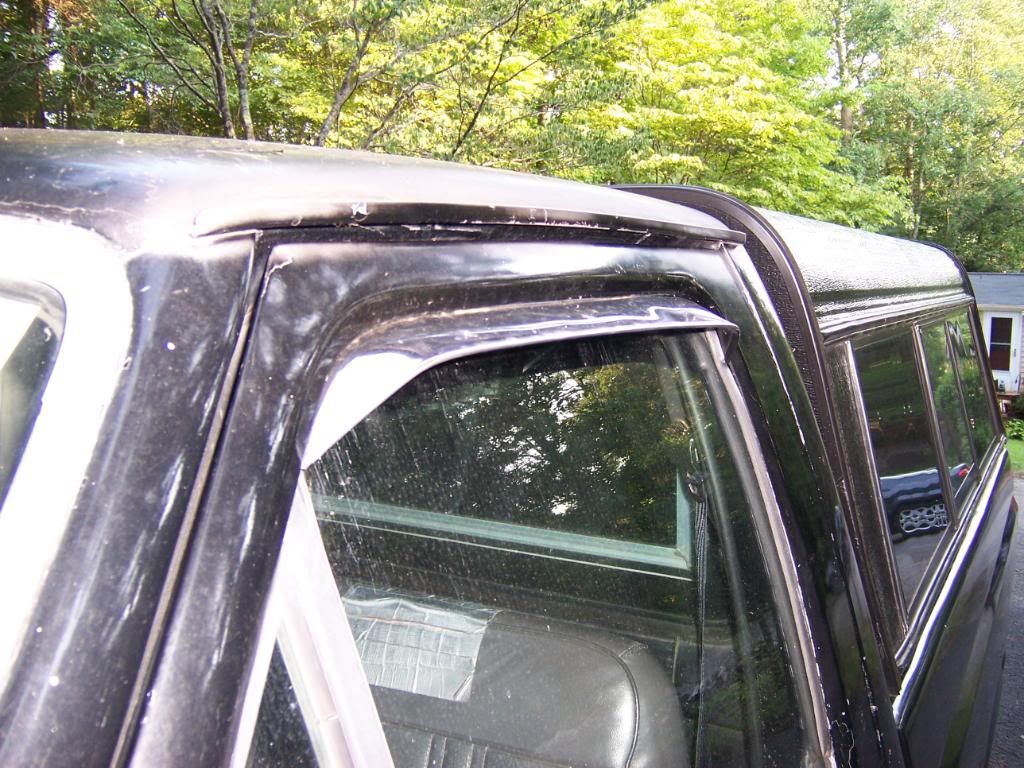
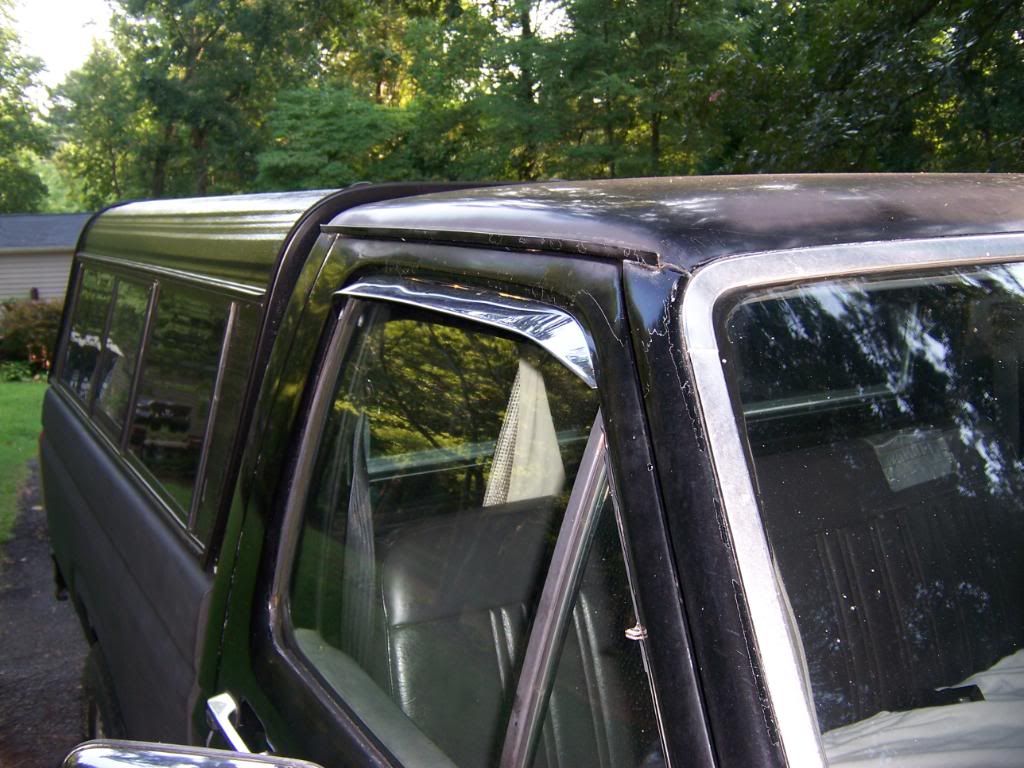
A set of like new window visors.
That's about all that I have done so far.
I want to change the cowl out to one from an '87-'91, with the little holes.
I would also like to repair the floor pan and put in new carpet.

And maybe even a new seat, possibly a split bench with an armrest or some type of console.
I also want new polyurethane body and cab mount bushings.
I need a new dash pad too.
And a bunch of weatherstripping.
I'm sure this list will grow and that I will have other questions as I go along, but this is what I have for right now.
All comments and suggestions are welcome, thanks.
Out with the old,
and in with the new.
I really want a new paint job within the next 2 years. So, I started on some of the body work that will need to be done.
A shopping trip to the junkyard netted me some much needed upgrades;
A set of ’92-‘96 taillights,
A set of ’87-’91 sun visors,
A set of like new window visors.
That's about all that I have done so far.
I want to change the cowl out to one from an '87-'91, with the little holes.
I would also like to repair the floor pan and put in new carpet.
And maybe even a new seat, possibly a split bench with an armrest or some type of console.
I also want new polyurethane body and cab mount bushings.
I need a new dash pad too.
And a bunch of weatherstripping.
I'm sure this list will grow and that I will have other questions as I go along, but this is what I have for right now.
All comments and suggestions are welcome, thanks.
#3
07-30-2010, 11:31 PM
Postmaster
Hey man,she's looking great.If you have any questions about that cowl panel swap,give me a holler,I did it on my truck two years ago.I'm real happy with it.I have pics too if you would like to see em.
There's one thing I wanna throw out about that swap.Although it can be done with the hood attached,it's kinda tricky,and it's easy to bend the cowl getting it out/in.Your best bet is to remove the hood,or at least loosen everything up so you can pull the hood farther away from the cowl to get more room.
There's one thing I wanna throw out about that swap.Although it can be done with the hood attached,it's kinda tricky,and it's easy to bend the cowl getting it out/in.Your best bet is to remove the hood,or at least loosen everything up so you can pull the hood farther away from the cowl to get more room.
#4
07-31-2010, 01:26 AM
Posting Guru
Join Date: Apr 2009
Location: Illernois
Posts: 1,089
Likes: 0
Received 0 Likes
on
0 Posts
#5
08-02-2010, 09:39 AM
Hey man,she's looking great.If you have any questions about that cowl panel swap,give me a holler,I did it on my truck two years ago.I'm real happy with it.I have pics too if you would like to see em.
There's one thing I wanna throw out about that swap.Although it can be done with the hood attached,it's kinda tricky,and it's easy to bend the cowl getting it out/in.Your best bet is to remove the hood,or at least loosen everything up so you can pull the hood farther away from the cowl to get more room.
There's one thing I wanna throw out about that swap.Although it can be done with the hood attached,it's kinda tricky,and it's easy to bend the cowl getting it out/in.Your best bet is to remove the hood,or at least loosen everything up so you can pull the hood farther away from the cowl to get more room.
Yes, I would like to see some pictures of it. And I would like to know what it took to do the job. What tools should I carry to the JY, to remove the cowl, when I go searching for one? I have heard that about removing the hood, although I think I will take a shot at it first before I remove the hood.
On another note, I think my next project is going to be removing the front grille and such. I am wanting to clean up, prime, paint, and spray some undercoating on the area behind the grille and lights and such, and around the radiator, radiator supports, etc. I have a polyurethane body bushing kit on order now (hopefully it includes the radiator support bushings), and will be installing it in bits and pieces as I go along with the renovation.
I drove the truck all weekend, dump and store on Sat., and moving my daughter (7 trips) Sun., and I really have to say how much better it drives and handles with the new suspension bushings on. I am really pleased, even more so that I did it all myself. I think it drives even better than when it was new.
#6
08-02-2010, 09:15 PM
Postmaster
Basic Tools are all you need.A Flathead Screw Driver(To pop the antenna cover off),Phillips Screwdriver,Pliers or similar(For the Antenna),WD40(for stubborn wiper arms).The hardest part will be getting the wiper arms off.If you get lucky,somebody else might have taken them off.There's about 10 screws that hold the cowl panel to the firewall,and then about 5 or 6 on the top of the cowl panel.You'll also need to disconnect the wiper fluid hose from the nozzle in the cowl.When you remove the antenna base cover,you will see four screws to remove the antenna base.After you remove all these screws,it should be loose.It doesn't take that long,but then again i've done it alot.
Here's the two panels side by side

This pic was taken before I adjusted the hood,which is why it doesn't seem to line up.If you want any certain pics,I can take some for ya.I didn't paint mine,because I plan on having the truck repainted,and the color on the new panel was close enough not to bother me.

Here's the two panels side by side
This pic was taken before I adjusted the hood,which is why it doesn't seem to line up.If you want any certain pics,I can take some for ya.I didn't paint mine,because I plan on having the truck repainted,and the color on the new panel was close enough not to bother me.
#7
08-03-2010, 08:11 AM
Thanks Fordzilla, great info. I was curious as to what tools I might need to remove one at the JY, looks like I already have those in my truck. I don't have a radio in mine, but I think I am going to install an antenna anyway. I think I will sand and prime mine before I install it, and maybe do something to the underside too. On the wiper arms there is a latch that you can open with a flat-head screwdriver, and the assembly will pull straight up and off. I'm curious to know approximately what the cost of the part was, so that I have a ballpark when I get mine.
Trending Topics
#8
08-03-2010, 06:10 PM
Postmaster
No problem.Sometimes the pins on the wiper arms get stuck,which is why I mentioned the WD40.Adding a Radio is quite the job on these trucks.The hardest part is drilling the holes in the doors if you don't have any power options.As far as the price goes,it depends on the yard,but I picked mine up for $15.Alot of yards like to play games with their prices.If they think you need it,they'll raise the price.
#9
08-05-2010, 09:33 AM
I started pulling the front of the truck off last night, grille and all. I just got a Polyurethane Body (Cab) bushing kit, I am going to replace them as I go along. I have everything off, except for the bumper and radiator core bushing bolts. Well, I have one out but, the other one is being a pain (looks like I'll need some new bolts). I guess I'll try some heat on it tonight. After that I'll have to work on the rusty bumper bolts. I'm going to clean everything, prime, paint, and spray some undercoating on most everything before I put it all back together. I'm also going to back-flush the radiator when I reinstall it. I'll post some more pictures when I'm done.
#10
08-06-2010, 03:39 PM
Everything is off, but one bumper bolt. Looks like I will need new bumper bolts/nuts. I had to order new radiator support bolts/nuts today. It looks like some nasty thunderstorms tonight, so no chance to work on the truck. Oh well, maybe I'll get something accomplished this weekend. Maybe some more pictures too.
#11
08-09-2010, 09:31 AM
Ok, so this was how I spent my weekend;
Before:
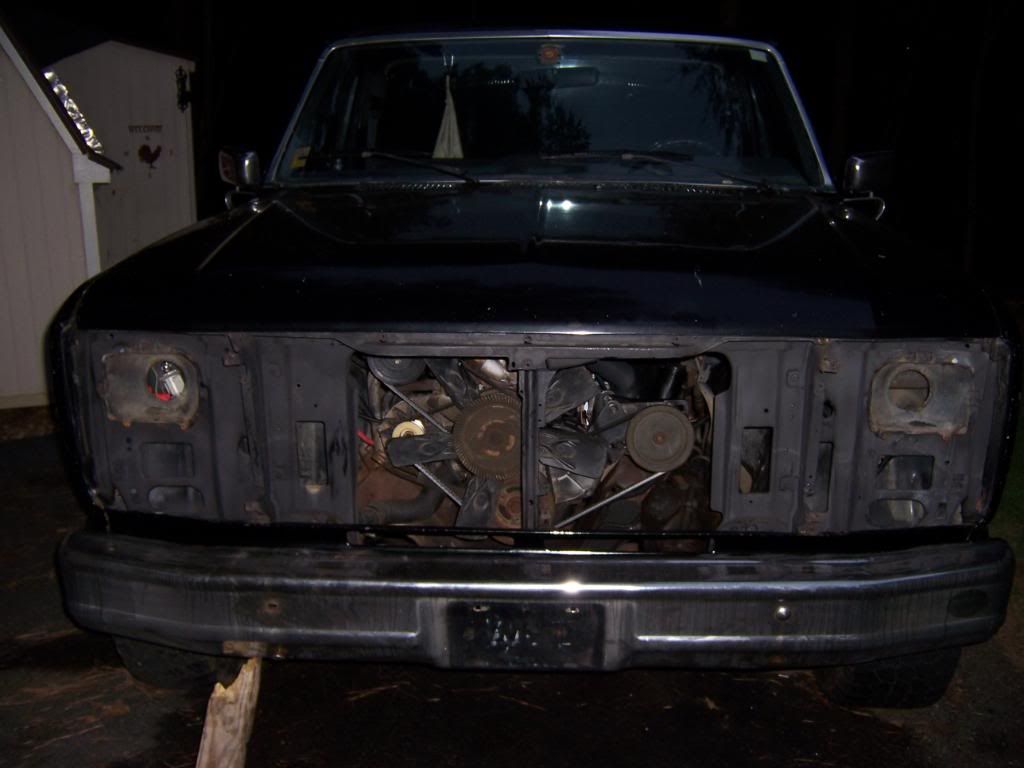
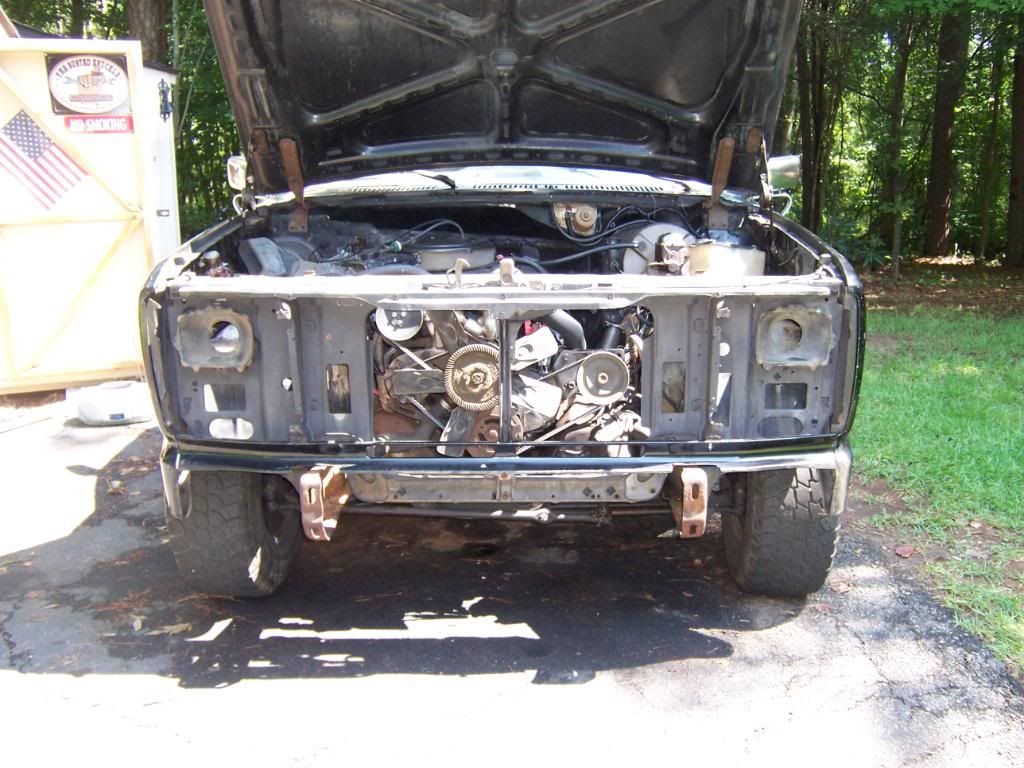
After:


If you look closely, you can see my new radiator core support bushings (red). Besides cleaning, priming, and spraying undercoating on the radiator core support and all associated pieces, I did a back-flush on the cooling system and changed the fluid. I also found out that my oil pan drain bolt was leaking. So, I got a new bolt, and a pack of washers for it and did an oil/filter change.
I am still waiting on the Radiator core support bolts/nuts (on order-LMC) to arrive, then I can finish installing them. The bumper needs new bolts ($35), but they will have to wait for a little while as I have run out of extra money. Meanwhile, I will clean up the rust on the backside of the bumper and prime and undercoat it.
Before:
After:

If you look closely, you can see my new radiator core support bushings (red). Besides cleaning, priming, and spraying undercoating on the radiator core support and all associated pieces, I did a back-flush on the cooling system and changed the fluid. I also found out that my oil pan drain bolt was leaking. So, I got a new bolt, and a pack of washers for it and did an oil/filter change.
I am still waiting on the Radiator core support bolts/nuts (on order-LMC) to arrive, then I can finish installing them. The bumper needs new bolts ($35), but they will have to wait for a little while as I have run out of extra money. Meanwhile, I will clean up the rust on the backside of the bumper and prime and undercoat it.
#12
08-12-2010, 08:00 AM
#13
08-12-2010, 11:46 AM
Postmaster
#14
08-12-2010, 12:10 PM
Just a little, I cleaned, wire brushed, and primed before I prayed the undercoating on it. I'm not looking for perfect or show quality. I just want it to last another 25-30 years (or so). I'll have to see how long it lasts and how well it wears, but I expect to do something like this again sometime in the future (although I hope not). As far as the battery tray area (corroded by acid and rusted somewhat), it looks like I will need a new tray or a decent one from the JY, which I will add to my growing parts list.
#15
08-12-2010, 12:42 PM
Postmaster
I see.My core support looks to be pretty good,except the bottom by the battery tray.There's a hole where it looks like acid got to it.My battery tray has a hole through the center of it.I pulled it out,cleaned it up,and sprayed it for the time being until I replace it.The paint seems to be holding up.