My D60 swap into '96 CCSB PSD
#46
 07-15-2014, 04:58 AM

Tuned

#48
07-20-2014, 08:35 PM
Thanks G man!
Saturday AM I went to the Ford dealership to buy the bolts that attach the track bar bracket to the frame as I prefered a factory look, they said they were discontinued. I asked them how much and of what kind of fluid i should put in a '96 F350 front differential and the best they could do is hand me a cross reference chart that started with the year model 2004...they said I could keep the print out it in case it helped later. Hmm, might be helpful for tomorrow's daily Constitutional. I'm not bagging on the Ford dealership, I should have known to not visit Saturday when their B team was on the field. Similar to Lowe's or Home Depot, visit during the week, from opening to about 3pm, any other time you are the one with the most knowledge in the store. Word to the wives, shop early and during the week if you want solid advice from these places, any other time you might as well be listening to your husband for information.
Went to my favorite auto parts store and selected the grade 8 nuts and bolts of needed lengths for the track bar itself and bracket, both tie rod ends, the steering and the drag link ends and out the door I went.
I pulled the adjuster sleeves and hardware off the old linkages and pre-assembled the new items using the grease zerks as approximate measurements from old to newly assembled pieces. I loosely attached these to nearly complete D60 and used ropes to tie the drag link into a neutral position so the whole assembly, now with wheels temporarily fitted with 2 nuts, can be rolled around. I've said it before, but these feel like "one ton" axles when you are trying to move them by hand.
I planned to knock the old rubber bushings and sleeves out of the donor F350 front springs as I plan to reuse the polyurethane bushings I installed in the D50 springs about a year ago. I'll reuse the U bolts, top U bolt / shock mount plates and both front/back spring bolts. Save your pontificating about reusing blah blah blah. This is all all temporary as a RSK and SD springs are phase 2 of this project.
In my amateure shadetree career I've removed about 10 or so bushings before so I thought these should be rather normal. These 4 bushings beat my butt. I don't have an oxy/acetylene torch so that "plan B" wasn't available. It wasn't until I beat on them with a BFH (=Big is the Hammer size) with all my might that they came out. I cussed. Loudly. The dog ran off. 3 hours, I'm embarrassed, mad, and too tired to care.
I took the easy project to end the day and installed a rear ranch hand I horse traded for. I don't like the cheap, one wire, license plate fixture they give you ao I need to open up the provided hole to accept the factory fixture. Until then I zip tied the fixture to the bumper in case I'm driving at night in front of Officer Friendly.
This Sunday morning I decided to tackle cutting the front bumper so a 2-1/2" receiver tube could be welded in. My brother gave me a bunch of class 5, 2-1/2" hitches and my rear receiver is sized for these. An adapter lets you use the normal 2" hitches.
I used and angle grinder with various wheels and a sawzall to make the openings on the front and the inside of the bumper. I trimmed the new receiver tube so that welds could be made on the three accessible sides inside the bumper, and then trimmed the 4rth side so that a full weld could be made on the inside too. I also had my welder close up the license plate screw holes as i now need to make a custom plate holder. A benefit to the 2-1/2" reciever is that I can build a plate holder on the 2-1/2" tube and still use a 2" hitch. This is a side project that I'll update here as I tackle it.
Test fit for angles, but too long.

Wish I had all the equipment and skills to do this...
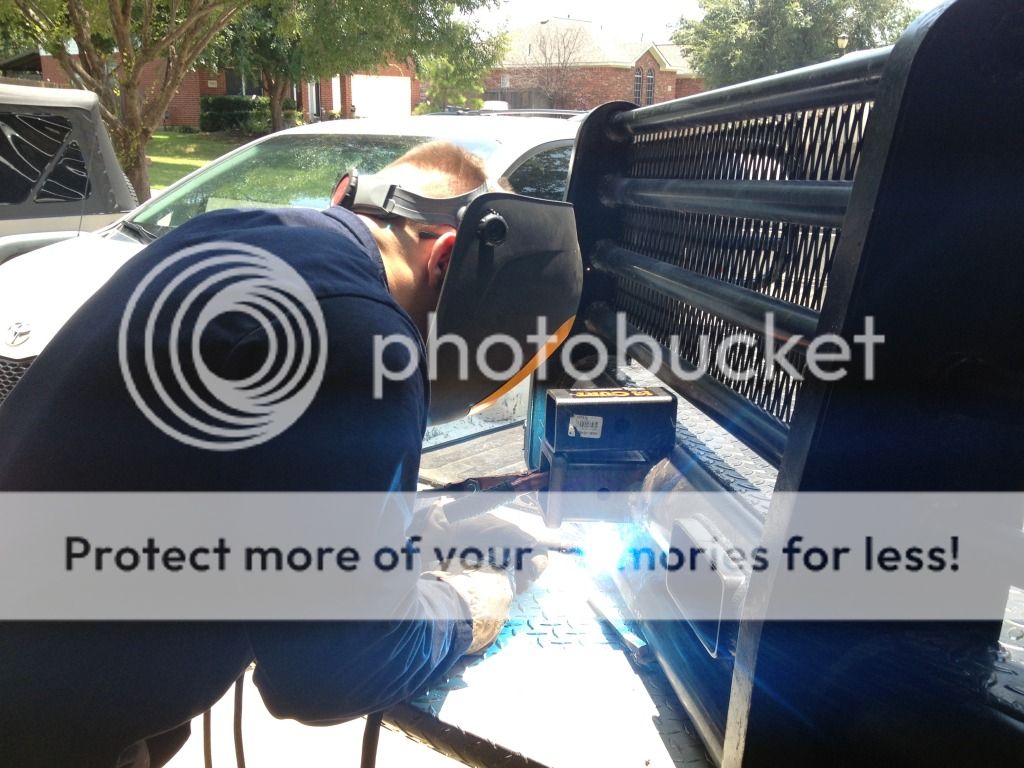
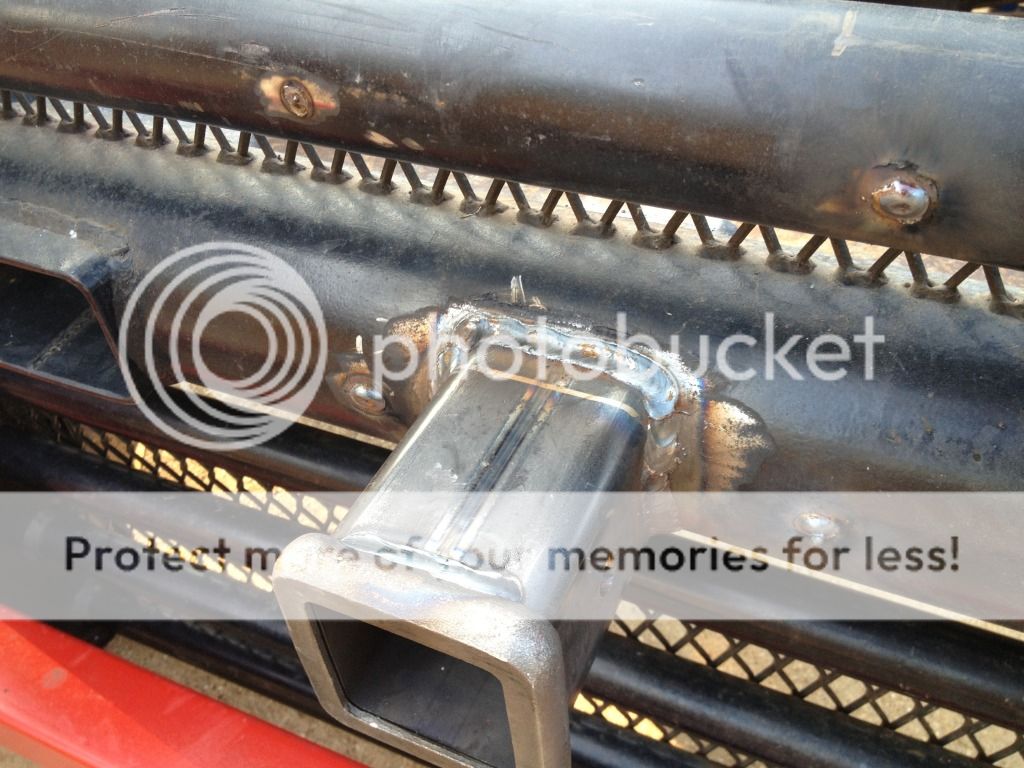
How I back cut the edge that couldn't be accessed on an already fabricate bumper...

A different view but you can see why I back cut it and could get this side welded. Yes, I'll need to remove some of the weld that intruded into the hitch tube, but all 4 sides are fully welded.

This is the front view with the 4 plate holes filled, ready for me to smooth it all up. The bumper is upside down and laying on the driveway in this picture.
Saturday AM I went to the Ford dealership to buy the bolts that attach the track bar bracket to the frame as I prefered a factory look, they said they were discontinued. I asked them how much and of what kind of fluid i should put in a '96 F350 front differential and the best they could do is hand me a cross reference chart that started with the year model 2004...they said I could keep the print out it in case it helped later. Hmm, might be helpful for tomorrow's daily Constitutional. I'm not bagging on the Ford dealership, I should have known to not visit Saturday when their B team was on the field. Similar to Lowe's or Home Depot, visit during the week, from opening to about 3pm, any other time you are the one with the most knowledge in the store. Word to the wives, shop early and during the week if you want solid advice from these places, any other time you might as well be listening to your husband for information.
Went to my favorite auto parts store and selected the grade 8 nuts and bolts of needed lengths for the track bar itself and bracket, both tie rod ends, the steering and the drag link ends and out the door I went.
I pulled the adjuster sleeves and hardware off the old linkages and pre-assembled the new items using the grease zerks as approximate measurements from old to newly assembled pieces. I loosely attached these to nearly complete D60 and used ropes to tie the drag link into a neutral position so the whole assembly, now with wheels temporarily fitted with 2 nuts, can be rolled around. I've said it before, but these feel like "one ton" axles when you are trying to move them by hand.
I planned to knock the old rubber bushings and sleeves out of the donor F350 front springs as I plan to reuse the polyurethane bushings I installed in the D50 springs about a year ago. I'll reuse the U bolts, top U bolt / shock mount plates and both front/back spring bolts. Save your pontificating about reusing blah blah blah. This is all all temporary as a RSK and SD springs are phase 2 of this project.
In my amateure shadetree career I've removed about 10 or so bushings before so I thought these should be rather normal. These 4 bushings beat my butt. I don't have an oxy/acetylene torch so that "plan B" wasn't available. It wasn't until I beat on them with a BFH (=Big is the Hammer size) with all my might that they came out. I cussed. Loudly. The dog ran off. 3 hours, I'm embarrassed, mad, and too tired to care.
I took the easy project to end the day and installed a rear ranch hand I horse traded for. I don't like the cheap, one wire, license plate fixture they give you ao I need to open up the provided hole to accept the factory fixture. Until then I zip tied the fixture to the bumper in case I'm driving at night in front of Officer Friendly.
This Sunday morning I decided to tackle cutting the front bumper so a 2-1/2" receiver tube could be welded in. My brother gave me a bunch of class 5, 2-1/2" hitches and my rear receiver is sized for these. An adapter lets you use the normal 2" hitches.
I used and angle grinder with various wheels and a sawzall to make the openings on the front and the inside of the bumper. I trimmed the new receiver tube so that welds could be made on the three accessible sides inside the bumper, and then trimmed the 4rth side so that a full weld could be made on the inside too. I also had my welder close up the license plate screw holes as i now need to make a custom plate holder. A benefit to the 2-1/2" reciever is that I can build a plate holder on the 2-1/2" tube and still use a 2" hitch. This is a side project that I'll update here as I tackle it.
Test fit for angles, but too long.
Wish I had all the equipment and skills to do this...
How I back cut the edge that couldn't be accessed on an already fabricate bumper...
A different view but you can see why I back cut it and could get this side welded. Yes, I'll need to remove some of the weld that intruded into the hitch tube, but all 4 sides are fully welded.
This is the front view with the 4 plate holes filled, ready for me to smooth it all up. The bumper is upside down and laying on the driveway in this picture.

#50
07-27-2014, 09:51 PM
Got a lot done and have been slacking on the updates.
There was nothing left to repair or pre-purchase so it was time to get this going.
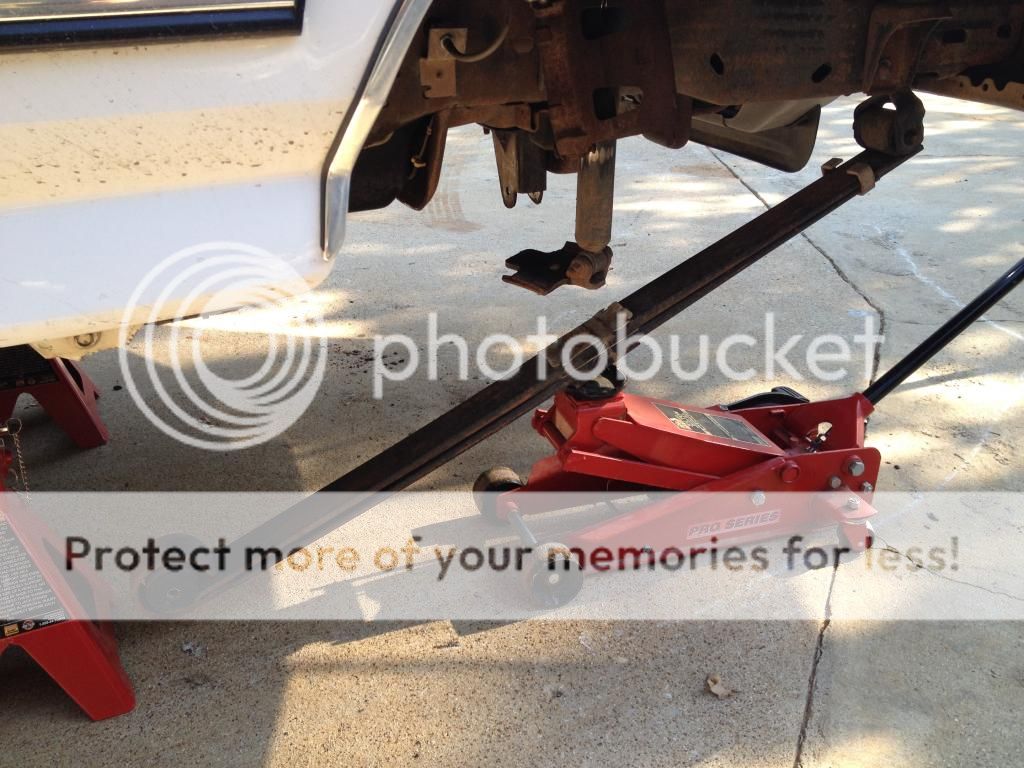
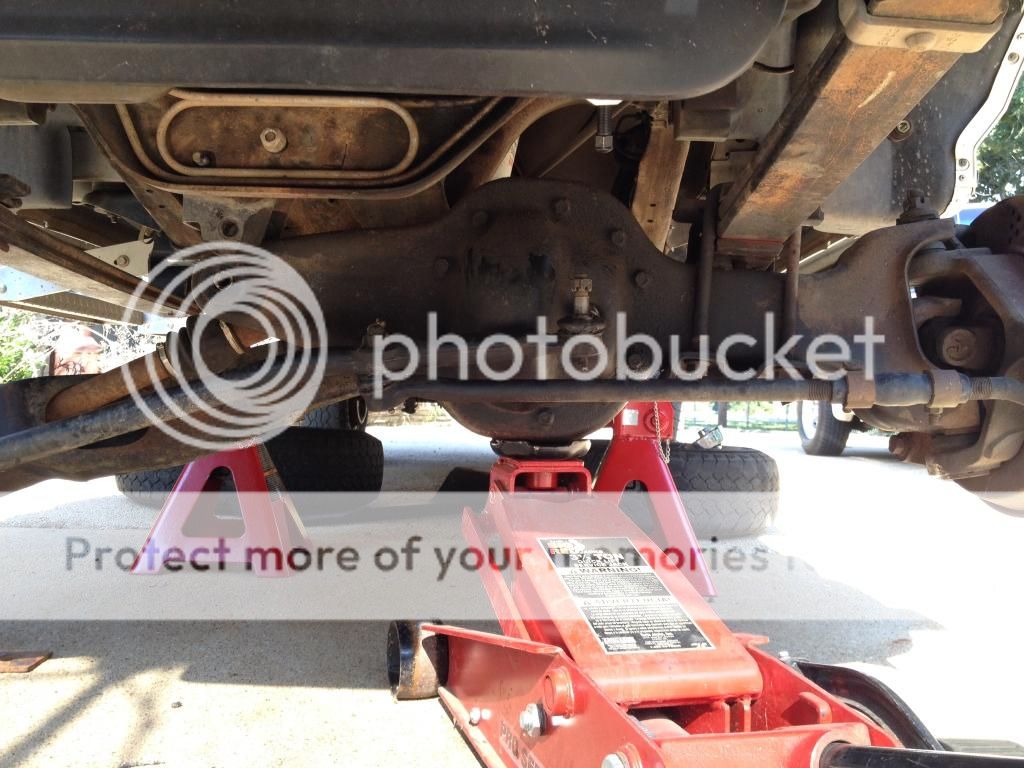
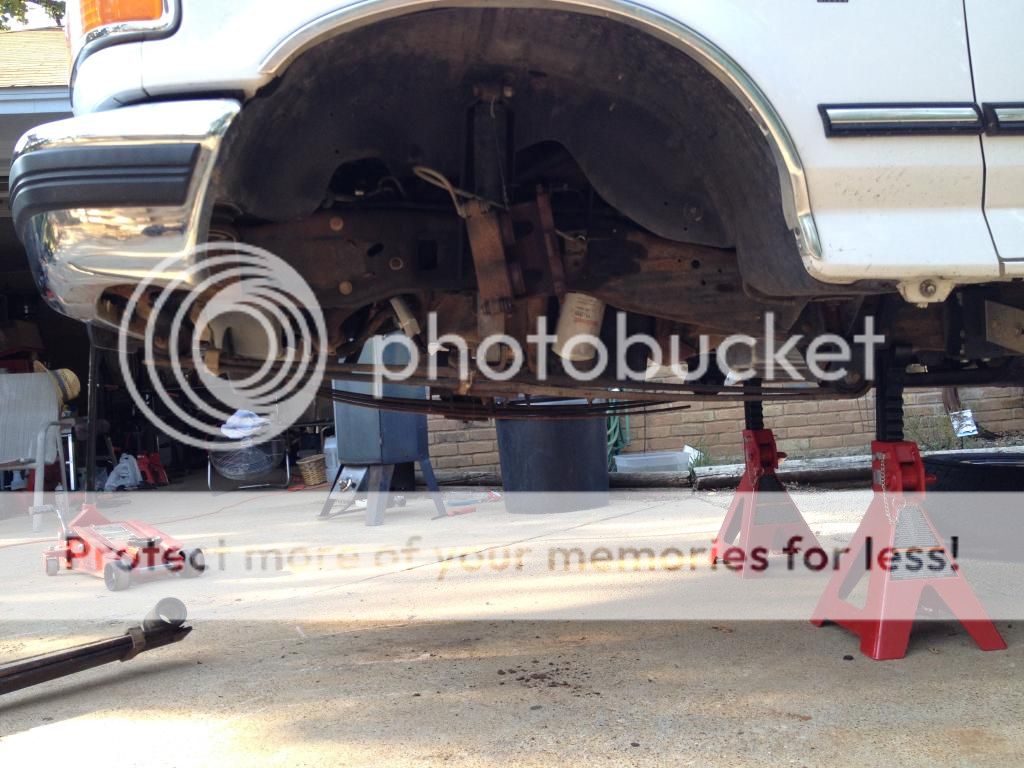
Thursday about 5pm I bottle jacked it up and put my 12 ton jack stands under the frame, just behind the front spring's rear hanger to keep them from slipping. Ran the bottle jack all the way up, reset, and lifted again to make sure I had enough clearance.

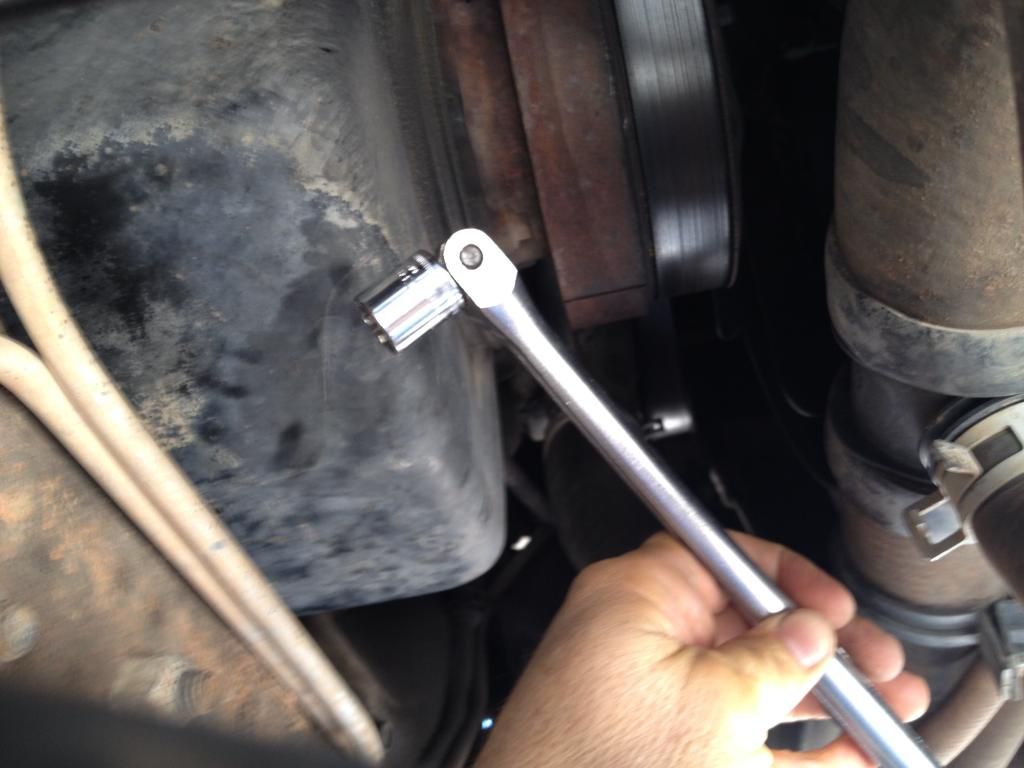
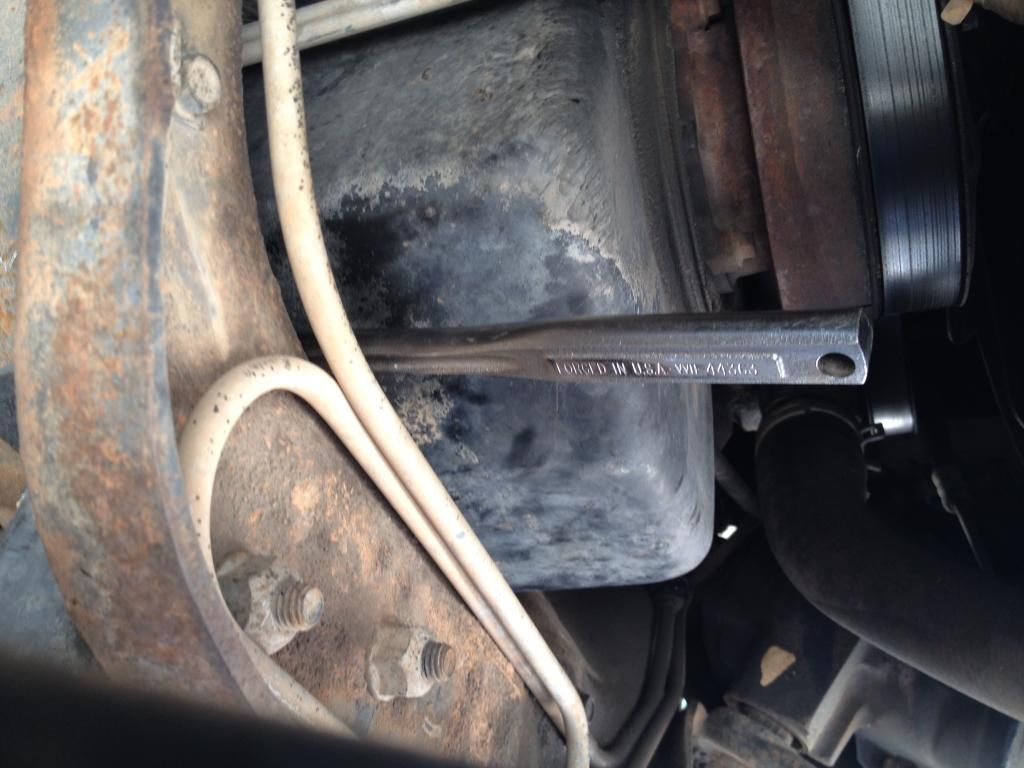
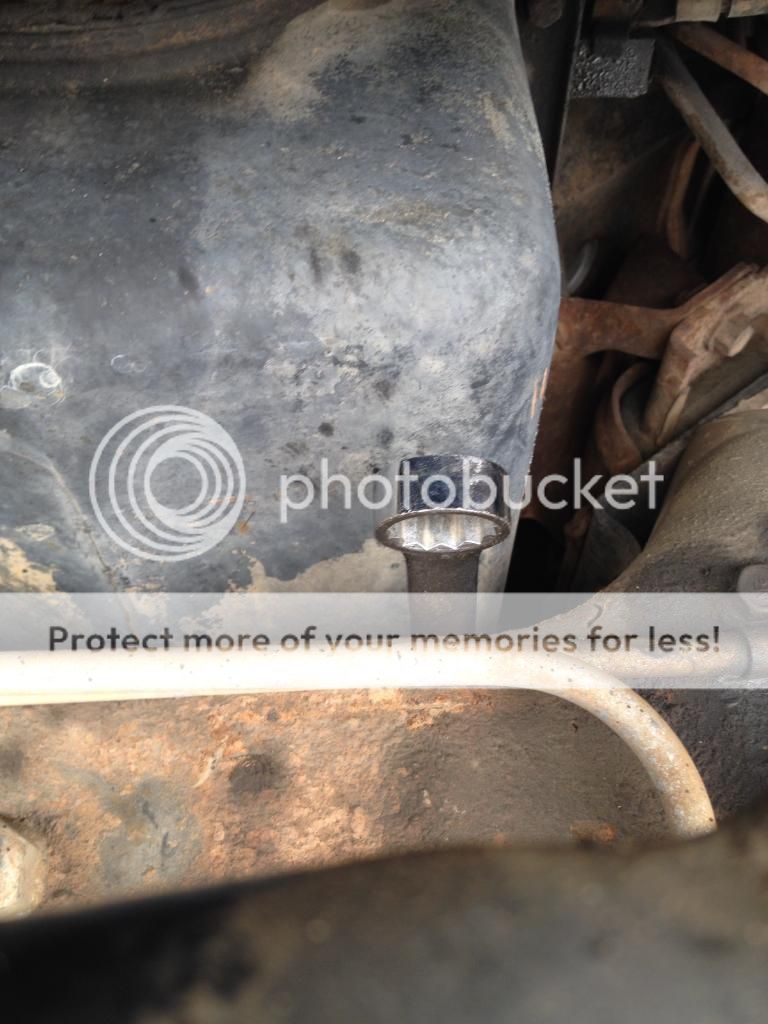
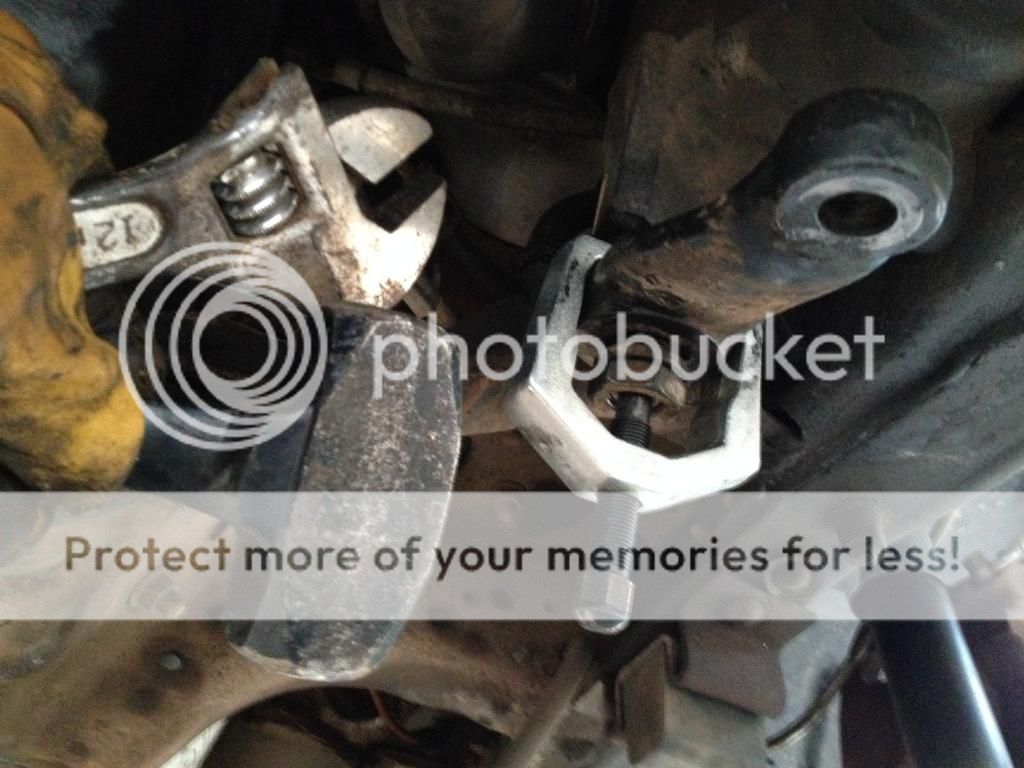
Removed the driveshaft, diff vent hose, loosened spring bolts, the tie rod bolts and separated them, put a rented pitman arm puller on and tightened it hopping it would come loose but it didn't. Loosened the Ubolts a little (just to make sure they weren't going to be a problem, and started on the pivot bracket bolts. My thought was that I'd just leave the pivot bracket bolts in place and just run the nut back down. Some propeller-head thought it was a good idea to have the bolt heads that are easy to get to captivated so a back up wrench was not needed. Why they didn't carry this thought to the bolt heads that are sandwiched between the oil pan and crossmember is shear stupidity. A 15mm wrench works on one of the front two bolts, a 3/8" drive 15mm shallow socket on a small break over bar backs up the other front bolt. I am sure it is possible to snake the socket onto the back bolts, and removing the oil filter would have helped, but by that time I had fiddled with these things too long and now I didn't care about keeping them there…the TTB ain't going back in anyway. I'll cut them tomorrow.
Nuts on the easy to get to bolts that are captivated:
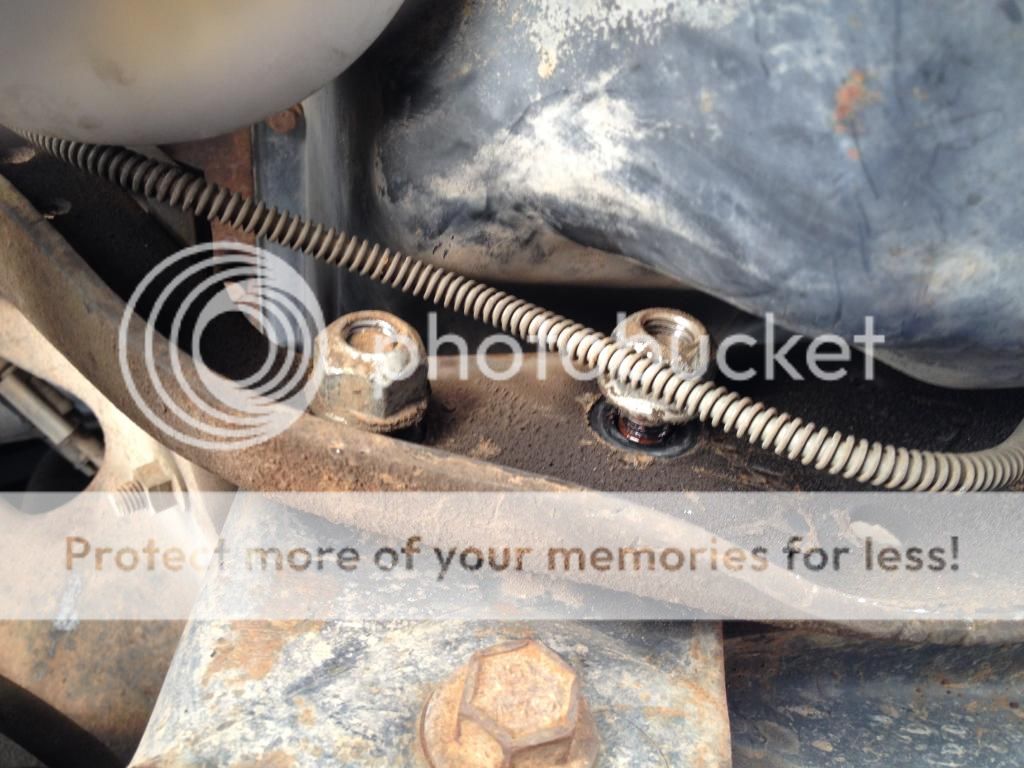
On the nut on the hard to get to nuts that spin freely:

Tomorrow some final removal and then I start putting it all back together!
There was nothing left to repair or pre-purchase so it was time to get this going.
Thursday about 5pm I bottle jacked it up and put my 12 ton jack stands under the frame, just behind the front spring's rear hanger to keep them from slipping. Ran the bottle jack all the way up, reset, and lifted again to make sure I had enough clearance.
Removed the driveshaft, diff vent hose, loosened spring bolts, the tie rod bolts and separated them, put a rented pitman arm puller on and tightened it hopping it would come loose but it didn't. Loosened the Ubolts a little (just to make sure they weren't going to be a problem, and started on the pivot bracket bolts. My thought was that I'd just leave the pivot bracket bolts in place and just run the nut back down. Some propeller-head thought it was a good idea to have the bolt heads that are easy to get to captivated so a back up wrench was not needed. Why they didn't carry this thought to the bolt heads that are sandwiched between the oil pan and crossmember is shear stupidity. A 15mm wrench works on one of the front two bolts, a 3/8" drive 15mm shallow socket on a small break over bar backs up the other front bolt. I am sure it is possible to snake the socket onto the back bolts, and removing the oil filter would have helped, but by that time I had fiddled with these things too long and now I didn't care about keeping them there…the TTB ain't going back in anyway. I'll cut them tomorrow.
Nuts on the easy to get to bolts that are captivated:
On the nut on the hard to get to nuts that spin freely:
Tomorrow some final removal and then I start putting it all back together!
#51
07-27-2014, 09:52 PM
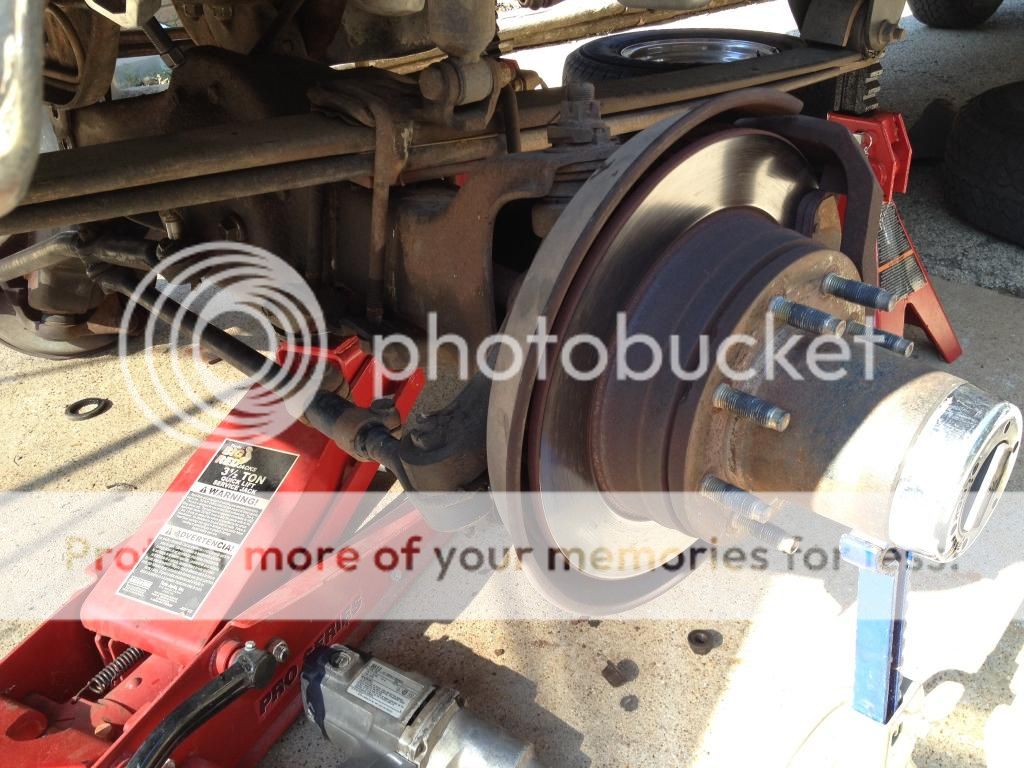
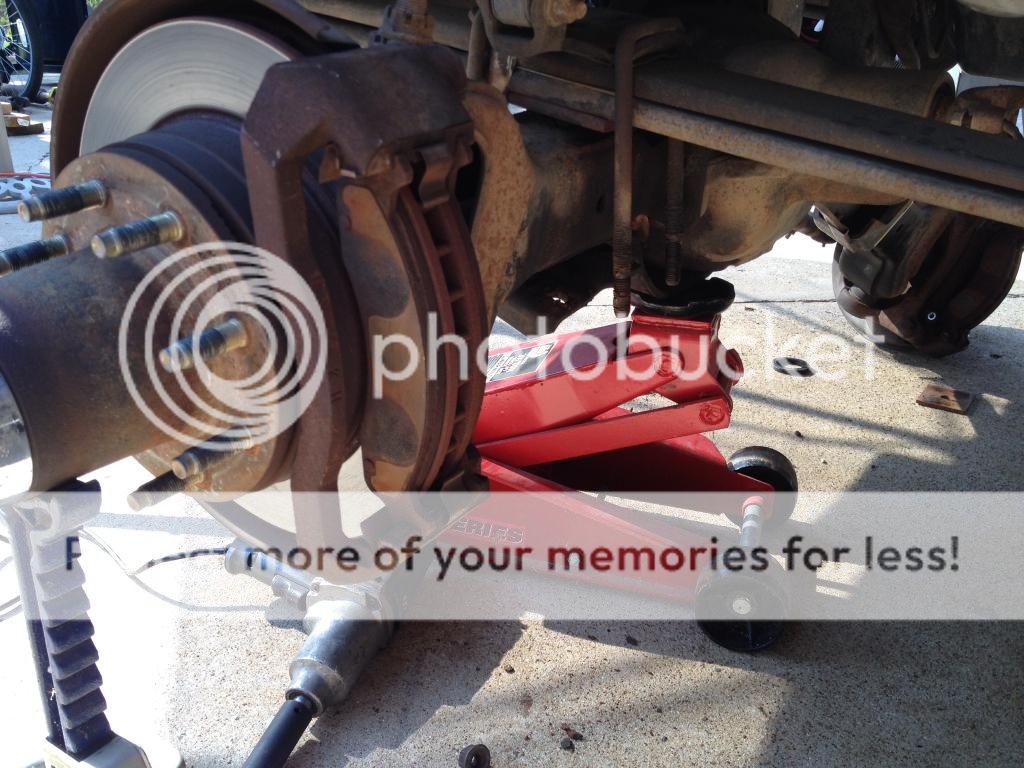
Friday about 5pm removed the brake caliper and tied it to the top of the shock with wire. I did not even loosen the lower shock bolts as I was reusing the top plate.
I dropped the TTB from the U bolts and pivots and spent about 30 minutes wrestling it out of the way. With my last tug the long side axle slip joint let go letting the mess plop into two manageable piles. If you don't have a way to move the whole assembly, pull this apart first.


On the short heavy side I put a jack stand under the hub, loosened the U bolts then let it down.
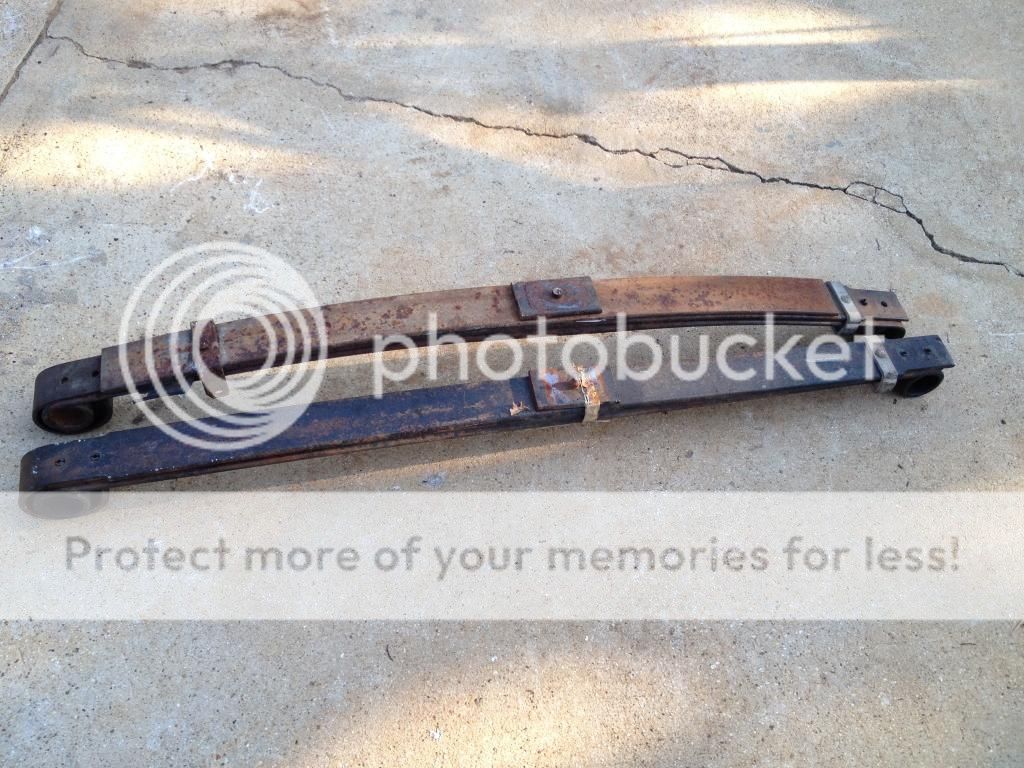
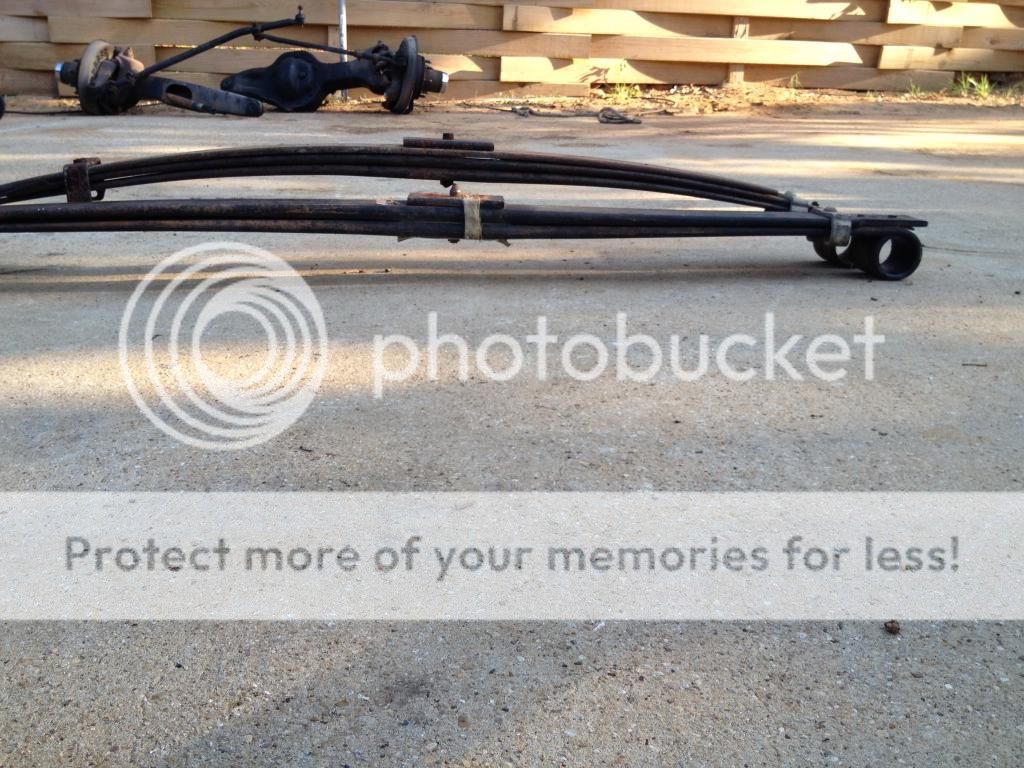
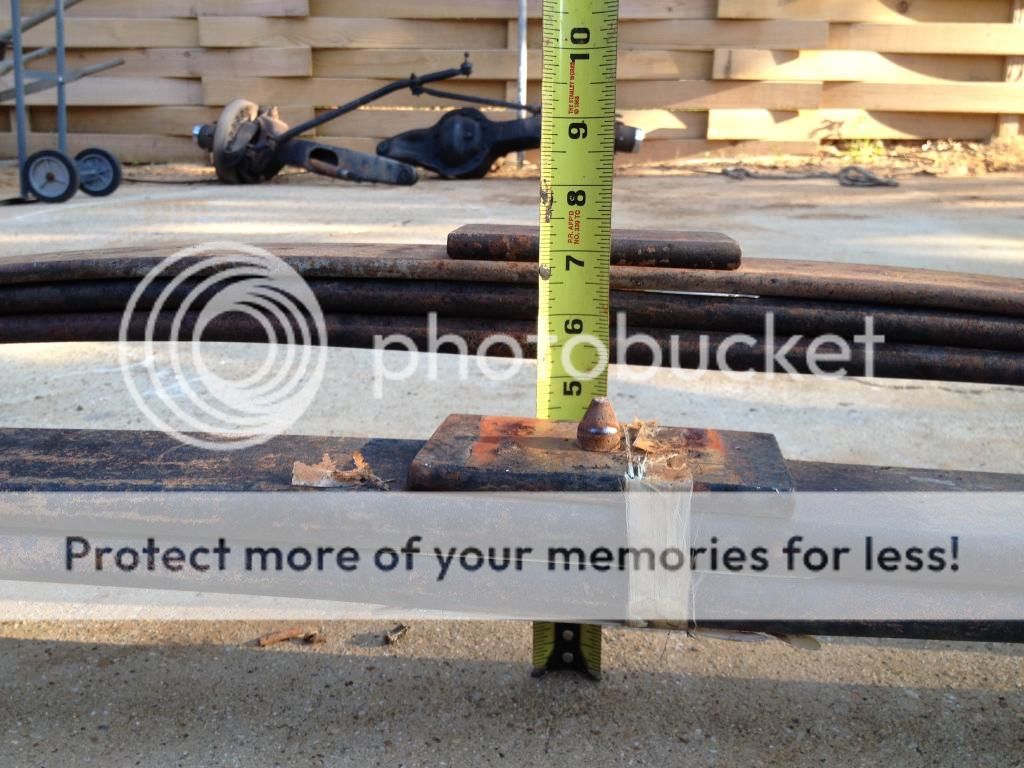
Dropped the springs, removed the poly bushings from them (what a pain…) and pressed them into the F350 springs. This took an hour. Here are a few pics of the flatish F250 springs and the more arched F350 springs, side by side and installed. The donor springs were from a '95 F350 4x4 and as near as I can tell are factory.
I used an angle grinder with a cutting wheel and cut straight down the rear pivot bracket bolts and a chisel split the bolt in two shucking the nuts, leaving a half-thickness that was pressed up and cocked enough to fall over on the cross member. A telescoping magnet retrieved them and I chunked the pieces in the trash rather frustrated I didn't do that last night as I have now removed all of them…with zero regret.
I had left the puller very tightly attached to the pitman arm overnight hoping it would pop free. I used the biggest crescent wrench I had, being mindful the truck is on jacks, so I made sure I countered my pulling of the wrench by pushing against something on the truck. This seems like it should be something you would do naturally, but it isn't. Bracing your foot against a jack stand or the garage wall and then grunting on the wrench could be a veery serious mistake.
The big crescent and a hammer finally broke it loose. The arm and shaft are keyed so they only fit in three possible orientations, it was easy to get the it splined correctly. Make sure you have the "drop" going down so the taper is correct.
No pics more pics until my last shot, the D60 hanging with almost everything installed loosely.

Tomorrow I'll start snugging everything up, set it on the tires, tighten everything about %80, drive it to the end of the driveway (there's a half-speed bump height bump there) and back to my work area just let everything settle in, and then torque it all to spec.
I dropped the TTB from the U bolts and pivots and spent about 30 minutes wrestling it out of the way. With my last tug the long side axle slip joint let go letting the mess plop into two manageable piles. If you don't have a way to move the whole assembly, pull this apart first.
On the short heavy side I put a jack stand under the hub, loosened the U bolts then let it down.
Dropped the springs, removed the poly bushings from them (what a pain…) and pressed them into the F350 springs. This took an hour. Here are a few pics of the flatish F250 springs and the more arched F350 springs, side by side and installed. The donor springs were from a '95 F350 4x4 and as near as I can tell are factory.
I used an angle grinder with a cutting wheel and cut straight down the rear pivot bracket bolts and a chisel split the bolt in two shucking the nuts, leaving a half-thickness that was pressed up and cocked enough to fall over on the cross member. A telescoping magnet retrieved them and I chunked the pieces in the trash rather frustrated I didn't do that last night as I have now removed all of them…with zero regret.
I had left the puller very tightly attached to the pitman arm overnight hoping it would pop free. I used the biggest crescent wrench I had, being mindful the truck is on jacks, so I made sure I countered my pulling of the wrench by pushing against something on the truck. This seems like it should be something you would do naturally, but it isn't. Bracing your foot against a jack stand or the garage wall and then grunting on the wrench could be a veery serious mistake.
The big crescent and a hammer finally broke it loose. The arm and shaft are keyed so they only fit in three possible orientations, it was easy to get the it splined correctly. Make sure you have the "drop" going down so the taper is correct.
No pics more pics until my last shot, the D60 hanging with almost everything installed loosely.
Tomorrow I'll start snugging everything up, set it on the tires, tighten everything about %80, drive it to the end of the driveway (there's a half-speed bump height bump there) and back to my work area just let everything settle in, and then torque it all to spec.
#52
07-27-2014, 09:53 PM
Saturday morning I was excited as I felt like I was ahead of schedule. I had a birthday party to leave for at 1pm.
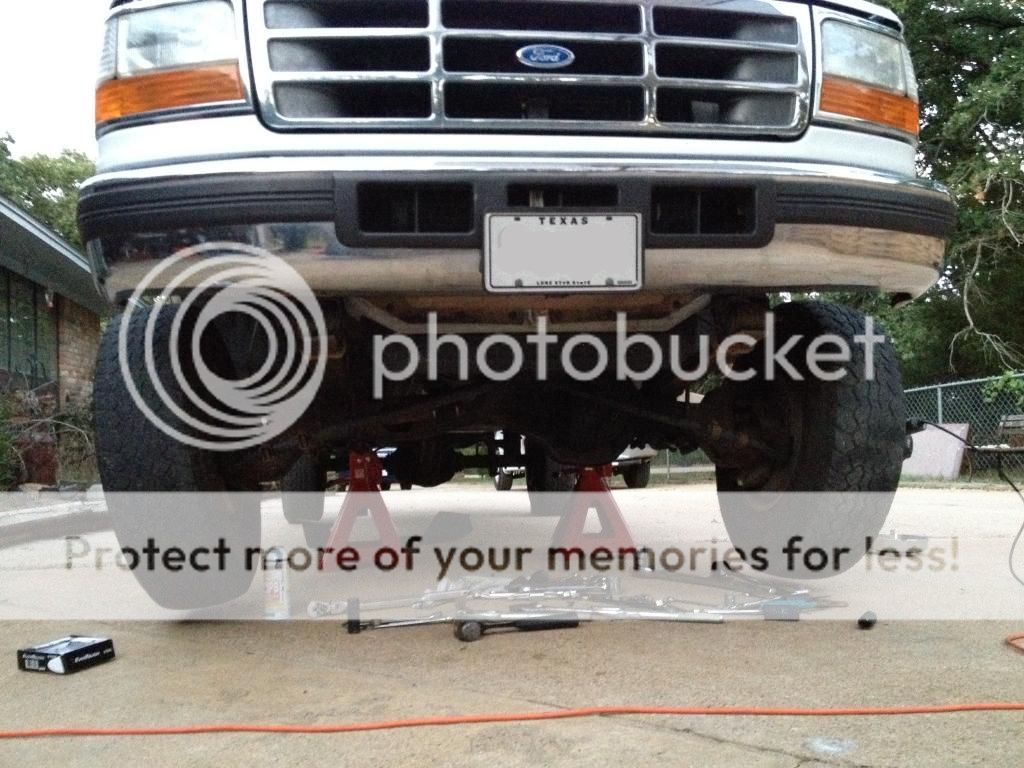
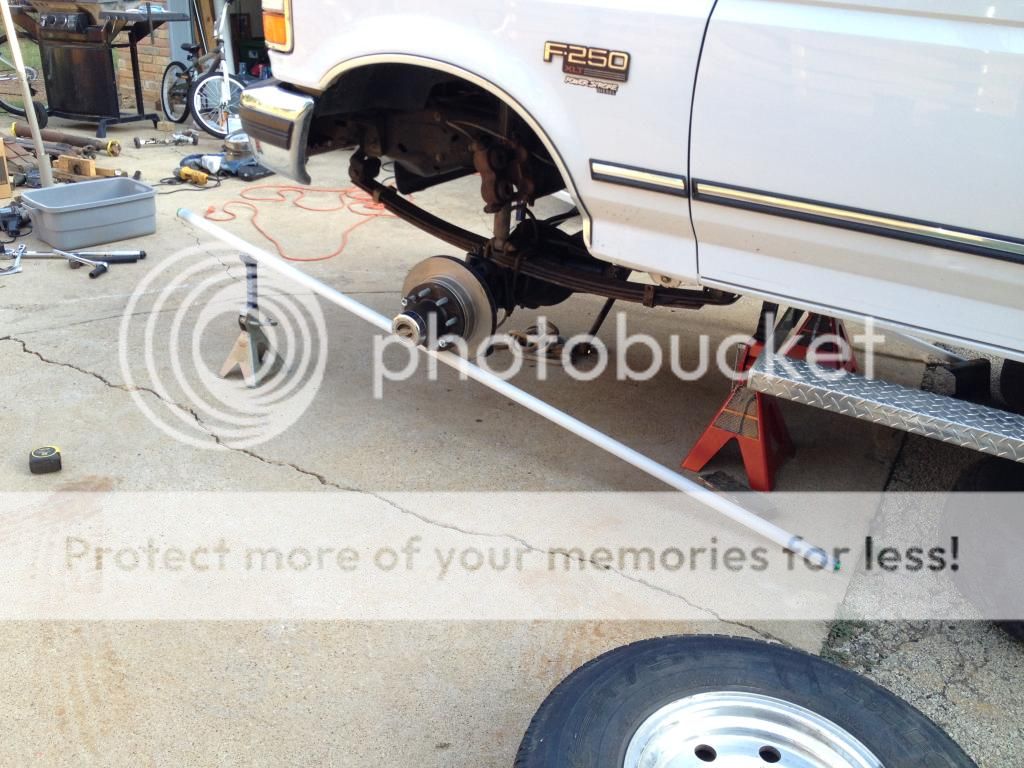
I keep some long fluorescent bulbs in the garage as I bungee them to my rear tire of my scooter and use them as guides to align the rear wheel to the front wheel. They are surprisingly straight. A scooter riding friend of mine taught me this. So I used a similar technique by placing them against the rotors and pushing a tape between them using the ground and the jack stands as my extra hand. this let me set the toe-in at just a smidgen inward. I'll have it aligned next week at a shop that understand ball joints and the sleeves that adjust the castor and camber. The Wife thought this was funny and took these two pics:
Re-installed the brake calipers (I had installed longer lines and flushed the fluid about a year ago in prep for this.) using the old pads, they had plenty of material left.
This is with everything torqued to spec, still on the jack stands, but the track bar wouldn't line up so I tied it up and drove it around the block.
This is just after a test drive around the block. Track bar was now a half hole off, a tapered drift pin was all it took to get the bolt in.
I was in the shower and out the door at 1pm.
My estimate of time:
Thurs eve: 3 hours
Fri eve: 4 hours
Sat morn: 5 hours
Temps are 100 at the 5pm peak and drops to 80 overnight…I took lots of water breaks. There were many things I did prior to this weekend helps things move along, changing to longer brake lines, flushing the fluid, new brake pads, going through the donor axle like I did is optional but swapping the locking hubs helped too. Having the rear springs swapped counts towards the overall swap project but didn't save time this weekend. Things I dwelled on too long were not cutting the pivot bracket bolts sooner and the fight the other weekend removing the factory rubber spring bushings and then now removing the poly bushings I had installed in the TTB 2 years ago for use on this donor springs.
#53
07-27-2014, 09:55 PM
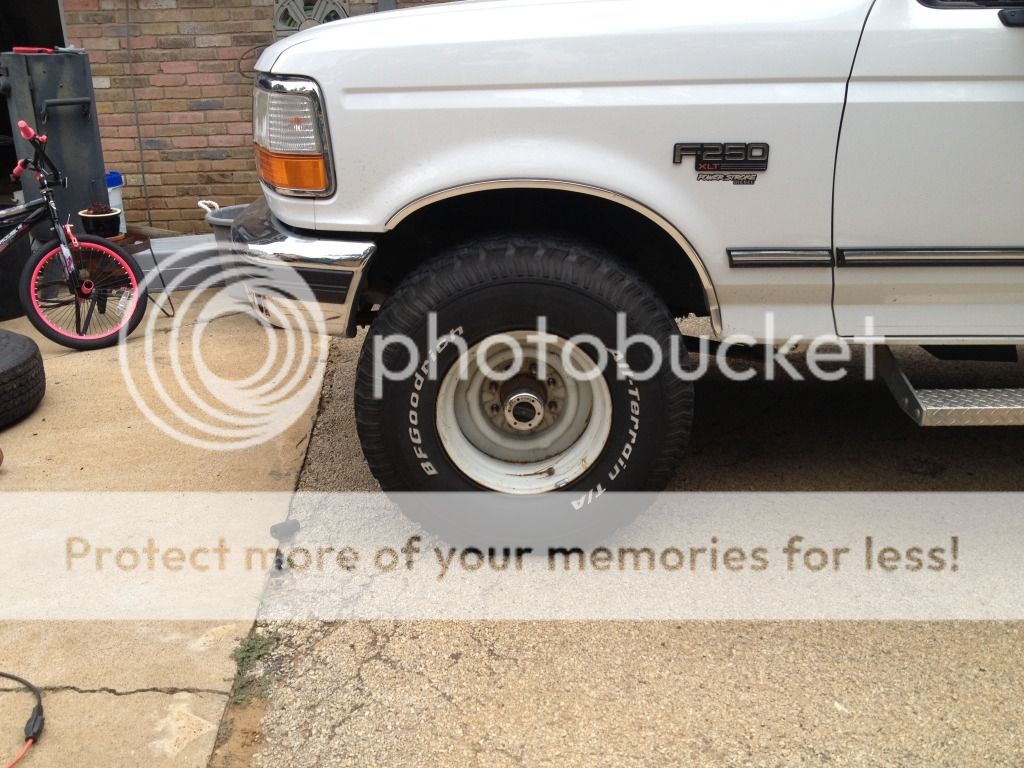
This morning I swapped on some crappy 35" tires I horse traded for and saw that putting the ranch hand back on was necessary for clearance. I'll unbolt it at the powder coater when I'd ready for that and drive naked for the 2 days they take.
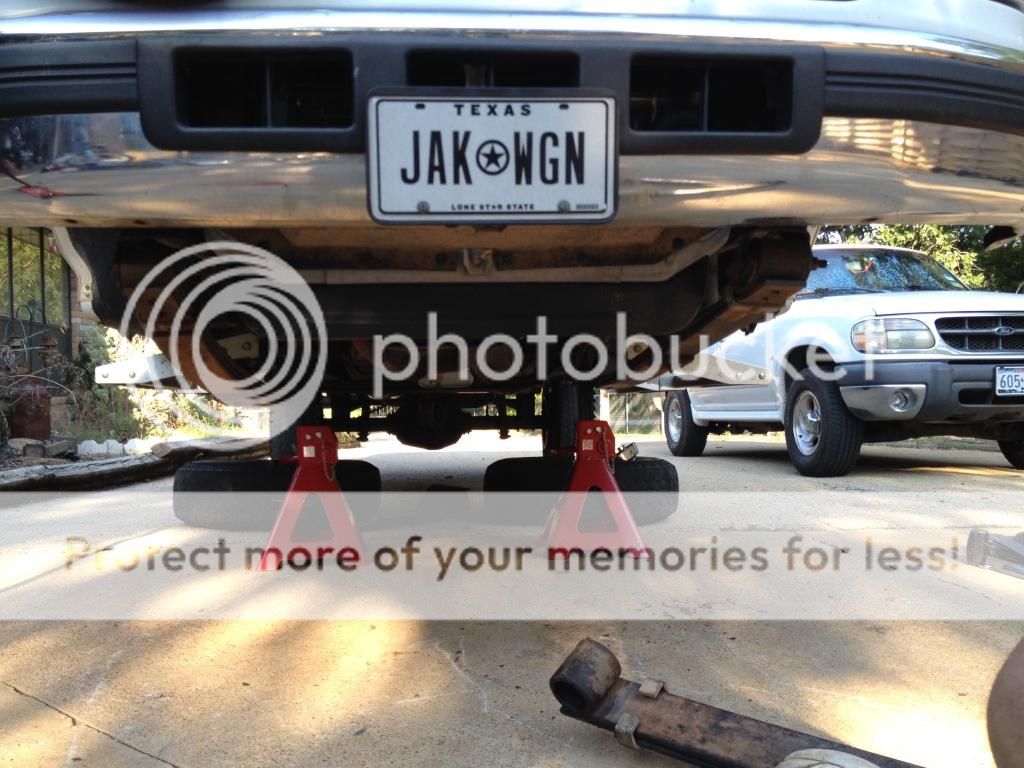
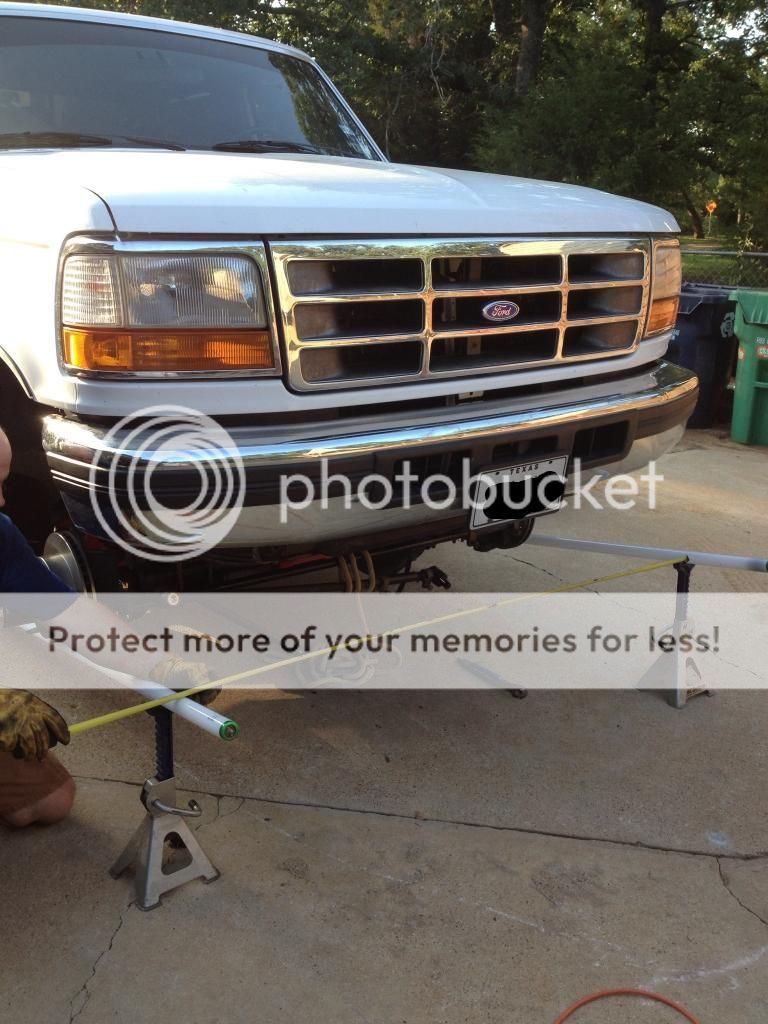
In a "OBS Chat" forum I asked if anyone has dressed up under the chin with such a bumper. This pic sorta shows my concern. I have an idea to use a transfer case rock guard (that seems to be an afterthought and unnecessary) as sort of a chin guard and to protect the trans cooler I may mount there. More on this later...
I'm hoping I can sneak 37" tires in there and drive it until I tackle a RSK in a few months. There is zero rubbing with these 35x12.5x16.5 BFG tires that are worn to about %50.
#54
07-27-2014, 10:07 PM
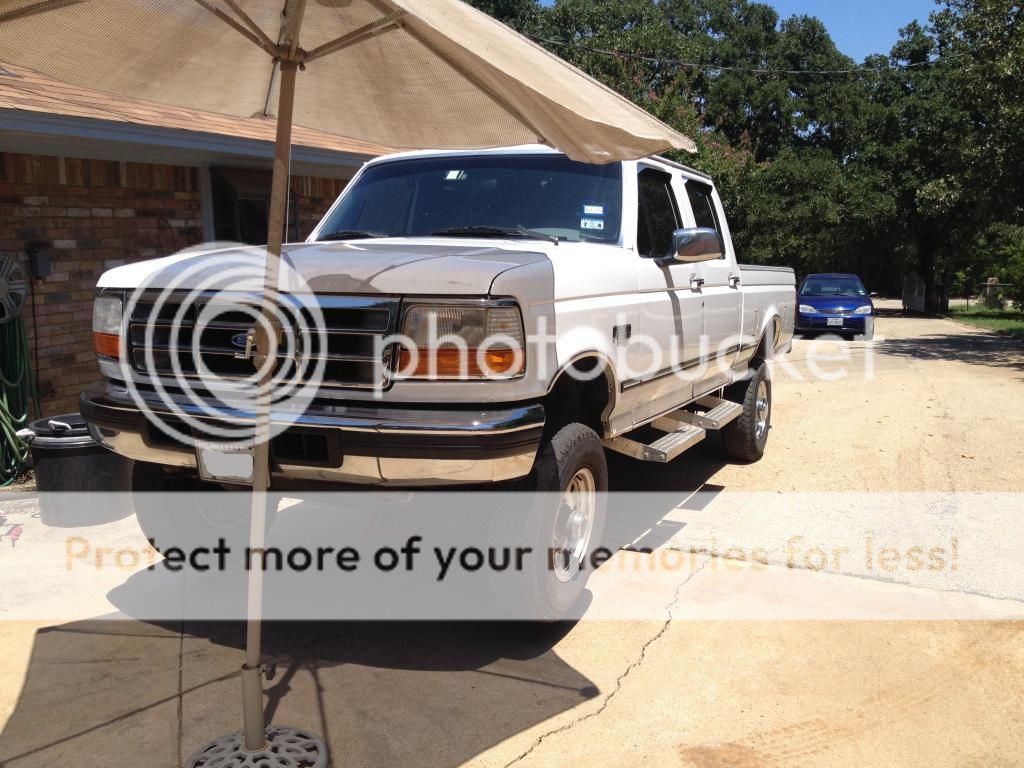
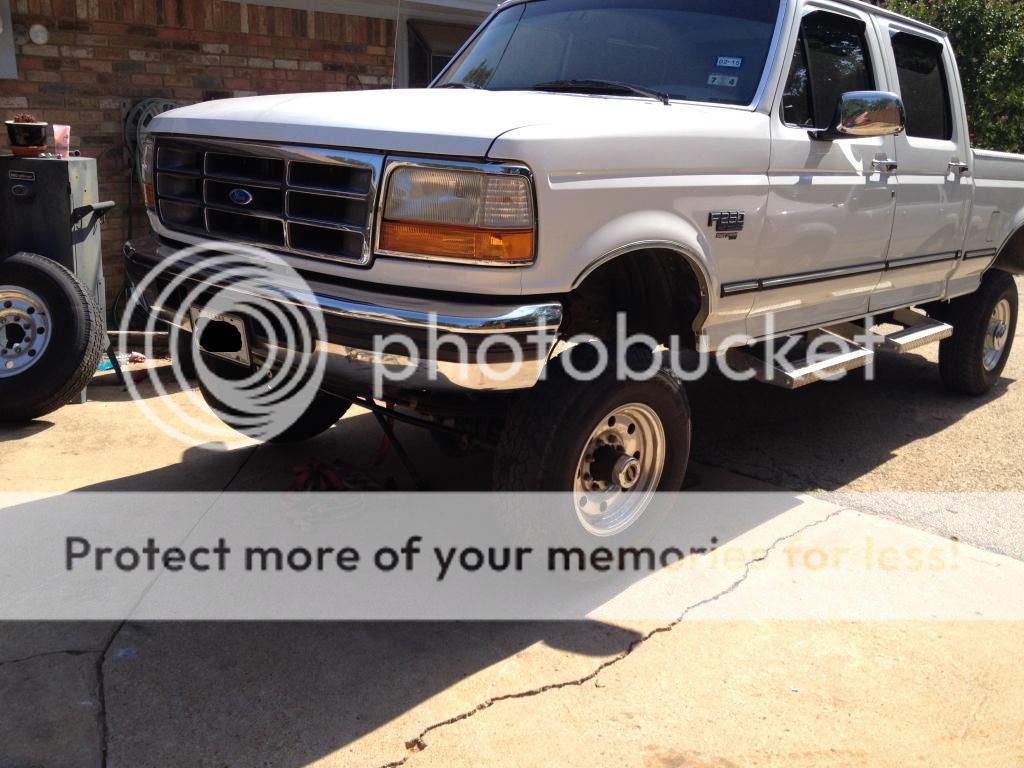
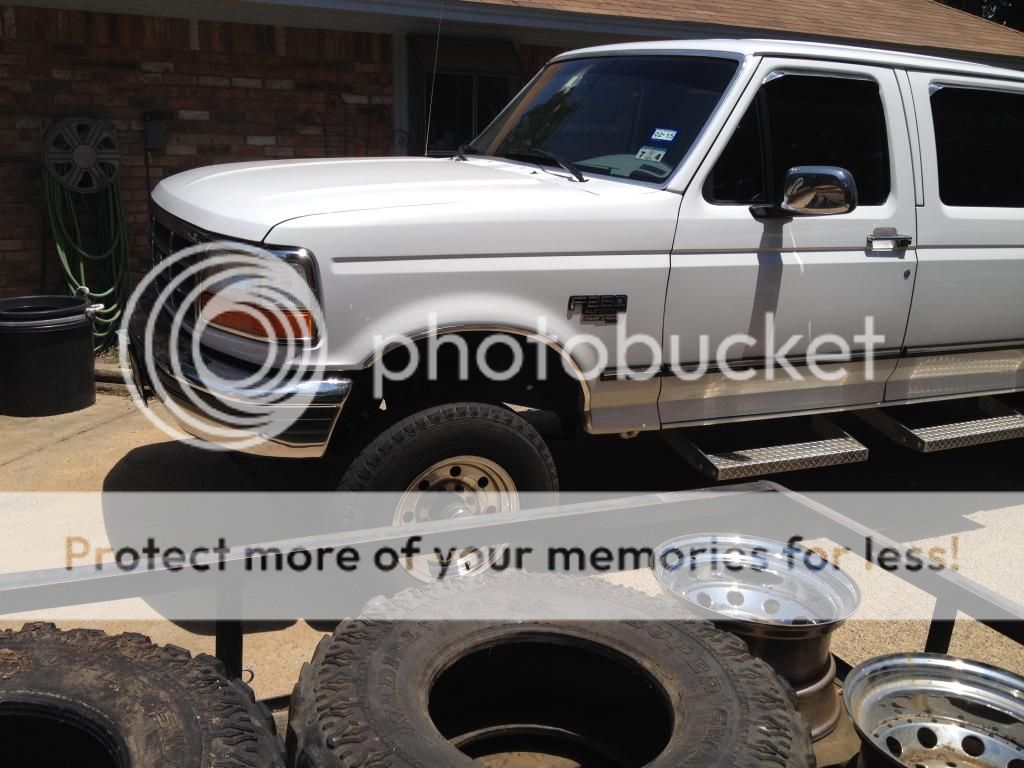
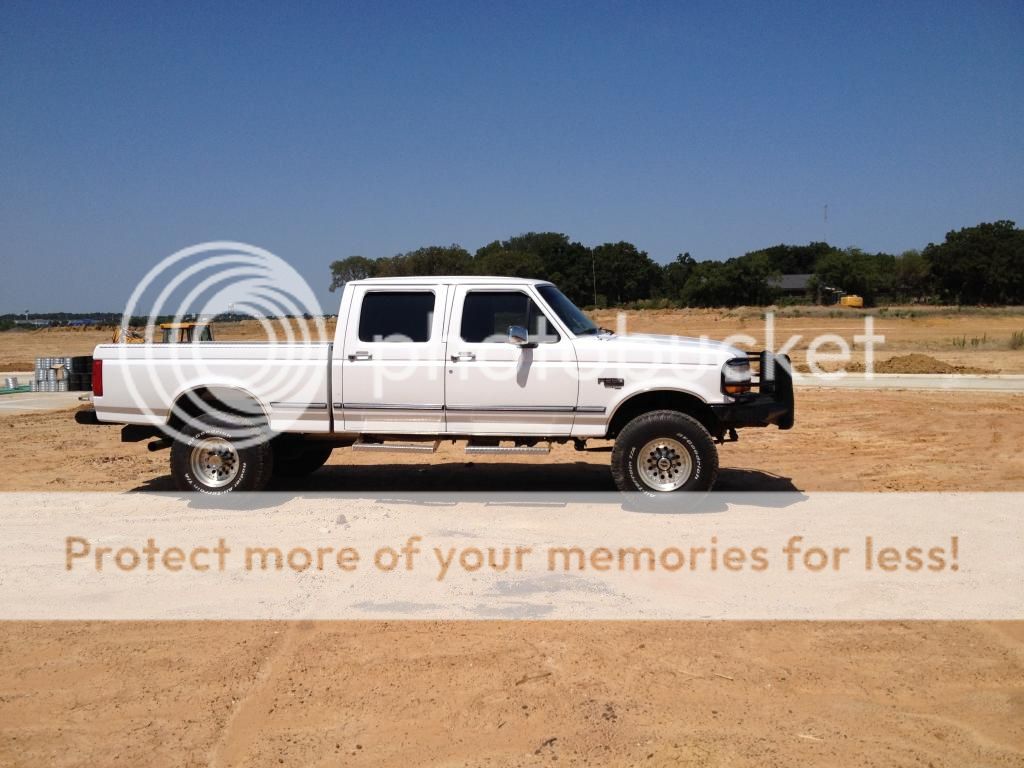
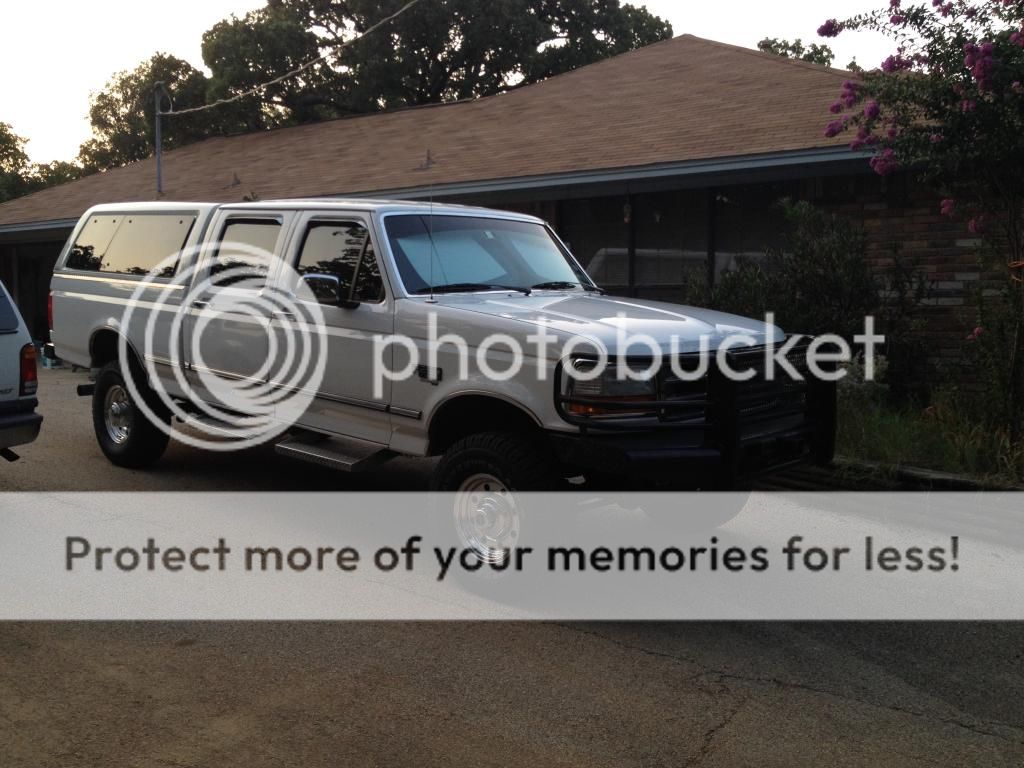
Different tires and trims, before the swap...
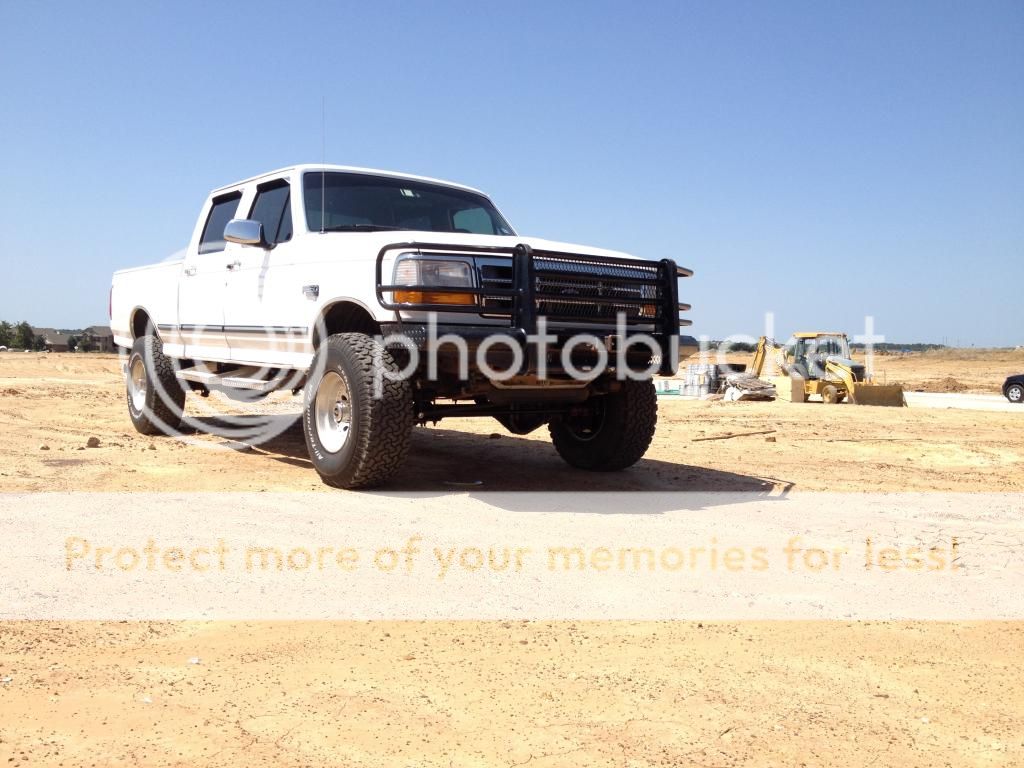
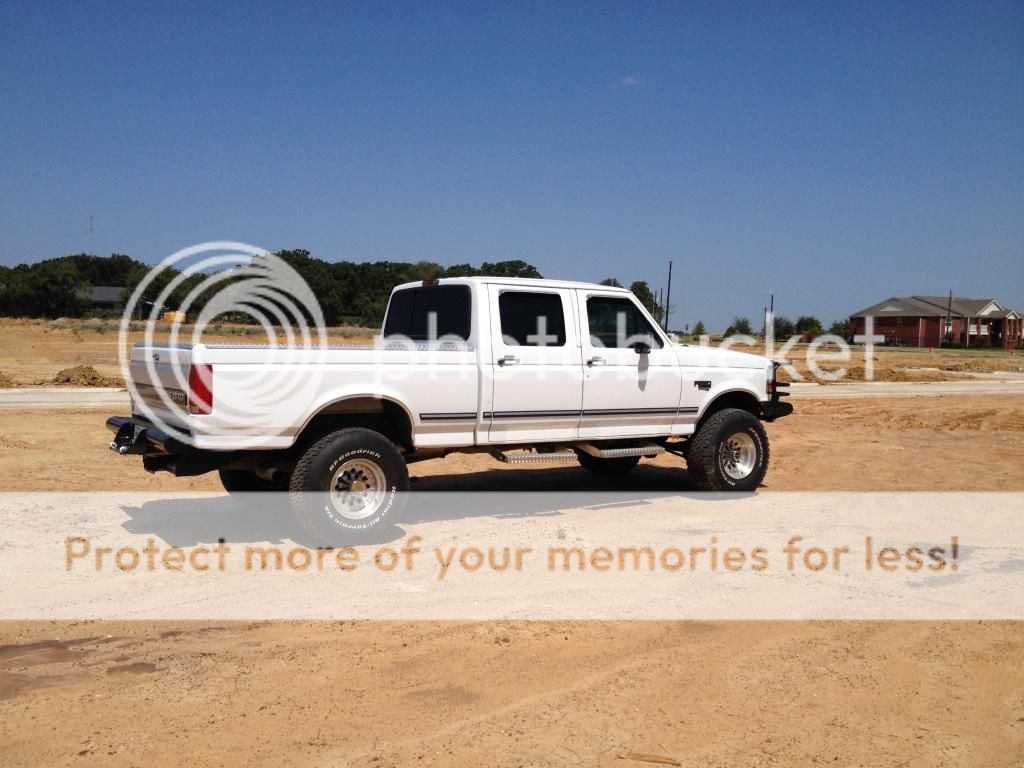
As close to a similar angle, after...
Didn't take hard measurements, but with the TTB I could barely get my finger's knuckle (the 2nd one from the fingernail) under the bump stop. Now I can turn my fist sideways and clear it. My estimate is a 3" lift. Partially due to good luck in getting decent donor springs and partially from the nearly non-supporting original springs.
#56
08-06-2014, 02:43 PM

Great write up, although I didn't discover it until the day after I did my swap. On your front leaf springs, were the F350 springs originally 3 leaf? The set that came with my axle is only 2. I agree with your decision on the splash shields, mine were pretty crappy but I put them on and now I regret it. I have to tear it all apart to change my inner axle seals, I will remove them at that point.
#58
08-07-2014, 08:45 AM
To you both… Everything was already removed from the donor truck when I arrived to buy them. And though I saw the F350 they came from, I have no way of knowing if they were factory or not, but yes, they do have 3 leafs. They are definitely softer than the TTB setup was and now get suspension movement from them. But I think I got more lift from these than most people do, so I y'all maybe right that they are not factory, but I don't know what they are or how ti find out. For now I'm happy with them factory or not, and a RSK is in my future so these are temporary anyway.
#59
08-07-2014, 12:05 PM
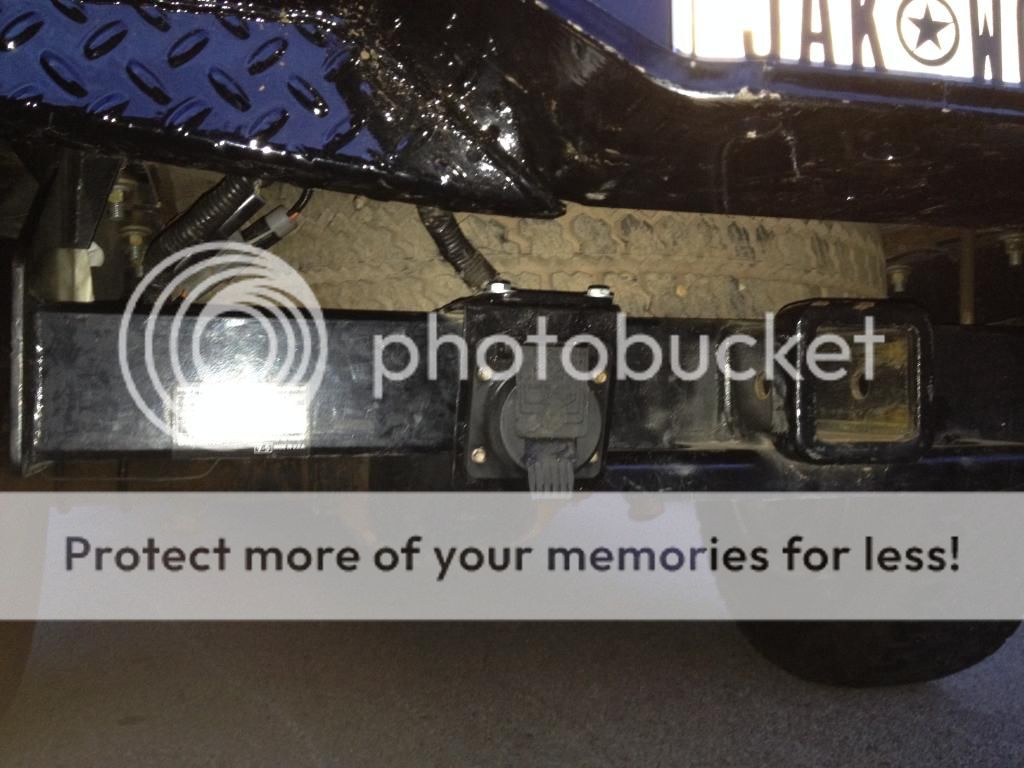
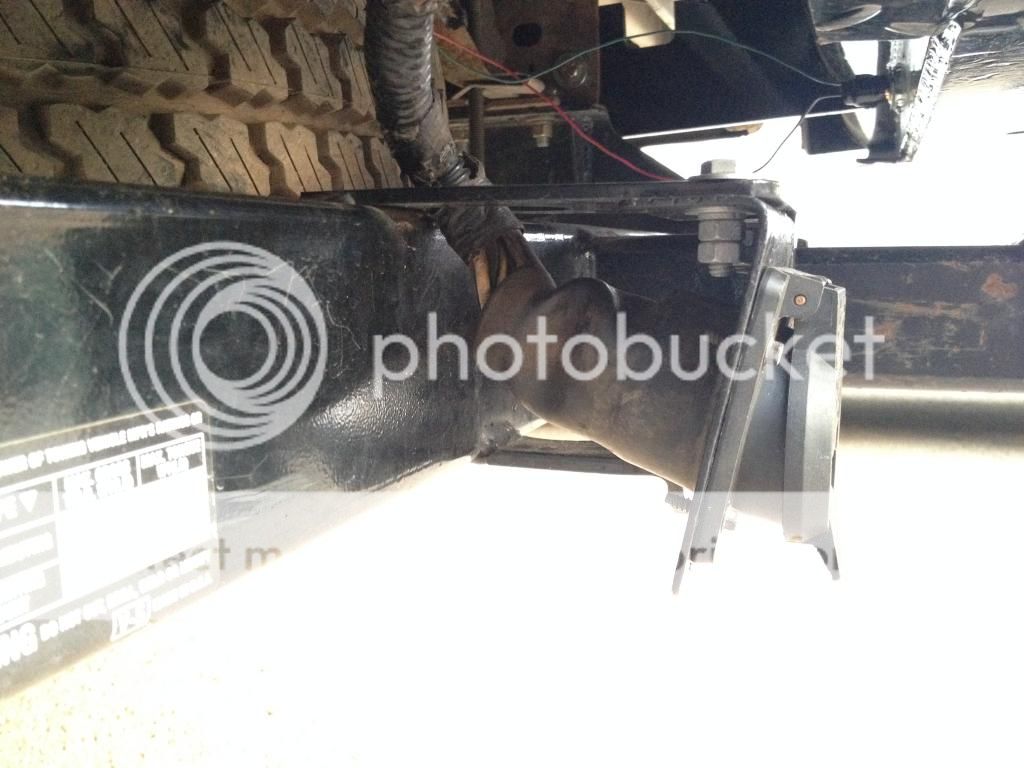
Awhile ago I removed the trailer plug when I removed the 12" drop bumper as there was nowhere to really attach it. The receiver hitch did have a tab on it but I only recently got motivated enough to put it back on. I bent the stock bracket a little farther so the plug wiring pigtail would route up and over the hitch rather than be pinched under neath it. Now to buy some plug adapters…
#60
08-07-2014, 12:06 PM
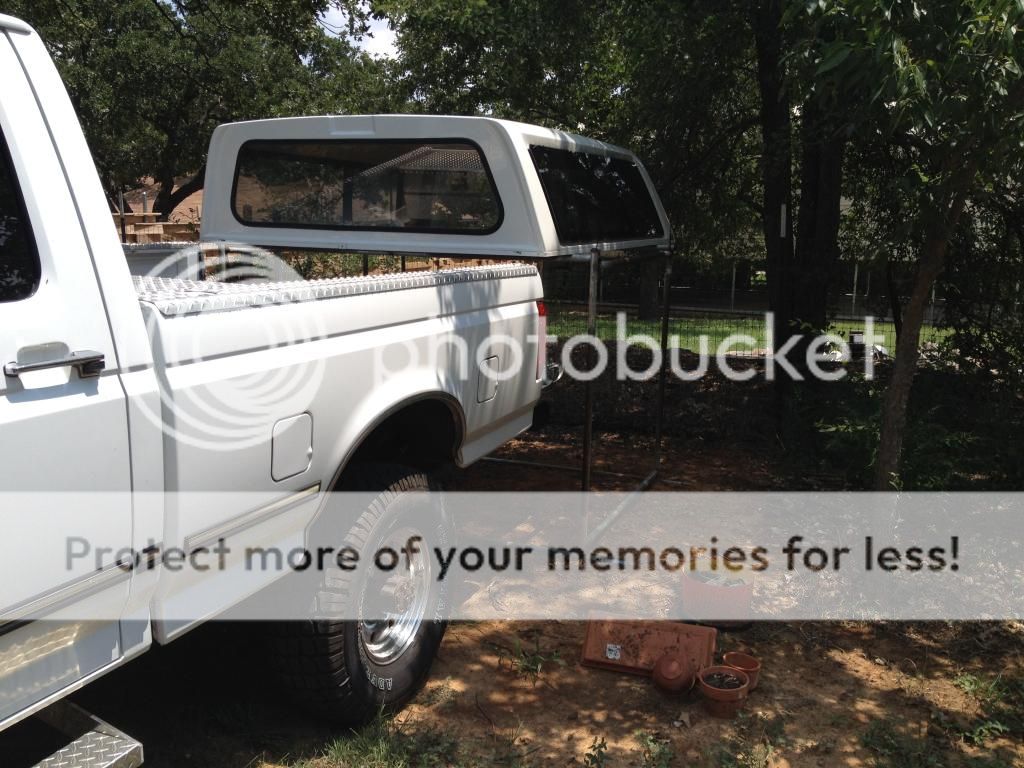
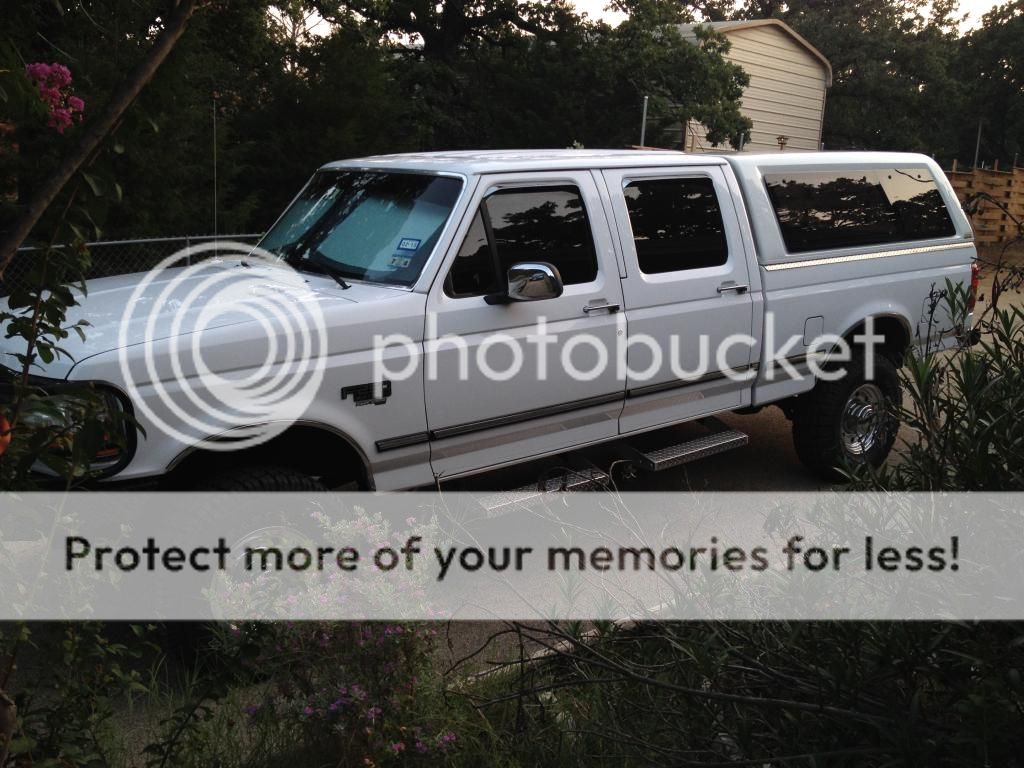
Decided to put on the topper. The truck is starting to get too high to load stuff over the side of the bed without scuffing up the clean paint. Kudos to the previous owner! And the bed slider I have waiting to be installed is now starting to make sense too. I wish it was a little longer (it's about 8" or 12" too short) but I got it with just this in mind.
I have a hard bed cover that I need to sand and rattle can some clear on it.
My girls (wife and 2 granddaughters) don't like the topper, saying it "looks like and old man's truck". Right now the topper is forcing some behavioral changes. Not working over the sides of the bed, loading only from the tailgate, hooking up the trailer if I'm moving something bulky. If all of this sticks I'll futz with the bed cover.