
Cracked dashpad recovering tutorial/ How-to...
#16
 01-25-2016, 05:35 PM

To answer some questions that were asked.
I paid $35 for material from the local auto upholstery place and them about $20 for a scraper and the spray glue. Compare that to 100 to $200 from LMC Truck or EBay.
I did not remove all the old plastics vinyl stuff from my dash pad I remove the loose stuff the material that I got was pretty sick so the vinyl that was still on there couldn't really be singing after it was done.
As far as holding up it's now been 2 & a half years and it is still going strong even with the Southern California Sun and now the central Texas Sun and humidity during the summer.
#17
01-31-2016, 03:49 PM

To answer some questions that were asked.
I paid $35 for material from the local auto upholstery place and them about $20 for a scraper and the spray glue. Compare that to 100 to $200 from LMC Truck or EBay.
I did not remove all the old plastics vinyl stuff from my dash pad I remove the loose stuff the material that I got was pretty sick so the vinyl that was still on there couldn't really be singing after it was done.
As far as holding up it's now been 2 & a half years and it is still going strong even with the Southern California Sun and now the central Texas Sun and humidity during the summer.
I paid $35 for material from the local auto upholstery place and them about $20 for a scraper and the spray glue. Compare that to 100 to $200 from LMC Truck or EBay.
I did not remove all the old plastics vinyl stuff from my dash pad I remove the loose stuff the material that I got was pretty sick so the vinyl that was still on there couldn't really be singing after it was done.
As far as holding up it's now been 2 & a half years and it is still going strong even with the Southern California Sun and now the central Texas Sun and humidity during the summer.
I have a quick one regarding aesthetics if you don't mind - you mentioned that not all of the original vinyl was removed. Just wondering if you can pick any 'bumps' where the replacement tracks over the original to bare base material (if you know what I mean)? Thanks in advance.
#18
02-01-2016, 08:26 PM
Dave, Ill take some more pictures soon. I can tell where the original material was left but IMO no one else could it came out pretty smooth despite leaving some of the original material but like I said what I used was pretty thick. a thinner fabric or other material might show the level changes more.
#19
02-02-2016, 02:45 AM
#20
03-02-2016, 01:16 PM
New User
Join Date: Oct 2010
Location: south west of Houston
Posts: 17
Likes: 0
Received 0 Likes
on
0 Posts
#21
05-07-2016, 03:04 AM

5th Wheeling
Tutorial
[QUOTvehoughridn_sob;14356180]Well about a month or so I ago was looking around the forum looking for -little walk-through tutorial/how-to on recovering the often ill-fated dashpad in our trucks after many failed trips to the junkyard trying to find a good one. I couldn't find anything so I took it upon myself to be the guinea pig and am pretty stoked with the results.
Just FYI I am not a pro, this my first time attempting something like this so if I can do it so can you.
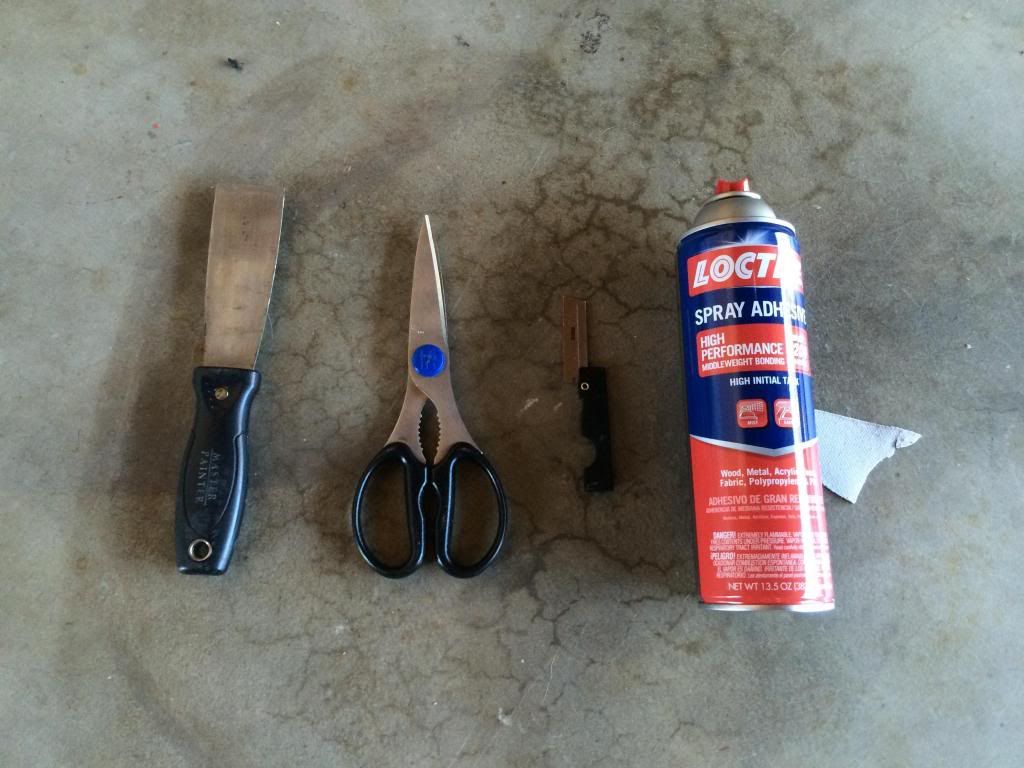
STEP 1: TOOLS/SUPPLIES
- Scraper to ease removal of old molded vinyl/plastic
- Scissors AND razor (your gonna want both)
- Spray adhesive I talked with the local auto upholstery shop and explained what I was doing he recommended the "Loctite high performance" brand and told me to stay away from 3M I dunno why thats just what he said...
- Desired fabric (Not pictured)I used small perforated cloth backed vinyl again recommended by local auto upholsterer..er..guy not only did it match my door panels he said its good for high UV areas.
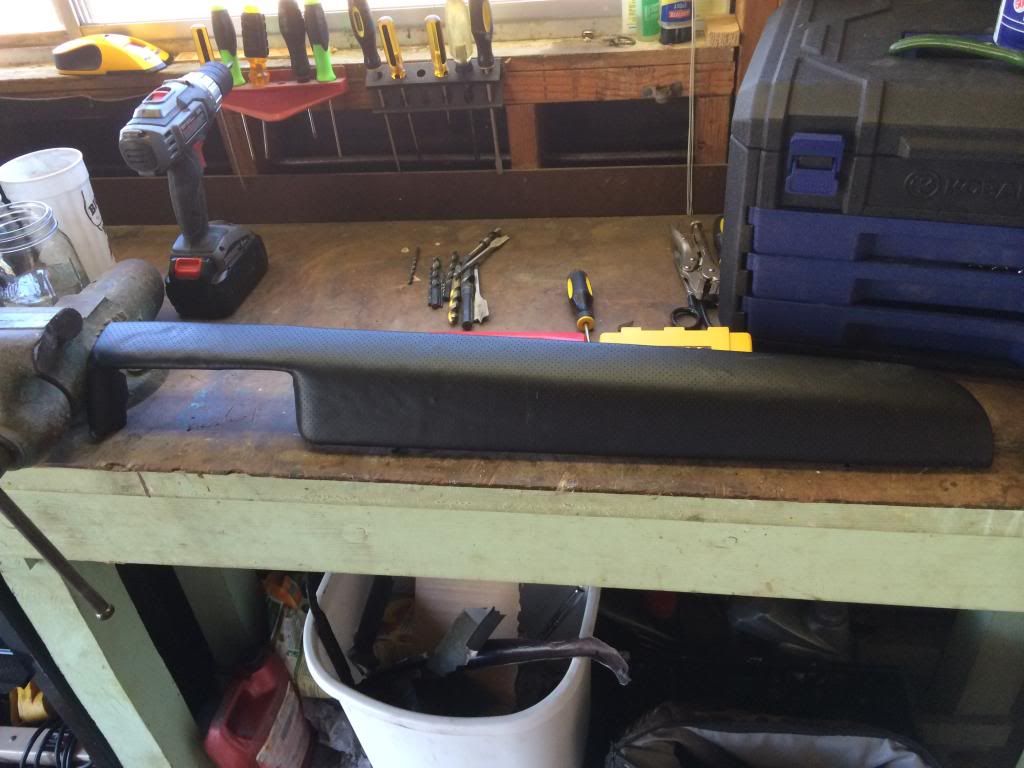
STEP 2: Start laying down your fabric
- I recommend starting in the middle and working away from your radio area (that's the hard part)

Take your time on this part. spray both the dash pad and the fabric and make sure it lays down flat. You get about 2 min of working time before the glue is set. Only lay the fabric on the top of the foam pad DO NOT go over the edges or around corners yet.
Step 3: Going Around the Radio bezel
I forgot to take pictures of this part partly because my figures had glue on them and partly because I was excited.
Start by doing a dry run pushing your fabric into the crease (it will bunch up don't worry about it). When you do this it will give you a good idea on where to make a relief cut. do it 2 or 3 times so your sure that's where its gunna be, use your thumbs to roll the fabric in. you can mark it or eyeball it and then make the relief cut with your scissors. then spray the glue and repeat for other corner.
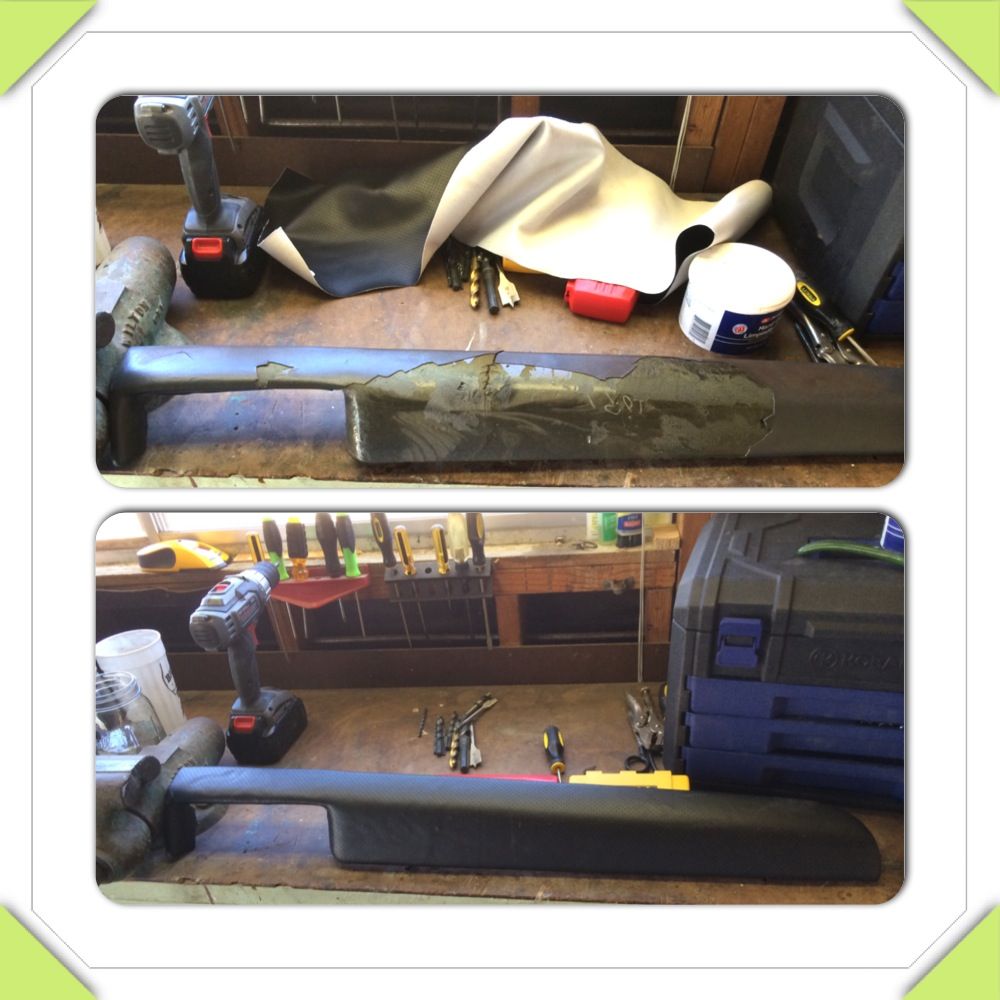
Step 4: Edges
After the whole top and radio bezel are done and glued in the you can start working your way around the edges. I was able to go around the whole edge only making 2 relief cuts. just use your thumbs and roll the edges keeping the fabric tight.

Step 5: Trim and DONE!
After all your corners and edges are wrapped (overlapping about 1/2" on the back) trimoff excess fabric with a razor (way easier than scissors). And you are done turn it over and check out your handy work. NOT TO SHABBY, see I knew you could do it!
Thanks for reading. If you have any questions feel free to message me on here and I'll help the best I can.[/QUOTE]
Very well presented. Easy to understand & follow, especially since you response to all of the responded.
I've customized every vehicle I ever owned, including my friends rides. Most of my work has been on semi truck interiors, mainly mine.
I'm new to this forum, real impressed
Rusty
Just FYI I am not a pro, this my first time attempting something like this so if I can do it so can you.
STEP 1: TOOLS/SUPPLIES
- Scraper to ease removal of old molded vinyl/plastic
- Scissors AND razor (your gonna want both)
- Spray adhesive I talked with the local auto upholstery shop and explained what I was doing he recommended the "Loctite high performance" brand and told me to stay away from 3M I dunno why thats just what he said...
- Desired fabric (Not pictured)I used small perforated cloth backed vinyl again recommended by local auto upholsterer..er..guy not only did it match my door panels he said its good for high UV areas.

STEP 2: Start laying down your fabric
- I recommend starting in the middle and working away from your radio area (that's the hard part)

Take your time on this part. spray both the dash pad and the fabric and make sure it lays down flat. You get about 2 min of working time before the glue is set. Only lay the fabric on the top of the foam pad DO NOT go over the edges or around corners yet.
Step 3: Going Around the Radio bezel
I forgot to take pictures of this part partly because my figures had glue on them and partly because I was excited.
Start by doing a dry run pushing your fabric into the crease (it will bunch up don't worry about it). When you do this it will give you a good idea on where to make a relief cut. do it 2 or 3 times so your sure that's where its gunna be, use your thumbs to roll the fabric in. you can mark it or eyeball it and then make the relief cut with your scissors. then spray the glue and repeat for other corner.
Step 4: Edges
After the whole top and radio bezel are done and glued in the you can start working your way around the edges. I was able to go around the whole edge only making 2 relief cuts. just use your thumbs and roll the edges keeping the fabric tight.

Step 5: Trim and DONE!
After all your corners and edges are wrapped (overlapping about 1/2" on the back) trimoff excess fabric with a razor (way easier than scissors). And you are done turn it over and check out your handy work. NOT TO SHABBY, see I knew you could do it!


Thanks for reading. If you have any questions feel free to message me on here and I'll help the best I can.[/QUOTE]
Very well presented. Easy to understand & follow, especially since you response to all of the responded.
I've customized every vehicle I ever owned, including my friends rides. Most of my work has been on semi truck interiors, mainly mine.
I'm new to this forum, real impressed
Rusty
#22
09-01-2016, 03:11 AM
Thanks Rusty, I too customize most of my vehicles and because Im not a rich person I usually end up doing it myself haha. Thanks for the compliment. Hope to throw some more tutorials/how to's up from time to time.
So Just a little update, I sold the truck, gas mileage was killing me for my commute to work so I went and got me a diesel, 1996 F250 7.3 what can I say I like the OBS trucks. The dashpad recover was still going strong after 3 years the buyer didn't even notice it was recovered.
So Just a little update, I sold the truck, gas mileage was killing me for my commute to work so I went and got me a diesel, 1996 F250 7.3 what can I say I like the OBS trucks. The dashpad recover was still going strong after 3 years the buyer didn't even notice it was recovered.
#23
09-05-2016, 07:49 PM


#25
09-23-2017, 07:10 AM
#26
09-23-2017, 07:54 AM
I think the problem is Photobucket. They no longer allow external hosting without a paid premium account.
#27
09-23-2017, 03:56 PM

#29
01-18-2018, 07:24 PM

#30
04-21-2018, 06:08 PM