64 F100 Shop Truck Build Thread
#16
 04-13-2014, 04:04 AM


I did have good intentions to settle a little of the hate I was sure to get from Ford purist's for putting a BMW into a ford truck. So the BMW build turned from taking a stock engine, putting a headgasket and headstuds in; to building a full on custom BMW short block that was even more odd than putting a BMW into a 64 f100! After learning a ton about the BMW engines I found that aftermarket parts for them, such as forged pistons and rods (what you will need to make 600+ hp which I decided I wanted! ) are stupid expensive! And knowing I'm all about cheap and thrifty I decided I'd find a better way....and I did. What I wanted to do was build a higher reving BMW. I found the short stoke crank from a 3.0L from the late 70's first generation BMW big 6 engines. They are basically throw away cranks because everyone wants to put the bigger strokes from the later model larger cube engines. I didn't want that, because instead, I found some ford parts that were going to work real nice.
So if you are all confused...well here are some pictures of what I am doing. Those shiny new pistons and rods you see are actually from a MOD motor. Its a 3.7" big bore piston set that I got for very cheap and the rods are from a set that only had 7....haha I have 1 extra now, for less than 1/4 the price of 6 new for the BMW. It is a much longer rod, but with the short stroke and big bore it should make a very fun setup! It takes a Honda size rod bearings which are readily available in aftermarket, tons of aftermarket pistons and rods for the MOD motor and I get them even cheaper when people melt down 1 cylinder then sell the other 7. I have the rotating assembly all machined, balanced and ready to assemble, but its on the back burner since its no longer going into the F100. I'm just showing you all to see it would still have been a Ford at heart!

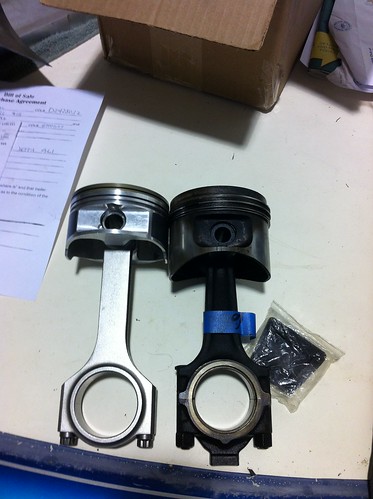
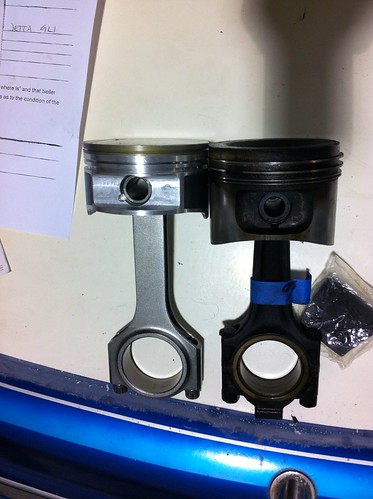
) are stupid expensive! And knowing I'm all about cheap and thrifty I decided I'd find a better way....and I did. What I wanted to do was build a higher reving BMW. I found the short stoke crank from a 3.0L from the late 70's first generation BMW big 6 engines. They are basically throw away cranks because everyone wants to put the bigger strokes from the later model larger cube engines. I didn't want that, because instead, I found some ford parts that were going to work real nice.So if you are all confused...well here are some pictures of what I am doing. Those shiny new pistons and rods you see are actually from a MOD motor. Its a 3.7" big bore piston set that I got for very cheap and the rods are from a set that only had 7....haha I have 1 extra now, for less than 1/4 the price of 6 new for the BMW. It is a much longer rod, but with the short stroke and big bore it should make a very fun setup! It takes a Honda size rod bearings which are readily available in aftermarket, tons of aftermarket pistons and rods for the MOD motor and I get them even cheaper when people melt down 1 cylinder then sell the other 7. I have the rotating assembly all machined, balanced and ready to assemble, but its on the back burner since its no longer going into the F100. I'm just showing you all to see it would still have been a Ford at heart!
#17
04-13-2014, 04:49 AM
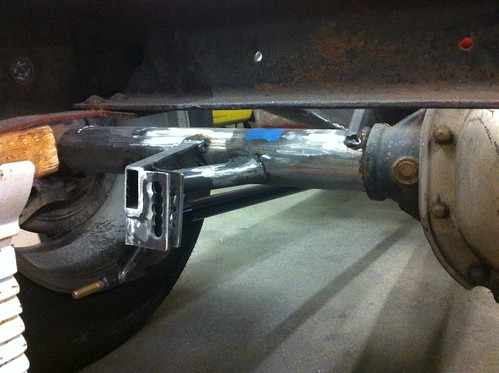
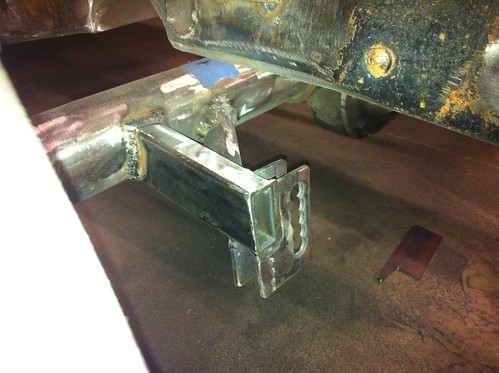
For the rear, I wanted strength, posi, large selection of gears, disc brakes and affordable....so I found a nice 8.8 out of a Crown Vic for super cheap! I also knew I wanted 5x4.5 bolt pattern like the front and I knew there was no chance I would run a leaf spring rear. It won't ride like a car, handle and tow with leaf springs, really the only awesome thing about leaf spring rear suspension is that they are cheap, so that meant all the stock stuff had to go and new stuff would find a new home back there. I had some ideas for a rear suspension design that I really wanted to try out, because I have variations of that design I want to use on customer cars.
more pictures before I call it a night.
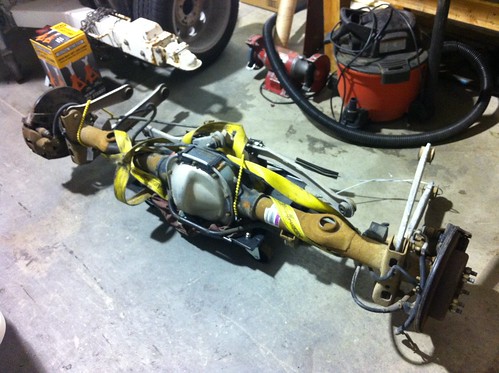
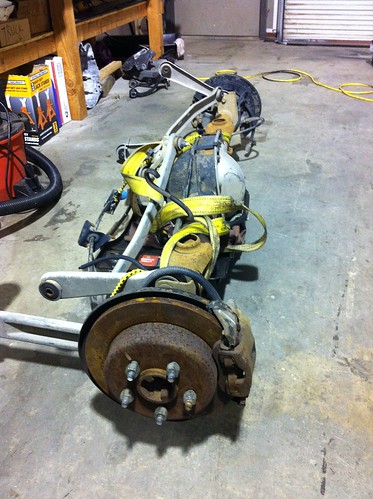
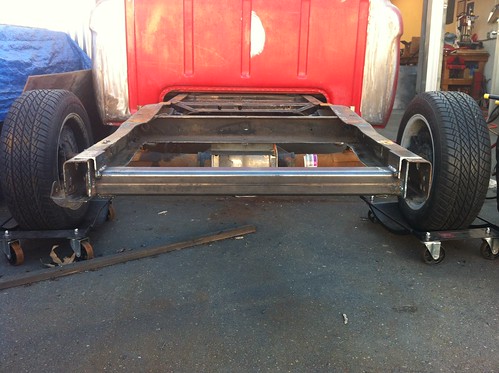
got all the original suspension and diff out, and put the new one it, welded it to the frame and started figuring out how low I wanted it and what size tire I could fit and if I would have to narrow the diff or not....which ended up being a not.
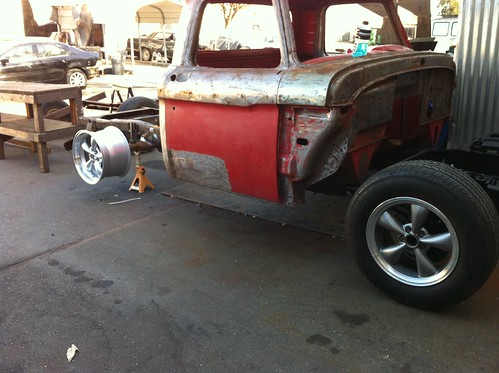
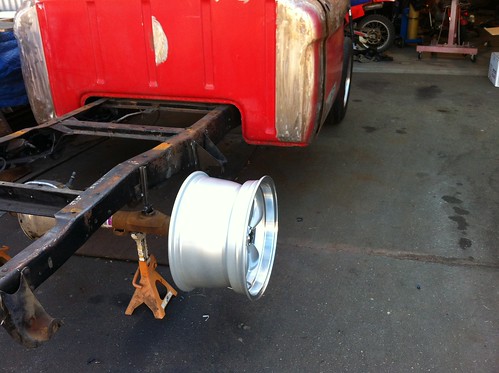
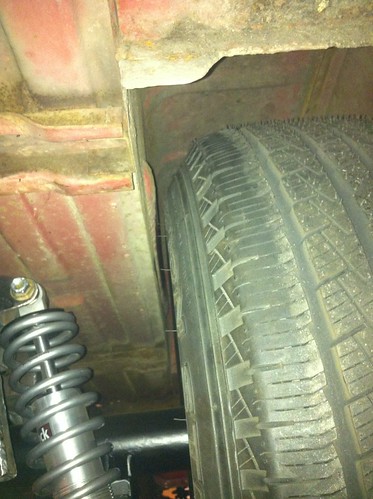
I decided I could cram a 10" wheel in there without any mods...but I'd be close.
more pictures before I call it a night.
got all the original suspension and diff out, and put the new one it, welded it to the frame and started figuring out how low I wanted it and what size tire I could fit and if I would have to narrow the diff or not....which ended up being a not.
I decided I could cram a 10" wheel in there without any mods...but I'd be close.
#18
04-13-2014, 03:11 PM
So at this point I had finished the CV front suspension swap, started mocking up the rear suspension build, and had gotten quite a bit done for the BMW install. I had tons of new parts for BMW engine, the block and rotating assembly was at the machine shop and I had a many of the issues on their way to being sorted out.
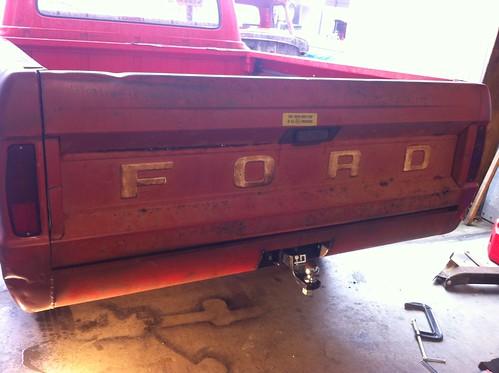
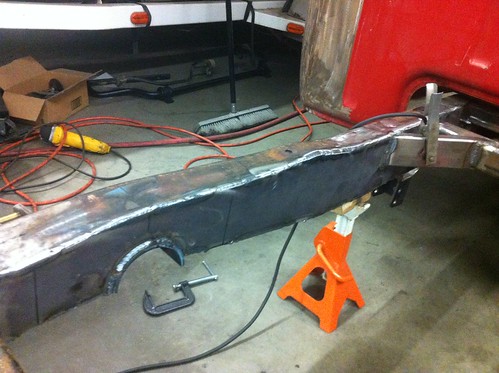
It was at this point when I started to do some work the the 64 F100 that was still bone stock that I was still driving daily. I had done the roll pan, and then I built a trailer hitch that would fit behind it so that I didn't have any ugly hitch hanging down. I built it on the 65 frame, then installed it on the daily driven 64.
and of course since I'm a cheap skate I designed it around buying the least amount of metal I could. I used a bunch of left over stuff I had, but didn't want to give up any strength, and did everything in a way that spread out the weight at best as possible. Its ugly, but you can't see the ugly with it hidden and it works great!
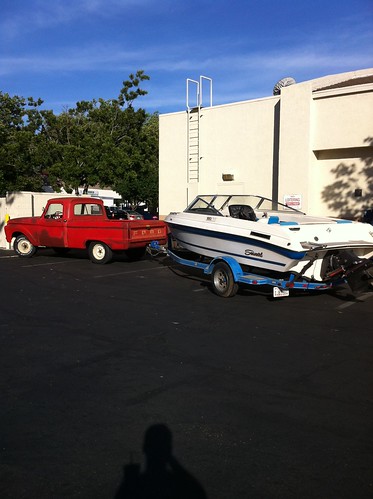
this is a friends boat that I do work on, and its not exactly light...this thing is quite a bit heavier than even my 20 foot sanger mini cruiser jet boat, but the truck and my custom built trailer hitch did fine pulling this thing to the lake many times!
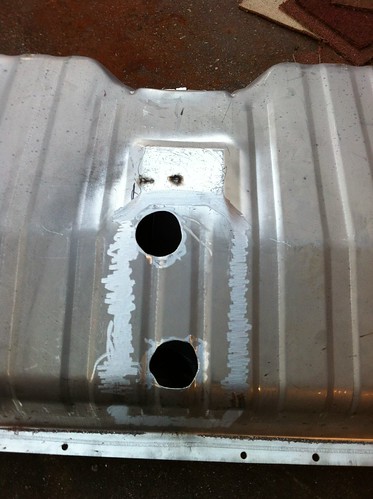
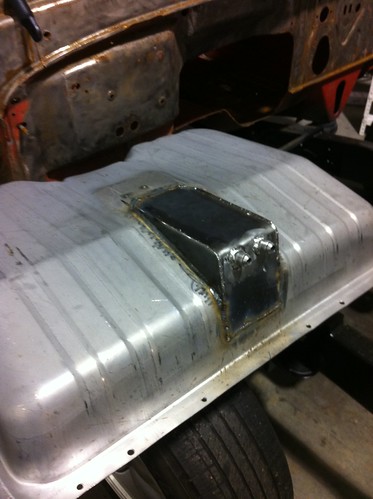
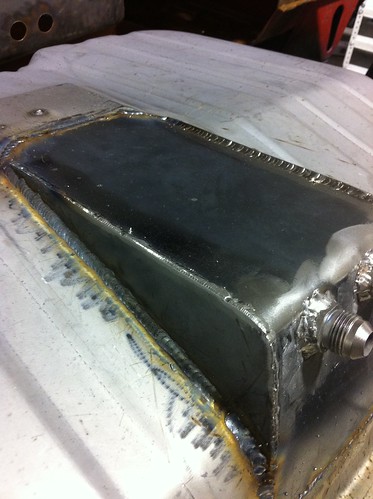
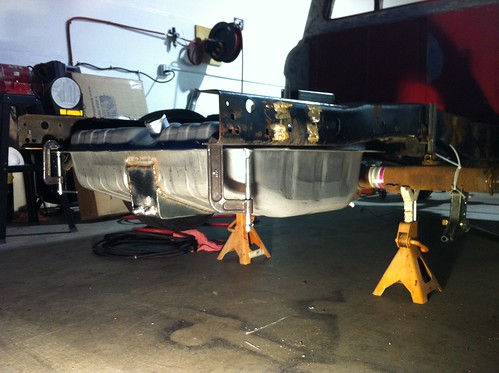
I also had started setting up the new rear mount fuel tank, again on the cheap I went with the 22gal 70 mustang tank, common swap, and for good reason. I did make some modifications to it thought to be a sump tank as I was planning to make some serious power.
you can also see where I was starting to mock up some of the suspension stuff.
It was at this point when I started to do some work the the 64 F100 that was still bone stock that I was still driving daily. I had done the roll pan, and then I built a trailer hitch that would fit behind it so that I didn't have any ugly hitch hanging down. I built it on the 65 frame, then installed it on the daily driven 64.
and of course since I'm a cheap skate I designed it around buying the least amount of metal I could. I used a bunch of left over stuff I had, but didn't want to give up any strength, and did everything in a way that spread out the weight at best as possible. Its ugly, but you can't see the ugly with it hidden and it works great!
this is a friends boat that I do work on, and its not exactly light...this thing is quite a bit heavier than even my 20 foot sanger mini cruiser jet boat, but the truck and my custom built trailer hitch did fine pulling this thing to the lake many times!
I also had started setting up the new rear mount fuel tank, again on the cheap I went with the 22gal 70 mustang tank, common swap, and for good reason. I did make some modifications to it thought to be a sump tank as I was planning to make some serious power.
you can also see where I was starting to mock up some of the suspension stuff.
#19
04-13-2014, 03:39 PM
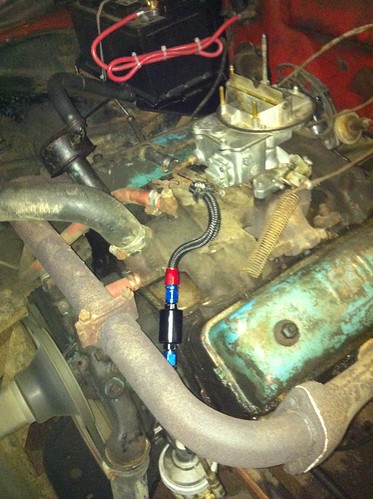
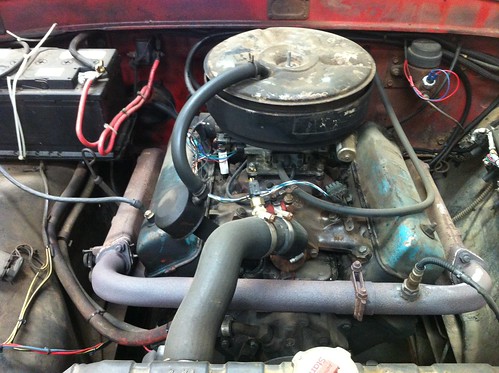
Most of what I have shared so far was all completed or mostly completed around the end of 2011 beginning of 2012. However I began to have some issues with the 64 daily. I kept having issues with the carb from crap getting stuck in the needle and seat and then flooding over and causing me issues. I probably had the carb off that thing 7-8 times over the course of 2 months in winter of 2012. I had made some mods to the fuel system to try and filter it all, but I was tired of the drivability, and terrible cold condition running. Its just a crappy carburetor and I hate carburetors.
here are some of the fuel system mods right before the bigger mods.
So, most of what I do at my shop is EFI swaps for older cars. I do them on all sorts of things. Right now in my shop I have 2 Datsun 510's with turbocharged 4 cylinders all getting EFI, I have an old VW bug with a turbocharged 2276 that I'm doing all the EFI stuff on, I built a Procharged 502ci BBC for my boat that is all EFI that I set up and I've had probably 6-7 other customer projects over the last few years that I have swapped, wired and tuned with EFI. It is kind of my thing, and it is mostly what I did when I was teaching at UTI. I ran cars on the dyno and taught everything from power adders (ie turbos, superchargers, Nitrous Oxide) to suspension design and setup, to fuel systems and ignition systems and my favorite of all, EFI tuning. I didn't always love EFI though, as I stated before I was a chevy muscle car guy. I loved carbs and N/A V8 chevy engines....then I went to work at Jaguar and got all the training and experience with all the modern electronics. Electronics and wiring just became my thing, and over time I morphed it in with my love for old cars. So now, I love modernizing old cars, because again, I want to use them...I want to make old iron as reliable, efficient, powerful and fun as some of the new cars out there....I just want the cool old car look.
So anyways....knowing where my mentality is, it was clear the carb was coming off, and it was the best thing I ever did to the worn out 292 Y block! Of course because I'm cheap I went to the junk yard and struck gold!
$60 later I had my fuel injection setup!

made an adapter plate from some scrap metal and bolted that crap onto the stock manifold.
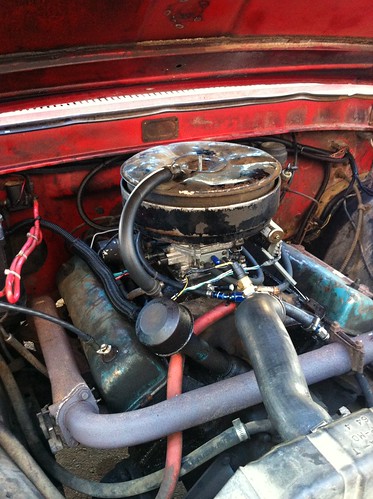

It was like this that I drove the truck for the next 2 years on a daily basis. After putting the fuel injection on it, the only issues I ever had, were the crappy points that I had intended on getting rid of but never did. I continued to build the 65 frame and drive the 64 until everything was ready to tear down and build 1 truck from the 2.
here are some of the fuel system mods right before the bigger mods.
So, most of what I do at my shop is EFI swaps for older cars. I do them on all sorts of things. Right now in my shop I have 2 Datsun 510's with turbocharged 4 cylinders all getting EFI, I have an old VW bug with a turbocharged 2276 that I'm doing all the EFI stuff on, I built a Procharged 502ci BBC for my boat that is all EFI that I set up and I've had probably 6-7 other customer projects over the last few years that I have swapped, wired and tuned with EFI. It is kind of my thing, and it is mostly what I did when I was teaching at UTI. I ran cars on the dyno and taught everything from power adders (ie turbos, superchargers, Nitrous Oxide) to suspension design and setup, to fuel systems and ignition systems and my favorite of all, EFI tuning. I didn't always love EFI though, as I stated before I was a chevy muscle car guy. I loved carbs and N/A V8 chevy engines....then I went to work at Jaguar and got all the training and experience with all the modern electronics. Electronics and wiring just became my thing, and over time I morphed it in with my love for old cars. So now, I love modernizing old cars, because again, I want to use them...I want to make old iron as reliable, efficient, powerful and fun as some of the new cars out there....I just want the cool old car look.
So anyways....knowing where my mentality is, it was clear the carb was coming off, and it was the best thing I ever did to the worn out 292 Y block! Of course because I'm cheap I went to the junk yard and struck gold!
$60 later I had my fuel injection setup!
made an adapter plate from some scrap metal and bolted that crap onto the stock manifold.
It was like this that I drove the truck for the next 2 years on a daily basis. After putting the fuel injection on it, the only issues I ever had, were the crappy points that I had intended on getting rid of but never did. I continued to build the 65 frame and drive the 64 until everything was ready to tear down and build 1 truck from the 2.
#20
04-13-2014, 05:00 PM
After I had gotten some of the mock up done on the rear suspension and began ordering all the parts I needed to build it the 65 frame project stalled a bit. I was beginning to get too many customers to work on my own projects and I was already out of space in the tiny 800sq ft shop I originally got just for myself as I was expecting to teach when I first moved to chico. I had added a lift and some new tools, but had to move all my own projects out so I had the space for customers. Another thing that caused the project to stall was that the machinist doing all the work on the BMW engine had the engine there for almost a year before getting it completed! It wasn't until the beginning of 2013 that I got the engine back. Then in May of 2013 I finally got a new shop. I moved to a much more professional location with a much larger shop....3000 sq ft to be exact. Once I got settled in by the middle of summer I was ready to get this project finished! I was a little discouraged though as I knew I still had quite a bit of fabrication in all the turbo stuff for the BMW and some other fab mods to get done along with the rear suspension. 
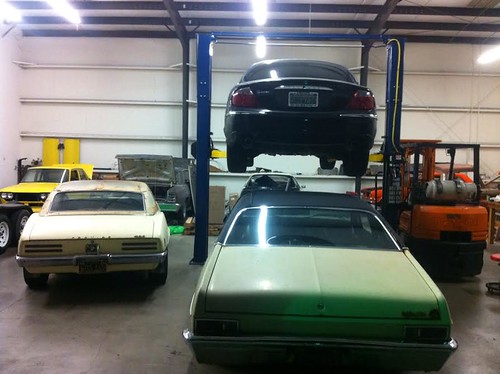
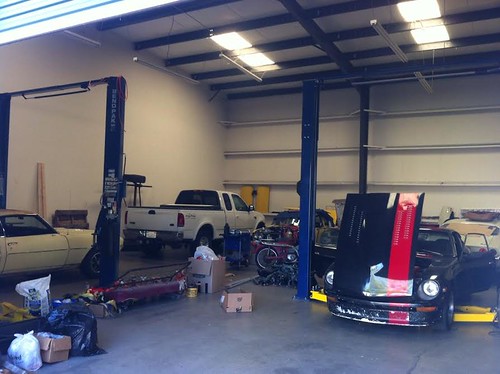
couple pictures of the new shop, just because everyone loves pictures!
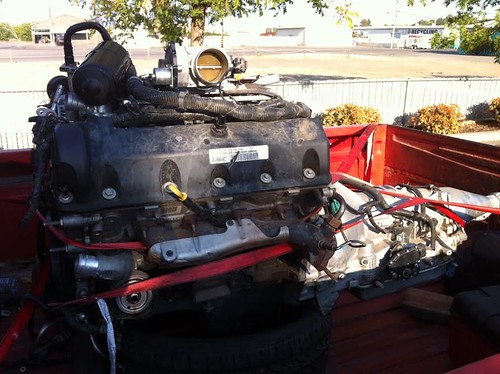
That all changed one day when I walked into my local Pick N Pull to look for something to fix a hack job someone else did on a customers 65 C10 pickup. Walking in the very front where they display the latest hot cars to pick from I caught a glimpse of the CHP star! Yep, it was a mangled police interceptor in the Pick N Pull. I looked it over quick and notice how clean the engine was, it wasn't smashed, but had a few things that would need to be swapped out. As I walked around the car I saw the Yr tagged on the back fender "10".....I was like "What the heck??! 2010! No, way!" So looked at the VIN tag and sure enough it was a 2010. So I quickly called a buddy of mine who works for Ford and he ran all the history on it and found it had been wrecked about 5 months before, and was in for service last about 3 months before that and when it was in for service it had 43k miles on it!
So for those that don't know, Pick N Pull the company owns this yard, they are the WORST yard to go to if you need stupid little things, because they nickle and dime you to death! But if you want something large, they are great because they don't care what it came from, how new it is, or anything else about condition. So knowing that I jumped on this police interceptor and pulled everything! I took the engine, transmission, front suspension, and anything else I thought I wanted and took it all for just over $700 out the door!
And with this came the jump start to the project I was needing!
after about 3 mins it obviously dropped right into place....
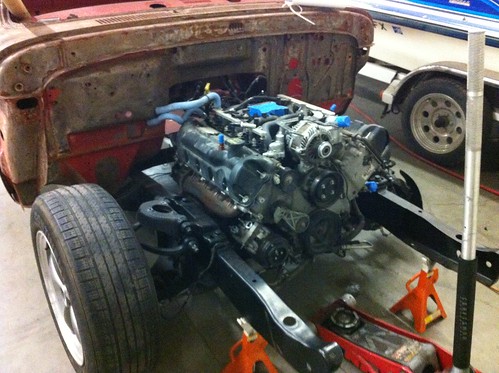
got all original brackets and rivets and crap taken off and the diff cleaned with all the CV brackets cut off the diff, so I could start getting everything tacked into place and setup.


couple pictures of the new shop, just because everyone loves pictures!
That all changed one day when I walked into my local Pick N Pull to look for something to fix a hack job someone else did on a customers 65 C10 pickup. Walking in the very front where they display the latest hot cars to pick from I caught a glimpse of the CHP star! Yep, it was a mangled police interceptor in the Pick N Pull. I looked it over quick and notice how clean the engine was, it wasn't smashed, but had a few things that would need to be swapped out. As I walked around the car I saw the Yr tagged on the back fender "10".....I was like "What the heck??! 2010! No, way!" So looked at the VIN tag and sure enough it was a 2010. So I quickly called a buddy of mine who works for Ford and he ran all the history on it and found it had been wrecked about 5 months before, and was in for service last about 3 months before that and when it was in for service it had 43k miles on it!
So for those that don't know, Pick N Pull the company owns this yard, they are the WORST yard to go to if you need stupid little things, because they nickle and dime you to death! But if you want something large, they are great because they don't care what it came from, how new it is, or anything else about condition. So knowing that I jumped on this police interceptor and pulled everything! I took the engine, transmission, front suspension, and anything else I thought I wanted and took it all for just over $700 out the door!
And with this came the jump start to the project I was needing!
after about 3 mins it obviously dropped right into place....
got all original brackets and rivets and crap taken off and the diff cleaned with all the CV brackets cut off the diff, so I could start getting everything tacked into place and setup.
#21
04-13-2014, 05:51 PM
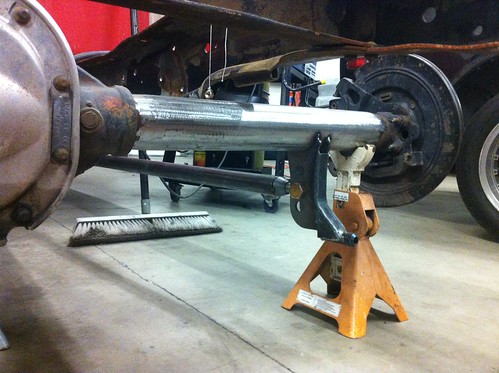
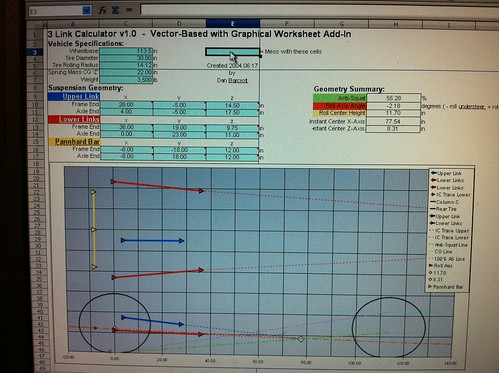
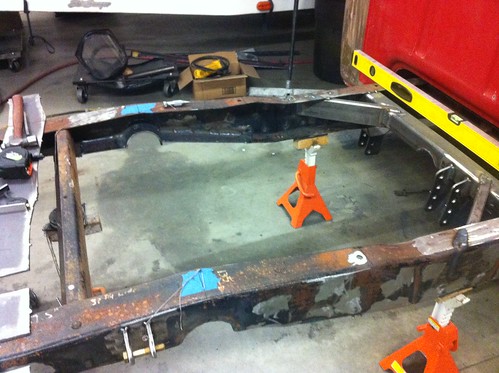
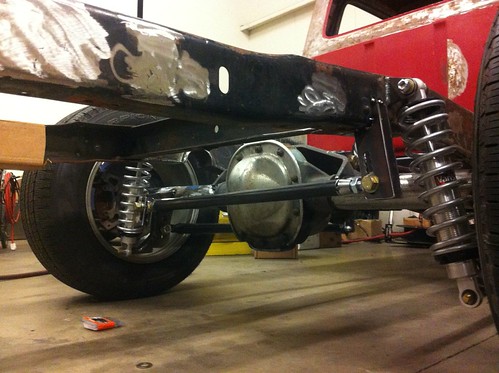
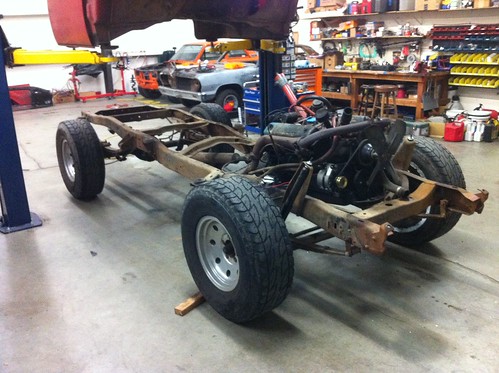
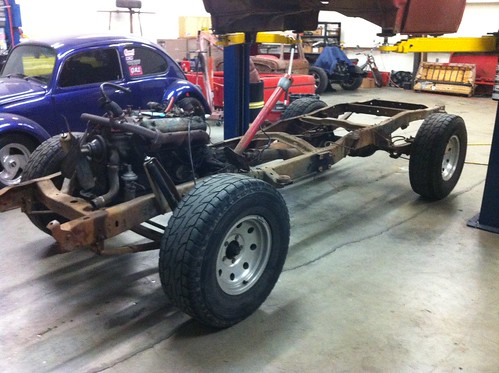
I had decided back before the project went on a year long stall out that I was going to build a 3-link for the truck. I wanted to do some testing with the design and also possibly some different track events with it at some point. This meant drag racing, some road course stuff, autocross, but most importantly I also wanted it to ride really nice, and perform all my original goals for the truck. With this design I spent a lot of time reading and running simulations through various suspension programs. This allowed me to build in a ton of adjustment, so that I could really see how well the 3 link was going to work with all I the things I wanted to do with the truck.
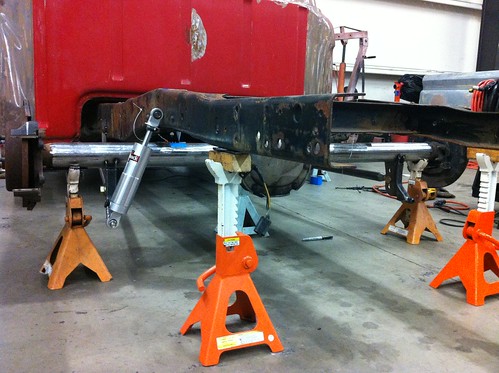
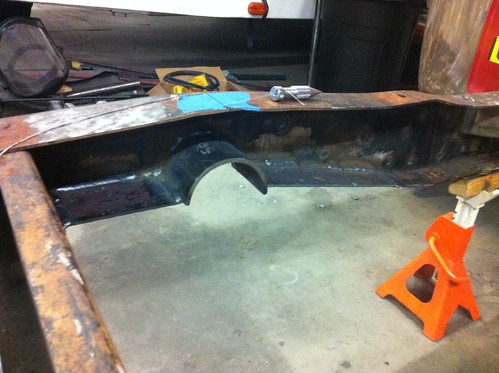
probably the biggest issue with the 3 link was figuring out how to mount the upper link so that it didn't stick up above the top of the pumpkin. I wanted the truck as low as possible but did not want to modify the bed at all in the center of it. This is suppose to be a daily driven usable truck, so the bed had to be 100% functional and not jacked up by some stupid step notch clearance or crap like that. so this is what I came up with...


probably the biggest issue with the 3 link was figuring out how to mount the upper link so that it didn't stick up above the top of the pumpkin. I wanted the truck as low as possible but did not want to modify the bed at all in the center of it. This is suppose to be a daily driven usable truck, so the bed had to be 100% functional and not jacked up by some stupid step notch clearance or crap like that. so this is what I came up with...
#23
04-14-2014, 12:26 AM
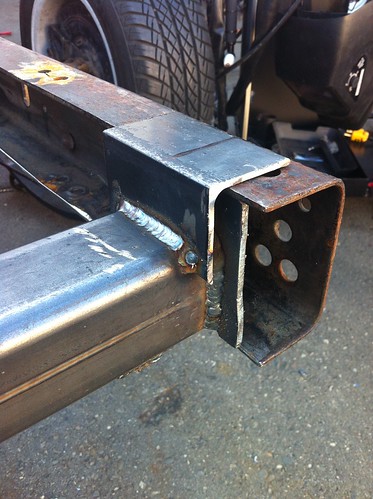
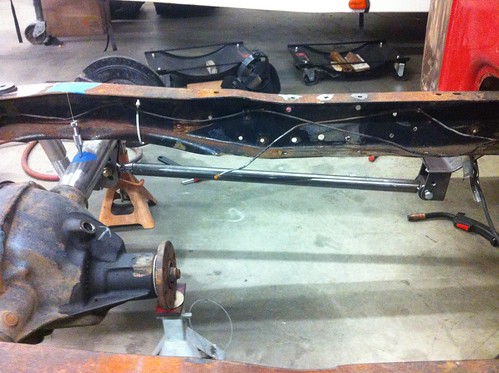
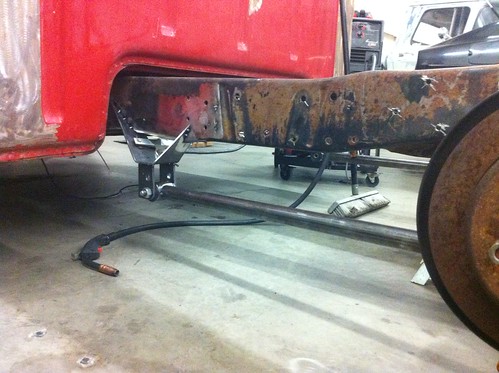
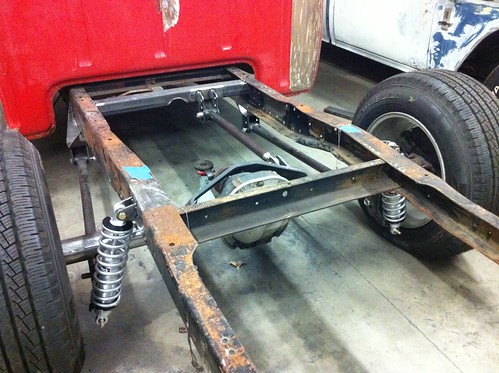
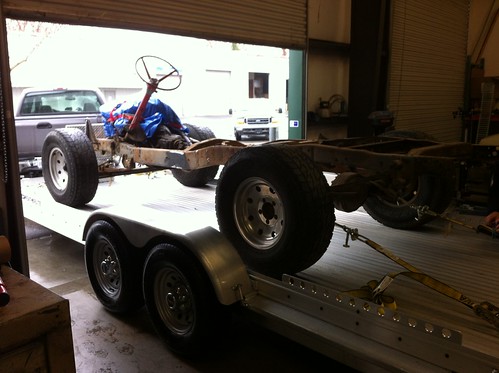
Once everything was basically set up, I took it all apart again because I wanted to be safe and C notch and box everything and fill all the holes
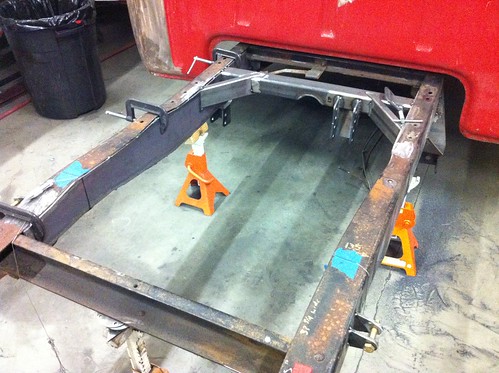
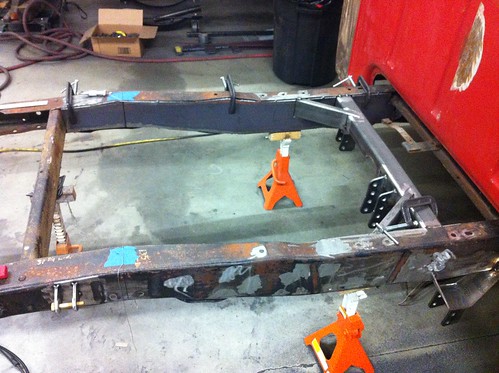
had a good friend run a few simulations in solidworks and we decided since I was going to be towing and using it like a truck, it was probably worth the little bit of extra time to ensure the C-notch would not be a weak spot.
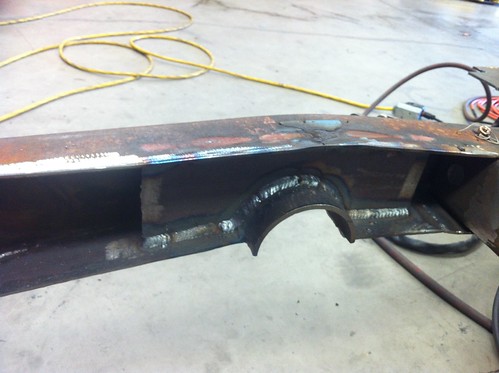
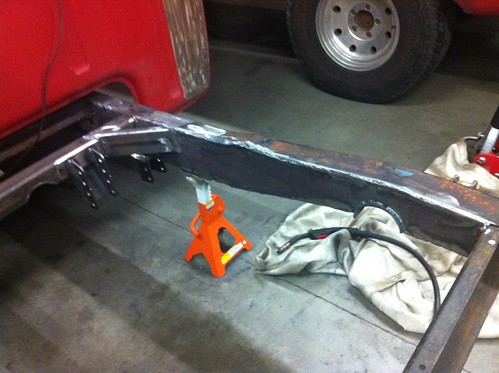
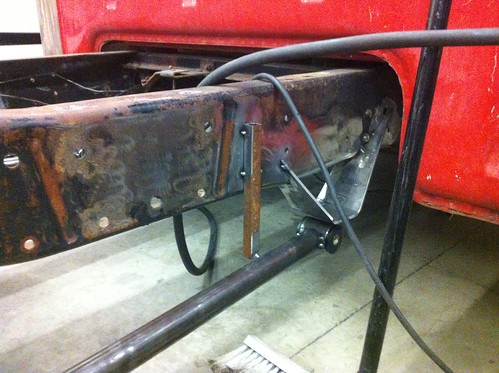
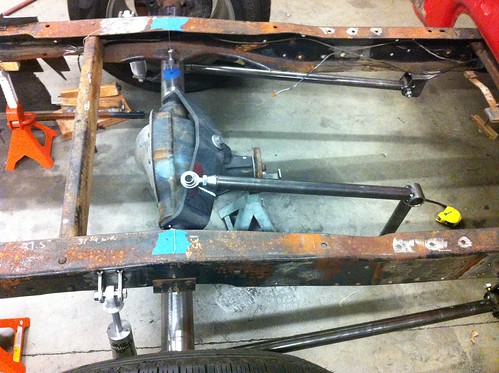
One of the last things on the list was the panhard bar so I started making the mount for the diff.
had a good friend run a few simulations in solidworks and we decided since I was going to be towing and using it like a truck, it was probably worth the little bit of extra time to ensure the C-notch would not be a weak spot.
One of the last things on the list was the panhard bar so I started making the mount for the diff.


#27
04-14-2014, 01:22 AM
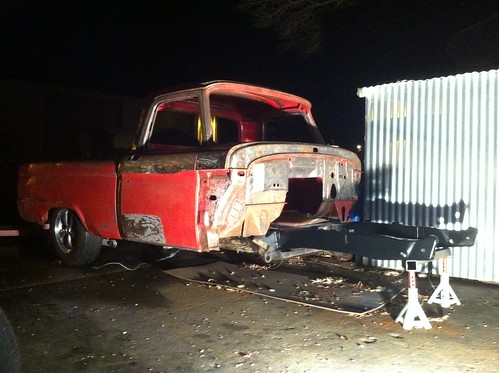
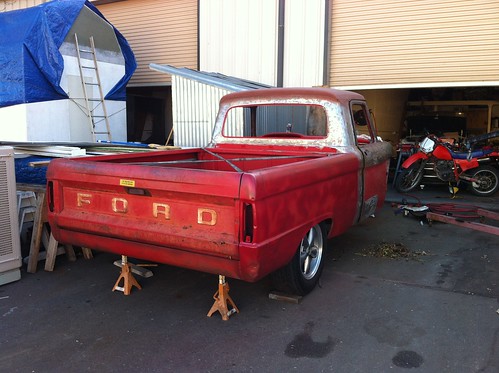
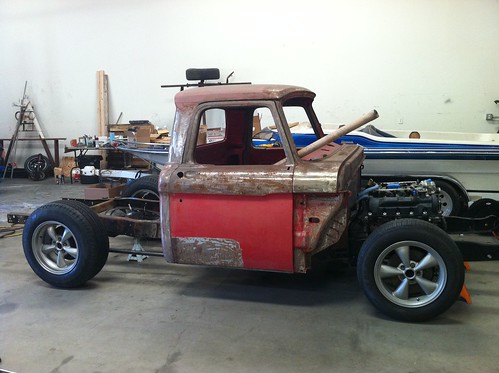
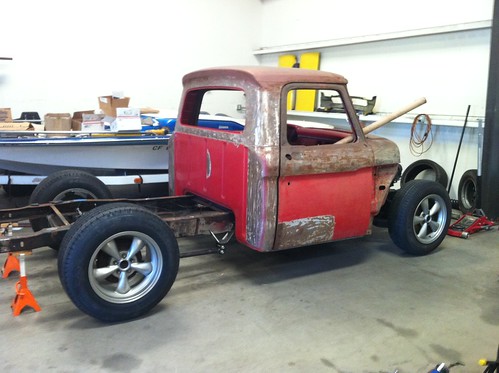
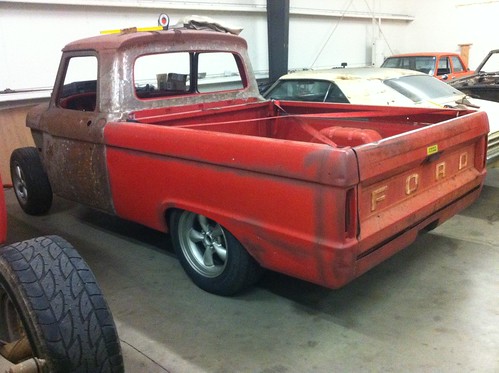
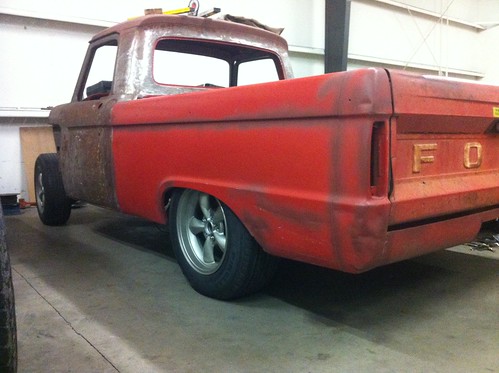
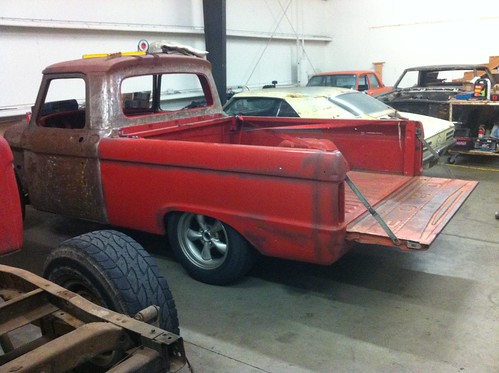
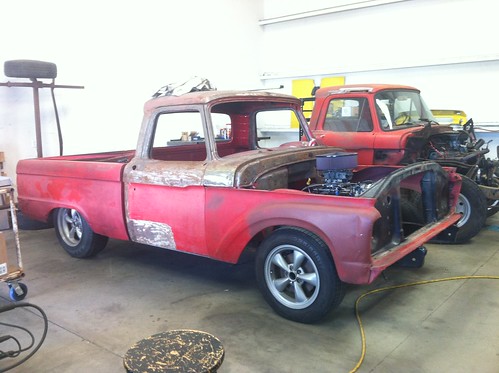
at this point in the build I had decided it was time to start tearing into the 64 F100 to finally turn it into the truck it deserved to be!
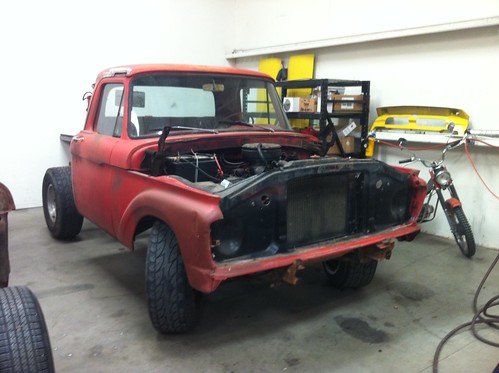
the old girl kept on running until the end...but she was tired...very tired.
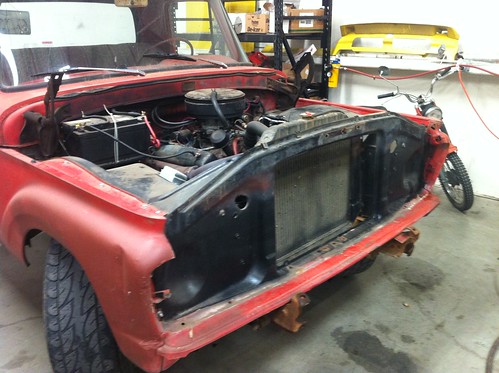
did a little mock up of the front end so I could start figuring out the cooling system and fan setup....had to take a profile picture though!
the old girl kept on running until the end...but she was tired...very tired.
did a little mock up of the front end so I could start figuring out the cooling system and fan setup....had to take a profile picture though!
#30
04-14-2014, 11:44 PM
Thanks!
The lower arms have just as much, it just doesn't look like it. There are 3 adjustment holes on the axle and 2 on the frame. With all the adjustment I can go from well into the 100+% AS, to below 0% AS. I really wanted to be able to test some different setups to gain more info for setting up customer cars.