1951 Ford F1 resurrection, jag IFS LT1, EFI, T56, etc
#136
 12-18-2013, 07:20 AM

https://www.ford-trucks.com/forums/1...-practice.html
Many local trade schools, community colleges, even high schools offer inexpensive continuing ed classes in welding.

#138
12-18-2013, 04:17 PM


#141
12-18-2013, 10:25 PM
Senior User
Join Date: Sep 2013
Location: Florida
Posts: 477
Likes: 0
Received 0 Likes
on
0 Posts
Welding skills are really not difficult to acquire. You need about 5-800.00 for equipment and a willingness to learn. In my introduction to MIG welding class, I taught 6-10 complete beginners to run satisfactory weld beads in 4 hrs of instruction and hands on practice. A couple more weekends of dedicated practice on their own would make them journeyman welders. A good way to start would be to carefully read my basic welding tutorial here:
https://www.ford-trucks.com/forums/1...-practice.html
Many local trade schools, community colleges, even high schools offer inexpensive continuing ed classes in welding.
https://www.ford-trucks.com/forums/1...-practice.html
Many local trade schools, community colleges, even high schools offer inexpensive continuing ed classes in welding.

#142
12-18-2013, 10:28 PM
Senior User
Join Date: Sep 2013
Location: Florida
Posts: 477
Likes: 0
Received 0 Likes
on
0 Posts
#143
12-26-2013, 09:19 PM
Hope all had a nice holiday! With the days off I actually got out in the garage for a few hours here and there to get some stuff done, have to keep pushing forward.
Got the steering done, nice and simple with one joint for once.
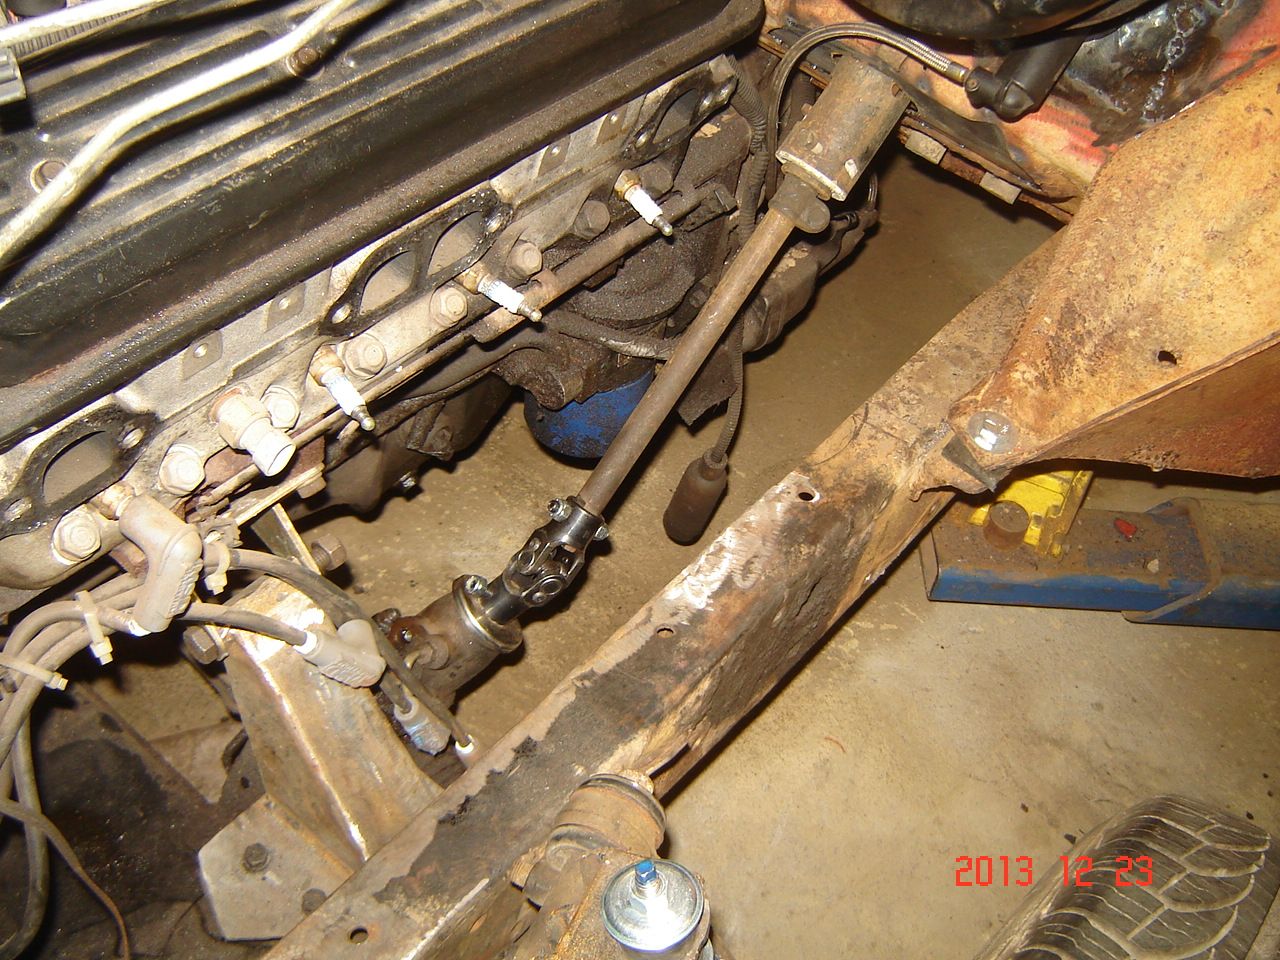
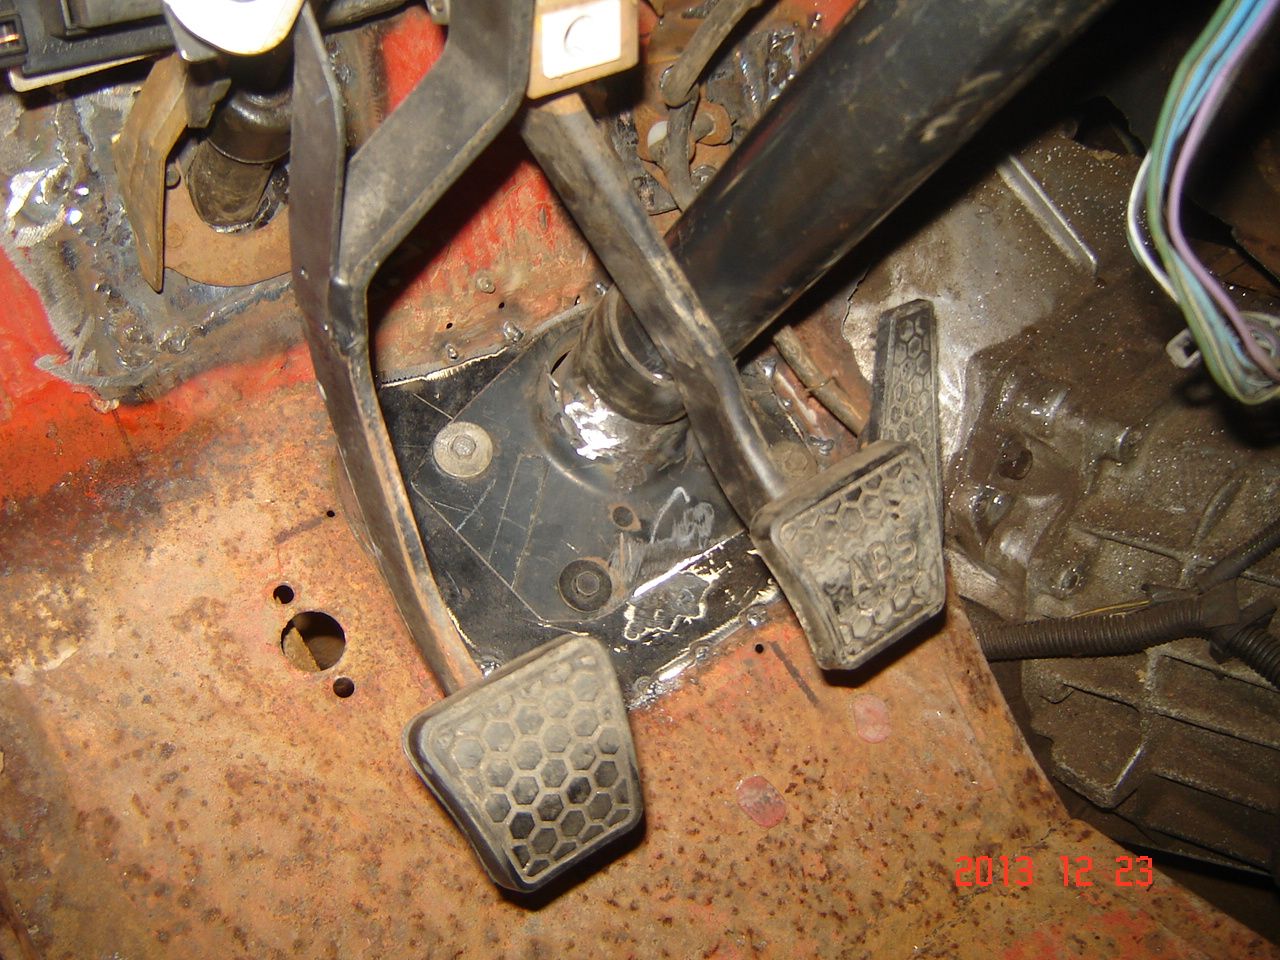
Column base mount location done
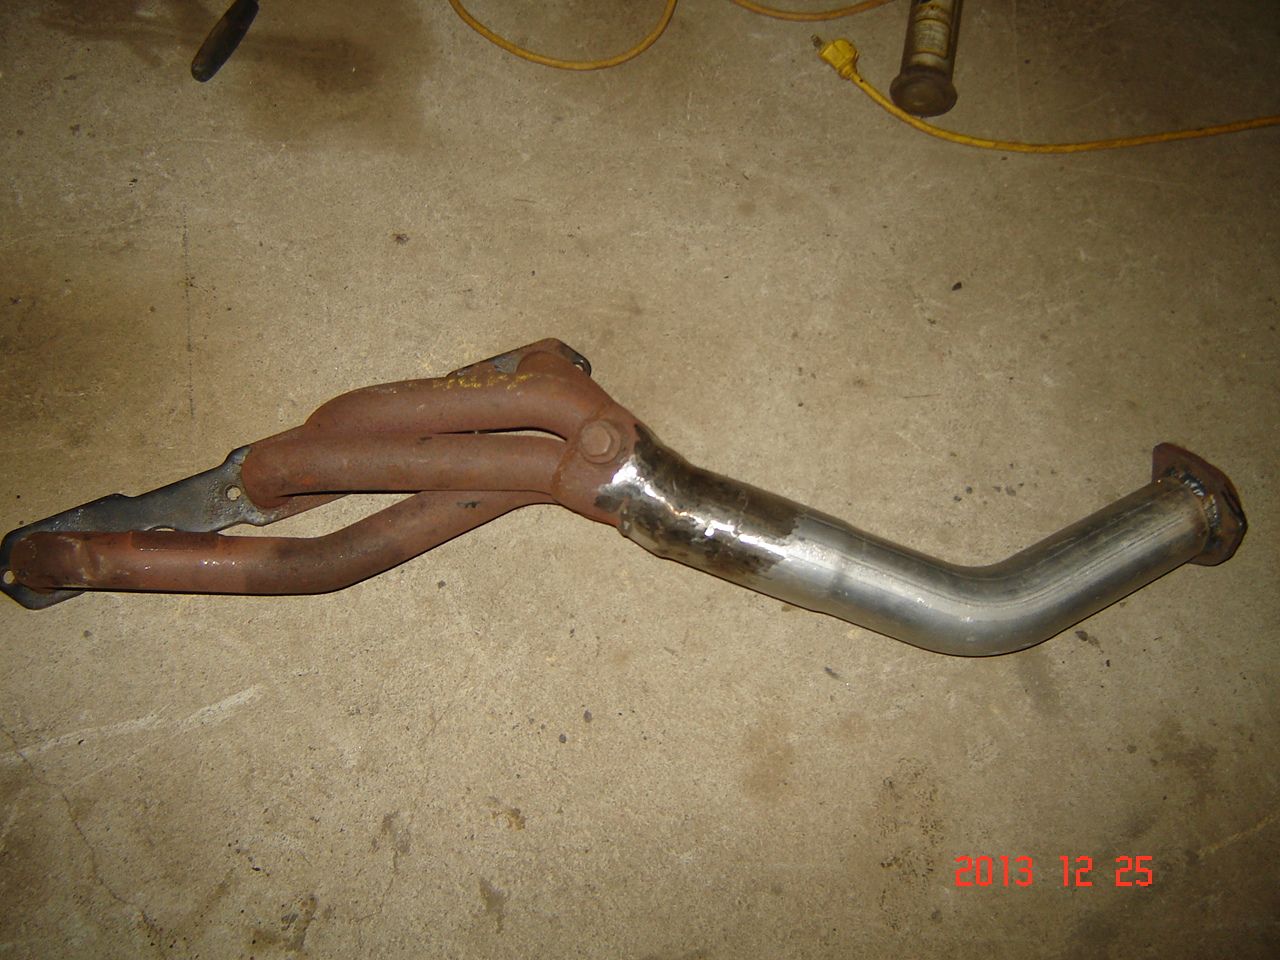
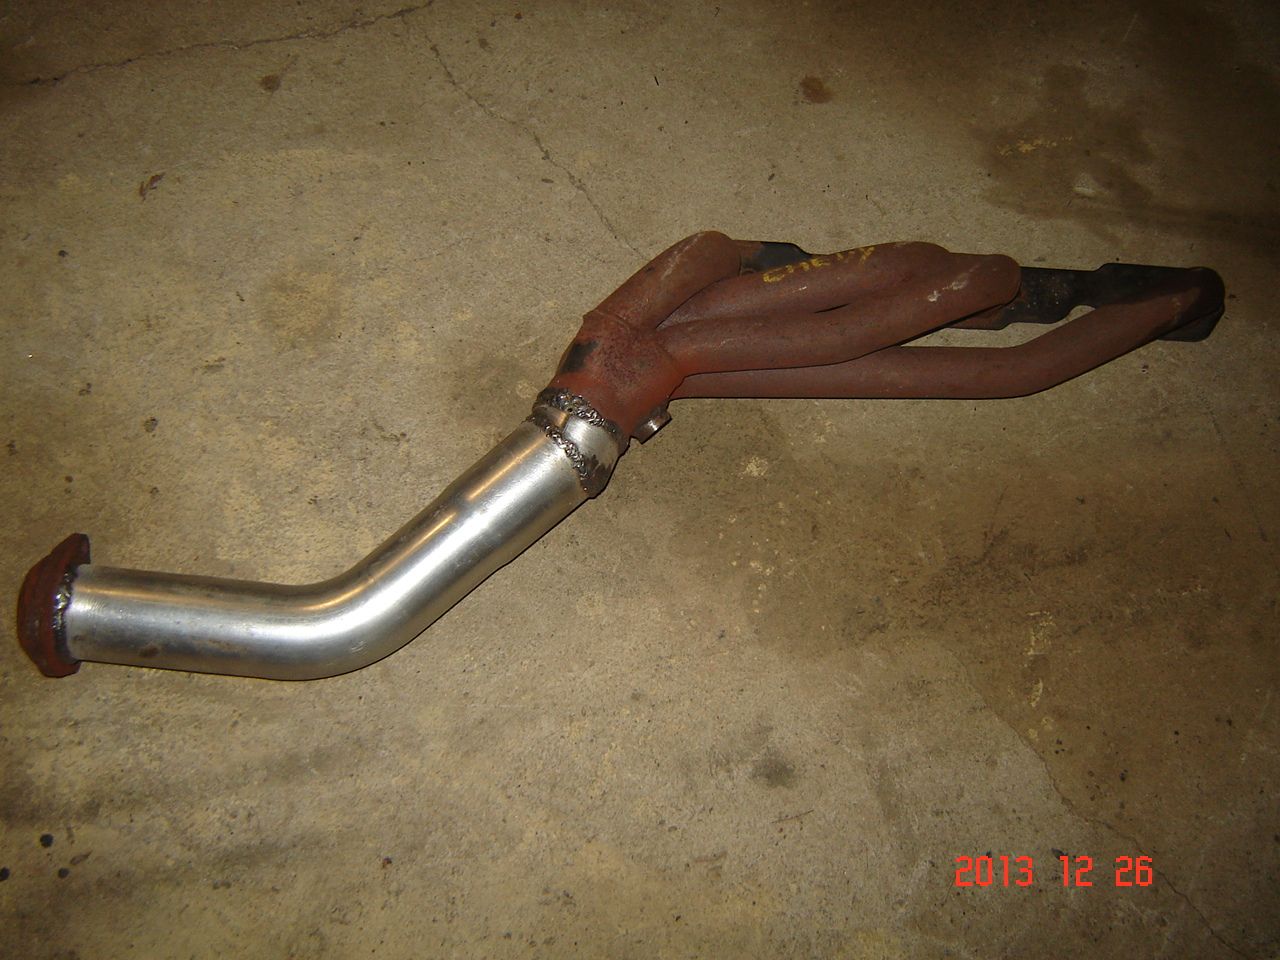
With the steering done I could decide on exhaust, went with the rear exit shorties which turned out to be for 1988-1995 chevy trucks, they are pace setter PN 70-1318 if anyone is looking for them. I cut the flanges off and made extensions so they would clear and moved the flange to an easier access area. Also added the O2 sensor bung to the passenger side header, the 93 engine only uses one sensor.
Clearance on the steering shaft is about 1/2" but will be fine, engine has a solid mount on the drivers side and is not going to be jumping around.

Headers had ball socket flanges which I like, I try to avoid using the old style flat flanges with the flat gaskets.

Drivers side hooked up, exhaust is a 2 1/2" flowmaster camaro system I picked up cheap at a swap meet.

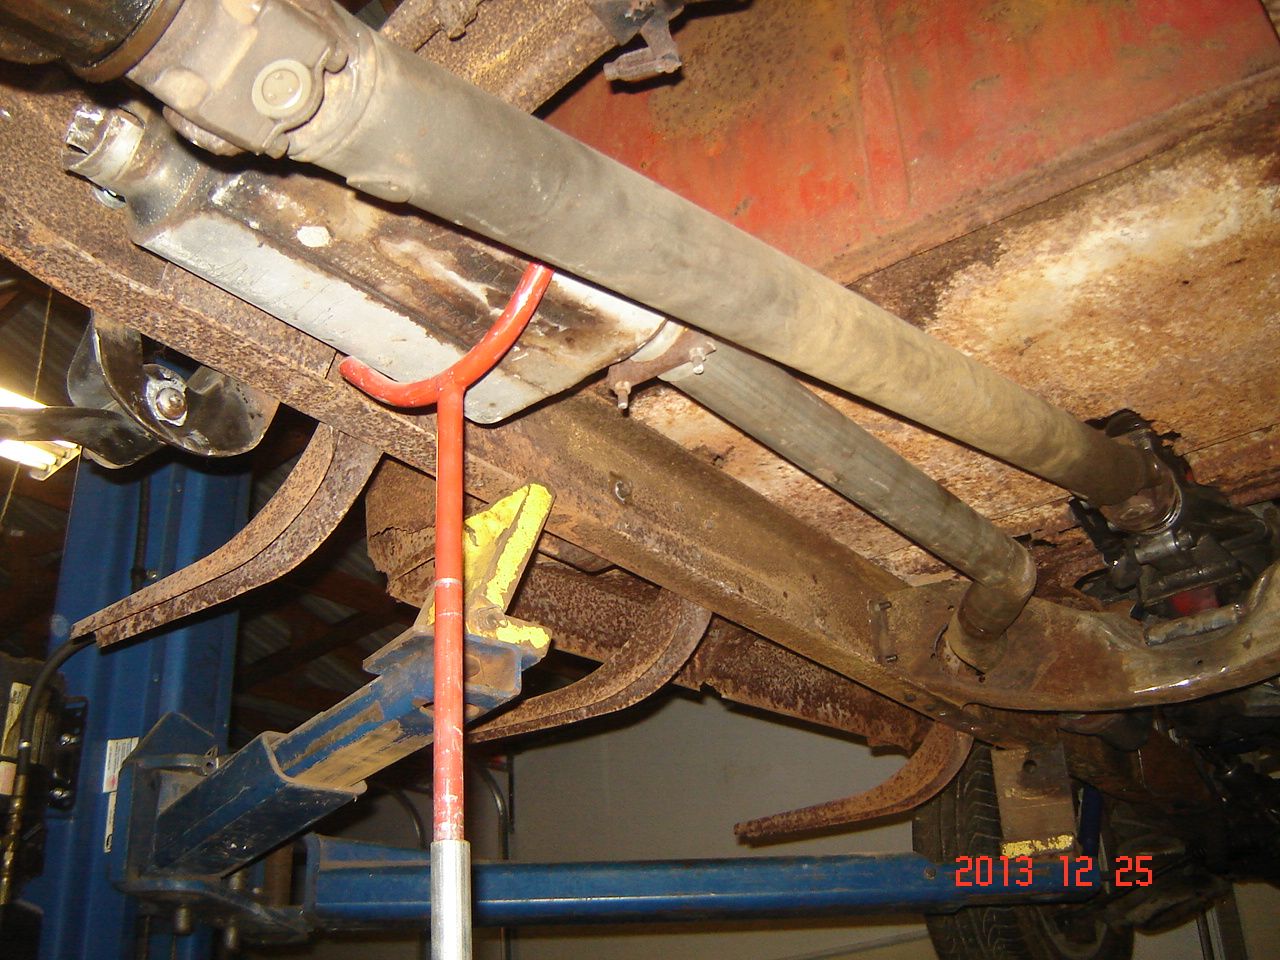
I plan on tail pipes, going to make them later once the work around the cab is done.
Got the steering done, nice and simple with one joint for once.

Column base mount location done

With the steering done I could decide on exhaust, went with the rear exit shorties which turned out to be for 1988-1995 chevy trucks, they are pace setter PN 70-1318 if anyone is looking for them. I cut the flanges off and made extensions so they would clear and moved the flange to an easier access area. Also added the O2 sensor bung to the passenger side header, the 93 engine only uses one sensor.


Clearance on the steering shaft is about 1/2" but will be fine, engine has a solid mount on the drivers side and is not going to be jumping around.

Headers had ball socket flanges which I like, I try to avoid using the old style flat flanges with the flat gaskets.

Drivers side hooked up, exhaust is a 2 1/2" flowmaster camaro system I picked up cheap at a swap meet.


I plan on tail pipes, going to make them later once the work around the cab is done.
#145
12-27-2013, 04:43 AM

From the order of your posts, are you indicating that you laid in the steering and joint before you chose your headers? That would surprise me and if you did, go and play the lottery right away since you are one very lucky guy!
I never found a header that would fit the sbc/jag at least with the engine centered in the chassis. I ended up using the angled back rams horn manifold. The sbc in a Jag guys are able to fit the straight down dump, larger 2 1/2' Rams Horns. I think that in the Jag chassis, the engine sits back a little further back in relation to the Jag rack. Did you offset the engine to the passenger side? I will say that hard mounting the Jag avoids the need to retain the unique (and bulky) jag joint at the Jag rack. That joint needs more swing room than a standard Borgeson joint.
Making the steering and exhaust all fit and work on the drivers side is the challenge with the Jag, well done!
I would have the same question as Ross above on the engine hard mounting.
Edit: I went back and looked at earlier posts. I would assume that you had tried a fit up of the headers that you are using back before finalizing the steering which would make you good rather than lucky!
#146
12-27-2013, 06:47 AM
Couple reasons. The 1972 and older style chevy mounts are not the best for strength and it is pretty common to break the drivers side mount. In my racing days I would put a chain or cable on the engine from the drivers side head to the frame to limit movement but the solid mount is cleaner. I run rubber mounts on the passengers side and on the transmission, there is no noticable difference vibration wise and the engine cannot rock over and move. Most of my builds lately are non stock with tight clearances and keeping the engine from moving keeps things from getting hit.
#147
12-27-2013, 06:57 AM
From the order of your posts, are you indicating that you laid in the steering and joint before you chose your headers? That would surprise me and if you did, go and play the lottery right away since you are one very lucky guy!
I never found a header that would fit the sbc/jag at least with the engine centered in the chassis. I ended up using the angled back rams horn manifold. The sbc in a Jag guys are able to fit the straight down dump, larger 2 1/2' Rams Horns. I think that in the Jag chassis, the engine sits back a little further back in relation to the Jag rack. Did you offset the engine to the passenger side? I will say that hard mounting the Jag avoids the need to retain the unique (and bulky) jag joint at the Jag rack. That joint needs more swing room than a standard Borgeson joint.
Making the steering and exhaust all fit and work on the drivers side is the challenge with the Jag, well done!
I would have the same question as Ross above on the engine hard mounting.
Edit: I went back and looked at earlier posts. I would assume that you had tried a fit up of the headers that you are using back before finalizing the steering which would make you good rather than lucky!
I never found a header that would fit the sbc/jag at least with the engine centered in the chassis. I ended up using the angled back rams horn manifold. The sbc in a Jag guys are able to fit the straight down dump, larger 2 1/2' Rams Horns. I think that in the Jag chassis, the engine sits back a little further back in relation to the Jag rack. Did you offset the engine to the passenger side? I will say that hard mounting the Jag avoids the need to retain the unique (and bulky) jag joint at the Jag rack. That joint needs more swing room than a standard Borgeson joint.
Making the steering and exhaust all fit and work on the drivers side is the challenge with the Jag, well done!
I would have the same question as Ross above on the engine hard mounting.
Edit: I went back and looked at earlier posts. I would assume that you had tried a fit up of the headers that you are using back before finalizing the steering which would make you good rather than lucky!
LOL sometimes it is better to be lucky than good!
<p>Engine is centered in the chassis and I set the location based on firewall clearance, radiator clearance, and driveline angle. Steering looked doable with the engine centered. Initially I did not know what exhaust I was going to use, manifolds or headers, and if headers which ones. I have the luxury of being a swap meet scrounger so I have a good selection of stuff on the shelf to try out without buying new. Initially I was going to use the center dump block huggers, cut off the collector and mount at an angle (similar to your rams horns) but decided to use the other headers and keep the exhaust away from the PS lines. The nice thing about headers is they can always be cut up and modded as needed, but I have another set of center dump shorties that fit with no mods at all. I am saving them for the "good" F1 I have waiting in the wings, so the "bad" F1 got these headers. I will get a pic of them this week if anyone wants to see them, very compact.<p>see above for the solid mount reasoning.<p>Thanks for the questions, hopefully the build will help someone elses project. My truck will be nowhere as nice as yours, just a cool swap meet parts chaser.
#148
12-27-2013, 04:19 PM
Senior User
Join Date: Sep 2013
Location: Florida
Posts: 477
Likes: 0
Received 0 Likes
on
0 Posts
Hey, Steering came out good so did the face plate in the cab... Now the Exhaust are you gonna dump it their in the middle/ground or are you gonna actually take it out to the side ??? I'm assuming you are gonna take it out the side, I think that is what I see in the Picture.....
Now the Exhaust are you gonna dump it their in the middle/ground or are you gonna actually take it out to the side ??? I'm assuming you are gonna take it out the side, I think that is what I see in the Picture.....
#149
12-27-2013, 05:29 PM
#150
12-27-2013, 06:10 PM
At this point in the build the thought may come to mind "now remind me again, why did I give up on the stock fuel tank"?