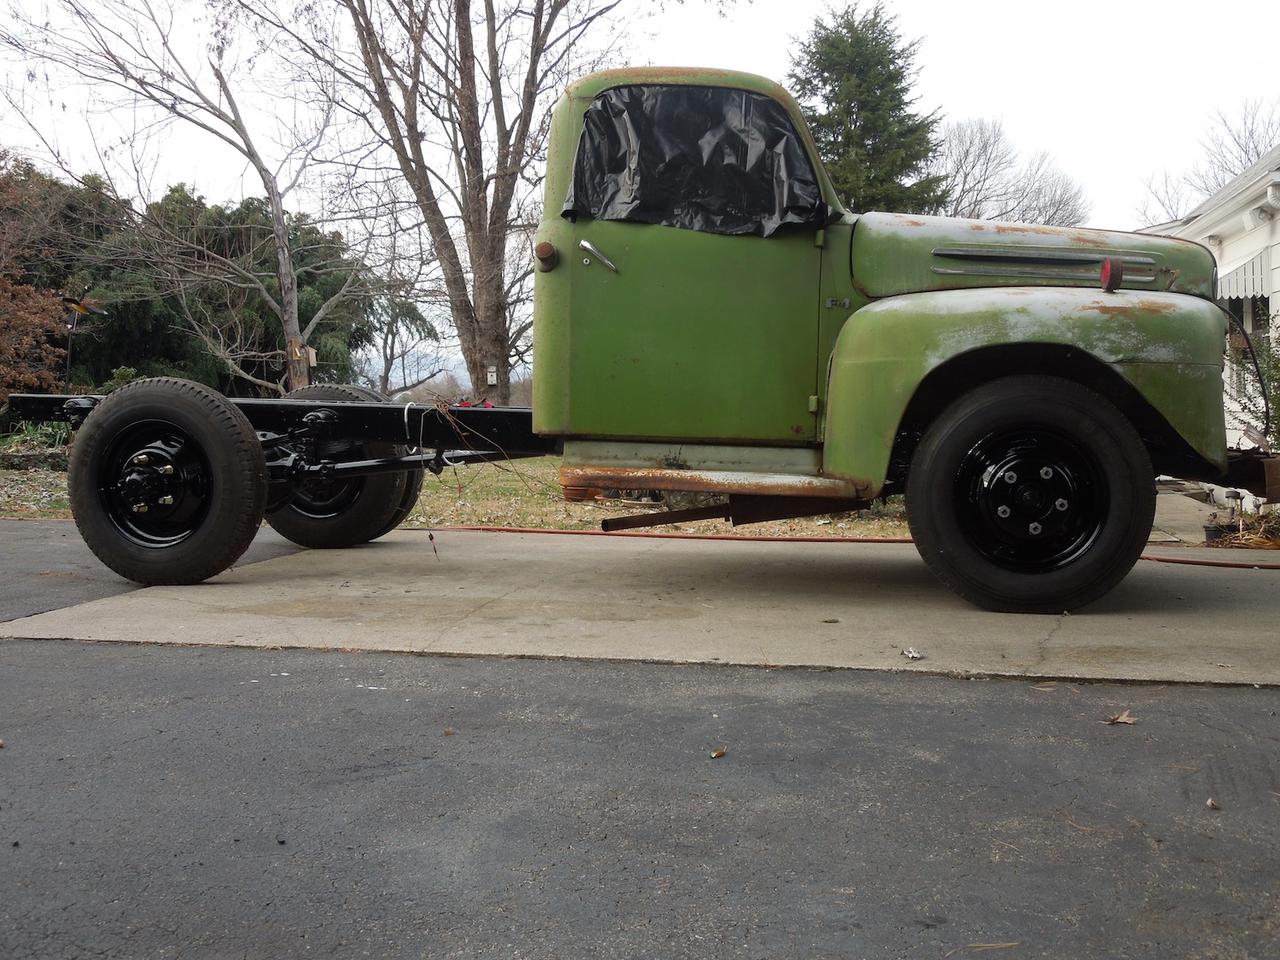
Stanley, the 1948 Ford F4
#31
 10-07-2013, 11:25 PM


Elder User
Join Date: Dec 2011
Location: Echuca VIC Australia
Posts: 701
Likes: 0
Received 0 Likes
on
0 Posts
#32
11-08-2013, 07:00 PM

As these build threads tend to go, I have been busy with other unrelated and less fun stuff. I am preparing for another battery of recertification exams in a couple of weeks for work- seems like we just did this three years ago.
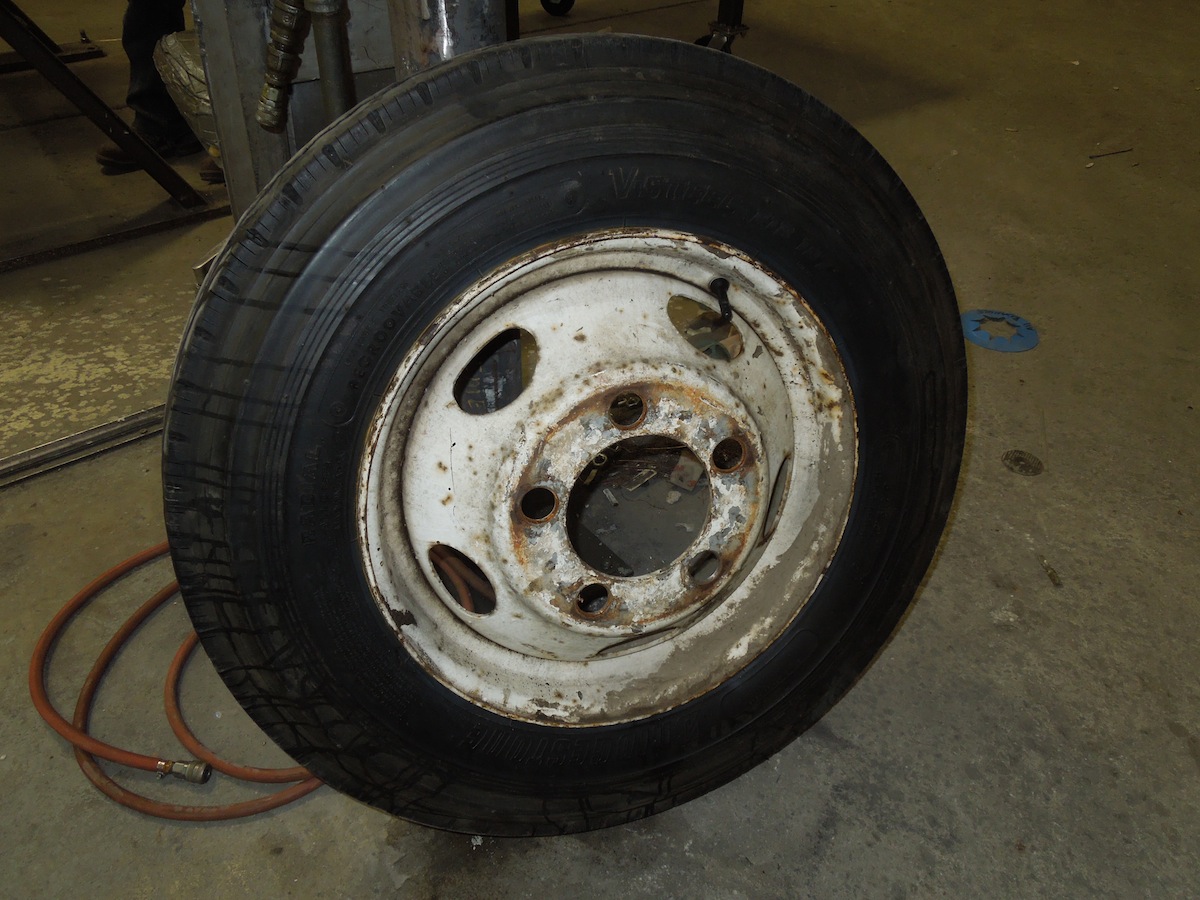
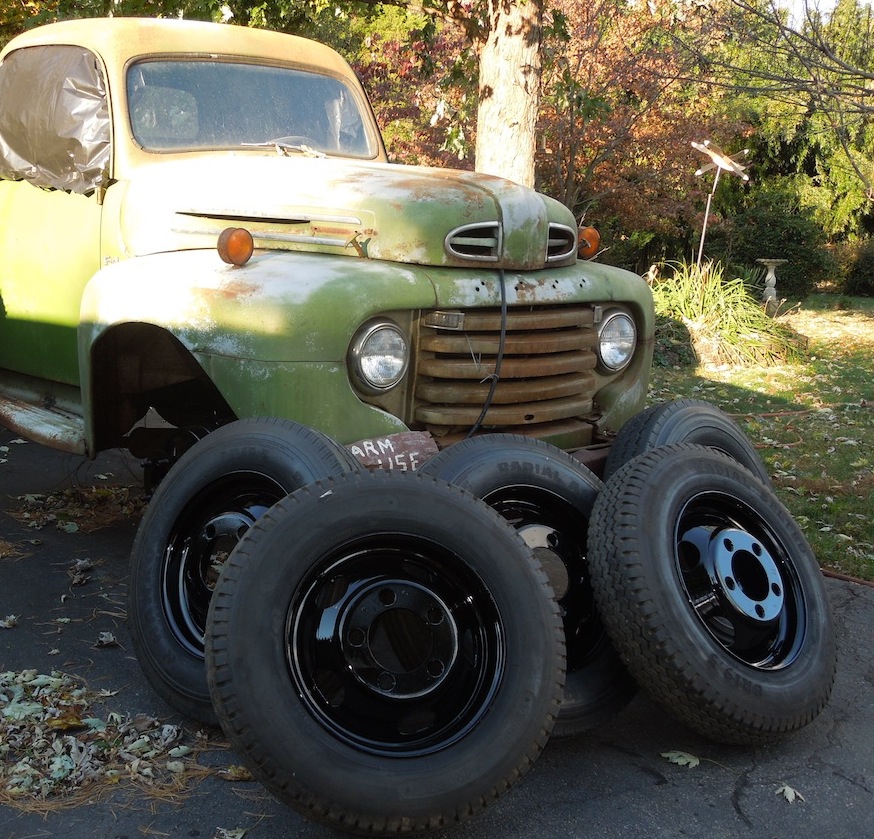
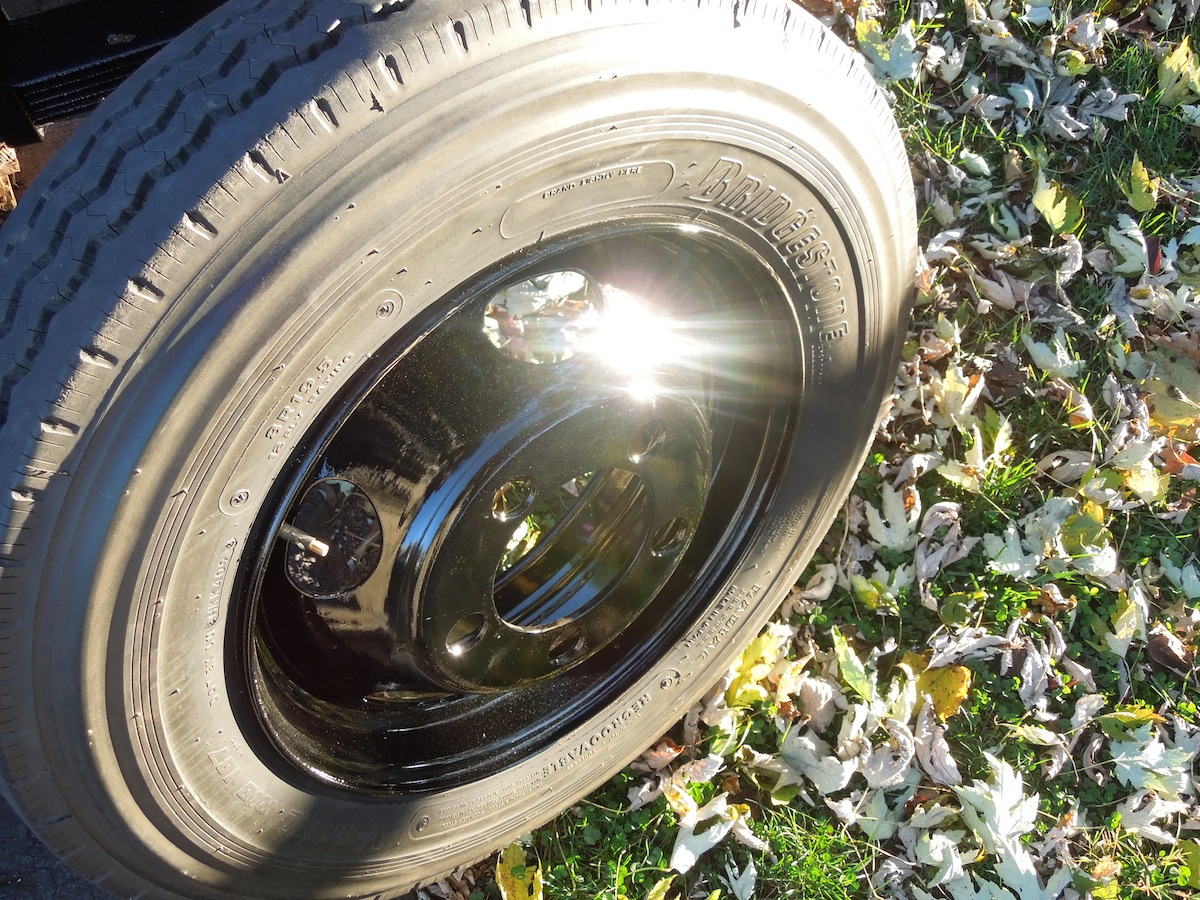
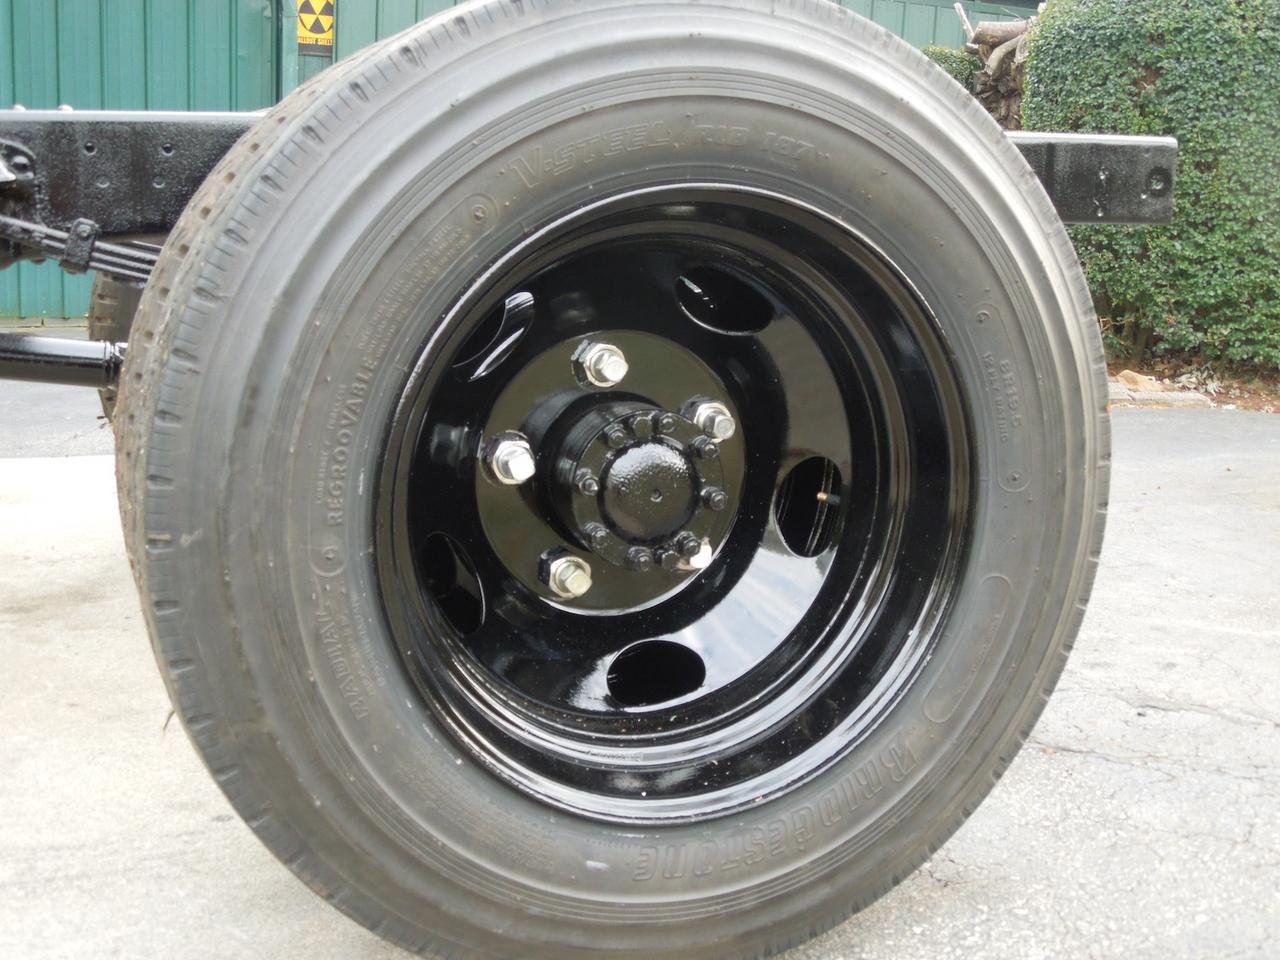
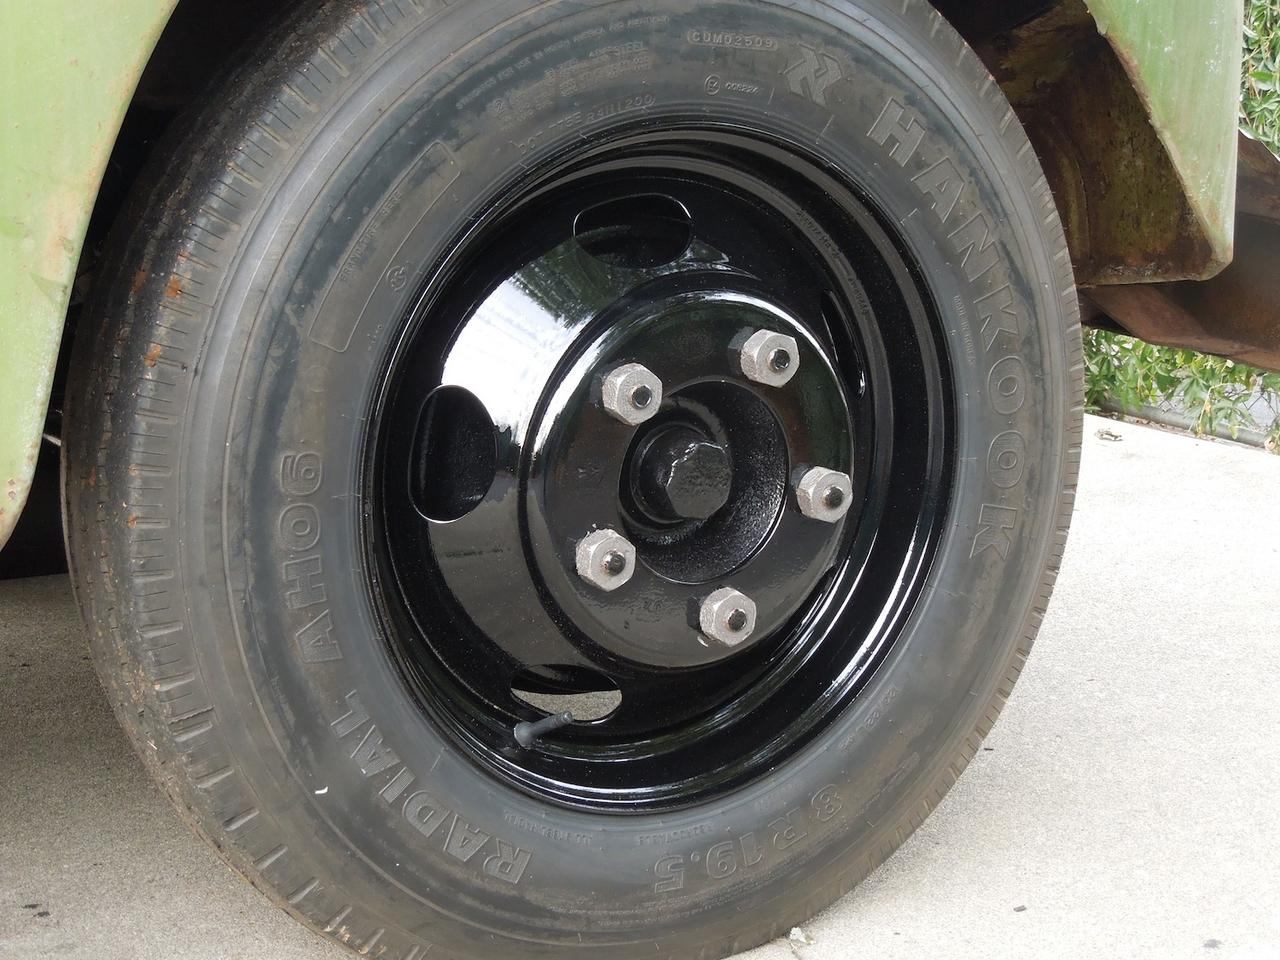
I have made a bit of progress on the old rugged truck, though. I started to strip the rims with a wire cup wheel a few weeks ago, and after 45 minutes I decided I was ill equipped for the task at hand. I removed 80% of the layers of paint, but I discovered that I could not get into the tight nooks and crannies of the rims. I talked with a guy that works for one of my best customers and he told me to drop them off and their media blast guy would have them stripped in no time. I left them six tubeless rims with mounted tires and a couple of weeks went by. I figured that with their schedule they had to work them in, so I didn't ask about them. Then the guy called Wednesday to let me know they needed me in the shop to work on Thursday and that I should drive the pickup to get the rims. I arrived bright and early and they rolled out 6 brilliantly black base/clear coated Budd truck rims with tires on them. These guys are just the absolute best! I will be making a trip to the adult beverage store and possibly Franklin County to get a few things to compensate them!
After exams are over I'll bleed the new brakes and get these babys mounted. I hope to experience Stanley with brakes pretty soon!
#33
11-08-2013, 07:08 PM
Senior User
Join Date: Feb 2011
Location: Crossville, Tennessee
Posts: 291
Likes: 0
Received 0 Likes
on
0 Posts
#37
11-30-2013, 03:26 PM
I was fortunate to have some down time yesterday and today to spend with the old truck. I replaced all the brake hydraulics a while back but had not yet had an opportunity to add fluid and bleed them. On the first attempt I could not get a pedal built up- it went to the floor each stroke. I adjusted the master cylinder push rod to increase the length a bit and then I got a decent pedal. It does not feel too spongy, but it takes the first half or better of pedal travel to reach the point where it starts to brake. I'm not sure if this is quite right or not. I am also not sure exactly where/how the pushrod length should be determined. I didn't find it mentioned in the manual, but I could have overlooked it.
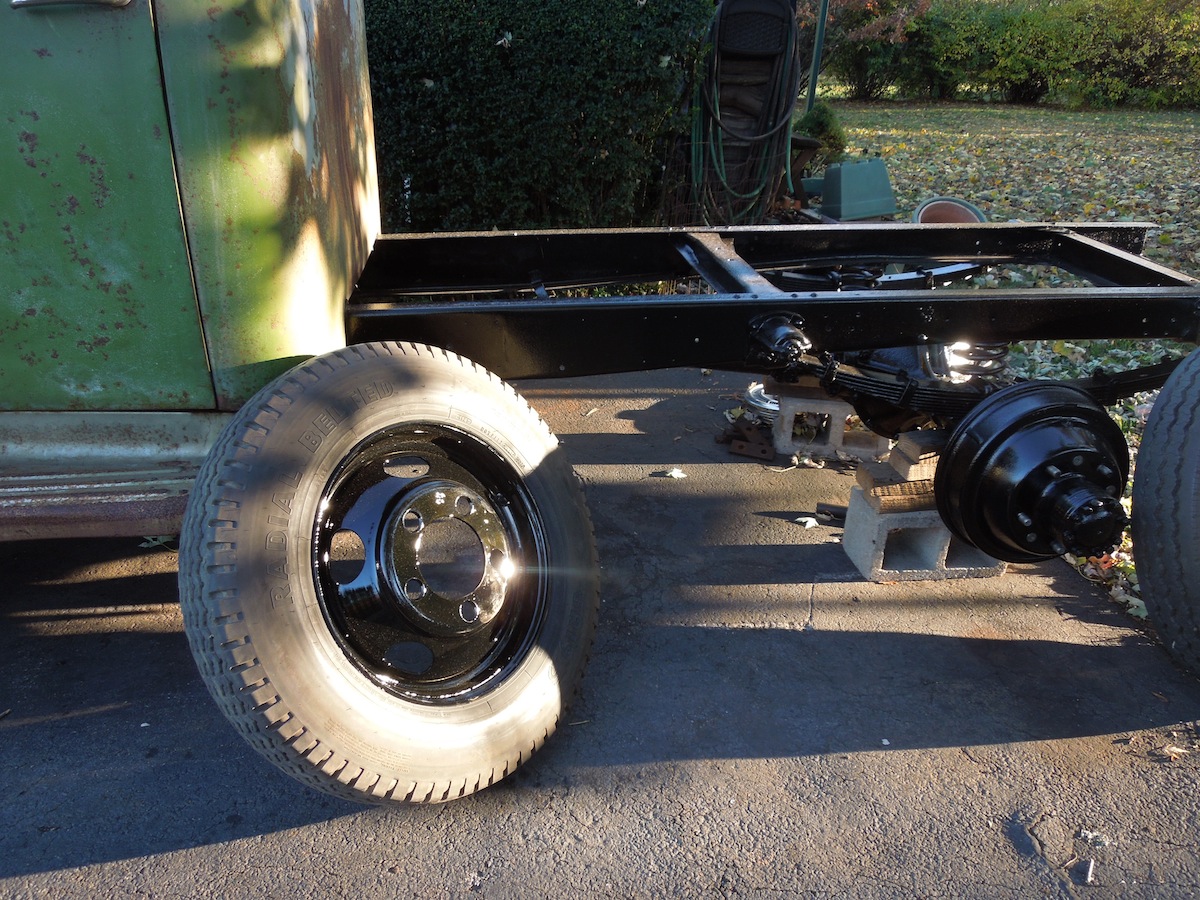
I also wrestled the rims and tires back on, and moved the truck around the back yard a bit. It seems to stop well, but I haven't gotten it up to any speed yet either. I replaced the inner and outer wheel nuts on the rear. For those of you that might need them, the part numbers at NAPA are:
RH inner: WA-2000
LH inner: WA-2001
LH outer: WA-2010
RH outer: WA-2011
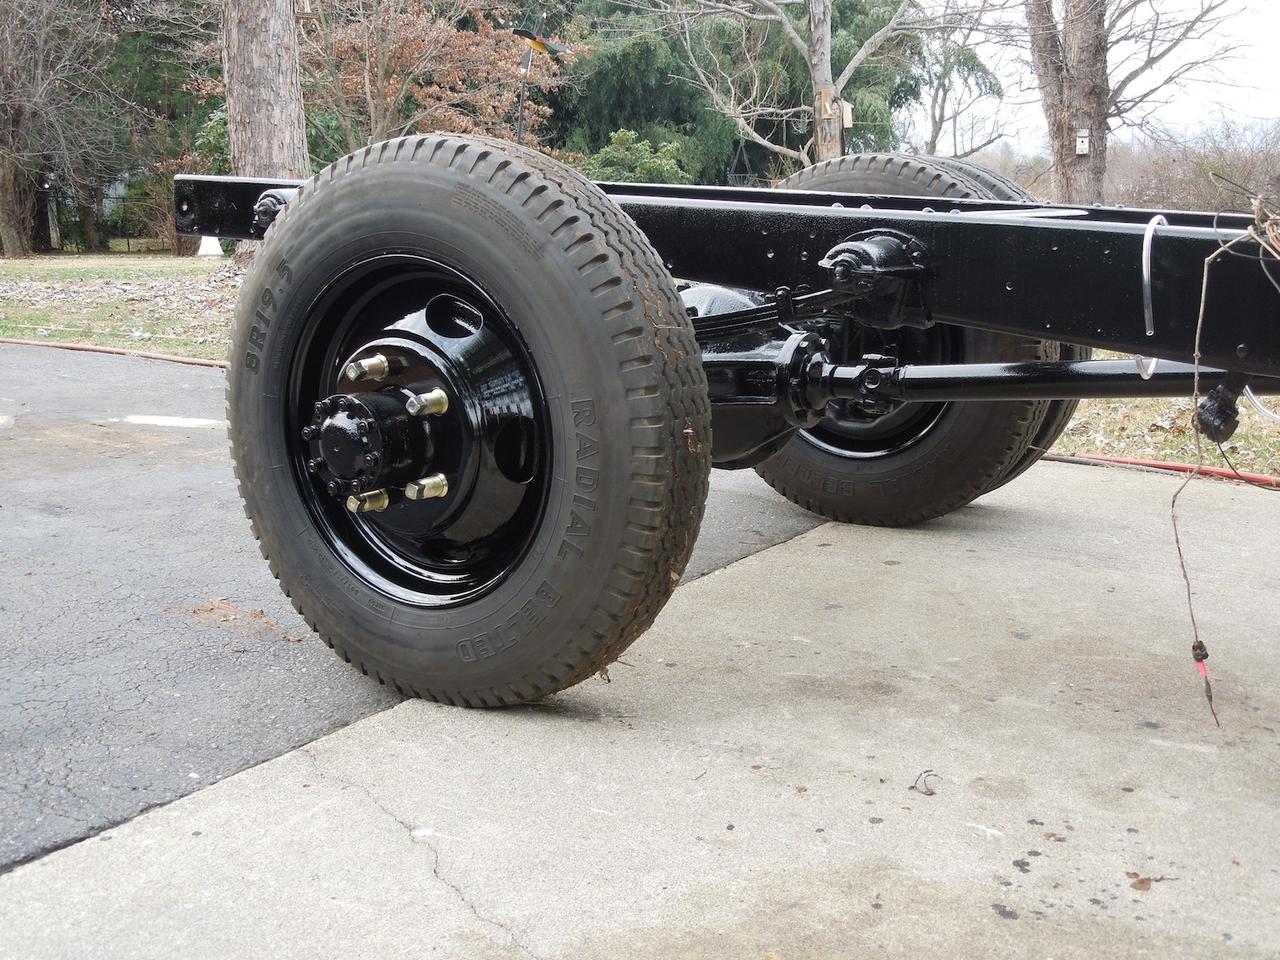


#41
01-24-2014, 10:43 AM
Hi Howard. Very nice thread! thanks for sharing this with the group. I also have an F4 and I'm about to make her road worthy. I already picked up a full set of Budd wheels from Stu and got them Powder coated! I will start a new thread with pics soon.
Can you tell me what black gloss paint product you used to paint the chassis, suspension and drums, etc. Did you brush or spray? it looks really nice in the pictures. Thanks!
Can you tell me what black gloss paint product you used to paint the chassis, suspension and drums, etc. Did you brush or spray? it looks really nice in the pictures. Thanks!
#42
01-24-2014, 11:49 AM
Hey Howard,
Fantastic! The challenge I always have is "project scope creep". So now that you have those beautiful new looking wheels on there - are you tempted to make the body match? What's your plan for the bed?
Personally I like the farm truck exterior - I wonder if there is a way to just put a protective finish on the outside to keep it looking just like that?
Looking great over there in Roanoke.
Ben in Austin
1950 F1
#43
01-24-2014, 08:07 PM
Guys, thanks a bunch for the great feedback. I keep looking at the old truck out there in the cold (15 degrees!) and can't wait to get back to it!
Bobby: The gloss black on the frame and components is single stage NAPA acrylic enamel. The paint on the rims is base/clear PPG- I don't know the brand because I was fortunate enough to know some real good guys that were way to kind!
Ben: I know exactly what you're referring to when you say "project creep"! I am wondering how I'm going to cover some of the interior items without transitioning through to the outside, completely wiping away the farm truck look. I like it too, and for the short term I would like to slightly scuff and spray the cab with a satin clear. I want to replace the bed too, first with flatbed with provisions for stakes, and then the stakes.
For Christmas I mocked up a temporary bed just to use to string Christmas lights. It was a decoration for a couple of weeks!
#44
01-25-2014, 10:08 AM

Lead Driver
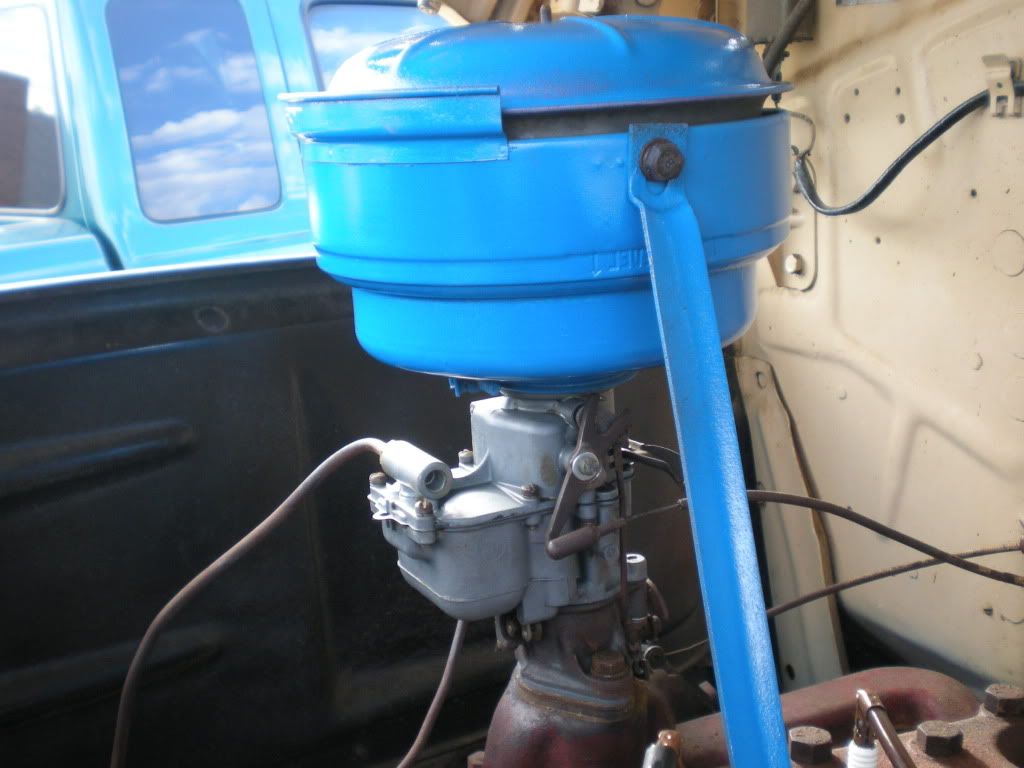
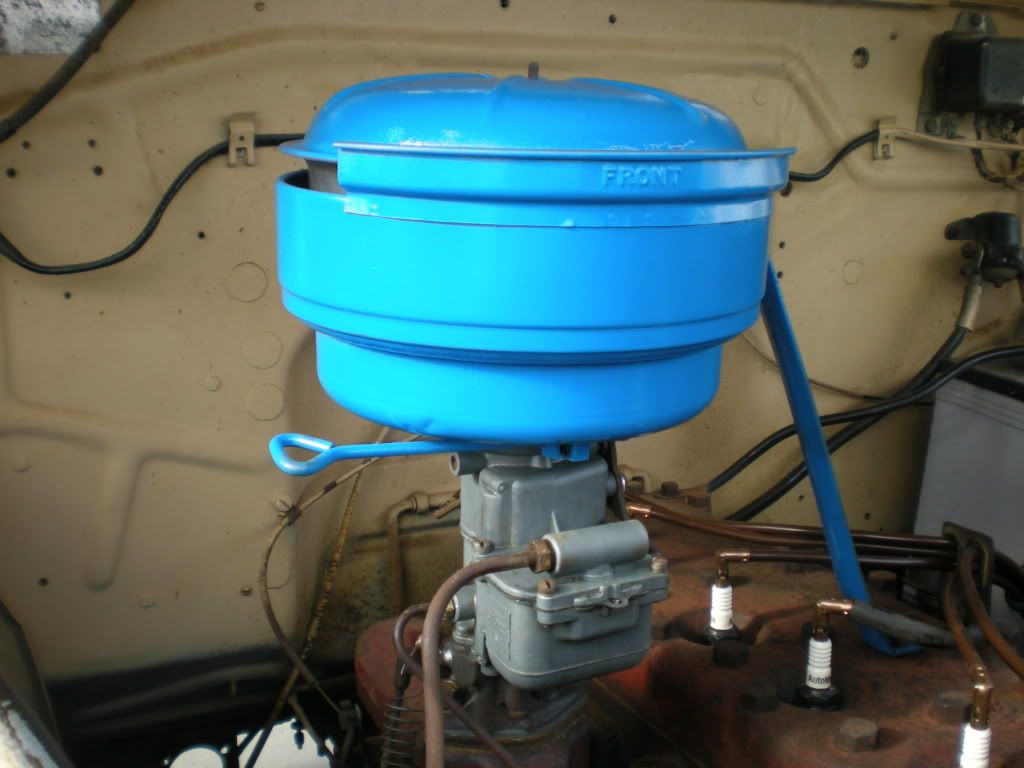
I have been noticing the air cleaners on other trucks here at FTE, and mine does not seem to be as tall as some. Does anyone know if this is a stock air cleaner? I also noticed that the bracket that supported the air cleaner is gone, but I am not sure where it would attache to the cleaner. Thoughts?
Attachment 82006
Attachment 82006
Well, I'm certainly no expert, but I can show you how my air cleaner looks with the bracket mounted. I don't think it is supposed to be blue, but I had that paint handy...
#45
03-30-2014, 09:09 AM
That's a good looking air cleaner Joe! I see that I will need to source a replacement brace for mine since it was missing upon arrival.
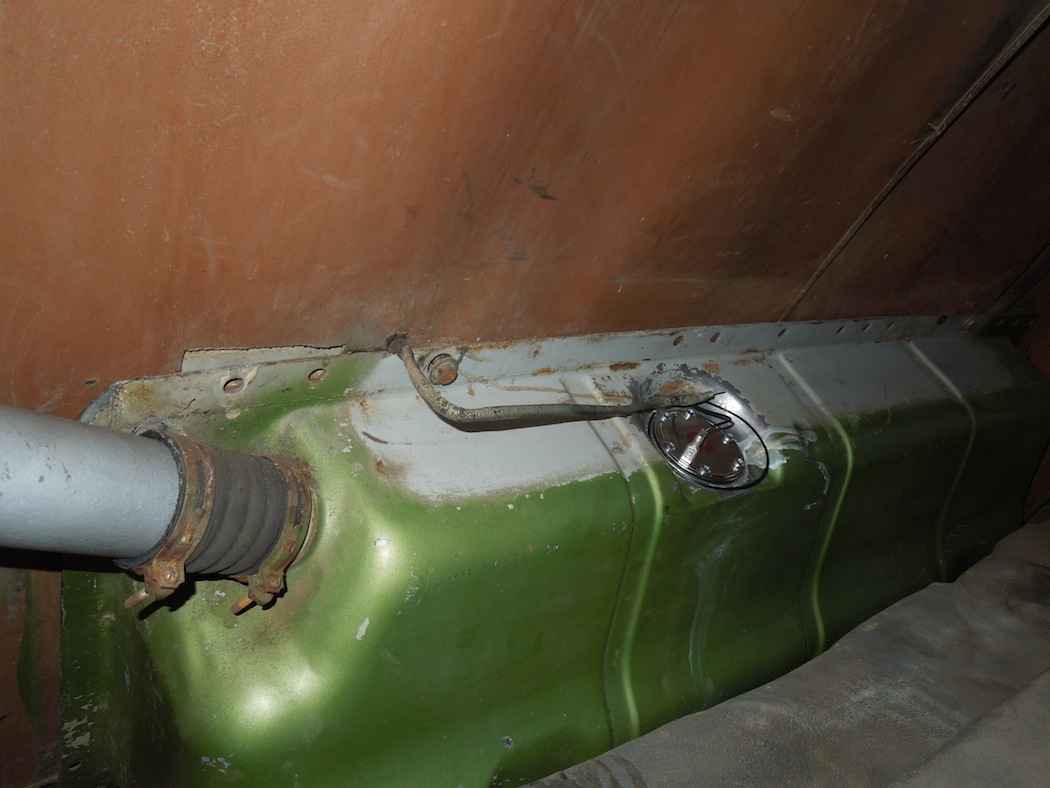
I have been able to make some small but necessary progress through the winter on old Stanley. I removed the fuel tank a couple of months ago and washed it out more times than I can count with dish detergent and degreaser. It had some crud inside that looked like dirt, but it eventually rinsed clean. I used the kit from Macs to etch and seal the inside of the tank afterward. I installed a new sending unit and seal, replaced the body seal for the fill tube, and reinstalled the tank. I replaced the fuel line from the tank to the pump with a new one also. For the first time in decades, this truck is being fed from an on board tank that's not a gas can strapped to the bumper!
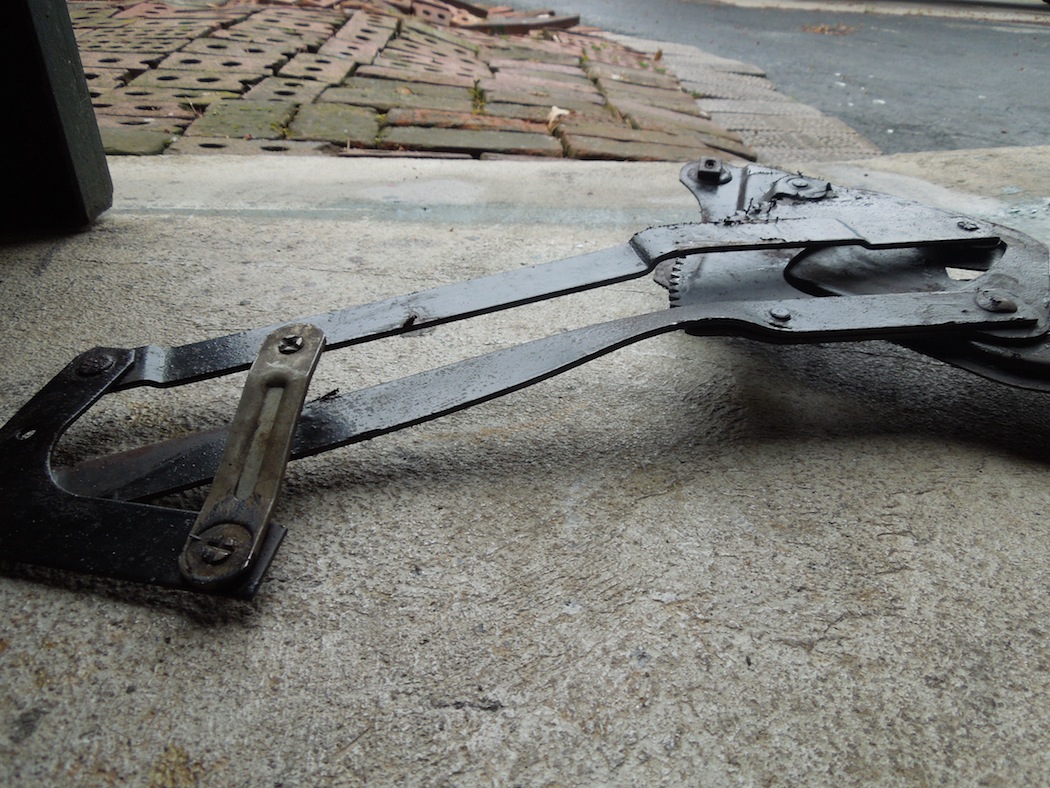
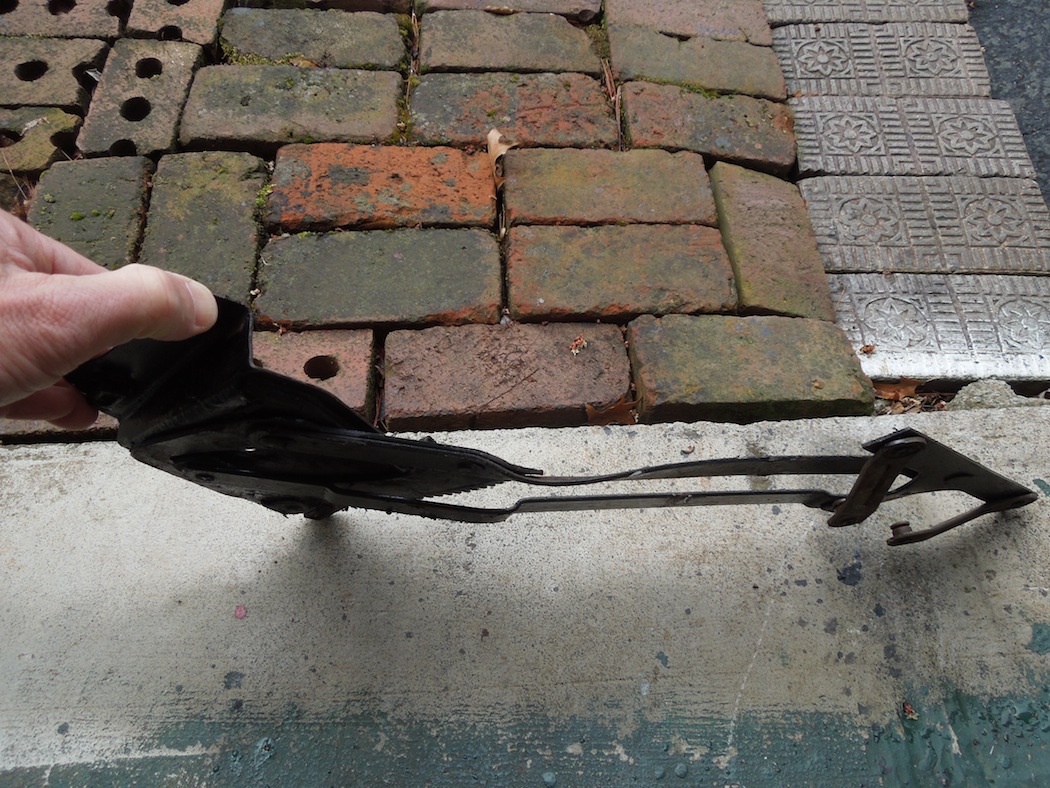
My next adventure was removing the innards from the r/h door to install the new glass and seals. Those that have been down this road know why I refer to this as an adventure. I had an extra surprise when I got the window regulator out and realized it was twisted and mangled a bit. I tried to straighten it and thought I had everything ok until it got in a bind during install and the linkage arms bent again. I did not initially remove the door latch due to some issues removing the door lock set screw, but Friday evening (before winter returned-again) I was able to remove it with no problem (on the advice of members here- THANKS!). Upon removing the door latch I realized its linkage arm was also bent and had been binding on the twisted window regulator linkage arms.
I believe I can straighten the latch linkage successfully, but I have sourced a replacement window regulator.
I have also replaced the channel and anti-rattle strips. What a pita these can be. I thought the vent window seals would have been more trouble, but they went very smoothly, although I have not yet set the vent glass back in yet. I have a question for those of you that have been through this before (and that might be still reading this long winded post): I see the division bar holds the window in the channel up front, but what keeps the window on tack toward the rear of the door? When I had this one assembled (prior to taking it apart again because of the bent linkages) the door glass seemed to go too far toward the back of the door when I rolled it all the way down, slipping out of the division bar channel and there didn't seem to be anything there to hold it? I'm using the kit from Macs that had the division bar, channel for around the window opening, vent window seals, etc. I just don't see what keeps the glass from tilting backward when it's rolled all the way down. I wonder if my regulator was just shot and allowed it to move too much?
I have been able to make some small but necessary progress through the winter on old Stanley. I removed the fuel tank a couple of months ago and washed it out more times than I can count with dish detergent and degreaser. It had some crud inside that looked like dirt, but it eventually rinsed clean. I used the kit from Macs to etch and seal the inside of the tank afterward. I installed a new sending unit and seal, replaced the body seal for the fill tube, and reinstalled the tank. I replaced the fuel line from the tank to the pump with a new one also. For the first time in decades, this truck is being fed from an on board tank that's not a gas can strapped to the bumper!
My next adventure was removing the innards from the r/h door to install the new glass and seals. Those that have been down this road know why I refer to this as an adventure. I had an extra surprise when I got the window regulator out and realized it was twisted and mangled a bit. I tried to straighten it and thought I had everything ok until it got in a bind during install and the linkage arms bent again. I did not initially remove the door latch due to some issues removing the door lock set screw, but Friday evening (before winter returned-again) I was able to remove it with no problem (on the advice of members here- THANKS!). Upon removing the door latch I realized its linkage arm was also bent and had been binding on the twisted window regulator linkage arms.
I believe I can straighten the latch linkage successfully, but I have sourced a replacement window regulator.
I have also replaced the channel and anti-rattle strips. What a pita these can be. I thought the vent window seals would have been more trouble, but they went very smoothly, although I have not yet set the vent glass back in yet. I have a question for those of you that have been through this before (and that might be still reading this long winded post): I see the division bar holds the window in the channel up front, but what keeps the window on tack toward the rear of the door? When I had this one assembled (prior to taking it apart again because of the bent linkages) the door glass seemed to go too far toward the back of the door when I rolled it all the way down, slipping out of the division bar channel and there didn't seem to be anything there to hold it? I'm using the kit from Macs that had the division bar, channel for around the window opening, vent window seals, etc. I just don't see what keeps the glass from tilting backward when it's rolled all the way down. I wonder if my regulator was just shot and allowed it to move too much?

