When you click on links to various merchants on this site and make a purchase, this can result in this site earning a commission. Affiliate programs and affiliations include, but are not limited to, the eBay Partner Network.
Yeah, theirs really no way good way to fix dents up near the bed rails.
Yea, I'm going to to try to pull them out as much as I can and just throw some bed rail caps on it.
Originally Posted by krooser
Done the same kinda project several times� nice job.
Thanks
Originally Posted by damarble
Cool build, you seem to change your mind on body parts as much as I did.
I got to thinking about that the other day and realized this build kinda ballooned out of control. The main reason for that though was finding out certain body parts I had planned to use were more rotted then I thought or more work to repair then I was willing to deal with.
A lot of "Might as well while I'm this far into it..." too
That's how it goes. I went through 3 cabs before I found one I was happy with. Deals on better stuff always come up.
Yup, that's exactly how I ended up including a SAS in the rebuild, too good of a deal to pass up.
As for today's plans; I managed to get a fair bit of what I wanted done today.
Finished up drilling out the rivets in the donor frame with a stepper bit, air chiseled the heads off and pulled the 2 cross members, 2 front rear hangers and removed the 2 shackles.
The donor truck after all that:
The rear diff, leaf springs and the cab forward is my brother's for his 7.3 IDIT build. That's gonna be a sick truck when it's done
I didn't get to finish the diffs or get to cleaning up the pieces from the donor truck as I killed off my 2nd knotted wire wheel brush and the store didn't have any in when I went there this morning. I did get some done to the diffs though:
My frame at the end of today awaiting paint on Tuesday:
Sadly I have to work tomorrow but that allows me to hit up the parts stores near by at lunch and pick up some last minute items (like a respirator!) for Tuesday. Getting excited to start putting stuff back together!
Frame is done. Well almost, still have to flip it and get a few spots from underneath. That will be this weekend.
Used a full quart of Chassis Saver for 2 coats and 4 cans of gloss black spray paint for 2 coats of top coat.
Came out pretty good I think:
Went on really nice with this cheapo gun ($15 on sale):
This weekend I'm hoping to get the other 2 cross members, diffs, drive shafts, etc cleaning up and painted.
Not sure if I should hit the gas tanks with Chassis Saver as it's pretty smooth metal. Thoughts?
I can't speak for Chassis Saver, but I once tried coating a brand new tank with bedliner. I scuffed it up and cleaned it really well. The bedline still just flakes off.
Thanks guys, I'll try some etching primer first, then Chassis Saver followed by a top coat.
A: Chassis Saver� has been formulated for application directly to clean sandblasted steel or right over tightly adhering rust and scale. Only if your surface to be painted is completely smooth will you need a primer. If you can not sandblast or mechanically abrade the surface before applying Chassis Saver�, a primer such as our 300 Series Universal Automotive Primer or 1900 Series MAGNAPOXY� Epoxy Primer should be used. Self etching primer from commercially available sources will also provide adhesion to smooth metal.
Thanks Krooser. Went down to the parts store at lunch today and talked to their paint guy about it and he said it should be fine scuffing the tanks and spraying it.
Picked up 2 more quarts so hopefully that should be enough to finish off the remaining drive train and do the underside of the cab and box.
Tomorrow's game plan is to finish prepping all the remaining drive train and misc frame pieces for paint and hopefully spray them Sunday. Would also like to start tearing into the diffs and see what they need to get them into shape.
Got about half of the wire wheeled done today before the sky opened up and poured and the power went out so that hampered progress a bit.
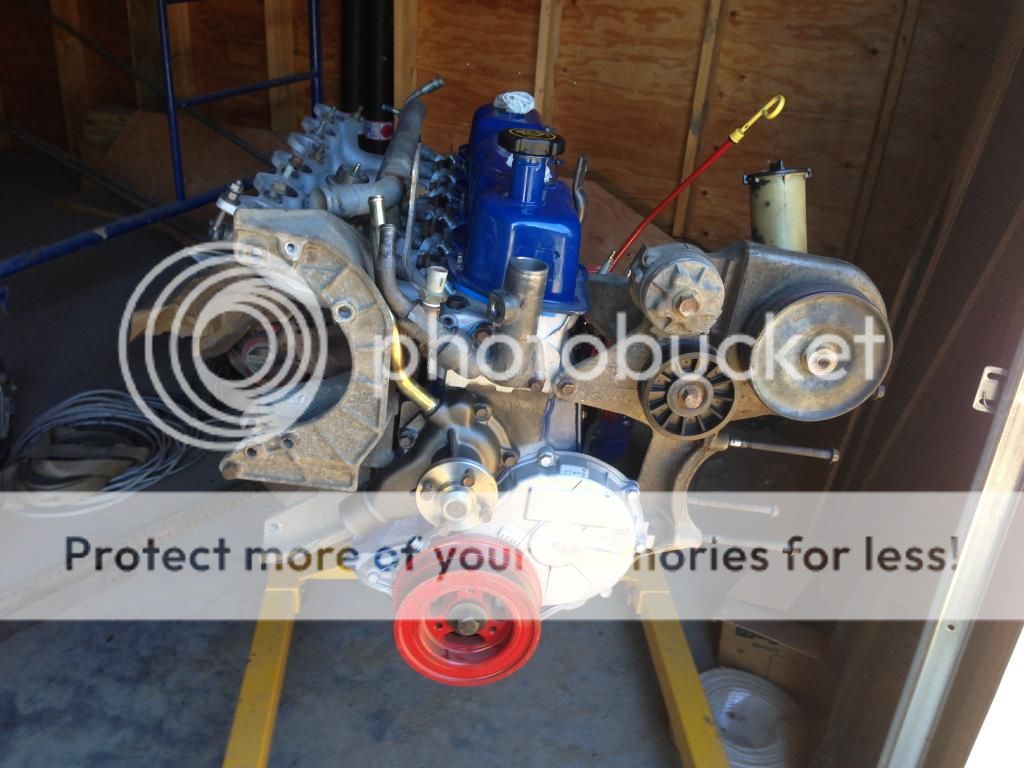
Switched focus onto the engine for a bit and started putting piece back on.
Also compared some items that I got that will be added on and tried to work out any kinks.
I'm adding a A.I.R. pump delete pulley, A/C and 3G alt. So far the pulley and alt look to be an easy swap. The A/C compressor pump I got in the A/C kit from Rock Auto doesn't seem to want to mount without some modification to the compressor. I have to remove 2
alignment dowels and enlarge the mounting holes it seems. Not sure if it's the wrong pump or I'm missing something in the mounting
My brother also pointed out the 460 donor truck has an engine oil cooler it in. So contemplating plumbing that in as well.
Tomorrow's game plan is to bring out the engine factory manual and get everything torqued down on the engine and continued on wire wheeling the remaining frame pieces. Hopefully next weekend will be a bit nicer for painting.
Didn't get much done to the engine today but I did get the exhaust/intake manifolds torqued down and fitted the 3G alt
Instead my bro brought out his sandblast cabinet, and while he tore into stripping the engine bay on the donor truck, I started blasting all the brackets and hangers.
Gonna try to sneak out there this week sometime and try to finish the rest so I can finish painting this coming weekend.
You've been pretty busy while I have been gone I see.
Builds tend to snowball no matter what you are working on.
I wanted to do a quick paint on my old oldsmobile and 6 months later I just about have it finished, just need to clean the interior again and put the floor mats in.
I have a '79 trans am that scares me every time I look at it - I know it will be a huge project already, and if a quick paint ends up taking 6 months....
You shouldn't need a air pump delete pully, your belt will make better contact with the alternator pully without it.
AC compressor should bolt right up, or at least mine did. I got a reman from Napa which blew out the front seal in less than 2 weeks, so I paid the difference and got a new one the second time. Knock on wood, its still working. Both of them bolted right up.
Edit: Forgot to mention, whichever cab you use, if I were you I would get the large reinforcement plate for the firewall and put that in while you have the dash and etc out. Way way easier than doing it with all that stuff in there. I'd also buy the plate premade (I think one of the members here sells them for like $125). I made mine and put it in with the truck together and it was not fun. Knowing what I know now I would gladly pay the $125.
Good job, keep up the good work.
Thanks bdelmar. The A/C compressor was from this kit from Rock Auto. Kind of a pain to return it if it is the wrong one but it seems like the holes are too small for the bolts that are the right size for the bracket on my engine. When I compared the '91 351W truck's compressor, it uses thinner bolts then my bracket needs. Only thing I can think of is ream the holes in the compressor larger or helicoil the bracket to the smaller size.
As for the cab, I am using the original. It's not cracked yet from the clutch but I do have the smaller reinforcement plate from another truck that I'll be putting in.
Hoping to have a rolling chassis by the middle of July so I can get started on the body work
I had a smaller plate, but I think it came off an older truck - 86 - I found while poking around in the upullit. It didn't seem like it was large enough to solve my issue though if I remember correctly.
My firewall never did crack. The glue holding the plate the master bolts to just failed.
The smaller plate I had just reinforced the area right around the master itself, it didn't tie it into the firewall, but you may have a different style plate than I did.
I actually just tack welded where the glue separated and drove it like that for several years, but when I went through the truck (somewhat anyway) I decided I wanted something better than the tack welds.
I was having water intrusion issues and the plate itself was bent out a bit toward the top. So I ground the weld back out and when I put the reinforcement plate in it pulled it back into place, then I sanded, primered, seam sealed and painted.
Not sure if it made a difference or not since I sealed several other places at around the same time, but I don't seem to be getting water inside the cab anymore.
Is your compressor a retrofit for 134a or just a replacement type?
Mine is just the replacement type. It works ok, but seems like it should cool better than it does. Probably has something to do with the rust holes in the floor and having the headliner, carpet, and trim out of the interior though.
It does fine going down the road for the most part, but when sitting it doesn't keep up that well. I did upgrade to a 7 blade fan, and that helped a bit.
I'm thinking about adding an electric pusher fan on the condenser though. Mostly for times when the truck sits for extended periods - like when the Mrs runs into the store 'quick.' lol.
Anyway, if its the replacement type it seems odd it would have smaller bolt holes. Is the mounting for the lines the same? They do make several similar compressors with different line mountings. The electrical plug for the clutch the same? If those match up it should work.
My preference would be to drill out the holes in the compressor if there is enough material it won't weaken it. Might cause an issue if you ever have to return it I suppose, though they probably wouldn't notice or care, but if you have to replace the compressor later down the road having different mounting bolts might be a pain.
I see you have the pipe to blow air on the injectors to keep them from having the vapor lock/fuel boil issue or whatever it is supposed to be for. Mine never did work, the fan for it was no good, and I have never had an issue with the truck starting, from heat anyway. So I removed mine and still have no issues with it. (even in FL)
If I remember correctly, they only used that system for a year or two and then did away with it.
I did however put the heat shield on the bottom of the intake runners, I notice you don't have one on yours, or at least not when you took the photo.
Not sure if that will make a difference or not as mine has always been on. It doesn't take up any room to speak of and takes care of itself so I put it back.
I'll try to snap a picture of the plate tomorrow night as I'm going back out to the In-Law's after work to hopefully finish all the sandblasting.
If I recall they had 2 different size plates based on how far along the crack was in your firewall. Since my grandfather's cab never cracked from the clutch flex I was just gonna put the smaller one I found in just to reinforce it so it doesn't crack down the road.
The A/C compressor is the replacement type. I'm just gonna bring it to work and use the drill press to ream the holes to the right size.
The shield for the intake runner is back on in the latest picture, just can't see it behind the alt bracket.
I'm having an issue trying to track down what I believe is the "crankcase breather", can't seem to get the parts store to find the right one and of course I left mine out at the In-Law's. I found this picture of it but it's on an older 300 i6.

 06-29-2014, 09:26 AM