01 Expedition Kenwood DDX512 Double Din Install
#1
 09-19-2008, 07:08 PM


Join Date: Jan 2004
Location: Tucson, AZ
Posts: 31
Likes: 0
Received 0 Likes
on
0 Posts
01 Expedition Kenwood DDX512 Double Din Install
Just finished the initial install of a Kenwood DDX-512 Double Din DVD receiver in my 2001 Expedition Eddie Bauer with Mach Audio.
Here's what I bought:
Kenwood DDX-512 DVD Receiver
Bestkits BHA5700R Amp Intergration Wire Harness Plug
Kenwood KCA-BT200 Bluetooth Kit
The install went pretty smooth and I still need to work on the finished trim but I am really happy with the results and so are my kids.
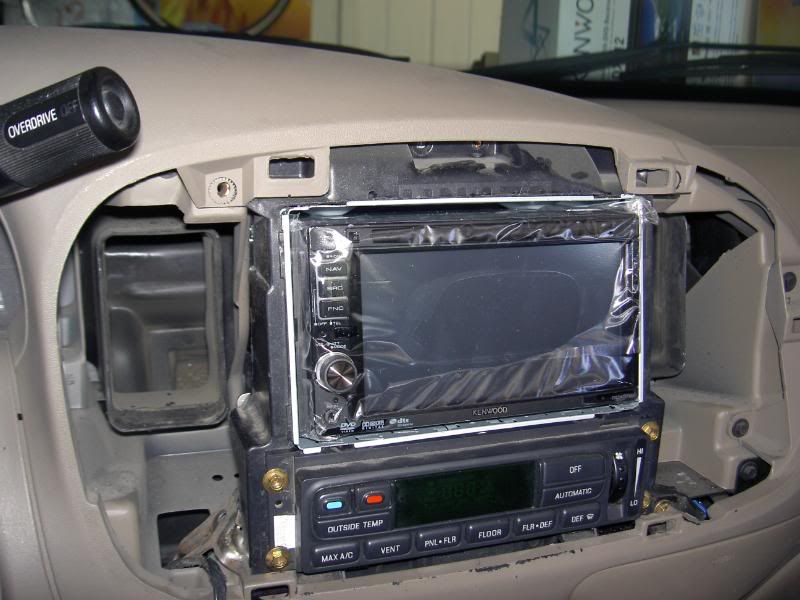
In order to put a double din receive into the opening I had to get busy with a Dremel and other instruments of destruction but you never see any of the cut pieces when you have the dash trim in place. Here's what I did and some pictures to show you how it looked along the way.
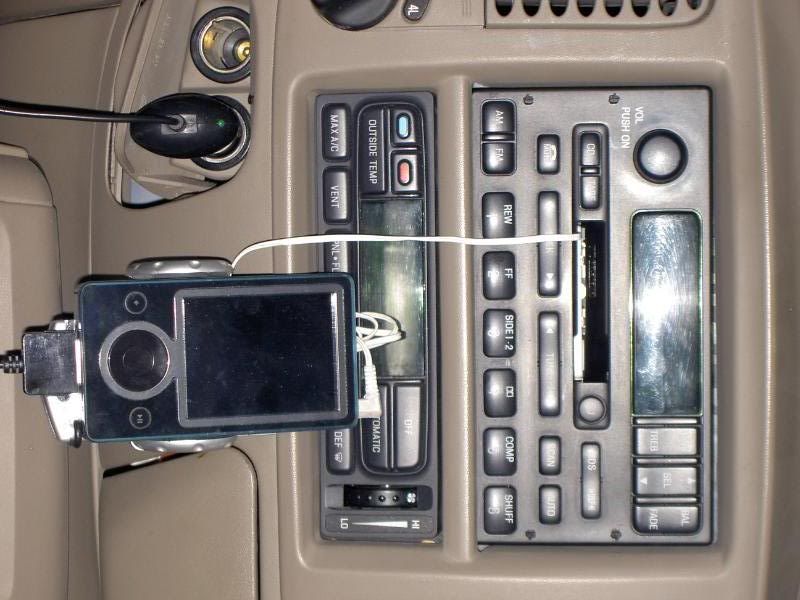
My original systems with 30GB Zune for extra tunes.
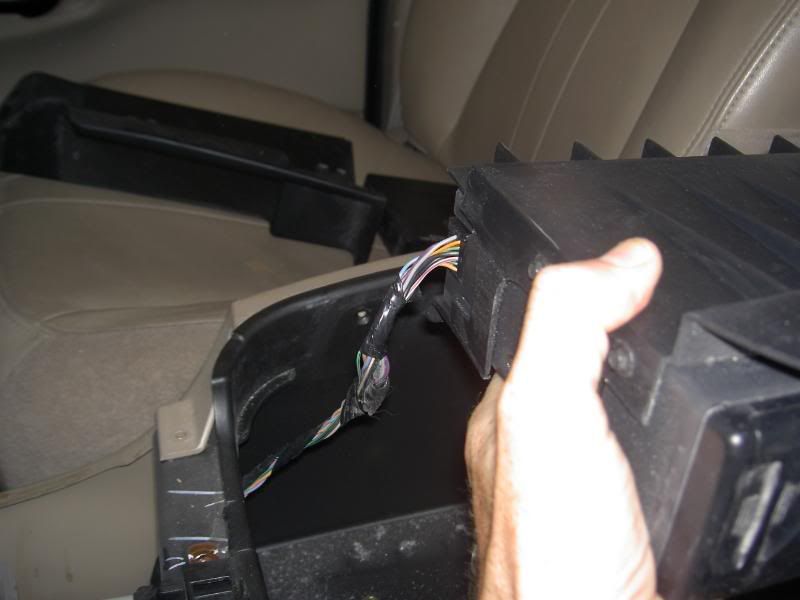
I pulled the CD changer as it will no longer work with my new system and I could use the extra storage space in the center console.
After you remove the 2 bottom screw, the plastice cover slides off and then it's just 2 more screws at the top to get the changer out.
Disconnect the wire and it's off to eBay.
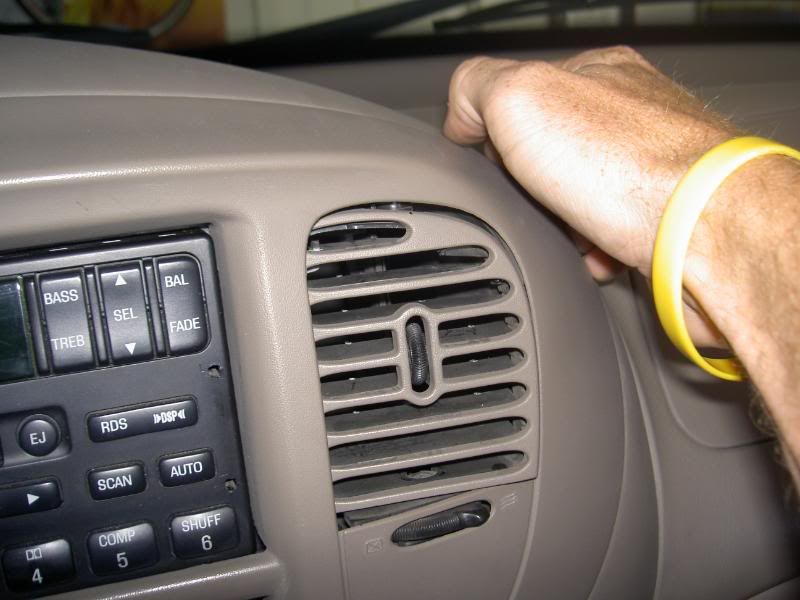
Next up, remove the dash trim. Just slip you fingers under the top right edge and pull.
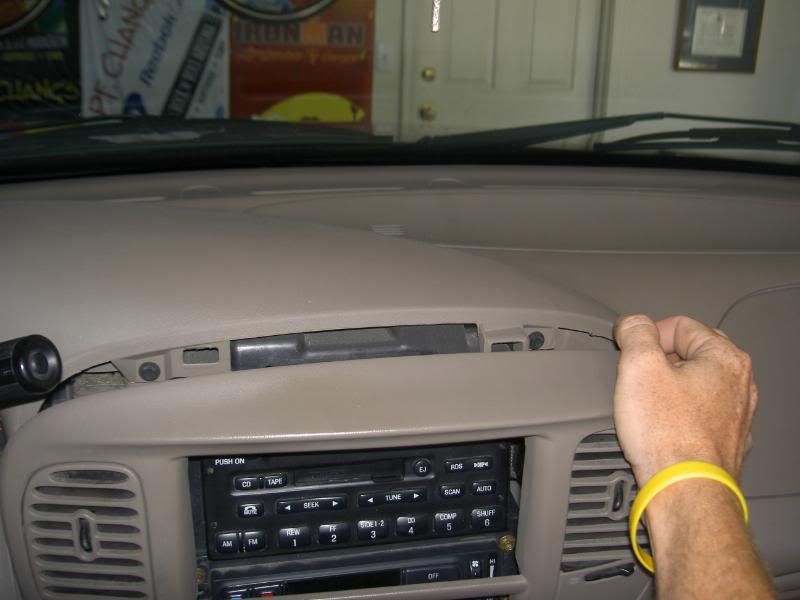
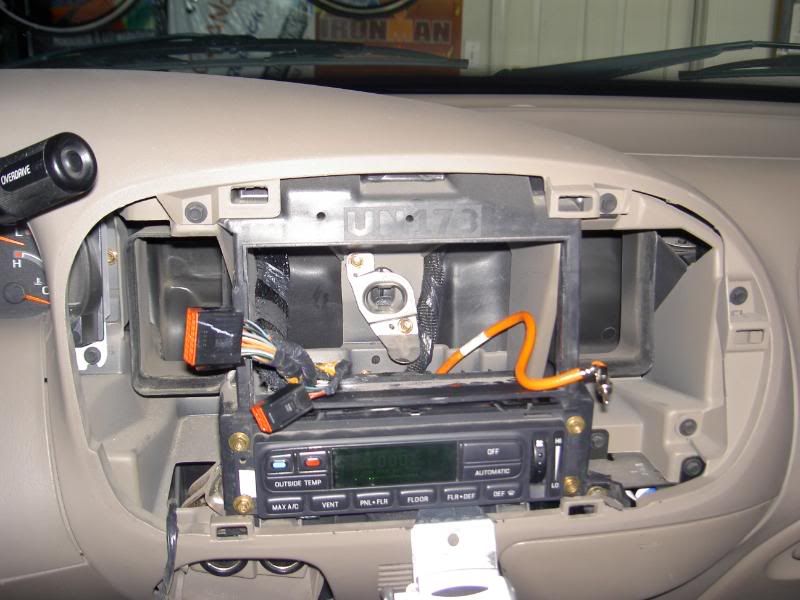
Now, you have the system exposed and ready.

Use the Ford stereo removal tools, or a bent coat hanger has worked for others to pull the original deck.
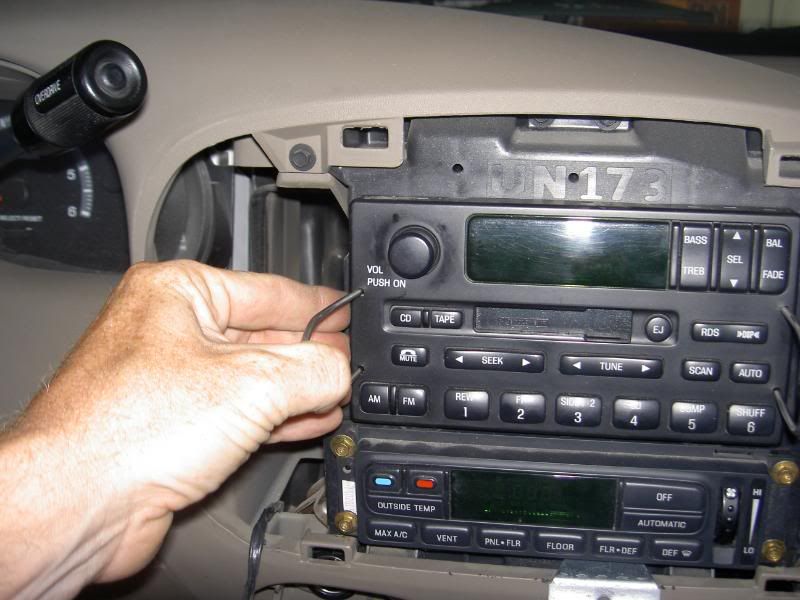
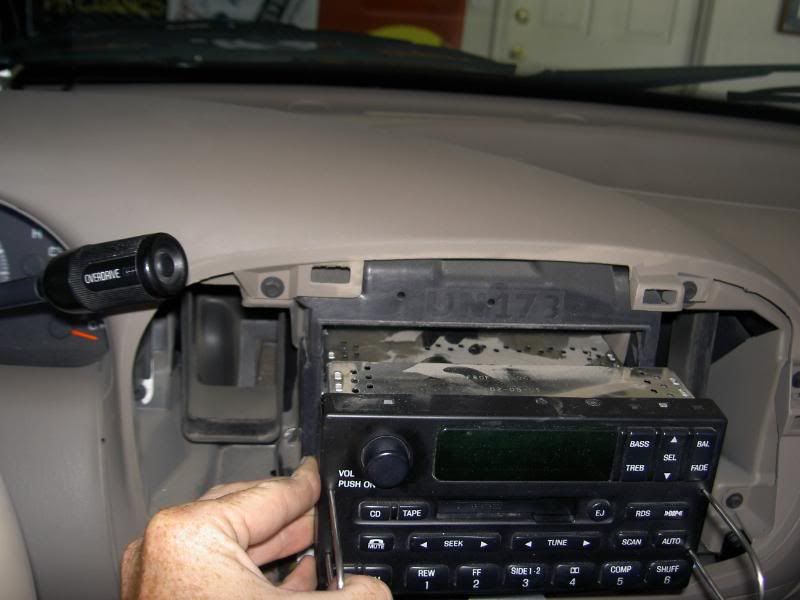
Disconnect the wires and the original deck is also off to eBay.
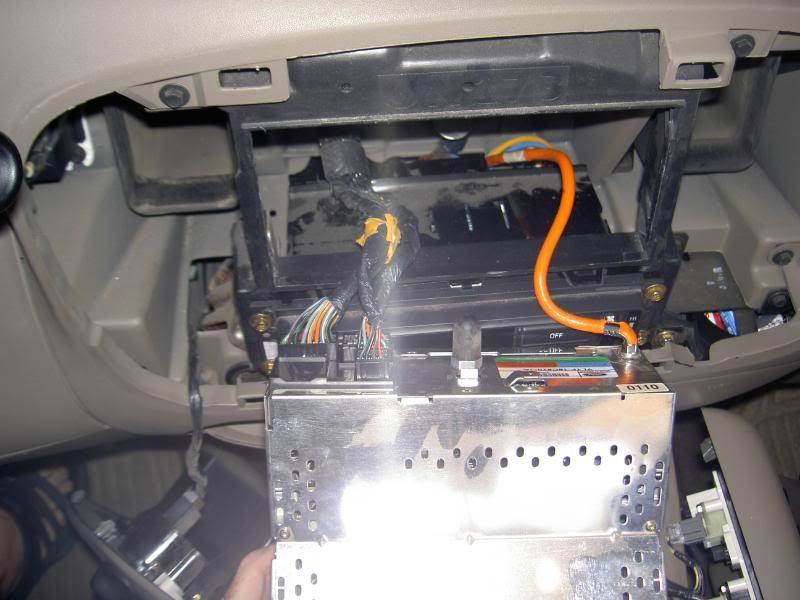
There is lots of room in here to work with.
You need to make the opening a little bit bigger, it's time for the Dremel and this might not be for the faint of heart.
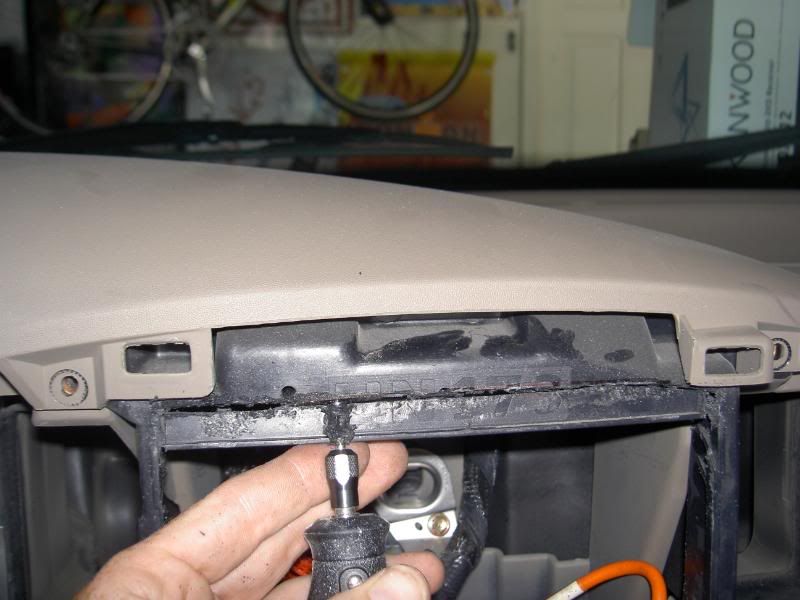
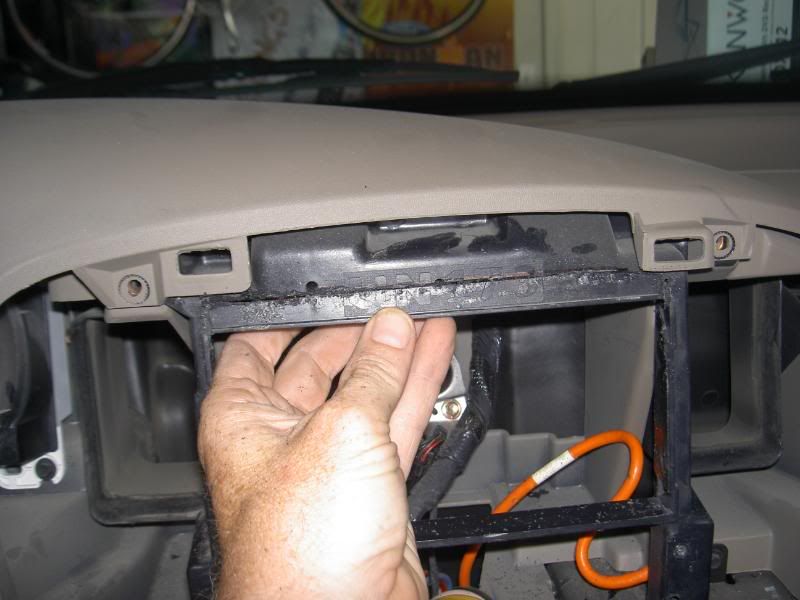
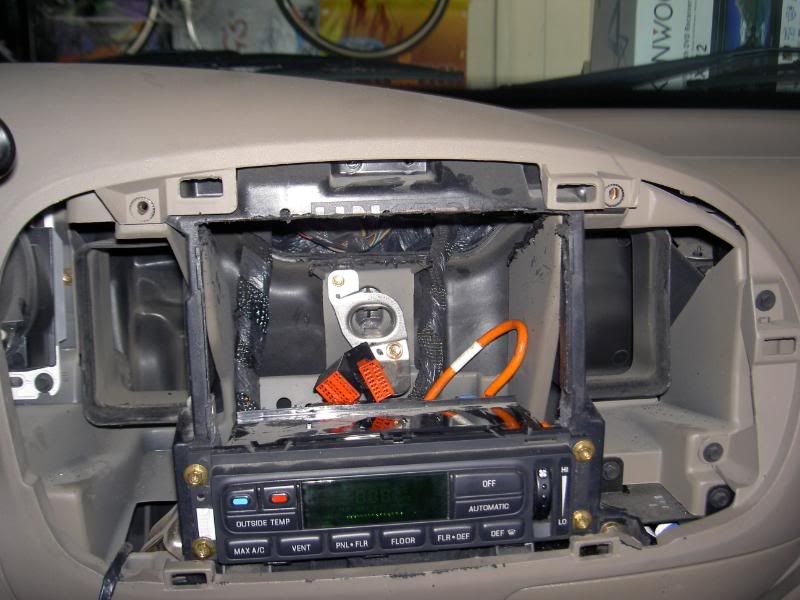
Remove the top piece that you cut.
Now you have to cut the bottom trim as well. For this, I just used a hacksaw blade.
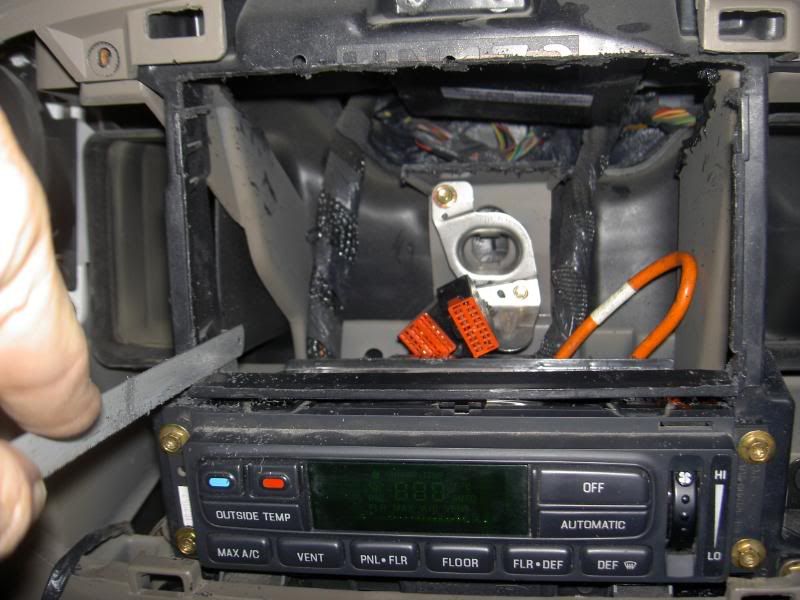
There is also a non structural, slanted piece of plastic that needs to be removed, sorry, I forgot to take a picture but if you got his far, you'll know what I'm talking about. I just used the Dremel to cut this out. You can see the rough cut miles on the right and in the back of the opening.
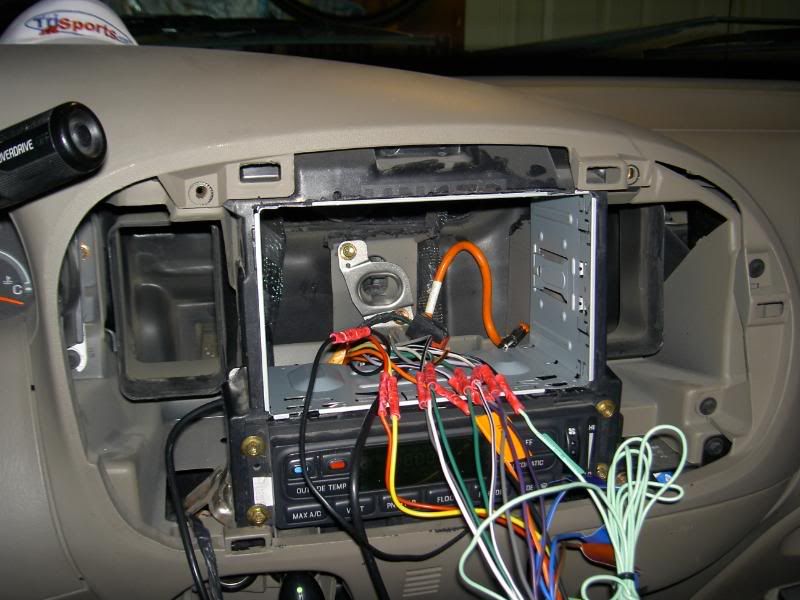
Next up, fit the new mounting sleeve.
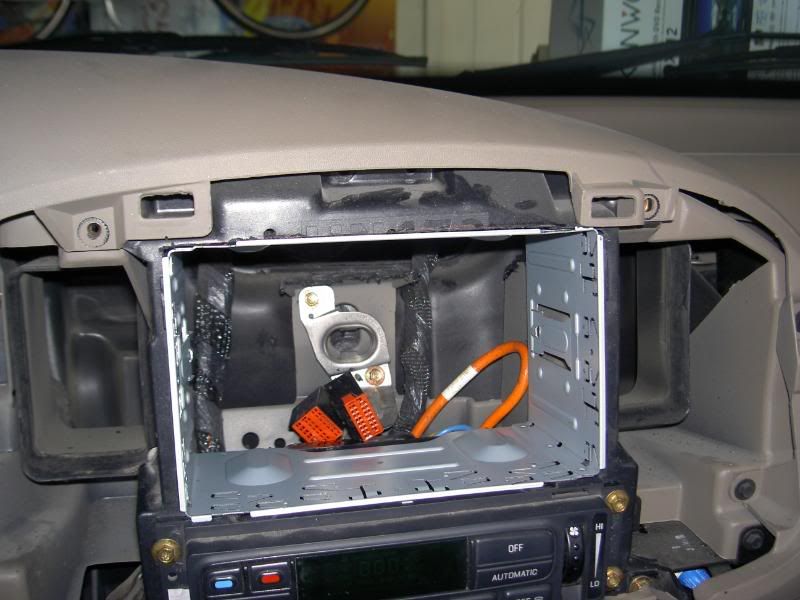
Checking for proper depth.
Now it's time for the wiring. Using the BestKits harness made everything a snap. The only thing I have not figured out yet is how to get the illumination to dim with the interior lights, but I'm working on that.
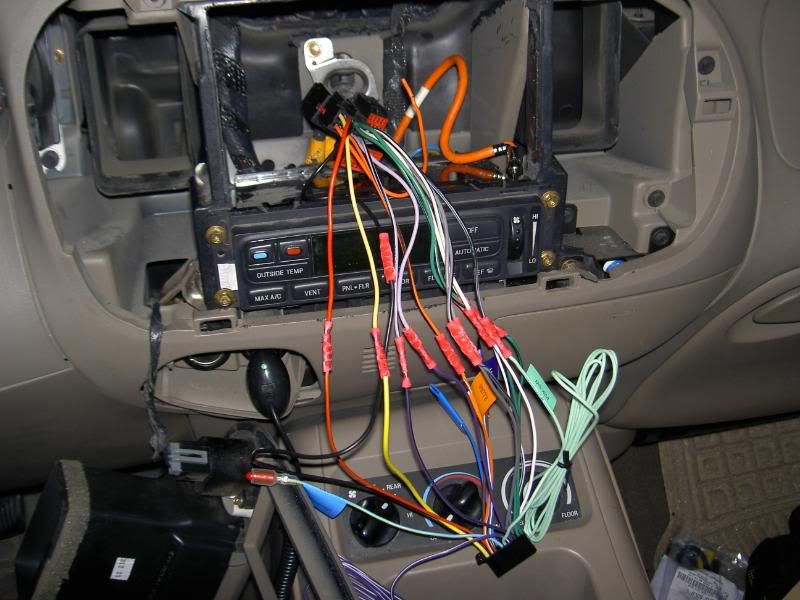
I ran the Parking Brake wire to a ground so that the kids can watch DVDs while I drive.
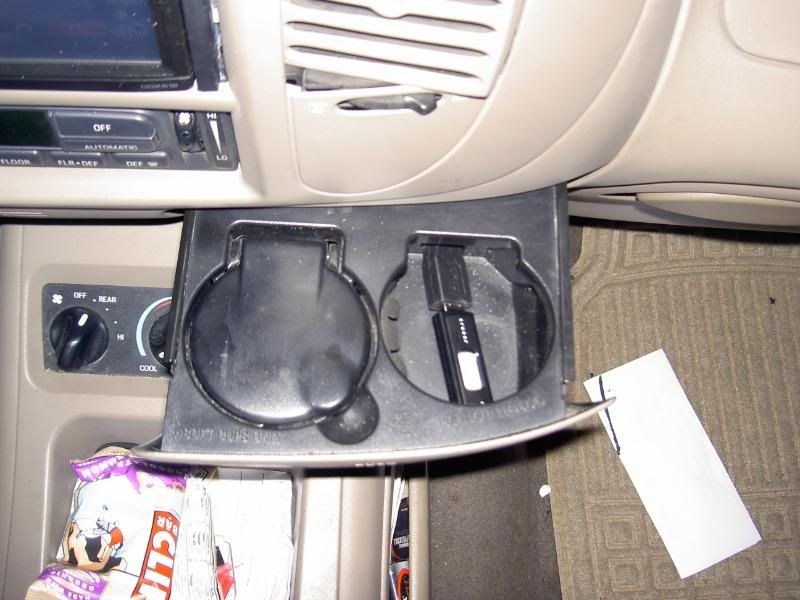
I put the bluetooth unit under the center console, there is a bunch of room under that thing. All the wires easily tuck back behind the unit. I ran the USB cord to a hole I made in the drink cup holder.
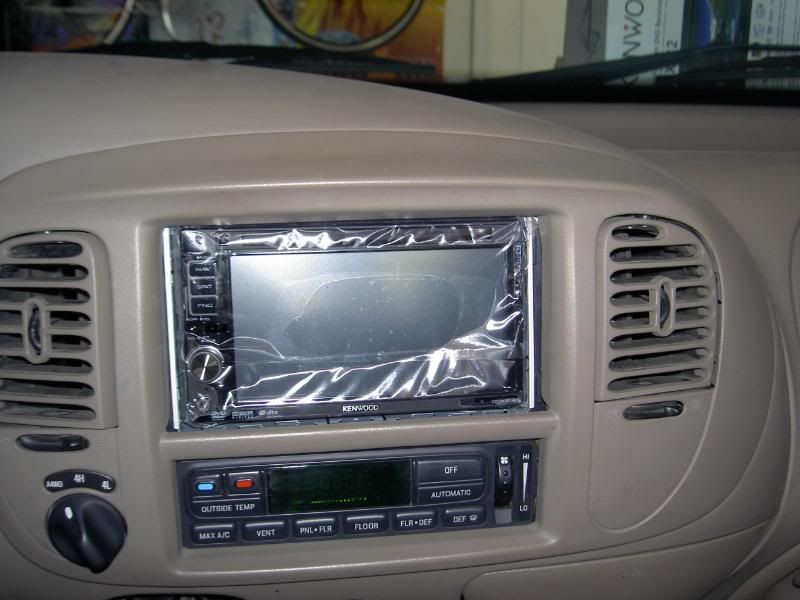
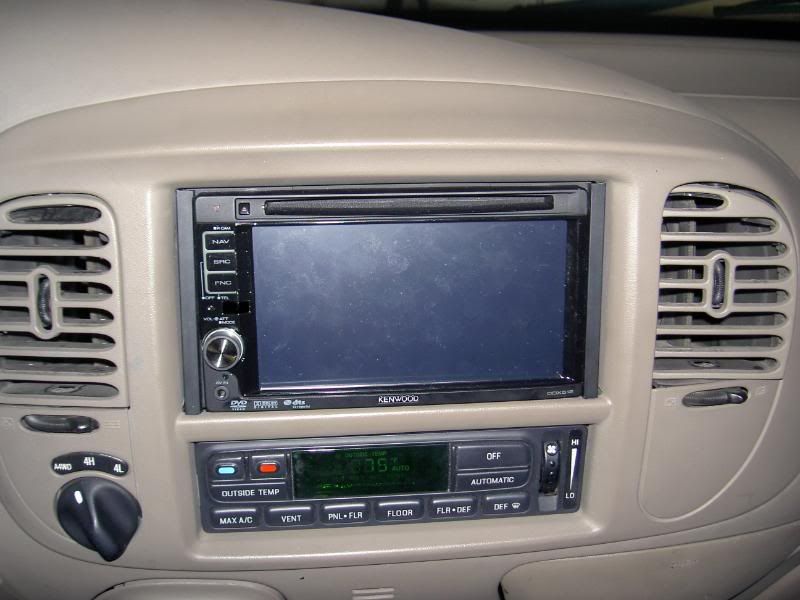
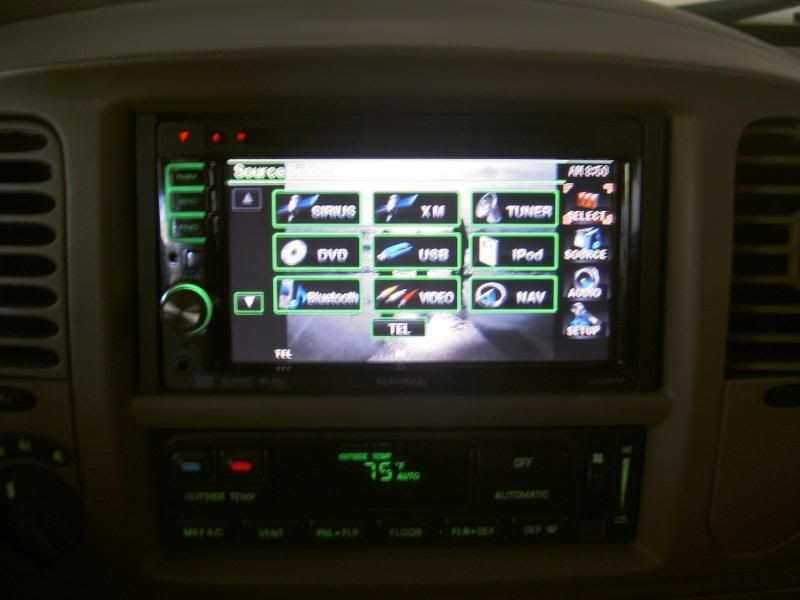
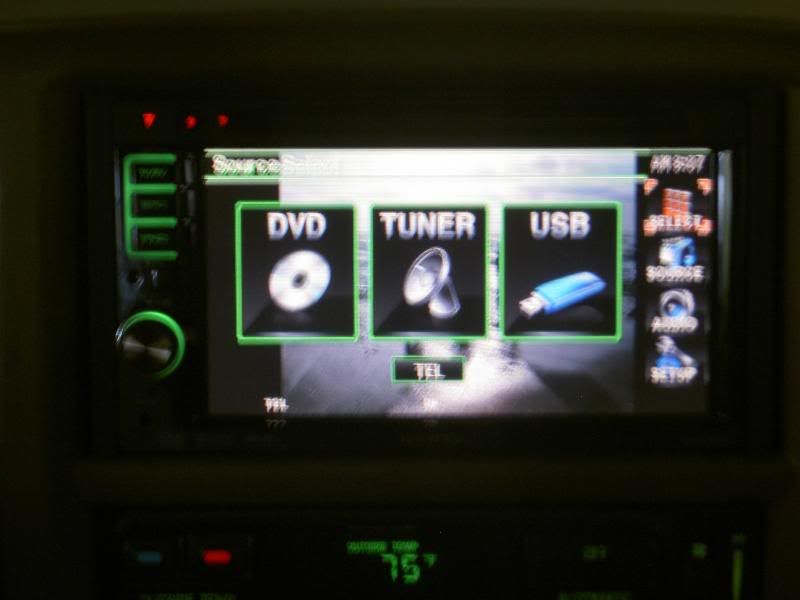
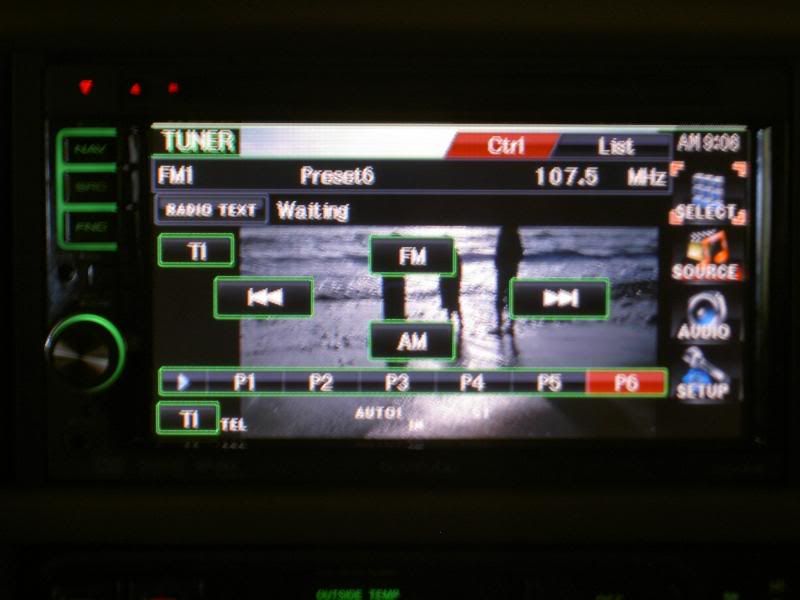
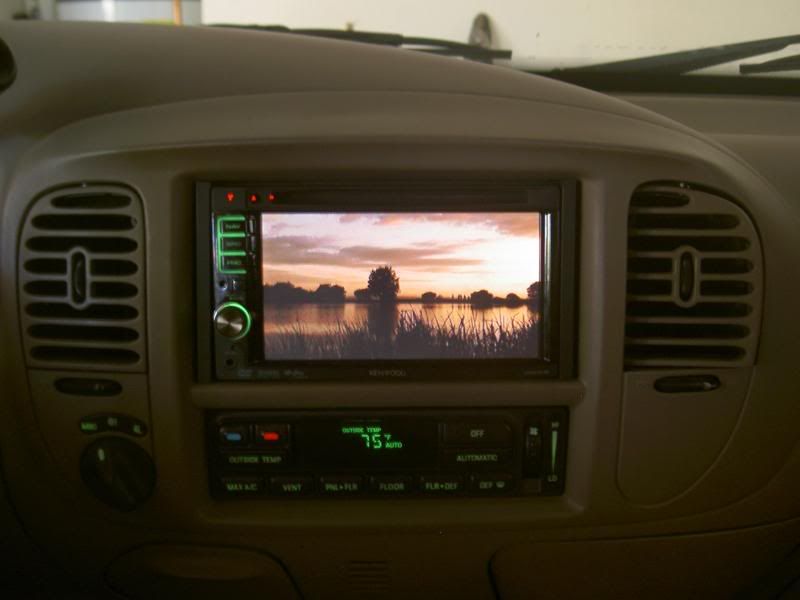
Reinstall the dash trim and it's time to test it out.
This is a mpeg video off of the USB thumb drive.
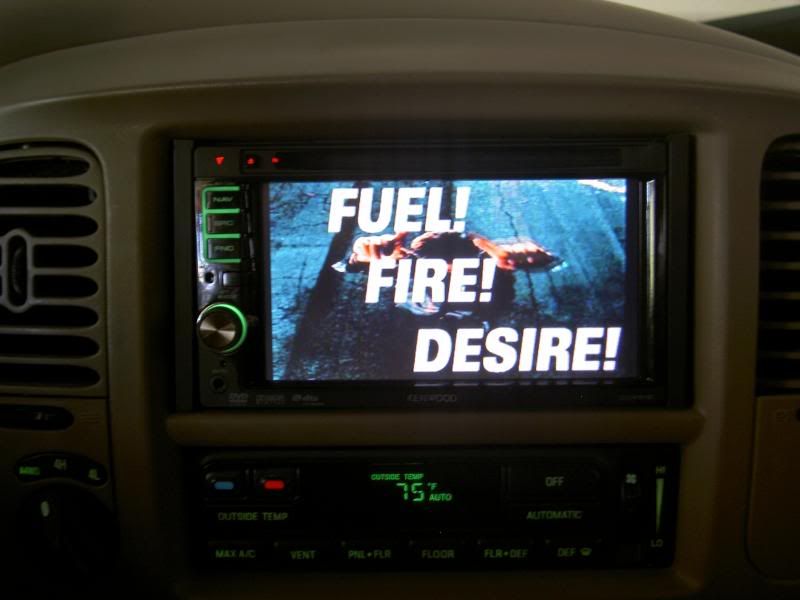
Here's a couple of shots from a DVD.

Like I said, I am really happy with the unit. There are a couple of little bugs, I am still working out but the bluetooth works great, my wife says it sounds better than my Motorola earpiece and it downloaded my contacts right off the bat.
The whole project took me a the better part of an afternoon and a 6 pack of Stone I.P.A. Well worth it!
If you have any questions, drop me a line and I'll try to answer as best as I can.
~mtuck
Here's what I bought:
Kenwood DDX-512 DVD Receiver
Bestkits BHA5700R Amp Intergration Wire Harness Plug
Kenwood KCA-BT200 Bluetooth Kit
The install went pretty smooth and I still need to work on the finished trim but I am really happy with the results and so are my kids.
In order to put a double din receive into the opening I had to get busy with a Dremel and other instruments of destruction but you never see any of the cut pieces when you have the dash trim in place. Here's what I did and some pictures to show you how it looked along the way.
My original systems with 30GB Zune for extra tunes.
I pulled the CD changer as it will no longer work with my new system and I could use the extra storage space in the center console.
After you remove the 2 bottom screw, the plastice cover slides off and then it's just 2 more screws at the top to get the changer out.
Disconnect the wire and it's off to eBay.
Next up, remove the dash trim. Just slip you fingers under the top right edge and pull.
Now, you have the system exposed and ready.
Use the Ford stereo removal tools, or a bent coat hanger has worked for others to pull the original deck.
Disconnect the wires and the original deck is also off to eBay.
There is lots of room in here to work with.
You need to make the opening a little bit bigger, it's time for the Dremel and this might not be for the faint of heart.
Remove the top piece that you cut.
Now you have to cut the bottom trim as well. For this, I just used a hacksaw blade.
There is also a non structural, slanted piece of plastic that needs to be removed, sorry, I forgot to take a picture but if you got his far, you'll know what I'm talking about. I just used the Dremel to cut this out. You can see the rough cut miles on the right and in the back of the opening.
Next up, fit the new mounting sleeve.
Checking for proper depth.
Now it's time for the wiring. Using the BestKits harness made everything a snap. The only thing I have not figured out yet is how to get the illumination to dim with the interior lights, but I'm working on that.
I ran the Parking Brake wire to a ground so that the kids can watch DVDs while I drive.
I put the bluetooth unit under the center console, there is a bunch of room under that thing. All the wires easily tuck back behind the unit. I ran the USB cord to a hole I made in the drink cup holder.
Reinstall the dash trim and it's time to test it out.
This is a mpeg video off of the USB thumb drive.
Here's a couple of shots from a DVD.
Like I said, I am really happy with the unit. There are a couple of little bugs, I am still working out but the bluetooth works great, my wife says it sounds better than my Motorola earpiece and it downloaded my contacts right off the bat.
The whole project took me a the better part of an afternoon and a 6 pack of Stone I.P.A. Well worth it!
If you have any questions, drop me a line and I'll try to answer as best as I can.
~mtuck
Last edited by mtuck; 09-19-2008 at 07:12 PM. Reason: spelling
#2
09-19-2008, 11:44 PM
#3
12-04-2008, 09:21 AM
Junior User
Join Date: Mar 2008
Location: Oregon
Posts: 57
Likes: 0
Received 0 Likes
on
0 Posts

#6
01-30-2009, 02:22 AM
Elder User
Join Date: Sep 2006
Location: NW Burbs of Illinois
Posts: 679
Likes: 0
Received 0 Likes
on
0 Posts
Nice job and the reason your illumination dimming doesnt work is because you hooked up to the wrong illumination wire. You dont want to hook up to the orange/black wire, thats the wire that controls the fading from the guage cluster so you can control the brightness.
The wire you need is the other orange wire. Hook up to that one and youll be all set!
The wire you need is the other orange wire. Hook up to that one and youll be all set!
#7
02-03-2009, 06:46 PM

Trending Topics


#9
02-03-2009, 10:22 PM
Postmaster
2004 - up Ford Double ISO DIN Kit at Scosche.com
#11
02-11-2009, 09:48 AM

New User
Join Date: May 2007
Location: Burlington, ON
Posts: 19
Likes: 0
Received 0 Likes
on
0 Posts
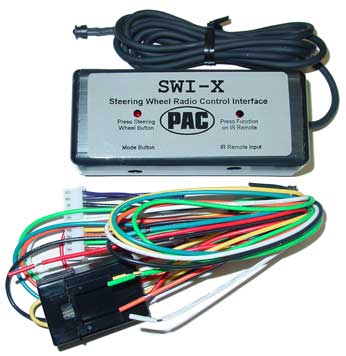
Pac swi-x
Also saw a reference to it in another thread. Search for PAC SWI-X. They said it works well.
It looks like it connects to the harness behind the Head Unit, and converts the steering wheel controls to Infra/Red signals as if they were coming from the remote control. As long as your HU comes with an I/R remote, you're all set.
Not sure where to place the I/R light transmitter, but I assume it will have to be in front of the HU in line of sight.
#12
02-11-2009, 02:49 PM
Postmaster

#14
01-10-2011, 08:28 AM

New User
Join Date: Jun 2003
Location: Galloway, OH
Posts: 23
Likes: 0
Received 0 Likes
on
0 Posts
I do love this setup but I was planning on taking the radio with me later and putting the factory unit back in, this project makes that a challenge  Would the factory radio install right back in place if I can just find another replacement bezel? That might be the way to go? Double DIN is definitely the way to go, Cant believe the biggest SUV doesnt have a double din setup from the factory.
Would the factory radio install right back in place if I can just find another replacement bezel? That might be the way to go? Double DIN is definitely the way to go, Cant believe the biggest SUV doesnt have a double din setup from the factory.
#15
01-10-2011, 01:34 PM
Join Date: Jan 2004
Location: Tucson, AZ
Posts: 31
Likes: 0
Received 0 Likes
on
0 Posts
I do love this setup but I was planning on taking the radio with me later and putting the factory unit back in, this project makes that a challenge Would the factory radio install right back in place if I can just find another replacement bezel? That might be the way to go? Double DIN is definitely the way to go, Cant believe the biggest SUV doesnt have a double din setup from the factory.
Would the factory radio install right back in place if I can just find another replacement bezel? That might be the way to go? Double DIN is definitely the way to go, Cant believe the biggest SUV doesnt have a double din setup from the factory.