66 F100 2WD Custom Cab short box, frame off build.
#31
 06-02-2013, 12:34 AM

Senior User
Join Date: Aug 2010
Location: Highlands Ranch CO.
Posts: 444
Likes: 0
Received 0 Likes
on
0 Posts
 are you going to leave the stock suspension?...sorry if I missed that part!
#32
06-02-2013, 09:11 AM
#33
06-02-2013, 09:46 PM

#34
06-02-2013, 10:01 PM
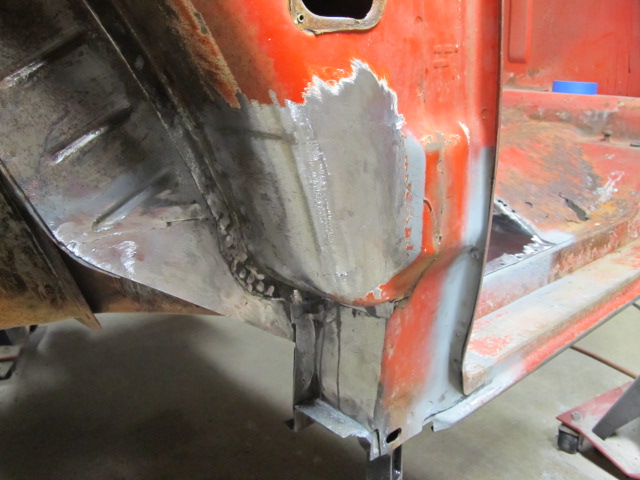
Got the kick panel piece welded in.
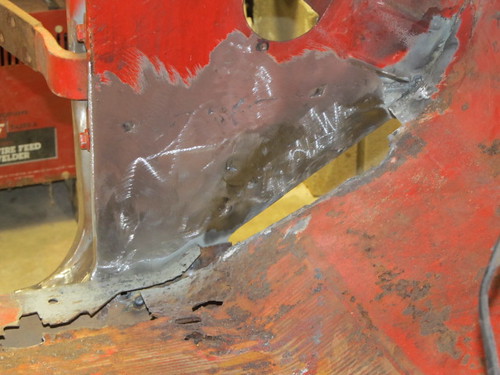
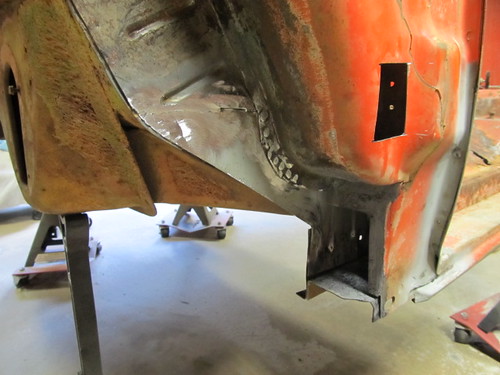
Had to open up the pillar to weld the rear hinge bolt plate. The retainer had rotted away and broke. While I was there I made a angle brace to replace the vertical pillar piece that rusted away.
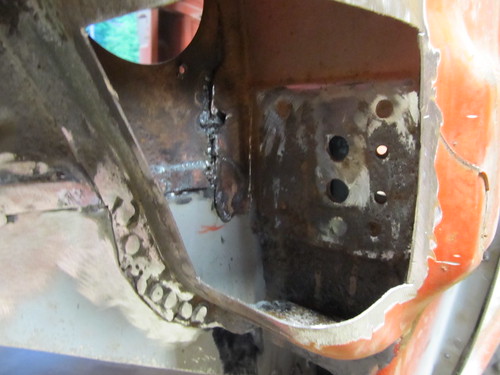

Welded it up.
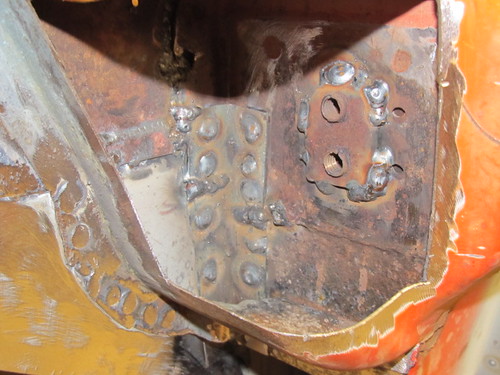
Now all I have to do is make the piece for the bottom of the pillar, then weld the piece I cut out back in...
Had to open up the pillar to weld the rear hinge bolt plate. The retainer had rotted away and broke. While I was there I made a angle brace to replace the vertical pillar piece that rusted away.
Welded it up.
Now all I have to do is make the piece for the bottom of the pillar, then weld the piece I cut out back in...
#35
06-02-2013, 10:39 PM
#36
06-02-2013, 10:56 PM
Roy, yep I'm enjoying working on the truck. I took about 15 yrs off from working on cars. Family, school, work, all the reasons everyone else has.
Everyone has their own "therapy", working on old vehicles is mine.
As far as cutting out 3 sides of a piece and bending the remaining side back, yes that's an option and I did think of that. The problem with that though is the bent side will get a buckle in it that has to be hammered back out. This area doesn't show so that really wouldn't matter. Not saying your method is wrong, it sure is easier! I just decided to do it this way...
Enjoy your truck!
#37
03-06-2014, 08:45 PM
Well guys I've been away since last summer, sorry I haven't posted in so long. I'm finally back to working on my truck again.
Here's a few pics I took last year and never posted.
Here's the cowl drain area repair welded back up and ground down.
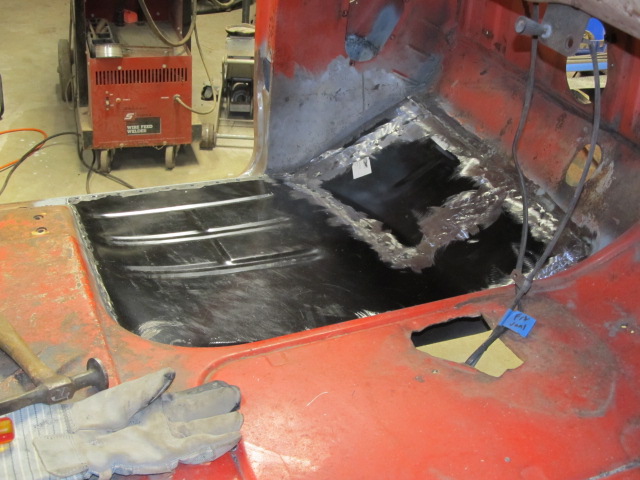
Driver's side floor pan cut out. I sand blasted around the cutout. I will sandblast everything after I get all the welding done and ground down.
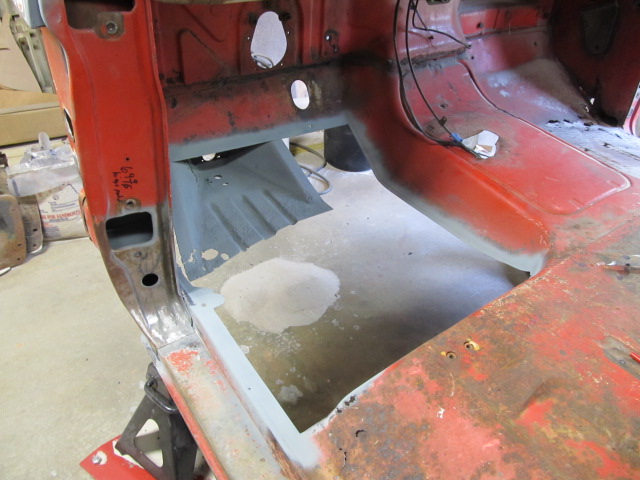
The floor pan being trimmed and fit. It's all welded now, I need to take some more pics and post along with my current progress.
Here's a few pics I took last year and never posted.
Here's the cowl drain area repair welded back up and ground down.
Driver's side floor pan cut out. I sand blasted around the cutout. I will sandblast everything after I get all the welding done and ground down.
The floor pan being trimmed and fit. It's all welded now, I need to take some more pics and post along with my current progress.

#40
03-07-2014, 06:07 PM

New User
Join Date: Feb 2014
Location: Dahlonega Georgia
Posts: 13
Likes: 0
Received 0 Likes
on
0 Posts
#42
03-08-2014, 03:33 PM
Elder User
#43
03-31-2014, 10:01 PM
Hi guys, been away again for a bit, life does sometimes get in the way. Lost both my parents 2 weeks ago. They had been sick so it was expected. Anyway, working on Effie does make great therapy...
64Ford, I have a hood I bought at last years F100 supernats. It's in very good shape. Also bought a correct year tailgate and nice 66 core support. Expensive but worth it. Paid $400 for the tailgate and $300 for the core support. There was a guy there selling a Cherry 66 support for $600, but I passed on that one. Those things are like gold for sure! Not sure if I mentioned it earlier but I also found a guy that had 3 nice 66 battery trays, so I bought 2. Also got the pwr steering column firewall bracket. Paid $60 for that, again hard to find.
64Ford, I have a hood I bought at last years F100 supernats. It's in very good shape. Also bought a correct year tailgate and nice 66 core support. Expensive but worth it. Paid $400 for the tailgate and $300 for the core support. There was a guy there selling a Cherry 66 support for $600, but I passed on that one. Those things are like gold for sure! Not sure if I mentioned it earlier but I also found a guy that had 3 nice 66 battery trays, so I bought 2. Also got the pwr steering column firewall bracket. Paid $60 for that, again hard to find.
#44
03-31-2014, 10:34 PM
Few pics of where I'm at now.
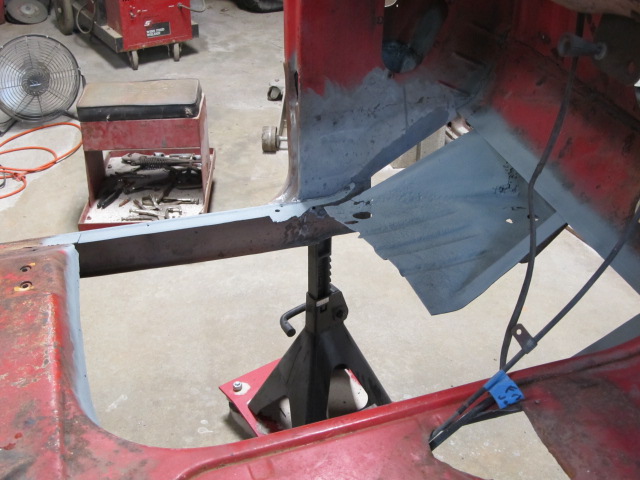
FINALLY got my rotisserie finished (minus some more red paint). Could'a bought one but wanted to build a custom version that bolts to the door pillars. I wanted this so I had full access to the floor pan. Once I finish the pan I will build the legs that mount to the body mounts as in all the other rotisseries out there.
<a href="https://www.flickr.com/photos/95792329@N03/13551600265" title="IMG_1286 by Wes Cook, on Flickr"><img src="https://farm8.staticflickr.com/7355/13551600265_2b1cf930ac.jpg" width="500" height="375" alt="IMG_1286"></a>
<a href="https://www.flickr.com/photos/95792329@N03/13551600415" title="IMG_1287 by Wes Cook, on Flickr"><img src="https://farm4.staticflickr.com/3773/13551600415_c0060159bb.jpg" width="500" height="375" alt="IMG_1287"></a>
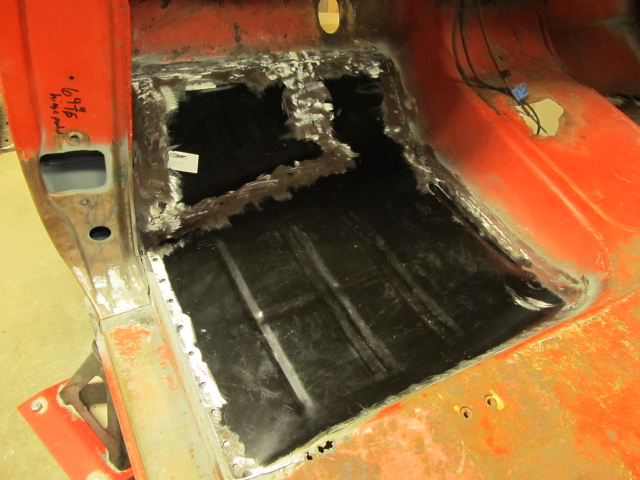
Got the floor pan section seam welded up and ground down.
<a href="https://www.flickr.com/photos/95792329@N03/13551611965" title="IMG_1289 by Wes Cook, on Flickr"><img src="https://farm8.staticflickr.com/7296/13551611965_d540c67472.jpg" width="500" height="375" alt="IMG_1289"></a>
<a href="https://www.flickr.com/photos/95792329@N03/13551715123" title="IMG_1292 by Wes Cook, on Flickr"><img src="https://farm4.staticflickr.com/3731/13551715123_6f53235edf.jpg" width="500" height="375" alt="IMG_1292"></a>
I'm not that happy with overlapping the floor pan section but it's done so oh well... Since I have the rotisserie now I'm pretty sure I'm gonna but weld the passenger section since now I can easily work from the bottom.
Probably gonna do some sandblasting next before it gets so hot here in Ga.
FINALLY got my rotisserie finished (minus some more red paint). Could'a bought one but wanted to build a custom version that bolts to the door pillars. I wanted this so I had full access to the floor pan. Once I finish the pan I will build the legs that mount to the body mounts as in all the other rotisseries out there.
<a href="https://www.flickr.com/photos/95792329@N03/13551600265" title="IMG_1286 by Wes Cook, on Flickr"><img src="https://farm8.staticflickr.com/7355/13551600265_2b1cf930ac.jpg" width="500" height="375" alt="IMG_1286"></a>
<a href="https://www.flickr.com/photos/95792329@N03/13551600415" title="IMG_1287 by Wes Cook, on Flickr"><img src="https://farm4.staticflickr.com/3773/13551600415_c0060159bb.jpg" width="500" height="375" alt="IMG_1287"></a>
Got the floor pan section seam welded up and ground down.
<a href="https://www.flickr.com/photos/95792329@N03/13551611965" title="IMG_1289 by Wes Cook, on Flickr"><img src="https://farm8.staticflickr.com/7296/13551611965_d540c67472.jpg" width="500" height="375" alt="IMG_1289"></a>
<a href="https://www.flickr.com/photos/95792329@N03/13551715123" title="IMG_1292 by Wes Cook, on Flickr"><img src="https://farm4.staticflickr.com/3731/13551715123_6f53235edf.jpg" width="500" height="375" alt="IMG_1292"></a>
I'm not that happy with overlapping the floor pan section but it's done so oh well... Since I have the rotisserie now I'm pretty sure I'm gonna but weld the passenger section since now I can easily work from the bottom.
Probably gonna do some sandblasting next before it gets so hot here in Ga.