
Banks Torque Tube headers V-10 install w/pics
#16
 03-20-2013, 10:09 PM


Nice work! I would like to do this to mine some day. Hopefully those Banks are CARB compliant. They ought to be since their HQ is just around the corner from me in Irwindale.
I get a kick seeing those Wawa milk crates. LOL. I used to love their coffee in the AM and turkey hoagies for lunch. Wish I was nearby and work with you downing some Yuengling Lagers. Can't get those around here in CA.
I get a kick seeing those Wawa milk crates. LOL. I used to love their coffee in the AM and turkey hoagies for lunch. Wish I was nearby and work with you downing some Yuengling Lagers. Can't get those around here in CA.
#17
03-21-2013, 08:30 AM
Oh the broken studs are heart breaking! That's where you sit there stunned for a few minutes, then start crying, then cursing, then figure out how to fix them! Been there, done that, but without the luxury of a welder. Nice work! 
Thanks! I knew I had the two broken studs before I started and I was just lucky to not break any more. I had never used the welder for pulling a broken bolt or stud before, I saw that others had done it here so I gave it a try, works great....when it works!
That stock t pipe is ridiculous! What a constriction point... I have a 6.0l Diesel. I wonder what the exhaust system looks like.
Yeah the T pipe is a real gem of engineering, supposedly designed that way to eliminate an exhaust "flutter" at a given RPM, so far I haven't heard any flutters.
Curious, are you doing or have you done any other power mods? Just doing headers on a normally aspirated motor reduces back pressure (obviously) but that can actually rob some power in the process.
Motor is otherwise totally stock, just running 4.88 gears so I do see slightly higher RPMs at a given speed. According to my butt-dyno these tubes have brought a performance increase, nothing gigantic but it definately has more giddy-up in the mid to high RPM range, that was my goal this is a tow rig. I am looking forward to it's first pull with the headers to get more feel for extra power. I like to only change one thing at a time, learned that from racing, gotta know whats helping and whats hurting!
BTW not being a smart *** or anything but its time to change your oil filter.
New one say 3-20-13 90,360 miles.
Good luck and thanks for the pics and the prose!
Thanks! I knew I had the two broken studs before I started and I was just lucky to not break any more. I had never used the welder for pulling a broken bolt or stud before, I saw that others had done it here so I gave it a try, works great....when it works!
That stock t pipe is ridiculous! What a constriction point... I have a 6.0l Diesel. I wonder what the exhaust system looks like.
Yeah the T pipe is a real gem of engineering, supposedly designed that way to eliminate an exhaust "flutter" at a given RPM, so far I haven't heard any flutters.
Curious, are you doing or have you done any other power mods? Just doing headers on a normally aspirated motor reduces back pressure (obviously) but that can actually rob some power in the process.
Motor is otherwise totally stock, just running 4.88 gears so I do see slightly higher RPMs at a given speed. According to my butt-dyno these tubes have brought a performance increase, nothing gigantic but it definately has more giddy-up in the mid to high RPM range, that was my goal this is a tow rig. I am looking forward to it's first pull with the headers to get more feel for extra power. I like to only change one thing at a time, learned that from racing, gotta know whats helping and whats hurting!
BTW not being a smart ***
or anything but its time to change your oil filter.New one say 3-20-13 90,360 miles.
Good luck and thanks for the pics and the prose!
Nice work! I would like to do this to mine some day. Hopefully those Banks are CARB compliant. They ought to be since their HQ is just around the corner from me in Irwindale.
Thanks! I'll report back after Easter with a review after a 1500 mile tow with them. Hopefully they have a CARB number, glad we don't have to worry about that.....yet.
I get a kick seeing those Wawa milk crates. LOL. I used to love their coffee in the AM and turkey hoagies for lunch. Wish I was nearby and work with you downing some Yuengling Lagers. Can't get those around here in CA.
#18
03-21-2013, 12:30 PM
#19
03-21-2013, 12:32 PM
Installation time!
OK time to catch up on some installation fun and games.
Once I started putting things back together I was pretty well lubricated with Never-Seize and didn't take as many pictures because that required either cleaning my hands pretty well before the shot or cleaning the ipad after it, or both.
I decided to put the left side on first because it looked more difficult and I like to torture myself. With the fuel lines, oil filter, oil cooler, wiring harneses, steering shaft and various other obstacles in the way it was a real hoot! The header has to be moved into position from below, thats why the oil dipstick tube had to come out. the headers have a thick solid flange from front to back that runs exactly where the tube sits from the factory.
That thick flange also requires the dipstick tube to be slightly bent to clear it on re-installation.
This shot gives some idea of how much room you have to work in and the access to the lower row of bolts through the flange and into the heads. So much wide open space it reminded me of Montana!
Sorry that shot didn't show the bolts from the bottom, you can only see 3 of them, the forward 2 are above the cross member and motor mount. I couldn't get my fat head into a position where I could see them.
(Not all of those chins are mine, some of them are rentals)
From the top there was actually a little more room, I was able to tighen all 5 bolts with a ratcheting box wrench. On the bottom row due to either tube interference, no room to swing a wrench or general lack of access 1 bolt could be had by the ratcheting box wrench, 1 by a 1/4 drive ratchet and the other 3 with open ended wrenches, the rear most one was one flat at time....all the way in. Happy times!
Time to keep the boss happy, be back shortly with more......
#20
03-21-2013, 02:36 PM
Installation continues.....
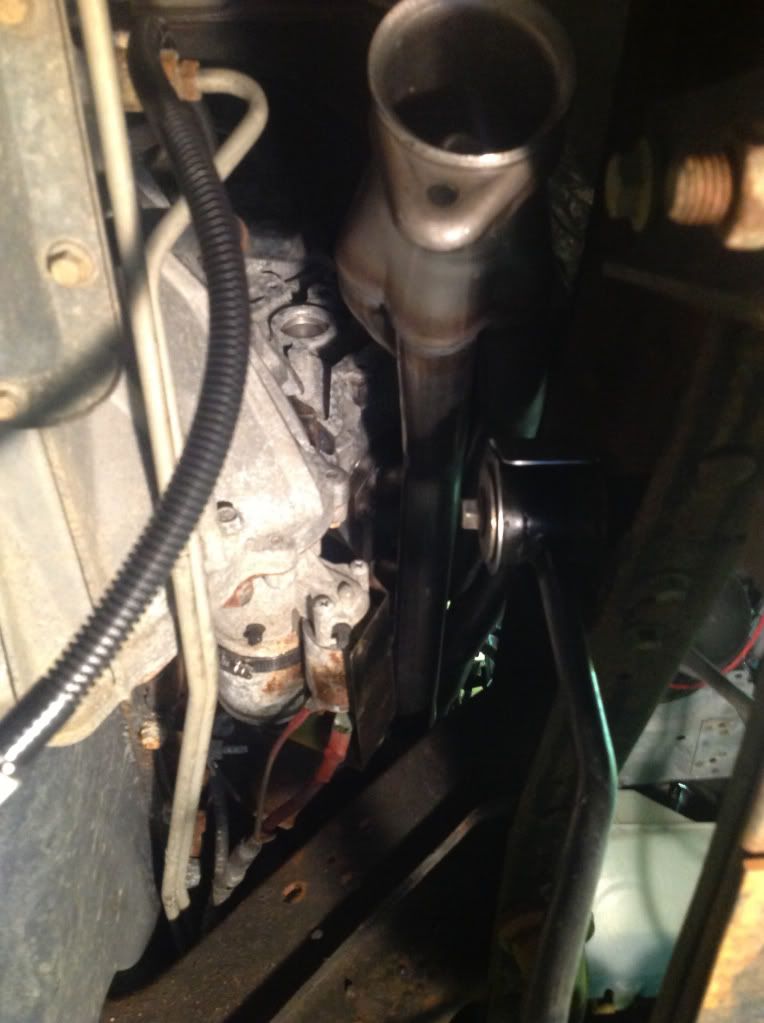
The right side header had it's share of clearance issues going in, the frame rail, sway bar end link, trans bell housing, starter, engine block, cylinder head and rear heat and A/C lines were all trying to block the path the header needed to follow into position. I tried fiddling with it with one hand above and the other from below, I lacked the proper wingspan to make that work. Fortunately for me my lovely bride came home and jumped in to help! (Thanks Honey!!!!) With her threading it into position from below and me lining it up correctly from above it only took a minute or two to set it in place. She reported that she could see the rearmost 2 bolt holes, said they would be a tight squeeze so I loaded up 2 bolts with Never-Seize and handed them down to her. She got them snugged up with the ratcheting box wrench, when she mentioned how hard they were to reach I said look at the other side that I just did, then she took pity on me. In this shot you can see how little room there is around these tubes by how little of the overhead light is getting through.
She who must be obeyed forbade any photos be taken of her while rolling around the garage floor covered in Never-Seize, I don't understand why, I take such flattering portraits. This was all I was allowed to capture to document her assistance on this project.
Topside access on this one was much better, all 5 top bolts and the forward 3 bottom ones could be attacked with either the ratchet box or 1/4" drive ratchet, easy peezie.
Time for a breif work period, be back shortly with more.

#22
03-21-2013, 03:36 PM
It's all done, pics soon......

#23
03-21-2013, 03:38 PM
#24
03-21-2013, 04:28 PM
Moar, Moar, Moar !!!!!!
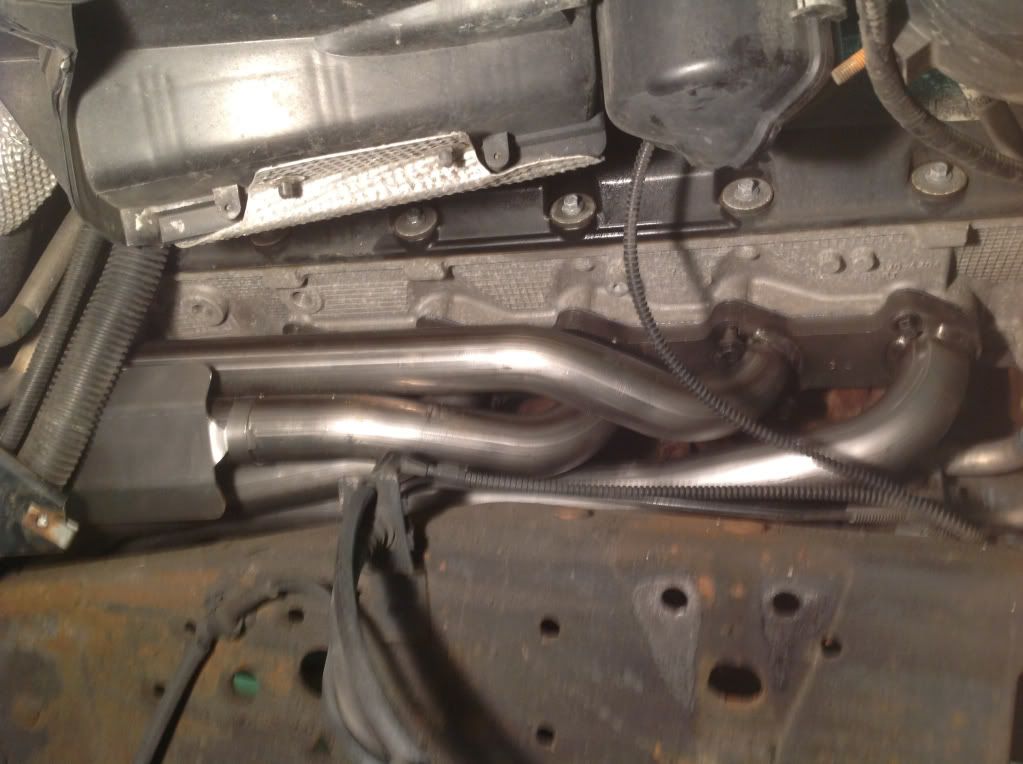
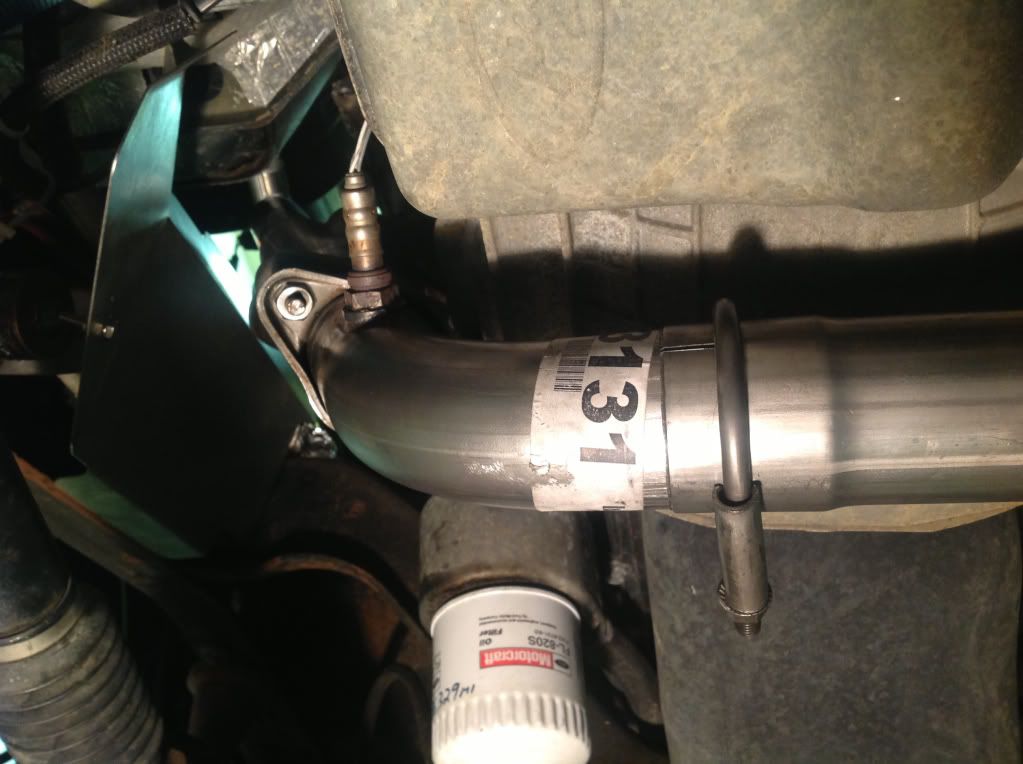
Progress, both new headers are now mounted and tight! Now it's time to tie them together with the adjustable crossover pipe and Y. First thing needed is to re-install the O2 sensors into their proper sides.
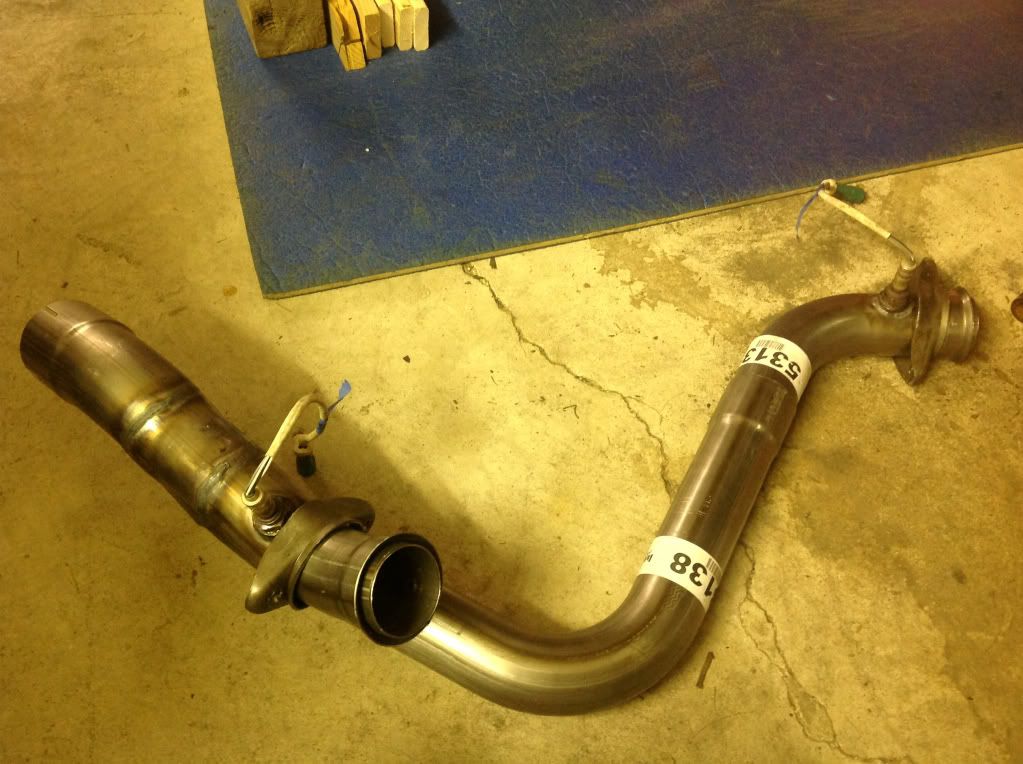
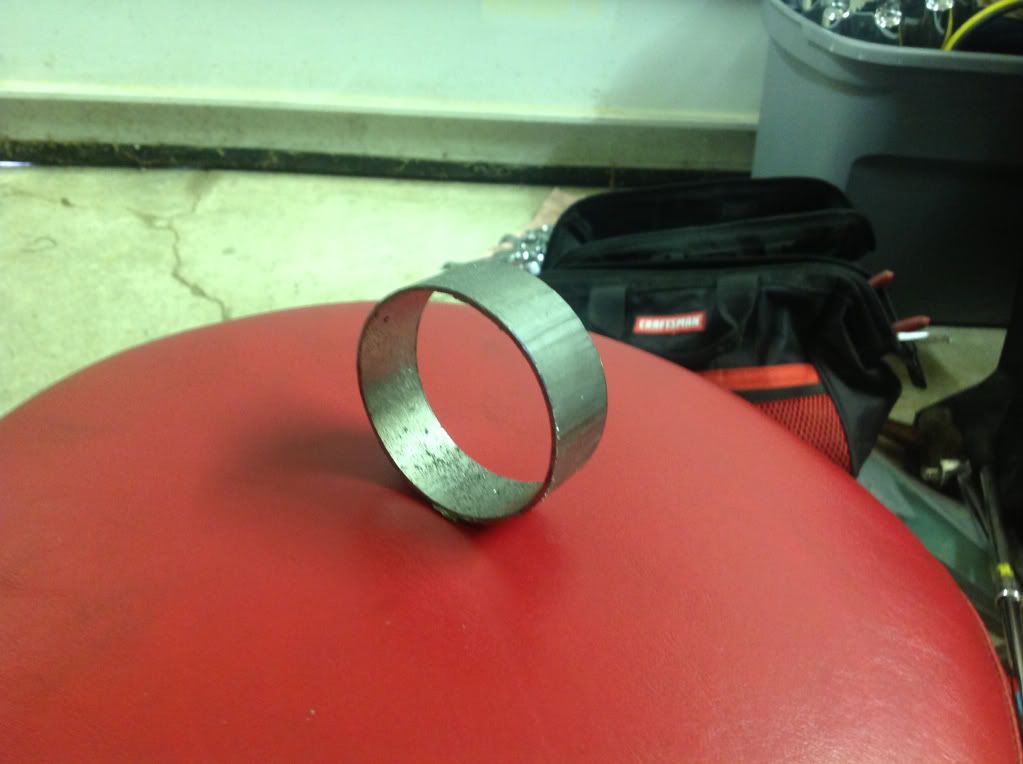
Both sides of the new collector flanges are floaters, that makes it nice to be able to orient them to the best spot to work on em, with the lower side having nuts welded in place and the bolts come down through the top section. It would be easier to make the joint up if the bolt went in from the bottom, but if these need to be reworked in years to come this will be better as it will be easier to drill out the nuts to allow for a new bolt to pass through. I replaced the supplied zinc plated bolts with a set of 1/2" longer stainless ones, SS semed like a better choice and I had them on hand plus the extra length made it easier to make the joint up. It takes 2 hands and a forehead to hold the Y pipe up and align both sides of the floater flanges while getting the bolt started. With the right side started and the Y outlet slid over that cat inlet pipe you need to insert the left side short peice into the crossover pipe to check it's alignment with the left header. My crossover was about 1" too long so that got sliced off.
Now the left side is able to be bolted up and everything can be wrenched up tight. Left side collector first.
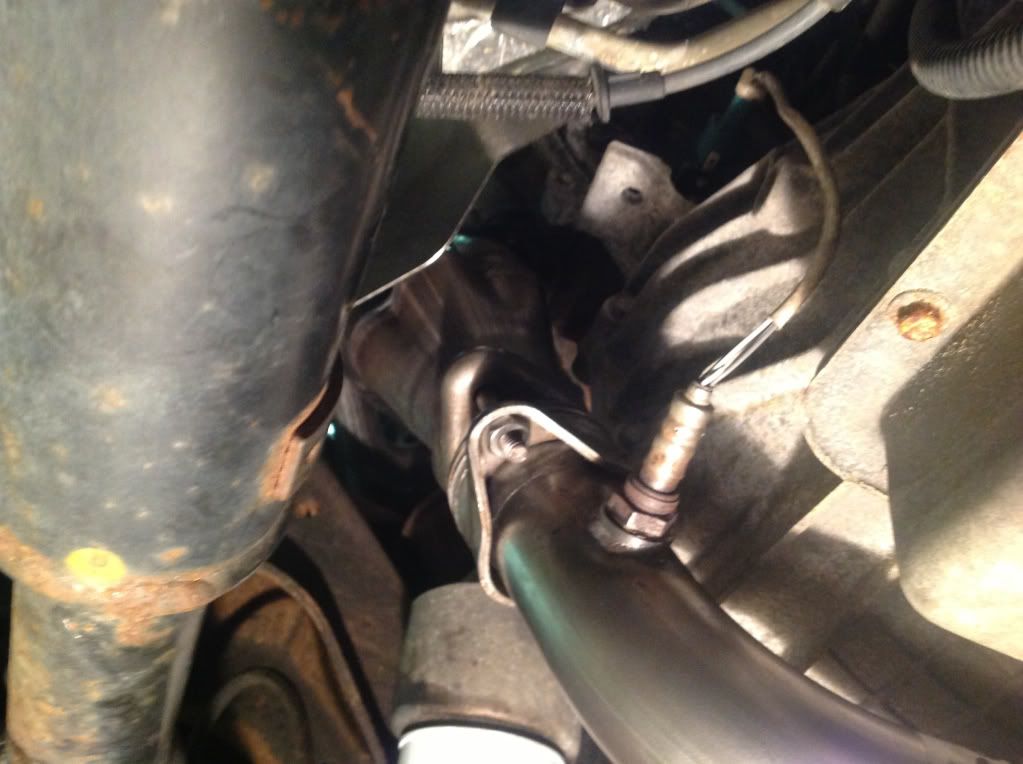
Then the right side, an extension cable is supplied to go from the truck's harness to the right O2 sensor, it sits slightly farther back now.

Then the crossover pipe.
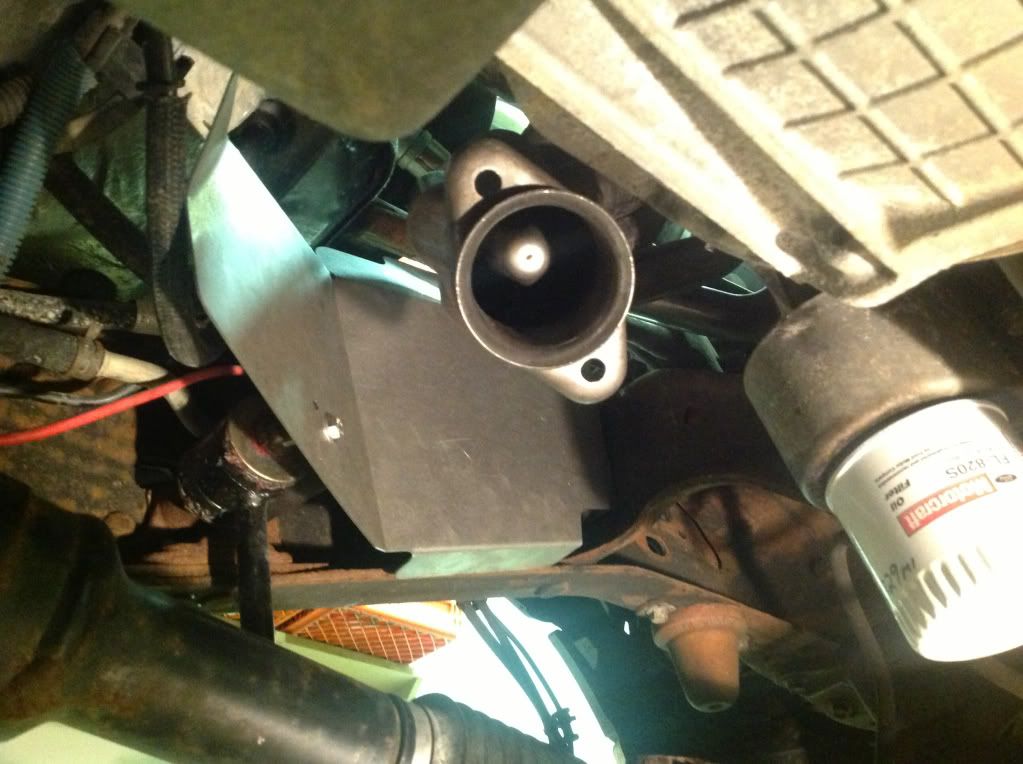
And last but not least the Y outlet to cat inlet joint, it's kind of backwards for an exhaust joint with flow from female into male but it works.
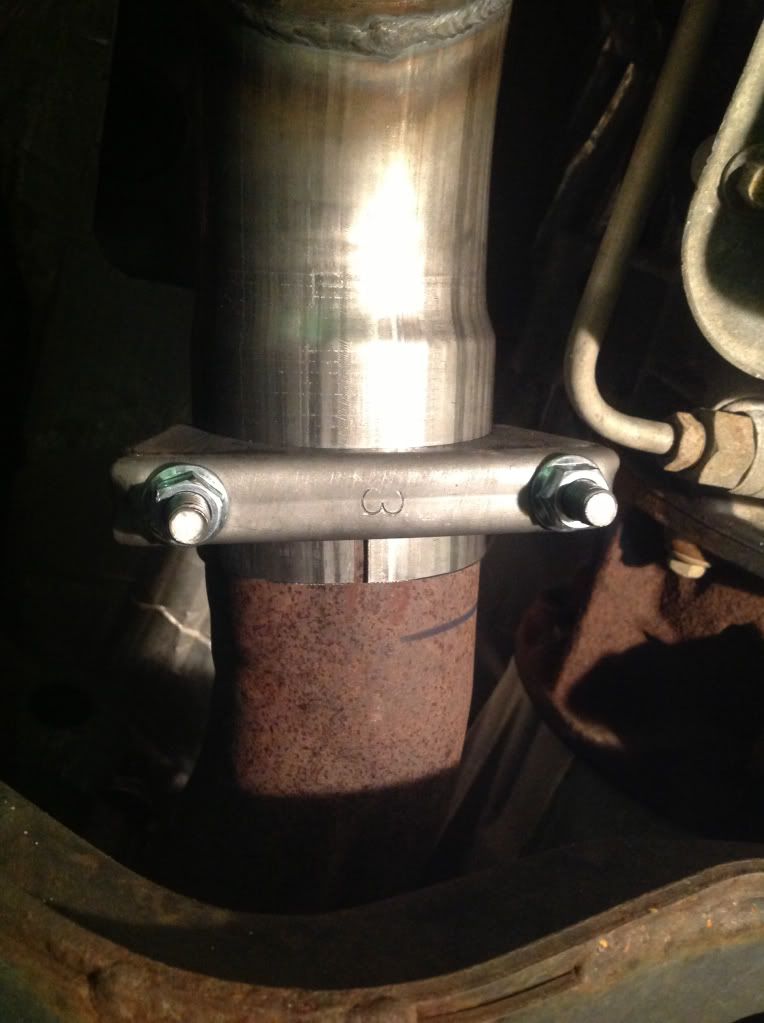
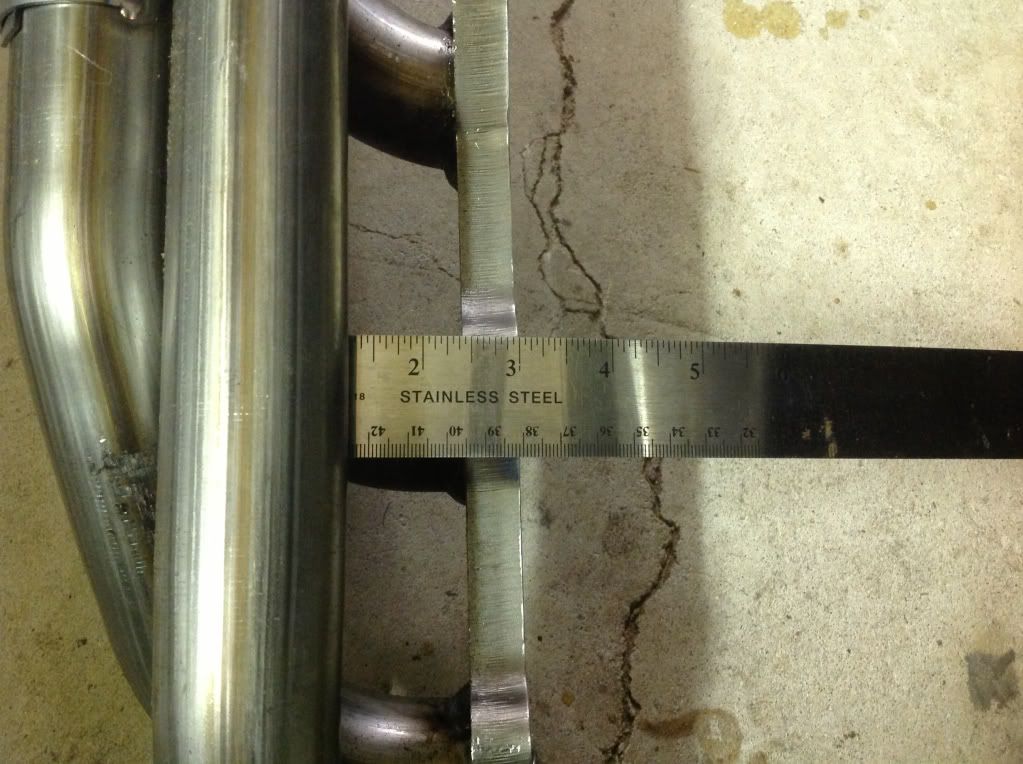
The directions called for the cut to be 8' back from the cat flange, the line you see here is where the Y outlet pipe comes to when bottomed out on the cat pipe. As you can see 7" would have been a better cut measurement. Still a good joint though.
It was sooooo tempting to fire the beastie up at this point but I had some concerns about heat and how close some items were to the new tubes. So I did a little extra insulating that I'll get to tomorrow, my shift is over now and I gotta go home and finish a trans temp gauge temporary installation. I wanna get some baseline readings before I start my trans cooling upgrades.
Both sides of the new collector flanges are floaters, that makes it nice to be able to orient them to the best spot to work on em, with the lower side having nuts welded in place and the bolts come down through the top section. It would be easier to make the joint up if the bolt went in from the bottom, but if these need to be reworked in years to come this will be better as it will be easier to drill out the nuts to allow for a new bolt to pass through. I replaced the supplied zinc plated bolts with a set of 1/2" longer stainless ones, SS semed like a better choice and I had them on hand plus the extra length made it easier to make the joint up. It takes 2 hands and a forehead to hold the Y pipe up and align both sides of the floater flanges while getting the bolt started. With the right side started and the Y outlet slid over that cat inlet pipe you need to insert the left side short peice into the crossover pipe to check it's alignment with the left header. My crossover was about 1" too long so that got sliced off.
Now the left side is able to be bolted up and everything can be wrenched up tight. Left side collector first.
Then the right side, an extension cable is supplied to go from the truck's harness to the right O2 sensor, it sits slightly farther back now.
Then the crossover pipe.
And last but not least the Y outlet to cat inlet joint, it's kind of backwards for an exhaust joint with flow from female into male but it works.
The directions called for the cut to be 8' back from the cat flange, the line you see here is where the Y outlet pipe comes to when bottomed out on the cat pipe. As you can see 7" would have been a better cut measurement. Still a good joint though.
It was sooooo tempting to fire the beastie up at this point but I had some concerns about heat and how close some items were to the new tubes. So I did a little extra insulating that I'll get to tomorrow, my shift is over now and I gotta go home and finish a trans temp gauge temporary installation. I wanna get some baseline readings before I start my trans cooling upgrades.
#25
03-21-2013, 08:12 PM
Fleet Mechanic
#26
03-23-2013, 03:44 AM
Insulation installation.
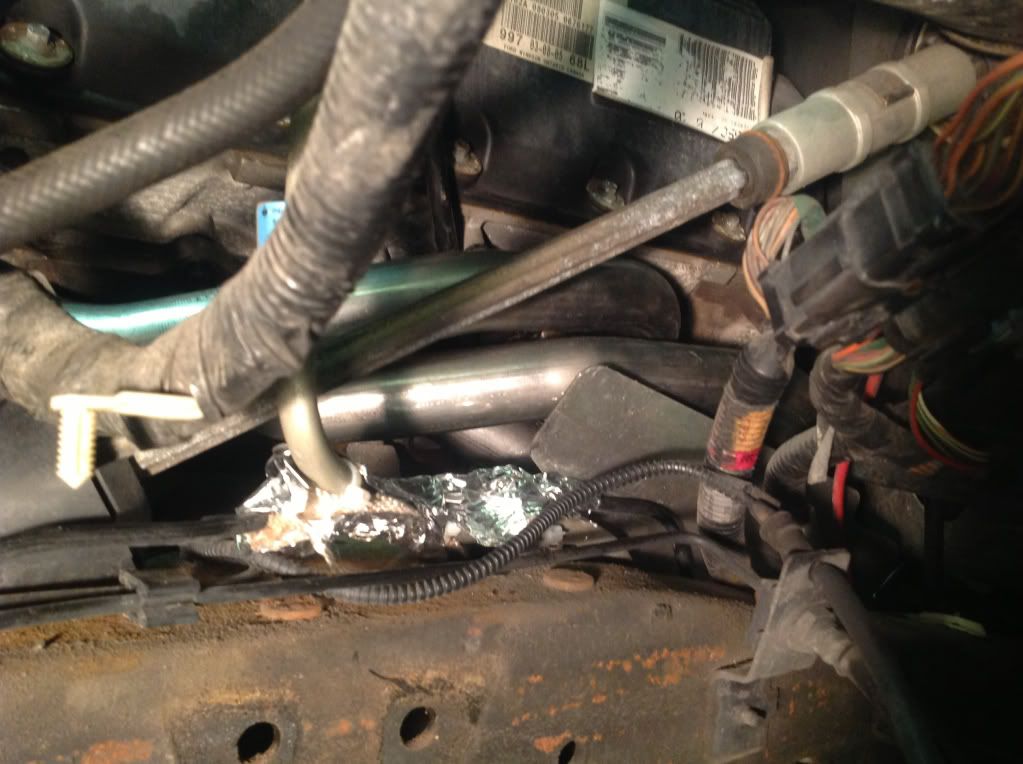
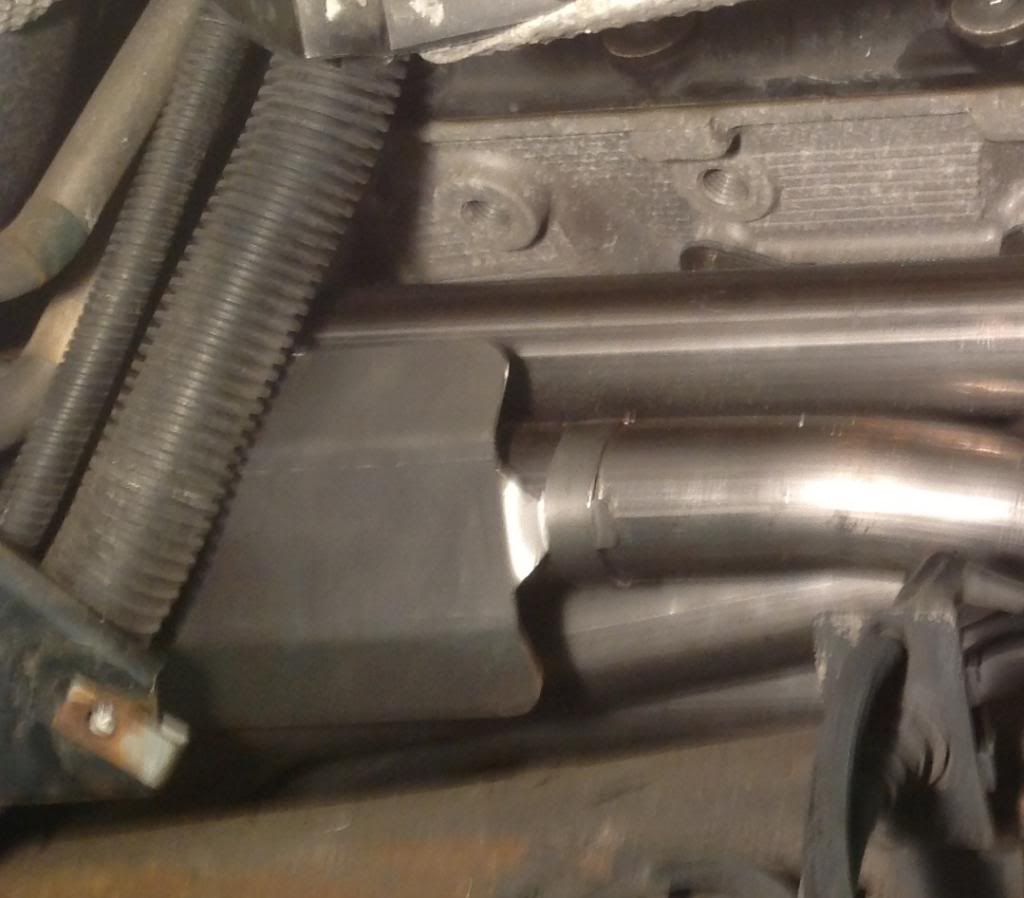
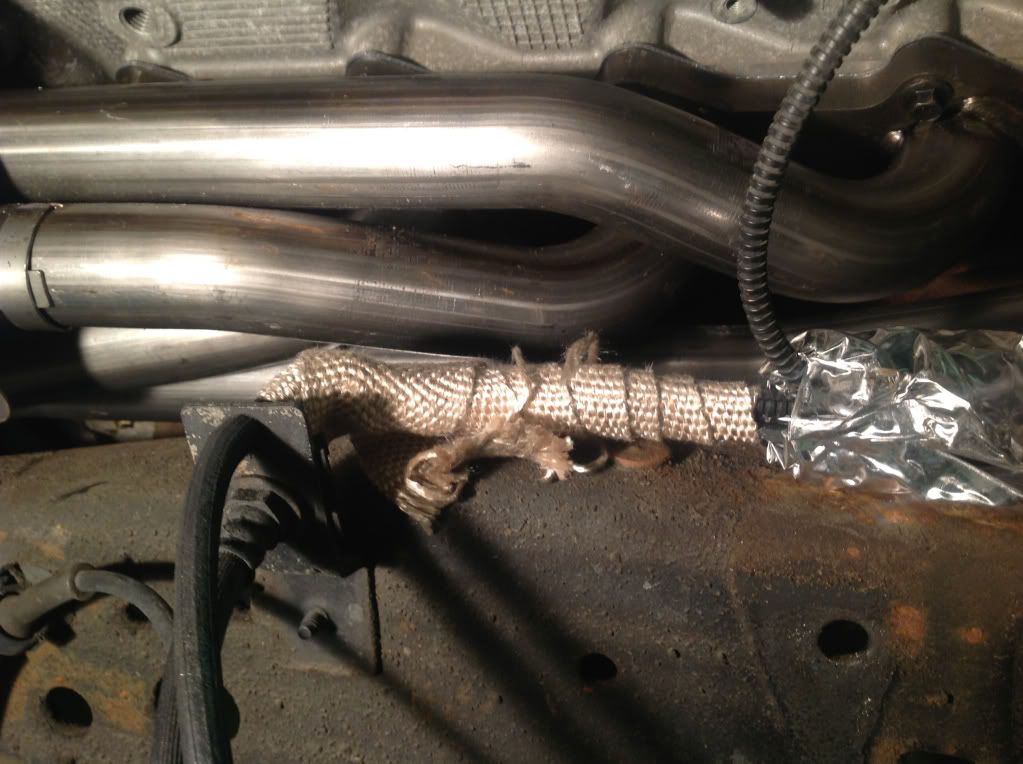
At this point the header installation is technically done but I had some concerns about how close some items were to the new hot tubes, so I did a little insulation work while I still had good access. The main area of concern was where the right header nearly touches the rear A/C lines, the plastic sheath on the A/C line was only a hair away from a built in heat sheild on the header tube. The heat sheild is welded on one end and banded on the other to allow for expansion and stands off the tube by about 1/4", you can see it here.

And here is where the header and A/C lines almost meet.
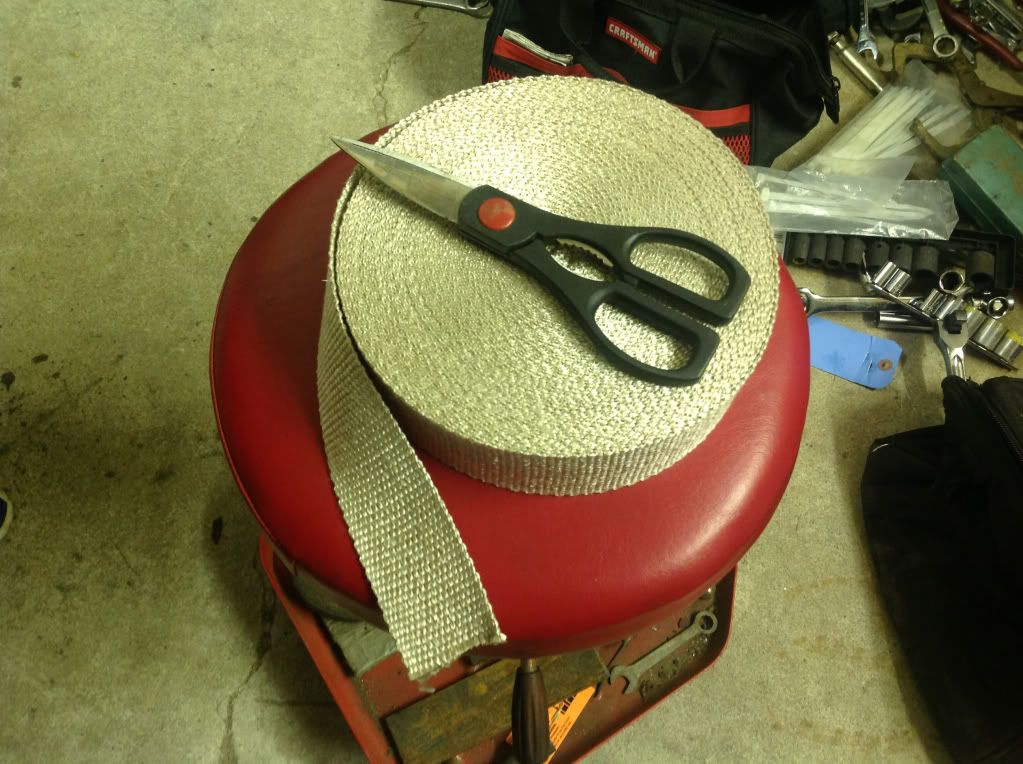
I had a roll of ceramic high temp insulation wrap in the garage, we use it on the exhaust on my son's Quartermidget racecars, keeps your arm from sizzling when doing any wrenching on the car when it's just been run. Here's the ceramic wrap.
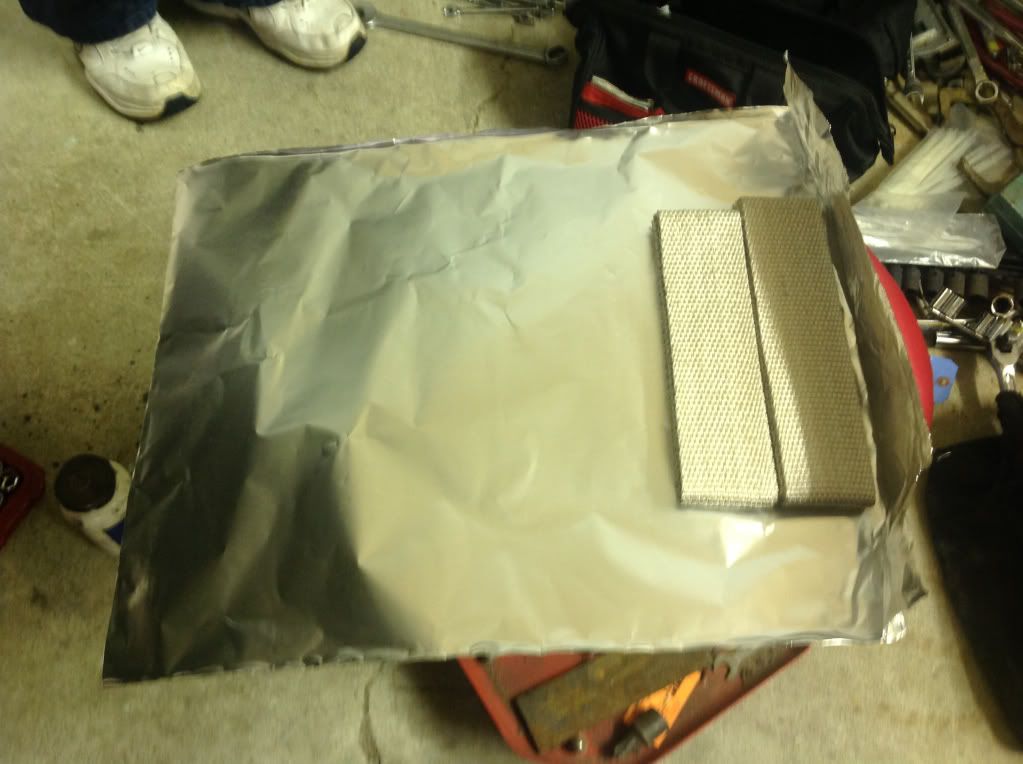
Along with the creamic wrap I also used some Extra Heavy Duty Reynolds Aluminum Foil, this stuff is waaay thicker than your typical kitchen foil, I kept the shiny side towards the heat source. I folded the ceramic over on itself until there were 6 layers about 7" long and placed two of these pads side by side.
Then folded the foil tightly around them.
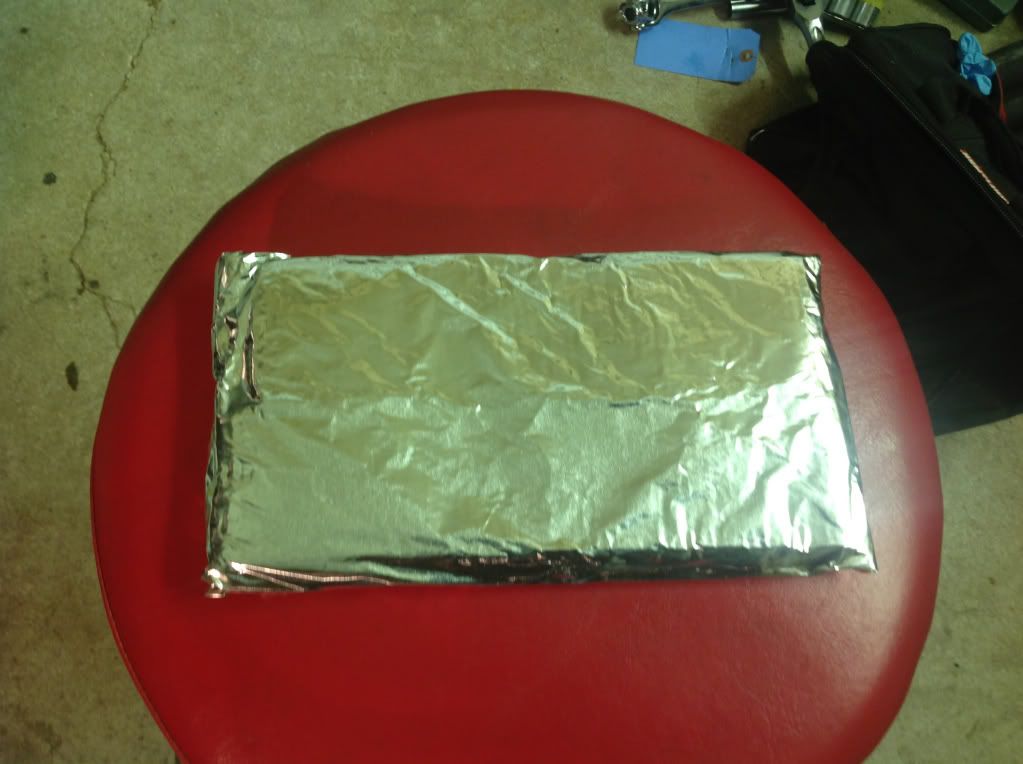
That pad then was placed between the A/C lines and the header heat sheild, I had to do a little prying to get it in there and used safety wire to keep it in place.

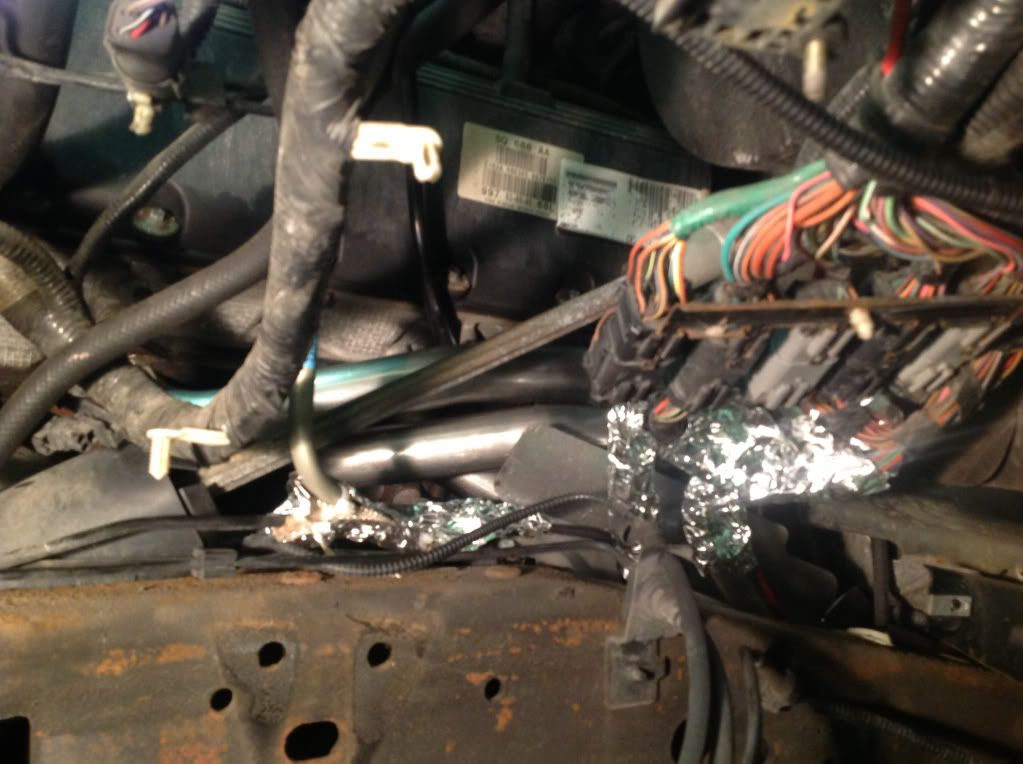
A little farther away from the tubes but still kinda close were the brake and vacuum lines so I wrapped them with the ceramic and covered them with more foil. Here they are just before the last peice of foil went on.
I then moved over to the left side and gave the fuel, brake and vacuum lines there the same treatment as well some additional foil on the closest wiring harness.
And with my little insulation adventure over it was time to fire it up! Yay for me NO LEAKS......but it smoked the hell out of my garage from the residual oil and whatever on the inside of the tubes from their manufacture. Once the smoke cleared I put the wheelwell liners back in (heated them up by sitting them on top of the oil/electric space heater to allow them to bend a little) and put the shocks and their mounts back in, tires back on and off the jack stands. Test drive time!
I likey
It's 4:35AM and I'm tired and tired of typing so I clipped my intial test drive notes from another thread.
I finished my Banks header install. Took a while due to working 12 hour days for the past two weeks solid, I have no idea how many hours were actually spent on the job but it was a major PITA due to access. I know Sammie/Christina is working on hers now and I'm sure her hands and forearms are smaller than mine so hopefully she will have an easier go of it. With the stock manifolds in place it looks pretty roomy in there, that all changes when you shoehorn five 1 5/8" primary tubes into that same space, then have to squeeze a meaty hand and arm up into tiny gaps to install bolts into holes that can't be seen.
I only have about 75 miles on it so far but just from that I am very happy with the gains. The only change was the headers, I am a one change at a time kind of guy, I like to see and feel the individual components improvements. The rest of the exhaust is stock. At idle it almost seems to be slightly more quiet, my son said "It sounds like a Prius" when I started it before the test drive. As soon as I pulled out of the driveway and rolled into the gas the sound came to life, not loud but a cool sounding whoosh. I've read others describe it as sounding like snakes hissing, I think it's more like the air rushing through a big turbo minus the whistle, whoosh! That sound is most noticable at low speed and gets masked by normal other truck and road noises as speed increases. Once warmed up I got on the highway and dropped the hammer, WOW! this thing now wants to rev, it sure seems to get to the high RPMs quick and ran through the gears in a hurry. As far as my finely tuned butt-dyno is concerned there has been a noticeable improvement over stock.
Some of the reviews I've read have said they felt only a slight increase while running solo but the gains really showed up when towing. If thats the case I am very interested to see how it performs with the ToyHauler in tow considering how good it feels solo. Hopefully the extra grunt provided by the headers will help to keep the rig in OD on more hills, that alone will improve our overall towing MPGs. Next week's 1500 mile tow should be the real test.
Thanks for following this, I had fun I hope you did too!
Tom
And here is where the header and A/C lines almost meet.
I had a roll of ceramic high temp insulation wrap in the garage, we use it on the exhaust on my son's Quartermidget racecars, keeps your arm from sizzling when doing any wrenching on the car when it's just been run. Here's the ceramic wrap.
Along with the creamic wrap I also used some Extra Heavy Duty Reynolds Aluminum Foil, this stuff is waaay thicker than your typical kitchen foil, I kept the shiny side towards the heat source. I folded the ceramic over on itself until there were 6 layers about 7" long and placed two of these pads side by side.
Then folded the foil tightly around them.
That pad then was placed between the A/C lines and the header heat sheild, I had to do a little prying to get it in there and used safety wire to keep it in place.
A little farther away from the tubes but still kinda close were the brake and vacuum lines so I wrapped them with the ceramic and covered them with more foil. Here they are just before the last peice of foil went on.
I then moved over to the left side and gave the fuel, brake and vacuum lines there the same treatment as well some additional foil on the closest wiring harness.
And with my little insulation adventure over it was time to fire it up! Yay for me NO LEAKS......but it smoked the hell out of my garage from the residual oil and whatever on the inside of the tubes from their manufacture. Once the smoke cleared I put the wheelwell liners back in (heated them up by sitting them on top of the oil/electric space heater to allow them to bend a little) and put the shocks and their mounts back in, tires back on and off the jack stands. Test drive time!
I likey
It's 4:35AM and I'm tired and tired of typing so I clipped my intial test drive notes from another thread.
I finished my Banks header install. Took a while due to working 12 hour days for the past two weeks solid, I have no idea how many hours were actually spent on the job but it was a major PITA due to access. I know Sammie/Christina is working on hers now and I'm sure her hands and forearms are smaller than mine so hopefully she will have an easier go of it. With the stock manifolds in place it looks pretty roomy in there, that all changes when you shoehorn five 1 5/8" primary tubes into that same space, then have to squeeze a meaty hand and arm up into tiny gaps to install bolts into holes that can't be seen.
I only have about 75 miles on it so far but just from that I am very happy with the gains. The only change was the headers, I am a one change at a time kind of guy, I like to see and feel the individual components improvements. The rest of the exhaust is stock. At idle it almost seems to be slightly more quiet, my son said "It sounds like a Prius" when I started it before the test drive. As soon as I pulled out of the driveway and rolled into the gas the sound came to life, not loud but a cool sounding whoosh. I've read others describe it as sounding like snakes hissing, I think it's more like the air rushing through a big turbo minus the whistle, whoosh! That sound is most noticable at low speed and gets masked by normal other truck and road noises as speed increases. Once warmed up I got on the highway and dropped the hammer, WOW! this thing now wants to rev, it sure seems to get to the high RPMs quick and ran through the gears in a hurry. As far as my finely tuned butt-dyno is concerned there has been a noticeable improvement over stock.
Some of the reviews I've read have said they felt only a slight increase while running solo but the gains really showed up when towing. If thats the case I am very interested to see how it performs with the ToyHauler in tow considering how good it feels solo. Hopefully the extra grunt provided by the headers will help to keep the rig in OD on more hills, that alone will improve our overall towing MPGs. Next week's 1500 mile tow should be the real test.
Thanks for following this, I had fun I hope you did too!
Tom
#27
03-23-2013, 12:27 PM
Very nice. What was the price of the headers and y pipe, if you don't mind my asking. How much was shipping.
I wonder if Banks would sell me a set direct from their HQ here in Irwindale? That would save me shipping. They're only about 5 miles from my office. I probably will have to go through a distributor.
I wonder if Banks would sell me a set direct from their HQ here in Irwindale? That would save me shipping. They're only about 5 miles from my office. I probably will have to go through a distributor.
#28
03-23-2013, 12:36 PM
Lead Driver
#30
03-23-2013, 08:04 PM
Postmaster
Thanks for posting this Tom. Mine is not going better, but I'm forging on - I have 15 of 20 studs out all the exhaust off, have 2 studs I can probably weld and extract but one down in the head. I'm trying to find the extractor tool and centering bit but having trouble finding the right one. I posted a similar comment in the "what did you do the ex today thread". Again thanks for the pictures they will help me a lot when I get to the heat wrap especially. Here is the one bolt broken down below the head. I wanted to cry, well laid on my garage floor and cussed for a few minutes instead.