
F250 4x4 fenderwell exit pics?
#1
 01-26-2013, 11:27 AM

F250 4x4 fenderwell exit pics?
I'm considering replacing my current headers (unless I find a way to weld up the crack in the collector), and see lots of pros and cons between chassis exit (what I have now) and fenderwell exit.
Regarding the latter, I have a hard time visualizing how these route especially on the driver side given the steering shaft. Does anyone have pictures they can share? BTW, I have a 77 lowboy with a 351M and a 4" suspension lift. Thanks!
Regarding the latter, I have a hard time visualizing how these route especially on the driver side given the steering shaft. Does anyone have pictures they can share? BTW, I have a 77 lowboy with a 351M and a 4" suspension lift. Thanks!
#2
01-26-2013, 11:44 AM

Read post #3 and there you go....you might have to grinder the fwd edge of the frame body mount metal bracket a bit and removing the dvrs side shock tower makes it easier for the install, of course reinstall afterwards. Brake lines were routed thru the headers, its a mudder so no worries there.
https://www.ford-trucks.com/forums/1...derwell+header
https://www.ford-trucks.com/forums/1...derwell+header

#4
02-19-2013, 10:06 PM
F250 4x4 fenderwell exit pics?
Thanks for the pics. I looked at repairing the chassis exit headers I have and the rust was too extensive. After contemplating whether I wanted to deal with removing the engine mount (or raising the engine), I grabbed the trusty Sawzall and quickly extracted them and the rest of the exhaust system. New Hedeman fenderwell exit headers are in transit and I'll pass along how the install goes!
#6
02-21-2013, 10:44 PM
F250 4x4 fenderwell exit pics?
Once again, I see I'm blessed to have a truck that's lived its life in the desert. I hadn't actually decided to replace the headers yet, but I tested removing a bolt and they all came out with ease! Whew! But I agree about soaking bolts - it made a big difference when I installed the lift kit. The headers arrived today, but we got some surprise snow. Hopefully it will warm up this weekend and I'll have something to share.
#7
03-01-2013, 09:40 AM
F250 4x4 fenderwell exit pics?
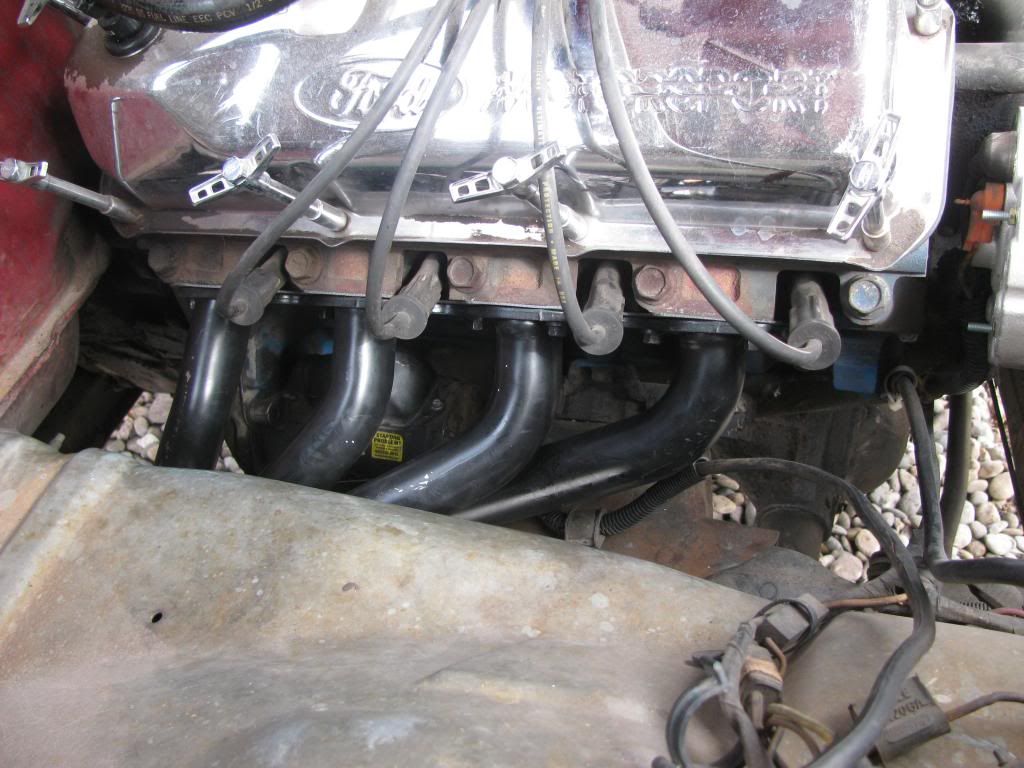
I had great success with the passenger side install - of course, I tackled the easiest first. Here are some pictures. I had to trim to achieve at least 1/4" clearance: cab mount body bolt, cab mount on frame, inner plastic fender (more clearance because it's plastic), and lots of trimming to the metal fender (removed at least an inch of material). I also am rerouting the starter cable so it doesn't pass between the header tubes and frame - bought a new one because it was too short and cooked from the old chassis exit headers. Onto the driver side today . . .

Trending Topics
#8
03-21-2013, 08:31 AM
F250 4x4 fenderwell exit pics?
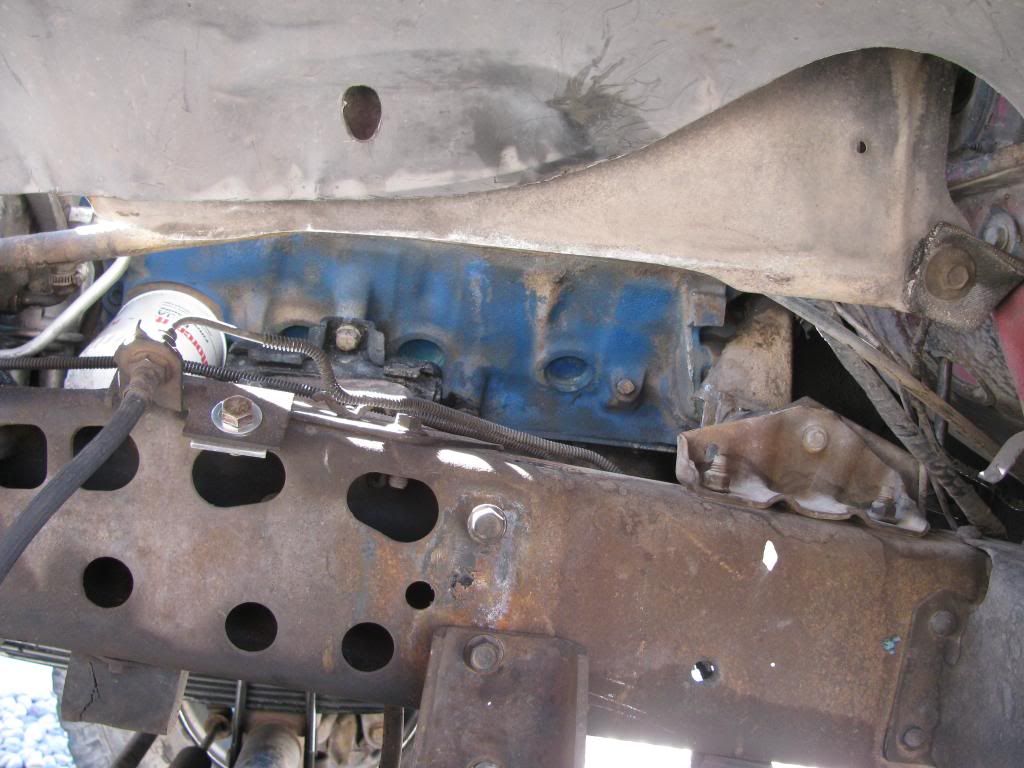
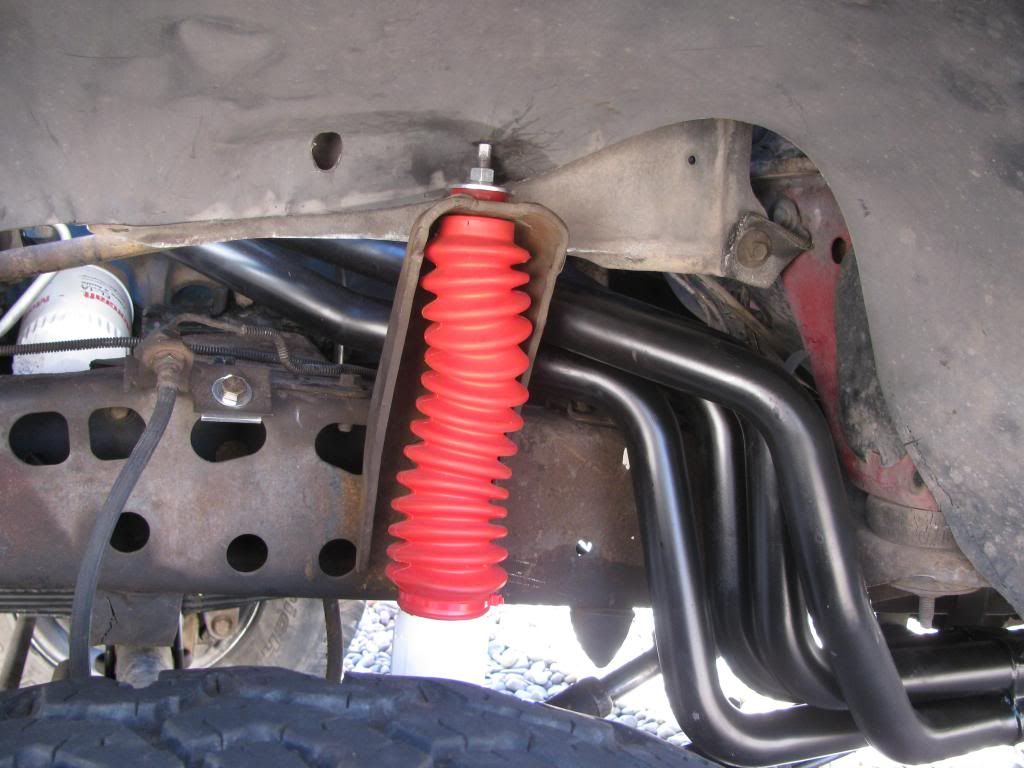
Finally go the driver's side installed. Not as bad as I expected. Most of the challenge was moving some of the wiring and the speedometer cable. Essentially this required bundling and clamping these up higher on the inner fenderwell. Also had to bend the break lines from the master cylinder to clear more space. Compared to the passenger side, I had to cut away more of the inner fenderwell, but this was just to feed the header through and not for clearance when installed. I also did a bit of trimming to the plastic fender liner. Next post will be on exhaust which is almost done . . .
#9
04-07-2013, 01:33 PM
F250 4x4 fenderwell exit pics?
Exhaust is done (for now) - took a bit more engineering than I originally thought. Initially I checked with a couple of local shops and got estimates from $500 to $700. One shop even told me that he had to install cat converters since it might have come factory with them - and it would cost another $200. Guess I'll do it myself.
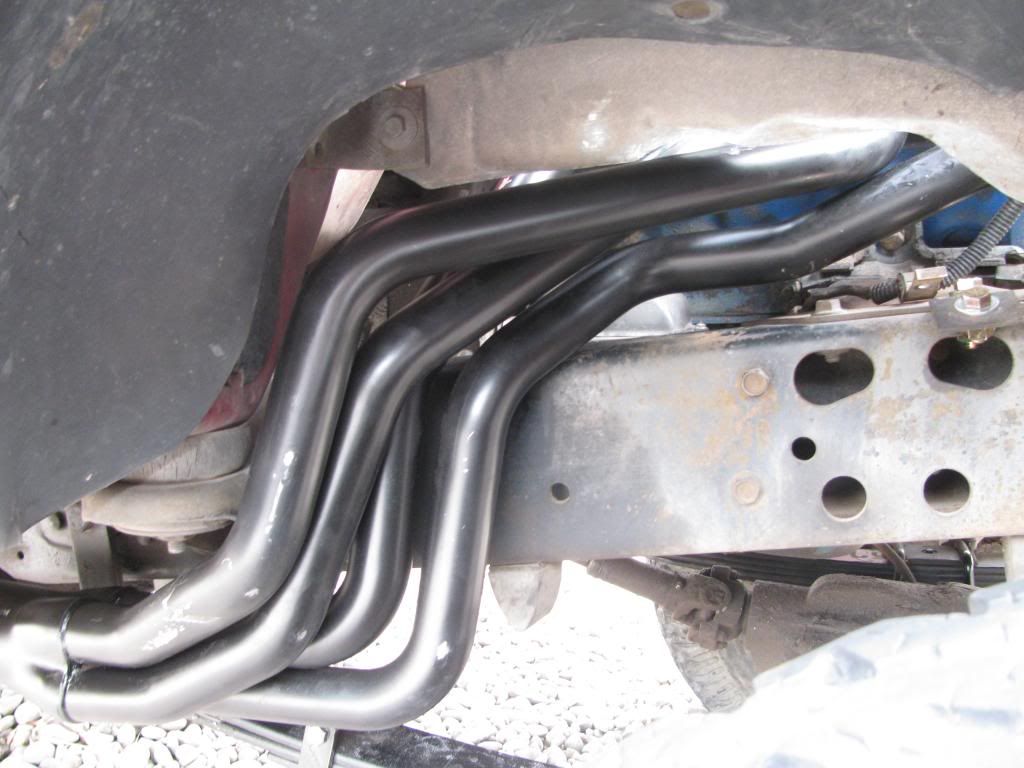
I used 2 1/4" pipe going straight back into Flowmaster Series 40 mufflers. Since I don't have a welder (and didn't want a permanent system yet), I used band clamps from Summit Racing. The challenging part was to easily craft the hangers. To have everything mounted from the frame, I used 1/2" bolts through mostly existing holes in the frame. From these I hung straps down to the clamps. Someday if I get some metal working tools, I'll make something different, but these worked great and were easy. Here are some pictures:
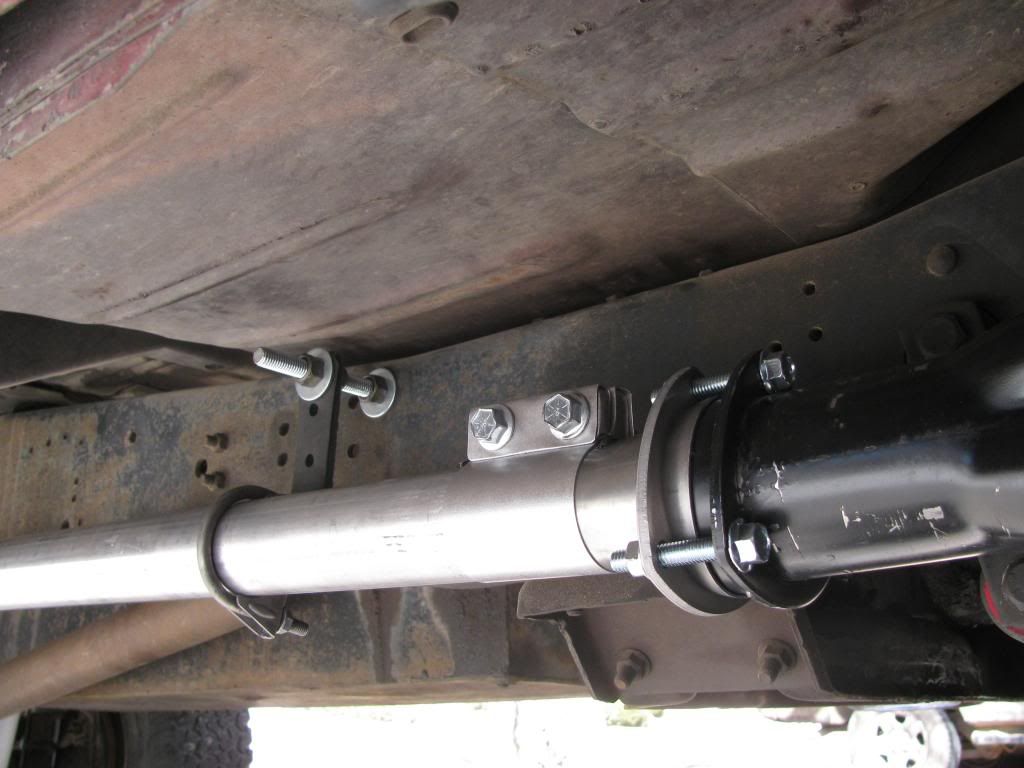

I used 2 1/4" pipe going straight back into Flowmaster Series 40 mufflers. Since I don't have a welder (and didn't want a permanent system yet), I used band clamps from Summit Racing. The challenging part was to easily craft the hangers. To have everything mounted from the frame, I used 1/2" bolts through mostly existing holes in the frame. From these I hung straps down to the clamps. Someday if I get some metal working tools, I'll make something different, but these worked great and were easy. Here are some pictures:
#10
04-07-2013, 01:44 PM

Elder User
Join Date: Jun 2012
Location: Plant city florida
Posts: 650
Likes: 0
Received 0 Likes
on
0 Posts
I'm in the process of installing my headman fenderwell exits and I got the passenger header on last night. If my shock tower wasn't bent towards the engine I could have left it but ill have to replace it anyways. Had to use bush cutter trimmer things to cut the 2 tubes on the headers that didn't fall off when I unbolted them lol, they fit well otherwise and look SEXY. Going to try and tackle the drivers side tonight after work. It is VERY VERY easy to do with your front axle and clip off, I recommend doing it that way.
#11
04-07-2013, 02:16 PM
#12
04-11-2013, 11:36 PM
Exhaust is done (for now) - took a bit more engineering than I originally thought. Initially I checked with a couple of local shops and got estimates from $500 to $700. One shop even told me that he had to install cat converters since it might have come factory with them - and it would cost another $200. Guess I'll do it myself.
I used 2 1/4" pipe going straight back into Flowmaster Series 40 mufflers. Since I don't have a welder (and didn't want a permanent system yet), I used band clamps from Summit Racing. The challenging part was to easily craft the hangers. To have everything mounted from the frame, I used 1/2" bolts through mostly existing holes in the frame. From these I hung straps down to the clamps. Someday if I get some metal working tools, I'll make something different, but these worked great and were easy. Here are some pictures:
I used 2 1/4" pipe going straight back into Flowmaster Series 40 mufflers. Since I don't have a welder (and didn't want a permanent system yet), I used band clamps from Summit Racing. The challenging part was to easily craft the hangers. To have everything mounted from the frame, I used 1/2" bolts through mostly existing holes in the frame. From these I hung straps down to the clamps. Someday if I get some metal working tools, I'll make something different, but these worked great and were easy. Here are some pictures:
That's pretty much exactly what I want to do with my 79. Was that a kit?
#13
04-13-2013, 07:57 AM
F250 4x4 fenderwell exit pics?
I thought about modifying a kit, but buying the parts was cheaper and I could engineer it as I went along. It did take me a few trips to Autozone, etc. looking at different hanger parts to get what I wanted. One key was finding the short mandrel bent pipes (Cherry Bomb 52014 at Summit) that were just perfect combined with an offset in / center out muffler to dump out just in front of the rear tire. Someday down the road I'd like to extend the exhaust out the back, but that looks like a big challenge given I have to go back inside the frame rails. Another reason I went with clamps.
#15
04-13-2013, 05:43 PM
F250 4x4 fenderwell exit pics?
For me, it doesn't seem too loud. I like the fact that it doesn't pop and crackle like the previous glasspacks. However, it does have a low-frequency drone at idle and just above idle. I'll have to do the math, but I'm guessing this is a resonance exacerbated by the straight pipes. I thought about fixing it by adding a resonator pipe, but that's on hold until I determine whether I want to modify the exits to go out the back and see if there's an easy way for a crossover. I assume these mods would affect the sound.