
Fuel Pump Replacement - LOTS of pics!
#1
 01-18-2013, 02:45 PM


Fuel Pump Replacement - LOTS of pics!
Twice over the past month my Excursion has refused to start after sitting overnight. Both times this has happened it has cranked strong but refused to start, and the common theme was that the fuel pump could not be heard after turning the key on. The first time I thought it may have been a sticky relay, but the second time it happened I swapped relays and still no fuel pump. Both times after repetitious cycling of the key and finally hearing the pump kick on it would start and run just fine.
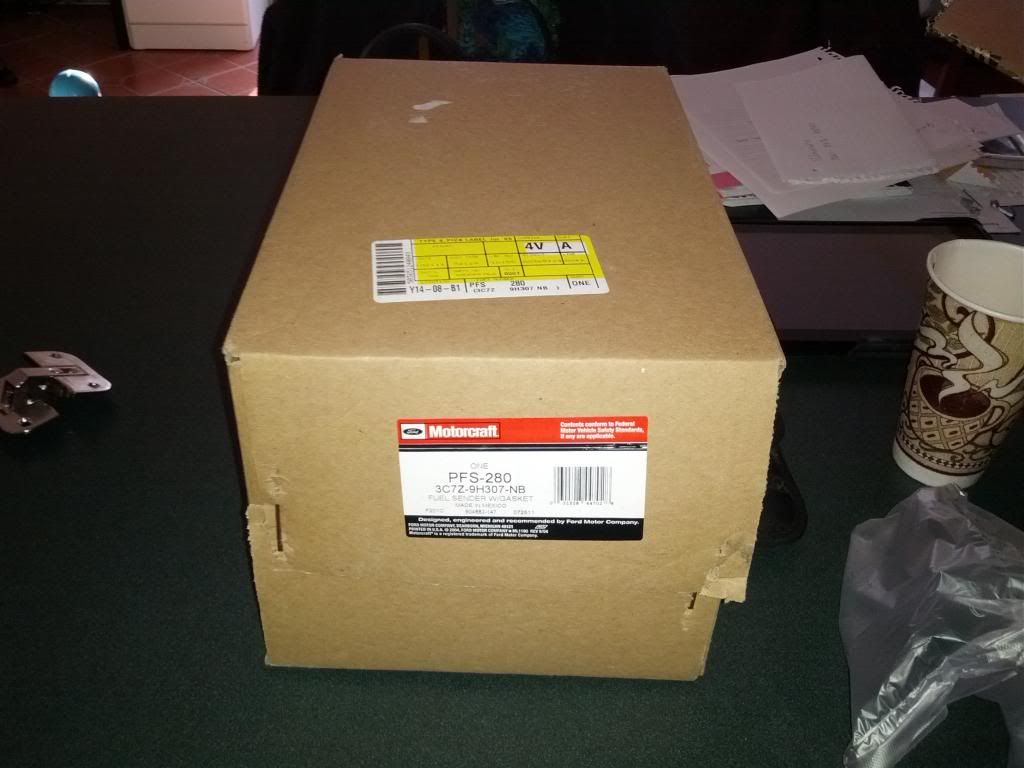
In the past I've been burned by using cheap parts, so I resolved a couple of years ago to use OEM or equivalent parts when I take the time to replace something. Tousley Ford and Rockauto both wanted over $320 for a Motorcraft replacement, but Amazon sold it to me for $270 shipped.
And it arrived today:
First step is to get as much fuel out of the tank as possible. Fortunately I only have 1/4 tank left, but I can do better than that. Using my disconnect tool I removed the line going into the fuel filter.
I then jumped the fuel pump relay...
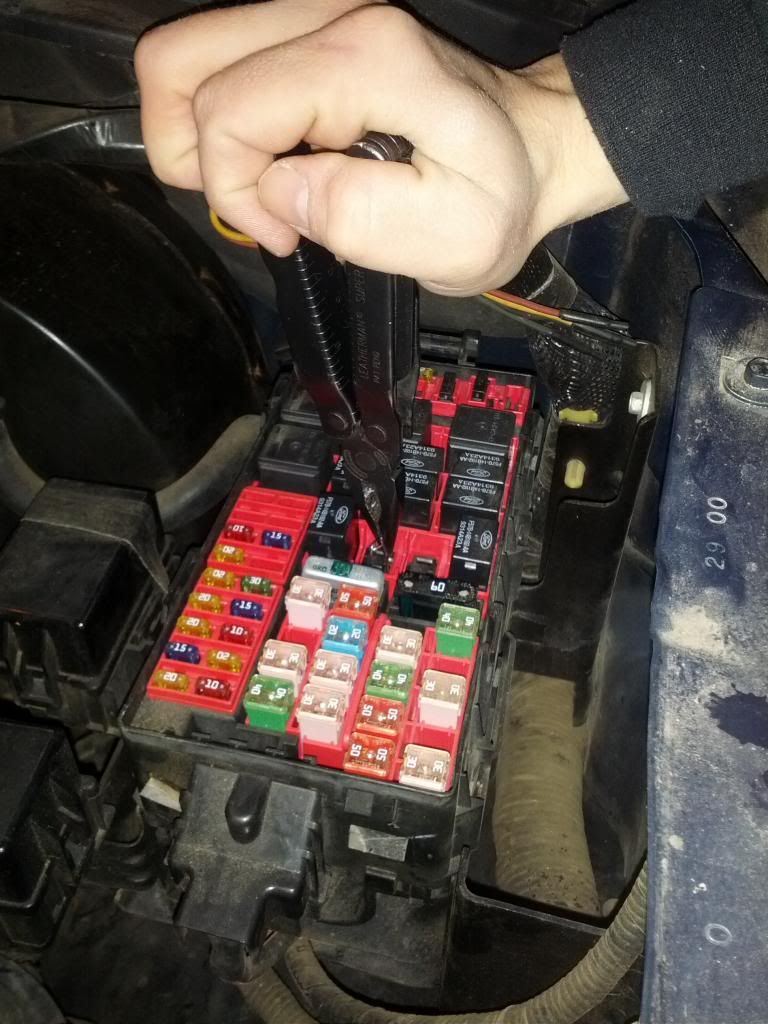
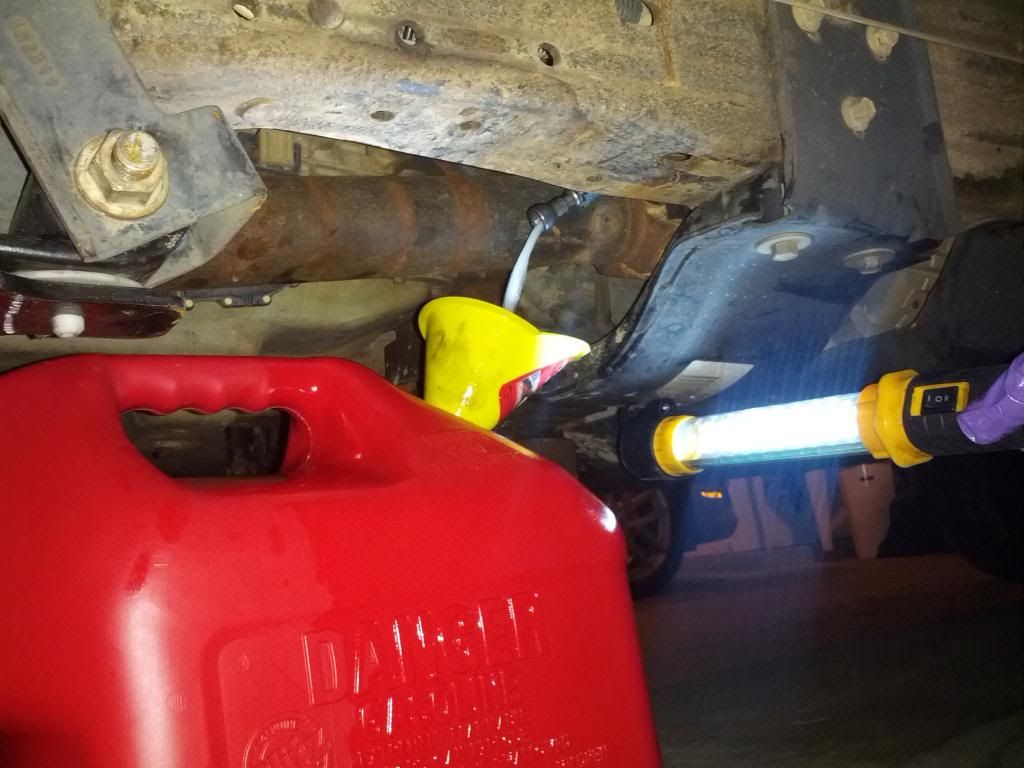
While my wife pointed the fuel line into a 5 gallon gas can:

I pumped out five gallons so far and my wife had to go upstairs, in a few minutes we will finish pumping the rest out and I'll start dropping the tank. More to follow, I'll be taking lots of pics!
In the past I've been burned by using cheap parts, so I resolved a couple of years ago to use OEM or equivalent parts when I take the time to replace something. Tousley Ford and Rockauto both wanted over $320 for a Motorcraft replacement, but Amazon sold it to me for $270 shipped.
And it arrived today:
First step is to get as much fuel out of the tank as possible. Fortunately I only have 1/4 tank left, but I can do better than that. Using my disconnect tool I removed the line going into the fuel filter.
I then jumped the fuel pump relay...
While my wife pointed the fuel line into a 5 gallon gas can:
I pumped out five gallons so far and my wife had to go upstairs, in a few minutes we will finish pumping the rest out and I'll start dropping the tank. More to follow, I'll be taking lots of pics!
#2
01-18-2013, 02:59 PM

I like Amazon, very affordable OEM parts available. I try to point many
Users to Amazon. You can't beat the ease of purchase and the speed of
Delivery - right to your mailbox!
BTW, I have not had the need to remove fuel from a late model vehicle,
But is it possible to siphon through the filler? Or is there a anti siphon
Device in place?
Users to Amazon. You can't beat the ease of purchase and the speed of
Delivery - right to your mailbox!
BTW, I have not had the need to remove fuel from a late model vehicle,
But is it possible to siphon through the filler? Or is there a anti siphon
Device in place?
#3
01-18-2013, 03:33 PM
It may be possible to siphon it out, but this seemed easier to me. I let it pump until the flow was down to a trickle, so I should have only a small amount of gas remaining in the tank. Headed out to dinner with the family, once I get back I'll start pulling the tank.
Draining the tank was this easy:
Draining the tank was this easy:
#5
01-18-2013, 03:46 PM
#7
01-18-2013, 10:25 PM
Got the job done in about two and a half hours, it wasn't nearly as tough as I thought it was going to be. I spent more time trying to disconnect and reconnect the filler lines than I did anything else, and even those weren't terribly difficult. I have a couple dozen pics I took along the way, and I'll post those tomorrow morning.
Trending Topics
#8
01-19-2013, 08:33 AM
How to replace the fuel pump
Okay everyone, here are the pics as promised:
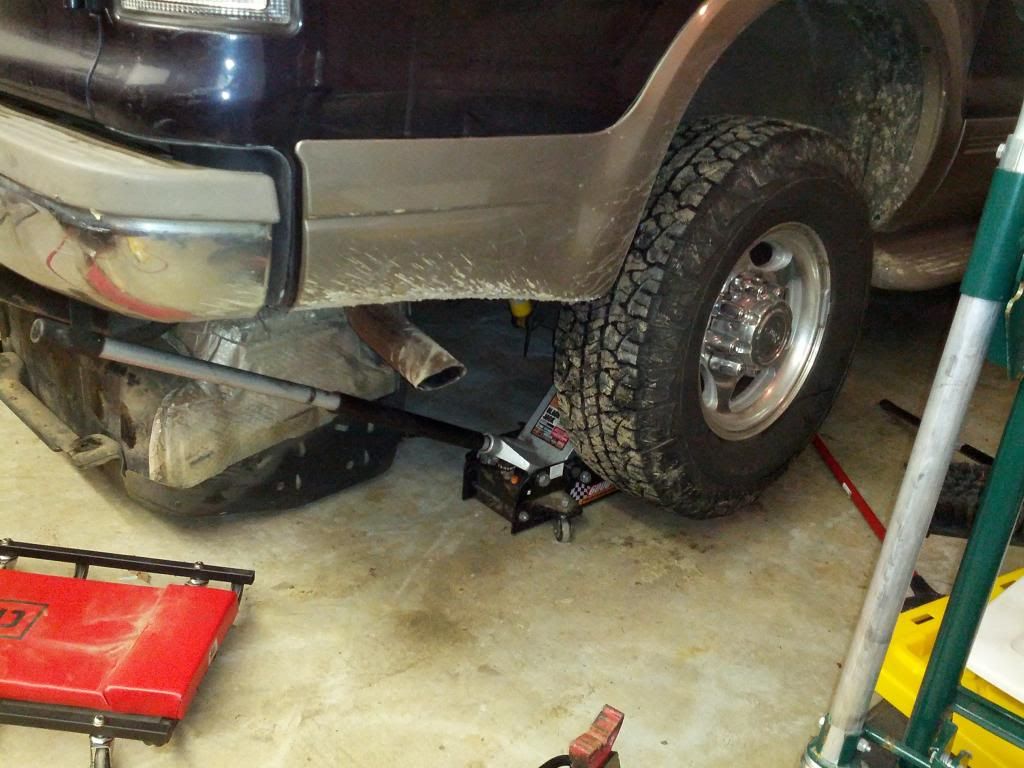
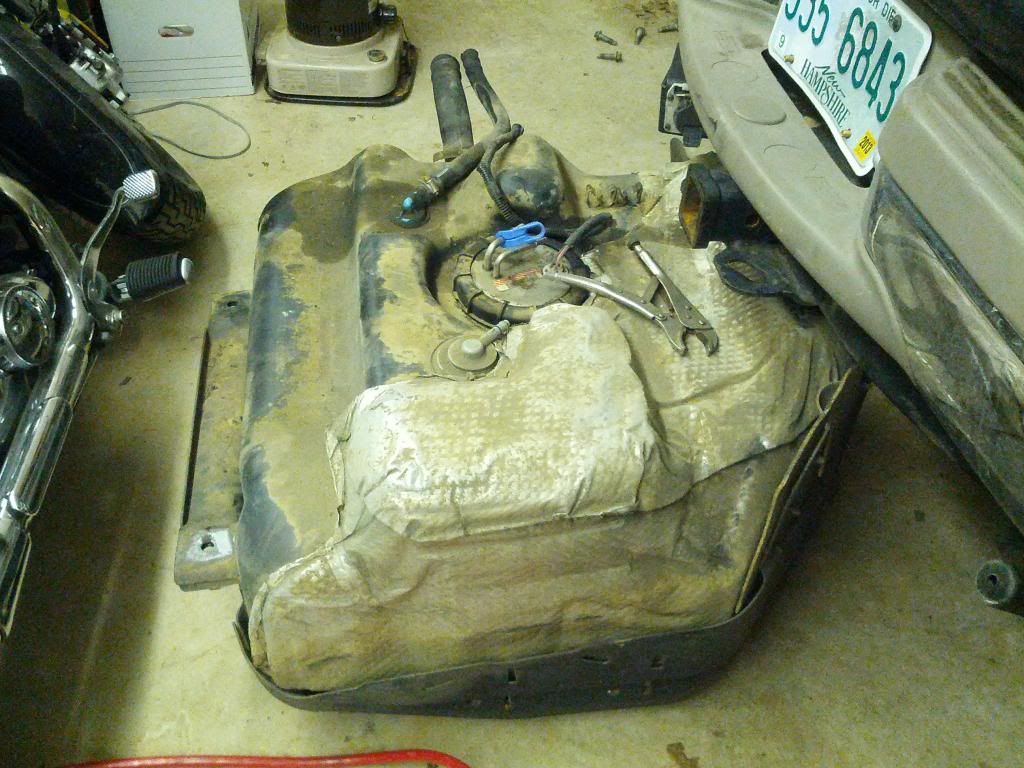
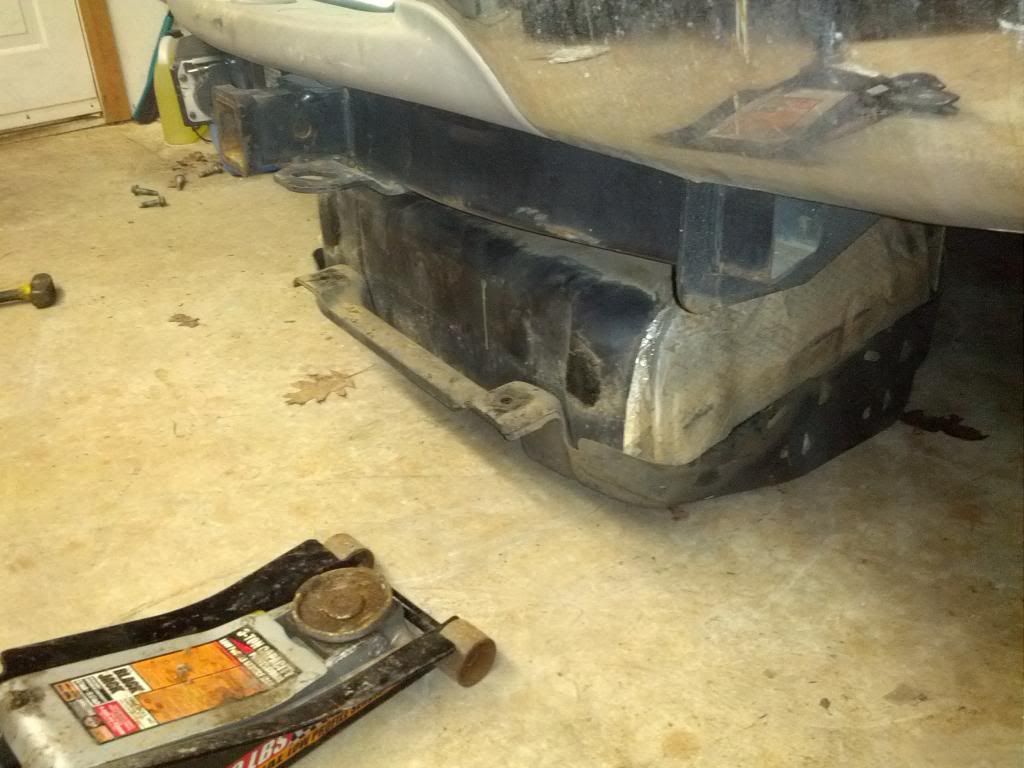
First I inflated my airbags to the 100 PSI maximum to raise the suspension as much as possible. Then I positioned my floor jack under the tank to support it while I removed the bolts. My tank was nearly empty, but with the metal skid plate the entire thing was still over 100 lbs in my estimation:
NOTE: while it may seem obvious it's worth mentioning that those four bolts that hold the skidplate are the only fasteners that hold the tank. There are no straps or anything else underneath to hold the tank in place, be sure to have a jack under the tank EVEN IF IT'S EMPTY! It's also worth mentioning that there's enough slack in the lines to allow the tank to rest on the ground without tearing anything off.
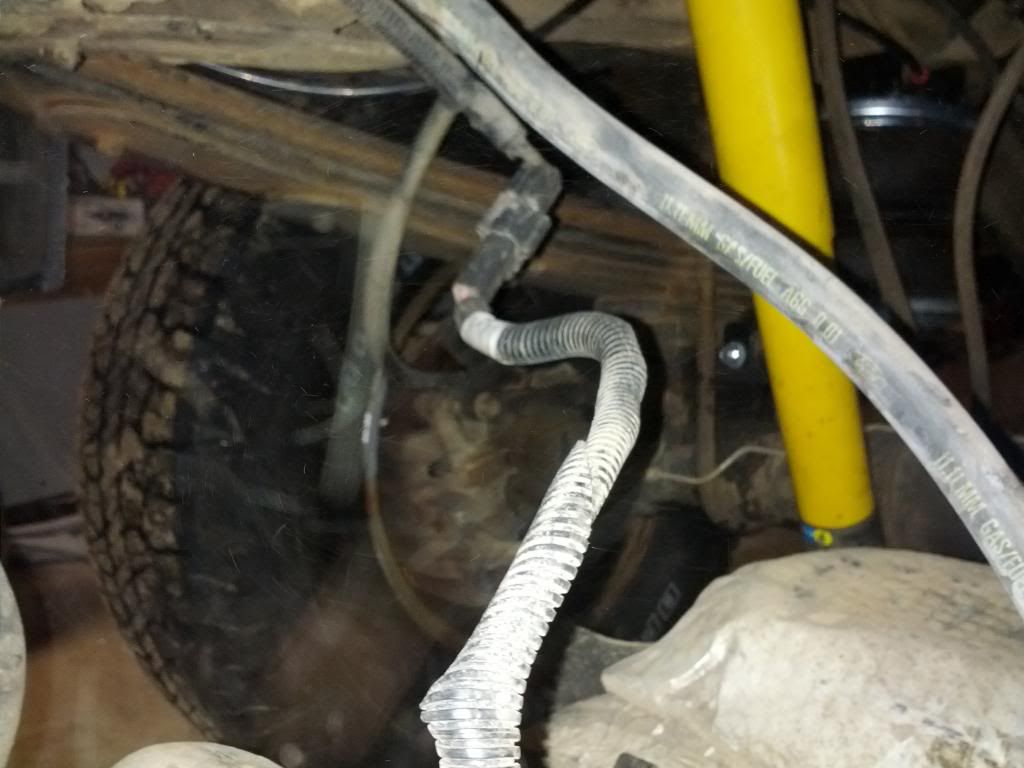
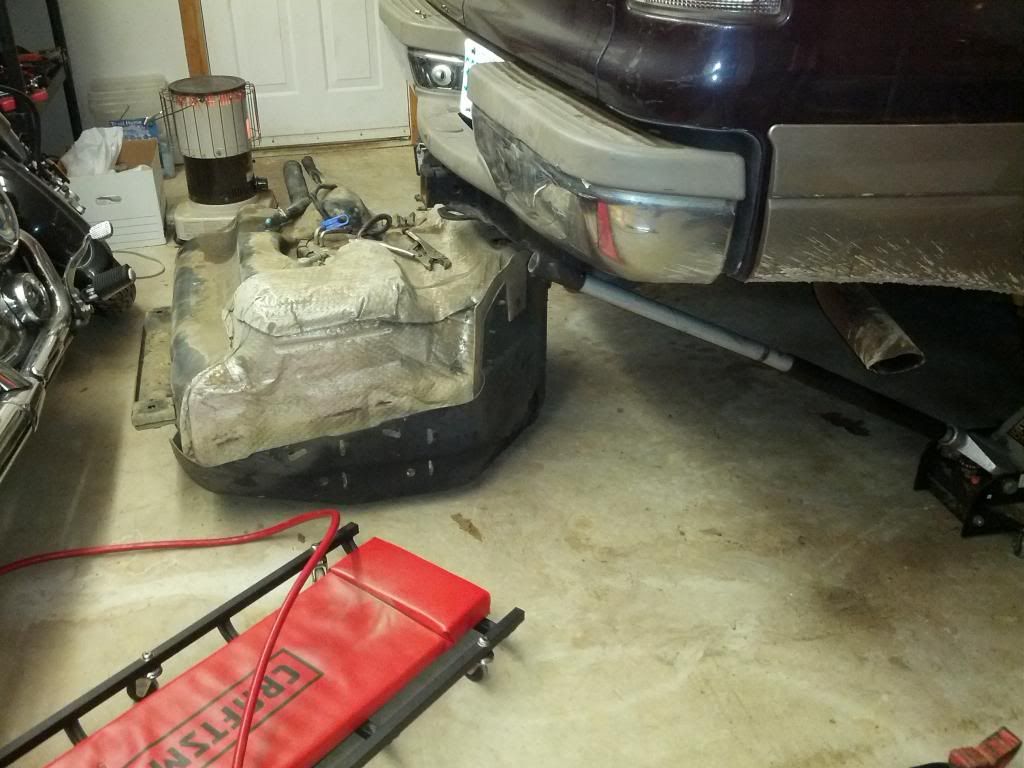
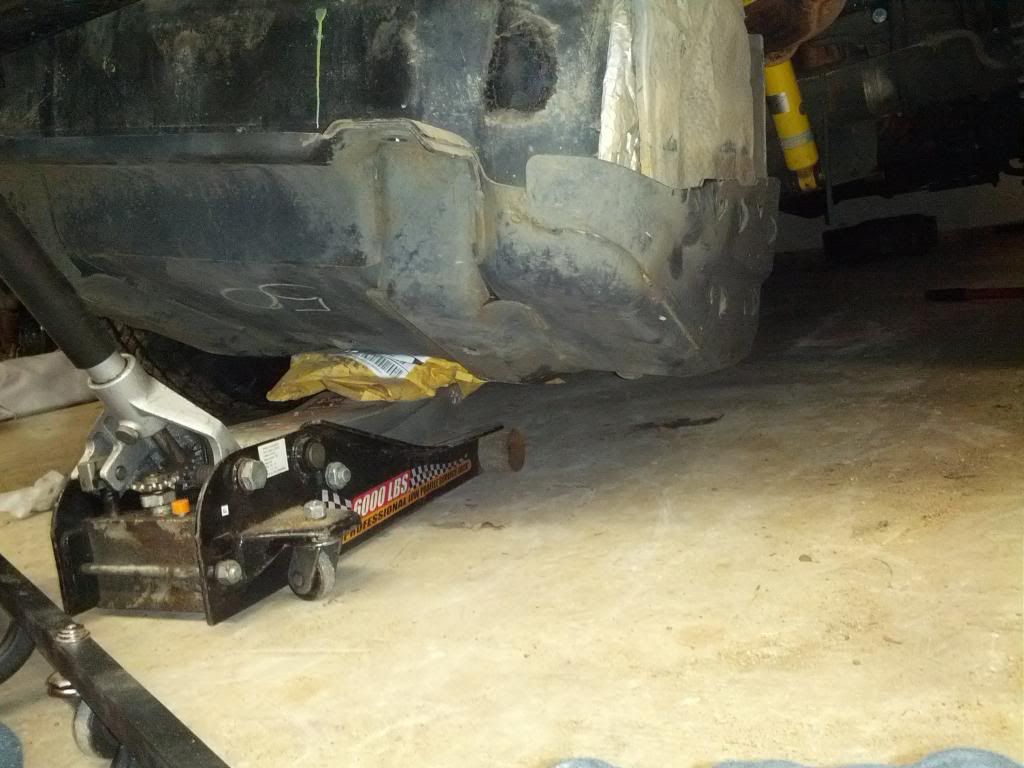
Next I saw how little clearance I had to get in and remove the lines, so I jacked up one wheel...
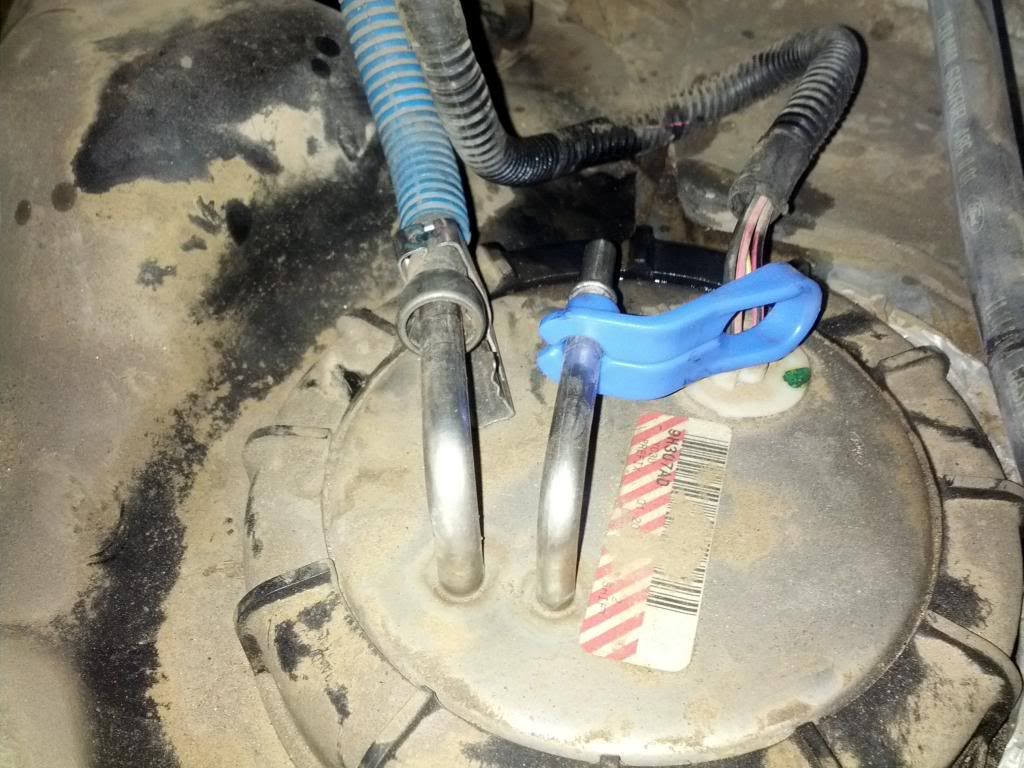
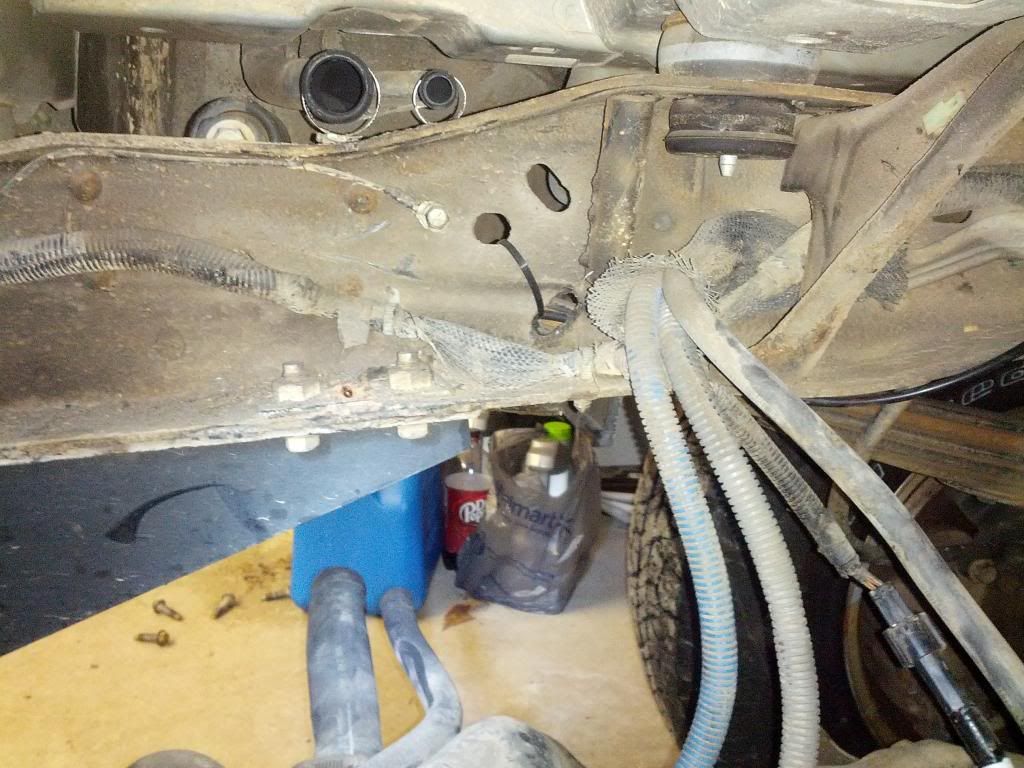
And had the clearance to come in under the hitch to disconnect the lines:
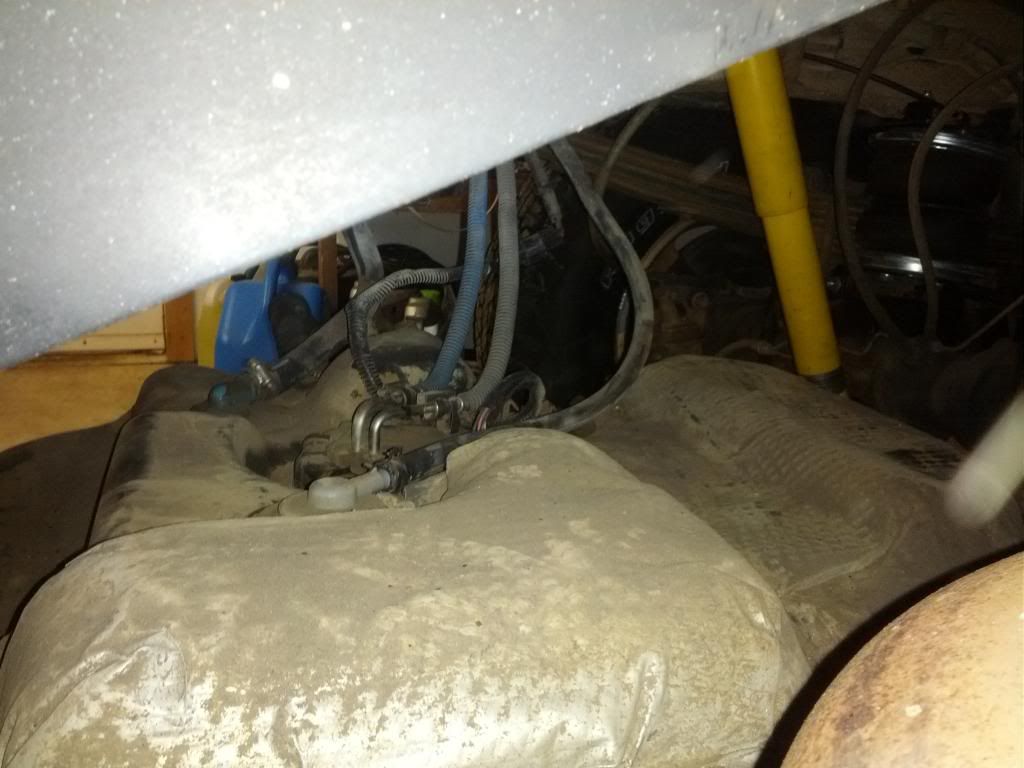
To disconnect the lines simply insert the disconnect tool into the flared end of the line and push inward...
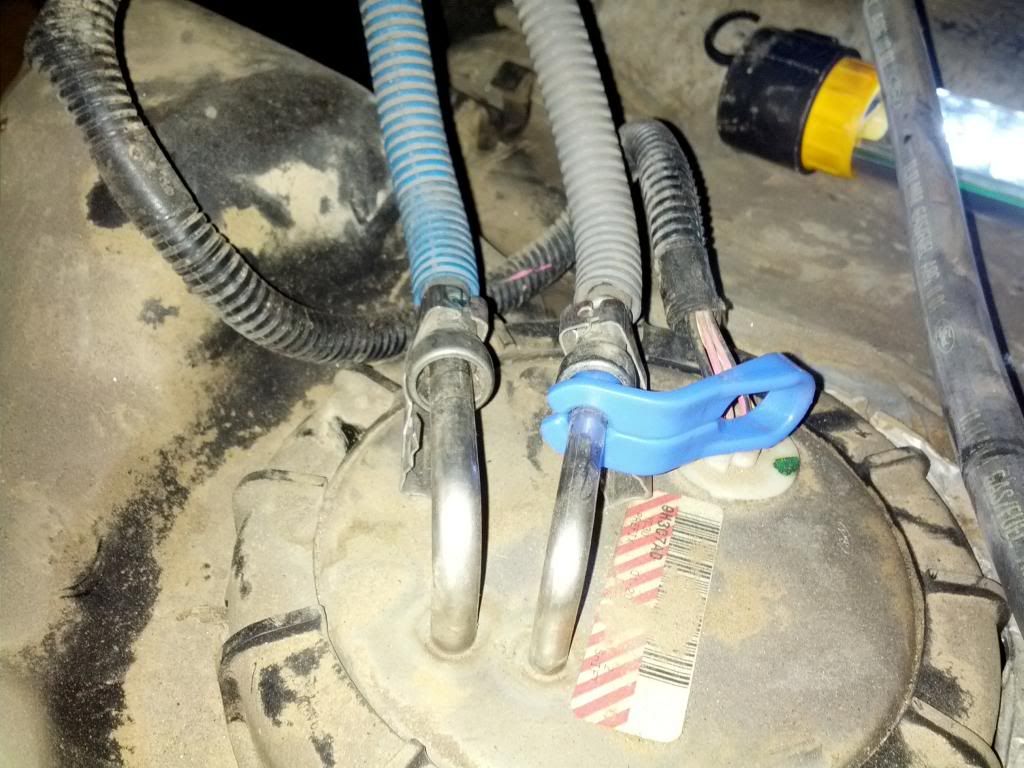
And then pull the line straight off:
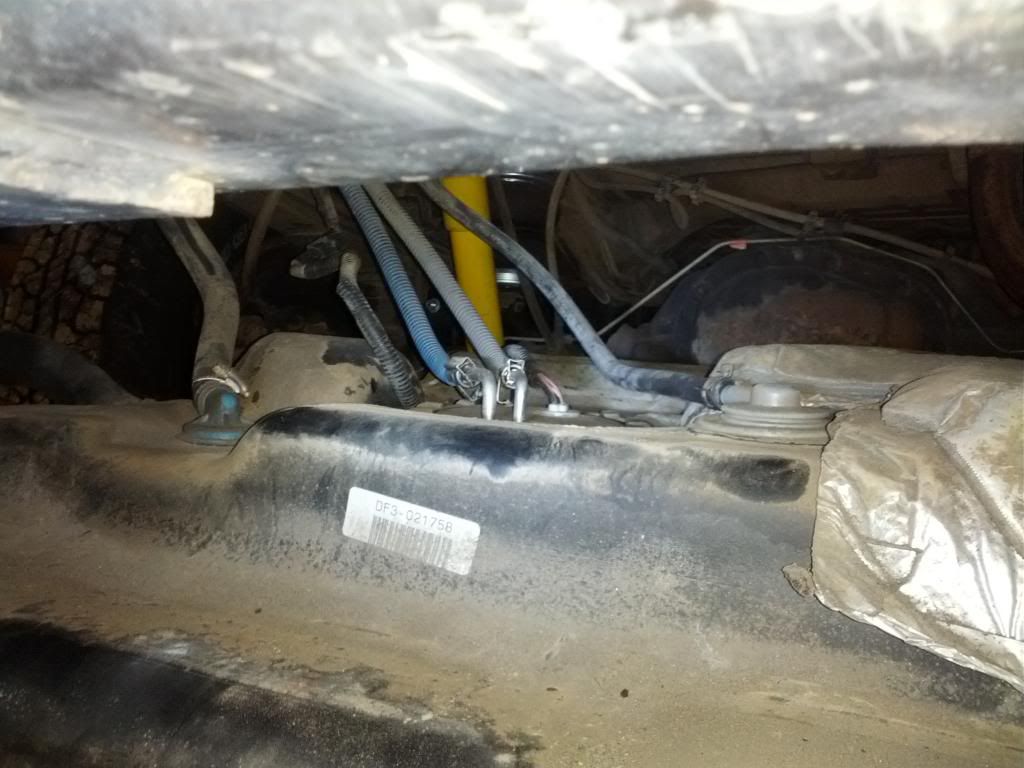
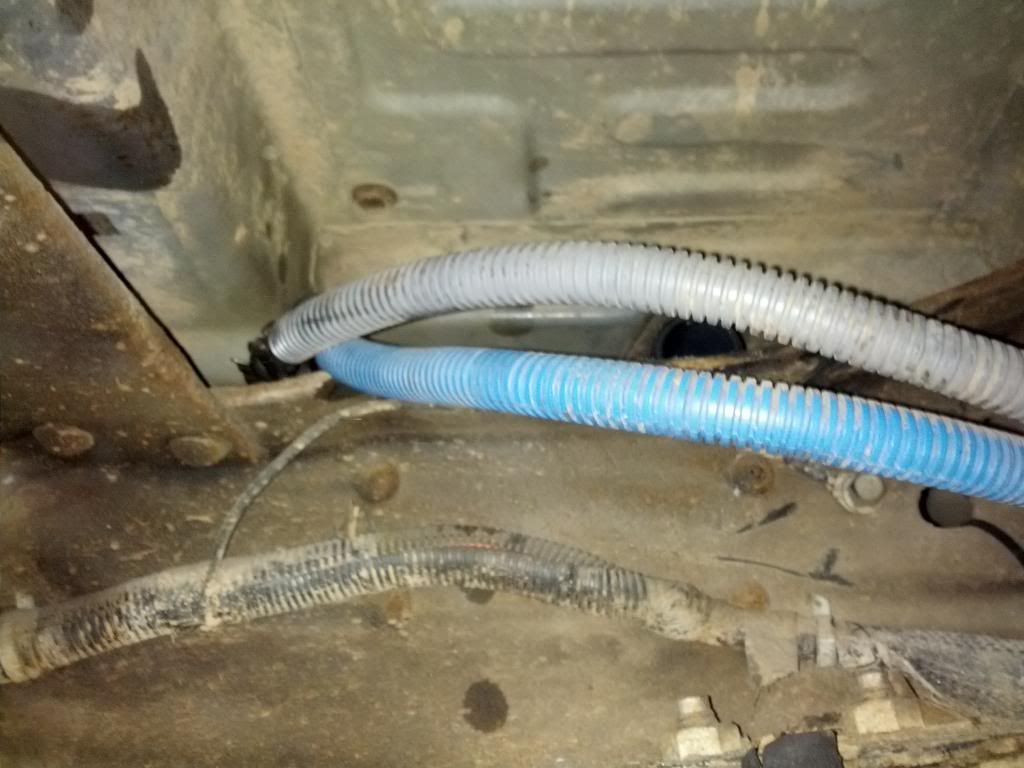
The lines still have fuel in them, so I hung them over the frame rail to minimize dripping:
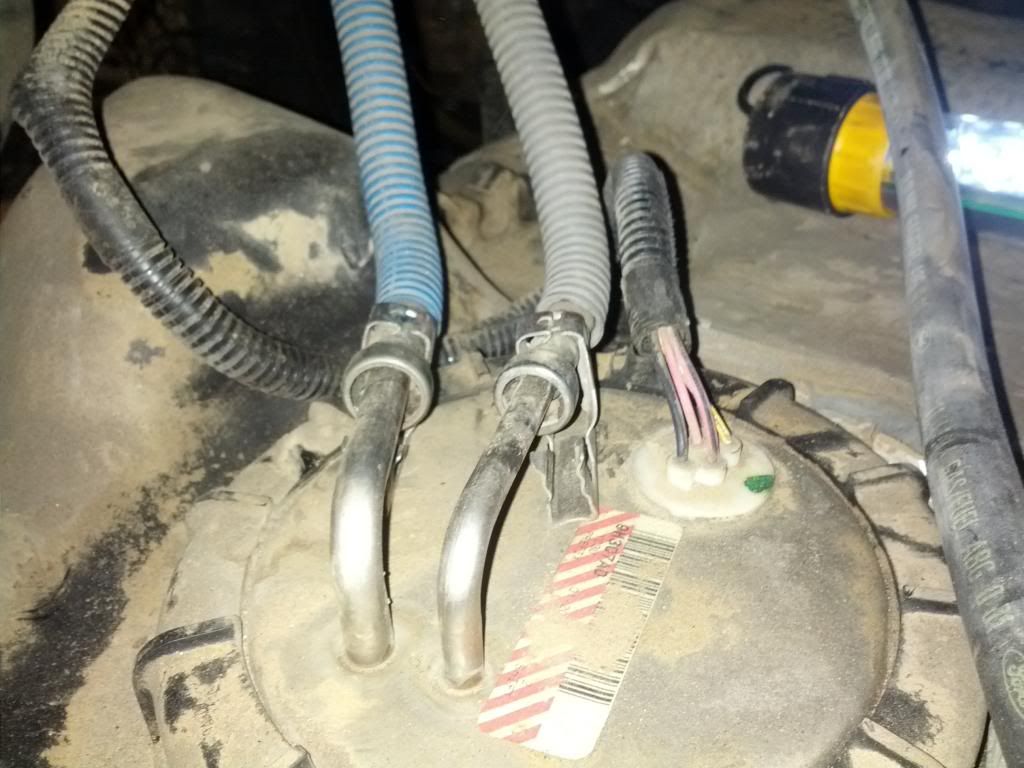
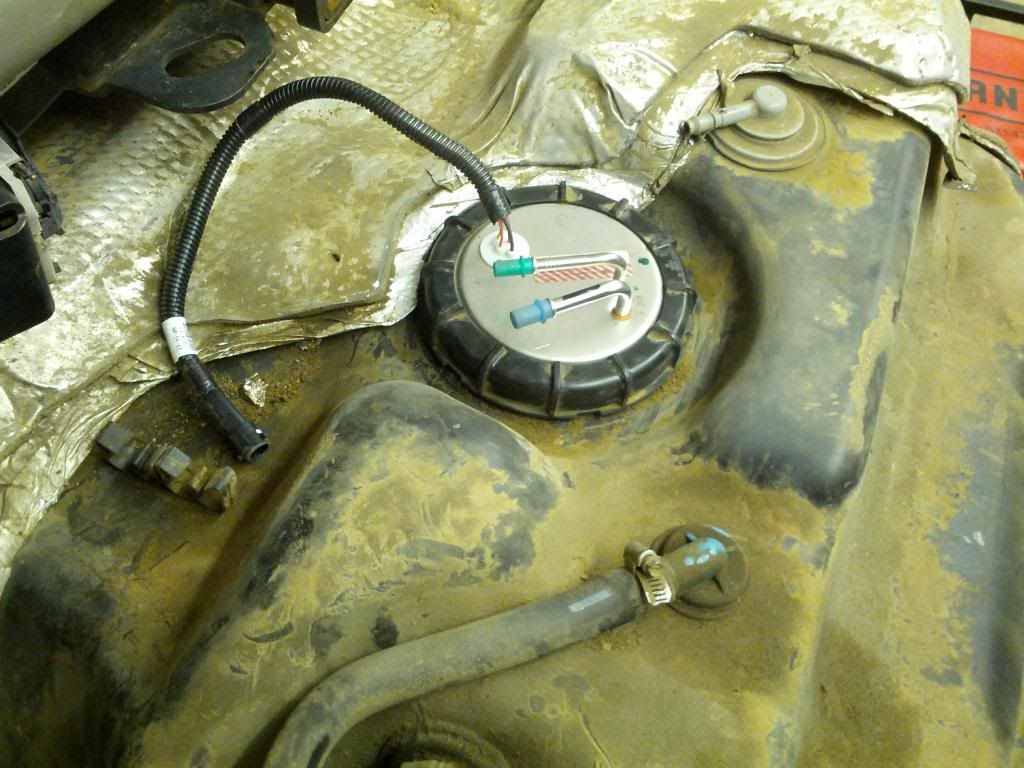
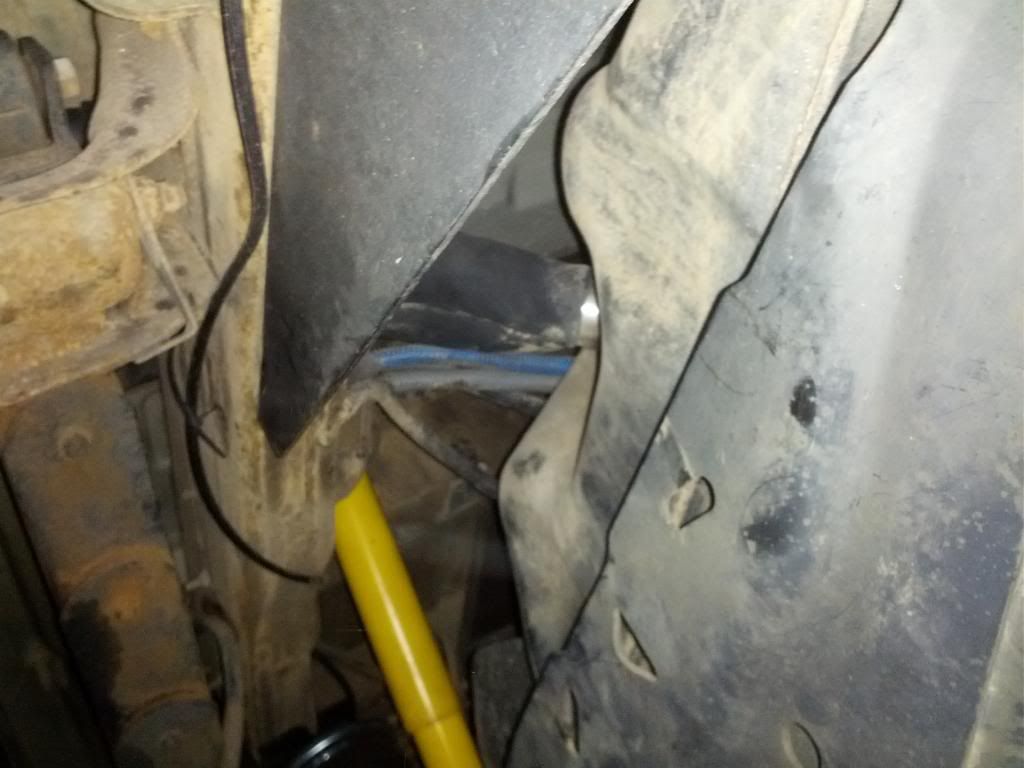
Disconnect the electrical connector:
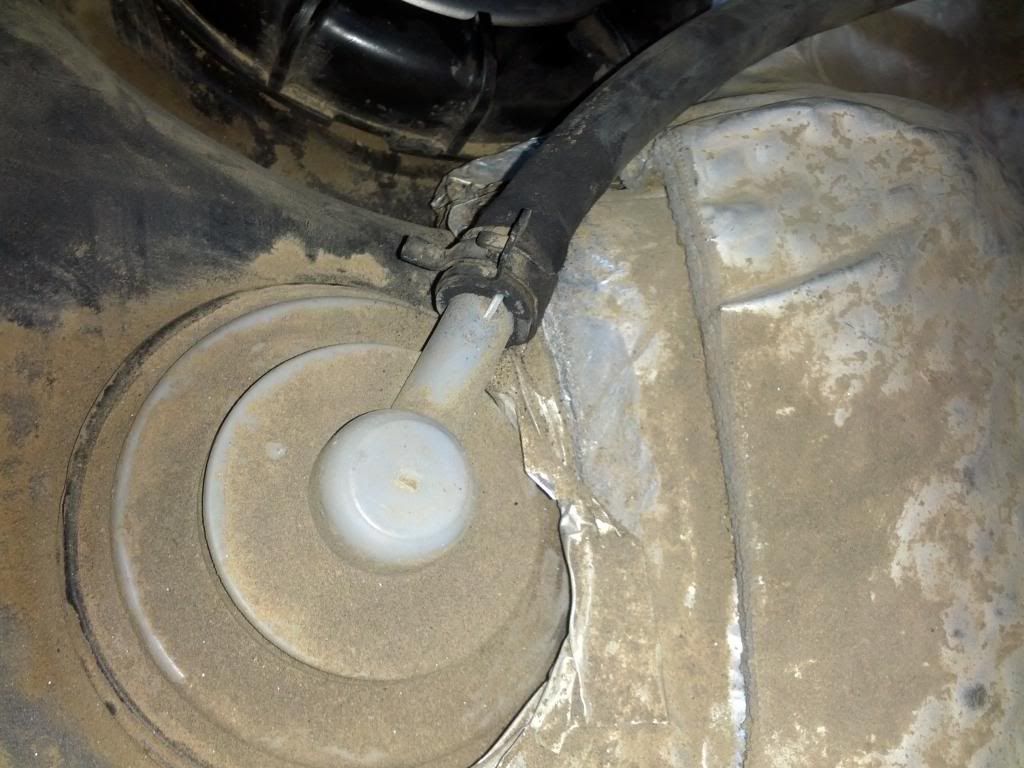
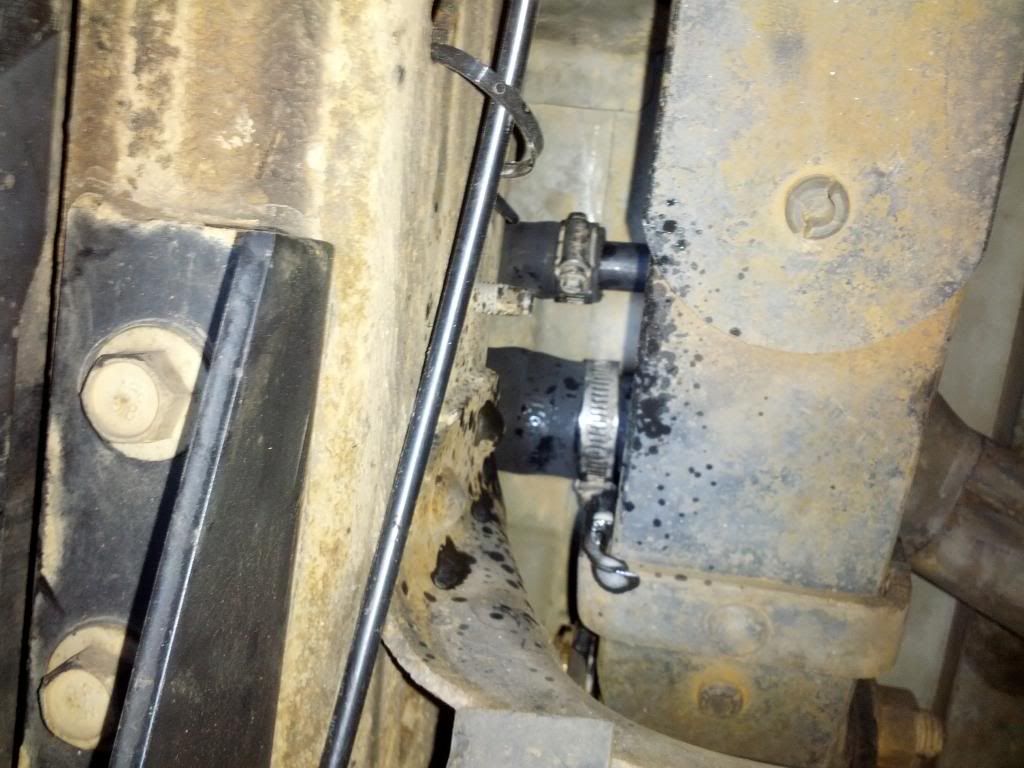
And the EVAP hose:

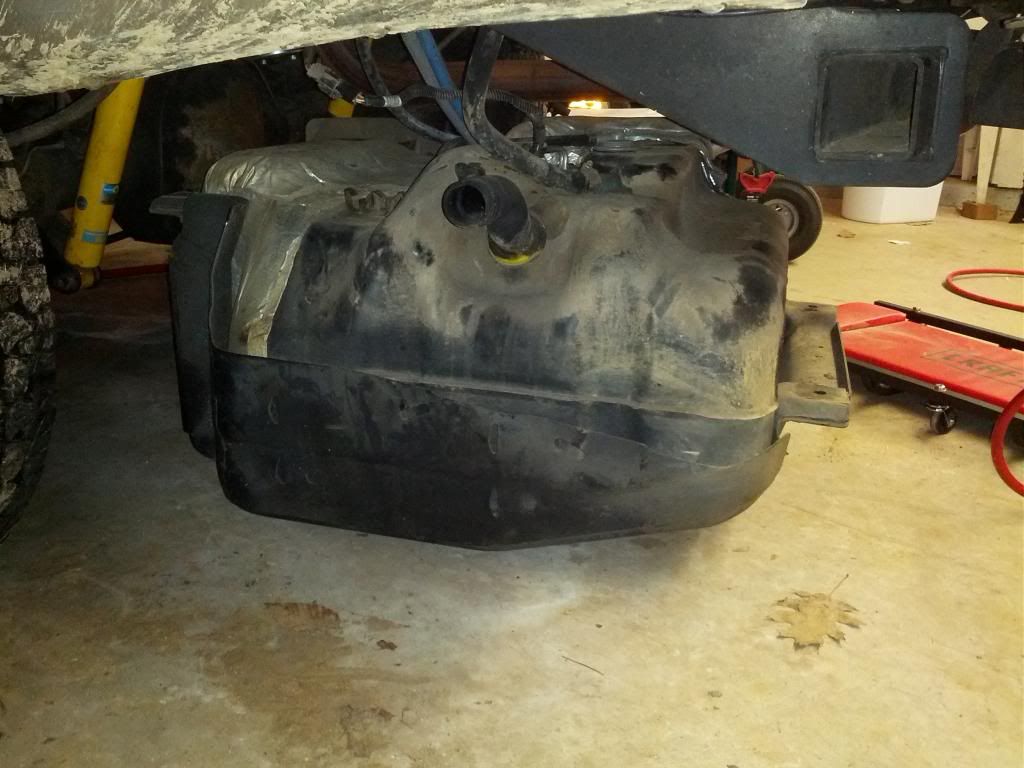
And slide the tank out! I would have barely cleared with the airbags inflated, but with a stock suspension you'd need to jack the rear axle a couple of inches to slide the tank out.
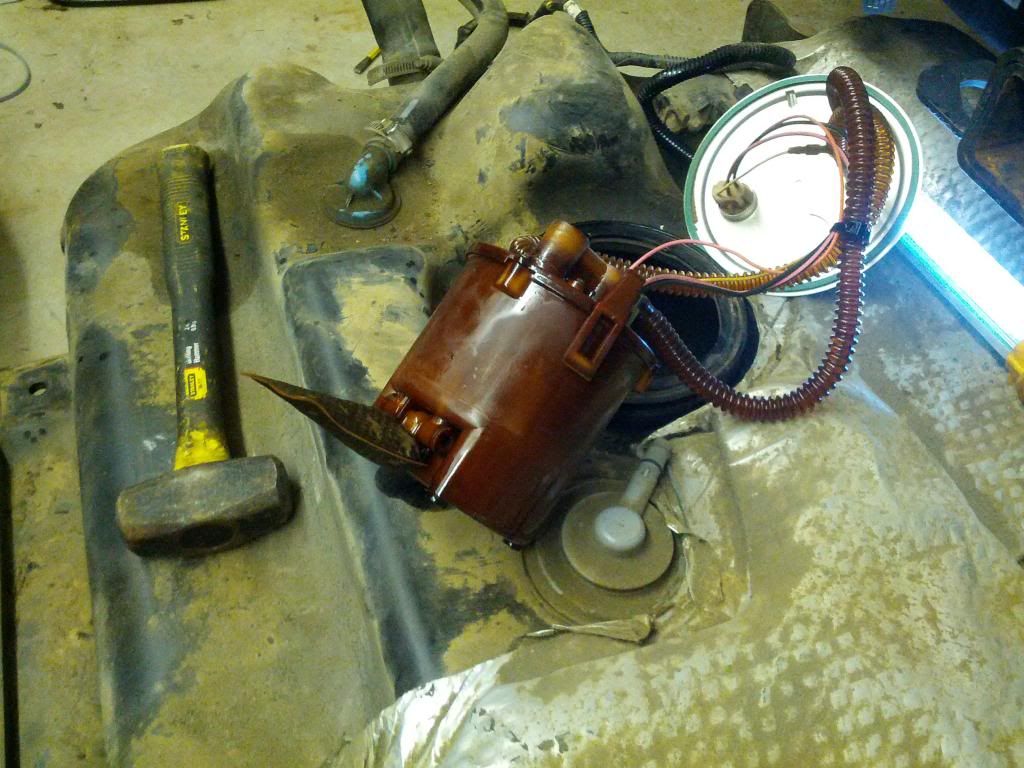
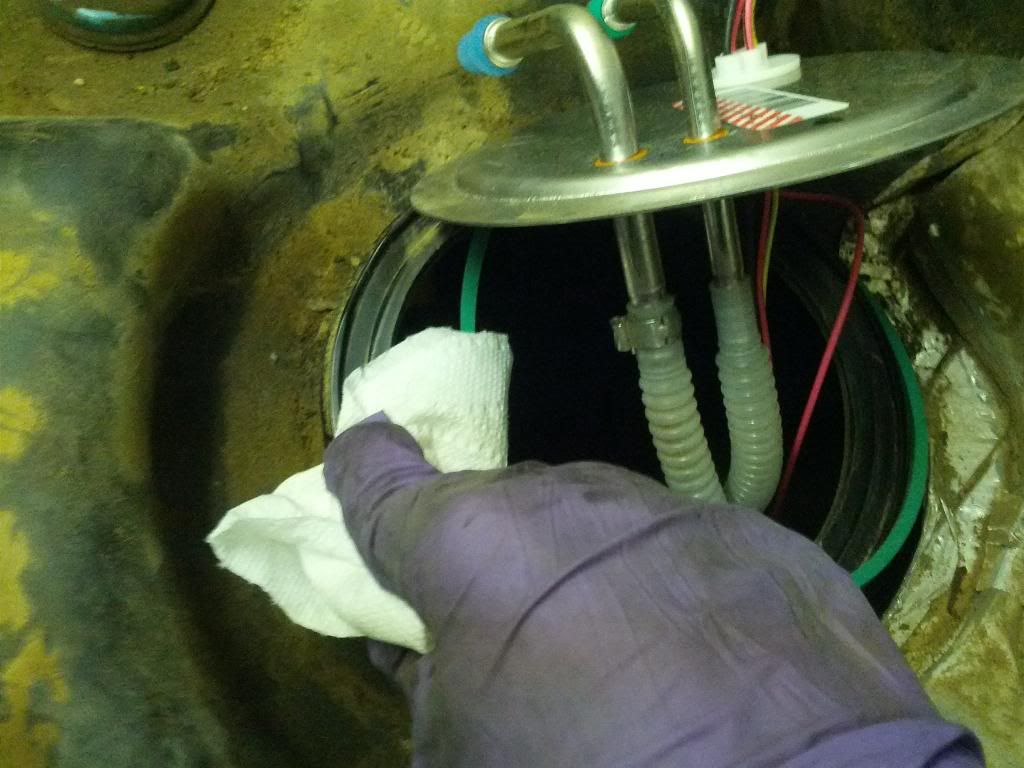
Now to remove the retaining ring. Supposed to use the Ford specific tool for this, but in it's absence I used a hammer and chisel.

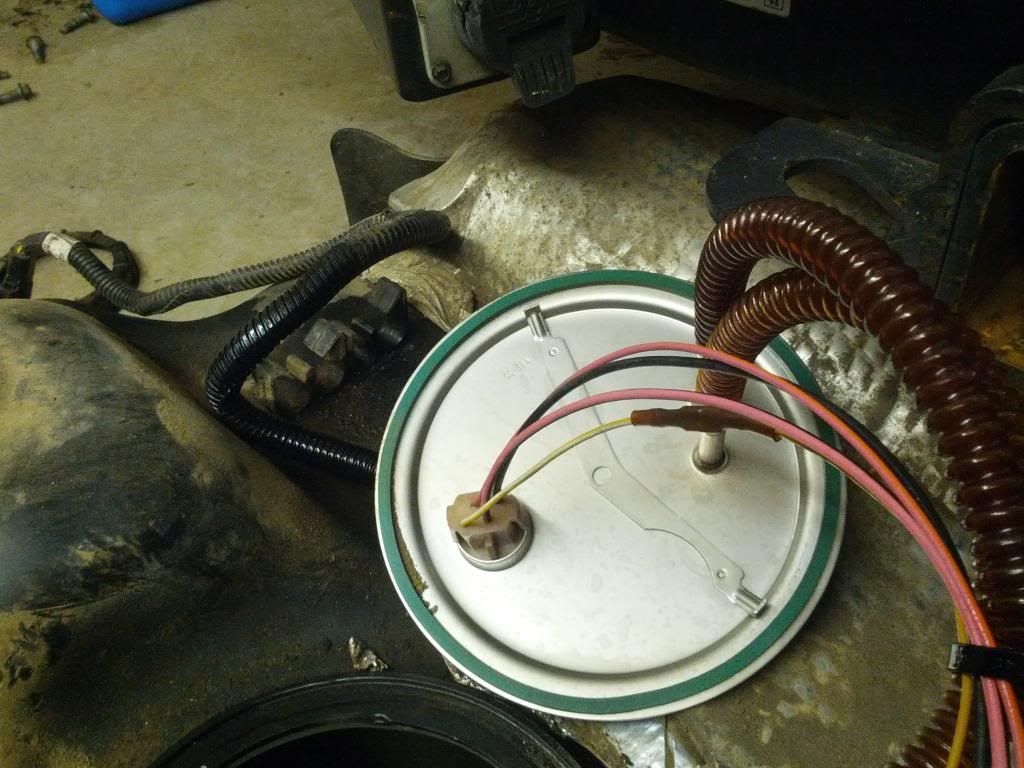
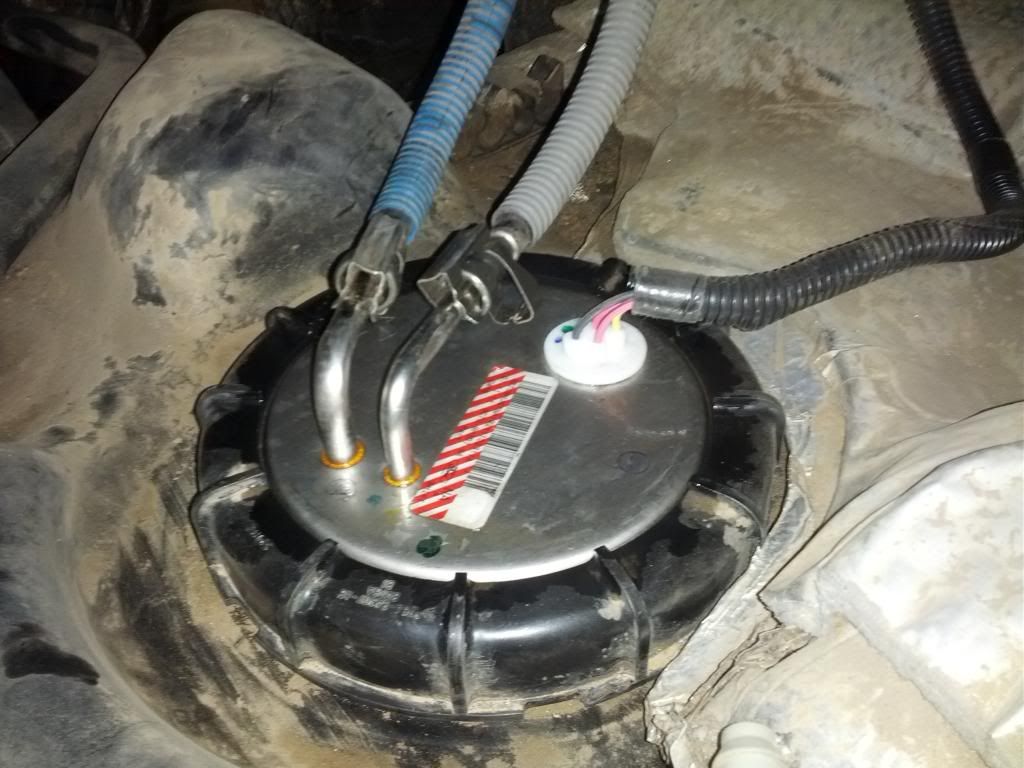
Take care to note the orientation of the cover, mine had an arrow pointing towards the driver's side:
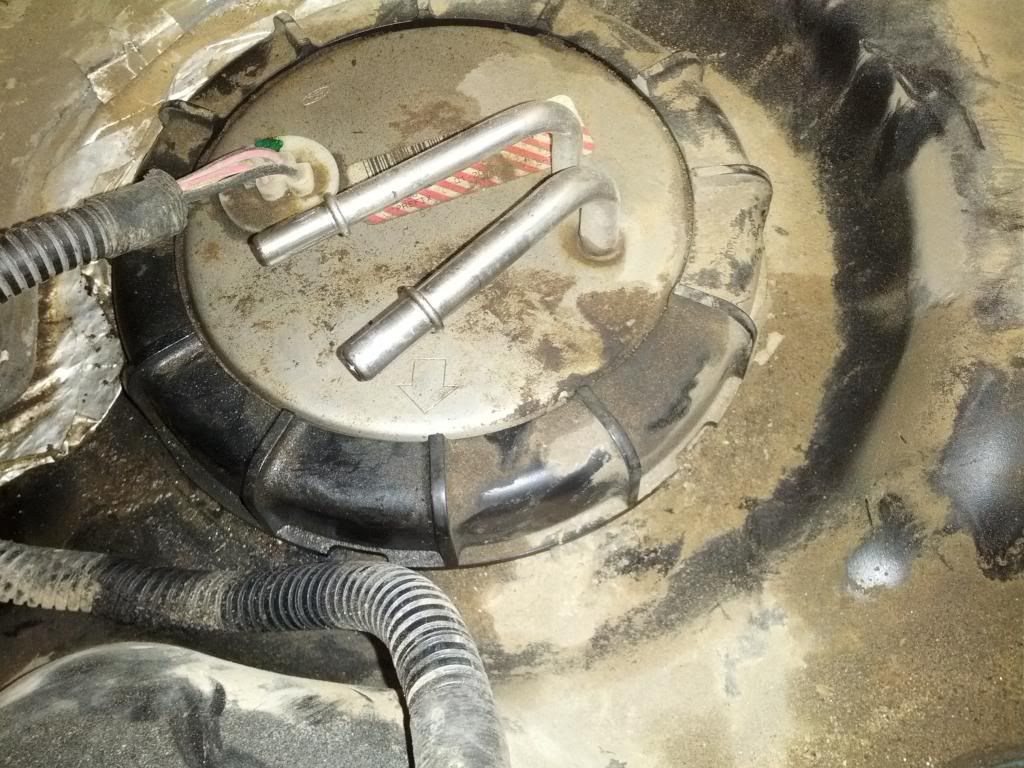
Once the ring is off pull the cover upward, note that the sender isn't a one piece unit like some other vehicles. The pump assembly is affixed to the bottom of the tank and the lines run to the cover.
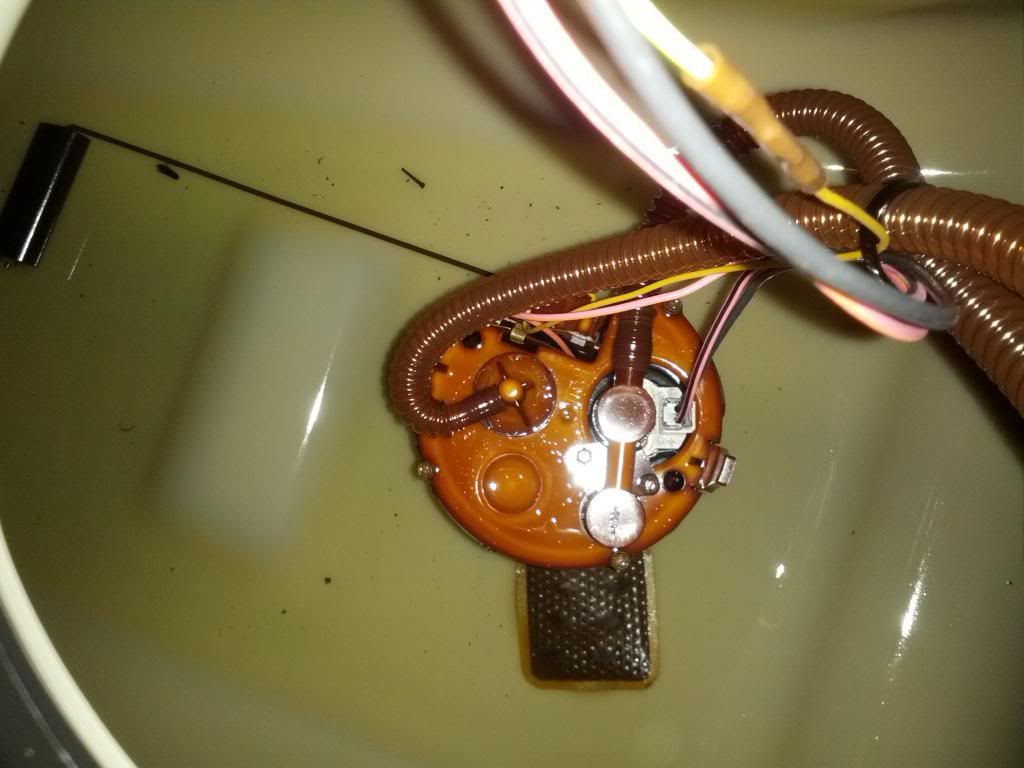
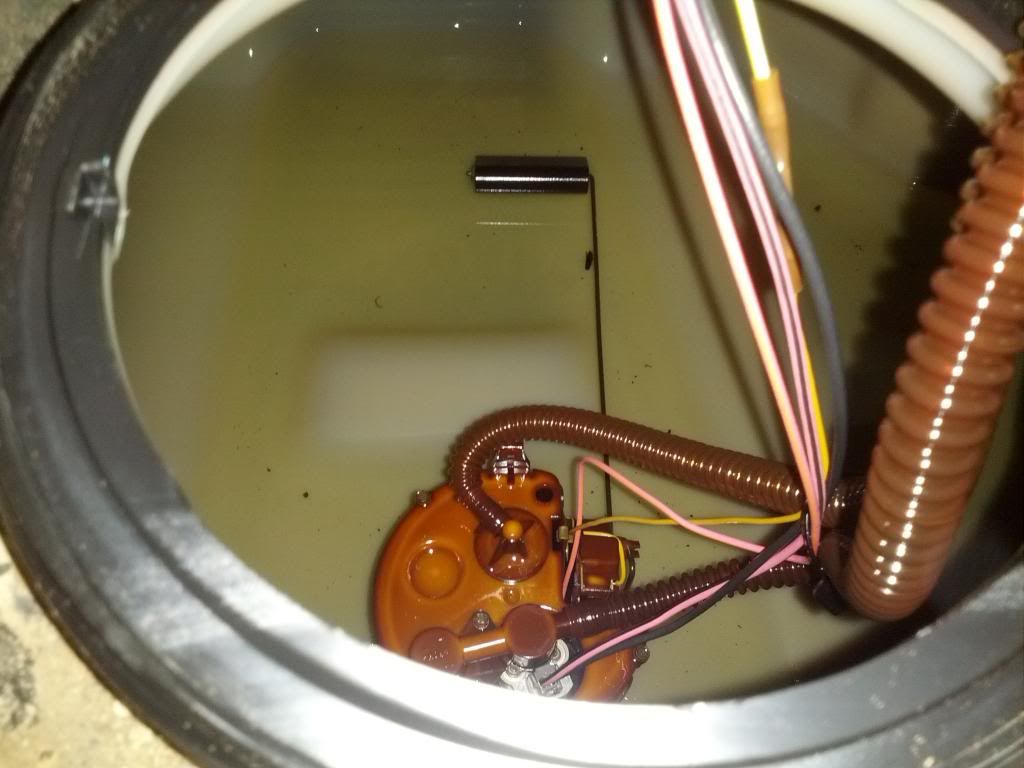
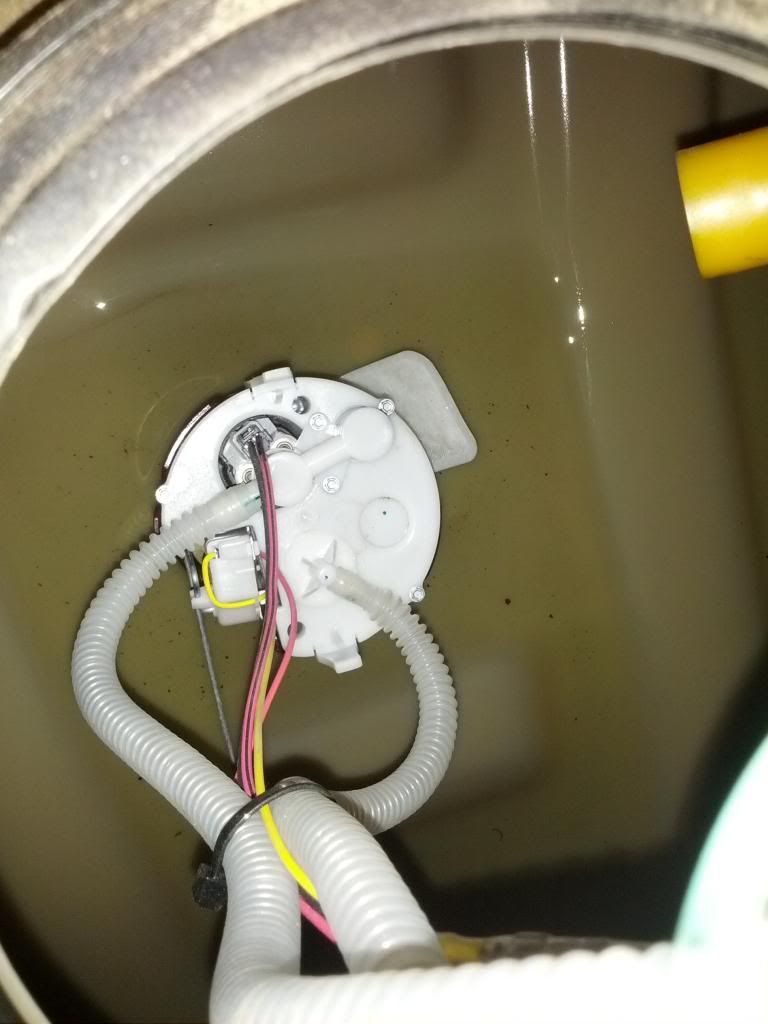
To remove, simply disengage the clips on the side of the pump and pull it out:
Close-up of the clips that secure the pump in place:
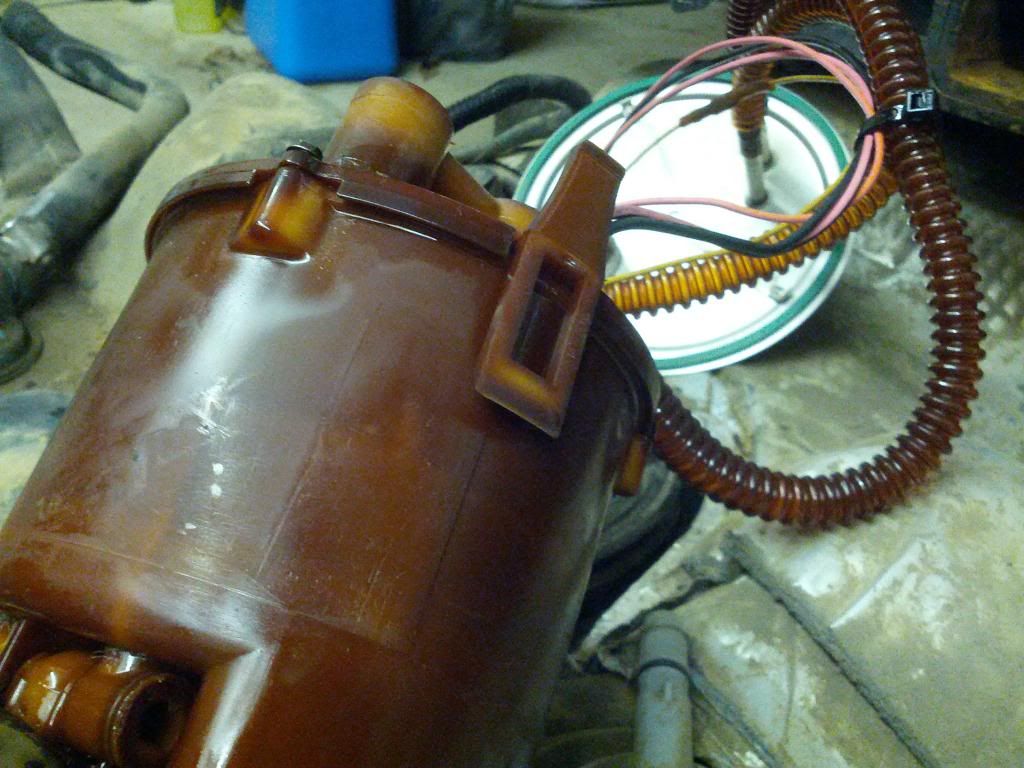
And this is the structure that affixes the pump to the tank:
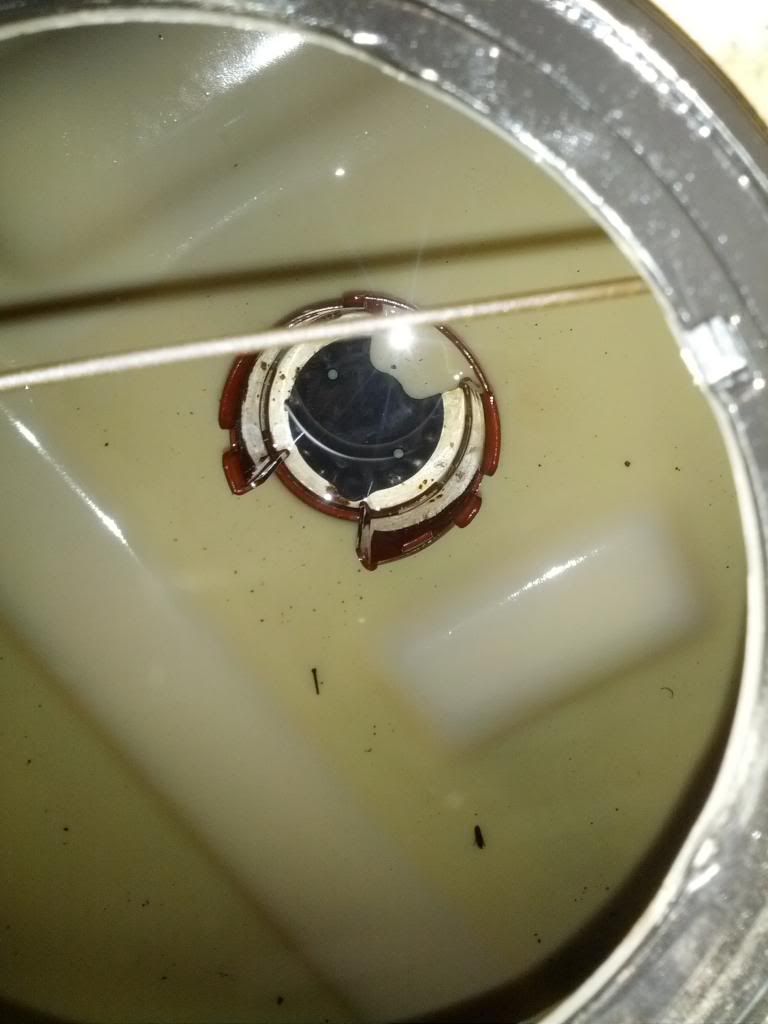
Note the green gasket that seals the cover to the tank:
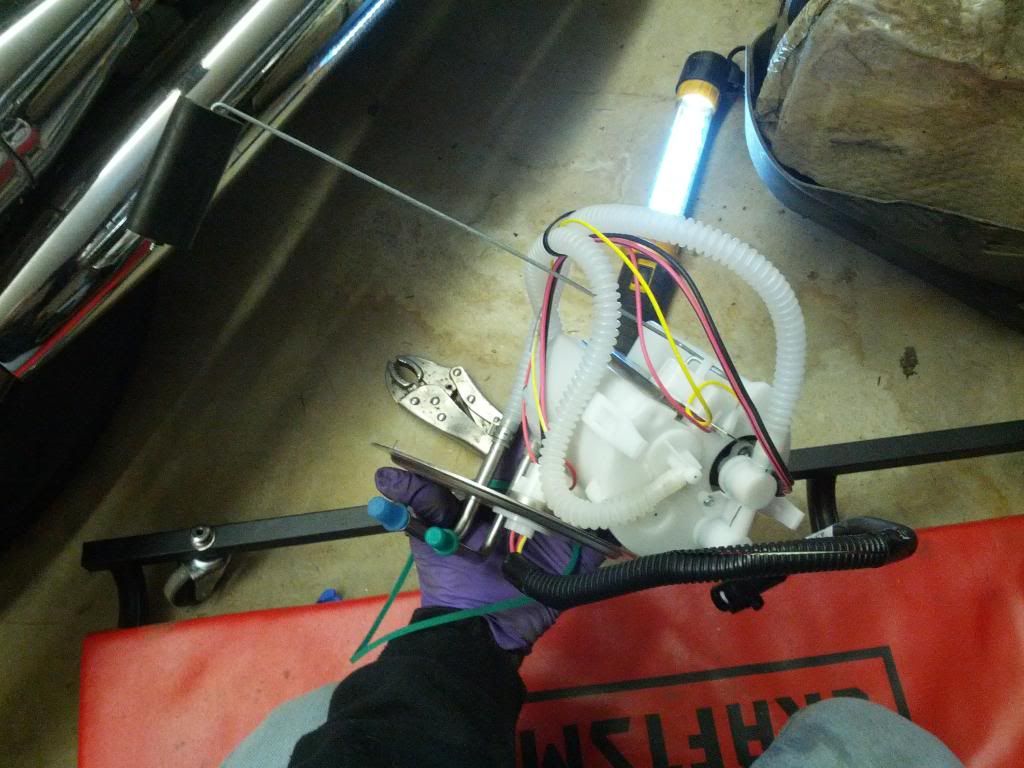
Old pump out, now for the new one. This is the pump and sender as it comes out of the box:
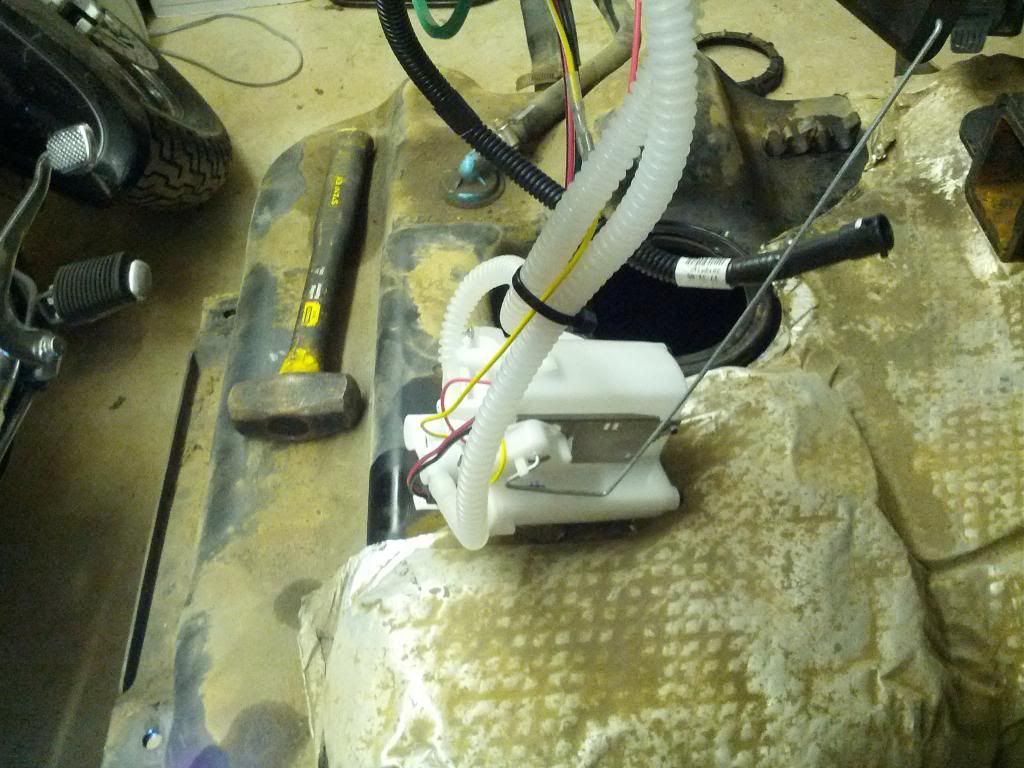
Take the new pump, put it into the tank...

And slide right in and snap in place:
Next clean the sealing surface on the tank that the gasket sits in:
And install the retaining ring:
Slide the tank back under and reconnect the lines:
And the EVAP line:
With required cursing and shouting position the tank on the jack and lift into place:
Be sure to guide it in between the frame rails...
Secure the four bolts, swear some more as you reconnect the filler lines:
And DONE.
First I inflated my airbags to the 100 PSI maximum to raise the suspension as much as possible. Then I positioned my floor jack under the tank to support it while I removed the bolts. My tank was nearly empty, but with the metal skid plate the entire thing was still over 100 lbs in my estimation:
NOTE: while it may seem obvious it's worth mentioning that those four bolts that hold the skidplate are the only fasteners that hold the tank. There are no straps or anything else underneath to hold the tank in place, be sure to have a jack under the tank EVEN IF IT'S EMPTY! It's also worth mentioning that there's enough slack in the lines to allow the tank to rest on the ground without tearing anything off.
Next I saw how little clearance I had to get in and remove the lines, so I jacked up one wheel...
And had the clearance to come in under the hitch to disconnect the lines:
To disconnect the lines simply insert the disconnect tool into the flared end of the line and push inward...
And then pull the line straight off:
The lines still have fuel in them, so I hung them over the frame rail to minimize dripping:
Disconnect the electrical connector:
And the EVAP hose:
And slide the tank out! I would have barely cleared with the airbags inflated, but with a stock suspension you'd need to jack the rear axle a couple of inches to slide the tank out.
Now to remove the retaining ring. Supposed to use the Ford specific tool for this, but in it's absence I used a hammer and chisel.
Take care to note the orientation of the cover, mine had an arrow pointing towards the driver's side:
Once the ring is off pull the cover upward, note that the sender isn't a one piece unit like some other vehicles. The pump assembly is affixed to the bottom of the tank and the lines run to the cover.
To remove, simply disengage the clips on the side of the pump and pull it out:
Close-up of the clips that secure the pump in place:
And this is the structure that affixes the pump to the tank:
Note the green gasket that seals the cover to the tank:
Old pump out, now for the new one. This is the pump and sender as it comes out of the box:
Take the new pump, put it into the tank...
And slide right in and snap in place:
Next clean the sealing surface on the tank that the gasket sits in:
And install the retaining ring:
Slide the tank back under and reconnect the lines:
And the EVAP line:
With required cursing and shouting position the tank on the jack and lift into place:
Be sure to guide it in between the frame rails...
Secure the four bolts, swear some more as you reconnect the filler lines:
And DONE.
#10
01-19-2013, 09:37 AM

#11
01-19-2013, 11:34 AM

What type of light is that in the gas can photo?
LED, fluorescent, other? I have been looking for a worklight
That is other than rechargeable, I have DeWalt lights, but they always die
When I need them the most. I don't want battery cell lights either.
Also the brighter the better.
LED, fluorescent, other? I have been looking for a worklight
That is other than rechargeable, I have DeWalt lights, but they always die
When I need them the most. I don't want battery cell lights either.
Also the brighter the better.

I don't know, but I would guess that it goes to the charcoal canister in the engine compartment. Hard to say though, as there is a separate part number for the CA-compliant models, and I have no idea what the difference is.
#12
01-19-2013, 07:01 PM
Can someone take a picture of that ?
I have a banks intake system, and the PO might have not had that hooked up.
Would releasing gasses into the open air somehow be detected by the evap system ?
#13
01-19-2013, 09:00 PM
I see a line going into the canister, then I see another connection coming out of it where what looks like some sort of valve is connected. But, after this valve, nothing is connected ? I would think this should go to the air intake ? Correct?
Can someone take a picture of that ?
I have a banks intake system, and the PO might have not had that hooked up.
Would releasing gasses into the open air somehow be detected by the evap system ?
Can someone take a picture of that ?
I have a banks intake system, and the PO might have not had that hooked up.
Would releasing gasses into the open air somehow be detected by the evap system ?
#14
01-19-2013, 09:36 PM
Thank you so much, I think I understand how this works now. The vent solenoid actually lets air IN to the canister when it is drawn out to the intake to purge the canister. Got it.
Now if I could only figure out which part isn't working....
where is the purge valve located ?
Now if I could only figure out which part isn't working....
where is the purge valve located ?
#15
01-20-2013, 07:52 AM

