Jon's 1950 f-1
#31
 11-23-2012, 04:47 PM

steering column
Now that the engine was installed with its headers in place and I had notched the firewall to fit around the new engine, it was time to fit the steering column and linkage.

The ididit column is a 30 inch unit with a 3 inch drop, I actually moved the floor board hole up 1 inch to get a little bit more foot room, its a tight cab for my large frame.
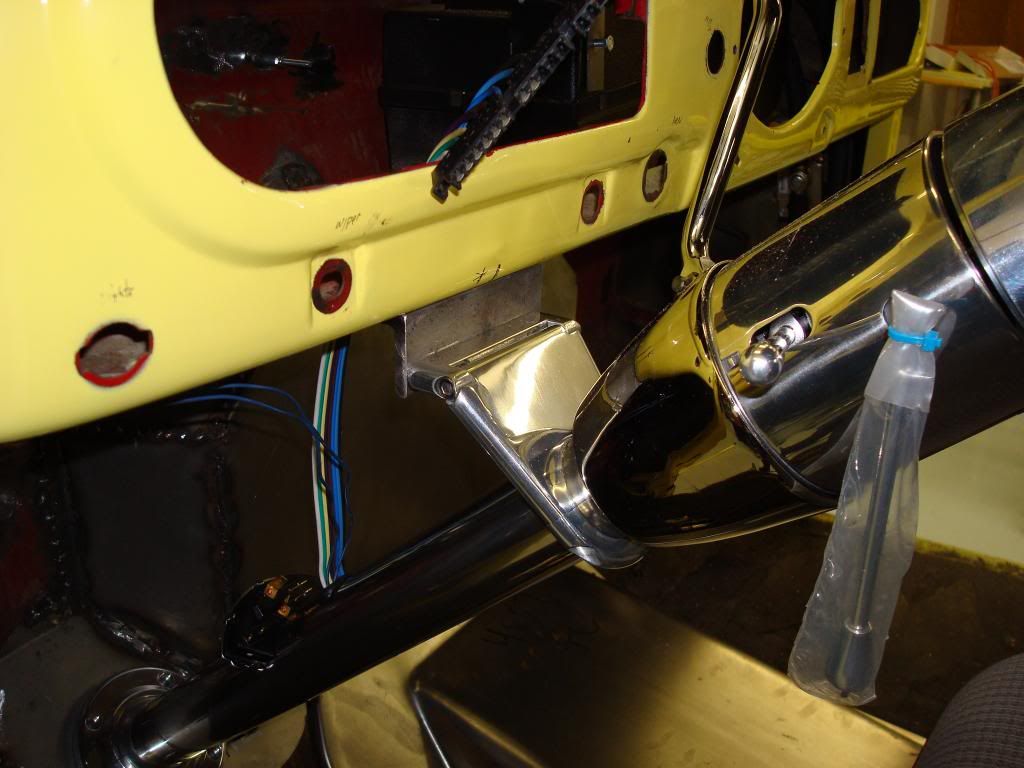
The column shift was just long enough that it hit the dash when placed in park, so I had to heat and bend it up and aft.

I made new floor panels and welded the upper one in, leaving the lower as a bolt if to feed the brake pedal through.
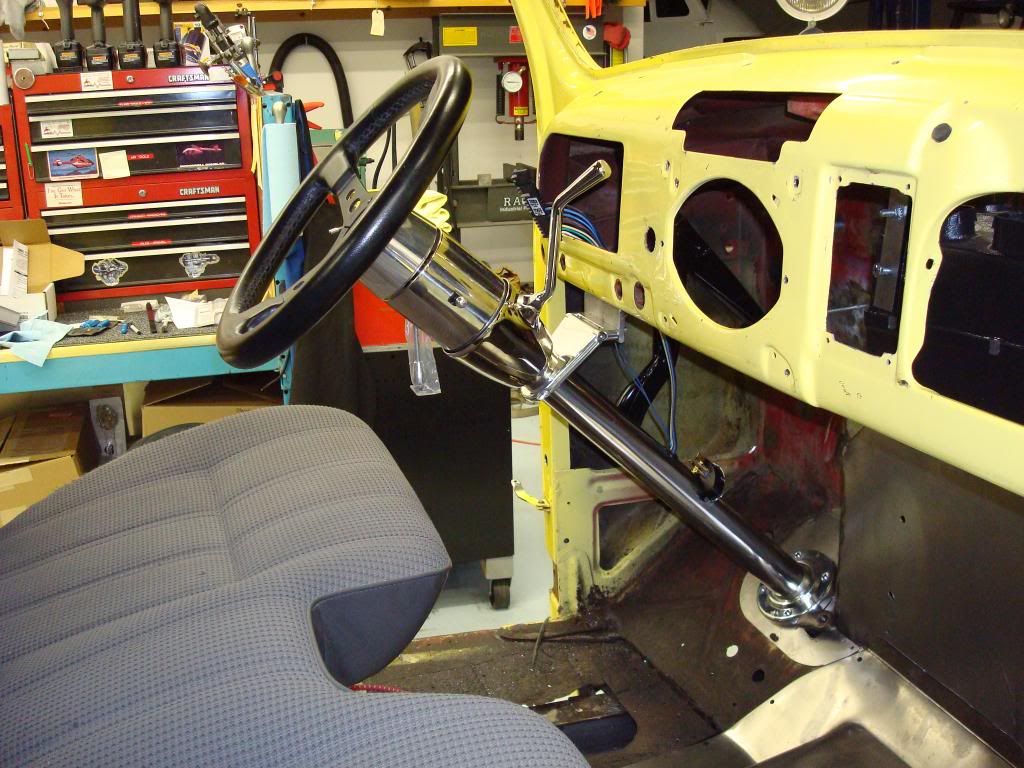
Here you can see the re-formed gear selector and the notched engine tunnel.
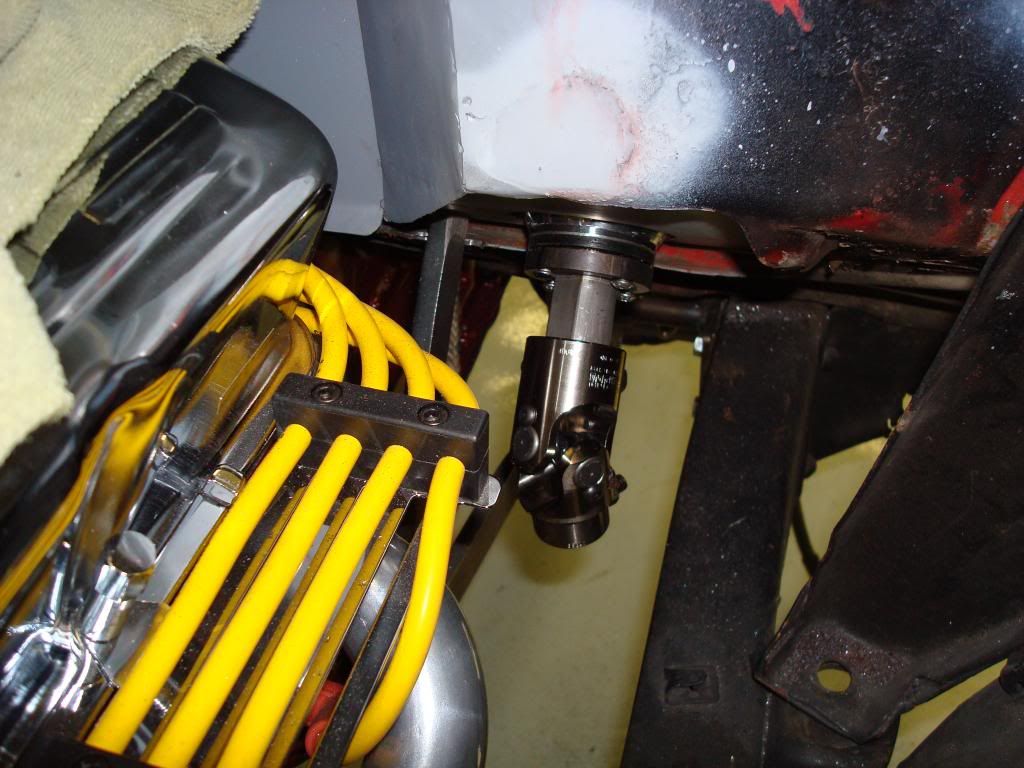
The column shaft came through the floor board at almost a perfect angle to run straight under the header and plug into the power rack.
The ididit column is a 30 inch unit with a 3 inch drop, I actually moved the floor board hole up 1 inch to get a little bit more foot room, its a tight cab for my large frame.
The column shift was just long enough that it hit the dash when placed in park, so I had to heat and bend it up and aft.
I made new floor panels and welded the upper one in, leaving the lower as a bolt if to feed the brake pedal through.
Here you can see the re-formed gear selector and the notched engine tunnel.
The column shaft came through the floor board at almost a perfect angle to run straight under the header and plug into the power rack.
#32
11-23-2012, 05:10 PM
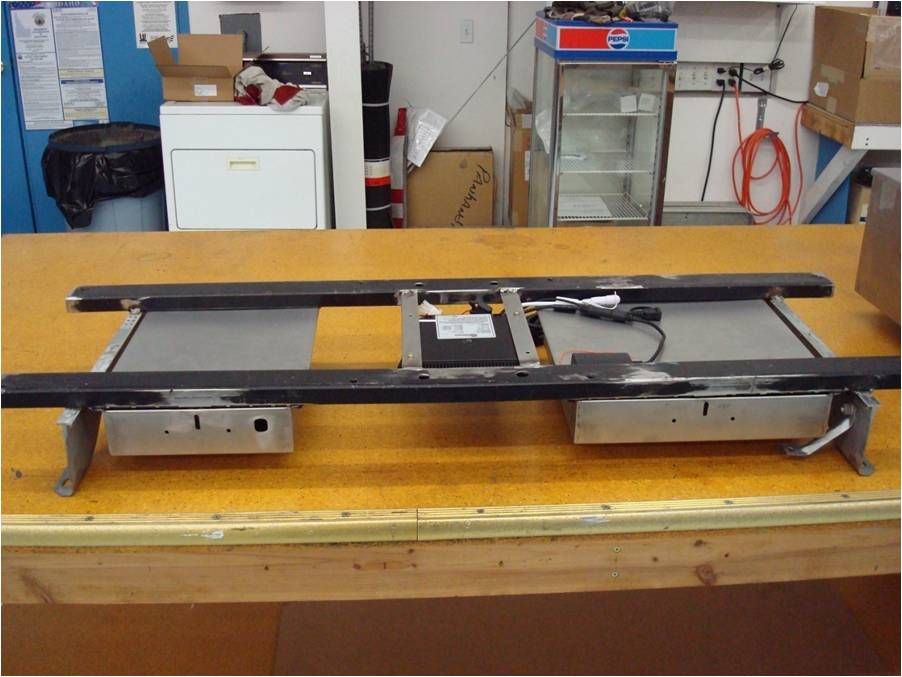
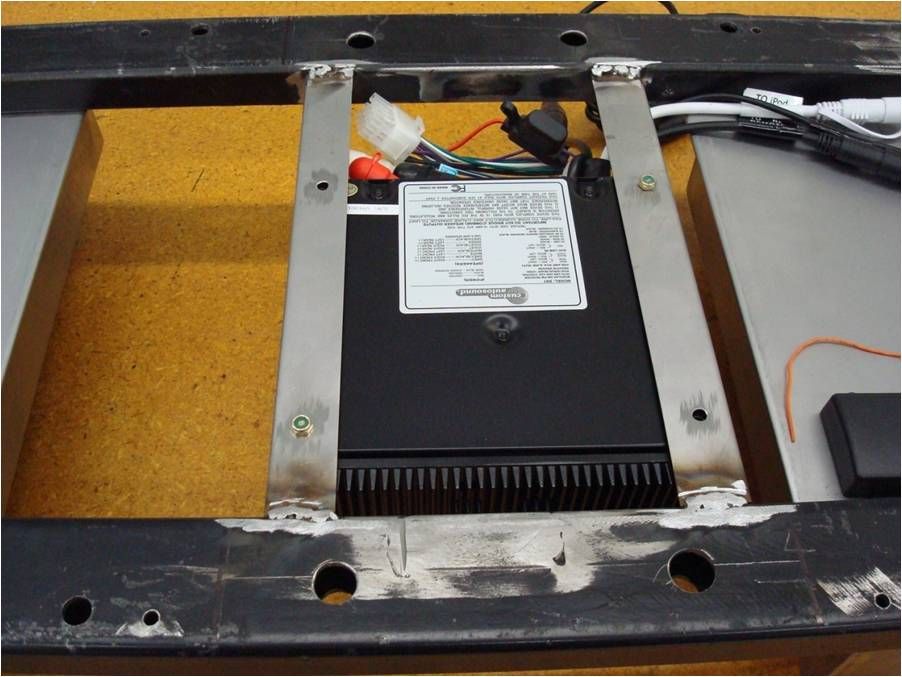
Under the Panel
We had now accumulated all of the computers, programers, and other electronic thingies that we needed to run the beast so I began tucking them all into place.
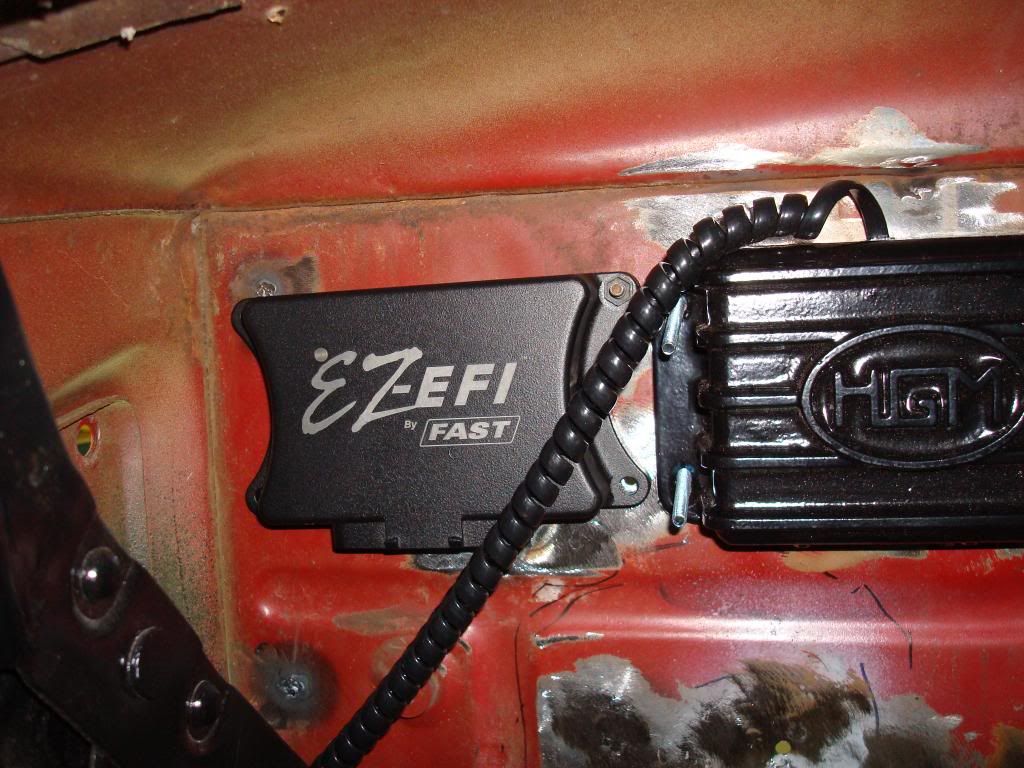
So I began installing the differant boxes from the far left hand side by welding 1 1/2 inch sections of 10/32 all thread so that each box would have good airflow all around them.
The first to go in place was the Fast EFI computer.
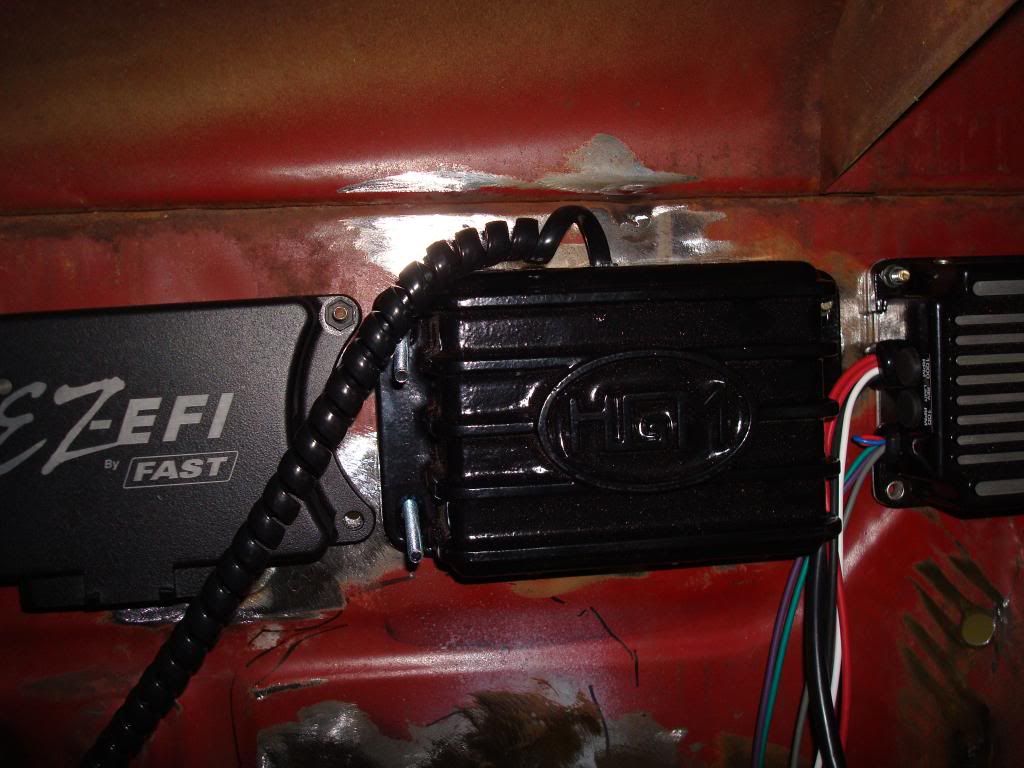
Next came the computer / programmer for the 4L60E transmisson.
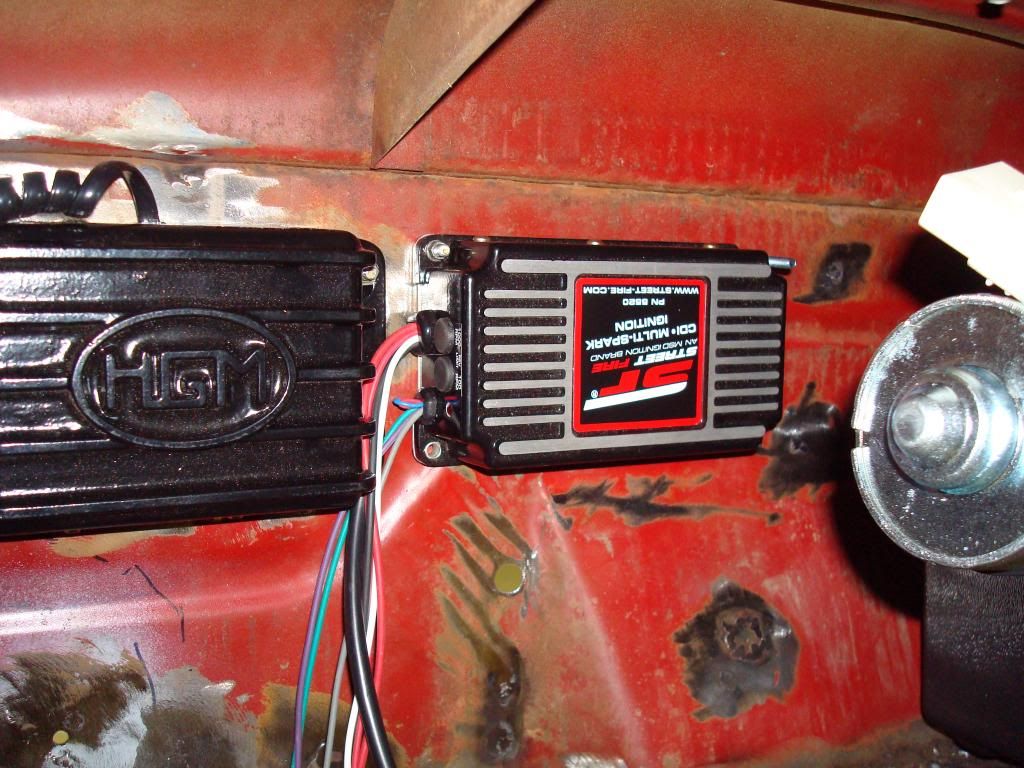
And beside it went the MSD ignition box.
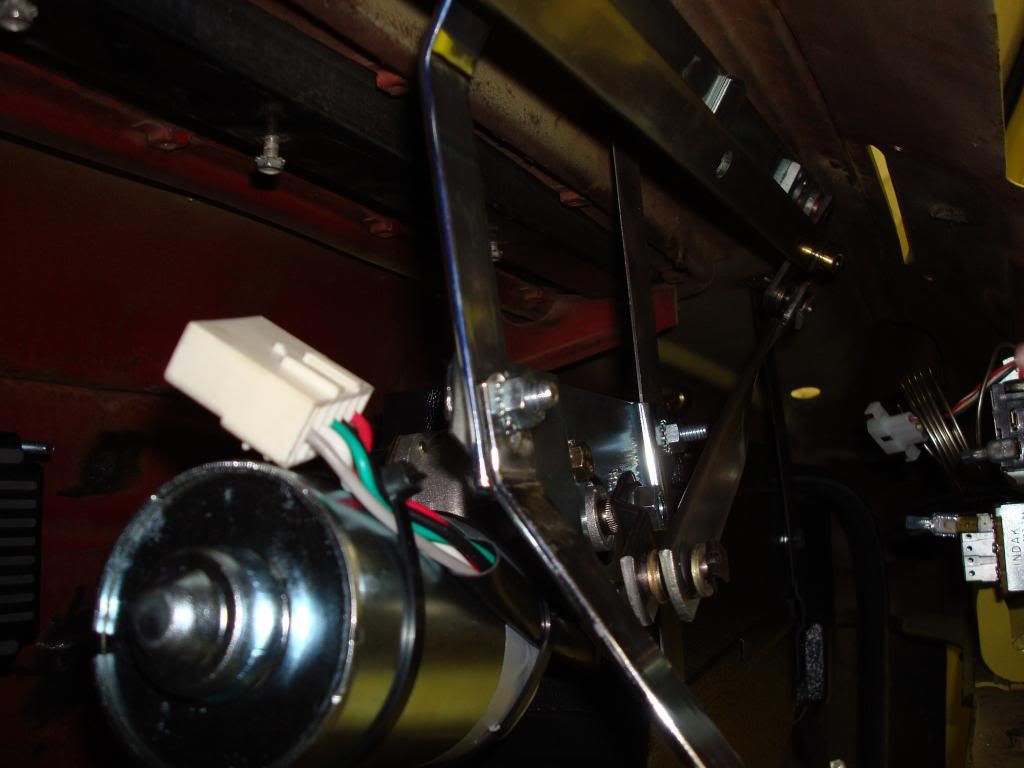
If the wper moter looks a bit out of place, thats because I had to cut it all apart and move the motor from the center right side to the far left in order to tuck the vintage air gen II unit all the way up and behind the panel.
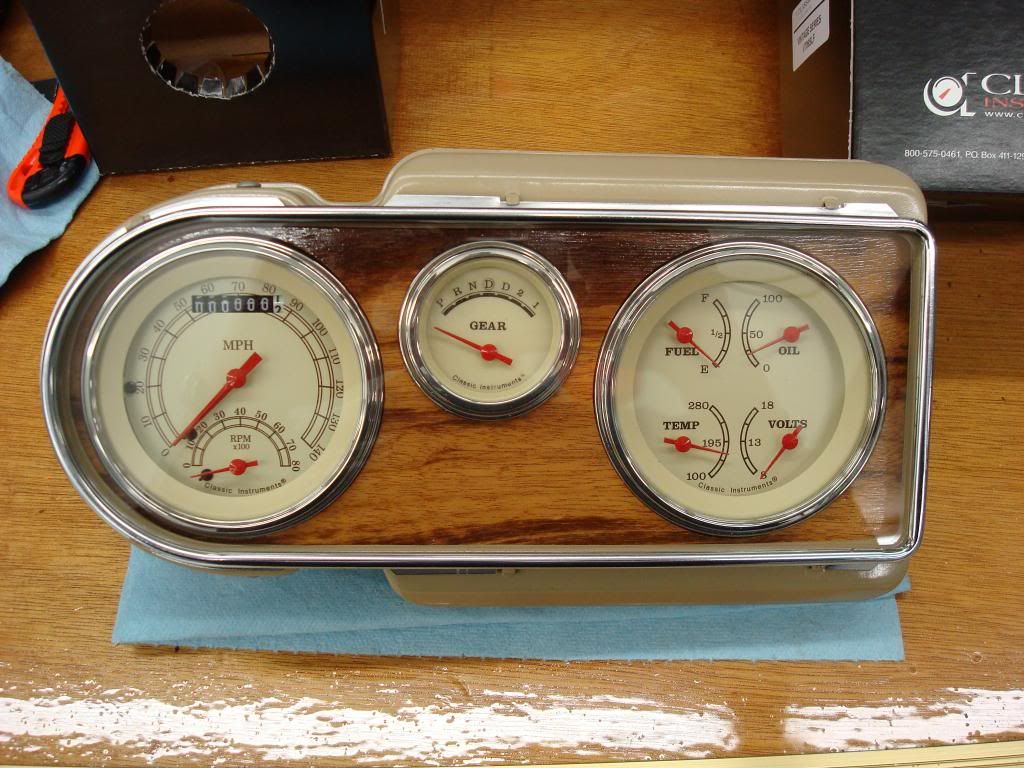
And I finally found enough free time to gut the original instrument bezel and install the new classic instruments in a monkey wood panel.
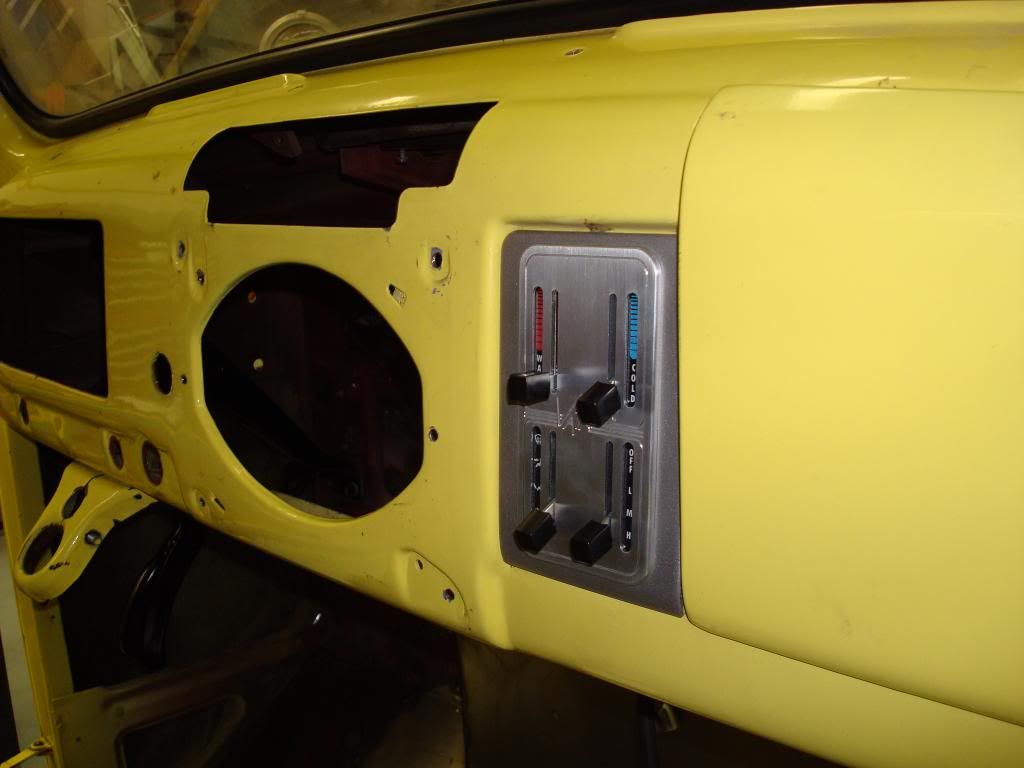
I even squeezed in enough time to fit the AC/heater panel into the ash tray panel.
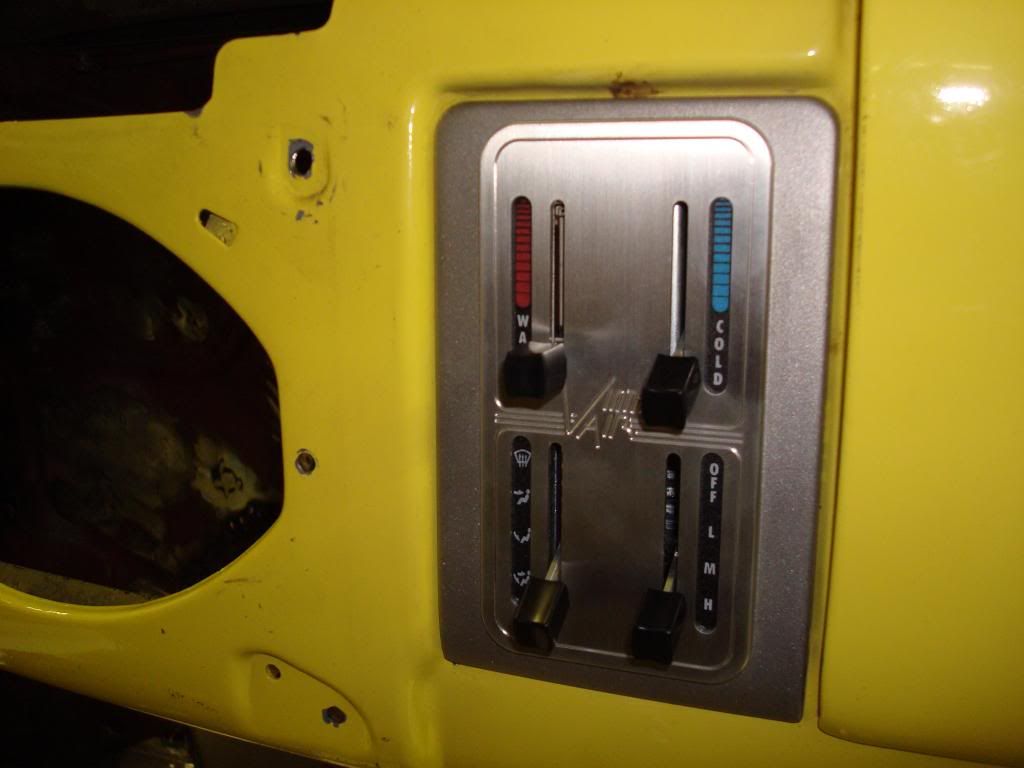
It looks like vintage air made this panel with this exact installation in mind.
So I began installing the differant boxes from the far left hand side by welding 1 1/2 inch sections of 10/32 all thread so that each box would have good airflow all around them.
The first to go in place was the Fast EFI computer.
Next came the computer / programmer for the 4L60E transmisson.
And beside it went the MSD ignition box.
If the wper moter looks a bit out of place, thats because I had to cut it all apart and move the motor from the center right side to the far left in order to tuck the vintage air gen II unit all the way up and behind the panel.
And I finally found enough free time to gut the original instrument bezel and install the new classic instruments in a monkey wood panel.
I even squeezed in enough time to fit the AC/heater panel into the ash tray panel.
It looks like vintage air made this panel with this exact installation in mind.
#33
11-23-2012, 05:41 PM
Assembled dash panel
Cal finally blessed the cab and painted the entire inside so I could begin installing the dynamat, wireing, and all the instruments and controls.
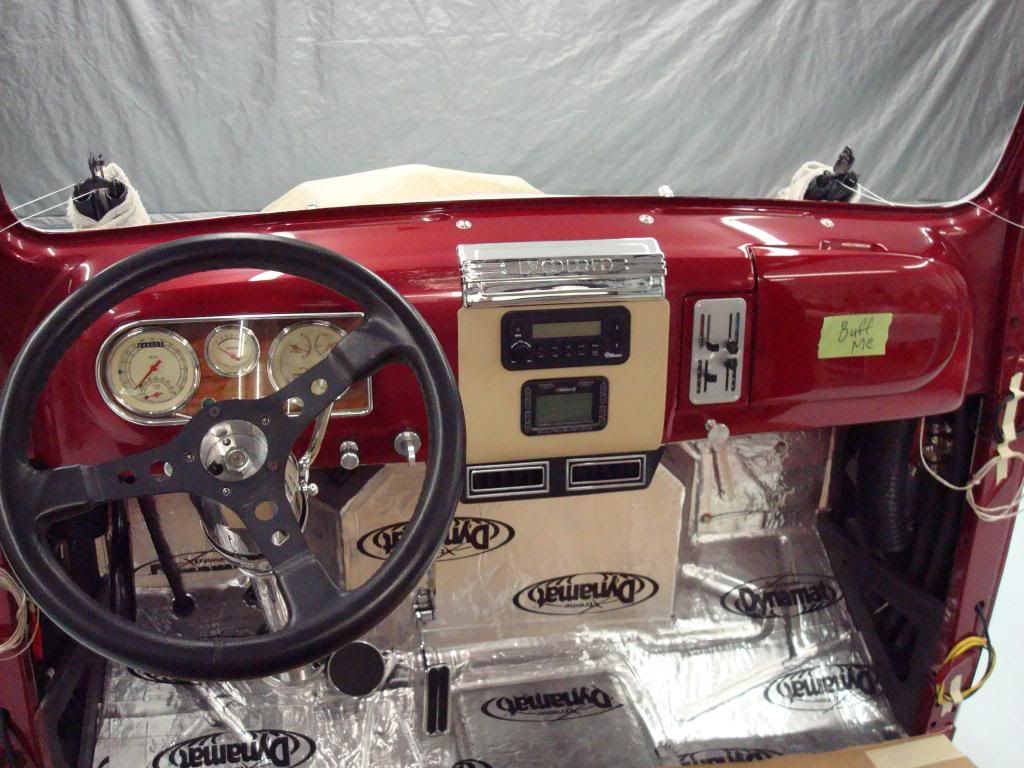
The panel turned out even better than we had expected, everything was within easy view and reach.
We had though about flushing in the original radio hole but Jon liked the big chrome ford filler plate so we left it there.
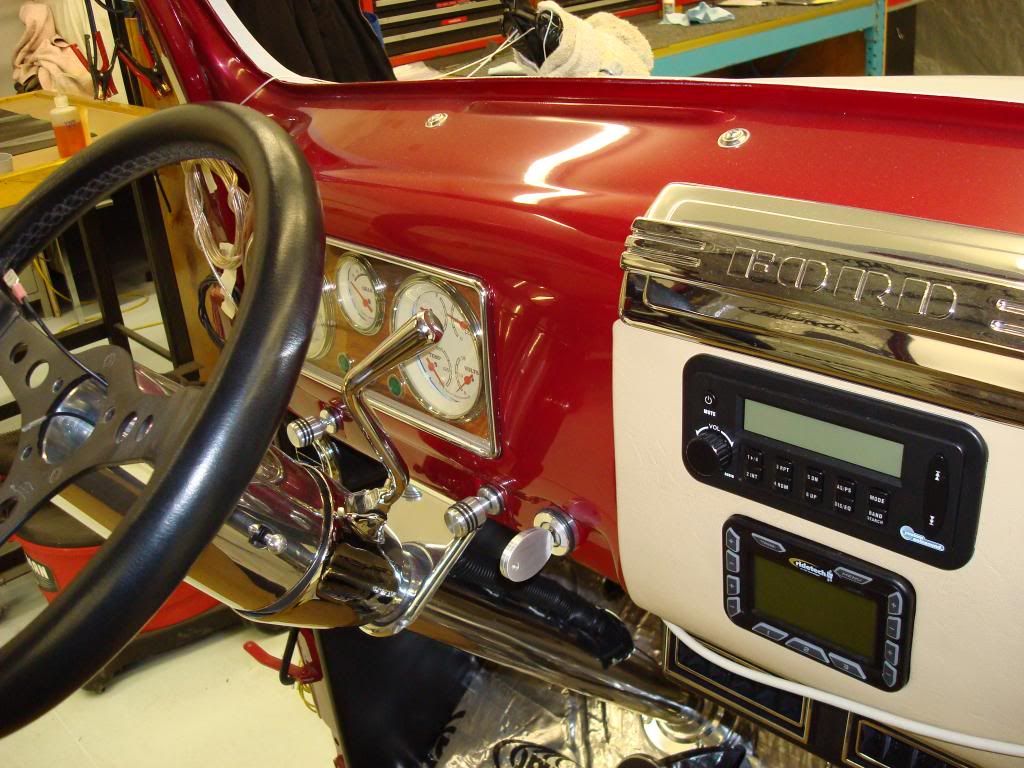
We bought the secret audio system because that control head is only 1 inch thick, making room for the vintage air evap/heater unit.
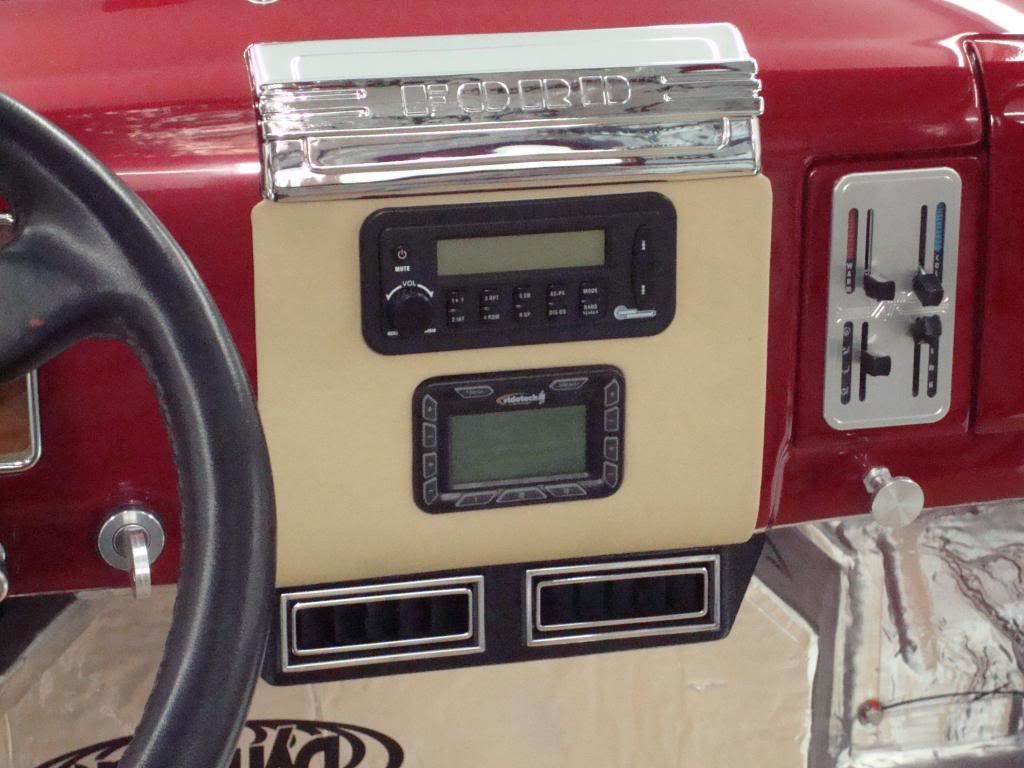
The ride tech air ride controller went right below the secret audio head and has 3 preset ride heights or manual control.
When the truck went in for the interior he had Rick add some beading around the two contol heads which really made the whole panel pop.

He also had Rick leather wrap the center ac duct
The left ac duct and
The r/h ac duct and kick panels.
The panel turned out even better than we had expected, everything was within easy view and reach.
We had though about flushing in the original radio hole but Jon liked the big chrome ford filler plate so we left it there.
We bought the secret audio system because that control head is only 1 inch thick, making room for the vintage air evap/heater unit.
The ride tech air ride controller went right below the secret audio head and has 3 preset ride heights or manual control.
When the truck went in for the interior he had Rick add some beading around the two contol heads which really made the whole panel pop.
He also had Rick leather wrap the center ac duct
The left ac duct and
The r/h ac duct and kick panels.
#34
11-23-2012, 06:09 PM
Our first Cruise
Finally everything was wired and plumbed, all the leak checks had been done and we couldn't wait another minute to test drive Jon's ride.
So, I threw in some plywood and foam pads on the seat frame and we braved the 20 degree weather and drove over to our buddies hangar to rub it in that Jon's truck was mobile and his A model was still in pieces. It was cruel but Bill took the ribbing with good humor, he even pulled out his camera and took these photo's to commemorate the occasion.
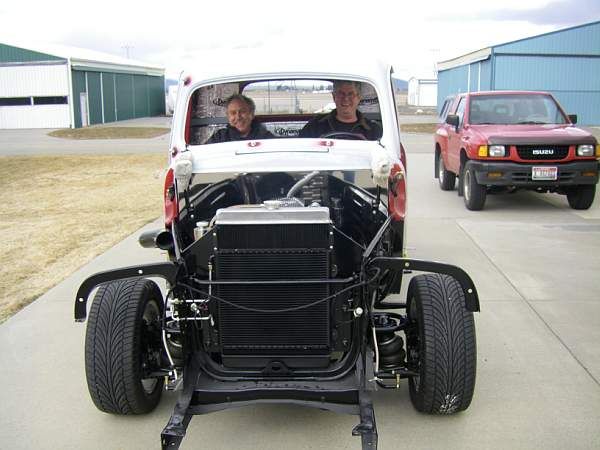
So, with me behind the wheel we drove up to Bill's and let the exhause noise annouce our arrival. Note the hand made polished firewall cover.
While we let bill stew in our glory we messed around with the air bags.
Changeing seats (pads) Jon got ready for his first spin behind the wheel.
We were having a blast but freezing at the same time.
There were several reasons for the single r/h exhaust, the 4 link just plain got in the way to out the back and the air ride system impeded us going out both sides, so we ran 2 1/2 pipes all the way from the headers to a 3" inlet, single 3 inch exhaust muffler,,,,it breaths well and sound crazy kewl.
So, I threw in some plywood and foam pads on the seat frame and we braved the 20 degree weather and drove over to our buddies hangar to rub it in that Jon's truck was mobile and his A model was still in pieces. It was cruel but Bill took the ribbing with good humor, he even pulled out his camera and took these photo's to commemorate the occasion.
So, with me behind the wheel we drove up to Bill's and let the exhause noise annouce our arrival. Note the hand made polished firewall cover.
While we let bill stew in our glory we messed around with the air bags.
Changeing seats (pads) Jon got ready for his first spin behind the wheel.
We were having a blast but freezing at the same time.
There were several reasons for the single r/h exhaust, the 4 link just plain got in the way to out the back and the air ride system impeded us going out both sides, so we ran 2 1/2 pipes all the way from the headers to a 3" inlet, single 3 inch exhaust muffler,,,,it breaths well and sound crazy kewl.
#35
11-23-2012, 06:10 PM

#36
11-23-2012, 06:26 PM
[quote=49willard;12517222]I like the look/fit of the control panel. I looked the panel up in
the catalogue. It did not indicate if the panel was for a manual system, is it? I put together my own system which need a manual contol, see some pics in my gallery.
Can you tell me a little more about it?
That controller is an all electric panel, the evap/heater unit uses servo motors to change from heat to defrost etc, The only manual control left in the system is the **** below the panel, that operates the original vent box which I and Jon wanted to retain so he could have fresh air without rolling the windows down. It now serves as a vent / recirculate control for the heater/ac unit.
If your looking for a manual unit I would give vintage air a call and see if they can help you out, hope this answered your question.
#37
11-26-2012, 10:09 PM
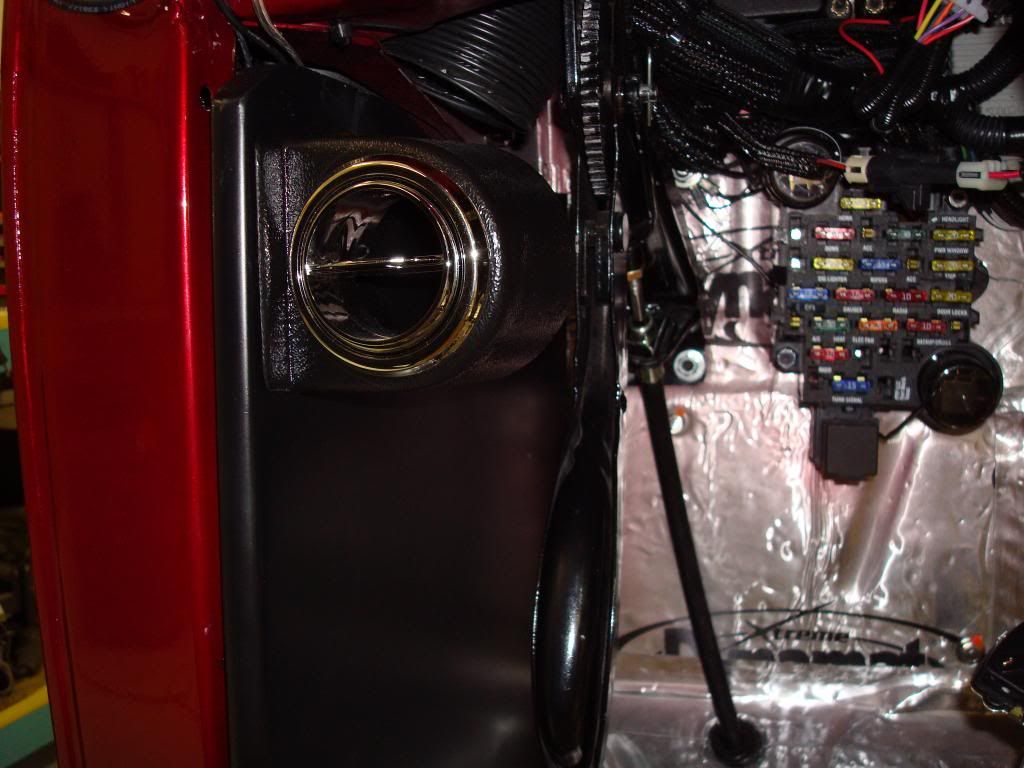
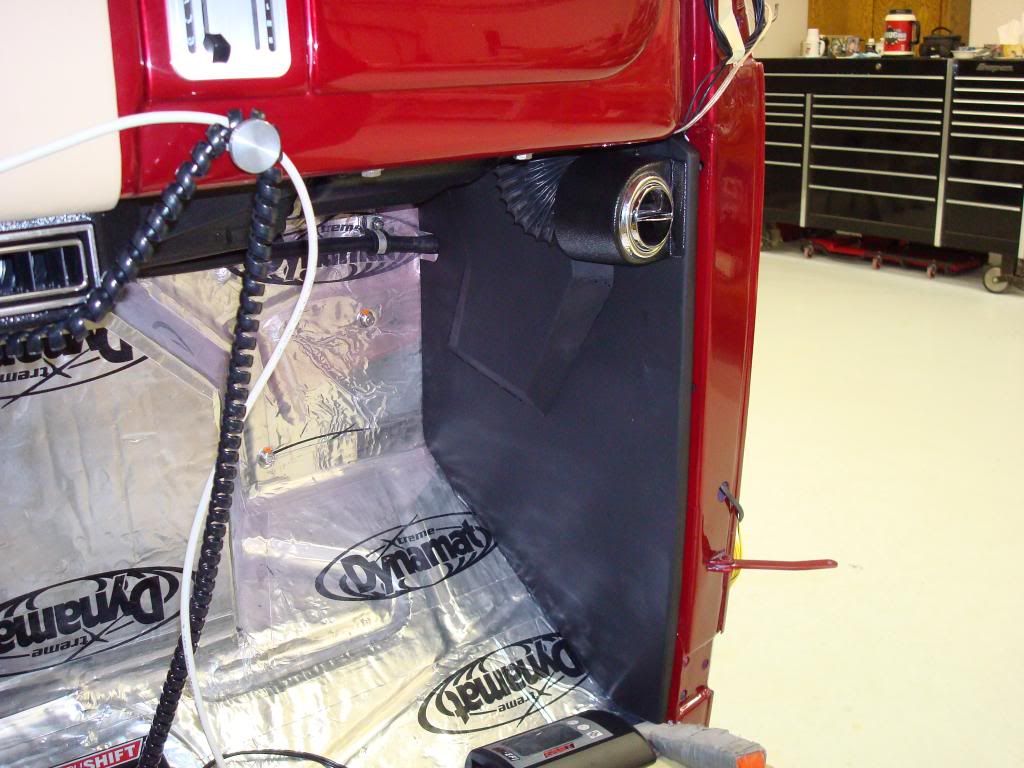
Exhaust system inst
I found some more pics, these are of the stainless exhaust system.
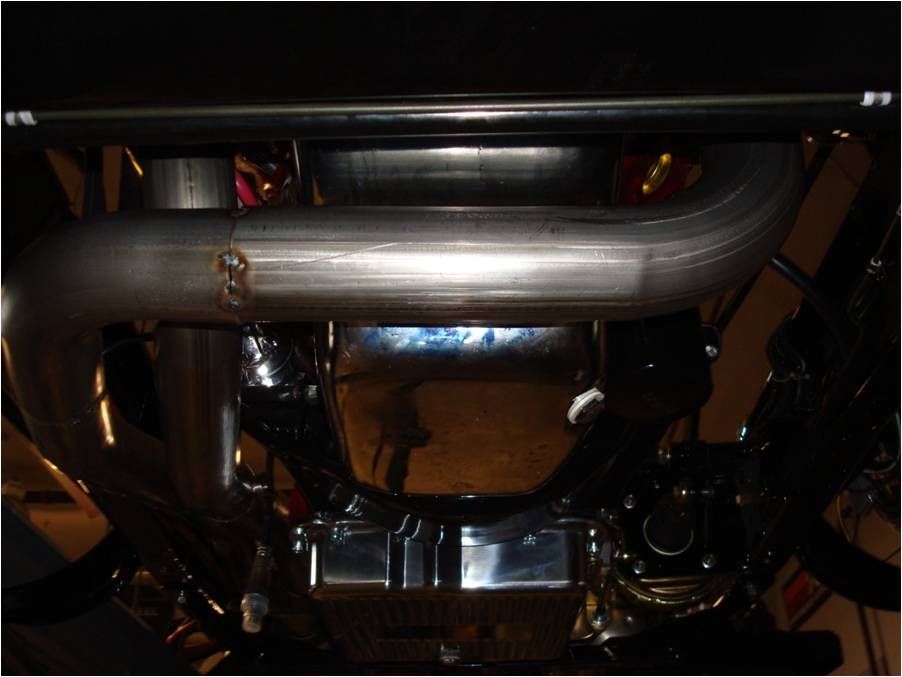
Because we had the air ride and power booster on the L/H side we routed the exhaust under the pan to the right side.

There we ran it back beside the R/H pipe the the muffler.
There the two pipes "Y"ed together into the muffler.

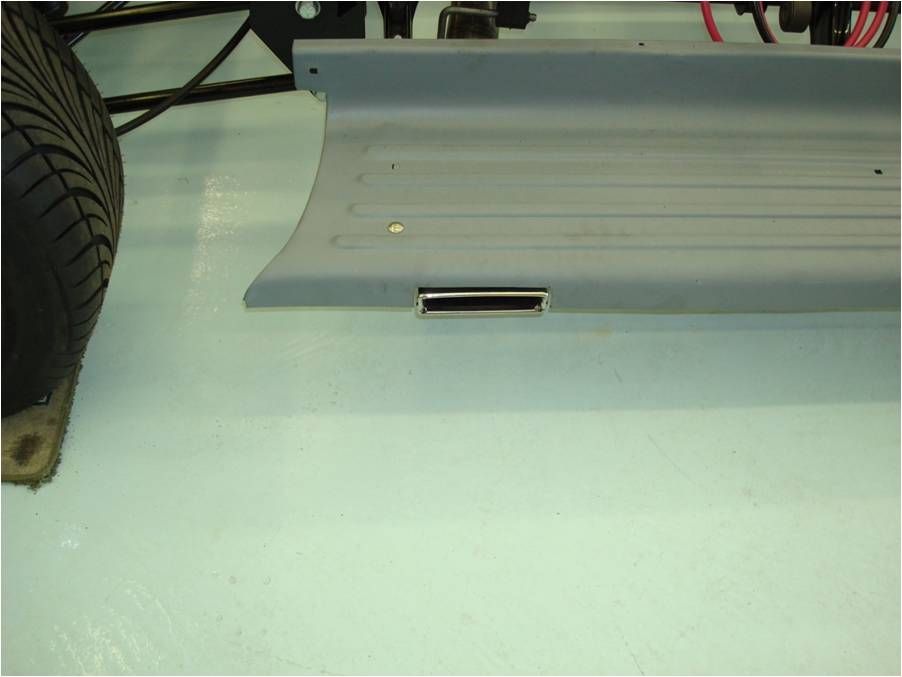
And a single exhaust tip was run out through the R/H running board. I had my doubts about the exhaust note from this arrangement but it sounds crazy bad.
Because we had the air ride and power booster on the L/H side we routed the exhaust under the pan to the right side.
There we ran it back beside the R/H pipe the the muffler.
There the two pipes "Y"ed together into the muffler.
And a single exhaust tip was run out through the R/H running board. I had my doubts about the exhaust note from this arrangement but it sounds crazy bad.
#38
11-28-2012, 02:04 PM
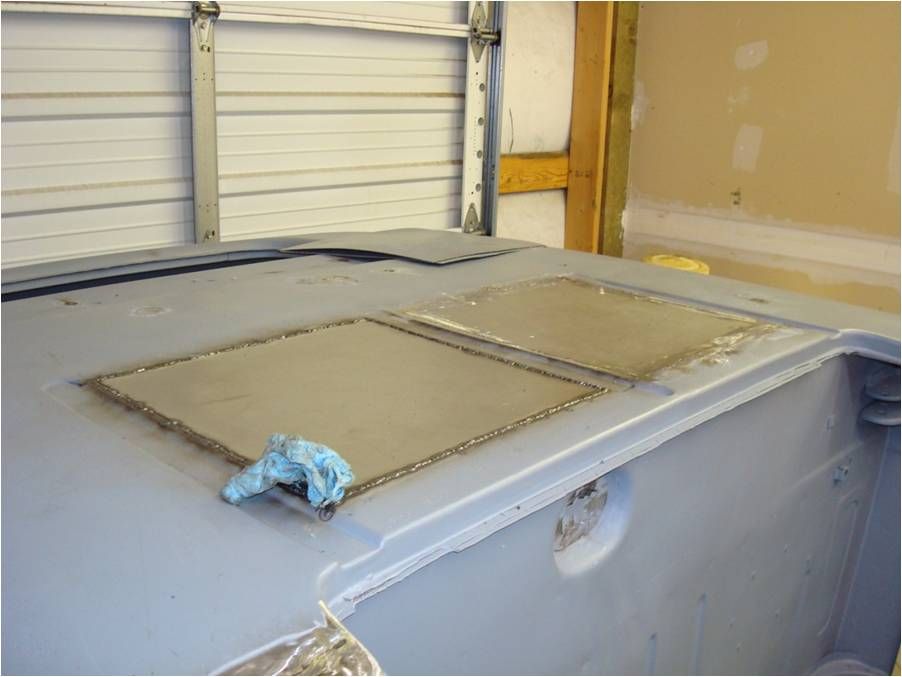
cab repairs and fab work
I know that I'm jumping all over and this is no exception. My wife sent me these and I'll just post them before I lose them again.

As usual the cab corners had some rot so we repaired the passenger side
and the drivers side, but that was the minor stuff.
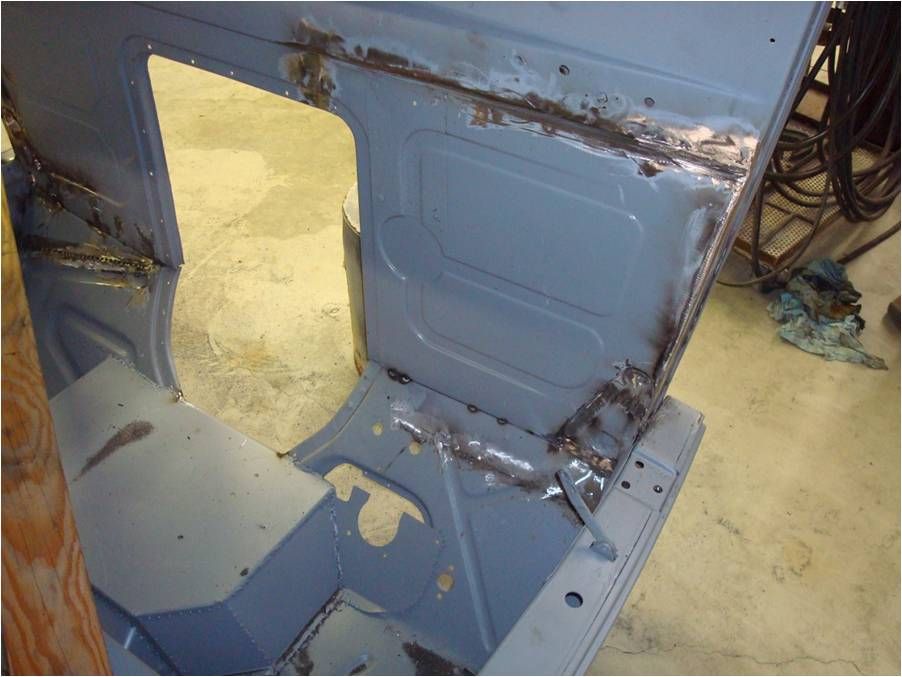
The driver floor was badly rotted and we had to replace the entire side with an LMC replacement then repair the R/H corner of the passenger side as well.
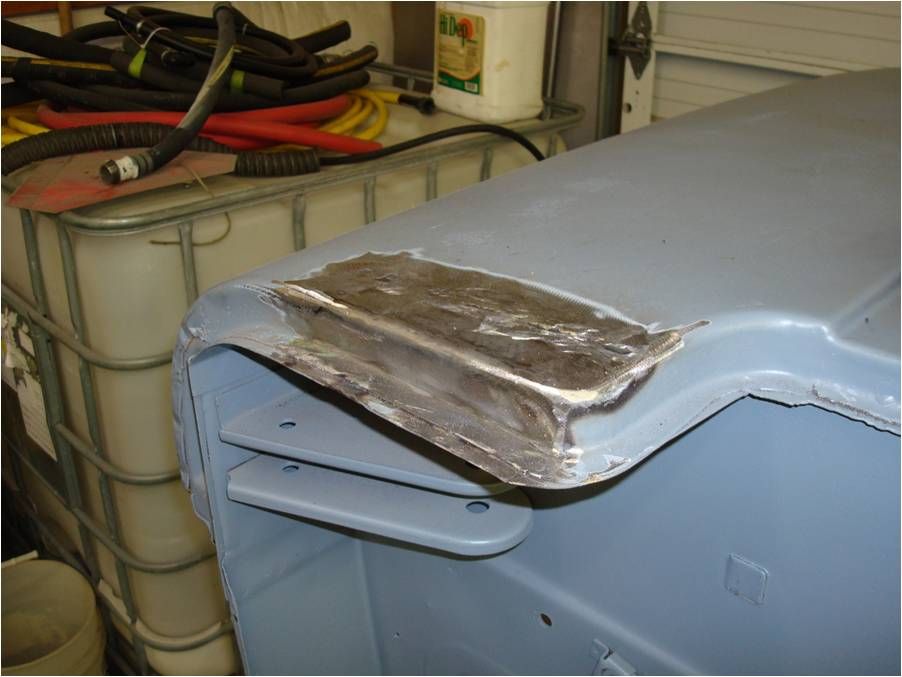
Because the PO had stuffed foam between the cab and bed to prevent rattles (the bed was only held on with 3 1/4 inch bolts), the entire back of the cab was rotted and needed to be replaced.
Jon had bought some Chevy Avaio seats so I took the original floor mounts and welded mount bars to them to install the new buckets.
Then I decided to make some siding drawers under the frame to add some needed storage and even put a lock on one for some extra security.
And the space between the drawers was a perfect spot to mount the secret audio controller / amp.
Because the seats had about 6 inches of space between them I built a center consol to fill the gap, this will be wrapped in leather later.
I even installed a couple of 12vdc power plugs along the rear of the consol so Jon could plug in any of his accessory items.
As usual the cab corners had some rot so we repaired the passenger side
and the drivers side, but that was the minor stuff.
The driver floor was badly rotted and we had to replace the entire side with an LMC replacement then repair the R/H corner of the passenger side as well.
Because the PO had stuffed foam between the cab and bed to prevent rattles (the bed was only held on with 3 1/4 inch bolts), the entire back of the cab was rotted and needed to be replaced.
Jon had bought some Chevy Avaio seats so I took the original floor mounts and welded mount bars to them to install the new buckets.
Then I decided to make some siding drawers under the frame to add some needed storage and even put a lock on one for some extra security.
And the space between the drawers was a perfect spot to mount the secret audio controller / amp.
Because the seats had about 6 inches of space between them I built a center consol to fill the gap, this will be wrapped in leather later.
I even installed a couple of 12vdc power plugs along the rear of the consol so Jon could plug in any of his accessory items.

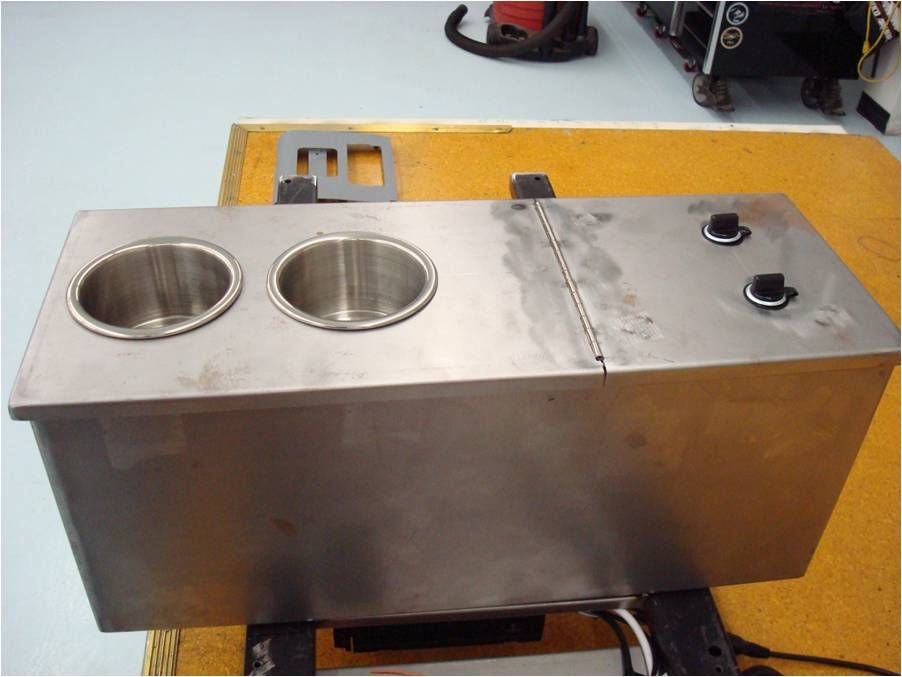
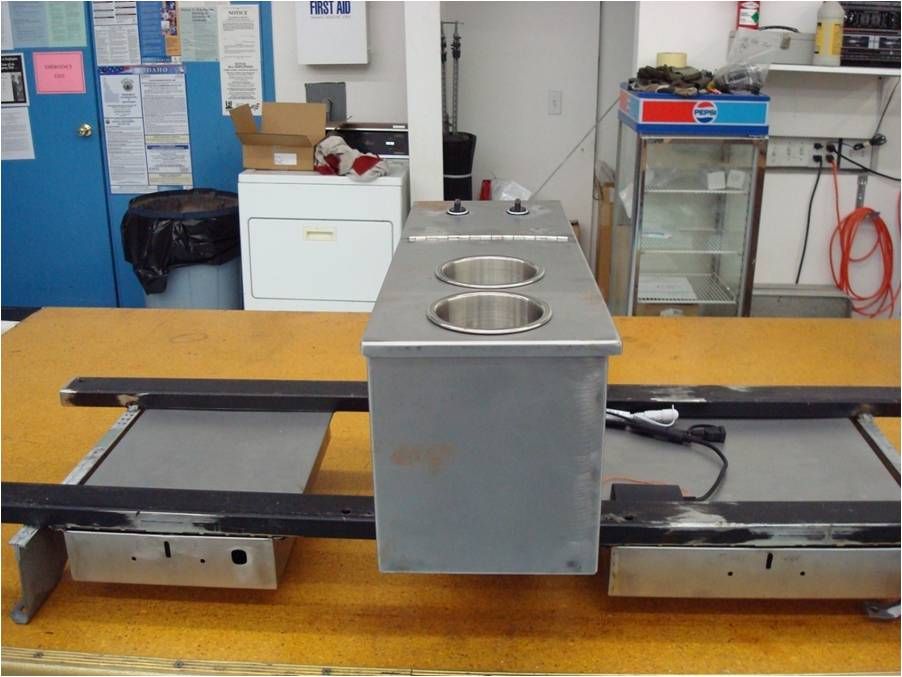
#40
11-29-2012, 11:49 AM
battery box
morning all,
My bride is having some technical issues sending me my photo files but she did get this one thru the net last night.
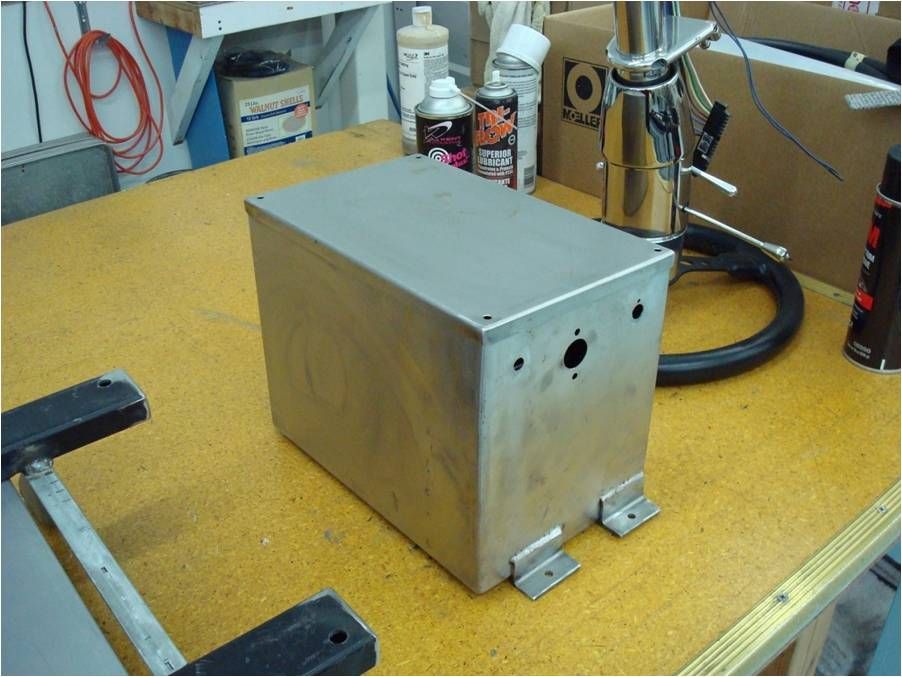
Because Jon did not want the battery in the engine bay and there was no more space under the cab I had to fab up a battery box that would bolt to the floor behind the passenger seat. As a safety factor I placed the two main circuit breakers and the main cutout switch in the end plate of the box. The box has 2 vent holes in the bottom, one has a small scoop that I made that sucks air into the box and the other vents back out of the cab floor. The lid has a rubber seal to prevent vapors in the cab which should never happen because we used an Optima sealed battery.
My bride is having some technical issues sending me my photo files but she did get this one thru the net last night.
Because Jon did not want the battery in the engine bay and there was no more space under the cab I had to fab up a battery box that would bolt to the floor behind the passenger seat. As a safety factor I placed the two main circuit breakers and the main cutout switch in the end plate of the box. The box has 2 vent holes in the bottom, one has a small scoop that I made that sucks air into the box and the other vents back out of the cab floor. The lid has a rubber seal to prevent vapors in the cab which should never happen because we used an Optima sealed battery.
 Nice build. Adding myself to this thread.
#43
11-29-2012, 11:08 PM
I am currently working on my own project, a 55 f 100, and am in it for the long run but eventually it may meet the quality of Jon's ride, not because I dumped a ****load of cash into it, but because I dumped a ****load of my time and guts into it.
I hope you all enjoy this thread and post your comments, after all, thats what its all about here.
Gary
#44
12-01-2012, 03:59 PM
More cab, chassis build pic's
The wife was able to send these to me last night. Enjoy

With all the pieces painted or powdercoated we began final assembly.
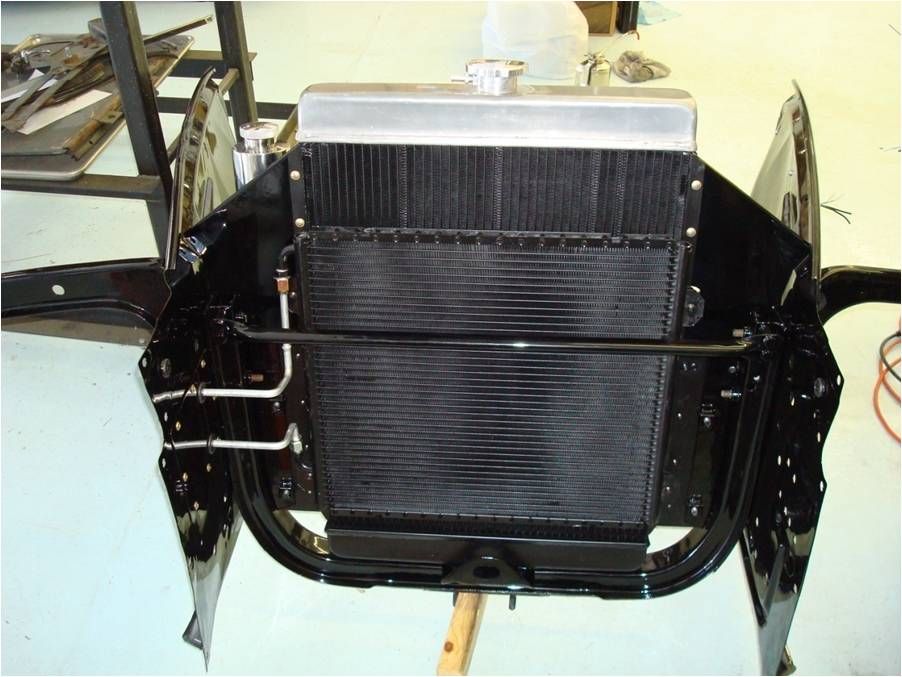
The support bar had to be spaced out an inch and a half to make room for the AC condenser.
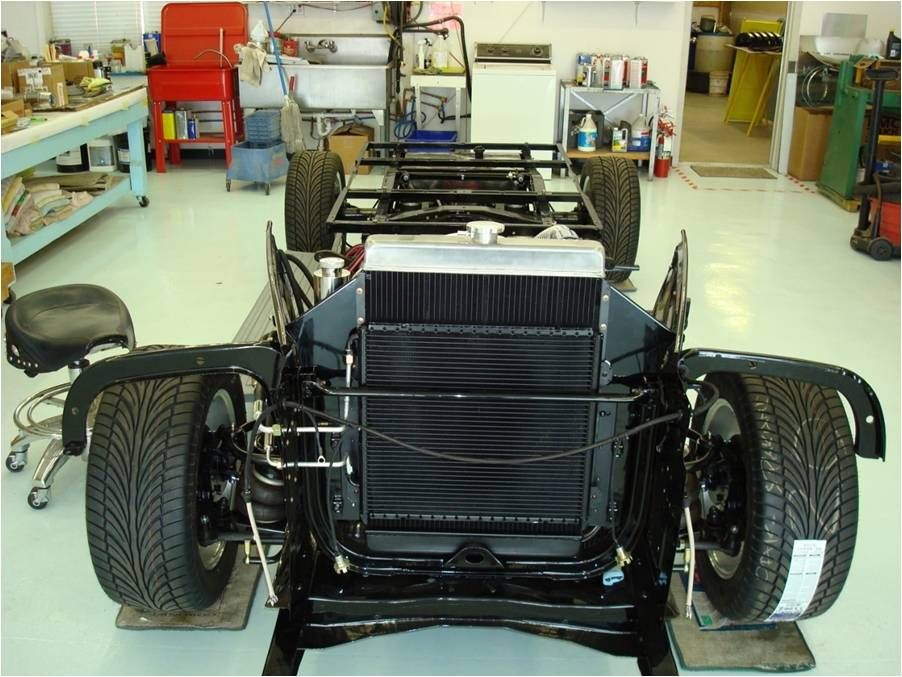
Then it was mounted as an assembly

And began plumbing the engine
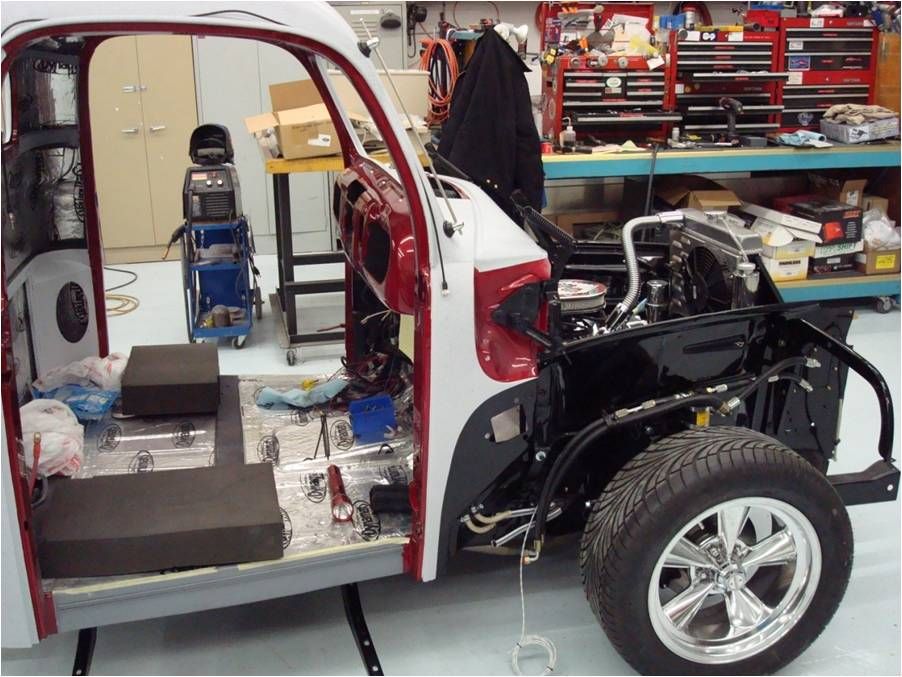
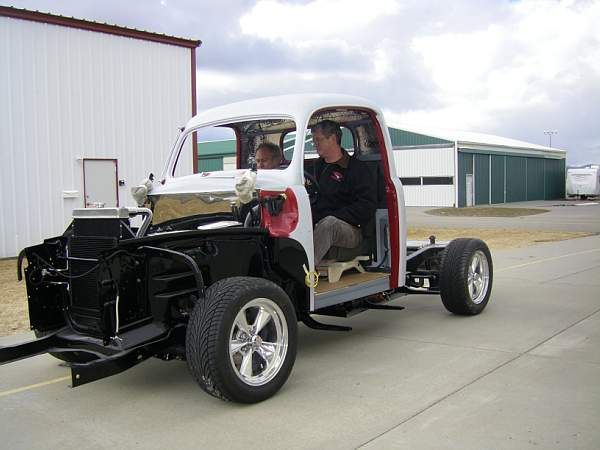
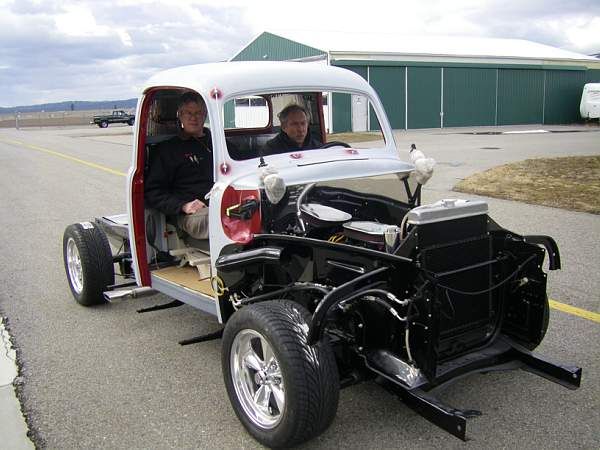
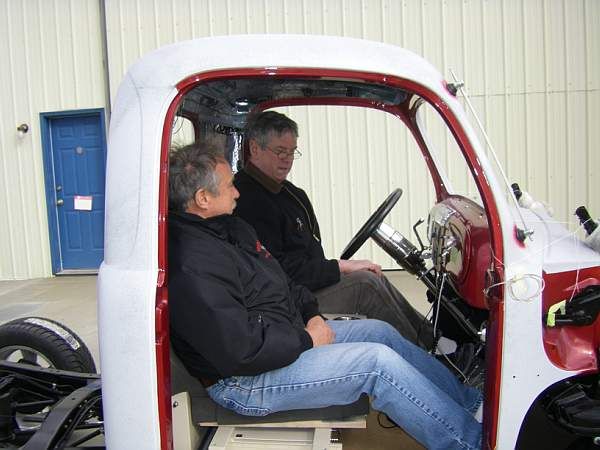
Then the cab was put into place and bolted down for the final time
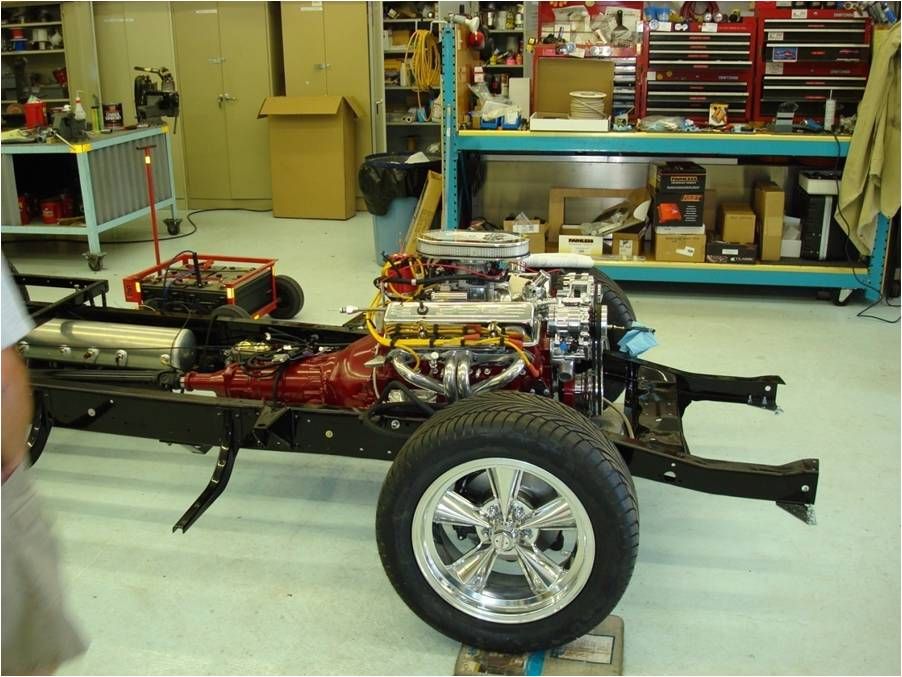
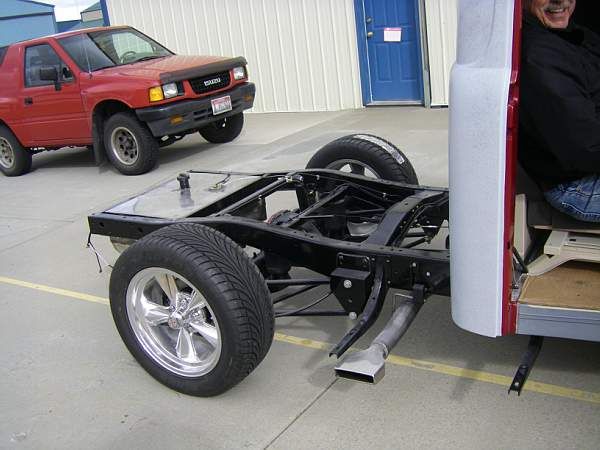
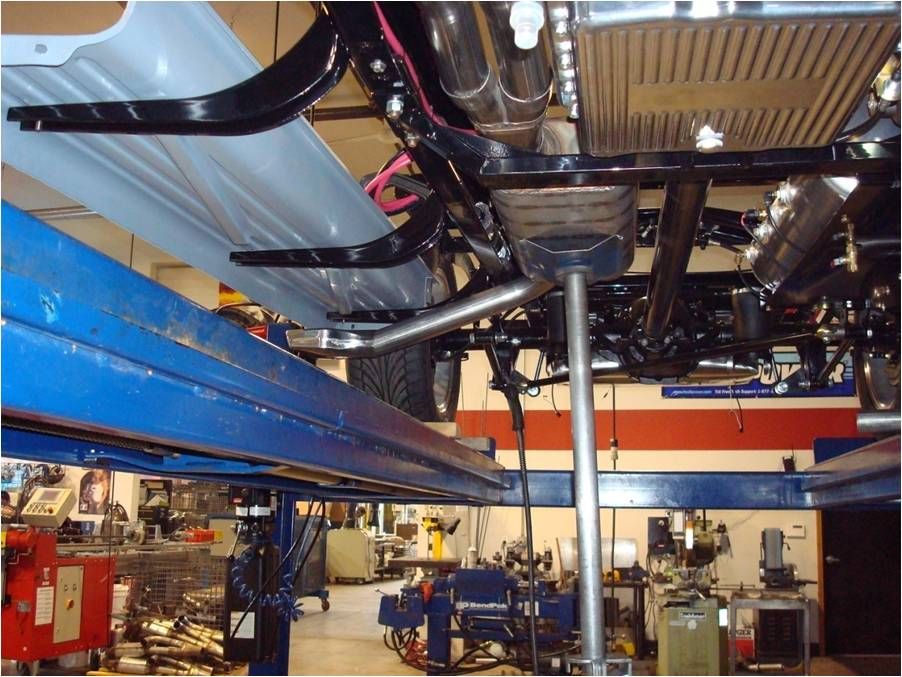
Another shot of the rolling chassis

I wired the chassis and connected it to the cab with several hidden cannon plugs inside the wheel wells
With all the pieces painted or powdercoated we began final assembly.
The support bar had to be spaced out an inch and a half to make room for the AC condenser.
Then it was mounted as an assembly
And began plumbing the engine
Then the cab was put into place and bolted down for the final time
Another shot of the rolling chassis
I wired the chassis and connected it to the cab with several hidden cannon plugs inside the wheel wells
#45
12-01-2012, 07:07 PM