1957 F100 build thread
#16
 11-13-2012, 08:09 PM


#17
11-13-2012, 08:38 PM
Idea
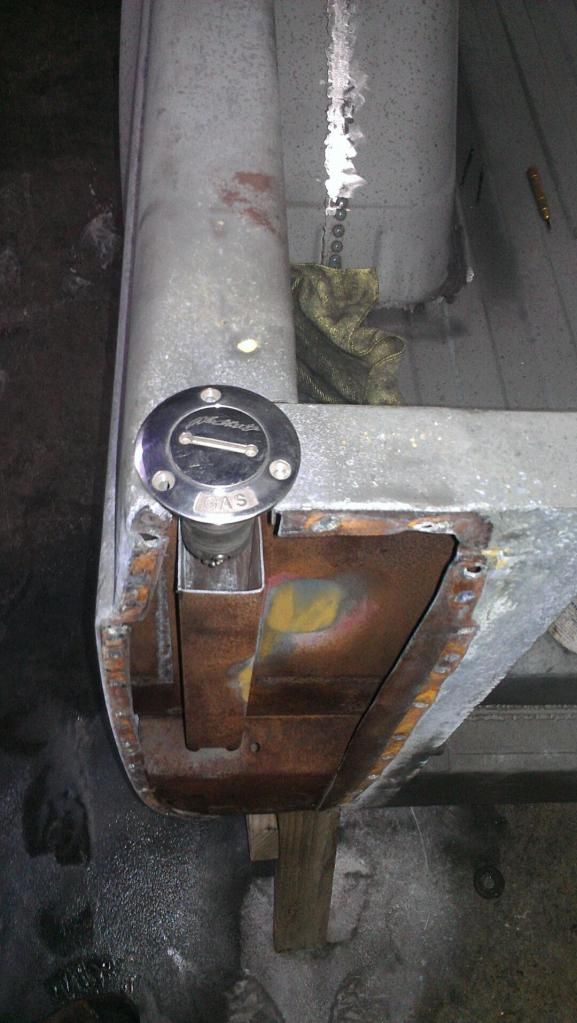
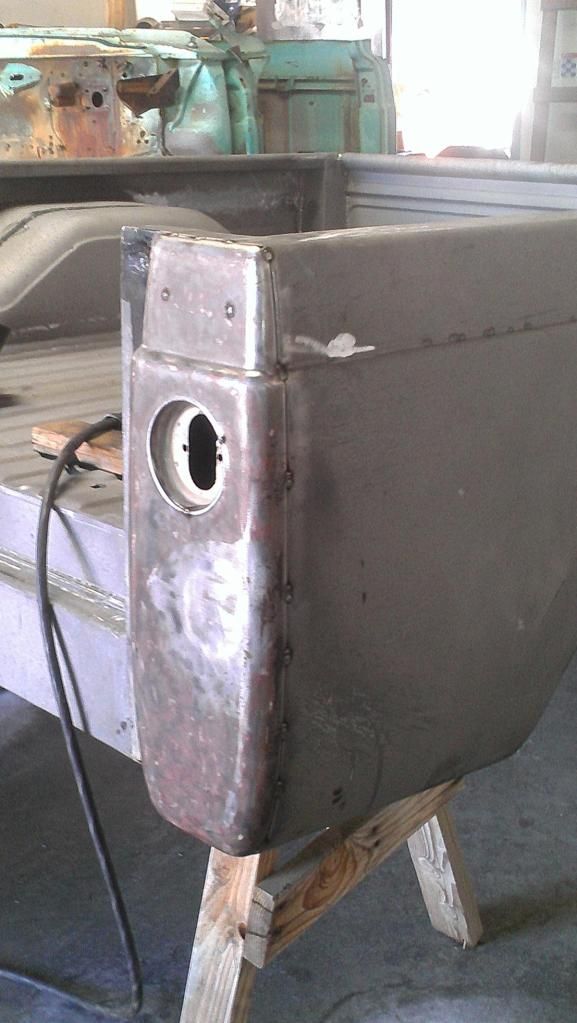
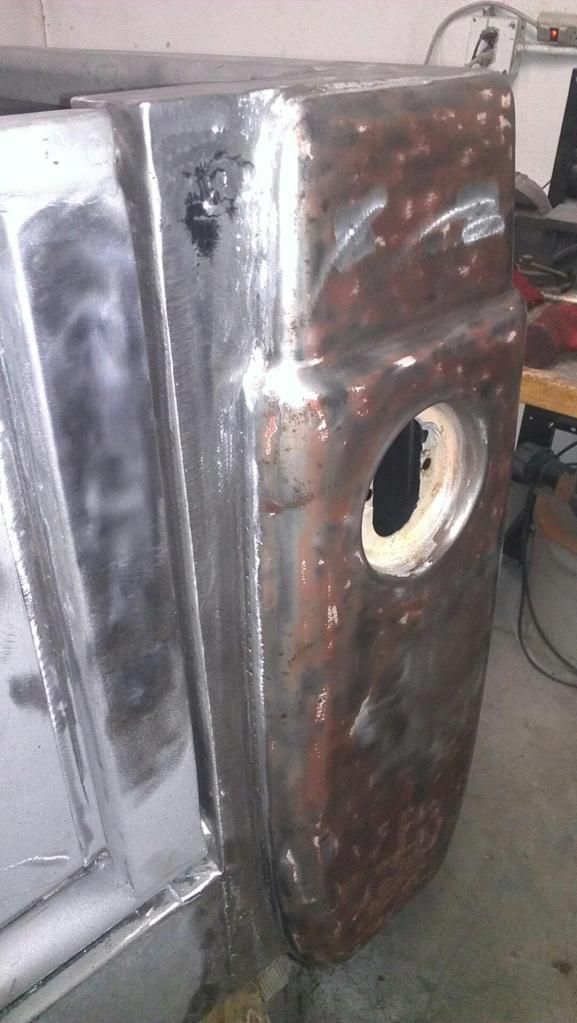
This was an idea we had for the fuel door, instead I will will this style fuel lid but it will be on the bed floor on the drivers side.
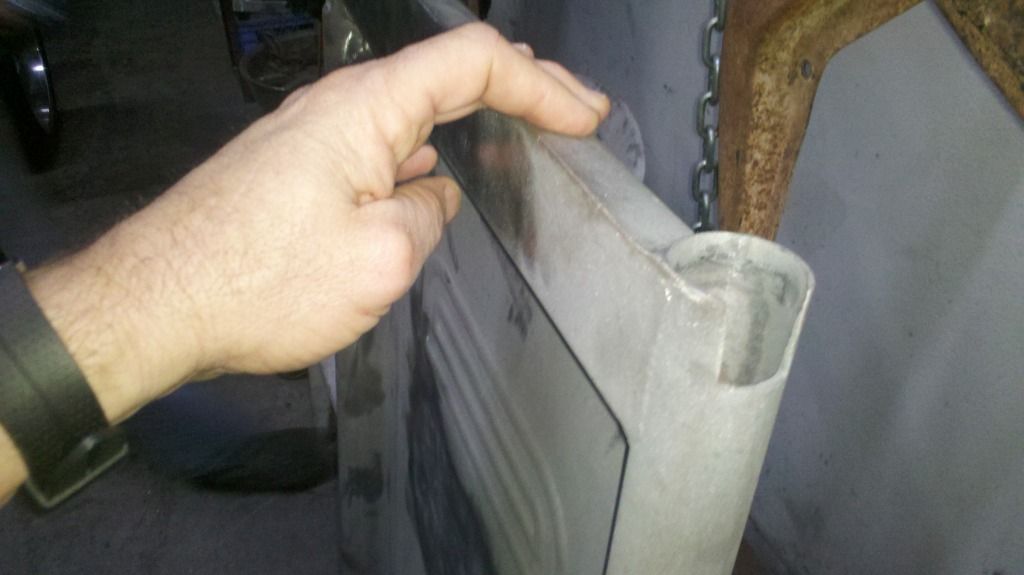
The stake pockets will be welded closed. I will have tie downs similar to the chain hook on the hitch welded onto plates in each corner of the bed.... this theme anyway, like these (simple cut pipe and softened edges
Ryan
The stake pockets will be welded closed. I will have tie downs similar to the chain hook on the hitch welded onto plates in each corner of the bed.... this theme anyway, like these (simple cut pipe and softened edges
Ryan


#19
11-14-2012, 09:45 AM
Yea I played with the idea of putting it in that area of the tail light/bed end also. Ended up putting a door on the side of the bed and boxing in the rear corner of the bed and mounting my battery back there. By raising your floor you have plenty of room between tank and floor now. I left my pockets open and recreated the joint where the quarter panel and tail light panel join. Whole different style truck!
#20
11-16-2012, 10:05 PM
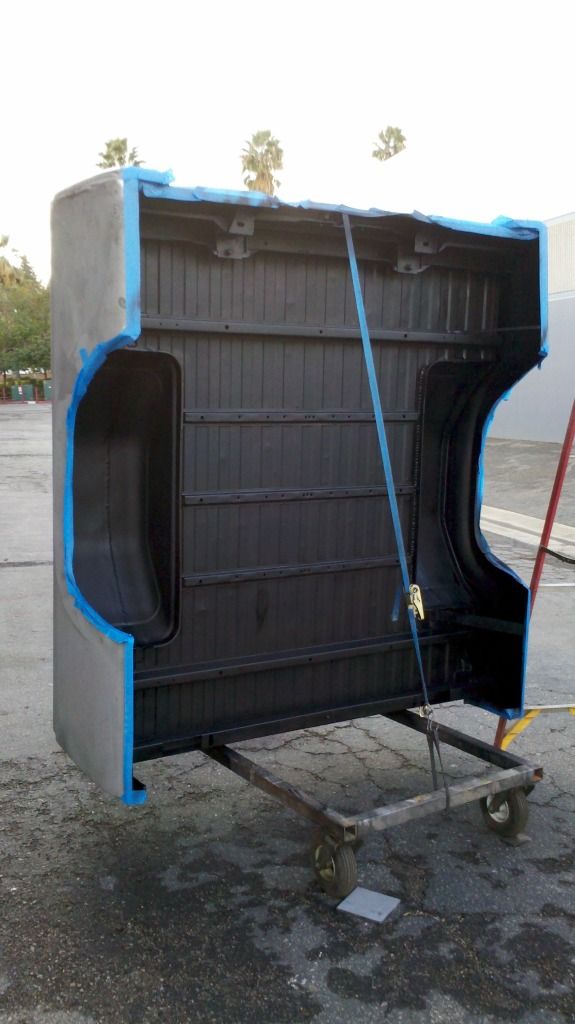
Bed update
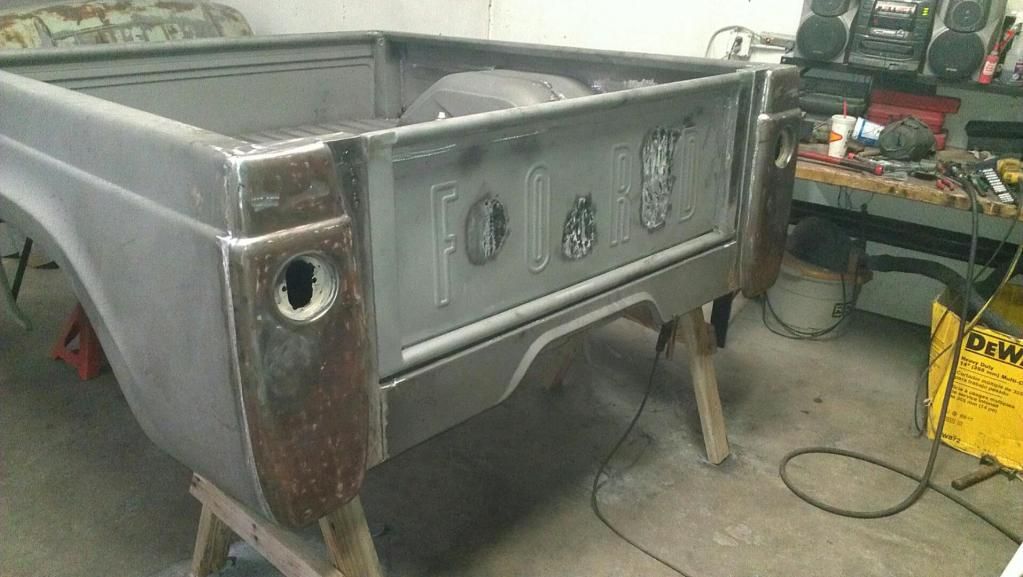
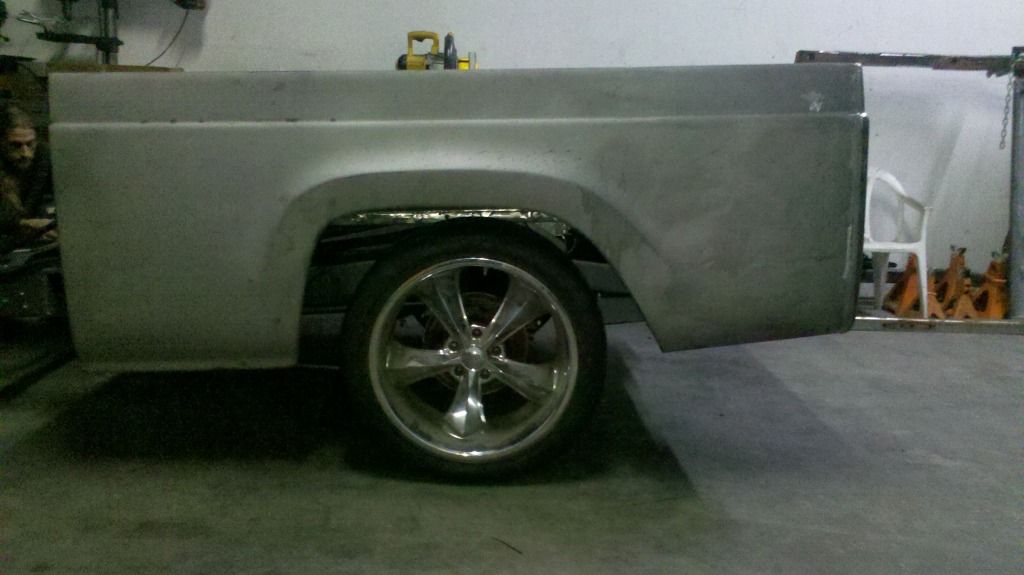
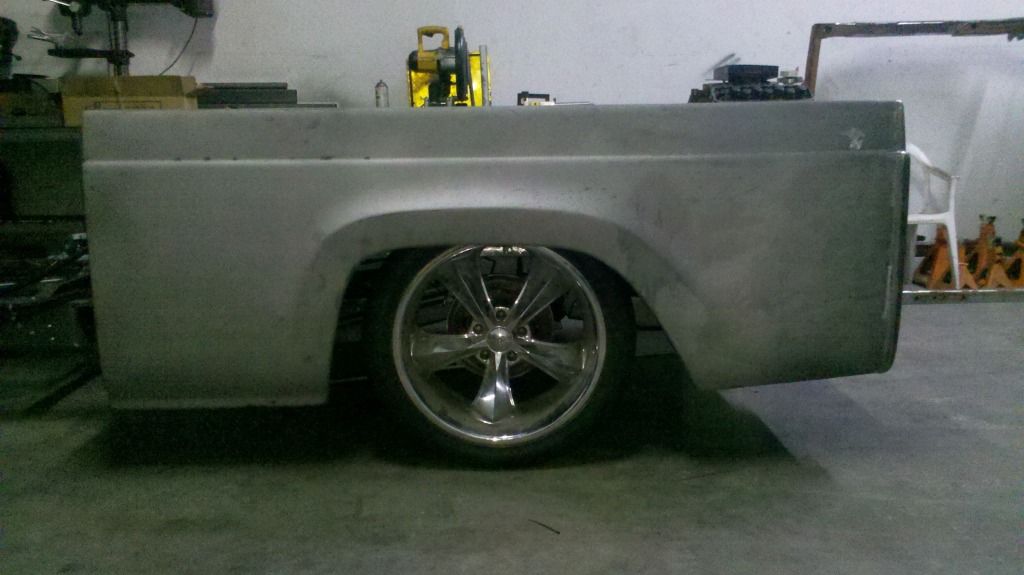
Well the tail light pieces are on, here are a few shots
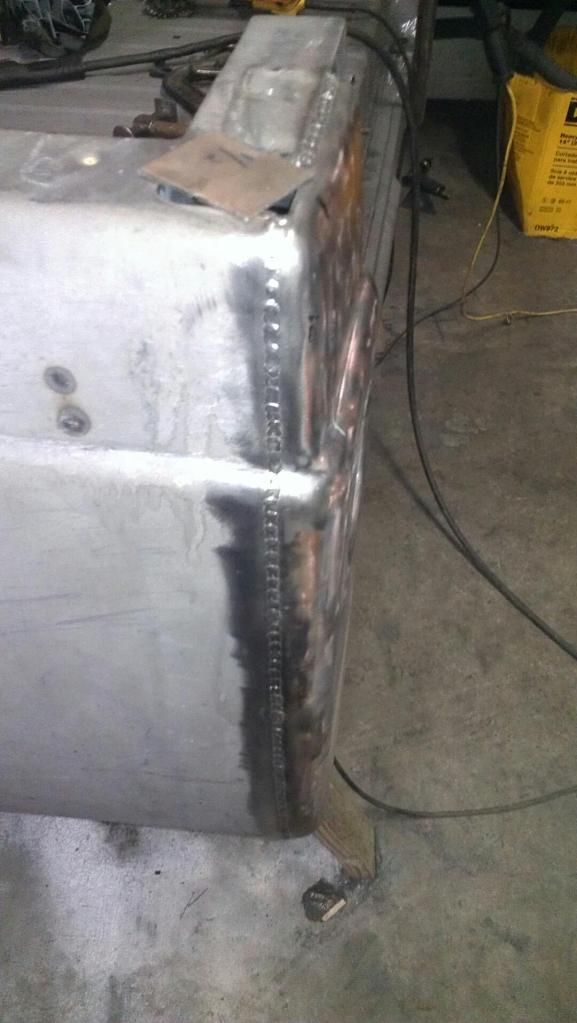
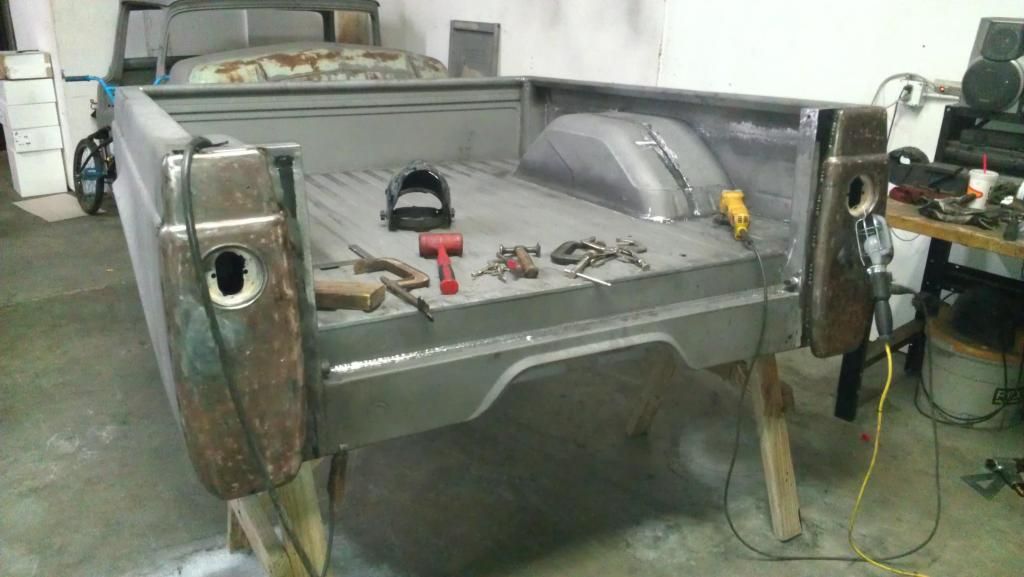
And here are the mods on the bed....if you can tell from this pic. The bedsides were brought up level as was the height of the tailgate, and the tailgat is now inset and closes flush
Hope to move the chassis this week to the home shop to start the motor mock up with exhaust etc
Stay tuned
Ryan
And here are the mods on the bed....if you can tell from this pic. The bedsides were brought up level as was the height of the tailgate, and the tailgat is now inset and closes flush
Hope to move the chassis this week to the home shop to start the motor mock up with exhaust etc
Stay tuned
Ryan

#22
11-18-2012, 01:16 PM
Tailgate
If you look at top and bottom of tailgate them are like 7/8 ID pipe welded to top and bottom. The hinge points off a late model truck was welded to each side, left side being basically a round button for the tailgate to slide over, the other end is slotted like a modern tailgate. The slotted side of the tailgate was modified as well. Basically operates like a late model now with no external hinges. I will take pics next time I get to truck if you would like??
Ryan
Ryan
#23
11-18-2012, 02:17 PM
#24
11-19-2012, 10:30 PM
Tailgate Pics
Here are a few pics of how we did the tailgate mount
If you blow this picture up you can see this is the side that slides out
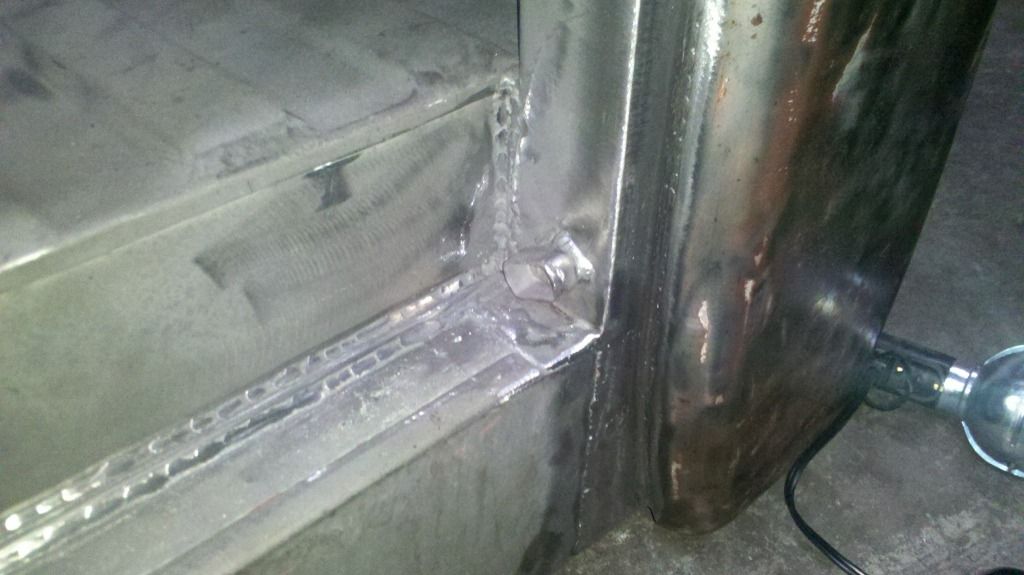
And then a simple slot cut in the pipe that was welded to the bottom
And this is the other side which of course you have to slide the gate onto first just like a late model tailgate
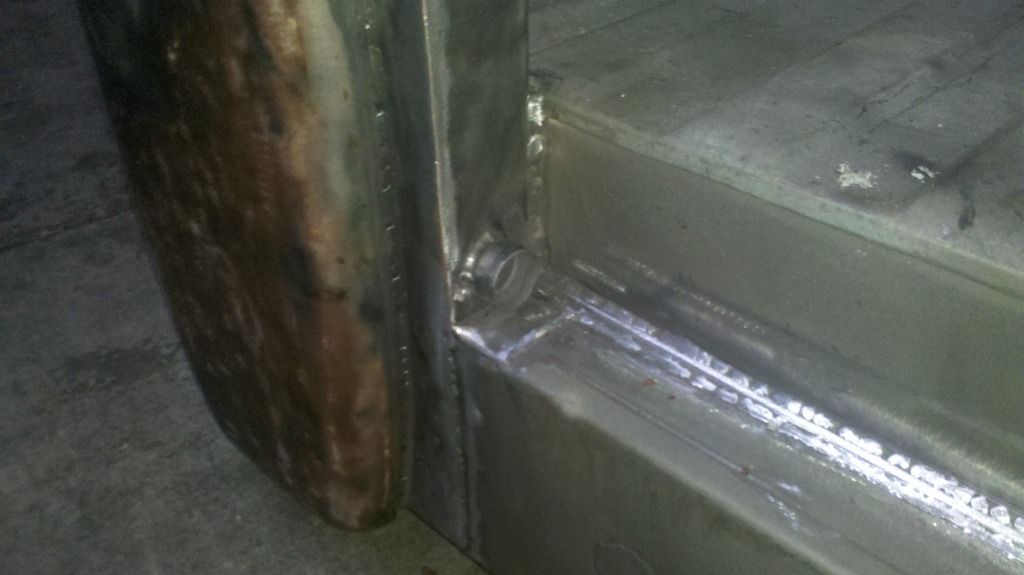
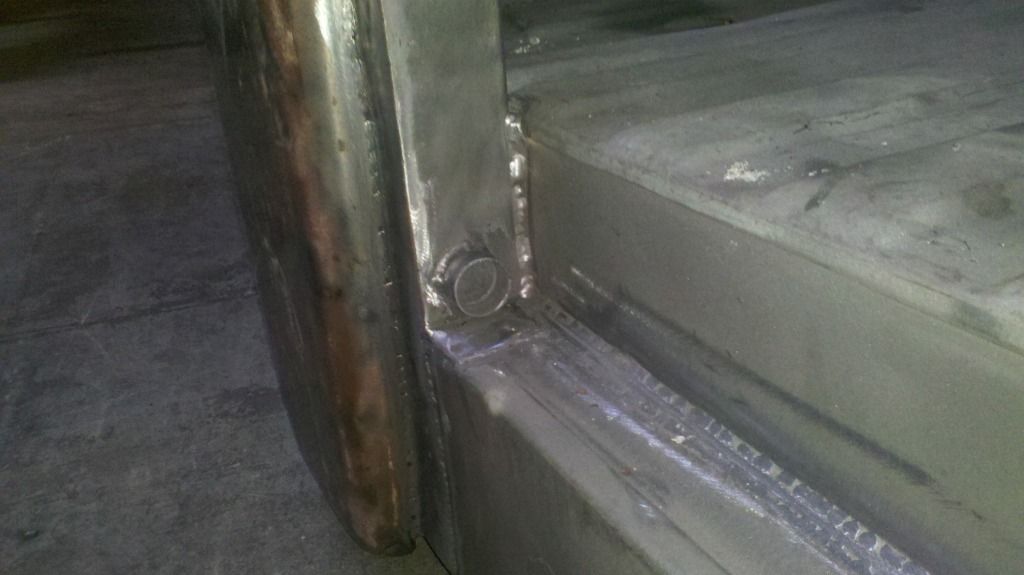
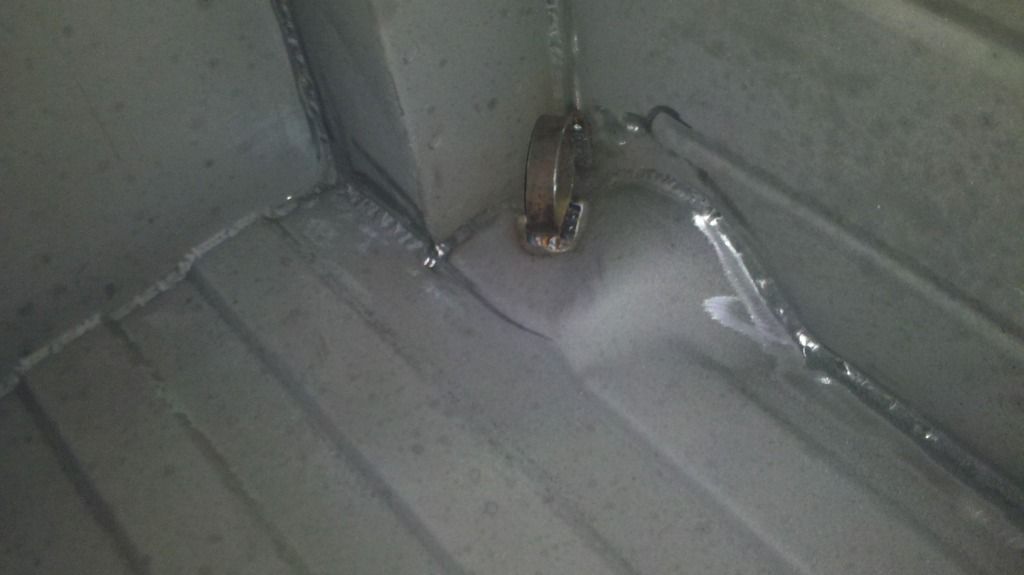
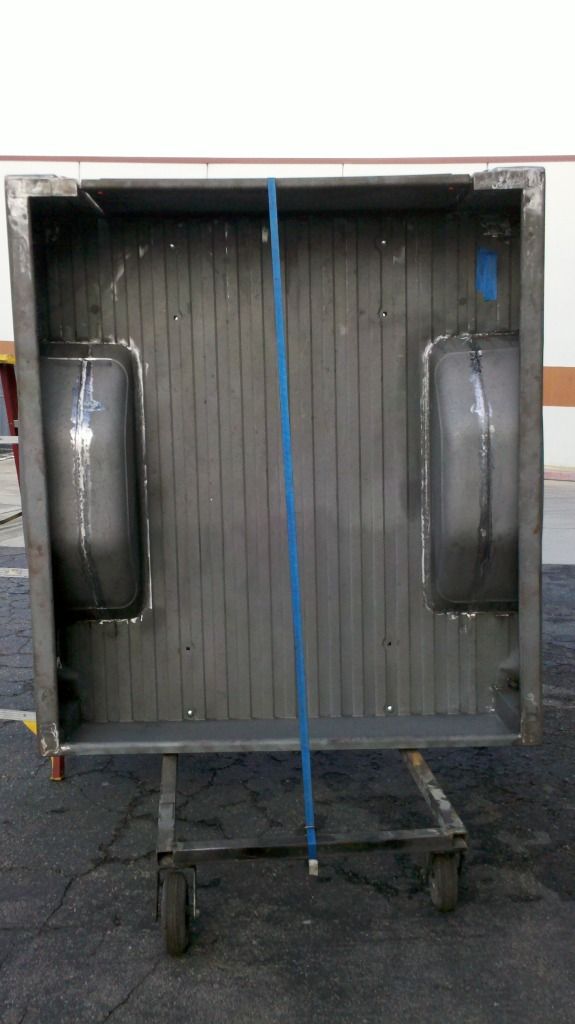
Here are the rings welded on in each corner for tie downs (match the connectors at the hitch)
And yes that is an inner bed wall with a roll in it, couldnt see a sinlge wall bed, too scary.... lol

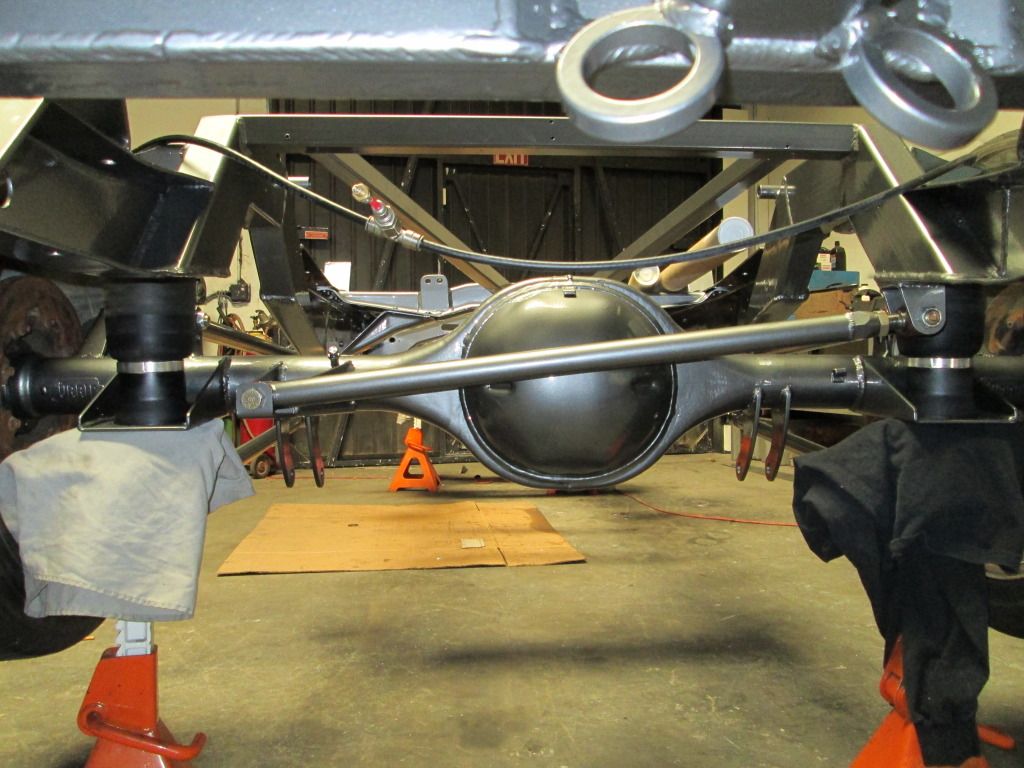
And some gratuitous shots of the bed on in the "UP" and "DOWN" suspension,
UP UP UP
DOWN DOWN DOWN
More to come,....STAY TUNED
Ryan
If you blow this picture up you can see this is the side that slides out
And then a simple slot cut in the pipe that was welded to the bottom
And this is the other side which of course you have to slide the gate onto first just like a late model tailgate
Here are the rings welded on in each corner for tie downs (match the connectors at the hitch)
And yes that is an inner bed wall with a roll in it, couldnt see a sinlge wall bed, too scary.... lol
And some gratuitous shots of the bed on in the "UP" and "DOWN" suspension,
UP UP UP
DOWN DOWN DOWN
More to come,....STAY TUNED
Ryan
#25
11-22-2012, 11:44 AM
5th Wheeling
Join Date: May 2010
Location: Springfield, OR
Posts: 47
Likes: 0
Received 0 Likes
on
0 Posts
#26
11-22-2012, 11:51 AM
#27
11-30-2012, 10:57 PM
Back to once a week on the truck until after Christmas, I may get 3 days in a row, woo hoo.
Kinda rainy here in So Cal. I really wanted to get the truck bed, (which is sandblasted and raw metal) covered with something on the under side before the moisture set in.....so today before the sprinkles we shot bed liner onto the entire underside of the fabricated bed floor. Put some seam sealer on the wheel tubs and went to town.
In between coats we started to assemble the "Frontrunner" pulley set up from VIntage air.
During the week I took the "main truss" of the vintage air system and strategically painted some of the aluminum black. I also painted the power steering pump and water pump black as they were both raw metal color.
Here are a couple of pics for your enjoyment
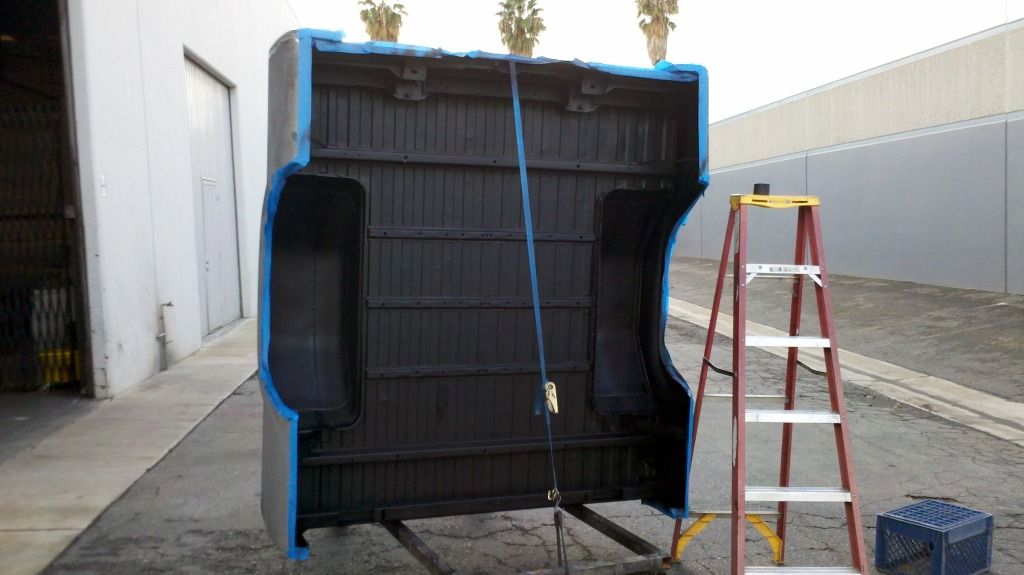
TOP SIDE OF BED (TUBS)
AFTER BEDLINED
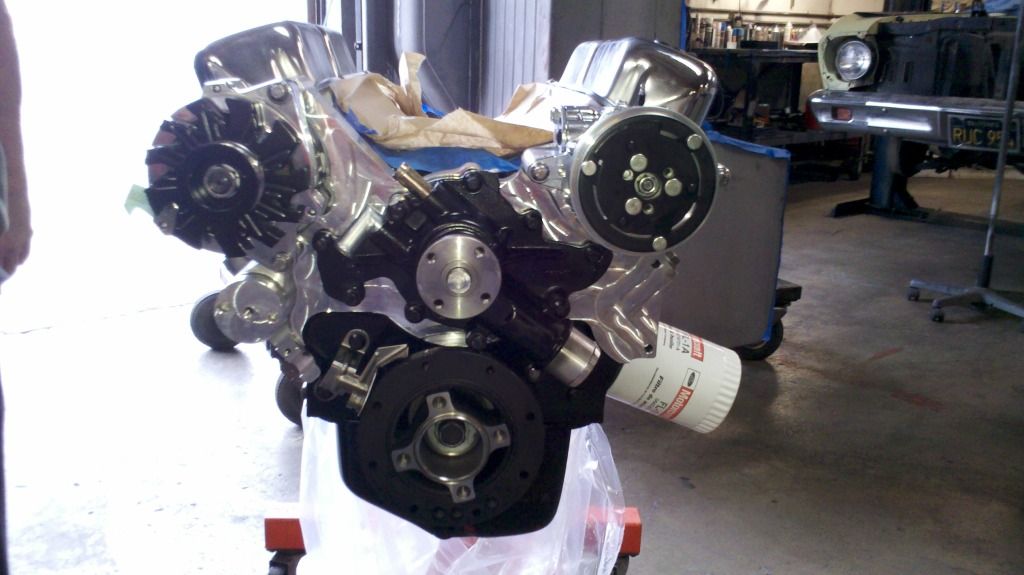
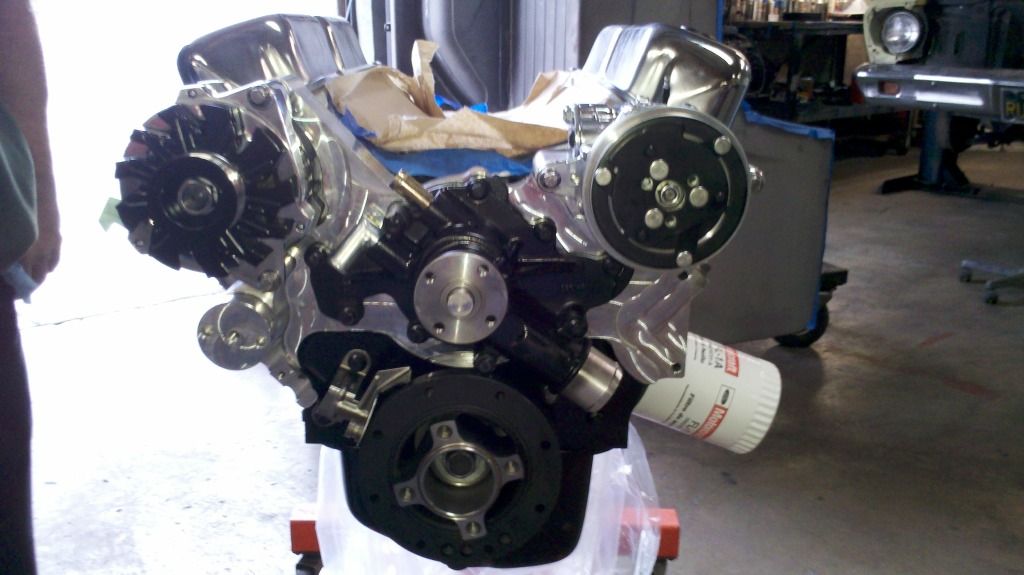
MOTOR WITH THE OLD TIMIMG COVER

AND THE NEW SET UP MINUS THE POWERSTEERING PUMP
hAVE A GOOD WEEKEND
RYAN
Kinda rainy here in So Cal. I really wanted to get the truck bed, (which is sandblasted and raw metal) covered with something on the under side before the moisture set in.....so today before the sprinkles we shot bed liner onto the entire underside of the fabricated bed floor. Put some seam sealer on the wheel tubs and went to town.
In between coats we started to assemble the "Frontrunner" pulley set up from VIntage air.
During the week I took the "main truss" of the vintage air system and strategically painted some of the aluminum black. I also painted the power steering pump and water pump black as they were both raw metal color.
Here are a couple of pics for your enjoyment
TOP SIDE OF BED (TUBS)
AFTER BEDLINED
MOTOR WITH THE OLD TIMIMG COVER
AND THE NEW SET UP MINUS THE POWERSTEERING PUMP
hAVE A GOOD WEEKEND
RYAN
#29
12-02-2012, 11:00 PM
Thanks, I actually did a bit of painting to the pretty pretty aluminum piece, I hope to have the perfect amount of mix between black and aluminum, when all the parts are on. The black carb (hard core grey) was extra but worth it for the look, havent decided what the air cleaner will be, black somethin, lol
Ryan
Ryan
#30
12-03-2012, 01:45 PM

Hey, I like what you're doing to your bed. I'm putting my '57 on a 4x4 S-10 frame (my original frame is long gone) and am going to have to raise my bed floor about the same amount. The floor is already cut out (lots of spot welds!) for the mock up. Did you just rosette weld the original floor into it's new spot or did you put some support pieces in to hold it in place? The pictures of your build are much appreciated (looks first class). Nice work!