
My 78 Bronco Project (Daddy's Big Truck)


#272
 09-30-2016, 08:15 PM
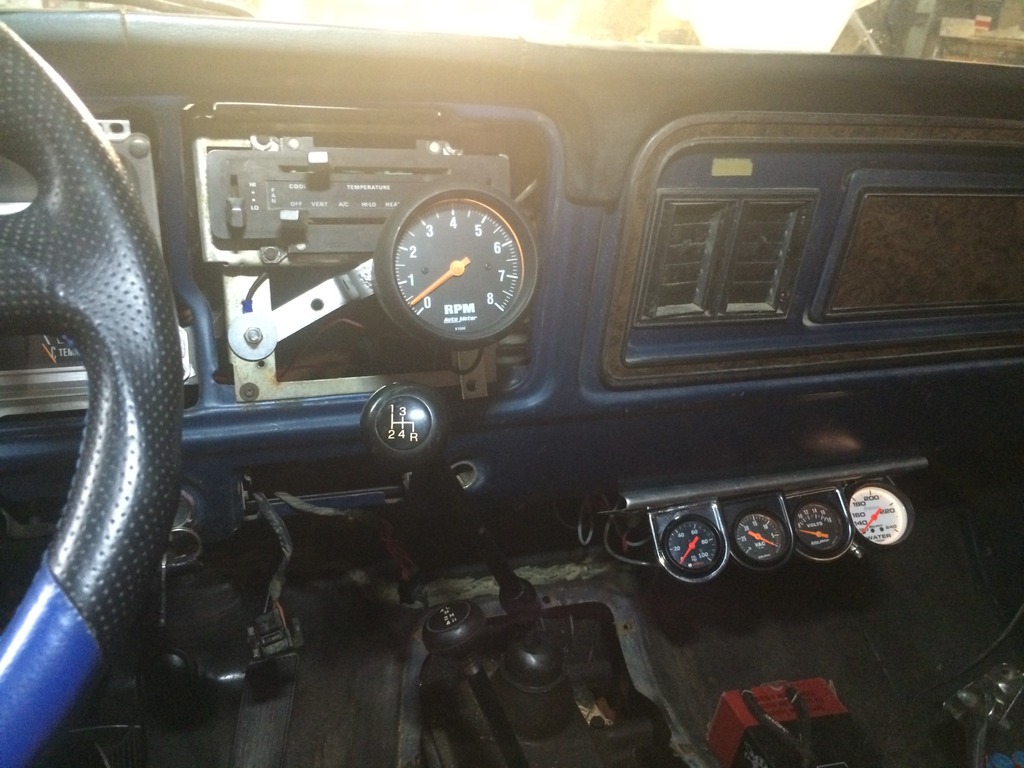
So, while I was chasing the no starter issue I ended up taking the dash apart and the instrument cluster out again. Once I had the starting issue fixed I used the factory accessory power to wire in my electric fuel pump to ignition hot. I also used a factory connection for the lights on my aftermarket gauges. I had decided to mount them before I started the engine so I could use them to monitor it. They are not in their permanent location yet, especially the Tach since its mounted in the radio hole, LOL.
I put the fenders on and even mounted the plastic inner liners in place! I figure they should help keep some of the crap from the tires from making it into the engine bay.
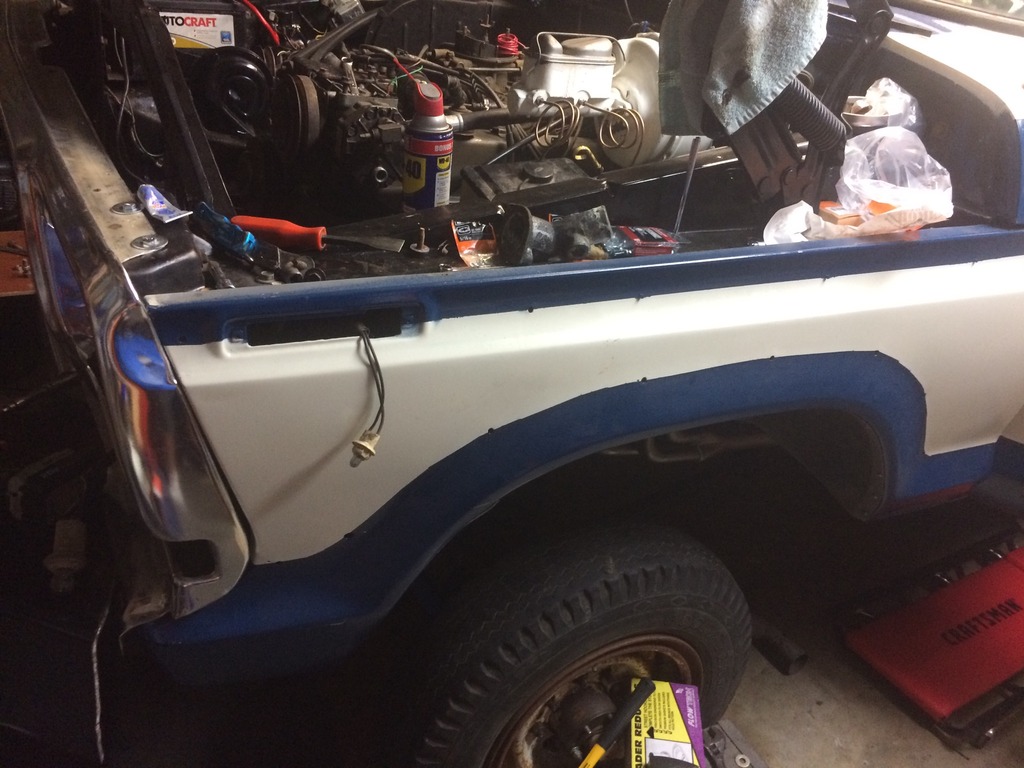
Next up was installing the radiator and I decided to bolt all of the Factory A/C parts on since I plan to get the A/C fixed and working at some point. I filled the radiator with distilled water only since I don't want antifreeze leaking out if there are cooling issues to deal with.
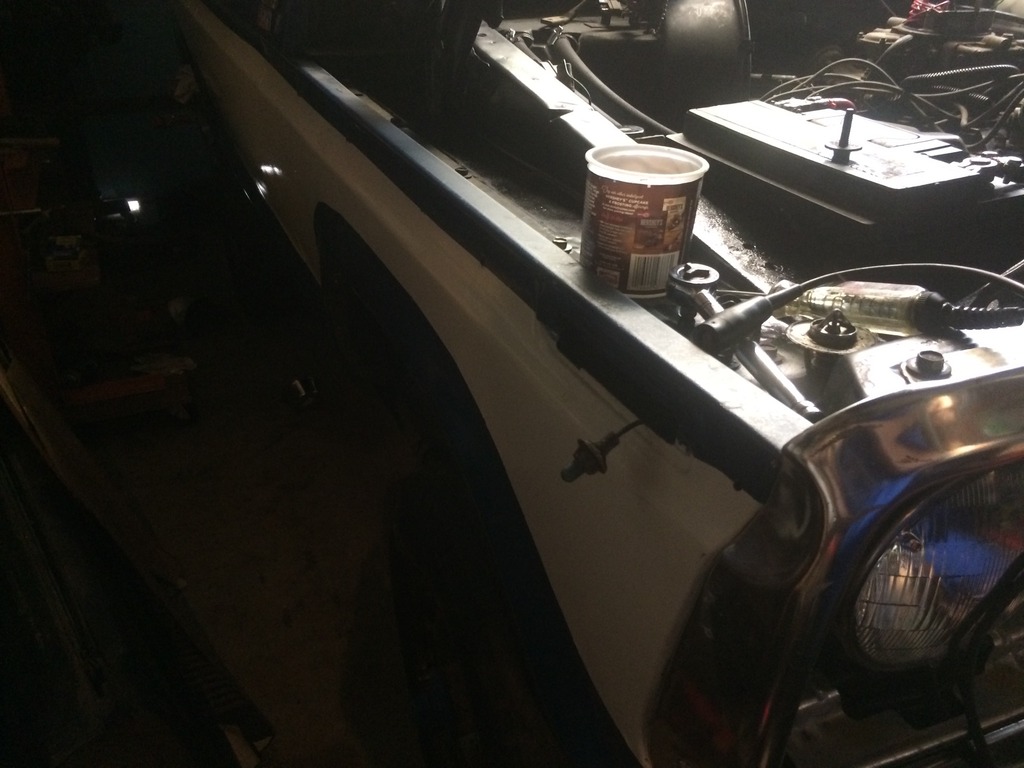
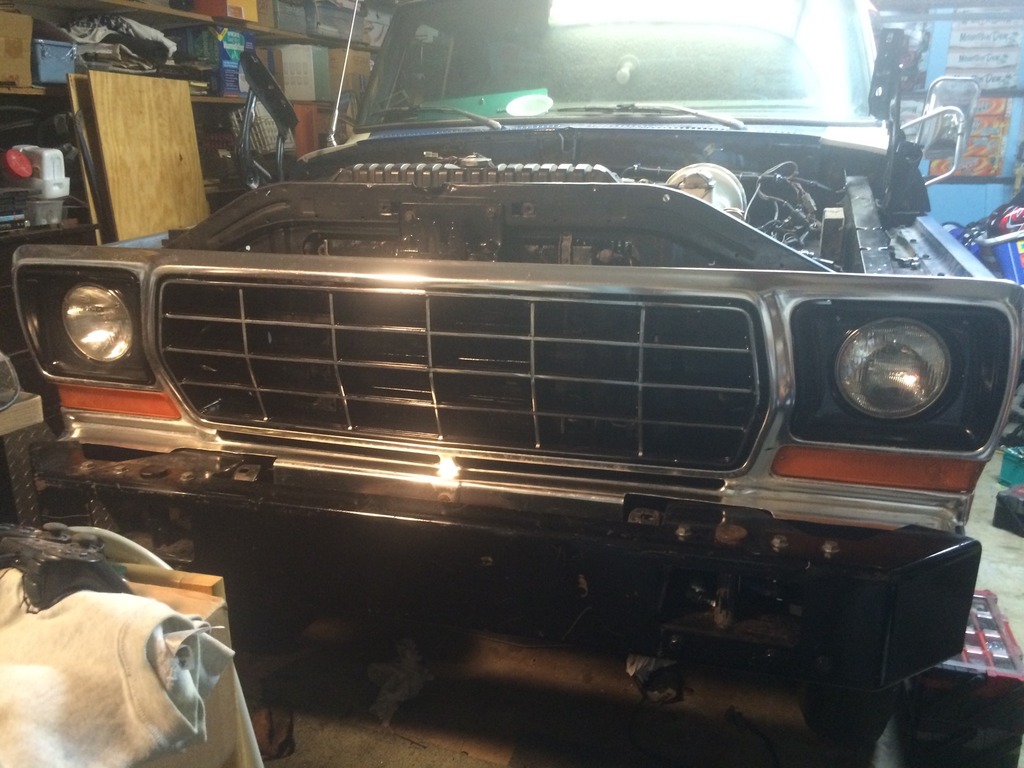
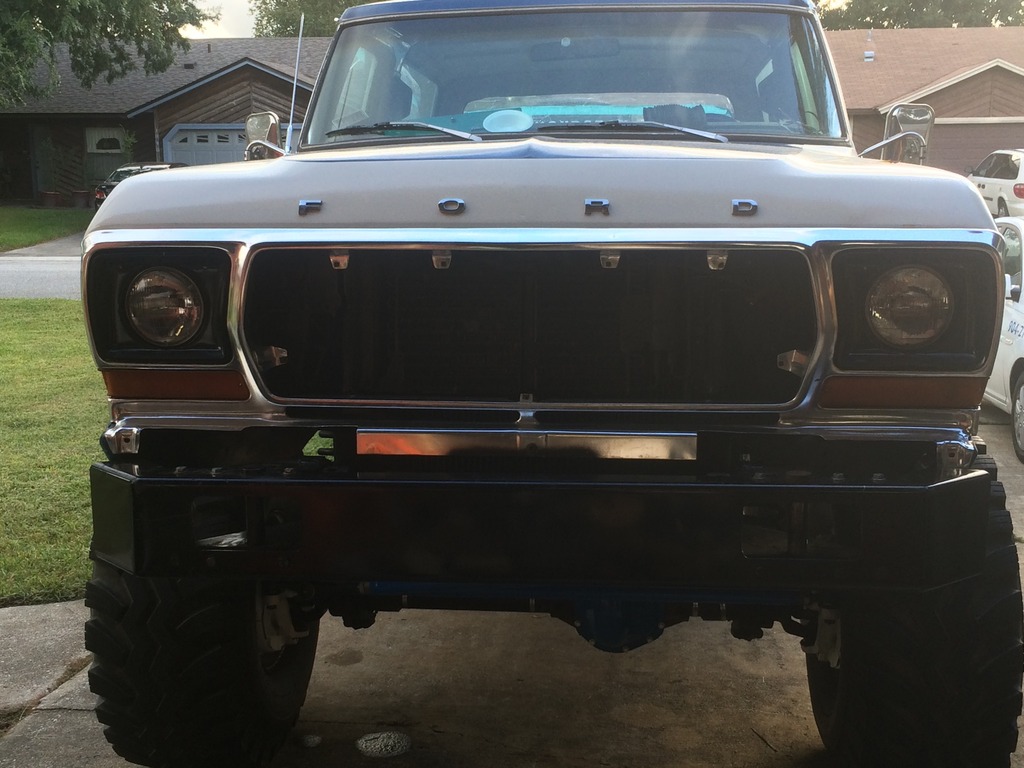
Once I got the fenders on I put the grill shell in place. I am missing a few of the bolts since I don't have to hood on so I have not aligned the all of the body panels to try and get even panel gaps. Once I got the grill on I started working on the headlights and trim. I have several sets of headlight surrounds and grills so I played with some paint to see what I liked.
Here is the trim sprayed with semi gloss black.
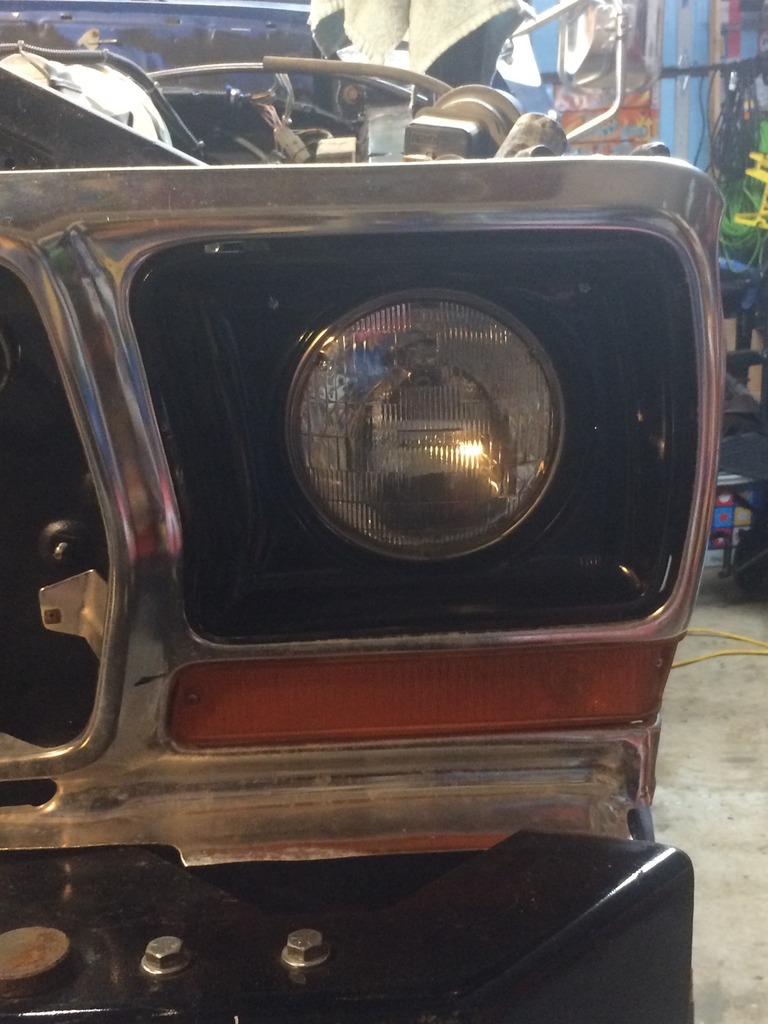
Then I masked the lines of the grill with 1/4" trip tape and sprayed it with the same semi gloss black.
Before I removed the tape...
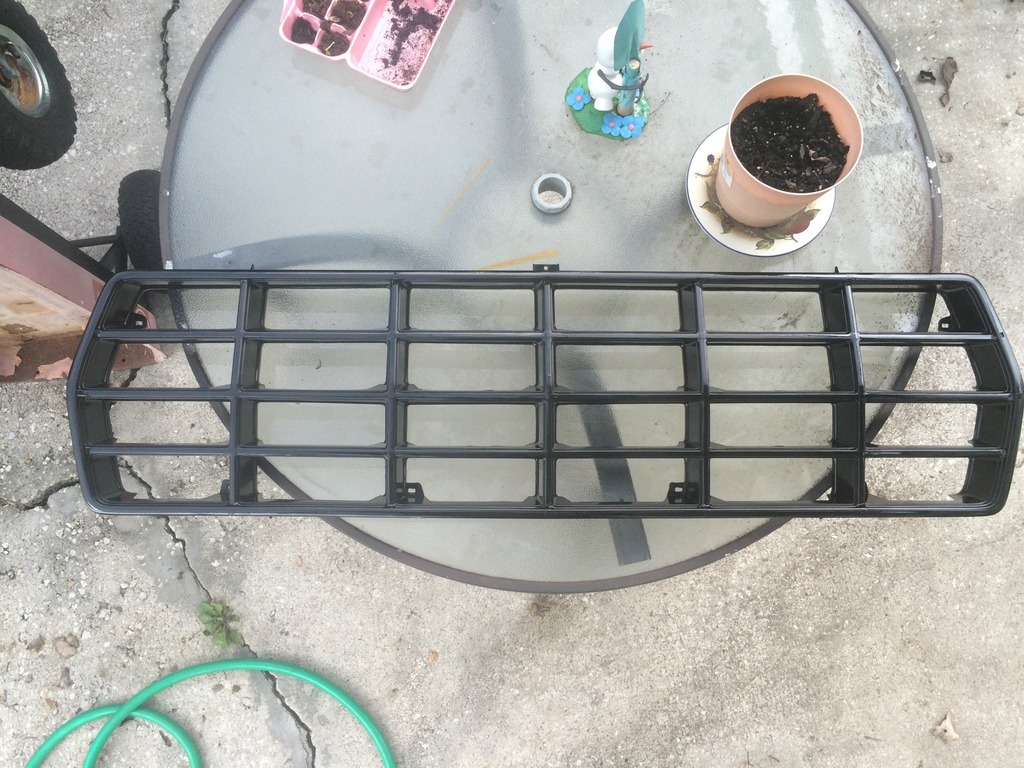
After I removed the tape and dropped it into place in the grill. I like it.
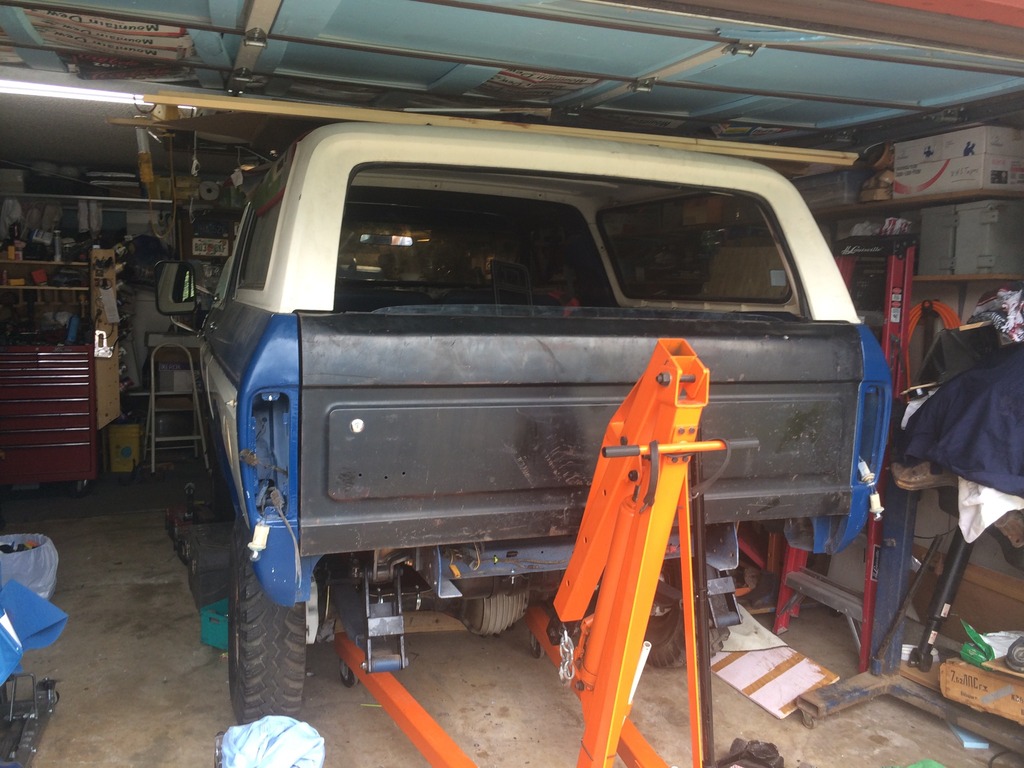
Since the Bronco is getting closer to starting and backing out of the garage under its own power I realized that once out of the garage my wife probably won't let it back in the garage. Flip side is that once I put the 40's on it there is no way it could fit in the garage. I bought a tailgate a few years ago just for the rear window glass, the bonus was that it had a working electric motor in it. I decided to install the whole tailgate onto the Bronco for now so I can roll the window up when it ends up sitting outside. The rest of the tailgate plan is to buy all of the parts and rebuild the entire nicely painted tailgate over time then put the good glass into it and put it back on the Bronco. And yes, I did use the engine hoist to swap the tailgate by myself. They're not just for engines.
On Thursday i picked up my son from school and brought him home and took him into the garage. I put him on the middle of the front seat and climbed into the driver seat next to him.
I hit the key and after one pump of the accelerator the 460 started right up on open headers in my garage!!!

I put the fenders on and even mounted the plastic inner liners in place! I figure they should help keep some of the crap from the tires from making it into the engine bay.


Next up was installing the radiator and I decided to bolt all of the Factory A/C parts on since I plan to get the A/C fixed and working at some point. I filled the radiator with distilled water only since I don't want antifreeze leaking out if there are cooling issues to deal with.
Once I got the fenders on I put the grill shell in place. I am missing a few of the bolts since I don't have to hood on so I have not aligned the all of the body panels to try and get even panel gaps. Once I got the grill on I started working on the headlights and trim. I have several sets of headlight surrounds and grills so I played with some paint to see what I liked.
Here is the trim sprayed with semi gloss black.

Then I masked the lines of the grill with 1/4" trip tape and sprayed it with the same semi gloss black.
Before I removed the tape...

After I removed the tape and dropped it into place in the grill. I like it.

Since the Bronco is getting closer to starting and backing out of the garage under its own power I realized that once out of the garage my wife probably won't let it back in the garage. Flip side is that once I put the 40's on it there is no way it could fit in the garage. I bought a tailgate a few years ago just for the rear window glass, the bonus was that it had a working electric motor in it. I decided to install the whole tailgate onto the Bronco for now so I can roll the window up when it ends up sitting outside. The rest of the tailgate plan is to buy all of the parts and rebuild the entire nicely painted tailgate over time then put the good glass into it and put it back on the Bronco. And yes, I did use the engine hoist to swap the tailgate by myself. They're not just for engines.

On Thursday i picked up my son from school and brought him home and took him into the garage. I put him on the middle of the front seat and climbed into the driver seat next to him.
I hit the key and after one pump of the accelerator the 460 started right up on open headers in my garage!!!

#274
10-03-2016, 09:08 PM
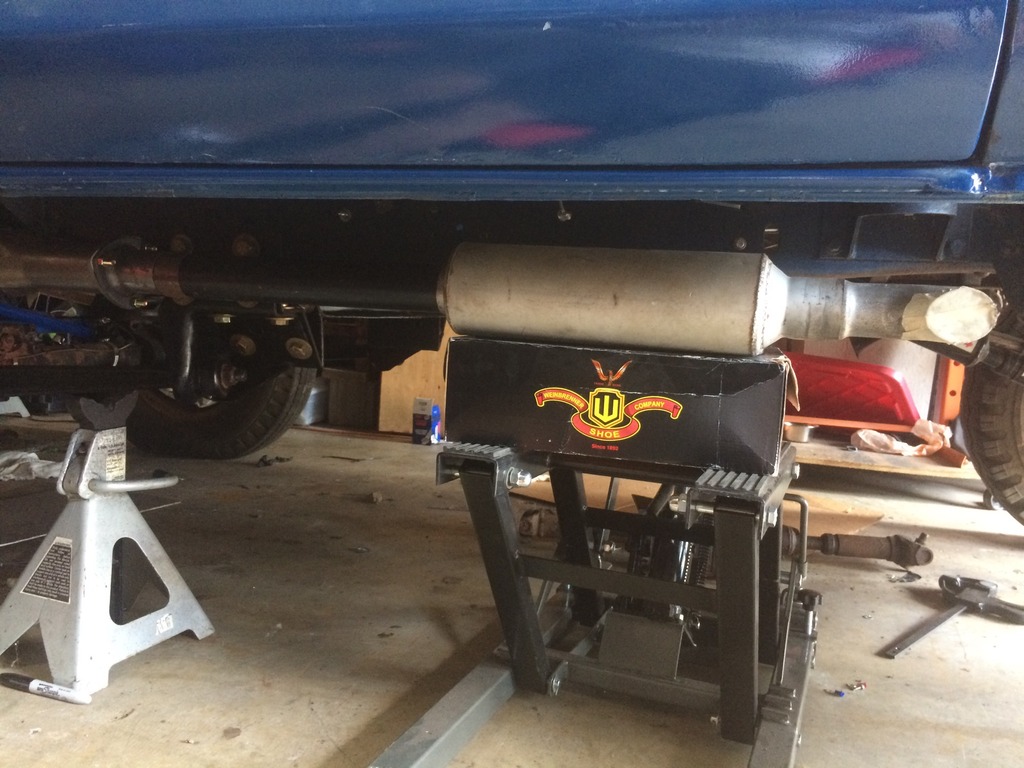
So after I got the engine started on open headers I decided that I really needed some form of mufflers to quiet down the beastly rumble. The mechanic that fixed my radiator hooked me up with a pair of slightly used Flowmaster mufflers really cheap. I welded them to the collector reducer and about 18" of pipe just to move their exit back a little further. Mocking them into place.
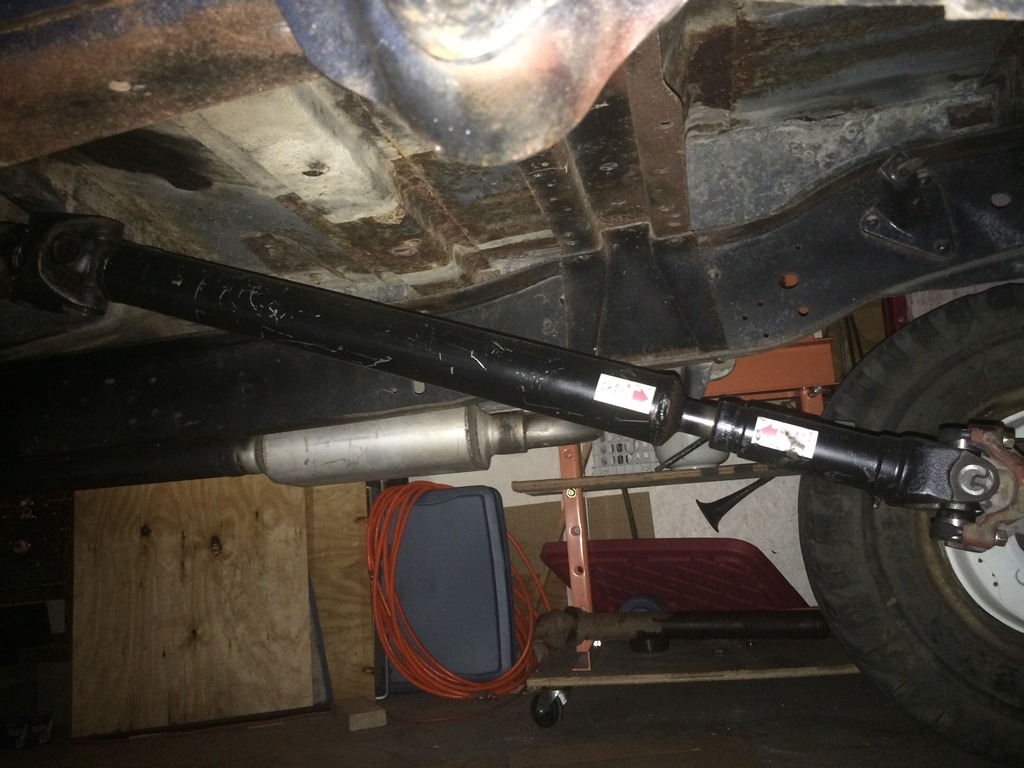
I also picked up a 1310 to 1350 conversion U-joint and got the driveshaft installed.
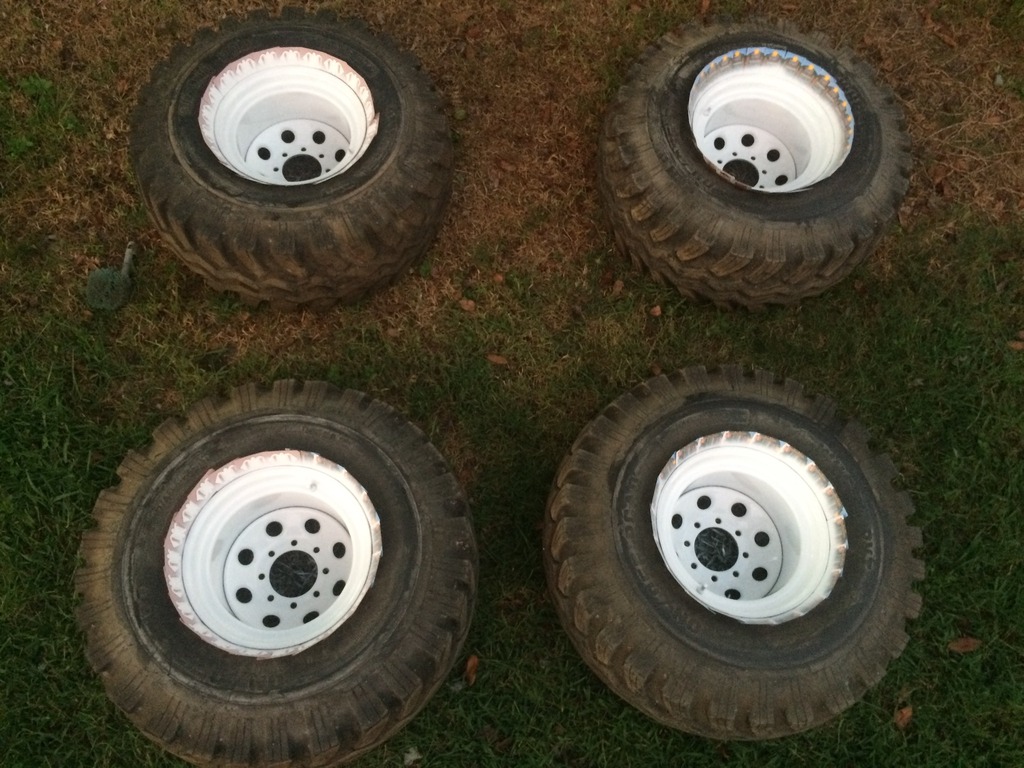
Then I went and got the tires out of the shed. I used a trick and took two decks of playing cards and stuck the cards between the rim and tire. I them painted the rims with some rattle can white. The chrome on them had started to come off and they were rusting.
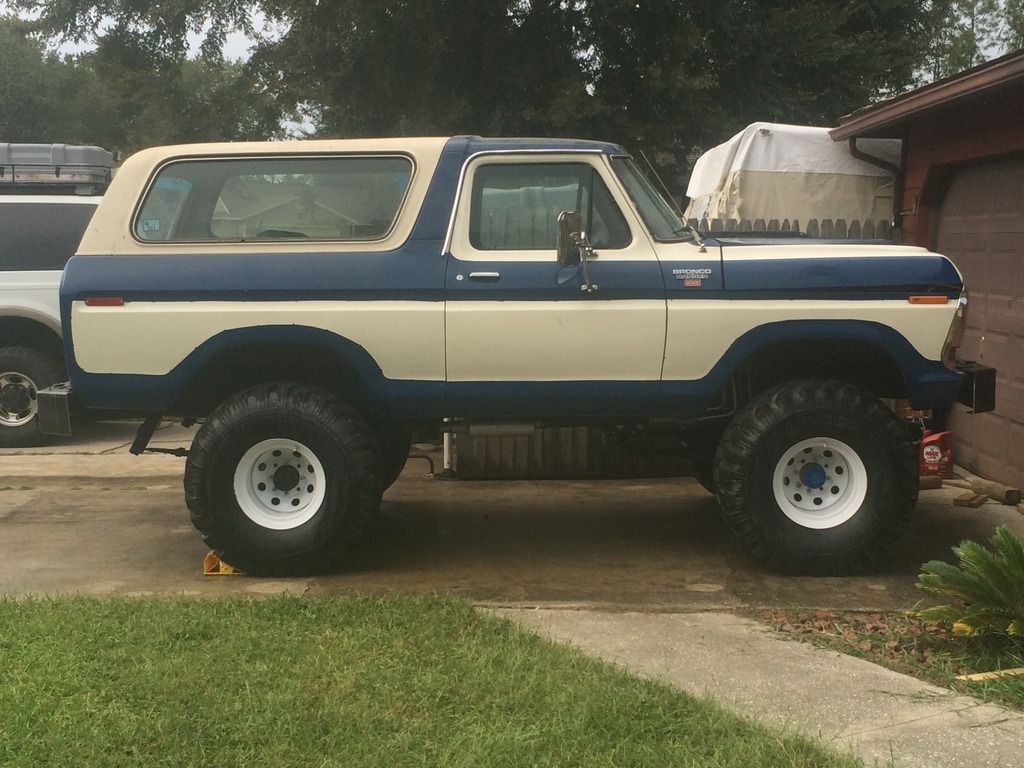
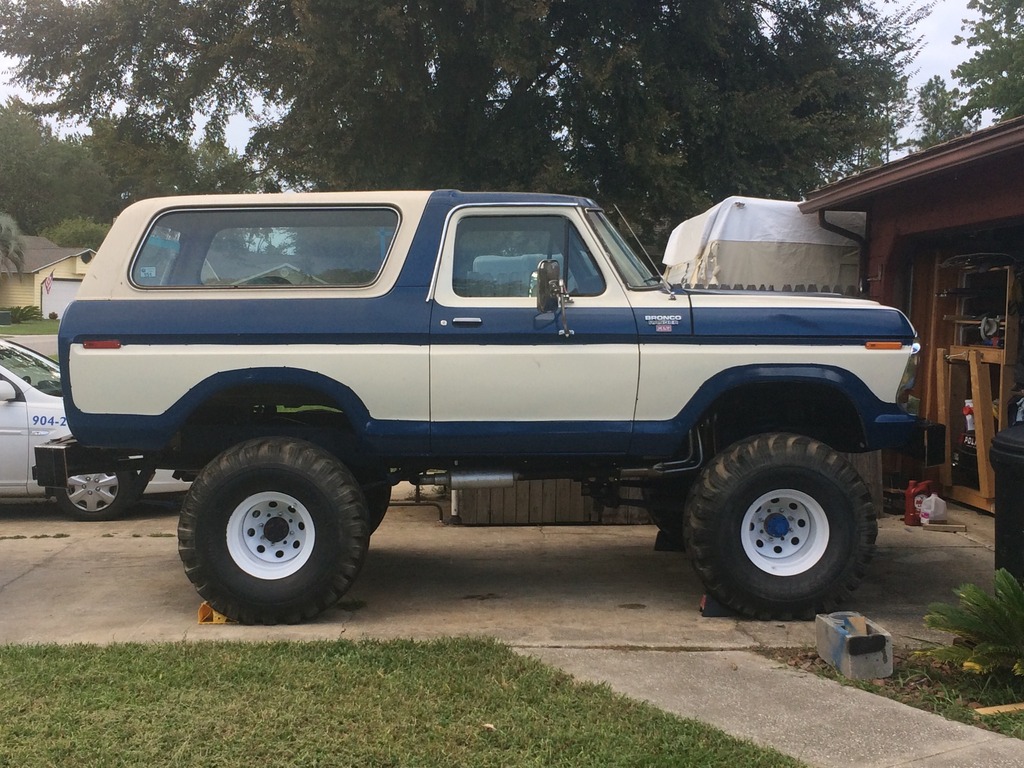
On Saturday I fired the Brinco up and backed it out of the garage under its own power for the first time ever. I spent over an hour bleeding the brakes by myself then put the tires on.
Next up are a ton of little things to get completed before I am able to drive for more then a trip into the street just to test the brakes.

I also picked up a 1310 to 1350 conversion U-joint and got the driveshaft installed.

Then I went and got the tires out of the shed. I used a trick and took two decks of playing cards and stuck the cards between the rim and tire. I them painted the rims with some rattle can white. The chrome on them had started to come off and they were rusting.

On Saturday I fired the Brinco up and backed it out of the garage under its own power for the first time ever. I spent over an hour bleeding the brakes by myself then put the tires on.

Next up are a ton of little things to get completed before I am able to drive for more then a trip into the street just to test the brakes.
#276
10-04-2016, 09:11 PM
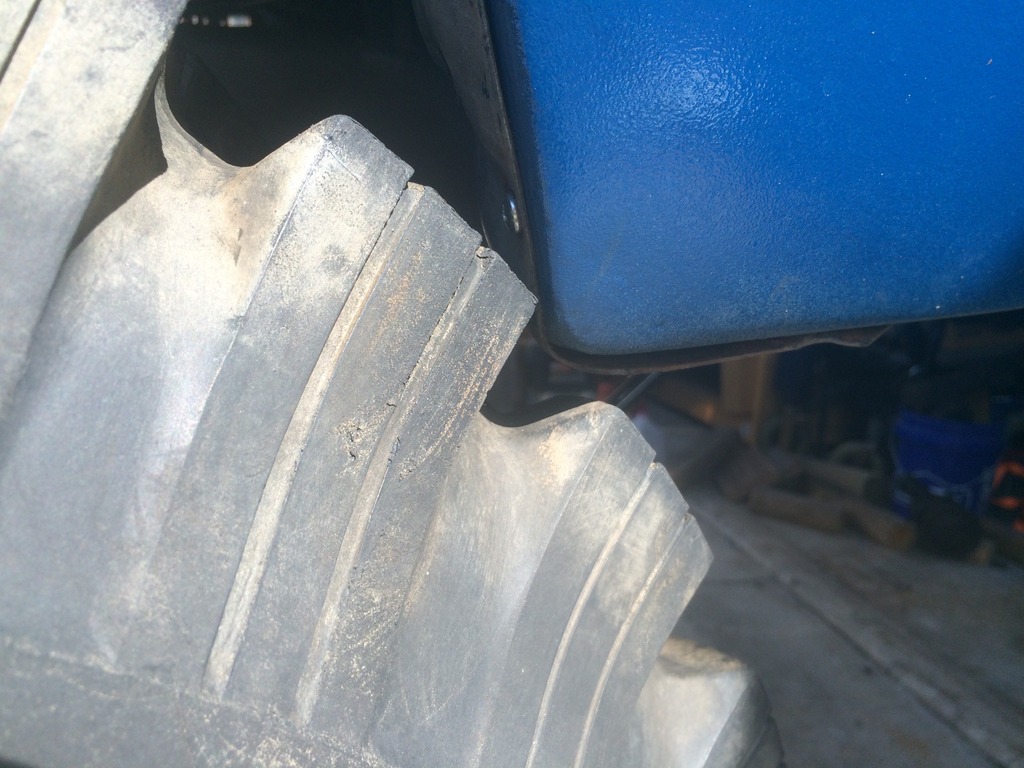
So after I bled the brakes I wanted to test them a bit more then rolling up and down the driveway. I decided to back it out in the street but when I cranked the wheel all the way over while backing up and heard some noises that I didn't like while feeling the steering wheel bouncing in my hands. I got out to investigate and found the problem. The front tires are hitting the front of the front fender opening a lot al full steering lock.
I looked at the budget and spending $500 for the Bushwacker cut out flares is not an option right now so I went with the next best option. I hit up Summit for a 3" body lift to give the clearance I need to actually steer the Bronco. This will also allow for using the Bushwacker flares in the future when I finally step it up to 44" tires.
I ordered the body lift kit at 11:00 Monday morning and it arrived at 11:30 Tuesday morning. I decided to try and see how far I could get on the install after lunch. I had the entire body lift on in less then an hour and a half.
I also am trying to figure out what to do to close the gap in the front since it is larger from when I trimmed the grill surround from when I first installed the front bumper.
After that I may make some gap covers so you can't see thru the openings in the rear wheel wells to the other side of the Bronco. I may try some thick rubber that I have around the garage.
Next up is adjusting where the rear bumper is attached to close the gap and make the body lift less noticeable. I'm waiting for my electric cooling fan to arrive so I can run the engine a little longer without it overheating.

I looked at the budget and spending $500 for the Bushwacker cut out flares is not an option right now so I went with the next best option. I hit up Summit for a 3" body lift to give the clearance I need to actually steer the Bronco. This will also allow for using the Bushwacker flares in the future when I finally step it up to 44" tires.
I ordered the body lift kit at 11:00 Monday morning and it arrived at 11:30 Tuesday morning. I decided to try and see how far I could get on the install after lunch. I had the entire body lift on in less then an hour and a half.

I also am trying to figure out what to do to close the gap in the front since it is larger from when I trimmed the grill surround from when I first installed the front bumper.

After that I may make some gap covers so you can't see thru the openings in the rear wheel wells to the other side of the Bronco. I may try some thick rubber that I have around the garage.
Next up is adjusting where the rear bumper is attached to close the gap and make the body lift less noticeable. I'm waiting for my electric cooling fan to arrive so I can run the engine a little longer without it overheating.
#277
10-04-2016, 09:27 PM
Postmaster
Join Date: Nov 2009
Location: SE Georgia
Posts: 3,189
Likes: 0
Received 0 Likes
on
0 Posts
#278
10-17-2016, 01:35 PM
Well I have made some progress and had some setbacks. I got my electric fans from Amazon and they are the same size, from the same company, but the mounting holes are at different locations around the fan shroud. I ordered them two days apart so that's the only reason I can guess that they are not the same. It meant I had to rework some of the shroud I built to get them to work but they are on for now.
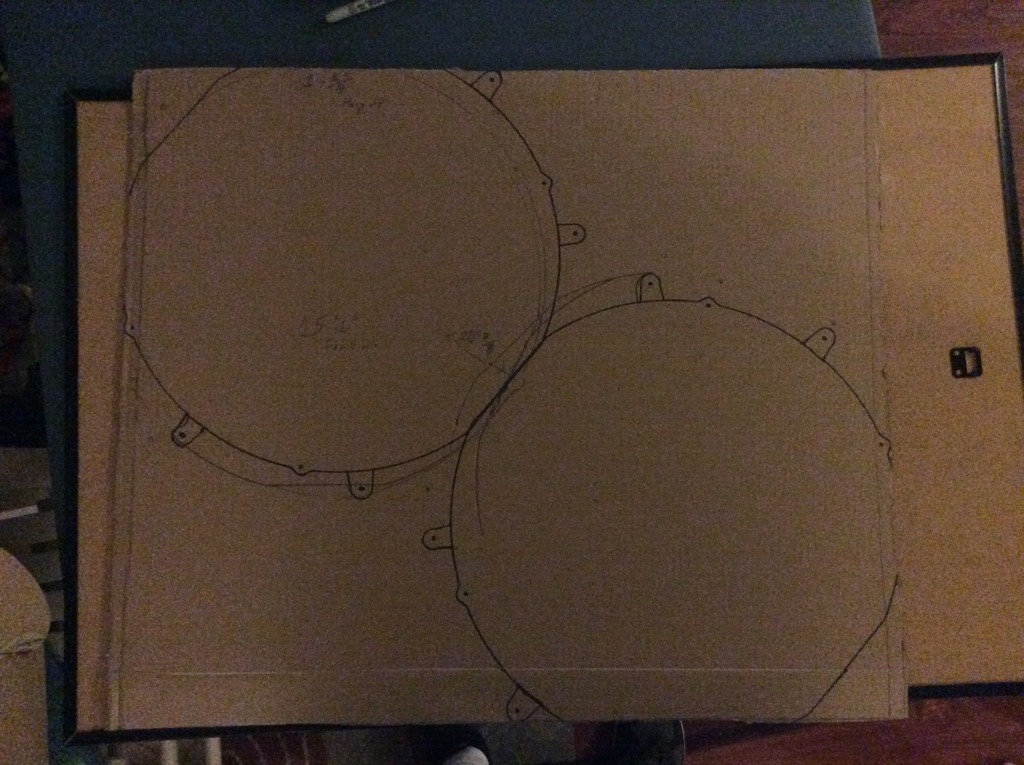
I started with a cardboard template.
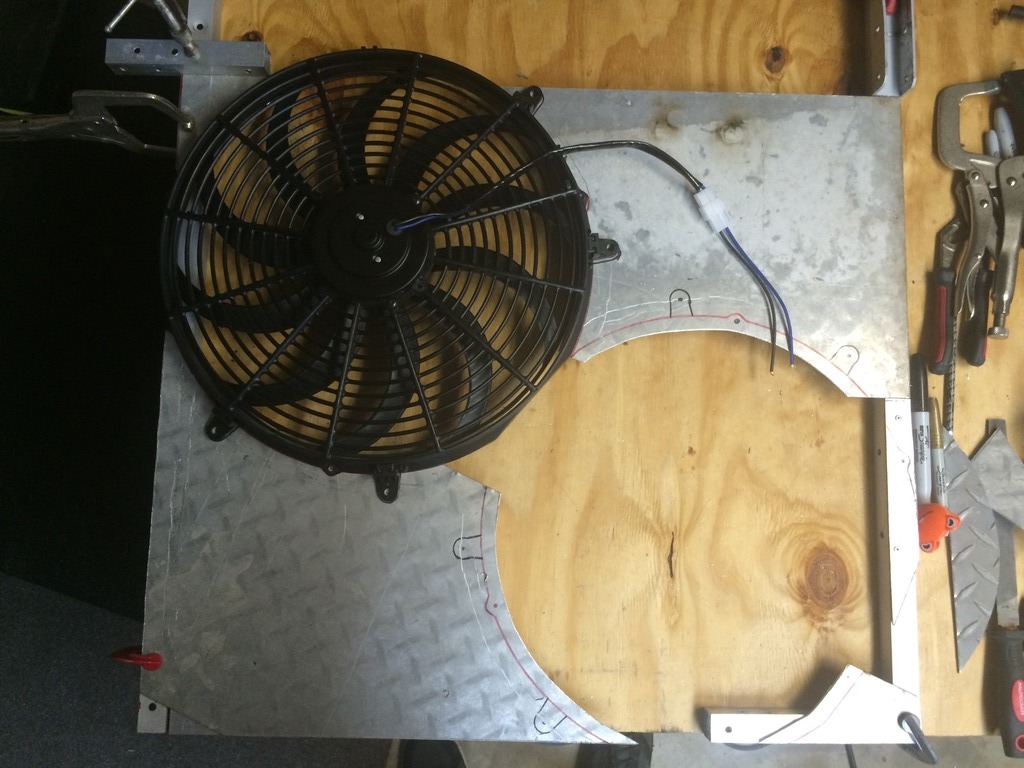
Then mocked it up with the first fan while waiting for the second to arrive. I used a length of 1"X1" aluminum square stock on each side to get the fans back from the radiator a little and make room for the bolts and such. Then I cut up some 1/8" diamond plate aluminum that I had to cover the rest of the radiator and mounted the fans to the plate.
Once the second fan showed up, and I changed the mounting points to match the fan, I put both fans on the shroud. Then I mocked it in place and marked where I had to trim the shroud for the radiator inlet and outlet. I trimmed a bit too much on both but I figure that's better then having metal rubbing on the hoses. Once I liked it I mounted the controller to the shroud and wired up both fans. Then I dropped it into place and bolted it to the radiator.
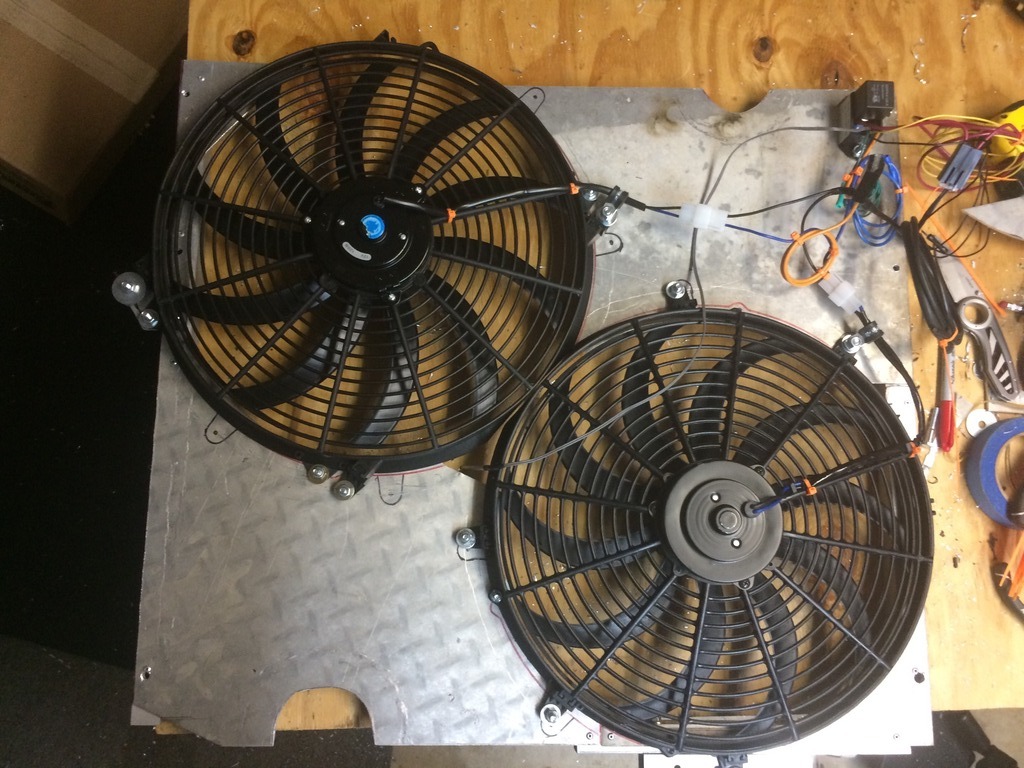
The problem I have now is the offset top fan only has 1/8" clearance from the fan motor to the A/C compressor so I'm sure they will rub while driving. I think I will end up taking the fans out and remounting the shroud on some 1/4" flat stock instead of the 1" tube to gain some clearance.
I started with a cardboard template.

Then mocked it up with the first fan while waiting for the second to arrive. I used a length of 1"X1" aluminum square stock on each side to get the fans back from the radiator a little and make room for the bolts and such. Then I cut up some 1/8" diamond plate aluminum that I had to cover the rest of the radiator and mounted the fans to the plate.

Once the second fan showed up, and I changed the mounting points to match the fan, I put both fans on the shroud. Then I mocked it in place and marked where I had to trim the shroud for the radiator inlet and outlet. I trimmed a bit too much on both but I figure that's better then having metal rubbing on the hoses. Once I liked it I mounted the controller to the shroud and wired up both fans. Then I dropped it into place and bolted it to the radiator.

The problem I have now is the offset top fan only has 1/8" clearance from the fan motor to the A/C compressor so I'm sure they will rub while driving. I think I will end up taking the fans out and remounting the shroud on some 1/4" flat stock instead of the 1" tube to gain some clearance.
#279
10-21-2016, 05:46 PM
So I started trying to figure out how long my shocks need to be so I decided to flex out the suspension on the Bronco. I started by jacking up the rear from the bumper with a High lift jack. Unfortunately I maxed the jack before I lifted a tire so I had to put the jack on a concrete block to lift it higher.
I kind of dig the huge pro-street look.
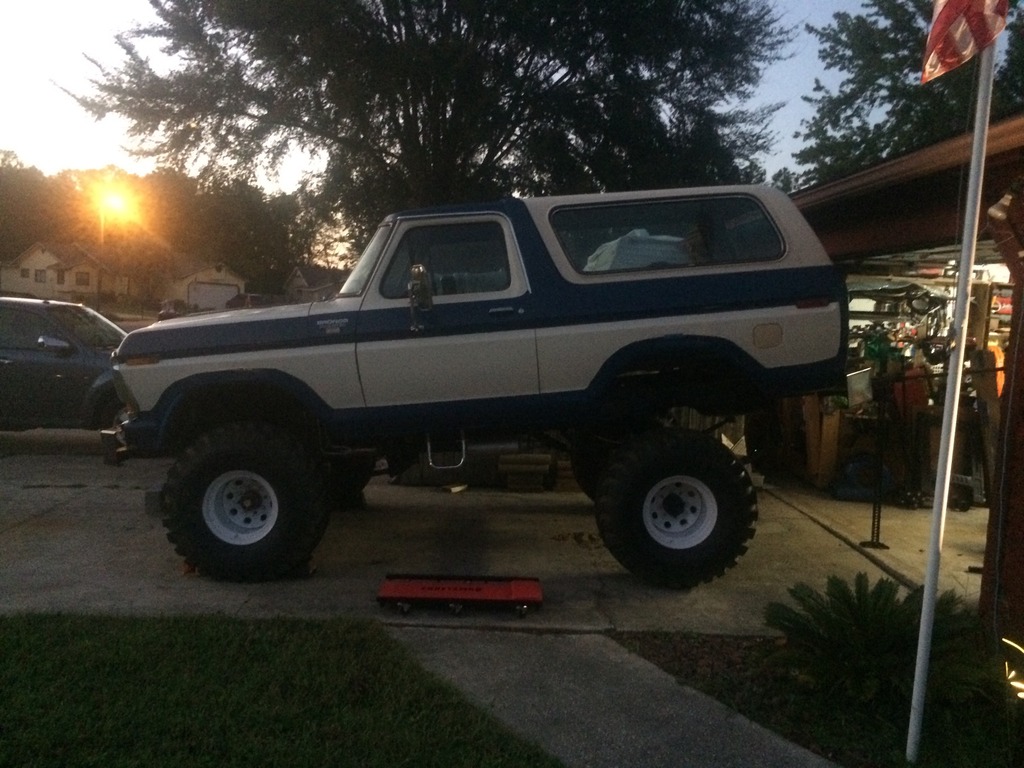
After I quickly measured the extended length of the shocks I brought the Bronco down and I found out the rear bumper had twisted up a little bit. I checked and it moved 3 degrees up so I know I will have to bring it down the figure out how to add a 3rd bolt to the frame mount on each side. I grabbed the jack and moved to the front.
I'm not as much of a fan of the pre-runner look.

I found out the rear will droop just over 6" while the front only droops 2-1/2". I got the ride height and extended shock measurements but was not sure how to compress the suspension to get the extended measurements. I got the suggestions of lifting from one wheel to stuff it, drive it up a ramp, load a ton of weight, guess.
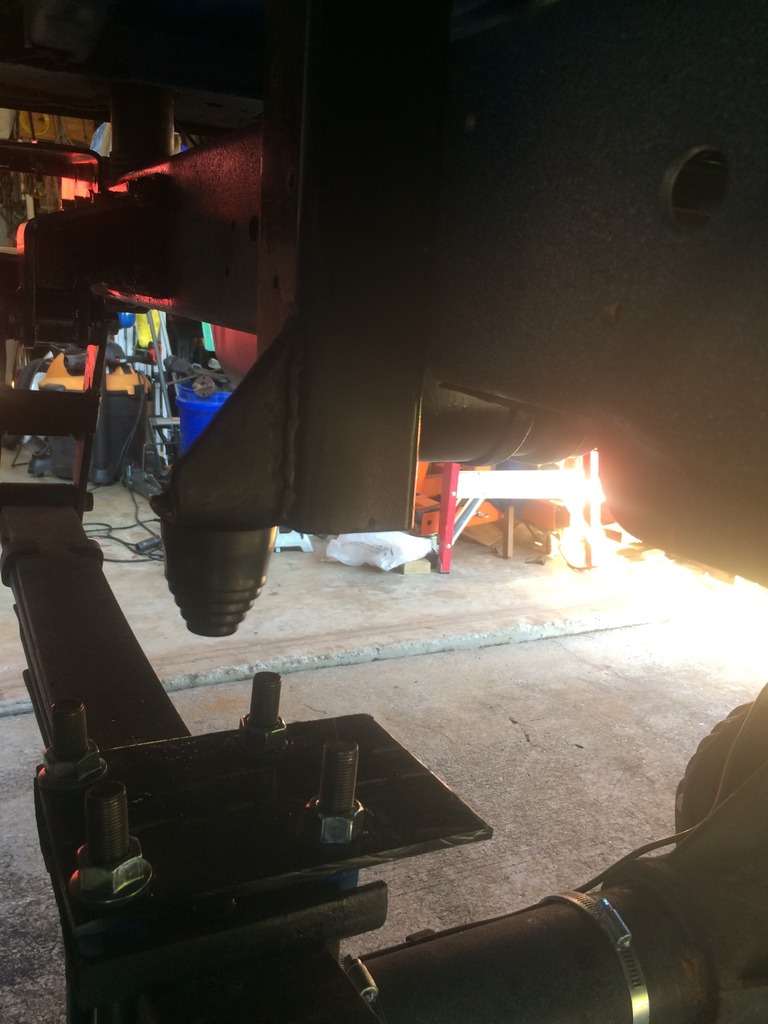
I decided to build my bump stops next so I would know exactly how far the axles can go up and that will give me the compressed shock length. I started on the rear just because it's closest to the garage and I knew I was working from scratch there. I decided it would be easier to build the stops to hit the top of the spring then to build it longer to hit the axle tube. My wife has informed me I'm out of Bronco building money this month so I had to use things I already have around. Since I was putting new U-bolts on the rear and they are cut to length after install I decided to use the extra length to hold a flat plate for the bump stop to land on.
Some mock up since I didn't take many pictures.
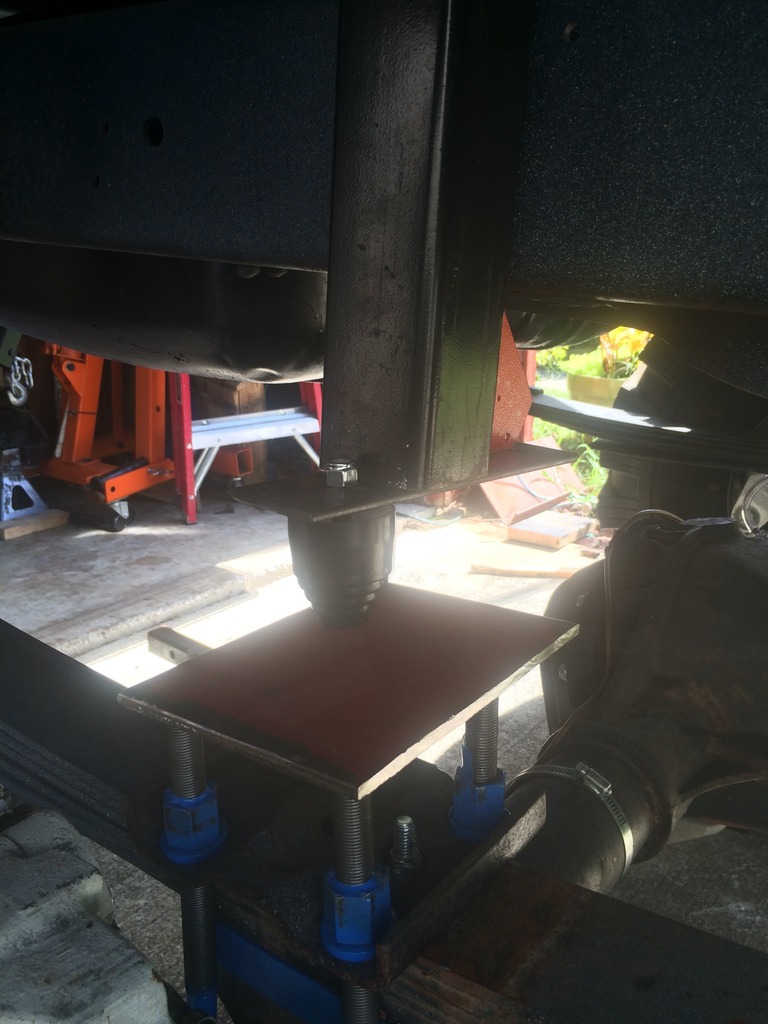
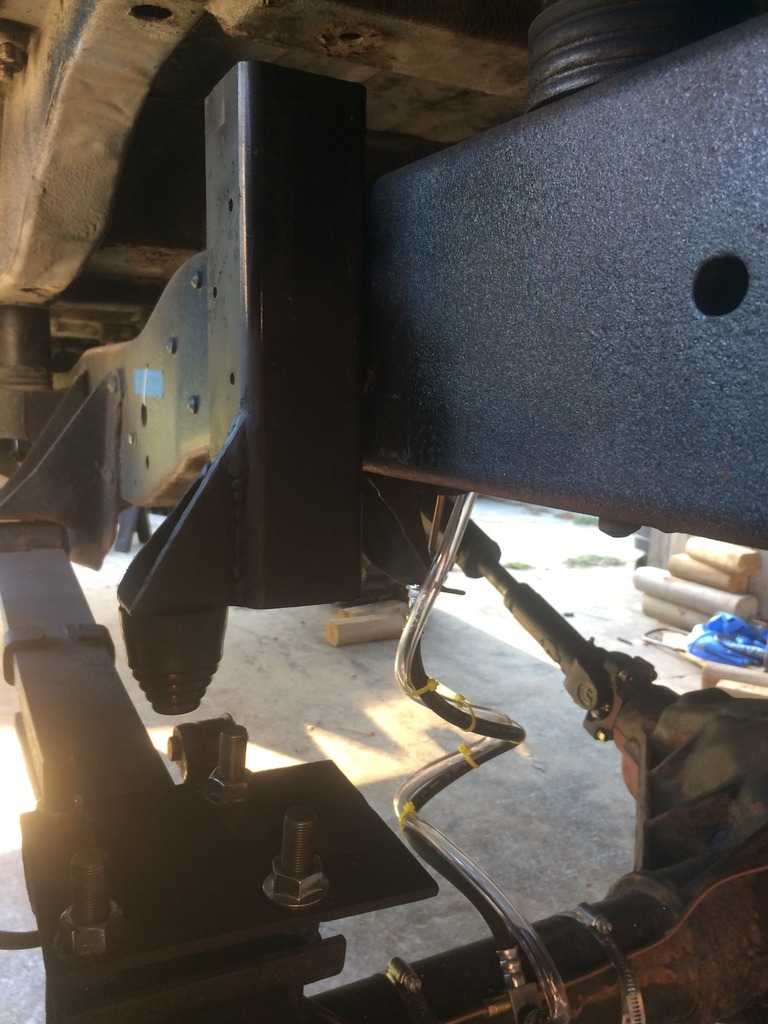
I decided to use some receiver tube cut offs and some scrap steel to mount the bump stops outboard of the frame so they would land on the flat plate above the spring mount.
I set the bump stop to allow about 4" of uptravel. That should allow some flex, but prevent the tires from hitting the body or the driveshaft from bottoming out.
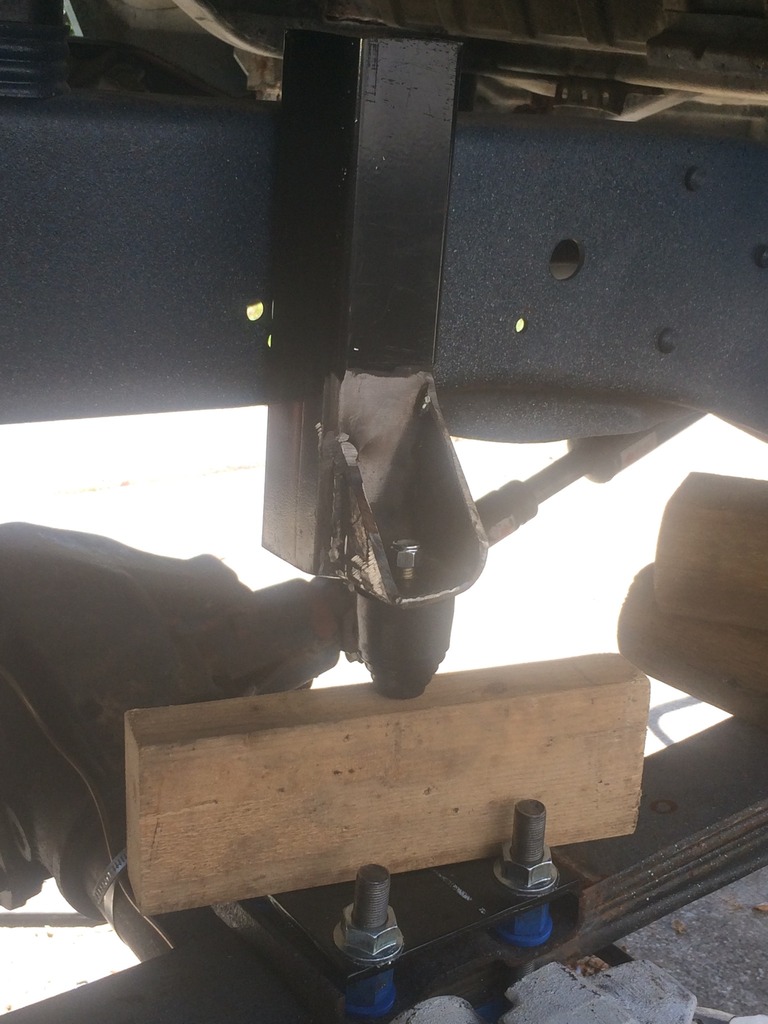
I welded the bolts on the inside of the tube and the nuts are on the inside of the frame. I still need to cut the extra length off of the U-bolts.
You can even see the clear line I used for the axle vent zip tied to the brake line. I terminated the axle vent behind the driver side tail light. I hope it won't be sucking water from there into the axle.
I kind of dig the huge pro-street look.

After I quickly measured the extended length of the shocks I brought the Bronco down and I found out the rear bumper had twisted up a little bit. I checked and it moved 3 degrees up so I know I will have to bring it down the figure out how to add a 3rd bolt to the frame mount on each side. I grabbed the jack and moved to the front.
I'm not as much of a fan of the pre-runner look.

I found out the rear will droop just over 6" while the front only droops 2-1/2". I got the ride height and extended shock measurements but was not sure how to compress the suspension to get the extended measurements. I got the suggestions of lifting from one wheel to stuff it, drive it up a ramp, load a ton of weight, guess.
I decided to build my bump stops next so I would know exactly how far the axles can go up and that will give me the compressed shock length. I started on the rear just because it's closest to the garage and I knew I was working from scratch there. I decided it would be easier to build the stops to hit the top of the spring then to build it longer to hit the axle tube. My wife has informed me I'm out of Bronco building money this month so I had to use things I already have around. Since I was putting new U-bolts on the rear and they are cut to length after install I decided to use the extra length to hold a flat plate for the bump stop to land on.
Some mock up since I didn't take many pictures.

I decided to use some receiver tube cut offs and some scrap steel to mount the bump stops outboard of the frame so they would land on the flat plate above the spring mount.
I set the bump stop to allow about 4" of uptravel. That should allow some flex, but prevent the tires from hitting the body or the driveshaft from bottoming out.

I welded the bolts on the inside of the tube and the nuts are on the inside of the frame. I still need to cut the extra length off of the U-bolts.

You can even see the clear line I used for the axle vent zip tied to the brake line. I terminated the axle vent behind the driver side tail light. I hope it won't be sucking water from there into the axle.

#280
10-22-2016, 12:07 PM
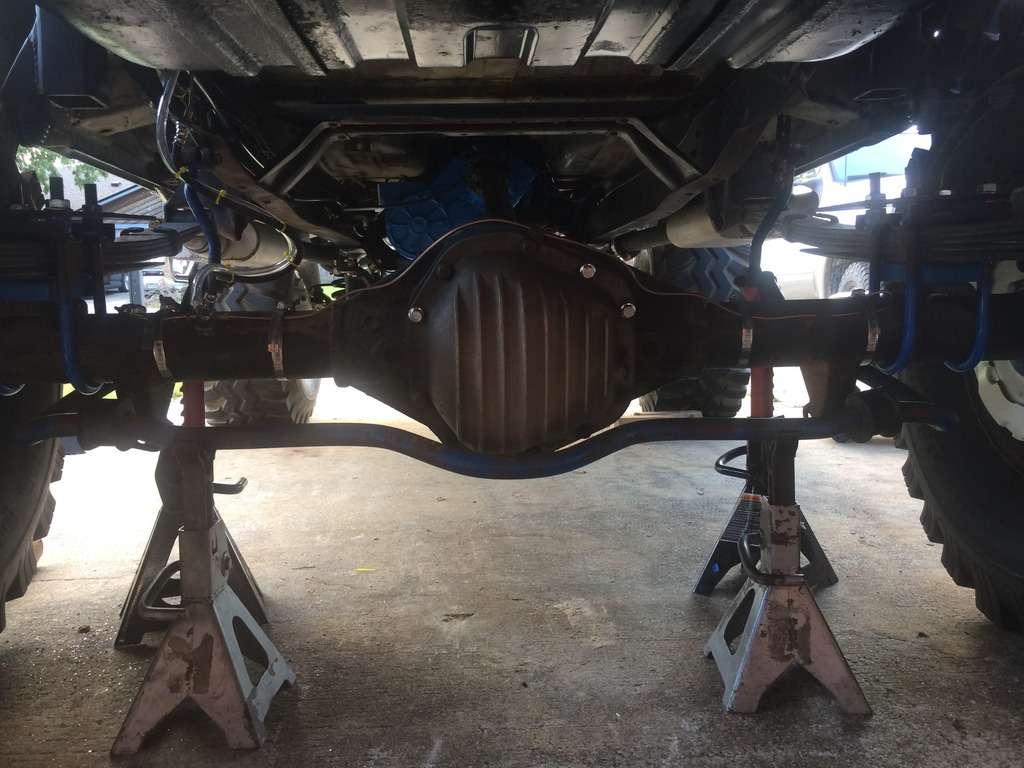
So way back this spring when I picked up my NP205 transfer case the guy threw in a bunch of other parts. One of the things he threw in was a heavy duty rear sway bar. It is meant for a Ford 9" rear and I'm trying to figure out if I can adapt it to the Dana 61 that is currently in the rear of the Bronco.
I set it in place on some jack stands and it looks like I will have to fab some spacers off the factory sway bar mounts on the axle and build some end link to frame mounts from scratch. I'm not sure if it is worth the effort.
Passenger side end link to frame as it sits.
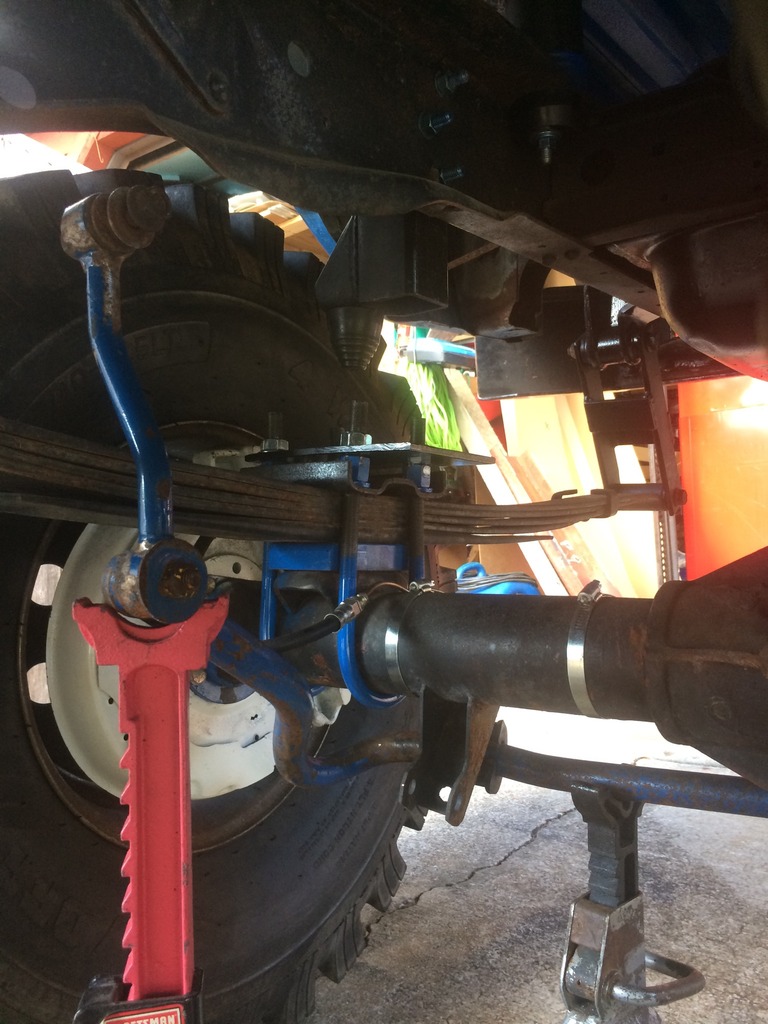
Driver side end link to frame as it sits.
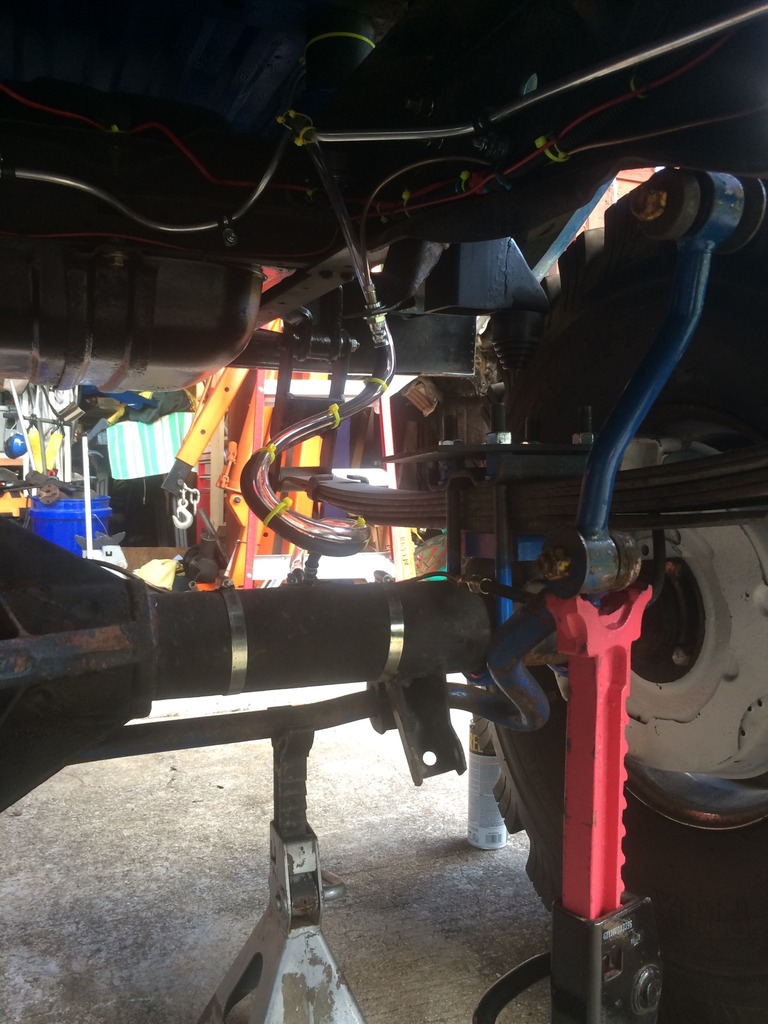
I'm going to think on it for a bit before I decide if it's worth the effort. I am going to see if I can figure out the factory front sway bar mounting for now.
I set it in place on some jack stands and it looks like I will have to fab some spacers off the factory sway bar mounts on the axle and build some end link to frame mounts from scratch. I'm not sure if it is worth the effort.

Passenger side end link to frame as it sits.

Driver side end link to frame as it sits.

I'm going to think on it for a bit before I decide if it's worth the effort. I am going to see if I can figure out the factory front sway bar mounting for now.
#281
10-22-2016, 07:20 PM
Postmaster
#282
10-24-2016, 09:41 PM
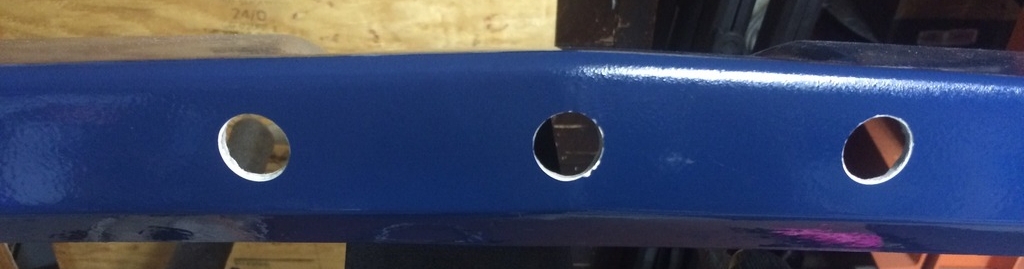
So I spent the afternoon in the garage working on the Lund visor for the Bronco. I got it from a truck I parted years ago and my brother fives Thebes's crack in it and painted it when we painted the Bronco. I really wanted a lighted one but had to work with what I've got. I ordered some 3/4" amber LED marker lights from Amazon and installed them today.
Figuring out the layout of the lights.

Drilling holes in the fiberglass. I used the shop vac right under the holes to help keep the mess down.
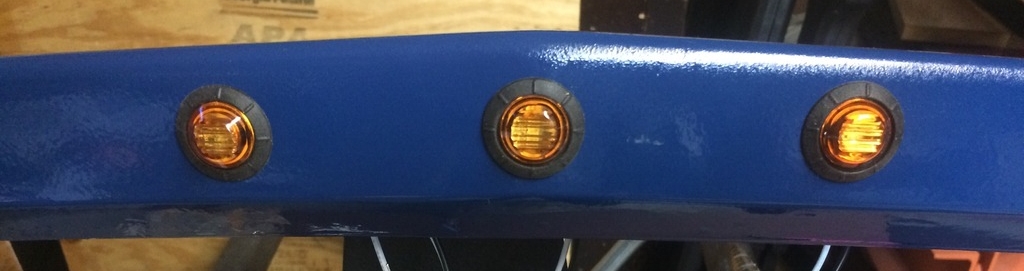
The rubber grommets cover the tiny bit where the paint chipped around the holes.
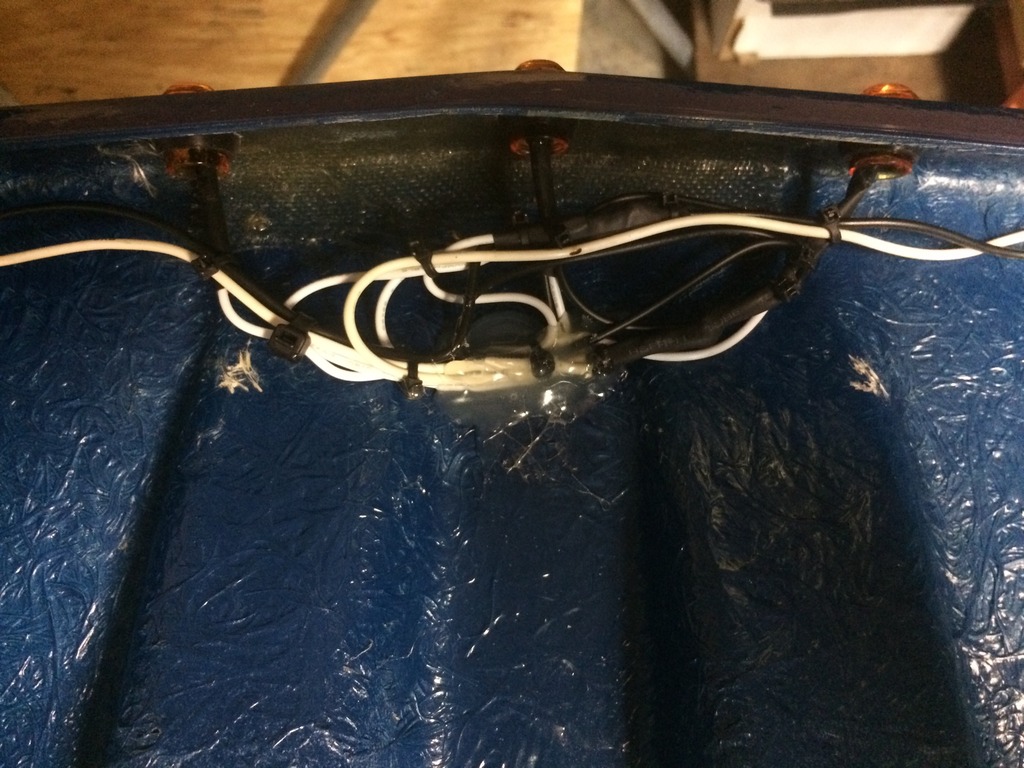
The wiring is all soldered, heat shrunk, zip tied, and then hot glued to the rough fiberglass so the wires don't slap around while I'm driving.
Lights on in daylight/garage lights.

And a blinding money shot with the garage lights off.

Now I just need to line up a helper so I can install it on the Bronco.
Figuring out the layout of the lights.

Drilling holes in the fiberglass. I used the shop vac right under the holes to help keep the mess down.

The rubber grommets cover the tiny bit where the paint chipped around the holes.

The wiring is all soldered, heat shrunk, zip tied, and then hot glued to the rough fiberglass so the wires don't slap around while I'm driving.

Lights on in daylight/garage lights.

And a blinding money shot with the garage lights off.

Now I just need to line up a helper so I can install it on the Bronco.
#283
02-18-2017, 12:14 PM
Fleet Mechanic
#284
02-21-2017, 11:49 AM
Well since I got the Bronco running and out of the garage in October I had to go back to light duty at work November 1. Between working and Physical Therapy I kind of ran out of Bronco time. I did get to drive it about once a week until January when my alternator died. I'm currently trying to put on a 1 wire 130 amp alternator on it but am having some issues with the brackets.
I start back to full duty at work 2-22-17 after 17-1/2 months since my accident. Hopefully the rotating schedule will allow some more time to work on the Bronco.
I start back to full duty at work 2-22-17 after 17-1/2 months since my accident. Hopefully the rotating schedule will allow some more time to work on the Bronco.
#285
02-28-2017, 05:50 PM
Fleet Mechanic
Yeah that would be nice! I hope you have recovered well as well! It will be nice to have time to work on the Bronco so hopefully work doesn't take it all up! I converted to a 130 amp alternator when I had the 302 and I liked that addition.
With my Bronco, I found out my compression on the motor I swapped was unfortunately quite low. It's supposed to be high 300s to low 400s, and it averaged about 300, with a bit of the cylinders at high 200s.
It's amazing how great the motor ran with awful compression, but I've been getting heavy fuel dilution in my oil, enough where the oil would get thin enough to leak out all the oil seals. I'll be looking for a donor motor to replace the one I have and keep that one for a rebuild late on.