D60 Swap for my 86 F250HD Cummins 12V
#16
 04-22-2012, 01:22 PM

Yea, that's how all the big trucks I've ever driven or owned did it also. Mating the Dodge condenser to the Ford system shouldn't be hard. May have to get a couple hoses made but that shouldn't cost much and most Automotive A/C shops should be able to do that.
#17
04-22-2012, 01:25 PM
Yeah, most everything in this area is a bolt in type shop, not a lot for the aftermarket add on types any more, with most new vehicles coming with it now. A lot of the aftermarket stuff just used hose clamps to hold it together... The other trick is that the Dodge uses the filter/drier in the high side, and the Ford uses the accumulator in the low side...
#18
04-22-2012, 02:04 PM
Yeah, most everything in this area is a bolt in type shop, not a lot for the aftermarket add on types any more, with most new vehicles coming with it now. A lot of the aftermarket stuff just used hose clamps to hold it together... The other trick is that the Dodge uses the filter/drier in the high side, and the Ford uses the accumulator in the low side...
#19
04-22-2012, 02:15 PM
The trick is that the evaporator on the Ford has the accumulator attached to the evaporator... and the inlet to the evaporator has the orifice tube in it. Likely what will happen is the filter/drier will be taken out, and just use the accumulator. Still have to make a custom hose though, as the Dodge pieces have bolt on blocks to attach generally, and the Ford uses hose fittings.
#20
04-22-2012, 07:11 PM
The hose should be possible to adapt to. If you dont have a hose shop near by you could even find a place on the web to ship it to.
KW has the condensor for a grill in their trucks.
I dont think it would be possible to put the condensor in front of the IC. It might be ,but, it would take some rigging.
KW has the condensor for a grill in their trucks.
I dont think it would be possible to put the condensor in front of the IC. It might be ,but, it would take some rigging.
#21
04-22-2012, 11:09 PM

Join Date: Nov 2010
Location: Southern Oregon
Posts: 91
Likes: 0
Received 0 Likes
on
0 Posts
It definitely would not be possible to mount it in front of the intercooler in my application. I would think that rolling down the road you would still achieve enough air flow, but I cannot back that up with experience. With that said, I could see that you might not pull enough air with the stock fan. I've read about upgrading the fan blades by swapping on the second gen fan blades on to the first gen hub. So, I'm going to start there and see where it gets me.
On topic of the thread, I did get the donor over to my house. It did fine right up until it ran out of gas. Guess maybe the gauge was accurate and not just broken! Doh! Anyway, hopefully I can start on th swap the end of this week. I figure a day to get the TTB off and Dana 60 on, then the next day to get my TTB back on the F350. I'll also be swapping the rear blocks. Looks like I'll get about 3" added height in the front and about 1.5" in the back!
On topic of the thread, I did get the donor over to my house. It did fine right up until it ran out of gas. Guess maybe the gauge was accurate and not just broken! Doh! Anyway, hopefully I can start on th swap the end of this week. I figure a day to get the TTB off and Dana 60 on, then the next day to get my TTB back on the F350. I'll also be swapping the rear blocks. Looks like I'll get about 3" added height in the front and about 1.5" in the back!
#23
04-23-2012, 09:42 AM
Join Date: Nov 2010
Location: Southern Oregon
Posts: 91
Likes: 0
Received 0 Likes
on
0 Posts
#24
04-26-2012, 10:44 PM
Join Date: Nov 2010
Location: Southern Oregon
Posts: 91
Likes: 0
Received 0 Likes
on
0 Posts
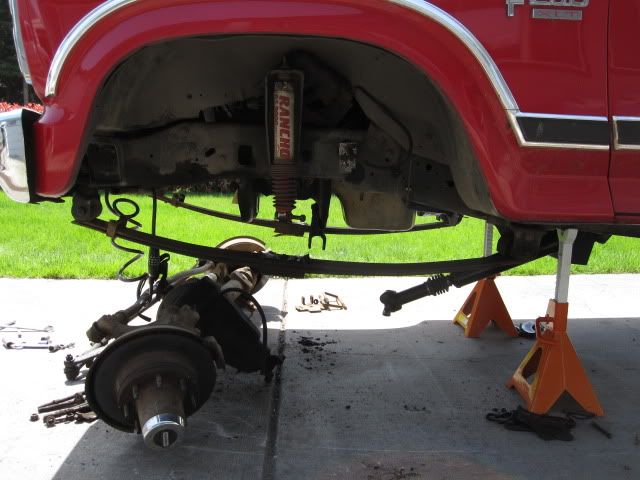
Well I had a few hours this afternoon, so I started my Dana 60 swap. I got the entire front suspension removed from my truck and ready to receive the D60. I don't know if there is actually more room than most people think for getting the TTB bracket bolts out, or if my Cummins swap actually afforded me extra room, but the TTB bracket bolts were a piece of cake in my setup. Anyway, I will try to get some pics uploaded tomorrow. I got in almost all my MOOG stuff and the new Energy Suspension bushings. The crossbar between the knuckles was backordered, so I will swap that next week. I'm putting in new leaf bushings, new trac bar bushings and replacing all the tie rods and steering rods.
More to come...
More to come...
#25
04-29-2012, 01:44 PM
Join Date: Nov 2010
Location: Southern Oregon
Posts: 91
Likes: 0
Received 0 Likes
on
0 Posts
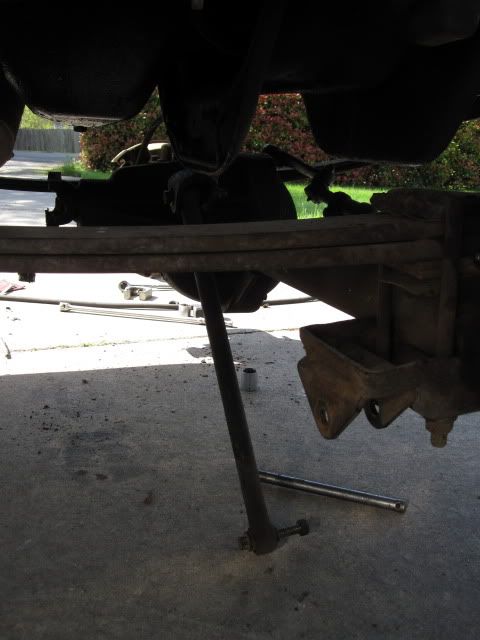
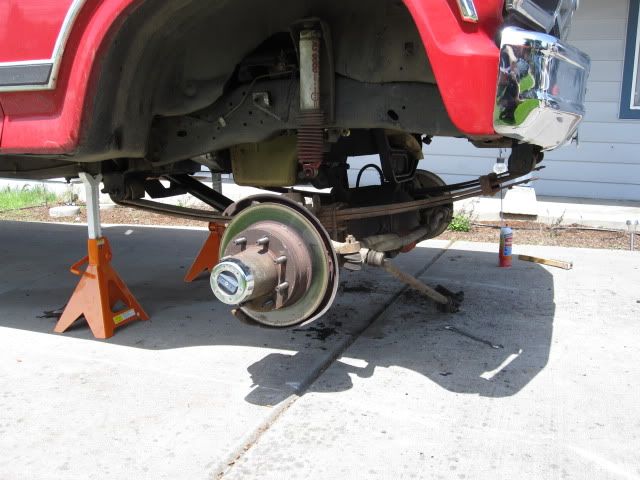
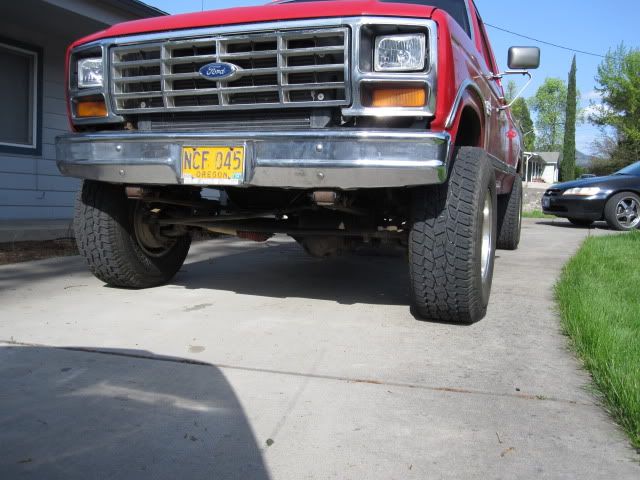
Well I managed to have a pretty successful string of three days on the trucks, despite a few things taking longer than anticipated. First and foremost, project TTB F350 is done! Oh wait, I was supposed to be doing project Dana 60 F250....?  Day one started Thursday with both trucks sitting completely untouched as far as the swaps were concerned. I started in on my Cummins F250 first, getting the TTB and all associated parts removed in the 3.5 hours I had available to me.
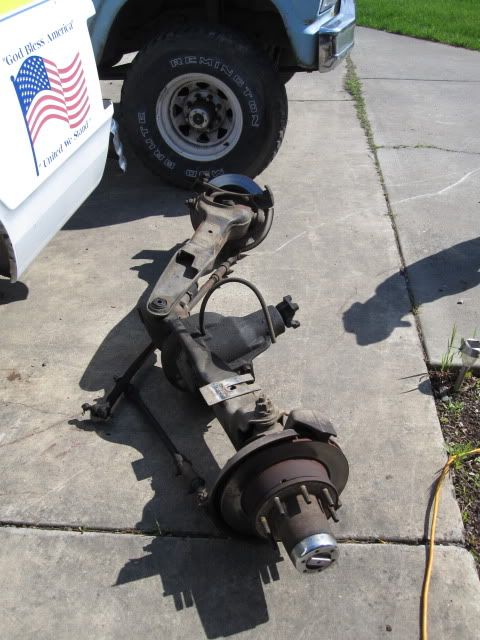
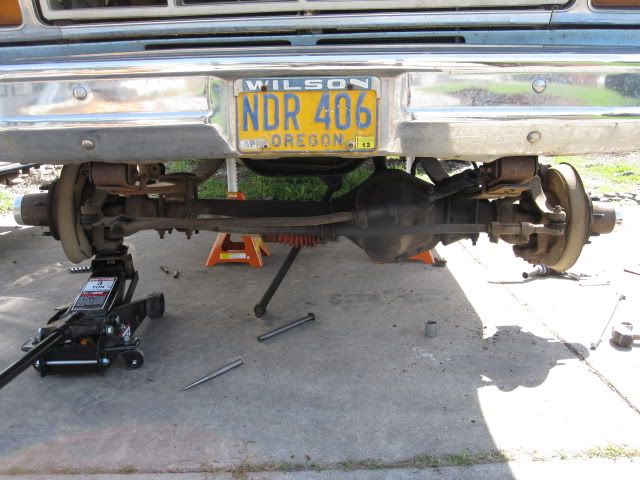
The TTB preparing to find a new home:
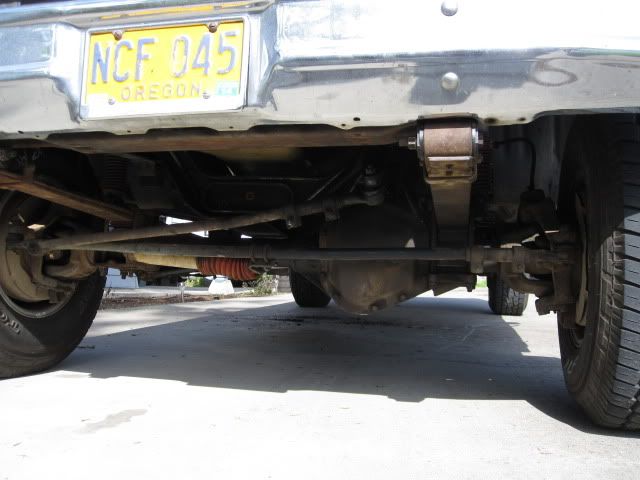
Despite all the negative feelings towards the TTB front ends, I have to say that these things will hold up great with proper care. This TTB has seen 197,000 miles, the first 80,000 as a ranch truck, the next 110,000 hauling a camper, boat, hay, 11,000# trailer, firewood trails, christmas tree trails etc. Running my 33" tires it has not eaten tires at all.
Dropping the passenger side:
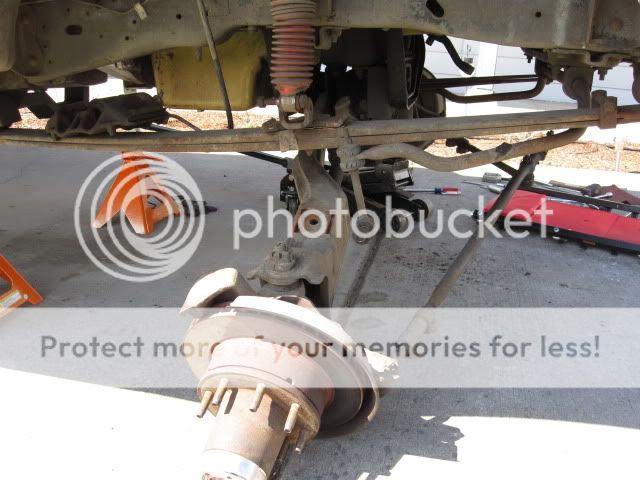

I started running short on time, so pictures took a back seat. I dropped the driver's side from the spring just the same as the passenger side, leaving the center brackets connected. Then I supported the center with the floor jack and carefully disconnected the center mounts from the axle. Once on the ground it was just a strong back exercise getting it out of the way. The flexing principle of the TTB makes it nearly impossible to move with a floor jack.

After getting the TTB out of the way, I set in to remove the springs and the TTB axle mounts from the crossmember.
Day one started Thursday with both trucks sitting completely untouched as far as the swaps were concerned. I started in on my Cummins F250 first, getting the TTB and all associated parts removed in the 3.5 hours I had available to me.The TTB preparing to find a new home:
Despite all the negative feelings towards the TTB front ends, I have to say that these things will hold up great with proper care. This TTB has seen 197,000 miles, the first 80,000 as a ranch truck, the next 110,000 hauling a camper, boat, hay, 11,000# trailer, firewood trails, christmas tree trails etc. Running my 33" tires it has not eaten tires at all.
Dropping the passenger side:
I started running short on time, so pictures took a back seat. I dropped the driver's side from the spring just the same as the passenger side, leaving the center brackets connected. Then I supported the center with the floor jack and carefully disconnected the center mounts from the axle. Once on the ground it was just a strong back exercise getting it out of the way. The flexing principle of the TTB makes it nearly impossible to move with a floor jack.
After getting the TTB out of the way, I set in to remove the springs and the TTB axle mounts from the crossmember.
#26
04-29-2012, 01:58 PM
Join Date: Nov 2010
Location: Southern Oregon
Posts: 91
Likes: 0
Received 0 Likes
on
0 Posts
Despite everything I have heard, I found getting the TTB frame mounts out to be pretty easy. As memory serves me, all it takes is a 15mm for the bolt heads below the oil pan and a 13/16" (possibly 7/8" can't remember off hand writing this) on the impact gun underneath. At first I thought I just got lucky and had more clearance because of the Cummins swap, but I found reinstalling them on the F350 with the 460 in place was just as easy?
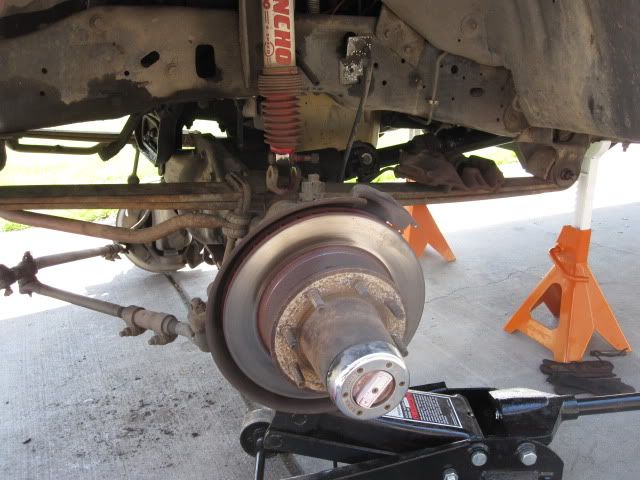
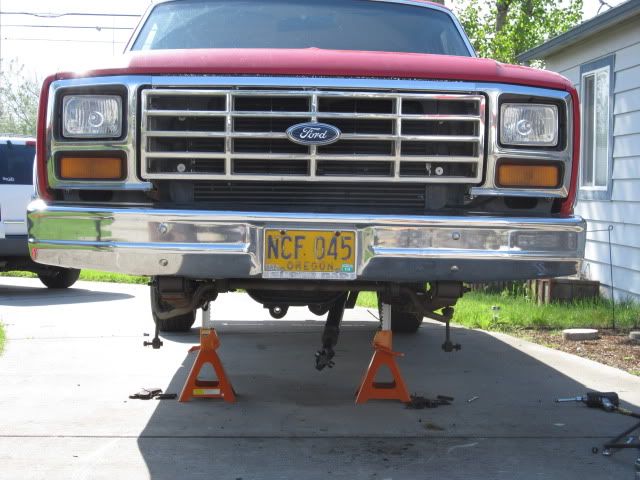
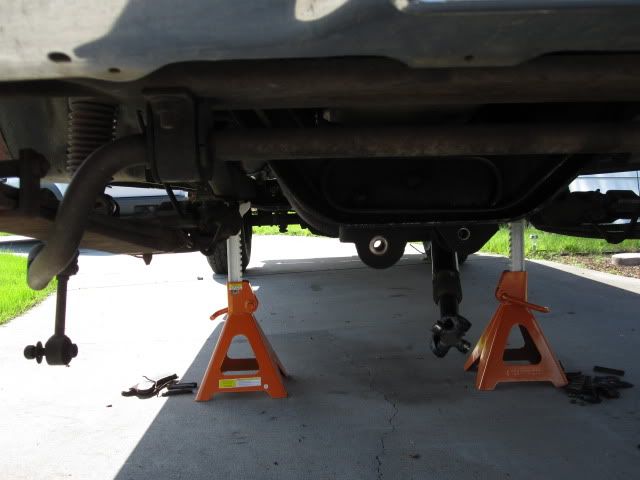
Day two started with my F250 stripped and the F350 complete still. The first order of business was getting the F350 supported on stands and getting the tires out of the way.
Although I am replacing all the tie rods and bushings I decided to pull the pitman arm off still connected to the tie rods as I figured it would be easier to reinstall. I am waiting on my tie rod crossover to come in, so I'm swapping the old tie rods for now until the last piece gets here next week.

I then dropped the trac bar from the axle, but left the frame end and frame mount connected until the axle and springs were out of the way.
Then I dropped the driveline, as I pulled the springs and axle as one.
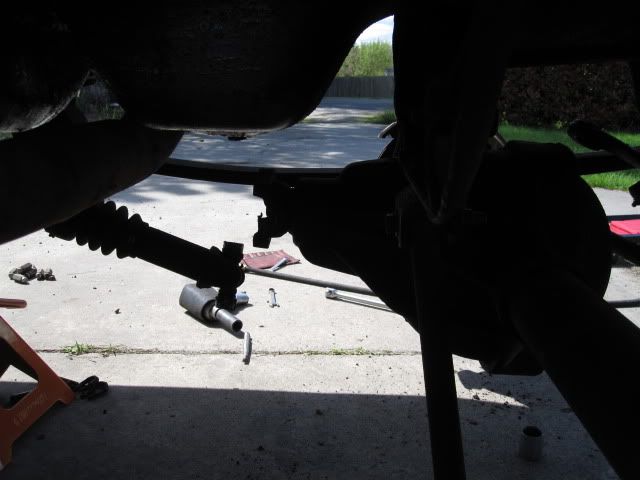
Next I dropped the passenger side springs and axle.
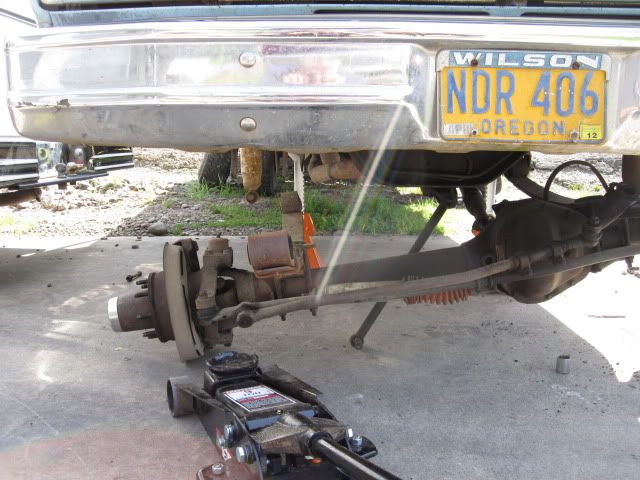
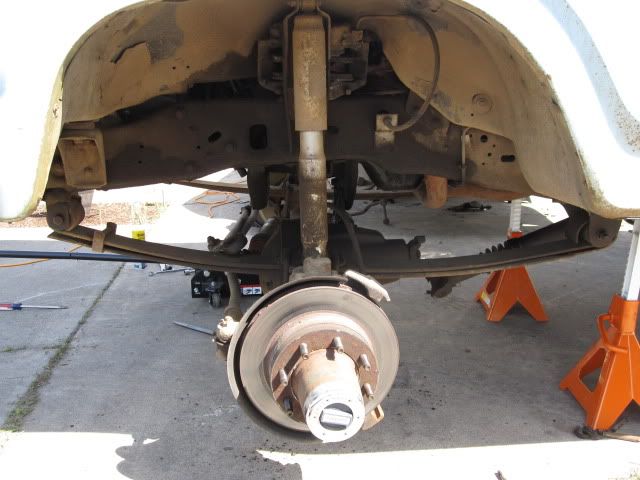
Followed by the driver's side and she's out:
I should have mentioned on both trucks, driving the caliper pins out and fitting them in between the frame and shock mount for safe keeping.
I then set out to remove the bushings from the F350 springs and from my F250 shackles.
I figured that my air hammer would do the trick. That's when the feeling of punishment for doing stuff the right way set in. I've read and talked to so many people that say how quick this swap is. Well, if you are simply swapping but not replacing that may be the case. I quickly realized that an air hammer wasn't going to touch the rubber bushings, as it counteracts all the hammer action. I realized that the only tool for the job was going to be the 15 ton press, which was 20 miles away at my shop. With that realization, I decided that day 2 was best spent finishing up TTB F350. All in all, I guess stripping the F350 of its Dana 60 AND getting the TTB D50 back in was a good accomplishment for day 2.
Day two started with my F250 stripped and the F350 complete still. The first order of business was getting the F350 supported on stands and getting the tires out of the way.
Although I am replacing all the tie rods and bushings I decided to pull the pitman arm off still connected to the tie rods as I figured it would be easier to reinstall. I am waiting on my tie rod crossover to come in, so I'm swapping the old tie rods for now until the last piece gets here next week.
I then dropped the trac bar from the axle, but left the frame end and frame mount connected until the axle and springs were out of the way.
Then I dropped the driveline, as I pulled the springs and axle as one.
Next I dropped the passenger side springs and axle.
Followed by the driver's side and she's out:
I should have mentioned on both trucks, driving the caliper pins out and fitting them in between the frame and shock mount for safe keeping.
I then set out to remove the bushings from the F350 springs and from my F250 shackles.
I figured that my air hammer would do the trick. That's when the feeling of punishment for doing stuff the right way set in. I've read and talked to so many people that say how quick this swap is. Well, if you are simply swapping but not replacing that may be the case. I quickly realized that an air hammer wasn't going to touch the rubber bushings, as it counteracts all the hammer action. I realized that the only tool for the job was going to be the 15 ton press, which was 20 miles away at my shop. With that realization, I decided that day 2 was best spent finishing up TTB F350. All in all, I guess stripping the F350 of its Dana 60 AND getting the TTB D50 back in was a good accomplishment for day 2.
#27
04-29-2012, 01:59 PM


I want to rebuild (probably just bushings & seals, nothing major) my D50 in my 1981 F350 along with ball joints and all the related stuff but I'm somewhat intimidated by it and it scares me...
My pass-side front tire wears from the outer edge to the inner, the front end thunks & clunks when I back out of the driveway onto the street, the steering wheel spokes are dang near vertical while driving straight, and the truck pulls badly to the right.
I've replaced ball joints & control & such arms in cars before, then taken them to the alignment shop. But I read about these caster/camber bushing things that are sometimes used in these front ends, it would seem stupid of me to take everything apart, replace parts, reassemble, take to 4x4 shop, and have them take stuff apart to add/change/delete what I've done so they can get the alignment right.
I don't have the money for this right now, anyhow, but I'm expecting it to be a summer-long project when I can get to/afford it.
#28
04-29-2012, 02:15 PM
Join Date: Nov 2010
Location: Southern Oregon
Posts: 91
Likes: 0
Received 0 Likes
on
0 Posts
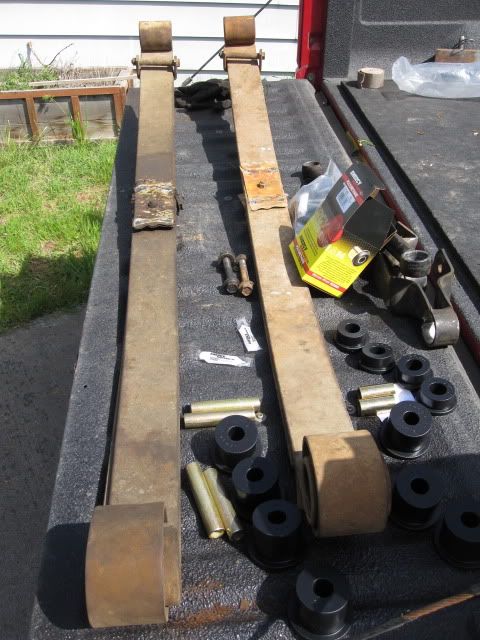
Day 3 started on the 15 ton press. Man, what a difference the right tools make!! The spring bushings were pressed out in about 20 minutes, the shackle bushings and trac bar bushings took slightly longer because the outer bushing shells had to be hammer and chiseled out. That paved the way for installing all the new polyurethane from Energy Suspension.
Example, shackle bushings starting out:


Parts ready to receive Energy bushings:
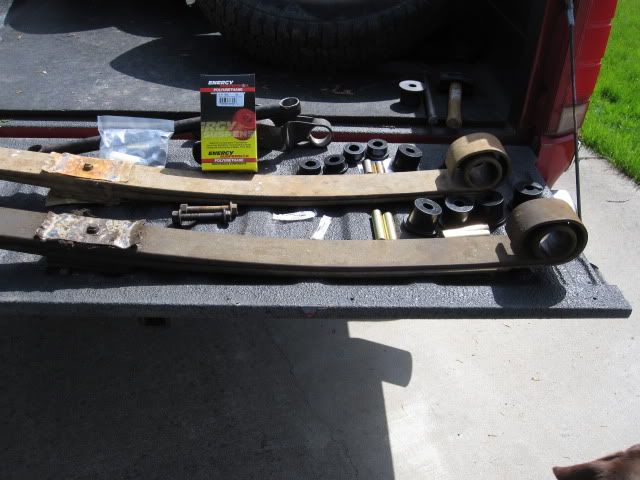
The new ride quality starts here!
Then, that reoccuring lesson of punishment for doing the correct thing propped up again! Energy Suspension, while they make great products, needs to revisit their shackle bushing sleeves... After reeming out the sleeves, I finally got the shackles back in and started in on the springs. My recommendation, leave the springs lightly bolted in until you get the axle bolted up to allow everything to move around and settle in.
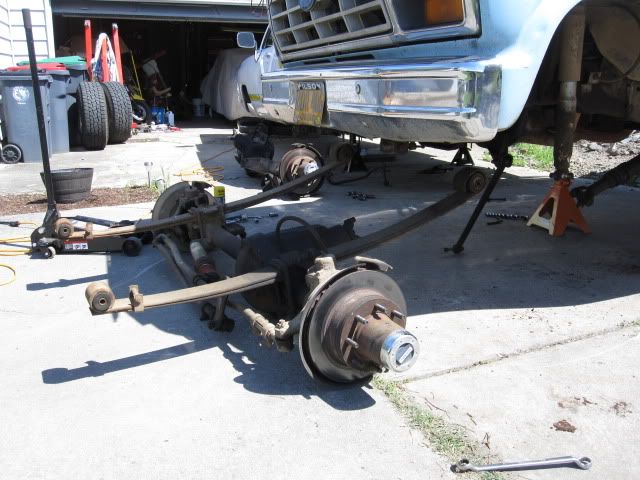
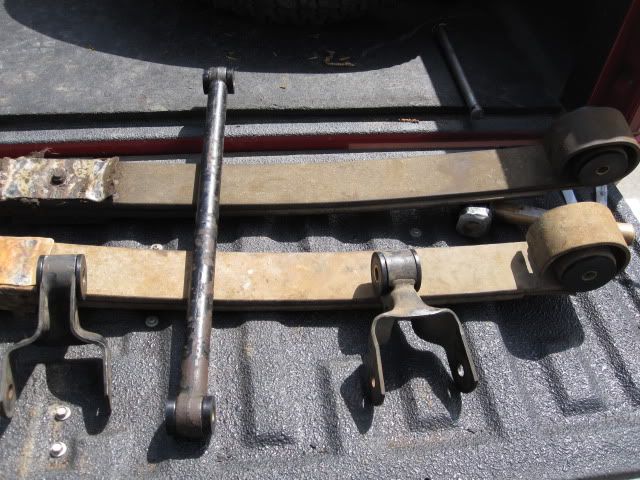
Springs in:
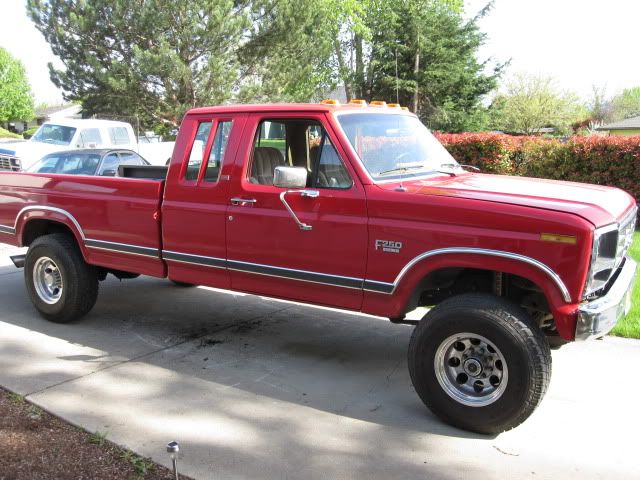
I jacked up the axle one side at a time, passenger side first. Leaving everything loose and a tiny bit of adjustment with the pry bar and the spring pins dropped right in! It's official, we now have a solid axle F250!

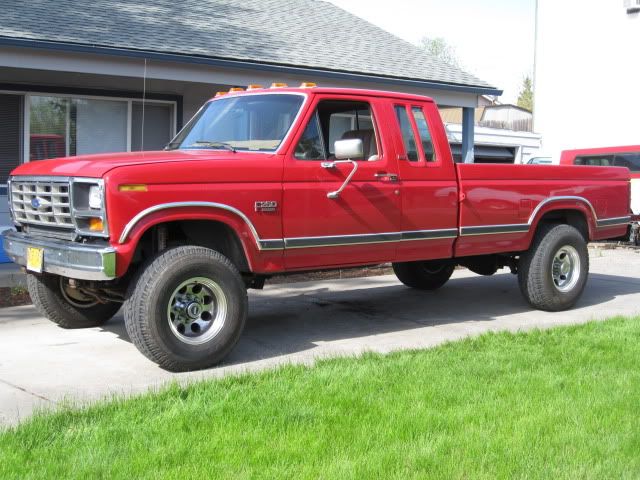
I love the trucks new stance, but I will be swapping the rear blocks over as the truck sits slightly nose high currently.
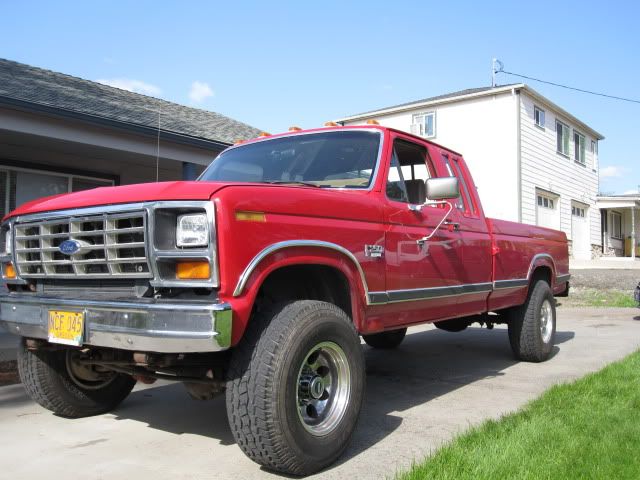
Next week I'll be swapping the blocks in the rear and I'll also be installing the new MOOG parts once it all shows up. I'm also going to be swapping my rotors and hubs from the D50 TTB because it has newer wheel bearings and nicer rotors and putting in new brake pads. The D60 assemblies are just fine, but since the F350 will be resold, sorry, my truck gets the nicer pieces. I will also have to have my custom length Cummins swap front driveshaft shortened back just slightly after the Dana 60.
I guess I'm in search of the ultimate F250 at this point. It's been great up to this point and I hope I'm getting close. I know my wife is even more hopeful I'm getting close! HAHA!
Thanks for suffering through my lengthy posts everyone! Brian
Example, shackle bushings starting out:
Parts ready to receive Energy bushings:
The new ride quality starts here!
Then, that reoccuring lesson of punishment for doing the correct thing propped up again! Energy Suspension, while they make great products, needs to revisit their shackle bushing sleeves... After reeming out the sleeves, I finally got the shackles back in and started in on the springs. My recommendation, leave the springs lightly bolted in until you get the axle bolted up to allow everything to move around and settle in.
Springs in:
I jacked up the axle one side at a time, passenger side first. Leaving everything loose and a tiny bit of adjustment with the pry bar and the spring pins dropped right in! It's official, we now have a solid axle F250!
I love the trucks new stance, but I will be swapping the rear blocks over as the truck sits slightly nose high currently.
Next week I'll be swapping the blocks in the rear and I'll also be installing the new MOOG parts once it all shows up. I'm also going to be swapping my rotors and hubs from the D50 TTB because it has newer wheel bearings and nicer rotors and putting in new brake pads. The D60 assemblies are just fine, but since the F350 will be resold, sorry, my truck gets the nicer pieces. I will also have to have my custom length Cummins swap front driveshaft shortened back just slightly after the Dana 60.
I guess I'm in search of the ultimate F250 at this point. It's been great up to this point and I hope I'm getting close. I know my wife is even more hopeful I'm getting close! HAHA!
Thanks for suffering through my lengthy posts everyone! Brian
#29
04-29-2012, 02:22 PM
Join Date: Nov 2010
Location: Southern Oregon
Posts: 91
Likes: 0
Received 0 Likes
on
0 Posts
I want to rebuild (probably just bushings & seals, nothing major) my D50 in my 1981 F350 along with ball joints and all the related stuff but I'm somewhat intimidated by it and it scares me...
My pass-side front tire wears from the outer edge to the inner, the front end thunks & clunks when I back out of the driveway onto the street, the steering wheel spokes are dang near vertical while driving straight, and the truck pulls badly to the right.
I've replaced ball joints & control & such arms in cars before, then taken them to the alignment shop. But I read about these caster/camber bushing things that are sometimes used in these front ends, it would seem stupid of me to take everything apart, replace parts, reassemble, take to 4x4 shop, and have them take stuff apart to add/change/delete what I've done so they can get the alignment right.
I don't have the money for this right now, anyhow, but I'm expecting it to be a summer-long project when I can get to/afford it.
My pass-side front tire wears from the outer edge to the inner, the front end thunks & clunks when I back out of the driveway onto the street, the steering wheel spokes are dang near vertical while driving straight, and the truck pulls badly to the right.
I've replaced ball joints & control & such arms in cars before, then taken them to the alignment shop. But I read about these caster/camber bushing things that are sometimes used in these front ends, it would seem stupid of me to take everything apart, replace parts, reassemble, take to 4x4 shop, and have them take stuff apart to add/change/delete what I've done so they can get the alignment right.
I don't have the money for this right now, anyhow, but I'm expecting it to be a summer-long project when I can get to/afford it.
#30
04-29-2012, 03:58 PM

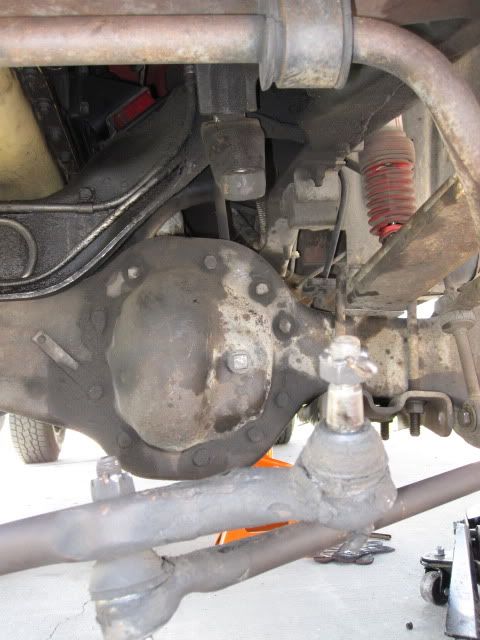
See the large nut that goes to the upper balljoint in the picture above? See the large nut does not sit directly on the ttb arm, but sits up on something else. That something else is the eccentric bushing that is turned to get it into alignment. When I did mine, I marked it's location, and then before I put it all back together I cleaned it all up and put lots of never sieze on it. That makes it easy for the alignment guy to bust it loose and turn it to get it in.
I have never messed with a dana 60, but I suspect the ball-joint versions of the 60 also may have a moveable cam on the upper ball-joint to get it into alignment also.