
99 F350 Super Duty Build
#16
 09-27-2012, 12:43 AM

Join Date: Oct 2011
Location: Finland
Posts: 293
Likes: 0
Received 0 Likes
on
0 Posts
 I try to keep it as clean as possible there cleaning the space takes almost as much of my time as my projects
#17
09-27-2012, 08:20 AM
Hotshot
Are you going to paint the cardboard to keep the rain off the cardboard?

I cut up my bumper this spring. It was a fun time!

Here is the whole speal if you want to take a look: https://www.ford-trucks.com/forums/1...d-stuff-3.html
Excited to see some metal work going on here!
#18
09-27-2012, 10:27 AM
Join Date: Oct 2011
Location: Finland
Posts: 293
Likes: 0
Received 0 Likes
on
0 Posts
Are you going to paint the cardboard to keep the rain off the cardboard?
I cut up my bumper this spring. It was a fun time!
Here is the whole speal if you want to take a look: https://www.ford-trucks.com/forums/1...d-stuff-3.html
Excited to see some metal work going on here!
I cut up my bumper this spring. It was a fun time!
Here is the whole speal if you want to take a look: https://www.ford-trucks.com/forums/1...d-stuff-3.html
Excited to see some metal work going on here!
I will not let it get wet
Really clean job you don there on you front. It look really good.
#19
09-27-2012, 02:11 PM
Lead Driver
I like the conceptual design so far. 
I have quite a bit of respect for people that have the talent and know-how to do this stuff. I don't possess the skills to fab items, so I overpay for someone else's work. Fortunately I know how to turn a wrench at least so I save a small fortune on labor at times...
The fact that you're posting pics makes it even better, love these threads (plus it's a change from "will these tires fit, which shocks, etc" threads).

I have quite a bit of respect for people that have the talent and know-how to do this stuff. I don't possess the skills to fab items, so I overpay for someone else's work.
Fortunately I know how to turn a wrench at least so I save a small fortune on labor at times...The fact that you're posting pics makes it even better, love these threads (plus it's a change from "will these tires fit, which shocks, etc" threads).
#20
09-28-2012, 10:38 AM
Join Date: Oct 2011
Location: Finland
Posts: 293
Likes: 0
Received 0 Likes
on
0 Posts

#21
09-29-2012, 08:44 AM
Hotshot
I like the conceptual design so far.
I have quite a bit of respect for people that have the talent and know-how to do this stuff. I don't possess the skills to fab items, so I overpay for someone else's work. Fortunately I know how to turn a wrench at least so I save a small fortune on labor at times...
The fact that you're posting pics makes it even better, love these threads (plus it's a change from "will these tires fit, which shocks, etc" threads).
I have quite a bit of respect for people that have the talent and know-how to do this stuff. I don't possess the skills to fab items, so I overpay for someone else's work.
Fortunately I know how to turn a wrench at least so I save a small fortune on labor at times...The fact that you're posting pics makes it even better, love these threads (plus it's a change from "will these tires fit, which shocks, etc" threads).
I agree! Many times I wander over to the pirate 4x4 forum just to look at some of the fab work going on. I as well get a bit tired of seeing the same threads posted over and over again. I just weed threw them to find the more interesting ones.

Anxiously awaiting fab pics!
#22
09-29-2012, 10:10 AM
Join Date: Oct 2011
Location: Finland
Posts: 293
Likes: 0
Received 0 Likes
on
0 Posts
#23
09-29-2012, 06:44 PM
Join Date: Oct 2011
Location: Finland
Posts: 293
Likes: 0
Received 0 Likes
on
0 Posts


#28
09-30-2012, 09:27 AM
Hotshot
Nice job!
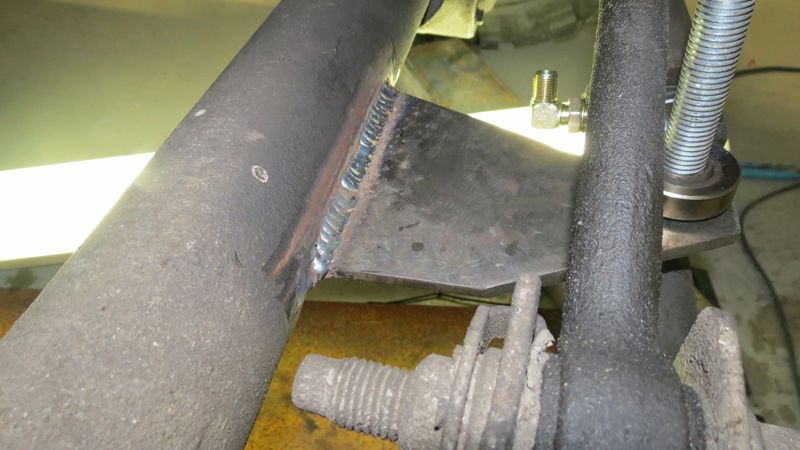
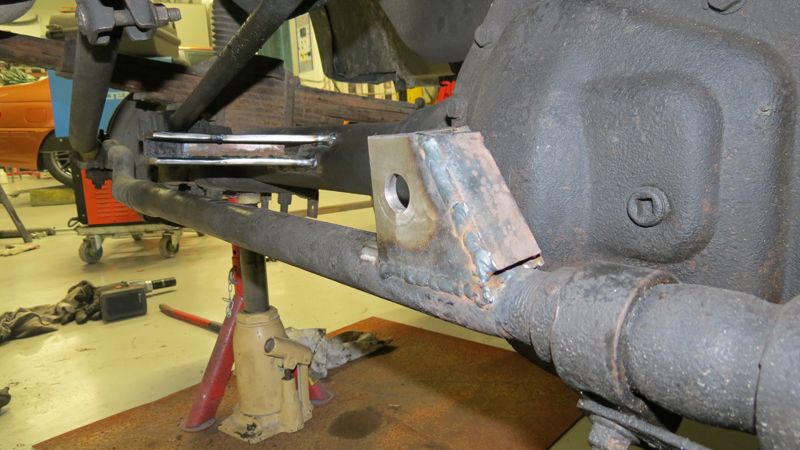
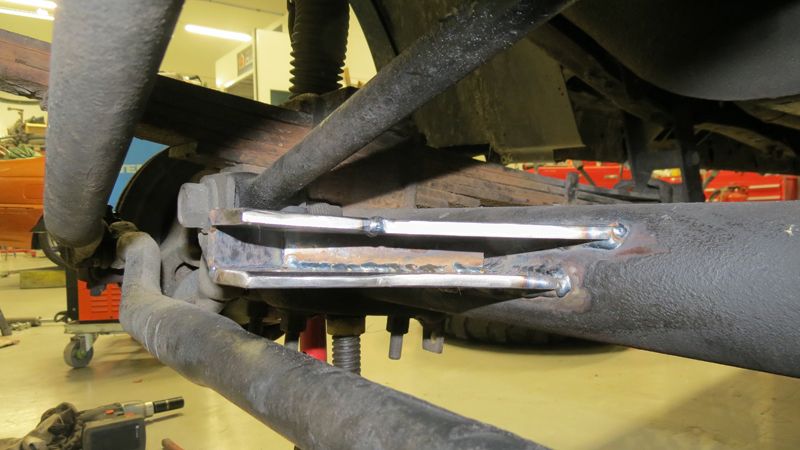
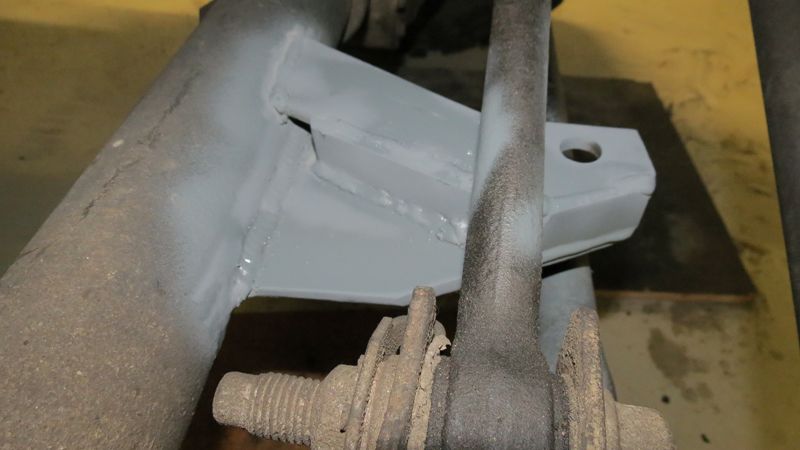
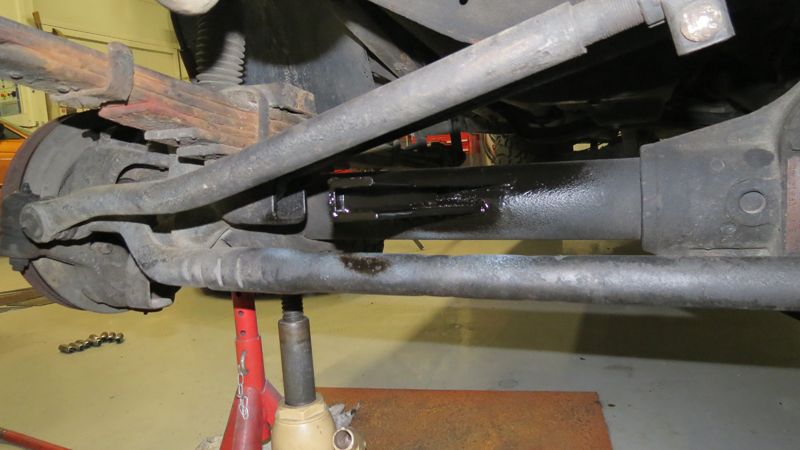
Just a tip, make sure you are cleaning the metal very good before welding. A tiny spot of paint/dirt/what have you, the size of a pin head is enough to cause a contaminated pin hole in the weld. A contaminated spot in a weld even smaller than the eye can see will be the root to a crack and cracks lead to broken off parts normally at the worst time.
In this pic you posted you can see the paint/dirt lines yet in between the grinder passes you made. That should have been cleaned perfectly to metal at least half way around the bar. Use the flappy disc on the grinder, it works much better at taking everything but the actual base metal off. It also looks like in the pic, the forward weld is completely off the cleaned area. That is also why your final welds look brown, from contamination.
The pic:
#29
09-30-2012, 03:26 PM
Posting Guru
Join Date: Dec 2010
Location: Boston, MA
Posts: 1,153
Likes: 0
Received 0 Likes
on
0 Posts
Nice job!
Just a tip, make sure you are cleaning the metal very good before welding. A tiny spot of paint/dirt/what have you, the size of a pin head is enough to cause a contaminated pin hole in the weld. A contaminated spot in a weld even smaller than the eye can see will be the root to a crack and cracks lead to broken off parts normally at the worst time.
In this pic you posted you can see the paint/dirt lines yet in between the grinder passes you made. That should have been cleaned perfectly to metal at least half way around the bar. Use the flappy disc on the grinder, it works much better at taking everything but the actual base metal off. It also looks like in the pic, the forward weld is completely off the cleaned area. That is also why your final welds look brown, from contamination.
The pic:
#30
09-30-2012, 03:27 PM
Join Date: Oct 2011
Location: Finland
Posts: 293
Likes: 0
Received 0 Likes
on
0 Posts
Nice job!
Just a tip, make sure you are cleaning the metal very good before welding. A tiny spot of paint/dirt/what have you, the size of a pin head is enough to cause a contaminated pin hole in the weld. A contaminated spot in a weld even smaller than the eye can see will be the root to a crack and cracks lead to broken off parts normally at the worst time.
In this pic you posted you can see the paint/dirt lines yet in between the grinder passes you made. That should have been cleaned perfectly to metal at least half way around the bar. Use the flappy disc on the grinder, it works much better at taking everything but the actual base metal off. It also looks like in the pic, the forward weld is completely off the cleaned area. That is also why your final welds look brown, from contamination.
The pic:
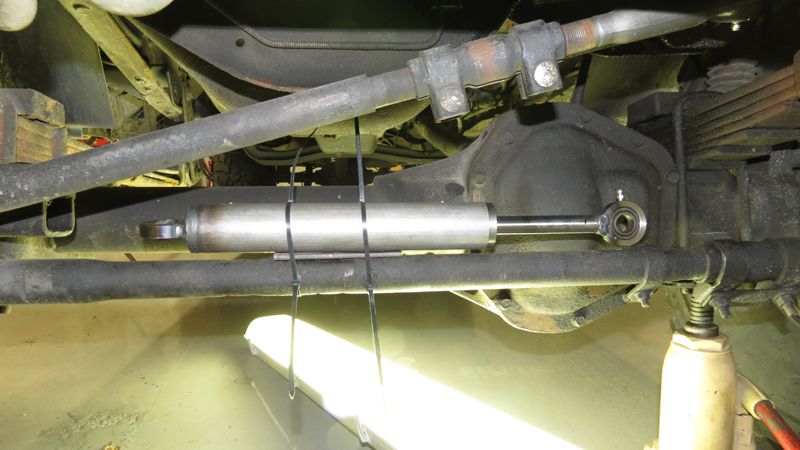
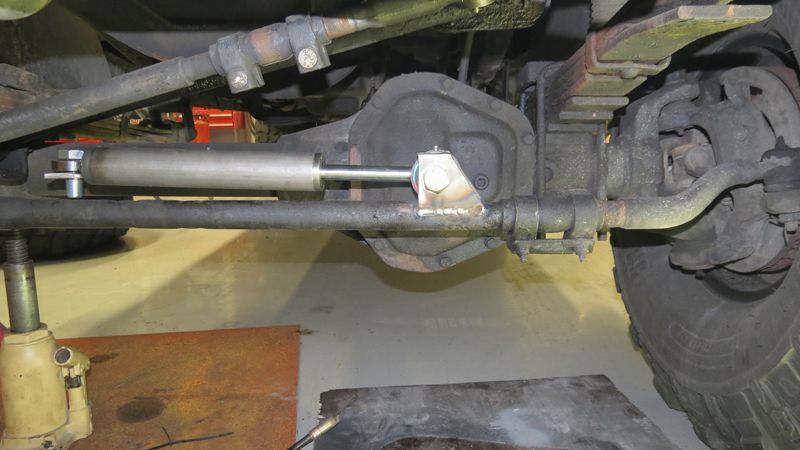
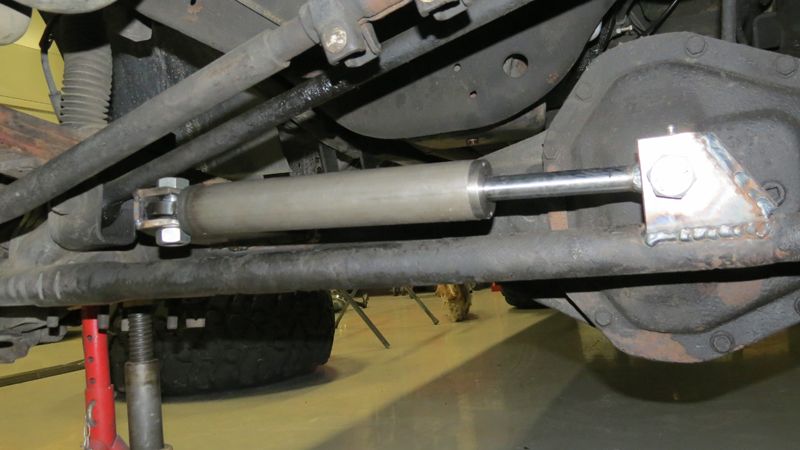
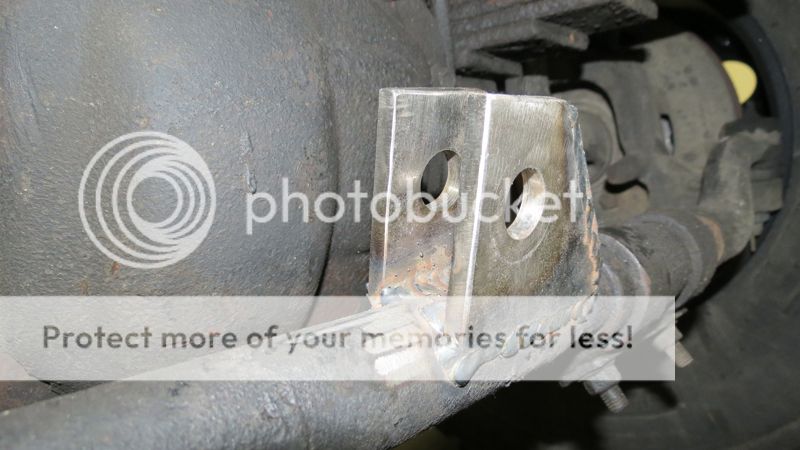
The funny thing about this is that I did hear from a friend today that in Finland it is illegal to weld on this tie rod so I probably have to cut it loose and only try to bolt it with some type of pipe clamps

