Write-Up: 99.5-04 Leveling Kit, w/ Pics
#1
 03-21-2012, 06:57 PM

Join Date: Jul 2009
Posts: 164
Likes: 0
Received 0 Likes
on
0 Posts
Write-Up: 99.5-04 Leveling Kit, w/ Pics
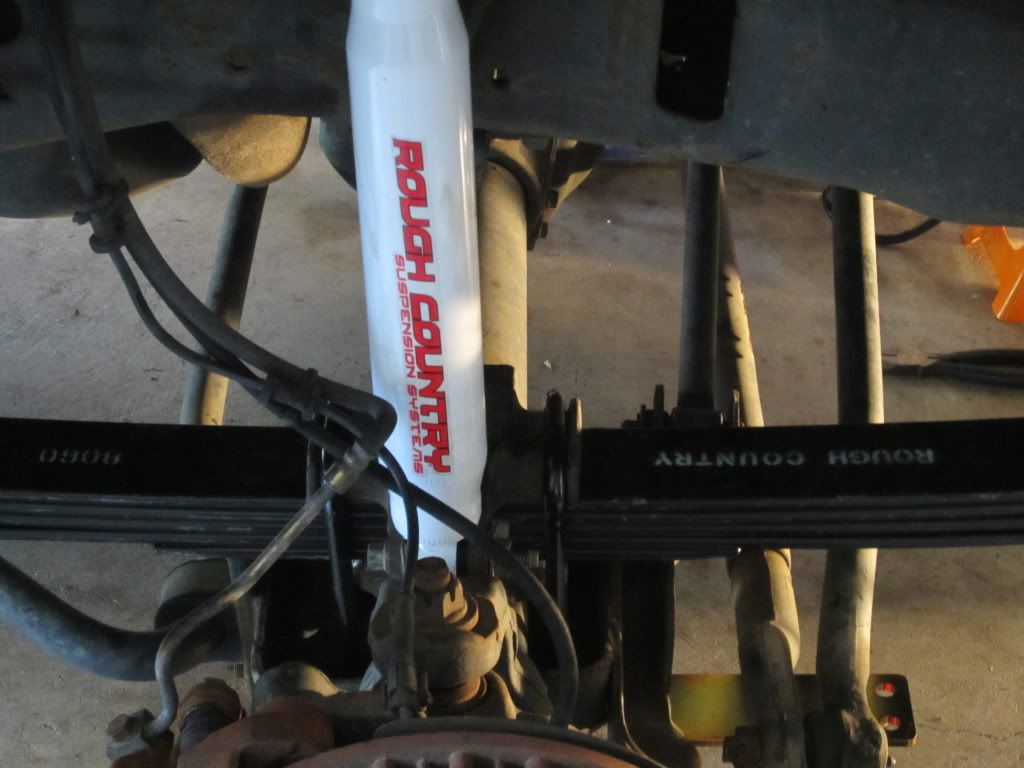
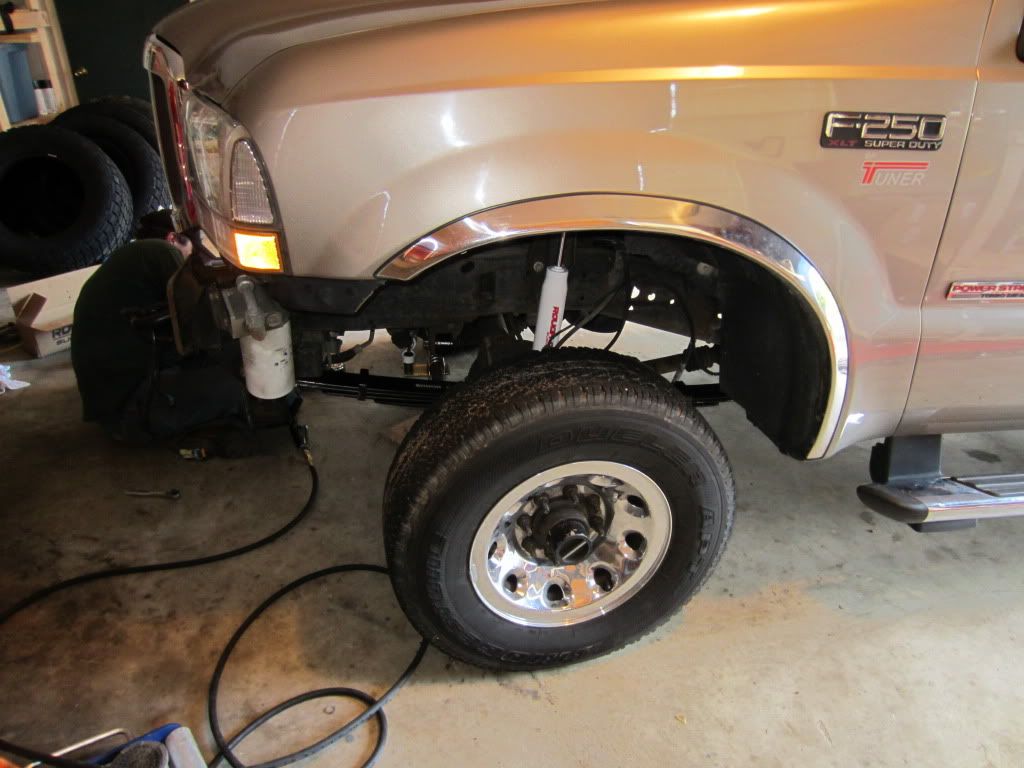
<!--[if gte mso 9]><xml> <w:WordDocument> <w:View>Normal</w:View> <w:Zoom>0</w:Zoom> <w:Compatibility> <w:BreakWrappedTables/> <w:SnapToGridInCell/> <w:WrapTextWithPunct/> <w:UseAsianBreakRules/> </w:Compatibility> <w:BrowserLevel>MicrosoftInternetExplorer4</w:BrowserLevel> </w:WordDocument> </xml><![endif][if gte mso 10]> <style> /* Style Definitions */ table.MsoNormalTable {mso-style-name:"Table Normal"; mso-tstyle-rowband-size:0; mso-tstyle-colband-size:0; mso-style-noshow:yes; mso-style-parent:""; mso-padding-alt:0in 5.4pt 0in 5.4pt; mso-para-margin:0in; mso-para-margin-bottom:.0001pt; mso-pagination:widow-orphan; font-size:10.0pt; font-family:"Times New Roman";} </style> <![endif]--> This is for a NON-COILOVER F250 Superduty, and will be somewhat brand specific to the Rough Country 498s 2.5" Leveling Kit. It is a full front leaf spring replacement kit, and to keep things symmetrical, the rear blocks were replaced with F350 OEM blocks.
This lift will allow for 305/70R16 tires, (or a 33” x 12” tire)
FYI, a good site for comparing tire sizes: Tire size calculator
Without further ado, let’s get started….
Tools Required:
Floor Jack, Jack Stands, Hammer, Sockets 10mm, 15mm, 18mm, 30mm, 21mm, 24mm, Wrenches 15mm, 21mm, 24mm.
Additional Tools Used:
Multiple Floor Jacks, a Bottleneck Jack, Pry Bar, �” Breaker Bar, �” Drive 8” Extension, Air Tools – Impact Guns and Air Wrench, 4”x4” wood blocks, Multiples of the above sockets, and a 7/8” deep socket.
Bonus:
PB Blaster, a couple of buddies, a case or two of beer and classic rock radio (your choice there)
Be safe!!!
Installation Steps:
1. Position vehicle in park, E-Brake set and rear wheels chocked
2. Raise the front of the vehicle, and secure with jack stands. Jack stands can be placed behind front spring shackles, or as I did at the outer most points of the front framing crossmember.
3. Remove the front wheels and shocks
4. Remove the front bumper. The four nuts just outside of the front tow hooks (18mm) and the bumper support bracket at the frame (15mm). You will have to unplug the fog lights if equipped and remove wiring from bumper, and the block heater plug to completely remove and place aside, out of the way.
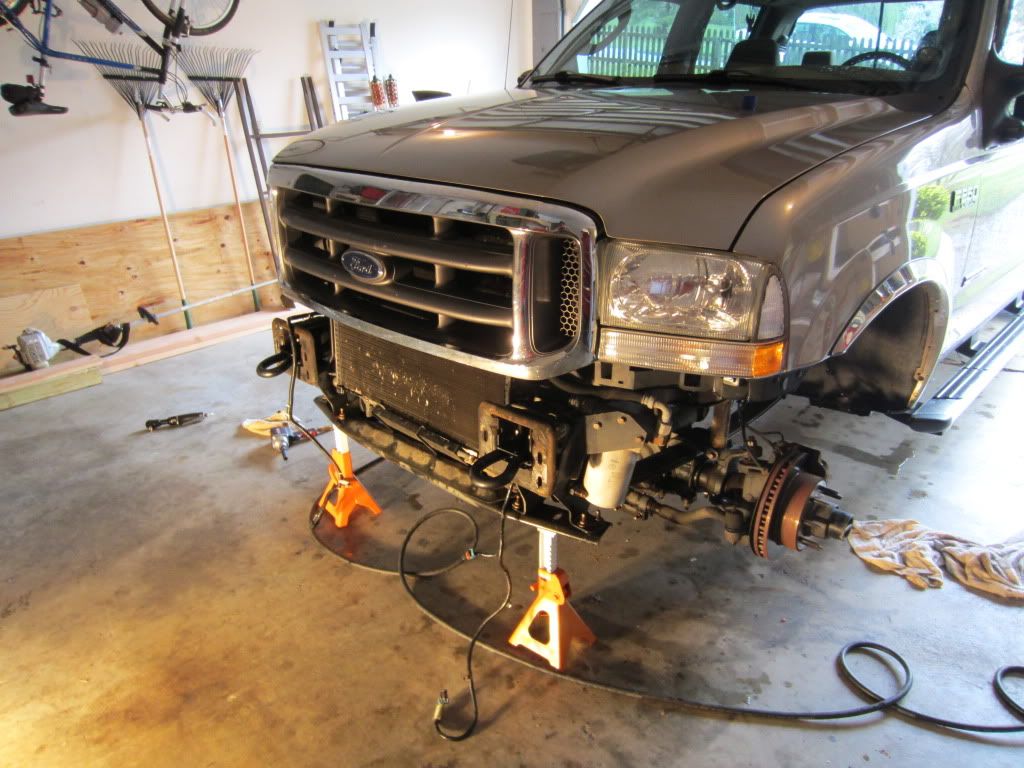
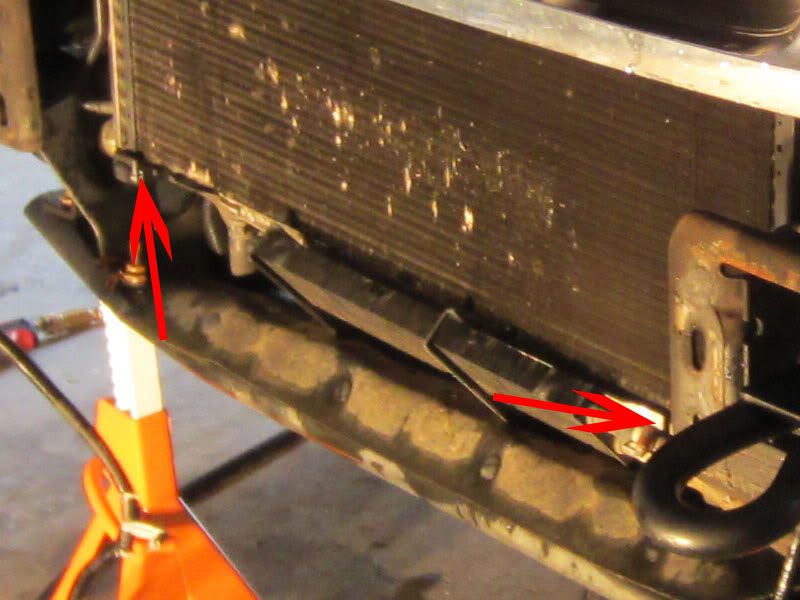
5. The bottom condenser mounts will needs to be removed in order to remove the front spring bolts. They can be access once the bumper is removed.
This lift will allow for 305/70R16 tires, (or a 33” x 12” tire)
FYI, a good site for comparing tire sizes: Tire size calculator
Without further ado, let’s get started….
Tools Required:
Floor Jack, Jack Stands, Hammer, Sockets 10mm, 15mm, 18mm, 30mm, 21mm, 24mm, Wrenches 15mm, 21mm, 24mm.
Additional Tools Used:
Multiple Floor Jacks, a Bottleneck Jack, Pry Bar, �” Breaker Bar, �” Drive 8” Extension, Air Tools – Impact Guns and Air Wrench, 4”x4” wood blocks, Multiples of the above sockets, and a 7/8” deep socket.
Bonus:
PB Blaster, a couple of buddies, a case or two of beer and classic rock radio (your choice there)
Be safe!!!
Installation Steps:
1. Position vehicle in park, E-Brake set and rear wheels chocked
2. Raise the front of the vehicle, and secure with jack stands. Jack stands can be placed behind front spring shackles, or as I did at the outer most points of the front framing crossmember.
3. Remove the front wheels and shocks
4. Remove the front bumper. The four nuts just outside of the front tow hooks (18mm) and the bumper support bracket at the frame (15mm). You will have to unplug the fog lights if equipped and remove wiring from bumper, and the block heater plug to completely remove and place aside, out of the way.
5. The bottom condenser mounts will needs to be removed in order to remove the front spring bolts. They can be access once the bumper is removed.
#2
03-21-2012, 06:57 PM
Join Date: Jul 2009
Posts: 164
Likes: 0
Received 0 Likes
on
0 Posts
6. With the vehicle supported with jack stand, apply some lift to the axle with a floor jack. (We chose to do this from either end with two floor jacks).
7. Using a 30mm, remove the factory track rod from the axle and the frame. (this one might take a couple beers unless you have a really good impact tool)

8. With the axle still supported by floor jacks and taking care not to damage the condenser, remove the front spring bolt and the rear spring bolt, retain both for reuse.
9. Remove the rear spring shackle bolt and shackle, retain for reuse.
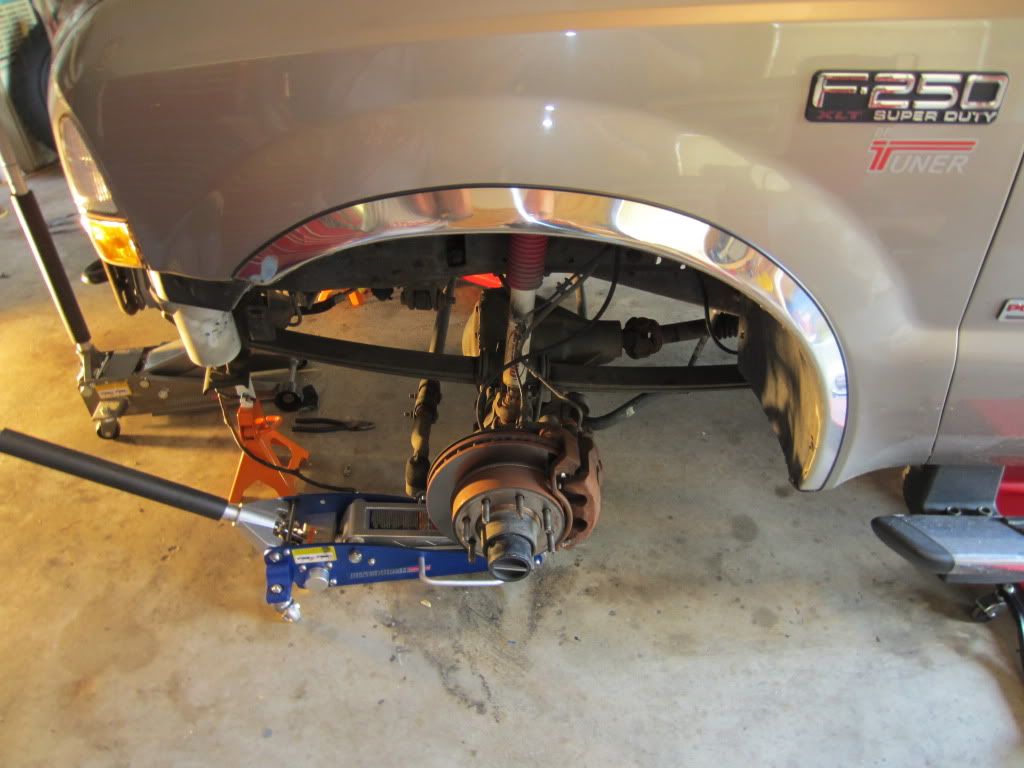
10. Remove the factory front U-bolts, ensuring the axle is still supported with floor jacks.
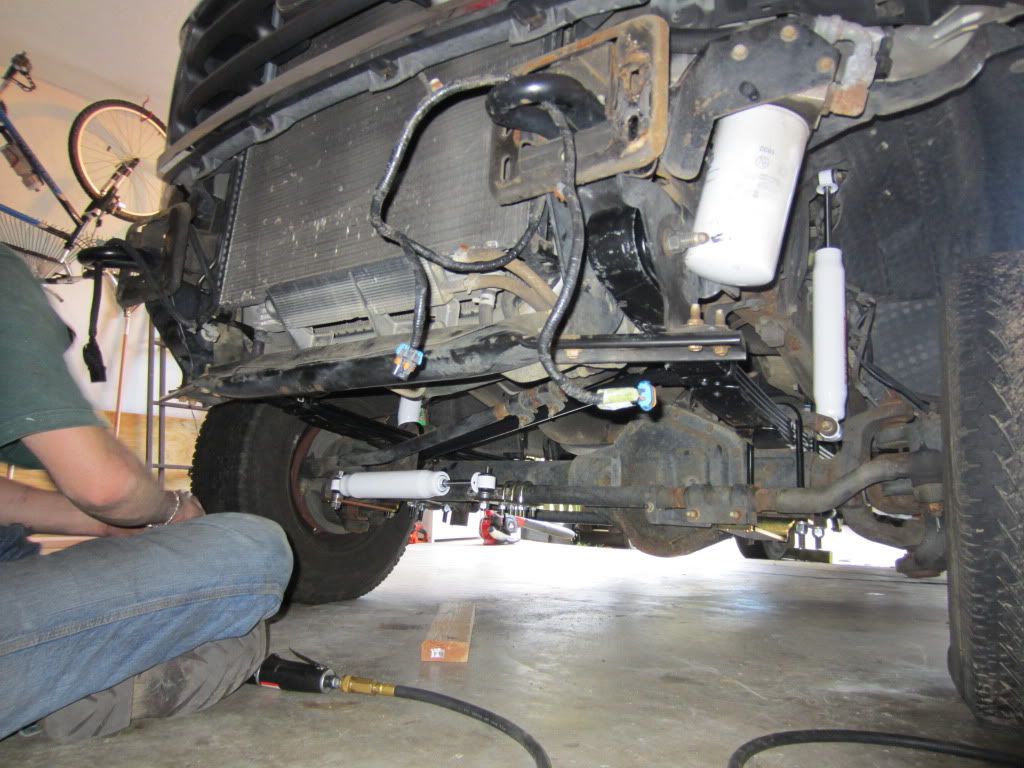
11. Lower the front axle to gain clearance between the axle and spring. Be cautious to not damage the connecting brake and vacuum lines. Remove the factory leaf spring.
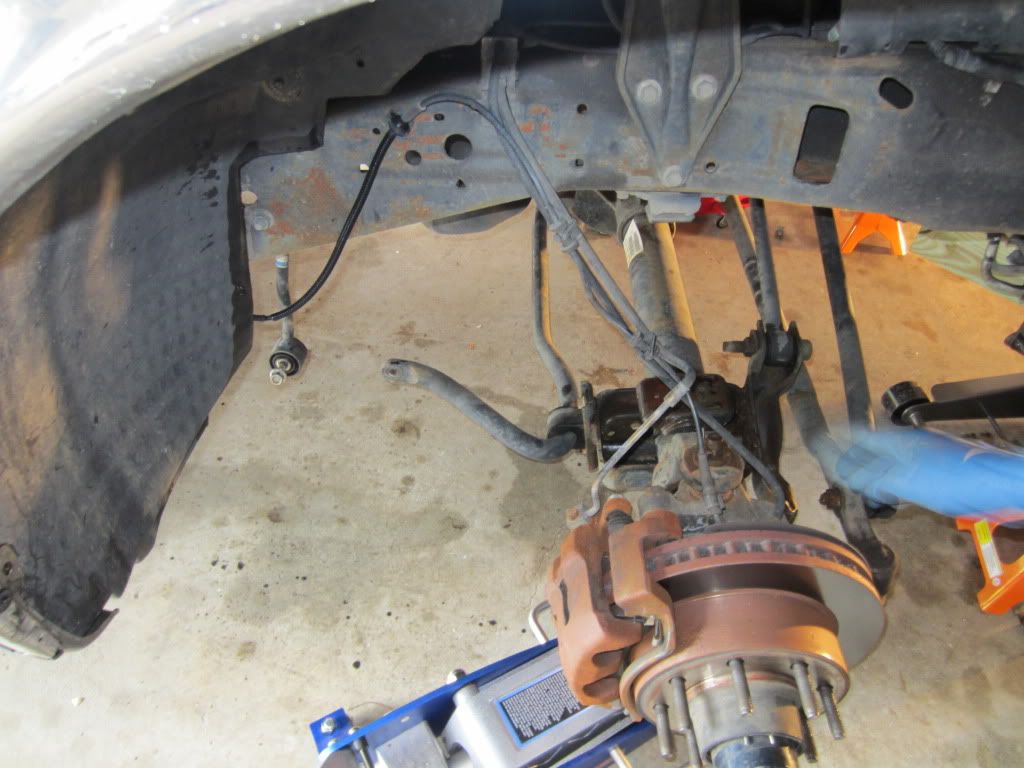
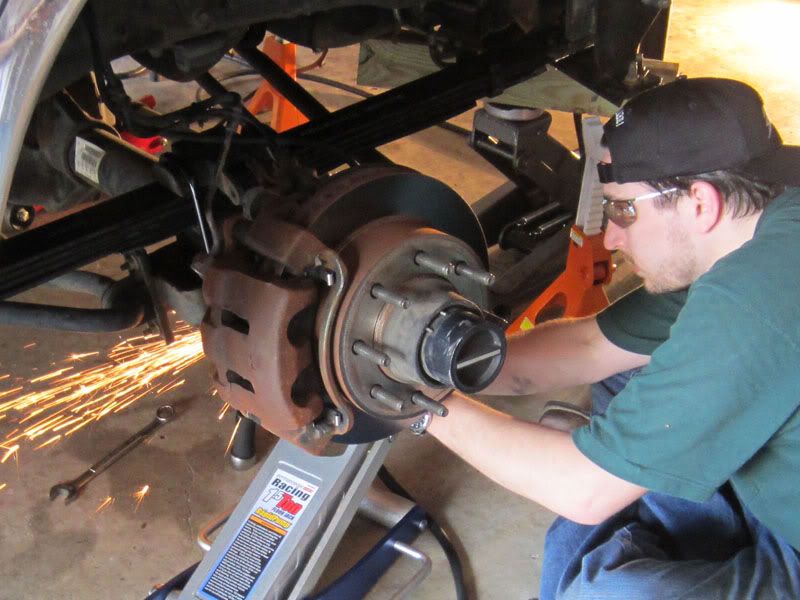
12. Install the new leaf spring. There is very little room to work with considering the bow in the unloaded spring, and the limited slack in the brake and vacuum lines. We installed the rear shackle and spring bolts first, as we felt the front was easier to man handle with the rear secured. With the axle secured, I used a bottleneck jack between the frame and the rear portion of the spring to flex the spring for additional help in getting the bolts through the shackle/spring. With the rear of the spring secured, and in combination with a pry bar I used a �” drive extension to feed into the bolt hole and with a breaker bar to gain more leverage, to assist pushing the front spring bolt through the front spring bushing/bolt hole. We also found it helpful to remove the sway bar connecting rod to better maneuver the axle. We also needed to chop the U-bolts a bit, as they were to long for a deep socket to fully tighten the nuts.
7. Using a 30mm, remove the factory track rod from the axle and the frame. (this one might take a couple beers unless you have a really good impact tool)
8. With the axle still supported by floor jacks and taking care not to damage the condenser, remove the front spring bolt and the rear spring bolt, retain both for reuse.
9. Remove the rear spring shackle bolt and shackle, retain for reuse.
10. Remove the factory front U-bolts, ensuring the axle is still supported with floor jacks.
11. Lower the front axle to gain clearance between the axle and spring. Be cautious to not damage the connecting brake and vacuum lines. Remove the factory leaf spring.
12. Install the new leaf spring. There is very little room to work with considering the bow in the unloaded spring, and the limited slack in the brake and vacuum lines. We installed the rear shackle and spring bolts first, as we felt the front was easier to man handle with the rear secured. With the axle secured, I used a bottleneck jack between the frame and the rear portion of the spring to flex the spring for additional help in getting the bolts through the shackle/spring. With the rear of the spring secured, and in combination with a pry bar I used a �” drive extension to feed into the bolt hole and with a breaker bar to gain more leverage, to assist pushing the front spring bolt through the front spring bushing/bolt hole. We also found it helpful to remove the sway bar connecting rod to better maneuver the axle. We also needed to chop the U-bolts a bit, as they were to long for a deep socket to fully tighten the nuts.
#3
03-21-2012, 06:58 PM
Join Date: Jul 2009
Posts: 164
Likes: 0
Received 0 Likes
on
0 Posts
13. Install the new front U-bolts and front shock. Be sure to install the shock bushings, and the bushing sleeve into the bottom bushing.
14. Repeat steps 8 through 13 for the opposite side.
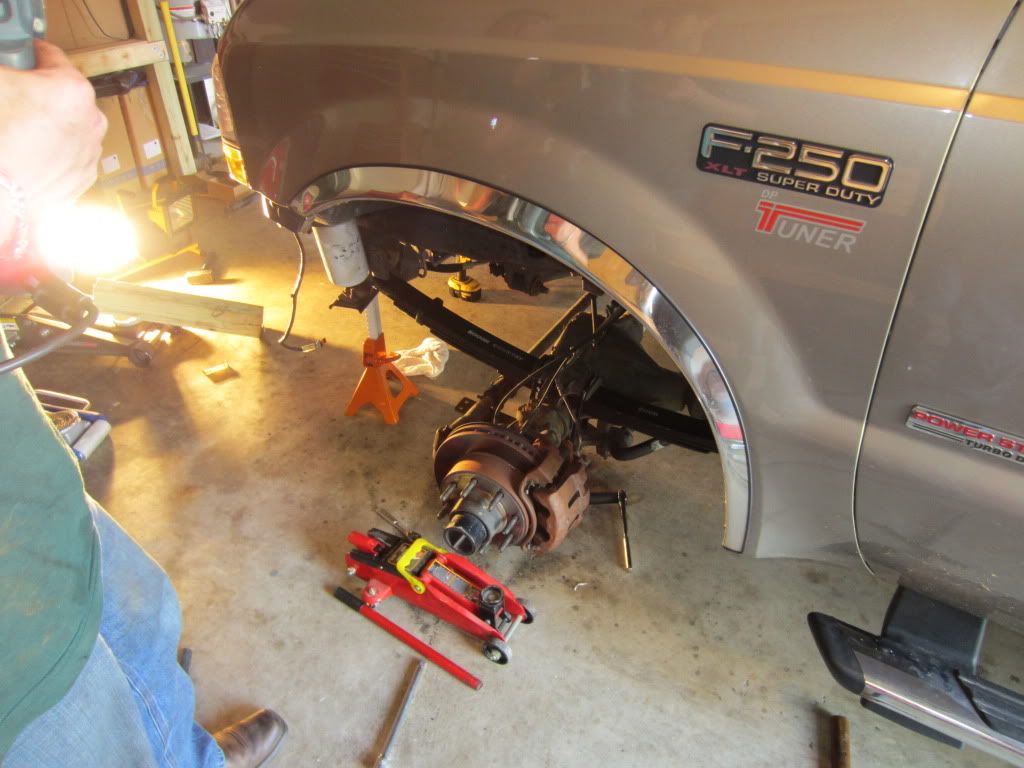
15. With both sets of springs installed, reinstall the wheels and lower vehicle to the ground.
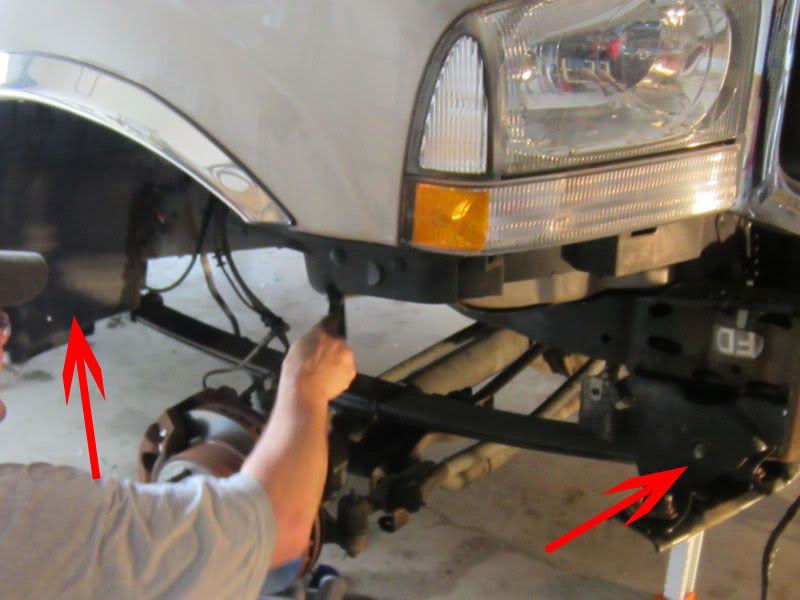
16. It is time to reinstall the track rod. Ensure the bushings are installed in the new track rod, and install using the factory bolts/nuts. In order to assist with the lining up of bolt/bolt-hole, it will help to have someone inside the truck turning the steering wheel back and forth. We also found it useful to use the same technique with the �” extension with breaker bar in the bolt hole to torque the track rod in order to assist feeding the bolt through the bolt hole.
17. I upgraded to the dual steering stabilizer, but I suggest possibly holding off until after getting the alignment that you will need to have done. Otherwise plan on removing the center support and adjusting a couple of inches after the alignment.
18. The rear block swap-out took about 30 minutes. We lifted the rear of the truck at the axle, removed the wheels and the U-bolts from the springs. Then we set axle down on jack stands, and lifted the rear of the truck at the hitch to unload the springs and remove the 2” F250 blocks, and then raised the truck to fit the F350 blocks under the springs. The front of the differential did need to be lifted slightly to align the pins to fully rest the weight of the truck on the springs. Once aligned and settled, reinstalled and tightened the U-bolts. Reinstall the wheels, and set the truck on the ground.
It will be necessary for 100 and 500 mile intervals to check and re-torque all the nuts.
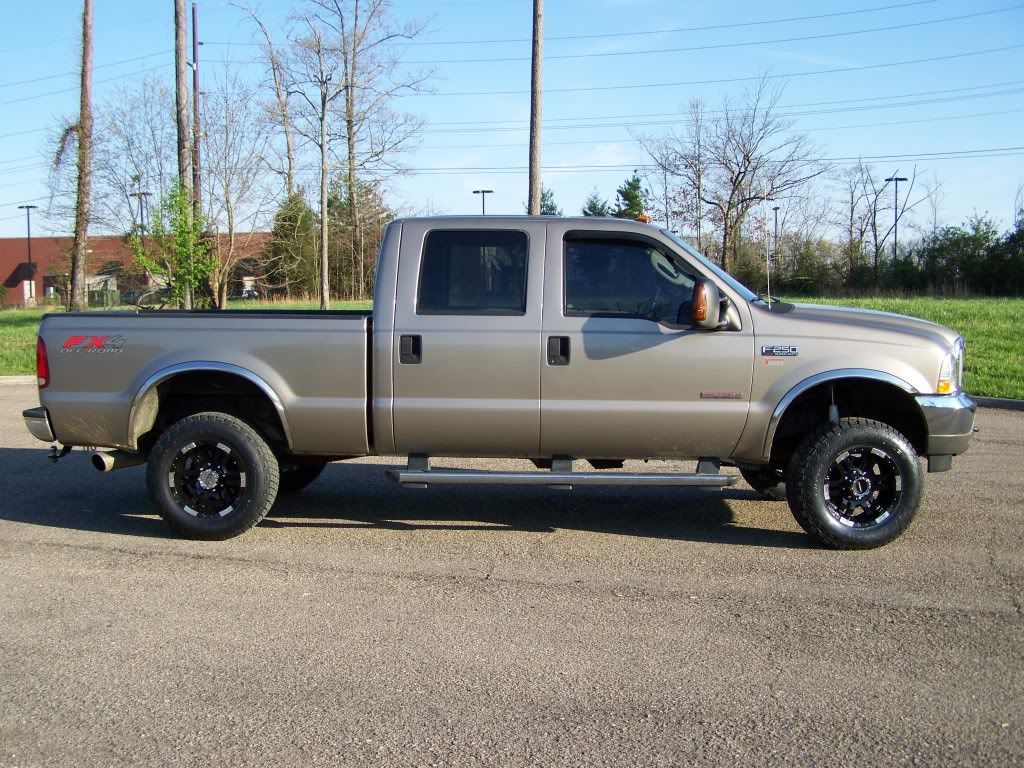
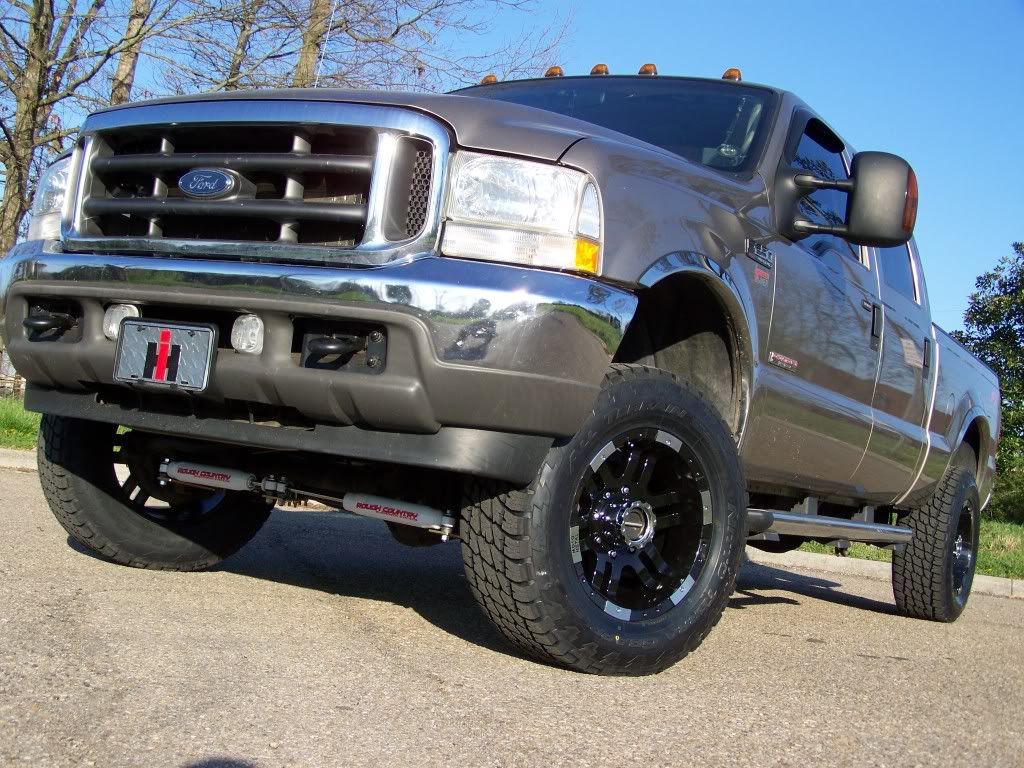
My finished product after alignment, and 285/65R18 Nitto Terra Grapplers, wrapped around Moto Metal 951’s
Before

After
14. Repeat steps 8 through 13 for the opposite side.
15. With both sets of springs installed, reinstall the wheels and lower vehicle to the ground.
16. It is time to reinstall the track rod. Ensure the bushings are installed in the new track rod, and install using the factory bolts/nuts. In order to assist with the lining up of bolt/bolt-hole, it will help to have someone inside the truck turning the steering wheel back and forth. We also found it useful to use the same technique with the �” extension with breaker bar in the bolt hole to torque the track rod in order to assist feeding the bolt through the bolt hole.
17. I upgraded to the dual steering stabilizer, but I suggest possibly holding off until after getting the alignment that you will need to have done. Otherwise plan on removing the center support and adjusting a couple of inches after the alignment.
18. The rear block swap-out took about 30 minutes. We lifted the rear of the truck at the axle, removed the wheels and the U-bolts from the springs. Then we set axle down on jack stands, and lifted the rear of the truck at the hitch to unload the springs and remove the 2” F250 blocks, and then raised the truck to fit the F350 blocks under the springs. The front of the differential did need to be lifted slightly to align the pins to fully rest the weight of the truck on the springs. Once aligned and settled, reinstalled and tightened the U-bolts. Reinstall the wheels, and set the truck on the ground.
It will be necessary for 100 and 500 mile intervals to check and re-torque all the nuts.
My finished product after alignment, and 285/65R18 Nitto Terra Grapplers, wrapped around Moto Metal 951’s
Before
After
#5
03-21-2012, 07:14 PM
Join Date: Jul 2009
Posts: 164
Likes: 0
Received 0 Likes
on
0 Posts
#6
03-21-2012, 08:59 PM
#7
03-21-2012, 09:10 PM
Join Date: Jul 2009
Posts: 164
Likes: 0
Received 0 Likes
on
0 Posts
Trending Topics
#8
07-22-2015, 04:10 PM

Definitely going to help me out. Tackling this job tomorrow or Fri!
Went a different rout on parts but same process needs to be done.
Forgot about the Bumper having to come off, and in my case Heavy *** brush guard too.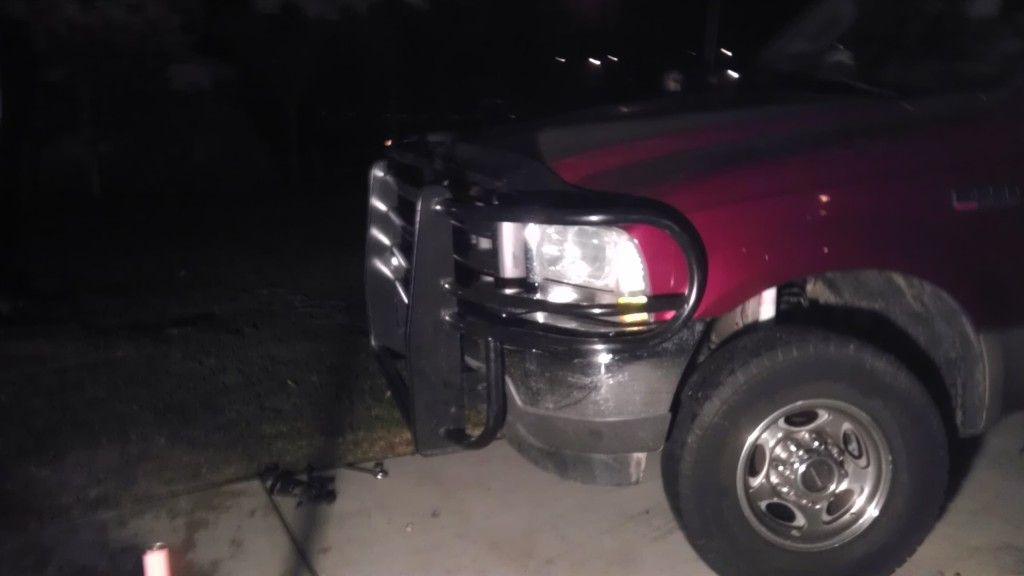
 Thanks again!
Went a different rout on parts but same process needs to be done.
Forgot about the Bumper having to come off, and in my case Heavy *** brush guard too.
Thanks again!
#9
07-23-2015, 09:27 AM

Tuned
I have the same kit on my truck and I really like it. Truck rides much better than stock IMO. The only thing is my front and back sit Exactly the same height...which does look OK however I like the look of the back end sitting higher, so I do have a 1" add-a-leaf I plan to install when I get a chance. Also I removed my front sway bar, I noticed absolutely no difference with it installed vs not-installed
#10
07-23-2015, 09:28 AM
Tuned
#11
07-23-2015, 01:08 PM
Yeah I had purchased mine a piece or two at a time over a few months
I ordered
$130 ea
$110
$50
When I had to replace my shocks recently I ordered the Rancho RS9000 series for a level kit; knowing I was going to do this. They were only 1" difference on fully compressed.
Overall I spent $100 more but I got the RS9000 shocks I wanted on my truck
Also got a - since I was spending loot on the truck might as well get it all done
#12
07-23-2015, 01:13 PM
I do always disconnect it for off road use.

Thread
Thread Starter
Forum
Replies
Last Post
Sous
1999 - 2003 7.3L Power Stroke Diesel
14
06-02-2015 12:08 AM
BLADE35
6.0L Power Stroke Diesel
51
07-04-2013 08:46 PM
bigdieseldav
1999 - 2003 7.3L Power Stroke Diesel
5
08-10-2006 12:23 AM