
78/79 RestoMod
#391
 06-21-2014, 09:36 PM

Join Date: Jan 2012
Location: Viva Las Vegas
Posts: 954
Likes: 0
Received 0 Likes
on
0 Posts
The front bumper came back from powder coating today and I dropped off the rear bumper and the door handles to be done. A little bummed because when I tightened the bolts the bumper tweaked and had a weird effect right under the bolt. I can live with it since I plan to mount a cactus smasher anyhow.
#392
06-28-2014, 05:37 PM
Join Date: Jan 2012
Location: Viva Las Vegas
Posts: 954
Likes: 0
Received 0 Likes
on
0 Posts


#395
06-28-2014, 09:17 PM
#397
07-03-2014, 06:52 PM
Join Date: Jan 2012
Location: Viva Las Vegas
Posts: 954
Likes: 0
Received 0 Likes
on
0 Posts
The dash is basically complete, I have to put the pedals in before the column can go in and I will have to pull it apart to install the head unit when it gets here.
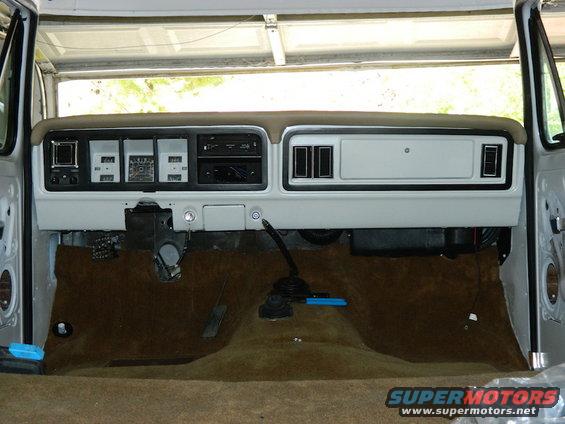
Really happy with the look of the black trim and the white cluster.

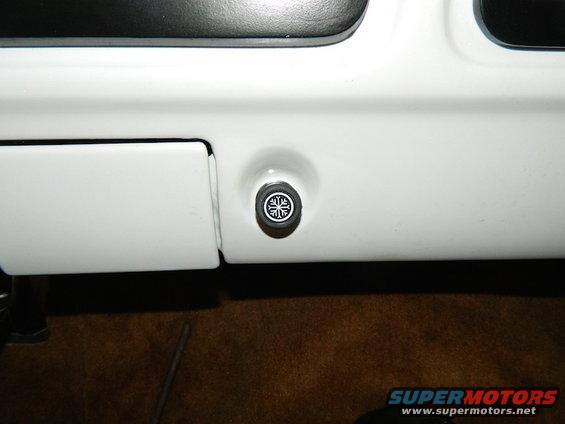
Nostalgic AC adapted the factory controls for the defrost, vent and heater.

The compressor is a separate ****, I removed the lighter and put the thermostat in it's place, perfect fit!
Really happy with the look of the black trim and the white cluster.
Nostalgic AC adapted the factory controls for the defrost, vent and heater.
The compressor is a separate ****, I removed the lighter and put the thermostat in it's place, perfect fit!
#398
07-03-2014, 07:22 PM
Post Fiend
Join Date: Nov 2011
Location: Algona, Washington
Posts: 8,908
Likes: 0
Received 0 Likes
on
0 Posts
#400
07-03-2014, 08:09 PM

I have a dash control for ac. I won't have it in my 79. I want to lose the big box and all the dash stuff too.
If I end up with even a heater I will switch it to the style like you have, but I'll have to find a donor truck so I can change the firewall and heater core and fan mount also.
Sweet lookin build! Nice work
If I end up with even a heater I will switch it to the style like you have, but I'll have to find a donor truck so I can change the firewall and heater core and fan mount also.
Sweet lookin build! Nice work
#401
07-04-2014, 04:28 PM
Posting Guru
Join Date: Nov 2002
Location: Napa
Posts: 1,260
Likes: 0
Received 0 Likes
on
0 Posts

#402
07-04-2014, 11:16 PM
Join Date: Jan 2012
Location: Viva Las Vegas
Posts: 954
Likes: 0
Received 0 Likes
on
0 Posts
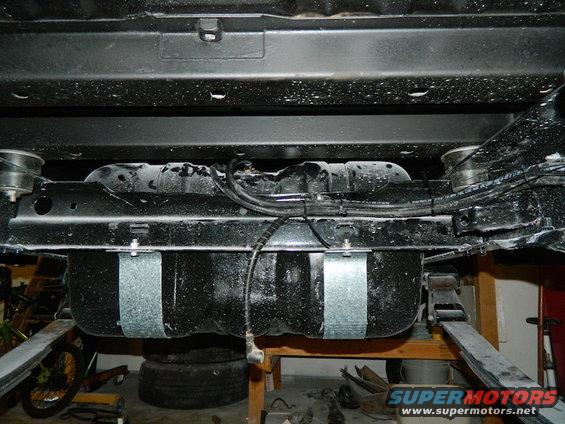
I got the fuel lines ran today, the pictures are not great since, sorry about that.
The undercarriage is quite dusty, once I get it running I will pull it out of the garage and give it full cleaning.
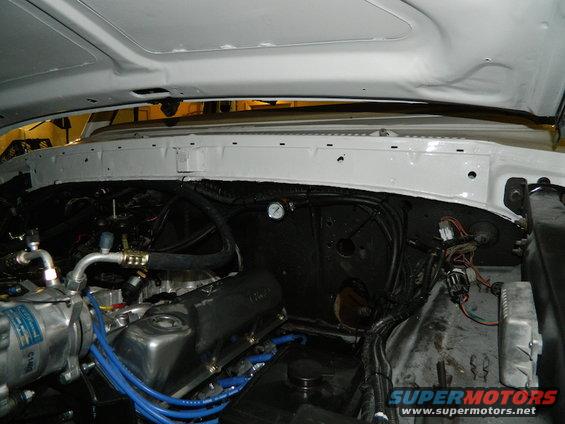
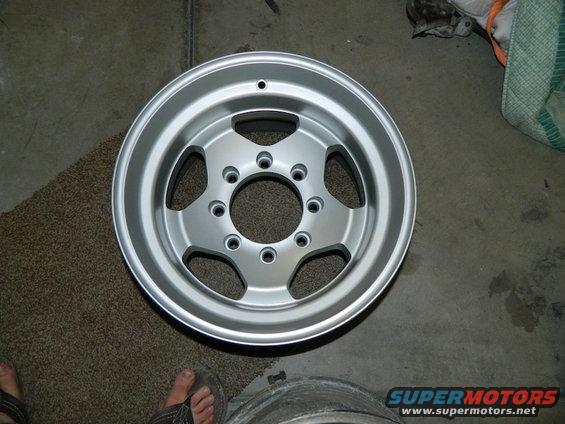
Also I sanded, primed and painted one of the wheels, I like the color and think it will look good on the rig.
The undercarriage is quite dusty, once I get it running I will pull it out of the garage and give it full cleaning.
Also I sanded, primed and painted one of the wheels, I like the color and think it will look good on the rig.
#403
07-04-2014, 11:30 PM
Post Fiend
Join Date: Nov 2011
Location: Algona, Washington
Posts: 8,908
Likes: 0
Received 0 Likes
on
0 Posts

#405
07-06-2014, 01:31 PM
Join Date: Jan 2012
Location: Viva Las Vegas
Posts: 954
Likes: 0
Received 0 Likes
on
0 Posts
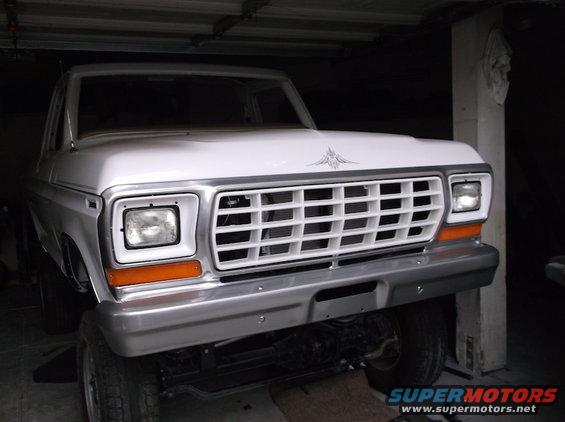
Mounted up one of the tires to check clearance and fit, it looks ****ing amazing!

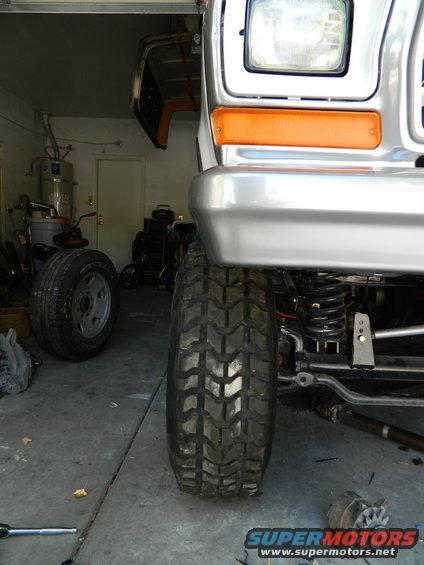
Surprisingly I have a little over 1" clearance to the lower link at full lock, I expected I would have to restrict the turning radius.
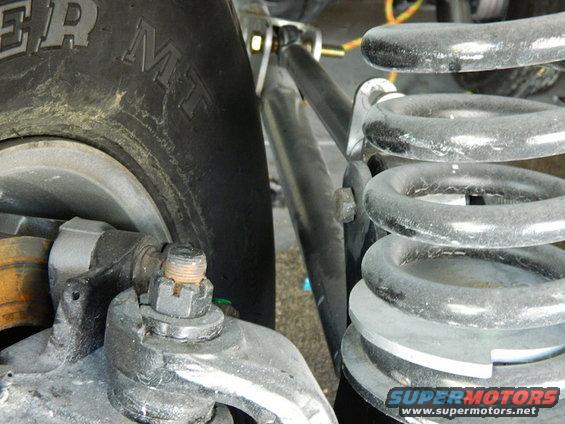

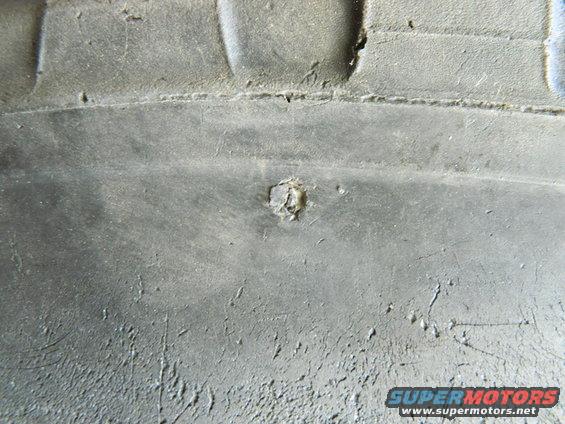
I do have a small leak in the shoulder of this tire
I have to buy another for a spare anyhow, so I may patch this, keep at low pressure and consider it my spare for the time being, ugh. Any thoughts on this? My other thought is to run a tube in this one and still use it as my spare.
Surprisingly I have a little over 1" clearance to the lower link at full lock, I expected I would have to restrict the turning radius.
I do have a small leak in the shoulder of this tire
I have to buy another for a spare anyhow, so I may patch this, keep at low pressure and consider it my spare for the time being, ugh. Any thoughts on this? My other thought is to run a tube in this one and still use it as my spare.