'54 Panel, Road to recovery
#1
 10-15-2011, 04:58 PM

Join Date: Apr 2009
Location: orange county, ca.
Posts: 746
Likes: 0
Received 0 Likes
on
0 Posts
'54 Panel, Road to recovery
I thought I should just start a rebuild thread and add to it as stuff gets done, instead of starting a new thread for each part. I'll just post links to the other threads to start and then post new things on this thread.
It started with just a steering column repair and then of course snowballed (I couldn't leave well enough alone). Now it's a new trans/engine, new wiring, rebuilding the steering, rebuild 9" center (2.47) to replace the 3.00 I have now, rebuild dash gauges, rebuild shifter, redo the stereo/speakers/interior lights in there now, new air deflectors, repair bumpers, replace and modify gravel pan to fit new trans cooler set up, repaint grill.........plus more as I find it .
.
So here we go.............
Steering Column Repair:
https://www.ford-trucks.com/forums/9...mn-repair.html
Gravel Pan Repair:
https://www.ford-trucks.com/forums/1...ravel-pan.html
Headers:
Header clearance - THE H.A.M.B.
Engine and Trans:
motor is back home - THE H.A.M.B.
more to come.
***EDIT*** new header link to the build, the last one was just to a posted question
It started with just a steering column repair and then of course snowballed (I couldn't leave well enough alone). Now it's a new trans/engine, new wiring, rebuilding the steering, rebuild 9" center (2.47) to replace the 3.00 I have now, rebuild dash gauges, rebuild shifter, redo the stereo/speakers/interior lights in there now, new air deflectors, repair bumpers, replace and modify gravel pan to fit new trans cooler set up, repaint grill.........plus more as I find it
.So here we go.............
Steering Column Repair:
https://www.ford-trucks.com/forums/9...mn-repair.html
Gravel Pan Repair:
https://www.ford-trucks.com/forums/1...ravel-pan.html
Headers:
Header clearance - THE H.A.M.B.
Engine and Trans:
motor is back home - THE H.A.M.B.
more to come.
***EDIT*** new header link to the build, the last one was just to a posted question
#2
10-23-2011, 11:16 PM
Join Date: Apr 2009
Location: orange county, ca.
Posts: 746
Likes: 0
Received 0 Likes
on
0 Posts
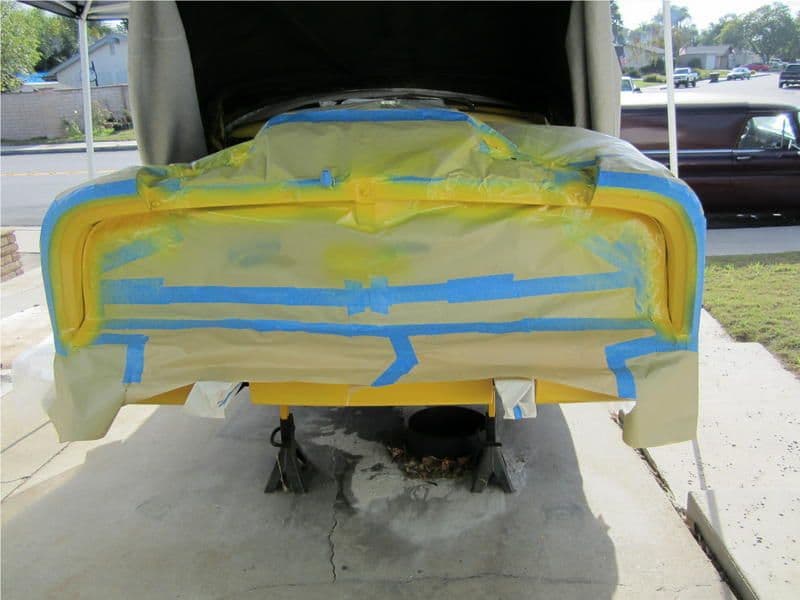
Finished painting the air deflectors today and the frame stubs on friday night. Put the gravel pan on saturday and primed the deflectors. Now next week/weekend is sanding the grill, painting the grill and turn signal bezels. I have to touch up the under side of the fender overhang above the grill, bad prep work (macco painted it I think the p/o said) and the light paint came off with the tape (you can see the black in the picture). Then back to the wiring and motor install finishing.

#3
10-23-2011, 11:28 PM
Join Date: Apr 2009
Location: orange county, ca.
Posts: 746
Likes: 0
Received 0 Likes
on
0 Posts
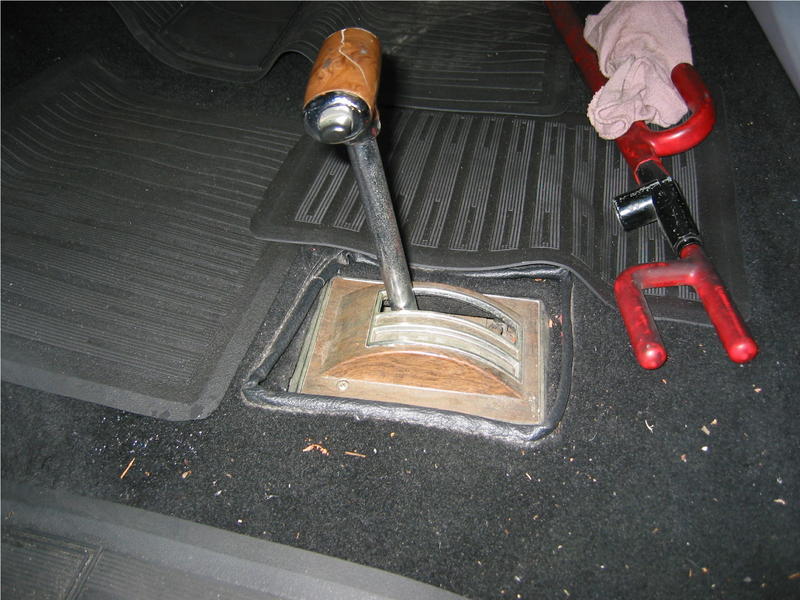
The shifter as it turns out is from a mustang II or a mid 70's granada. If I used a mustang shifter with the bent arm I couldn't get 2nd or low. I took off the woodgrain sticker, painted the insert black, found an NOS shifter handle on Ebay (black handle), polished the plastic and replaced the bushings. They also used the stock shifter rod, put in a few Z bends because it was too long, so I sectioned the rod to fit.
Here's before and after:

Here's before and after:
#4
11-07-2011, 10:52 AM
Join Date: Apr 2009
Location: orange county, ca.
Posts: 746
Likes: 0
Received 0 Likes
on
0 Posts
#5
11-08-2011, 12:22 PM
Join Date: Apr 2009
Location: orange county, ca.
Posts: 746
Likes: 0
Received 0 Likes
on
0 Posts
#6
11-17-2011, 02:07 AM
Join Date: Apr 2009
Location: orange county, ca.
Posts: 746
Likes: 0
Received 0 Likes
on
0 Posts
painted the fenders above the grille, the tape pulled some more paint off the hood latch panel.......I hate crappy body shops that don't sand before they paint  .
.
also had the lower hose made (I need to get a lathe and TIG......and learn how to TIG weld ), so now I have plenty of room for the belt.

I also cleaned up the cal custom air filter and started to paint my '54 tab. Next is a car rebuild, which I need to find a bushing kit for the shaft and install the fan clutch and blade when they come in. Then headers, make some down pipes and fire it up!!!!.
.also had the lower hose made (I need to get a lathe and TIG......and learn how to TIG weld
), so now I have plenty of room for the belt.I also cleaned up the cal custom air filter and started to paint my '54 tab. Next is a car rebuild, which I need to find a bushing kit for the shaft and install the fan clutch and blade when they come in. Then headers, make some down pipes and fire it up!!!!.
#7
11-20-2011, 11:59 PM
Join Date: Apr 2009
Location: orange county, ca.
Posts: 746
Likes: 0
Received 0 Likes
on
0 Posts
Trending Topics
#8
11-21-2011, 08:13 AM

Postmaster
#9
12-02-2011, 11:48 PM
Join Date: Apr 2009
Location: orange county, ca.
Posts: 746
Likes: 0
Received 0 Likes
on
0 Posts
Hard to paint when I get home from work, not enough daytime for the paint to even start to dry (painting outside). Making the park light housing/bezels fit better now, then have to paint those. Having to work on other things on the weekends, but I did get the license plate tab painted, sanded numbers and now need to sand the rest and clear coat.

#10
01-10-2012, 12:22 AM
Join Date: Apr 2009
Location: orange county, ca.
Posts: 746
Likes: 0
Received 0 Likes
on
0 Posts
Had another plumbing problem....which I hope is the last. I have the grille together and the lights in, still sorting out the turn signal bezels vs the grille adjustment but the bezels are painted. Still working on the carb rebuild and the interior wiring. I made a coil bracket, spark plug wire holders, carb return spring bracket and ran the spark plug wires. The headers are on, I ordered a tall K&N filter for CHEAP from amazon, the regular K&N filters ranged from $50 to $80 and I bought the 6" high one for a 14" air cleaner for $29!!!. Here's a picture to keep the thread going...........more to come.


#14
01-12-2012, 06:53 PM


