
How To....Gauge Pod with Pics...
#1
 10-15-2011, 03:56 PM

How To....Gauge Pod with Pics...
Okay, so you are tired of dealing with gauge issues or you just want "real" gauges to trust. Especially if you have spent big bucks under the hood. This is a How To article for a custom gauge pod. This project is for anyone that doesn't use their ashtray and wants a nice looking gauge pod.
Materials Needed.
1/4 Luan
Fleece fabric (available in fabrics a Wal Mart)
Fiberglass Resin and Hardner
Fiberglass
Body Filler
Sandpaper
Paint
Cheap 2" chip brushes
1 foot 2" PVC Pipe
Crazy Glue
Staple Gun
Drill and assorted Bits
Cardboard and Scissors
Hot Glue and Gun or Adhesive
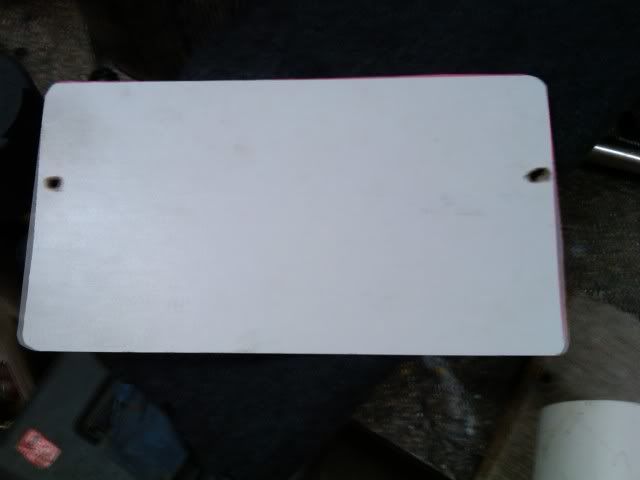
1. Remove Ashtray and Metal Frame. There are 2 screws in the front, 1 under the bottom.
2. Lay the metal frame on a piece of cardboard and mark a template, including the front 2 screw holes.
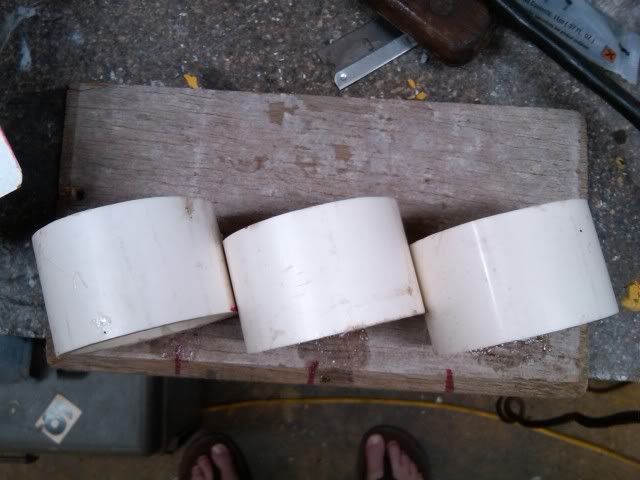
3. Cut your 1/4 luan to match your template and test fit. Then cut 3 sections of 2 inch pvc and mount to the luan in the angle and configuration you would like. Attach the pvc with hot glue or adhesive. Make sure not to make the pvc pipe much deeper than gauge depth.
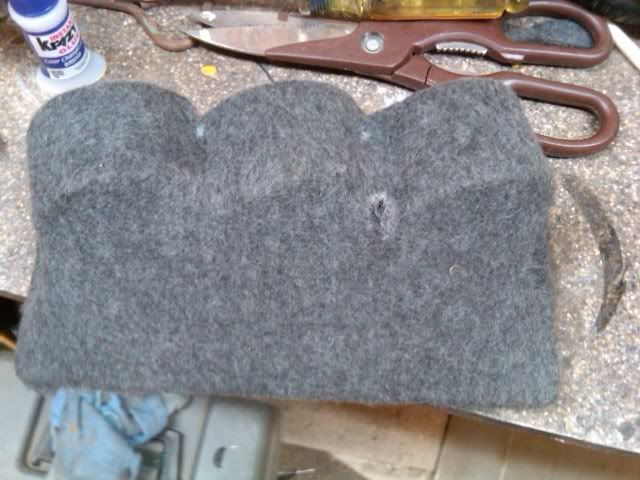
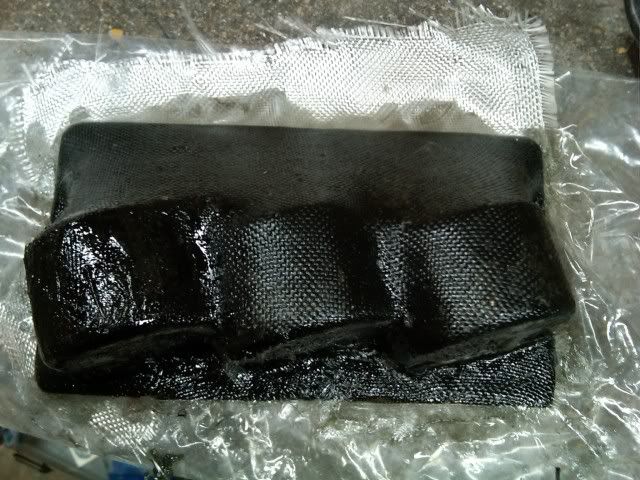
4. Stretch fleece starting by gluing crazy glue around the rim on pvc and around the edges of the pvc...take your time and stretch out all the wrinkles. Once you get it to your liking around the gauges stretch over the sides and staple on the back until it looks like this. In the second picture note position of staples making the sides dent in. This is so once the pod is dry you can drill the mounting holes through. This is why it was important to mark them from your ashtray template. You will mount the pod with those 2 screws into the same holes as your ashtray frame.
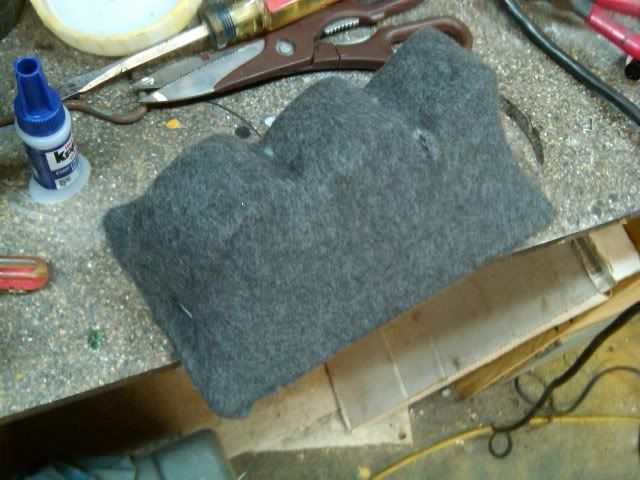
5. Soak the fleece in fiberglas resin by brushing on with a 2 inch chip brush. Make sure to get it good and soaked and let dry overnight. Sand smooth. This is optional but if you now lay down 1 layer of fiberglas and resin it will really smooth out. Just take your time and soak the glass smooth it out. Once dry sand once again. I opted to coat with a layer of fiber as seen here.
6. Sand down the fleece and resin until smooth as possible. The final product will look better if you work to get it smooth.
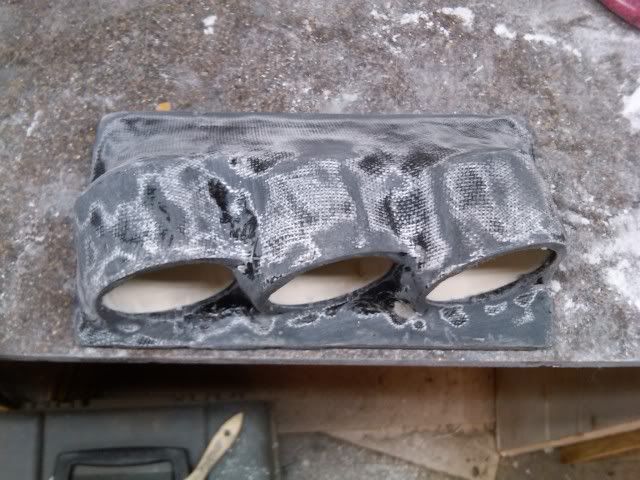
7. After sanding this layer skim the hole structure with body filler and sand until you get a super smooth finish free of any defects. This is important as any blemish will show in the final product.
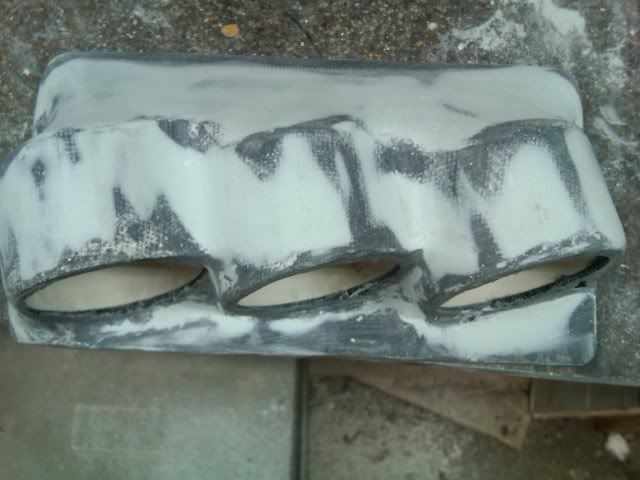
8. Coat with several coats of primer and finish color.
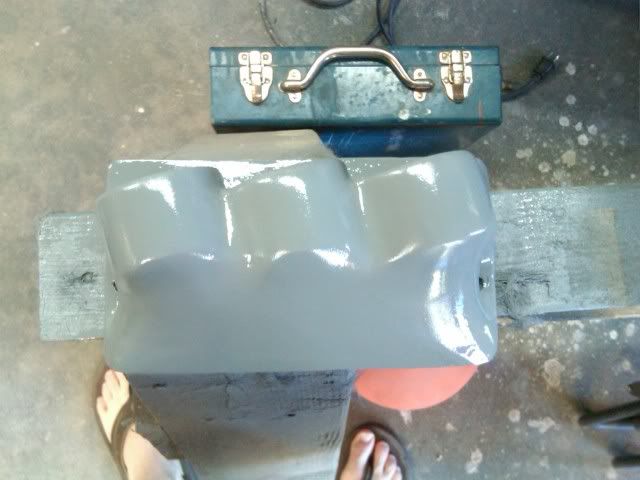
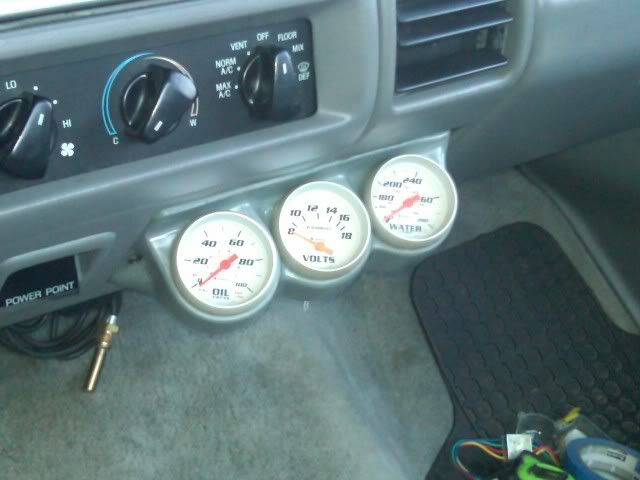
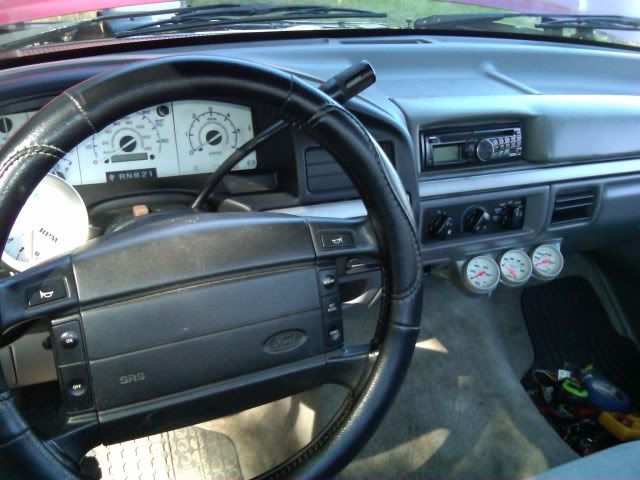
9. Mount and wire your 2/16 inch gauges and enjoy a custom fitted gauge pod that looks right at home in your cab.
Materials Needed.
1/4 Luan
Fleece fabric (available in fabrics a Wal Mart)
Fiberglass Resin and Hardner
Fiberglass
Body Filler
Sandpaper
Paint
Cheap 2" chip brushes
1 foot 2" PVC Pipe
Crazy Glue
Staple Gun
Drill and assorted Bits
Cardboard and Scissors
Hot Glue and Gun or Adhesive
1. Remove Ashtray and Metal Frame. There are 2 screws in the front, 1 under the bottom.
2. Lay the metal frame on a piece of cardboard and mark a template, including the front 2 screw holes.
3. Cut your 1/4 luan to match your template and test fit. Then cut 3 sections of 2 inch pvc and mount to the luan in the angle and configuration you would like. Attach the pvc with hot glue or adhesive. Make sure not to make the pvc pipe much deeper than gauge depth.
4. Stretch fleece starting by gluing crazy glue around the rim on pvc and around the edges of the pvc...take your time and stretch out all the wrinkles. Once you get it to your liking around the gauges stretch over the sides and staple on the back until it looks like this. In the second picture note position of staples making the sides dent in. This is so once the pod is dry you can drill the mounting holes through. This is why it was important to mark them from your ashtray template. You will mount the pod with those 2 screws into the same holes as your ashtray frame.
5. Soak the fleece in fiberglas resin by brushing on with a 2 inch chip brush. Make sure to get it good and soaked and let dry overnight. Sand smooth. This is optional but if you now lay down 1 layer of fiberglas and resin it will really smooth out. Just take your time and soak the glass smooth it out. Once dry sand once again. I opted to coat with a layer of fiber as seen here.
6. Sand down the fleece and resin until smooth as possible. The final product will look better if you work to get it smooth.
7. After sanding this layer skim the hole structure with body filler and sand until you get a super smooth finish free of any defects. This is important as any blemish will show in the final product.
8. Coat with several coats of primer and finish color.
9. Mount and wire your 2/16 inch gauges and enjoy a custom fitted gauge pod that looks right at home in your cab.
#3
10-15-2011, 04:22 PM


#6
10-15-2011, 09:16 PM
I got him.
Looks good.
I might do the same one day but I use my ashtray for change and my cig lighter for a 2nd 12v source when needed.
Maybe I could make one work with the ashtray or even make one for another location.
I currently have a 3 gauge pillar pod with oil pressure,fuel pressure, and trans temp. I need to add water temp now. Might just get a Quad pod for the pillar. Then one day when I need a wideband ill get the steering column pod.
#7
10-16-2011, 05:26 AM
More Turbo
Trending Topics
#8
10-16-2011, 07:04 AM
Yeah I dropped the lighter 12v wires and plug and tucked underneath the dash just in case I ever needed a second 12v plugin, although I have never used the one in the ashtray. At least I still have access to both.
#9
10-16-2011, 12:54 PM

Posting Guru
#10
10-16-2011, 08:46 PM

Elder User
Join Date: Feb 2002
Location: Portage Twp, PA
Posts: 636
Likes: 0
Received 0 Likes
on
0 Posts
#11
10-16-2011, 09:18 PM
Posting Guru
#12
10-17-2011, 08:58 AM
Mine fit perfectly in the 2 inch pipe....just enough tightness that they don't move or wiggle. Just test fit them to be sure...if you need to sand a little, no biggie. A dremel tool for this project is a big help.
#13
10-17-2011, 01:44 PM
Posting Guru
Join Date: Mar 2005
Location: Central,Texas
Posts: 1,453
Likes: 0
Received 0 Likes
on
0 Posts

#14
10-17-2011, 05:03 PM
Laughing Gas
Join Date: Mar 2009
Location: long island
Posts: 1,028
Likes: 0
Received 0 Likes
on
0 Posts
#15
10-21-2011, 03:52 PM
That was the idea...the "factory look". Yeah...I got to pull me a good vent from a junk truck when I get a chance.
Never been to "the track" with my truck, but have done some computer datalogged runs on a do not try this at home track....aka....street.
Thanks all...nice project that doesn't cost much if you have most of this stuff laying around the shop as I did.
Never been to "the track" with my truck, but have done some computer datalogged runs on a do not try this at home track....aka....street.
Thanks all...nice project that doesn't cost much if you have most of this stuff laying around the shop as I did.