'70 F100 CV IFS/TBird IRS Build
#151
 07-09-2012, 06:55 AM

Unless the engine with flattops was a rebuilt 460, it could very well be a 429. They come stock with flat top pistons with one flycut valve relief.
Nice engines, but gotta pay attention cause they most all (tbird ones) take a smaller crank pilot, so a 460 converter or input shaft bearing won't fit.
Nice engines, but gotta pay attention cause they most all (tbird ones) take a smaller crank pilot, so a 460 converter or input shaft bearing won't fit.
#152
07-09-2012, 07:21 AM
Unless the engine with flattops was a rebuilt 460, it could very well be a 429. They come stock with flat top pistons with one flycut valve relief.
Nice engines, but gotta pay attention cause they most all (tbird ones) take a smaller crank pilot, so a 460 converter or input shaft bearing won't fit.
Nice engines, but gotta pay attention cause they most all (tbird ones) take a smaller crank pilot, so a 460 converter or input shaft bearing won't fit.
#153
07-09-2012, 08:10 AM
I probably overlooked it. I been up to the camp working all week and reading was fast because of everyone needing guidance.
429 is great engine. Revs real well and makes great power. I use the larger summit 460 cam in them all the time and people love it.
I'm not convinced of the factory hp rating, but it's darn impressive wether correct or not.
429 is great engine. Revs real well and makes great power. I use the larger summit 460 cam in them all the time and people love it.
I'm not convinced of the factory hp rating, but it's darn impressive wether correct or not.
#154
07-09-2012, 08:36 AM
I am figuring on a considerable improvement over what I started with. Not that the original '76 460 wasn't doing the job pushing the little truck down the road. Warming her up should make it a bit more fun to drive. I went back & looked. I had not stated the '69 was a 429. The '76 has a 4* cam retardation stock. I am bringing the cam back to 0, using the early heads which untouched will breath better than the D6 heads. No idea if there is any advantage to the C8 intake but it's going on & then getting the distributor setup properly.
#155
07-09-2012, 09:17 AM
The 69 intake just doesn't have smog.
They are both spread bore carbs, but are they both the narrow Chevy bolt pattern. Or do they take a regular Holley flange. Carb adapters work but I like using the Chevy ho spread bore Holley. I got a 625 double pump and a 900 DP. Both are great carbs.
The only thing you gotta watch for is the cast rockers of the c9 heads cracking with higher lift or with heavier springs.
#156
07-10-2012, 05:08 AM
The 69 intake just doesn't have smog.
They are both spread bore carbs, but are they both the narrow Chevy bolt pattern. Or do they take a regular Holley flange. Carb adapters work but I like using the Chevy ho spread bore Holley. I got a 625 double pump and a 900 DP. Both are great carbs.
The only thing you gotta watch for is the cast rockers of the c9 heads cracking with higher lift or with heavier springs.
They are both spread bore carbs, but are they both the narrow Chevy bolt pattern. Or do they take a regular Holley flange. Carb adapters work but I like using the Chevy ho spread bore Holley. I got a 625 double pump and a 900 DP. Both are great carbs.
The only thing you gotta watch for is the cast rockers of the c9 heads cracking with higher lift or with heavier springs.
#157
07-10-2012, 05:50 AM
My boat 460 loves the 900cfm
A mild 460 only needs 650-700cfm depending on rpm.
1-2" 4hole carb spacer (or middle split spacer) is great for velocity on stock intake
I run a 700dp on my 500hp fe but it's been worked on a little
750dp is a great overall carb and won't ever need to be upgraded.
Look for a set of "rail" rockets. You won't need guide plates with them. They have little lips over the valve tip to keep them aligned. Work great on these heads. I use the cast rockers on my built up work truck. I've only broke a few and I really abuse my truck.
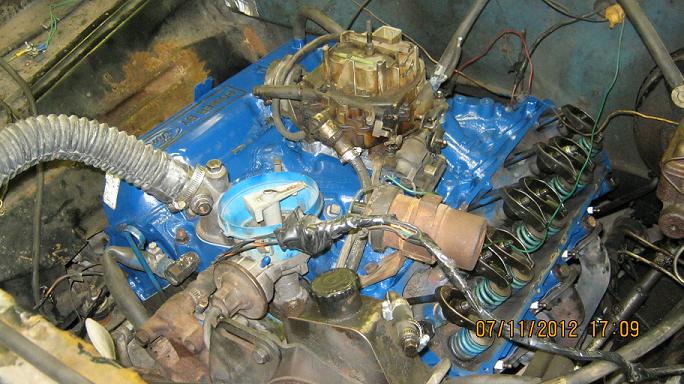
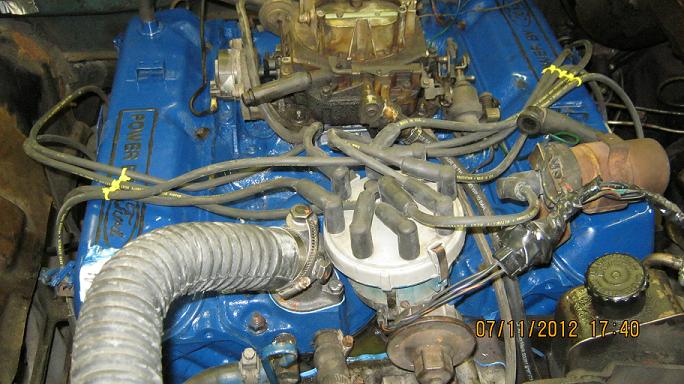
#158
07-14-2012, 11:24 AM
Time to put her back together again.
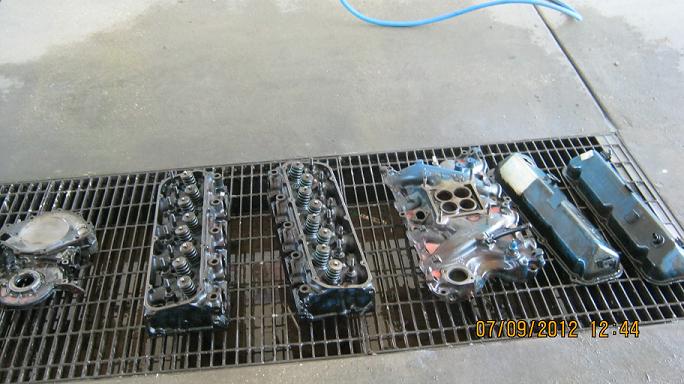
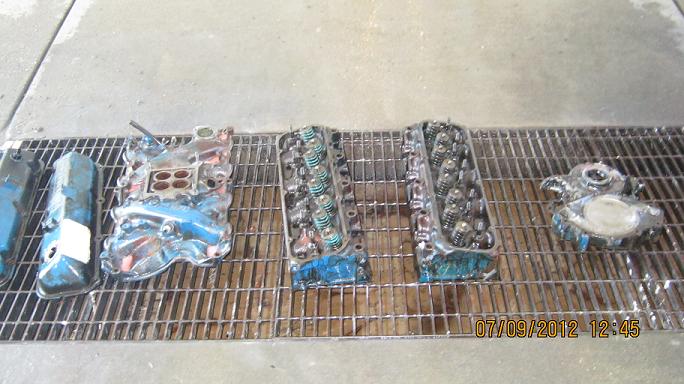
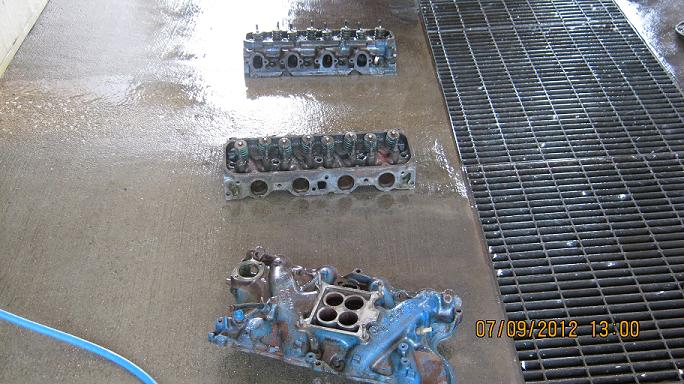
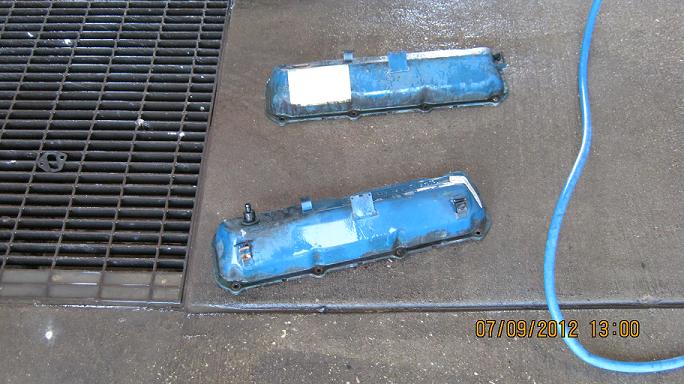
Cleaning major parts at the car wash.


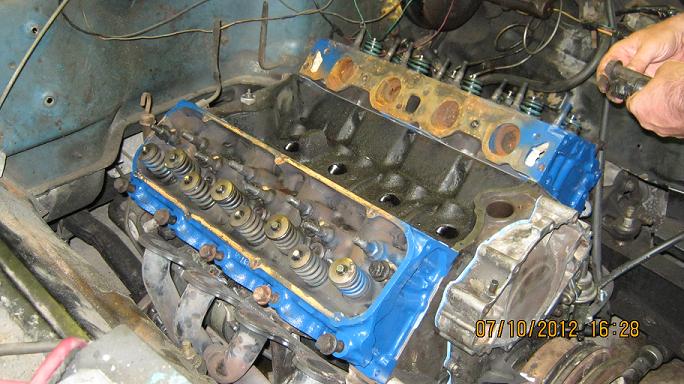
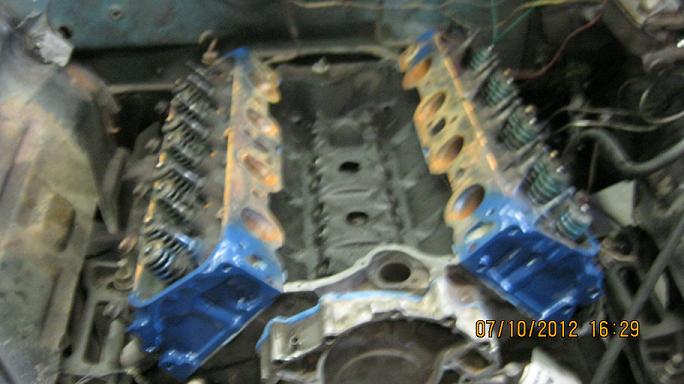
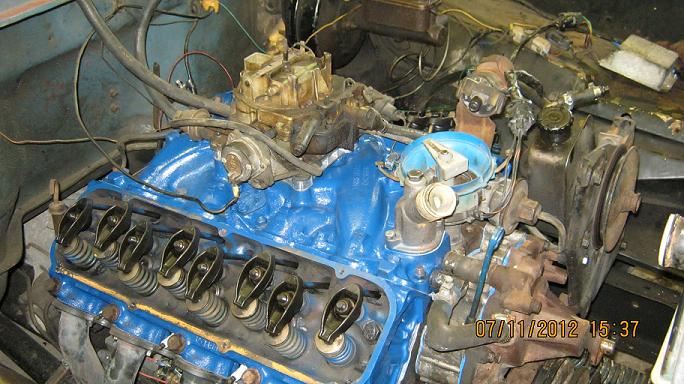
Timing cover on, heads set in place & putting the head bolts in.
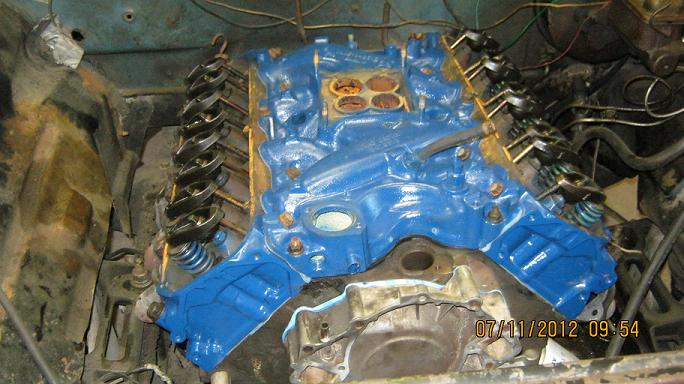
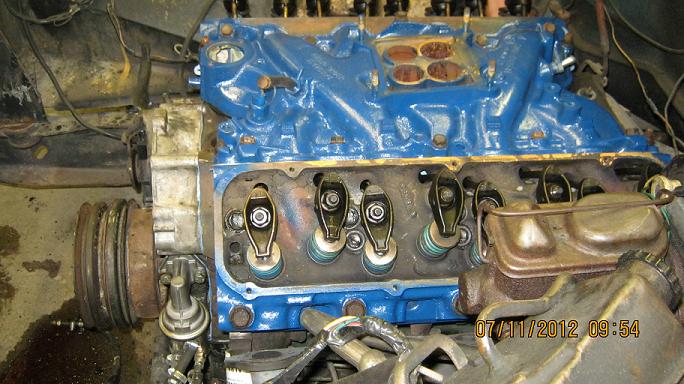
Rockers back in & intake on.
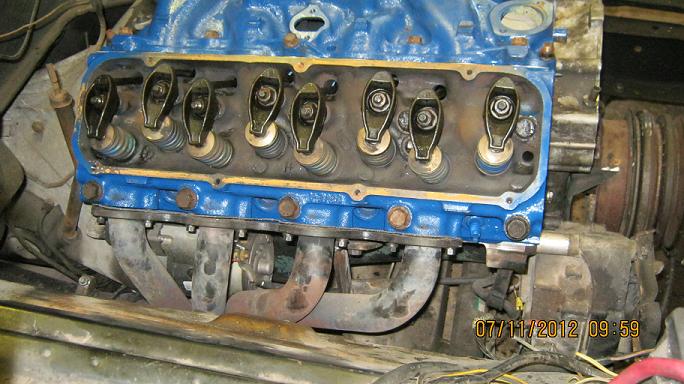
Nothing like getting into your work. All the bending over doing this still has my back feeling it. Gotta love getting old. Bolting on the left header in this pic.

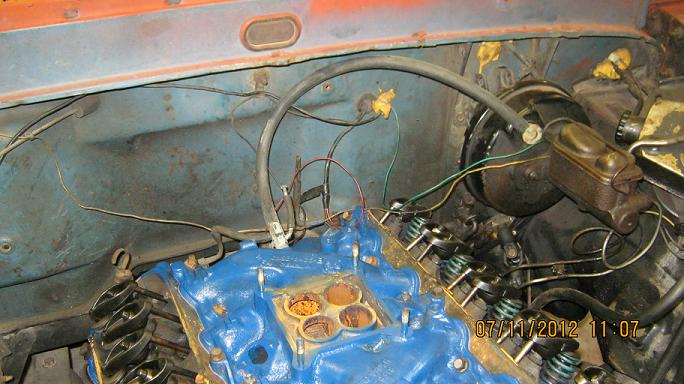
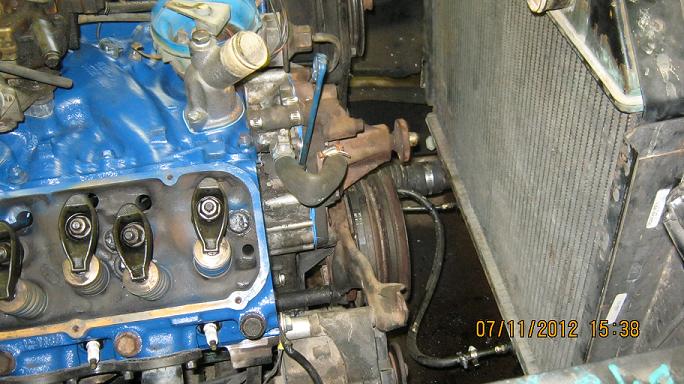
Connecting vac lines on the back of the intake.
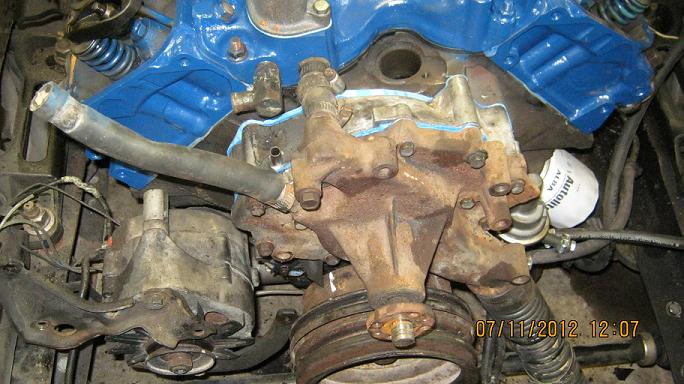
Water pump on.
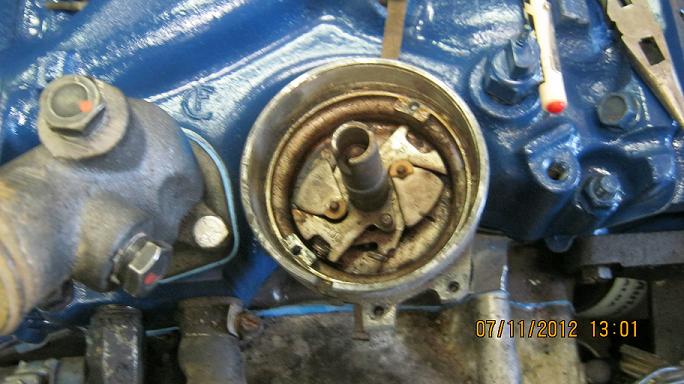
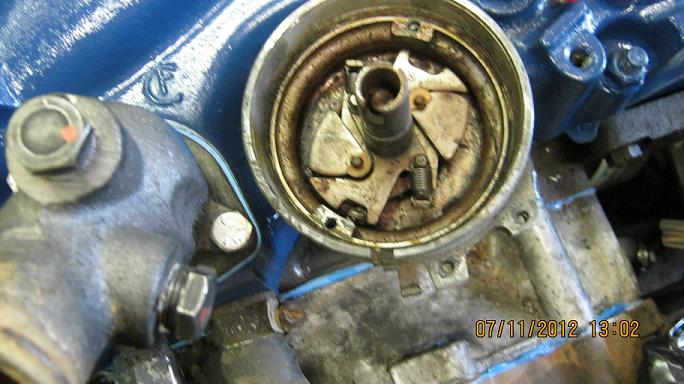
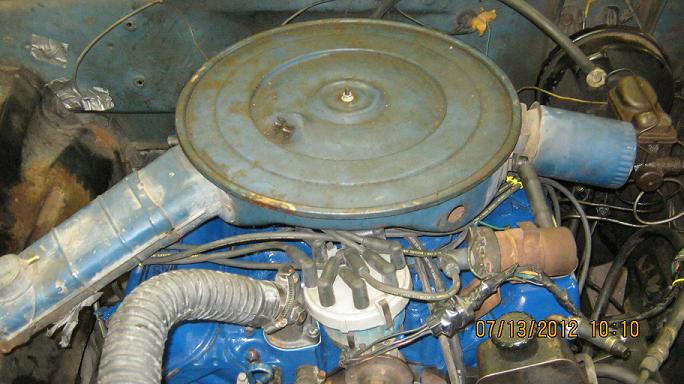
Distributor tore down for recurving. I had 10L & 15L slots in mine. It was originally set on the 15L slot. I moved it to the 10L slot. It may get moved back we will see how it all goes.
Distributor back together, PS pump on, 1" carb spacer & carb on.
Valve covers going on.
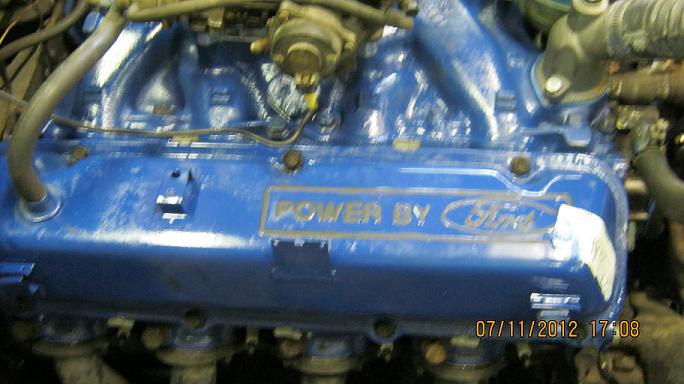
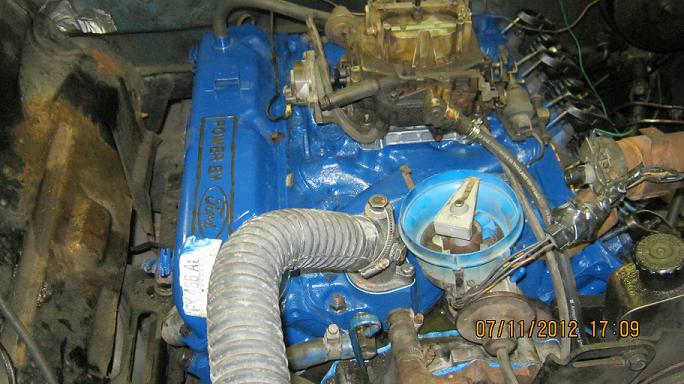
Air cleaner on. Still needs painted & will be replaced with a pretty one in the future.
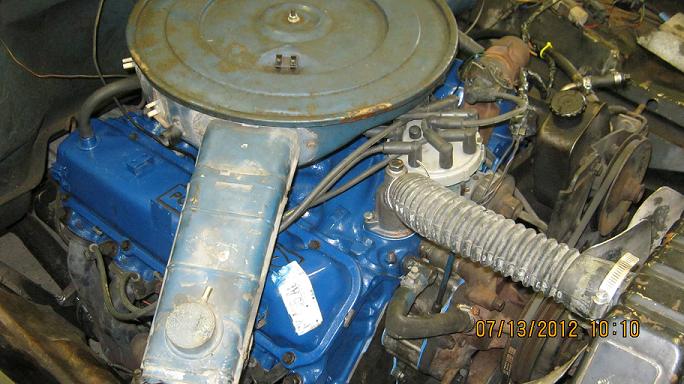
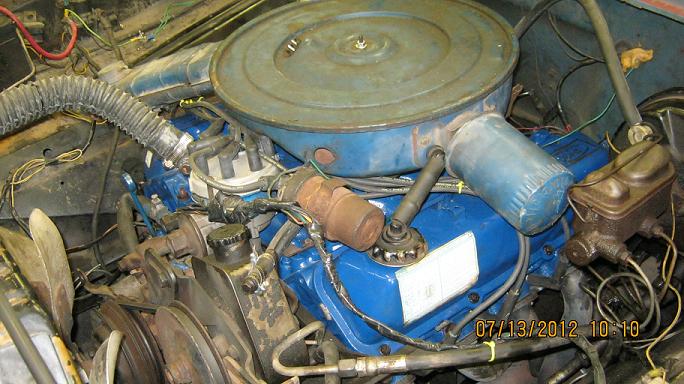
This has definitely "woke up the sleeping giant". Hopefully Monday I am picking up a 750 dp for the engine. It has been worth every bit of effort. The higher compression has given her a deeper, throatier sound out the pipes. Pulling out of the driveway for the test drive I got sideways with it without even trying. That woke me up.
Cleaning major parts at the car wash.
Timing cover on, heads set in place & putting the head bolts in.
Rockers back in & intake on.
Nothing like getting into your work. All the bending over doing this still has my back feeling it. Gotta love getting old. Bolting on the left header in this pic.
Connecting vac lines on the back of the intake.
Water pump on.
Distributor tore down for recurving. I had 10L & 15L slots in mine. It was originally set on the 15L slot. I moved it to the 10L slot. It may get moved back we will see how it all goes.
Distributor back together, PS pump on, 1" carb spacer & carb on.
Valve covers going on.
Air cleaner on. Still needs painted & will be replaced with a pretty one in the future.
This has definitely "woke up the sleeping giant". Hopefully Monday I am picking up a 750 dp for the engine. It has been worth every bit of effort. The higher compression has given her a deeper, throatier sound out the pipes. Pulling out of the driveway for the test drive I got sideways with it without even trying. That woke me up.

#160
07-14-2012, 01:39 PM
Depending on fuel quality you may be better with the less advance in the distributor. But it's not just the slot that gives you advance. Your weights and slots and springs along with max rpm all come into play. I've had to grind some off the weights, I've lengthened a slot more, I've used two different springs. Finding the sweet spot takes time. Be patient. I'm guessing you're gonna max out timing around 36-37 total timing at 6000rpm. Probably want to try setting timing and advance with and without vacuum. I run all mechanical advance on most of my cars and street trucks. I only run vacuum advance on my work trucks cause it will retard timing when I lug the motor and helps with not pinging.
Especially with a double pump carb, you don't need vacuum advance.
Especially with a double pump carb, you don't need vacuum advance.
#161
08-30-2012, 08:12 PM
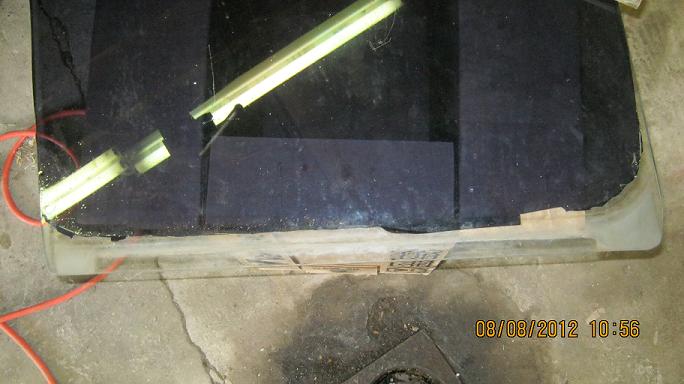
I installed pwr windows in my truck some time back with issues. Always had a plan to get back to it & fix my mistakes. When I originally did the install I used the track on my windows which was the beginning of my mistake. The next thing I did wrong was I set the regulator at halfway & mounted based on that with the window halfway up. The track on the bump windows is narrower & shorter. The original track is still on the window in this picture with the F150 track laying on the window just above it
This required grinding the nylon down on the end of the '90 F150 regulators so that it would fit.
This is what the nylon looks like when in the F150.
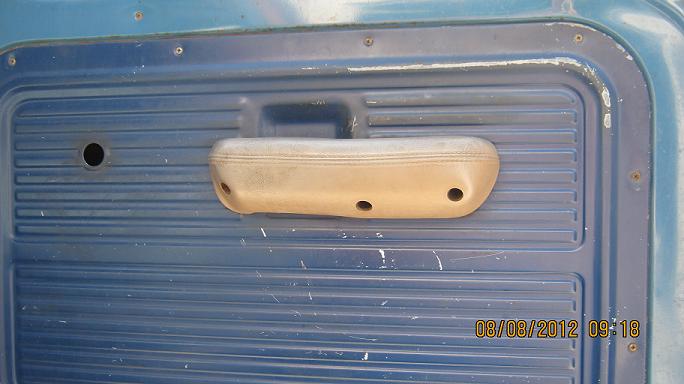
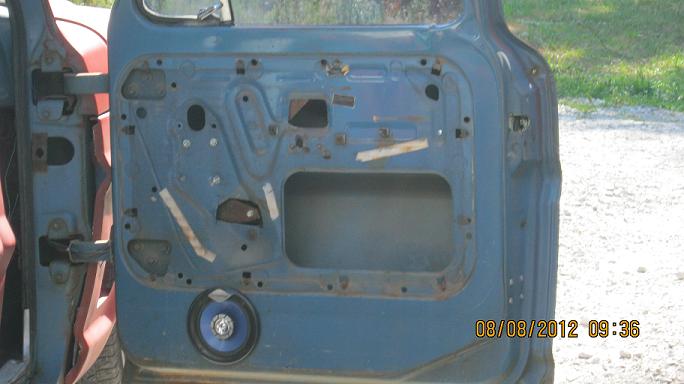
We start by removing the door panel. I assume most all know how to do that.
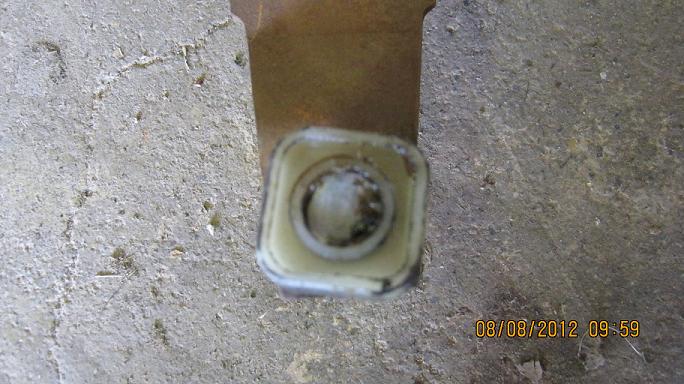
You will notice a screw located just above the door panel. This screw is part of what hold the vent window in. You will also notice I have a hole in my door panel. That is where the crank was. In this next image we see 3 screws running up the front of the door. These too help hold the vent window in place.
In this picture you will see I have made 2 cuts in the door to remove the recessed areas. They are in the way of the regulator movement. Just below the regulator gear you see a nut. That is the final piece that holds the vent window in place.
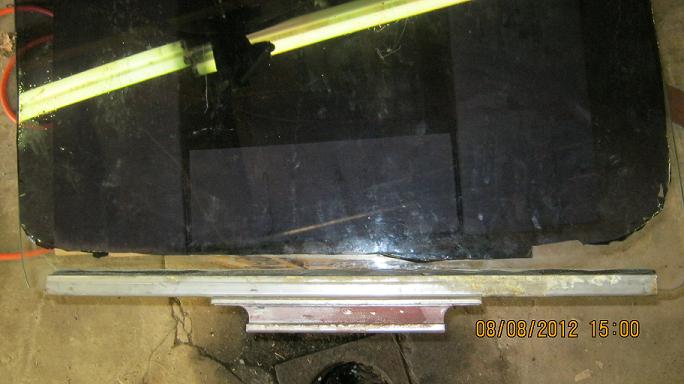
Since we will be changing the track we need to remove the vent window in order to remove the main glass. Once it is removed either you can change the track or you can take it to a local glass shop & they will do it for you. I was going to do mine but the rubber was so far deteriorated I ended up taking it to a glass shop. It cost $10 to have them put it together with new rubber. A great investment in my opinion. Here is the window with the track removed.
Here is the window after I got it back from the glass shop.
You will notice in the picture of the door with the panel removed 3 shiny nuts. Those are what was holding the regulator in place. What you want to do is set the regulator in the all the way down position. At this point when laced into the track You will be able to line up one of the holes with the lower right original regulator hole. You will also notice that the window travels upward through the door on an angle. You want to set the regulator up to match this angle of travel as best as you can. This reduces stress on all the pieces involved. I used 1/4" flat washers that I glued together. In this lower right corner I used 9 washers. I had to move slightly to the left of my original holes from the 1st attempt. In the top right I used 5 washers & top left I used 7. I used a small tie wrap laced through the washers to lower them in place without losing them in the bottom of the door. It worked well.
You major issue in doing this is the hinge mounts at the front of the door but spacing the regulator out to match travel path allows the regulator to clear with no interference. This is a great mod in my opinion that can be accomplished with factory parts. Cost to accomplish is minimal. Regulator with motor & track from Pull A Part is $20.xx per door. Not sure what switches & the harness would cost but I am betting you will come in under $75. Any future problems & you are using off the shelf Ford parts that you can get at any parts store.
This required grinding the nylon down on the end of the '90 F150 regulators so that it would fit.
This is what the nylon looks like when in the F150.
We start by removing the door panel. I assume most all know how to do that.
You will notice a screw located just above the door panel. This screw is part of what hold the vent window in. You will also notice I have a hole in my door panel. That is where the crank was. In this next image we see 3 screws running up the front of the door. These too help hold the vent window in place.
In this picture you will see I have made 2 cuts in the door to remove the recessed areas. They are in the way of the regulator movement. Just below the regulator gear you see a nut. That is the final piece that holds the vent window in place.
Since we will be changing the track we need to remove the vent window in order to remove the main glass. Once it is removed either you can change the track or you can take it to a local glass shop & they will do it for you. I was going to do mine but the rubber was so far deteriorated I ended up taking it to a glass shop. It cost $10 to have them put it together with new rubber. A great investment in my opinion. Here is the window with the track removed.
Here is the window after I got it back from the glass shop.
You will notice in the picture of the door with the panel removed 3 shiny nuts. Those are what was holding the regulator in place. What you want to do is set the regulator in the all the way down position. At this point when laced into the track You will be able to line up one of the holes with the lower right original regulator hole. You will also notice that the window travels upward through the door on an angle. You want to set the regulator up to match this angle of travel as best as you can. This reduces stress on all the pieces involved. I used 1/4" flat washers that I glued together. In this lower right corner I used 9 washers. I had to move slightly to the left of my original holes from the 1st attempt. In the top right I used 5 washers & top left I used 7. I used a small tie wrap laced through the washers to lower them in place without losing them in the bottom of the door. It worked well.
You major issue in doing this is the hinge mounts at the front of the door but spacing the regulator out to match travel path allows the regulator to clear with no interference. This is a great mod in my opinion that can be accomplished with factory parts. Cost to accomplish is minimal. Regulator with motor & track from Pull A Part is $20.xx per door. Not sure what switches & the harness would cost but I am betting you will come in under $75. Any future problems & you are using off the shelf Ford parts that you can get at any parts store.
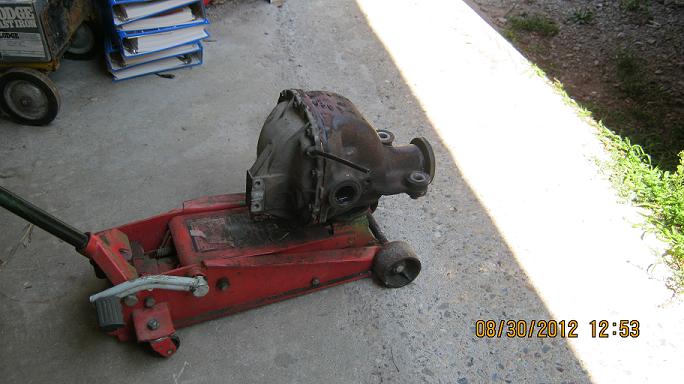
#162
08-30-2012, 08:14 PM
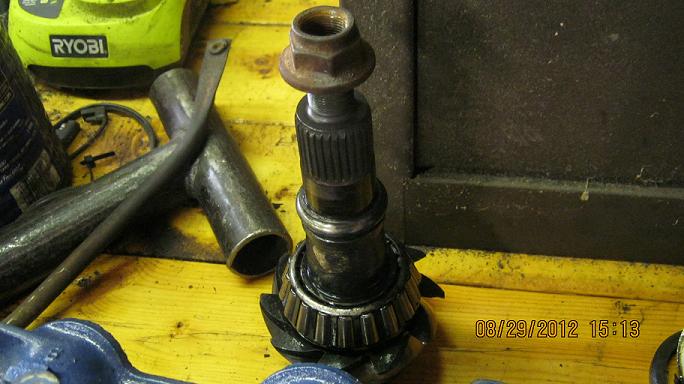
What is this you ask. It is the pinion gear from my 4.10 gears going in my truck!
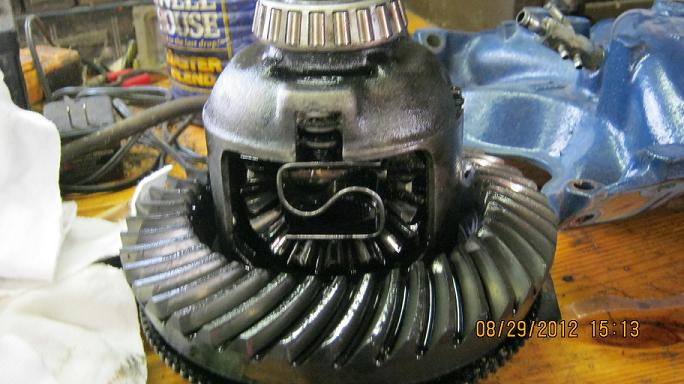
Here is the Limited Slip carrier. Life is good!
I actually found a set of the 3.55s that I originally wanted today. My wife would have divorced me if I didn't do the 4.10 gears. Ok not really but she did want the lower gears.
Here is the Limited Slip carrier. Life is good!
I actually found a set of the 3.55s that I originally wanted today. My wife would have divorced me if I didn't do the 4.10 gears. Ok not really but she did want the lower gears.
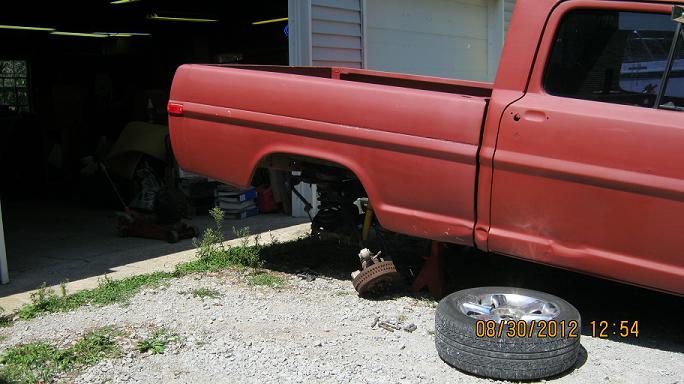
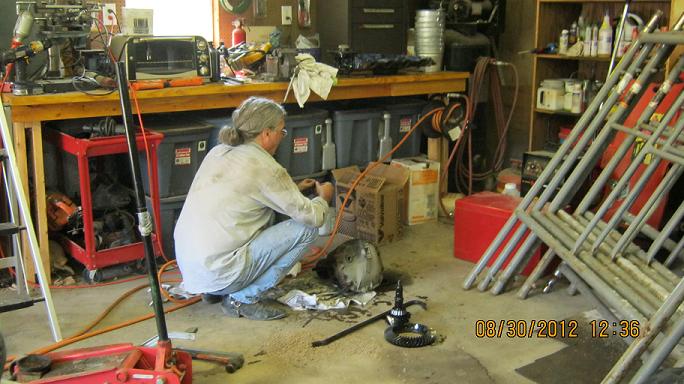
#163
08-30-2012, 08:15 PM
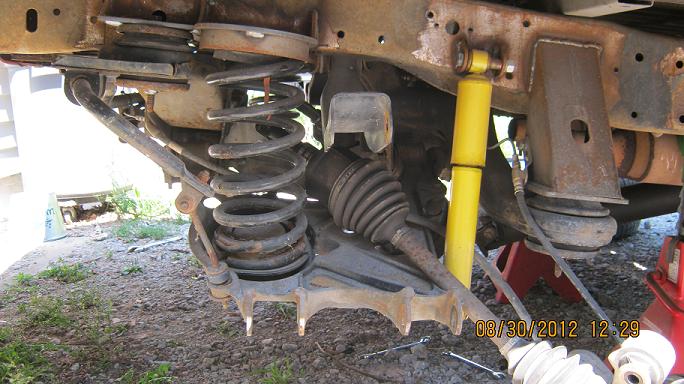
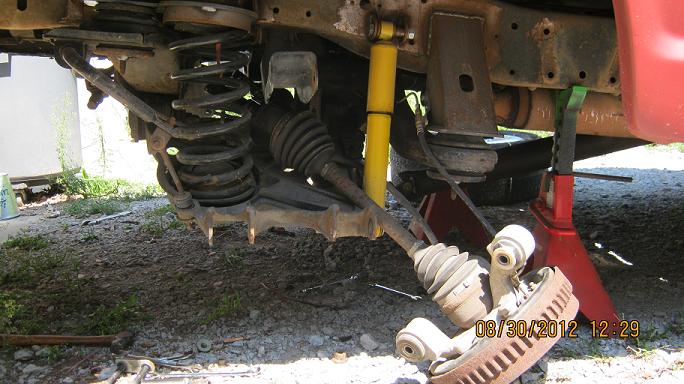
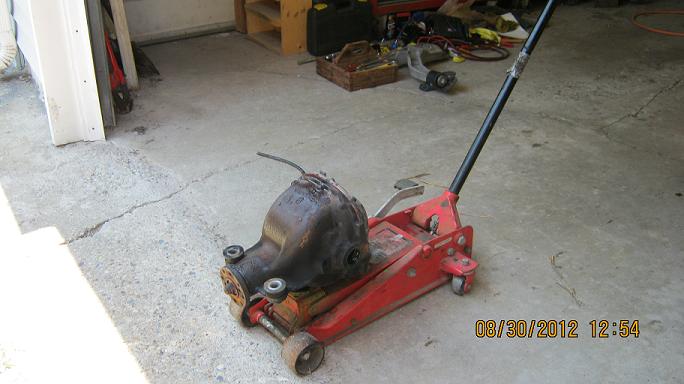
I swapped out the rear gears today from 3.08 to 4.10.
A couple pics from behind after the rear was out of the truck.

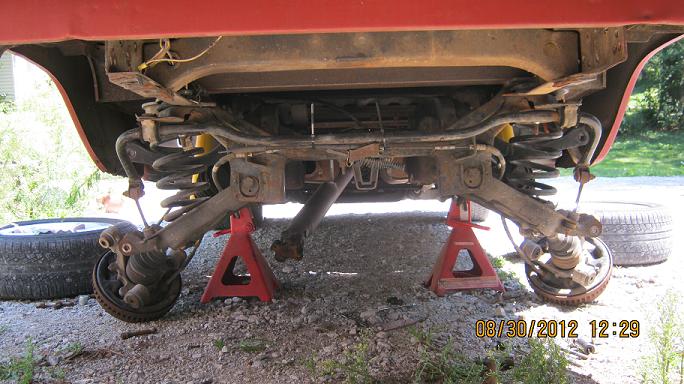
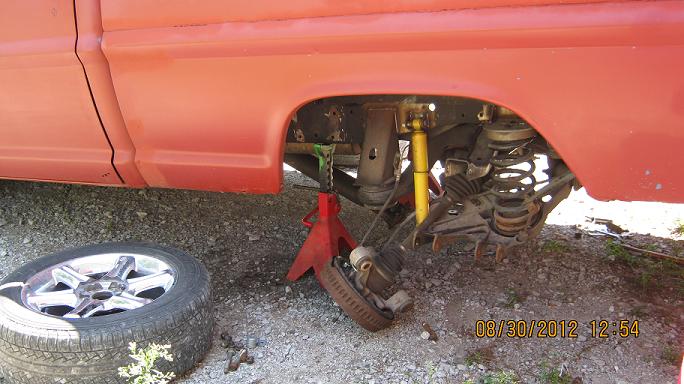
The spindle is held on with 3 bolts. I left the axle shaft in the hub & dropped the entire spindle axle shaft & all.
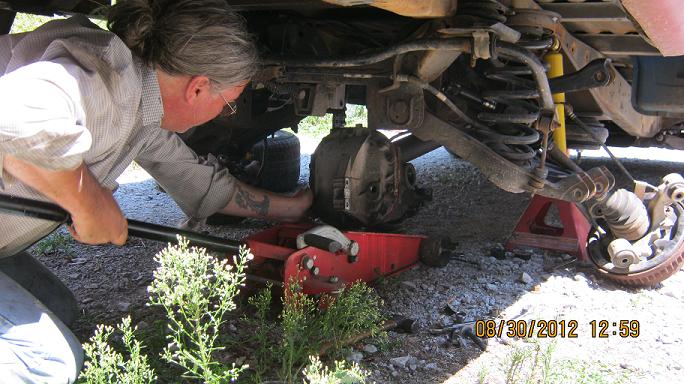
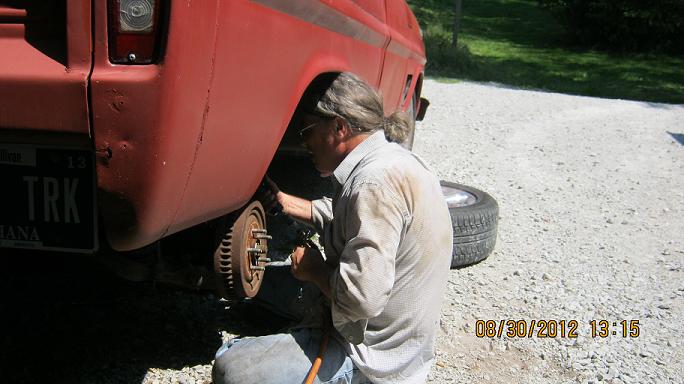
Time to do something about all that grey hair! All you young guys this is what happens to your hair from working on old trucks! I have the gears swapped in this pic. The old gears are sitting on the floor next to me. I was pulling the fill plug from the rear cover in preparation for the install.
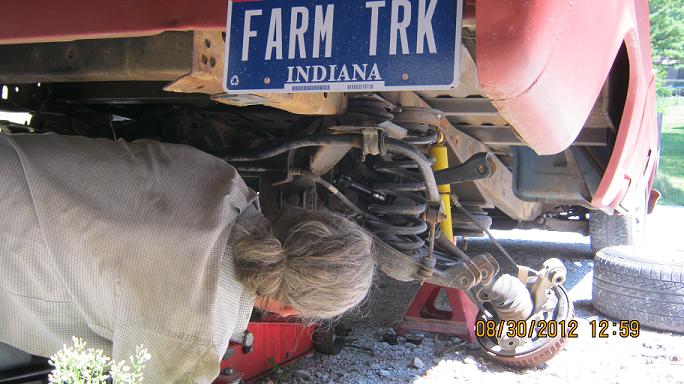
Staging for the install.
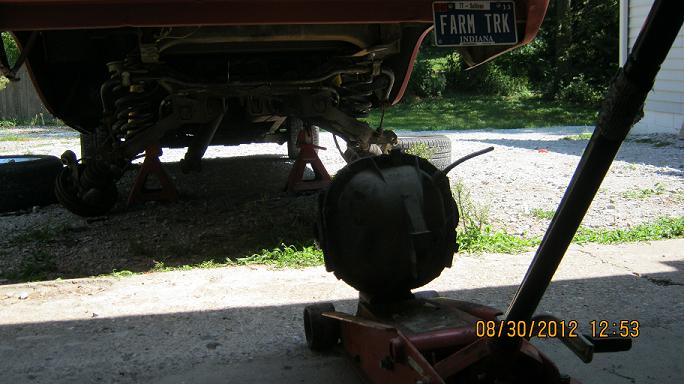
Getting it under the truck & aligned for install.
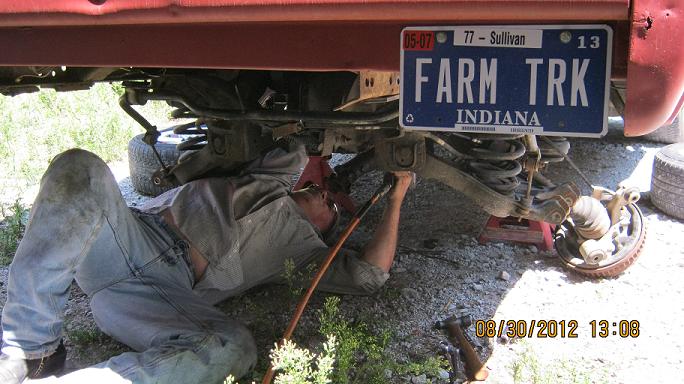
Running up the 2 front mount bolts.
Finishing up with getting the spindle back in place.
Final step prior to adding fluid. Reinstalling the driveshaft.

I have not a chance to do much driving with the new gears yet but what I have done I think I went too far. Quicker? Not so sure. I will probably end up trying either 3.73 gears next or the 3.55 ratio I originally wanted.
A couple pics from behind after the rear was out of the truck.
The spindle is held on with 3 bolts. I left the axle shaft in the hub & dropped the entire spindle axle shaft & all.
Time to do something about all that grey hair! All you young guys this is what happens to your hair from working on old trucks! I have the gears swapped in this pic. The old gears are sitting on the floor next to me. I was pulling the fill plug from the rear cover in preparation for the install.
Staging for the install.
Getting it under the truck & aligned for install.
Running up the 2 front mount bolts.
Finishing up with getting the spindle back in place.
Final step prior to adding fluid. Reinstalling the driveshaft.
I have not a chance to do much driving with the new gears yet but what I have done I think I went too far. Quicker? Not so sure. I will probably end up trying either 3.73 gears next or the 3.55 ratio I originally wanted.
#165
08-31-2012, 11:07 AM