Pics/description of audio upgrade in 2011 F250 CC
#1
 08-04-2011, 07:11 PM

Join Date: Oct 2010
Location: NW IN.
Posts: 2,525
Likes: 0
Received 0 Likes
on
0 Posts
Pics/description of audio upgrade in 2011 F250 CC
I have finally gotten almost everything done. All I have left to do is the Polk tweeters up front. I'm still toying with the placement which is why I don't have any installed pics on those. They will be coming though. Please excuse all the pics but I know we all love to look at what others have done and I'm only trying to oblige. 
I'd like to preface the rest of this post by saying this is a budget install in the grand scheme of things. My total cost including all components, cables and hardware was just under $1100. That might seem like a lot to some of you, but there are guys here who have spent twice that on one set of component speakers. There were no custom amp rack builds, speaker box fabrications or truck modifications done other than trimming the fabric against the rear wall for the sub box. You can buy everything I did and get the same results with a few days (total) labor and basic stereo installation knowledge. I did a bit here and a bit there over a period of several months due to time constraints.
There are a couple things I neglected to photograph along the way such as the panel removal procedures, the PAC AOEM FRD24 unit installation (which enabled me to keep the factory head unit) and rear seat removal for the sub/amp install. If anyone has any questions on how to go about those, let me know. I'll tell you what I know (about the 2011's anyway).
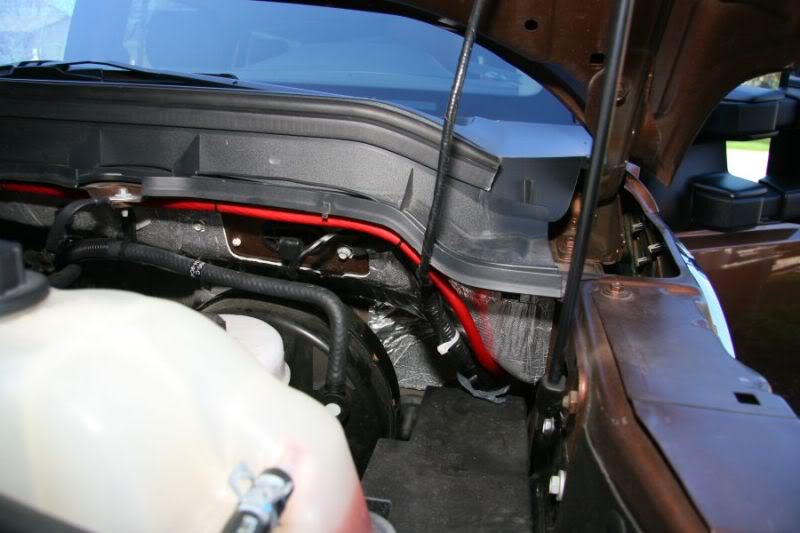
My first order of business was mounting the main fuse holder. After that I ran the cable across the engine compartment cowl and down the firewall on the drivers side.
IMG_7399r.jpg?t=1312498511
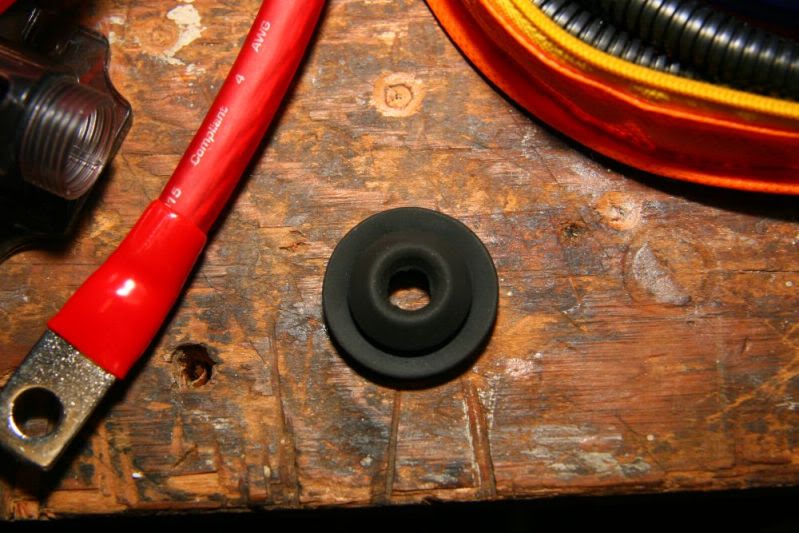
Now I had to and get the 4ga power cable into the cabin. I poked around and found an unused grommet in the firewall behind the pedals on the drivers side. Just so happens it was the perfect size for the cable.
Here's the grommet. Pay close attention to the 2 studs sticking out of the firewall on the right side of the pic. Those came in extremely handy later on.
IMG_7388r.jpg?t=1312498838
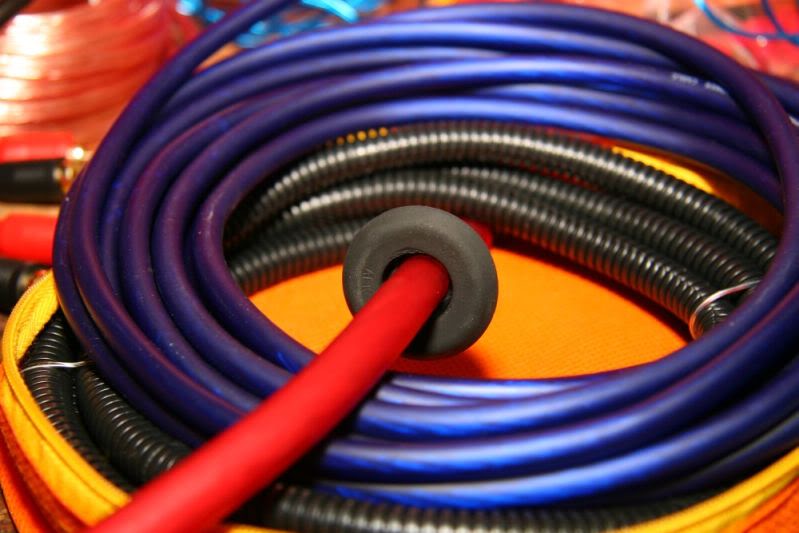
All I had to do was cut a hole in the grommet, put it back in and thread the cable through.
Through some research I found another gentleman who had mounted a small amp on the firewall behind the pedals on the drivers' side. Awesome idea I thought, so that's where it was decided my 4 channel for the door and rear speakers was going to go. Here was a quick mock-up of the positioning...
IMG_7408r.jpg?t=1312499430
Before we continue, here is a shot of the main components being installed, minus the sub box, PAC unit, amp kits, cables and such.
2 10" Alpine SWS-1023D dual 2 ohm voice coil subs.
2 sets of JL Audio TR570-CXi 5x7 2 way speakers
1 set of Polk Audio db 1001 1" silk dome tweeters
1 Boss Audio CX350 4 channel amp rated at 50w x 4 RMS
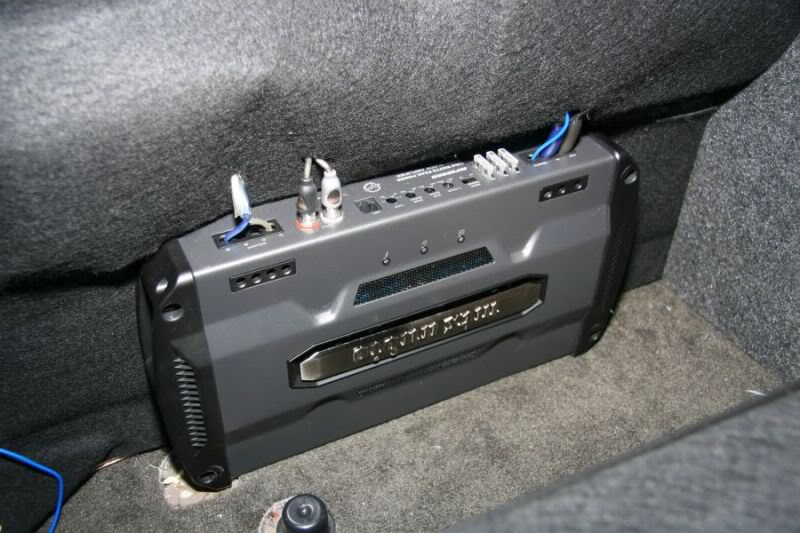
1 MTX RFL600D class D monoblock subwoofer amp rated at 600 RMS @2 ohms
1 Clarion EQS746 7 band graphic equalizer
IMG_8698r.jpg?t=1312499596
Here are the door and rear speakers installed. I used 6x8 baffles behind each one.
IMG_8702r.jpg?t=1312500831
IMG_8700r.jpg?t=1312500875
Next up Is the EQ. I had to fab some brackets to get it where I wanted it, under the steering wheel and a little to the right. The reason I wanted this piece was to ease the integration of the factory head unit. The PAC unit gives you the necessary set of main inputs, and then the EQ gives you front, rear and sub line level outputs. No brainer.
IMG_7828r.jpg?t=1312501041
Brackets installed...
EQ installed...
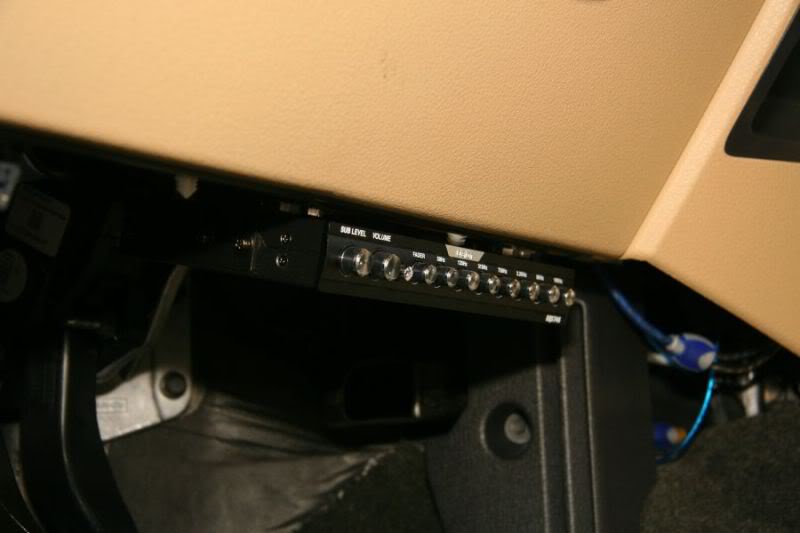
IMG_7836r.jpg?t=1312501336
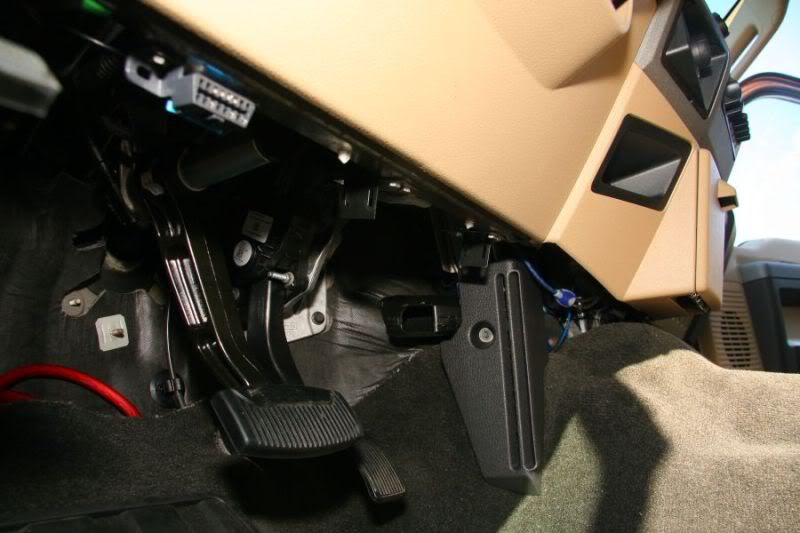
Ok. Remember those studs I mentioned earlier? Here they are being put to use as mounts for the distribution block and remote turn-on relay.
IMG_8703r.jpg?t=1312501255
Here's the 4 channel installed. Don't mind the wire mess as it has since been neatened up. Had to make sure it all worked!
IMG_8704r.jpg?t=1312501462
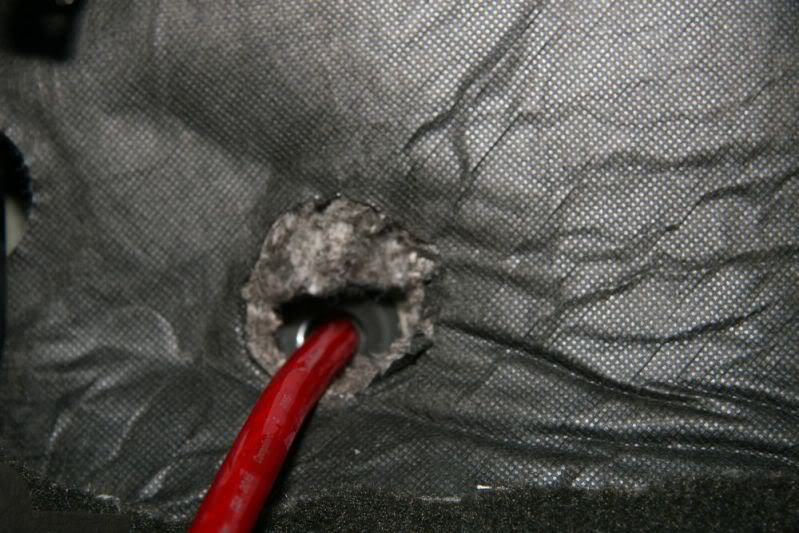
Next are the sub box and MTX install. First pic is the box in place (the seat is unbolted and moved forward, which it has to be to put the box into place, and it also made the amp install much easier).
IMG_8724r.jpg?t=1312501575
Here's the amp mocked up.
IMG_8715r.jpg?t=1312501792
Here is the amp installed.
And here is a pic with the seat back in.
IMG_8723r.jpg?t=1312501976
That's all I have for now. I will say I wasn't expecting this system to sound as good as the 2 12's and Infinity set up in my Windstar, but I was wrong. Those $63 subs and $150 box (properly assembled) are very impressive. Nice tight, clean, deep bass. Far better than I was expecting!
The JL's are also more than expected. And as soon as the Polk's are in, I'm sure I'll be an even happier camper. The Clarion doesn't hurt either and made utilizing the factory head unit a breeze.
Hope somebody got some useful info out of all this or at least enjoyed the pics!

I'd like to preface the rest of this post by saying this is a budget install in the grand scheme of things. My total cost including all components, cables and hardware was just under $1100. That might seem like a lot to some of you, but there are guys here who have spent twice that on one set of component speakers. There were no custom amp rack builds, speaker box fabrications or truck modifications done other than trimming the fabric against the rear wall for the sub box. You can buy everything I did and get the same results with a few days (total) labor and basic stereo installation knowledge. I did a bit here and a bit there over a period of several months due to time constraints.
There are a couple things I neglected to photograph along the way such as the panel removal procedures, the PAC AOEM FRD24 unit installation (which enabled me to keep the factory head unit) and rear seat removal for the sub/amp install. If anyone has any questions on how to go about those, let me know. I'll tell you what I know (about the 2011's anyway).
My first order of business was mounting the main fuse holder. After that I ran the cable across the engine compartment cowl and down the firewall on the drivers side.
IMG_7399r.jpg?t=1312498511
Now I had to and get the 4ga power cable into the cabin. I poked around and found an unused grommet in the firewall behind the pedals on the drivers side. Just so happens it was the perfect size for the cable.
Here's the grommet. Pay close attention to the 2 studs sticking out of the firewall on the right side of the pic. Those came in extremely handy later on.
IMG_7388r.jpg?t=1312498838
All I had to do was cut a hole in the grommet, put it back in and thread the cable through.
Through some research I found another gentleman who had mounted a small amp on the firewall behind the pedals on the drivers' side. Awesome idea I thought, so that's where it was decided my 4 channel for the door and rear speakers was going to go. Here was a quick mock-up of the positioning...
IMG_7408r.jpg?t=1312499430
Before we continue, here is a shot of the main components being installed, minus the sub box, PAC unit, amp kits, cables and such.
2 10" Alpine SWS-1023D dual 2 ohm voice coil subs.
2 sets of JL Audio TR570-CXi 5x7 2 way speakers
1 set of Polk Audio db 1001 1" silk dome tweeters
1 Boss Audio CX350 4 channel amp rated at 50w x 4 RMS
1 MTX RFL600D class D monoblock subwoofer amp rated at 600 RMS @2 ohms
1 Clarion EQS746 7 band graphic equalizer
IMG_8698r.jpg?t=1312499596
Here are the door and rear speakers installed. I used 6x8 baffles behind each one.
IMG_8702r.jpg?t=1312500831
IMG_8700r.jpg?t=1312500875
Next up Is the EQ. I had to fab some brackets to get it where I wanted it, under the steering wheel and a little to the right. The reason I wanted this piece was to ease the integration of the factory head unit. The PAC unit gives you the necessary set of main inputs, and then the EQ gives you front, rear and sub line level outputs. No brainer.
IMG_7828r.jpg?t=1312501041
Brackets installed...
EQ installed...
IMG_7836r.jpg?t=1312501336
Ok. Remember those studs I mentioned earlier? Here they are being put to use as mounts for the distribution block and remote turn-on relay.
IMG_8703r.jpg?t=1312501255
Here's the 4 channel installed. Don't mind the wire mess as it has since been neatened up. Had to make sure it all worked!
IMG_8704r.jpg?t=1312501462
Next are the sub box and MTX install. First pic is the box in place (the seat is unbolted and moved forward, which it has to be to put the box into place, and it also made the amp install much easier).
IMG_8724r.jpg?t=1312501575
Here's the amp mocked up.
IMG_8715r.jpg?t=1312501792
Here is the amp installed.
And here is a pic with the seat back in.
IMG_8723r.jpg?t=1312501976
That's all I have for now. I will say I wasn't expecting this system to sound as good as the 2 12's and Infinity set up in my Windstar, but I was wrong. Those $63 subs and $150 box (properly assembled) are very impressive. Nice tight, clean, deep bass. Far better than I was expecting!
The JL's are also more than expected. And as soon as the Polk's are in, I'm sure I'll be an even happier camper. The Clarion doesn't hurt either and made utilizing the factory head unit a breeze.
Hope somebody got some useful info out of all this or at least enjoyed the pics!

#3
08-05-2011, 02:46 PM
#5
08-06-2011, 10:18 PM
Join Date: Oct 2010
Location: NW IN.
Posts: 2,525
Likes: 0
Received 0 Likes
on
0 Posts
Thanks! I'll try not to. 
Thanks. It did take some time to put the post together. Glad to do it though!
Thanks! New door speakers do wonders. The rest doesn't hurt either. 
Thanks. It did take some time to put the post together. Glad to do it though!
#6
08-14-2011, 08:40 PM

Senior User
Join Date: Jun 2009
Location: Cape Girardeau, Mo
Posts: 105
Likes: 0
Received 0 Likes
on
0 Posts
#7
08-15-2011, 01:47 AM
Join Date: Oct 2010
Location: NW IN.
Posts: 2,525
Likes: 0
Received 0 Likes
on
0 Posts
And can you reach that EQ without leaning down? Not knockin' just asking.
Trending Topics
#8
08-15-2011, 08:40 PM

#9
08-16-2011, 04:24 AM
Join Date: Oct 2010
Location: NW IN.
Posts: 2,525
Likes: 0
Received 0 Likes
on
0 Posts
Heck no I didn't build it. That's way over my head and quite frankly, I don't have the patience or tools to do it.

I got the box from SuperCrewSound. I was originally going to go with a box from BoxWorx but the SCS box was $130 less (which incidentally was the total I paid for the 2 subs). I'm not sure if the BW box is worth the extra money or not. I do know the SCS box needed a little attention before I installed it and it does have 3 imperfections in the carpeting. Most likely from shipping but still. If it wasn't hidden behind the seat, SCS and I would have had an issue to resolve.
Nice post BTW. I love a clean system install. I should have taken pics during mine..
#10
08-16-2011, 05:24 AM
Lead Driver
I'm not sure if the BW box is worth the extra money or not. I do know the SCS box needed a little attention before I installed it and it does have 3 imperfections in the carpeting. Most likely from shipping but still. If it wasn't hidden behind the seat, SCS and I would have had an issue to resolve.
#11
08-16-2011, 05:35 AM
Join Date: Oct 2010
Location: NW IN.
Posts: 2,525
Likes: 0
Received 0 Likes
on
0 Posts
#12
10-07-2011, 02:30 AM

#13
10-07-2011, 03:43 PM
Join Date: Oct 2010
Location: NW IN.
Posts: 2,525
Likes: 0
Received 0 Likes
on
0 Posts
For the 4 channel up front I used a Raptor ISPKBL8-BG. It's just a cheap kit for a cheap amp, but it works just fine.
For the sub amp I used a Rockford Fosgate RFK4I. Since I used the 4 gauge from this kit to get the power to my distribution block, I also had to order another 20 ft. of 4 gauge to run to the amp behind the rear seat. That was Kicker 09PWB4-20FT. My primary reason for using these two was that Kicker and Fosgate are true-to-gauge. When they say 4 gauge, that's what you're getting. With the cheapo kits, the 4 gauge is closer to 8 gauge. I wasn't going to skimp when it came to the subs, and it paid off. I also bought 18 ft. of Monster Cable XLN 12S-18 speaker wire for the subs, though it has been discontinued at SonicElectronix.
The install was a piece of cake, though I'm not sure it will work with the Nav unit. I know for sure it won't work with the factory amplified THX sound system, at least that's what the literature says. If I were you I'd call PAC directly or e-mail them and verify.
For the sub amp I used a Rockford Fosgate RFK4I. Since I used the 4 gauge from this kit to get the power to my distribution block, I also had to order another 20 ft. of 4 gauge to run to the amp behind the rear seat. That was Kicker 09PWB4-20FT. My primary reason for using these two was that Kicker and Fosgate are true-to-gauge. When they say 4 gauge, that's what you're getting. With the cheapo kits, the 4 gauge is closer to 8 gauge. I wasn't going to skimp when it came to the subs, and it paid off. I also bought 18 ft. of Monster Cable XLN 12S-18 speaker wire for the subs, though it has been discontinued at SonicElectronix.
How did the PAC install go? I have the factory NAV hopefully it will work with the PAC.