
New "X" Toy hauler
#16
 06-08-2011, 12:07 AM


Join Date: May 2011
Posts: 139
Likes: 0
Received 0 Likes
on
0 Posts
Step 2 - Elevate the truck and get the stress off of the front springs
a - Loosen the lug nuts so when you lift up the front end, you are still able get the wheels off
b - Jack up the truck and put some big stands under the frame rails, just behind the front spring hangers
c - Remove the wheels
d - Lower the front axle on to some smaller stands so that the front springs are sitting in a no stress state (slightly curved with the ends up)
#17
06-08-2011, 12:12 AM
Join Date: May 2011
Posts: 139
Likes: 0
Received 0 Likes
on
0 Posts
Step 3 - Remove the shocks. These are easy. Nut and bolt at the bottom end, nut on the top end
Step 4 - Disconnect the sway bar. 2 bolts on each side where the sway bar is mounted to the axle (this is also where the bushings are for the sway bar - good idea to change these). Just leave the sway bar hanging for now. It's out of the way

Step 4 - Disconnect the sway bar. 2 bolts on each side where the sway bar is mounted to the axle (this is also where the bushings are for the sway bar - good idea to change these). Just leave the sway bar hanging for now. It's out of the way
#18
06-08-2011, 07:14 PM

Life is so funny some times.
During the winter there are numerous threads of people asking
"where is the block heater cord" I need to plug-in it's cold here.
Here you are posting pictures and provide "THE" best picture
of the block heater cord I have seen so far.
Great write-up and welcome to FTE.
During the winter there are numerous threads of people asking
"where is the block heater cord" I need to plug-in it's cold here.
Here you are posting pictures and provide "THE" best picture
of the block heater cord I have seen so far.
Great write-up and welcome to FTE.
#19
06-09-2011, 07:48 AM
Join Date: May 2011
Posts: 139
Likes: 0
Received 0 Likes
on
0 Posts
Check the tires too...make sure they are E rated tires as some folks have found D rated tires on their Ex's when they bought them...that will make a big difference too.
Ford initially equipped Ex's with D rated tires but I believe they had a recall and upgraded them all to E's.
joe.
Ford initially equipped Ex's with D rated tires but I believe they had a recall and upgraded them all to E's.
joe.
Anyone know (I imagine everyone but me does) which year they changed the backspacing on the superduties? If I am looking for factory wheels am I looking for pre.... 2006?
#20
06-09-2011, 08:01 AM

Elder User
#21
06-09-2011, 01:18 PM
Join Date: May 2011
Posts: 139
Likes: 0
Received 0 Likes
on
0 Posts
 . Actually that is the tether strap from one of my kids car seats. Amazingly, the velcro on my floor panels still works. All of the other Ex's I looked at while shopping had atleast one falling down, if not both.
#22
06-09-2011, 06:21 PM
Hotshot
Check the tires too...make sure they are E rated tires as some folks have found D rated tires on their Ex's when they bought them...that will make a big difference too.
Ford initially equipped Ex's with D rated tires but I believe they had a recall and upgraded them all to E's.
Ford initially equipped Ex's with D rated tires but I believe they had a recall and upgraded them all to E's.


#23
06-09-2011, 11:46 PM
Join Date: May 2011
Posts: 139
Likes: 0
Received 0 Likes
on
0 Posts
On we go
Step 5 - Remove the u-bolts - I was just going to cut them off (as I am of course, using new ones), but the nuts came off easy enough with a little WD-40 (I've worked on trucks with 300k and the u-bolts don't come off that easy.... you just cut them off)

Step 6 - Remove the old springs
a - with the u-bolts off you can drop the axle down to give you room to pull out the springs. Just don't stretch your brake lines too far!!
b - remove the bottom rad mounts to allow you to pull out the front spring bolt

c - remove the front mount bolts
d - disconnect the front end of the driveshaft. Remove the 4 bolts holding the u-bolt to the pinion flange. I did this to get the driver's rear spring bolt out of the shackle

e - remove the rear spring bolts (bottom of the shackles) and remove the springs
Step 5 - Remove the u-bolts - I was just going to cut them off (as I am of course, using new ones), but the nuts came off easy enough with a little WD-40 (I've worked on trucks with 300k and the u-bolts don't come off that easy.... you just cut them off)
Step 6 - Remove the old springs
a - with the u-bolts off you can drop the axle down to give you room to pull out the springs. Just don't stretch your brake lines too far!!
b - remove the bottom rad mounts to allow you to pull out the front spring bolt
c - remove the front mount bolts
d - disconnect the front end of the driveshaft. Remove the 4 bolts holding the u-bolt to the pinion flange. I did this to get the driver's rear spring bolt out of the shackle
e - remove the rear spring bolts (bottom of the shackles) and remove the springs

#25
06-10-2011, 12:26 AM
Join Date: May 2011
Posts: 139
Likes: 0
Received 0 Likes
on
0 Posts
Step 7 - Install the new spring
a - Put the spring in position. Install the front bolt. Put the nut on, but don't tighten yet.
b - Allign the rear spring bolt hole with the shackle. I had to turn the shackle to line them up. And they aren't easy to turn. So I put a wrench on the top bolt and turned it. This gives enough leverage to turn it enough to line up with the spring hole. Put the bolt in with the nut. Leave it loose
c - Lined up the axle perch with the spring center pin. The first side isn't too difficult, but the second side sure is. I used a couple of ratchet straps to line it up. One wrapped around the axle to pull it forward, another one around the spring and hub to pull the spring outward

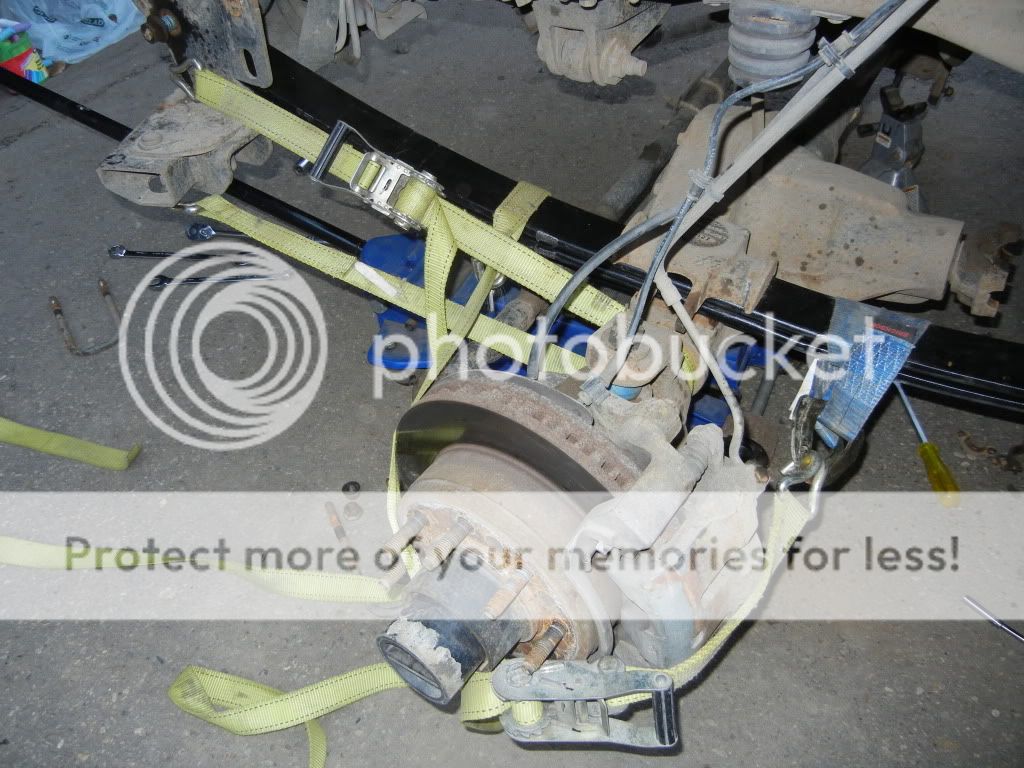
d - Once the center pin was lined up, I installed the u-bolts (with the shock mounts). I used my old u-bolts just for lining everything up because they had about 1/8" more width to them. Once everything was lined up, I changed them to the new ones.
e - Once all of the u-bolts are on, tighten all of them up. Tighten up the spring bolts at both ends, on both springs as well.
There, springs are on!!
a - Put the spring in position. Install the front bolt. Put the nut on, but don't tighten yet.
b - Allign the rear spring bolt hole with the shackle. I had to turn the shackle to line them up. And they aren't easy to turn. So I put a wrench on the top bolt and turned it. This gives enough leverage to turn it enough to line up with the spring hole. Put the bolt in with the nut. Leave it loose
c - Lined up the axle perch with the spring center pin. The first side isn't too difficult, but the second side sure is. I used a couple of ratchet straps to line it up. One wrapped around the axle to pull it forward, another one around the spring and hub to pull the spring outward
d - Once the center pin was lined up, I installed the u-bolts (with the shock mounts). I used my old u-bolts just for lining everything up because they had about 1/8" more width to them. Once everything was lined up, I changed them to the new ones.
e - Once all of the u-bolts are on, tighten all of them up. Tighten up the spring bolts at both ends, on both springs as well.
There, springs are on!!
#26
06-10-2011, 12:34 AM
Join Date: May 2011
Posts: 139
Likes: 0
Received 0 Likes
on
0 Posts
Step 8 - Install the shocks
I used front shocks from an F250. Rancho 9000s. Just left them on setting 5 for now. Easy install, however, the springs had just a little more droop than the shock, meaning the shock limited down travel slightly (And I think these are longer than the stock Ex shocks!!)
Step 9 - Install the swaybar
Installation is reverse of the removal. I did put the new bushings in however
Step 10 - Install the tires
My rims came with 2 of the 1/4" spacers per side. I hate that. This was to clear the steering arms on the knuckles. I mounted the wheels with one in and there is just under 1/8" of clearance between the rim and arm. That's good enough for me, so now there is only 1 spacer per side.
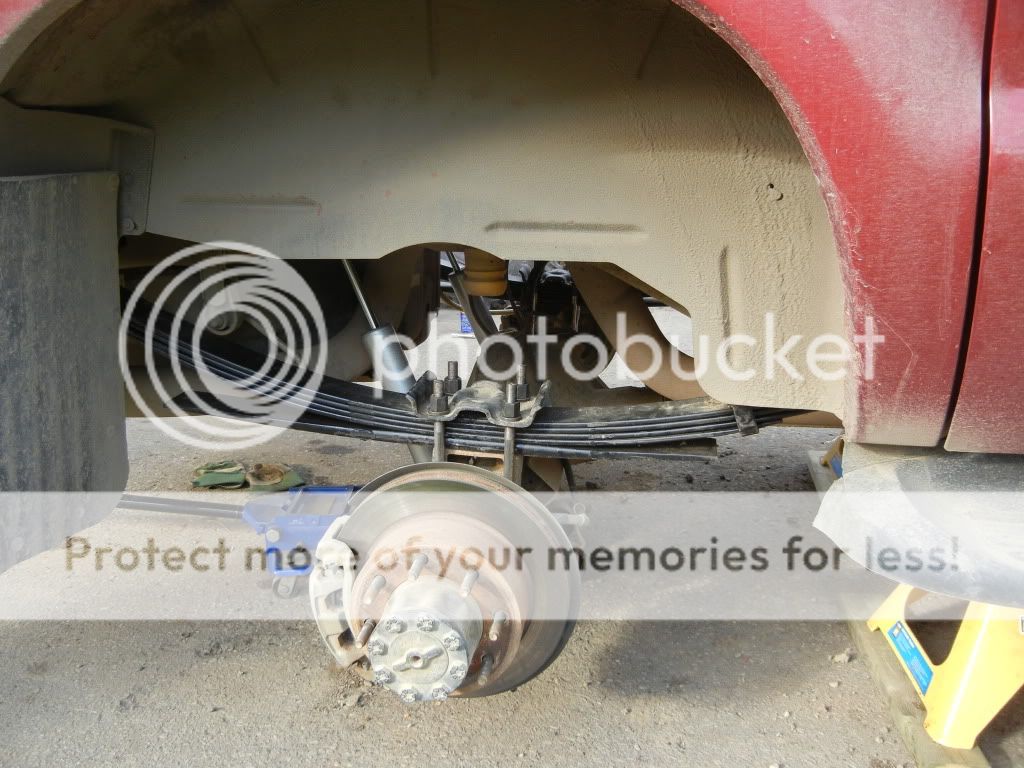
Here's the pic of everything installed. There is now about 3.5" of clearance to the bump stop. About 2.25" extra. This will settle down later I'm sure
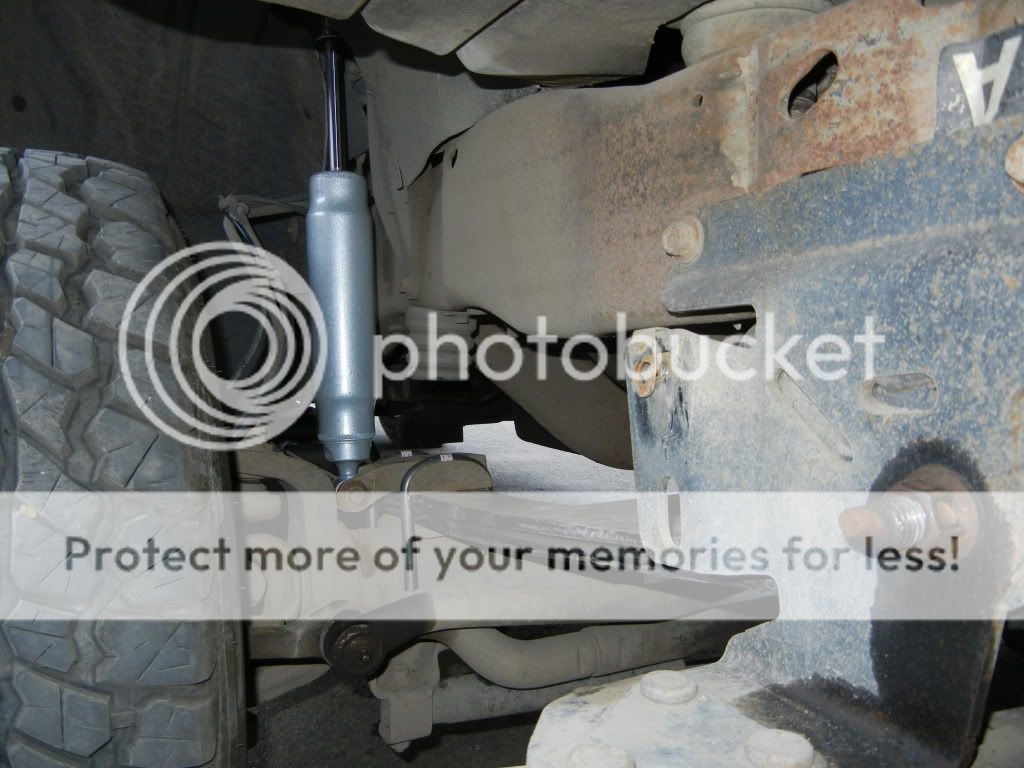
I used front shocks from an F250. Rancho 9000s. Just left them on setting 5 for now. Easy install, however, the springs had just a little more droop than the shock, meaning the shock limited down travel slightly (And I think these are longer than the stock Ex shocks!!)
Step 9 - Install the swaybar
Installation is reverse of the removal. I did put the new bushings in however
Step 10 - Install the tires
My rims came with 2 of the 1/4" spacers per side. I hate that. This was to clear the steering arms on the knuckles. I mounted the wheels with one in and there is just under 1/8" of clearance between the rim and arm. That's good enough for me, so now there is only 1 spacer per side.
Here's the pic of everything installed. There is now about 3.5" of clearance to the bump stop. About 2.25" extra. This will settle down later I'm sure
#27
06-10-2011, 12:39 AM
Join Date: May 2011
Posts: 139
Likes: 0
Received 0 Likes
on
0 Posts
I put the bumper on temporarily as I have a front receiver on it's way that I need to install. But I needed to take the truck for a drive.
It definately sits higher in the front (I think it even did before).
What a difference!!! With stiffer springs, the ride is smoother cause there is no more bottoming out. The front end rattle is gone too, although I don't know what fixed that. Ford said my shocks and sway bar bushings were gone, but the shocks were in great shape. The sway bar bushings were a little worn.
I can't believe the difference. I can't wait to get the rear done too.
#28
06-14-2011, 01:18 AM
Join Date: May 2011
Posts: 139
Likes: 0
Received 0 Likes
on
0 Posts
Well finally got on to the rear suspension
Step 1 - Lifted the truck up just like I did the front. Put some big stands under the frame ahead of the rear springs, and used some small jack stands under the axle
Step 2 - Removed the wheels
Step 3 - Removed the shocks. There is a nut/bolt at the bottom end and 2 bolts that bolt up into the bottom of the body. Just need to use a couple long extensions on the socket wrench
Step 4 - Removed the u-bolts on the driver's side.
Step 5 - Removed the driver's side spring
a - removed the lower bolt of the rear spring shackle (left the shackle attached to the spring.... for now)
b - removed the front spring bolt
c - lower the axle and slide the spring out. (having a buddy help would be great at this stage, but I did it myself, so I'm sure you can too!)
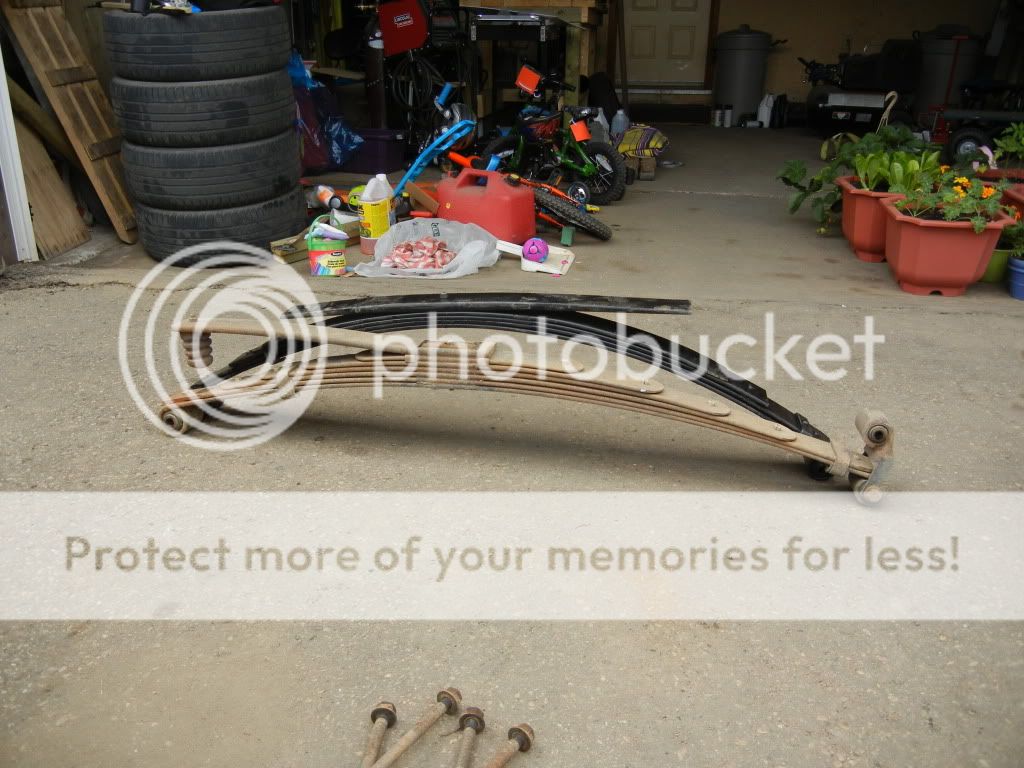
Here is a pic of the new and old spring
The old one has a much thicker pack due to the traction spring but the new one is about 4" taller. The new one is also slightly shorter (in length)
Step 1 - Lifted the truck up just like I did the front. Put some big stands under the frame ahead of the rear springs, and used some small jack stands under the axle
Step 2 - Removed the wheels
Step 3 - Removed the shocks. There is a nut/bolt at the bottom end and 2 bolts that bolt up into the bottom of the body. Just need to use a couple long extensions on the socket wrench
Step 4 - Removed the u-bolts on the driver's side.
Step 5 - Removed the driver's side spring
a - removed the lower bolt of the rear spring shackle (left the shackle attached to the spring.... for now)
b - removed the front spring bolt
c - lower the axle and slide the spring out. (having a buddy help would be great at this stage, but I did it myself, so I'm sure you can too!)
Here is a pic of the new and old spring
The old one has a much thicker pack due to the traction spring but the new one is about 4" taller. The new one is also slightly shorter (in length)
#29
06-14-2011, 01:29 AM
Join Date: May 2011
Posts: 139
Likes: 0
Received 0 Likes
on
0 Posts
Step 6 - Installed the shackle on the new spring.
Here's a pic showing how I got the nut/bolt off. It was pretty tight

Step 7 - Installed the spring on the truck
a - rested the spring/shackle on the rear hanger and installed the front spring bolt (leave it loose)
b - Installed the bolt through the shackle (leave it loose)
c - positioned the axle to line up the spring center bolt to the axle perch
d - installed the u-bolts (left them loose for now)
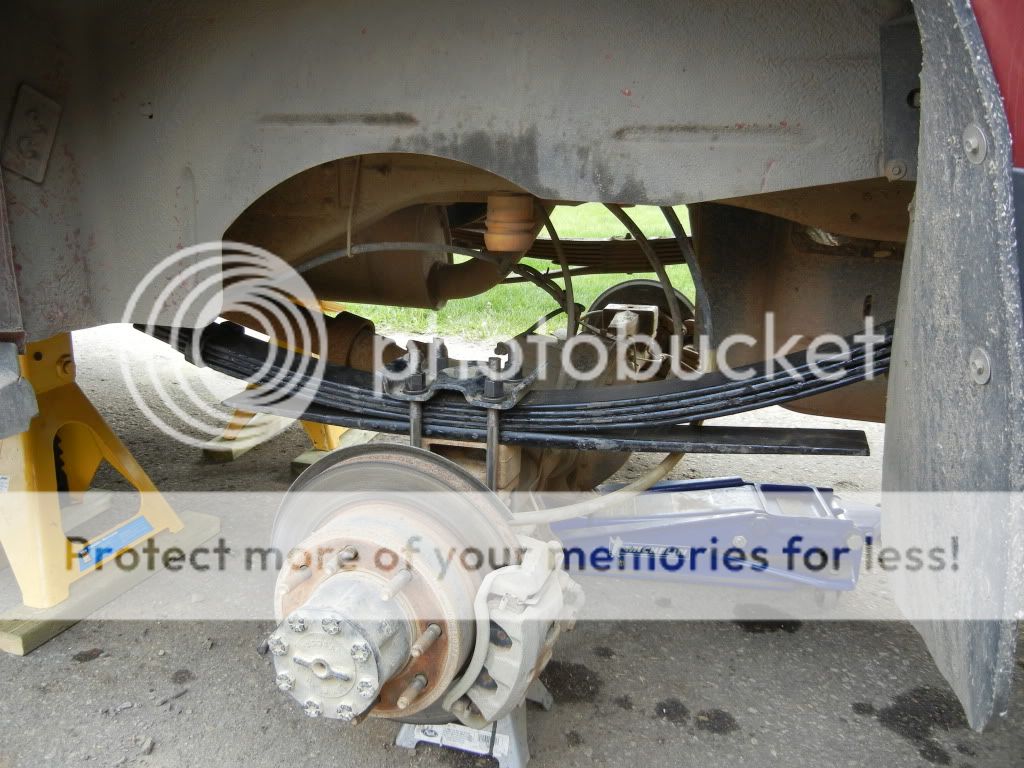
Because the spring is slightly shorter in length, you can see here the difference in the shackle angle. The factory spring had the shackle sitting vertical
Here's a pic showing how I got the nut/bolt off. It was pretty tight
Step 7 - Installed the spring on the truck
a - rested the spring/shackle on the rear hanger and installed the front spring bolt (leave it loose)
b - Installed the bolt through the shackle (leave it loose)
c - positioned the axle to line up the spring center bolt to the axle perch
d - installed the u-bolts (left them loose for now)
Because the spring is slightly shorter in length, you can see here the difference in the shackle angle. The factory spring had the shackle sitting vertical
#30
06-14-2011, 01:39 AM
Join Date: May 2011
Posts: 139
Likes: 0
Received 0 Likes
on
0 Posts
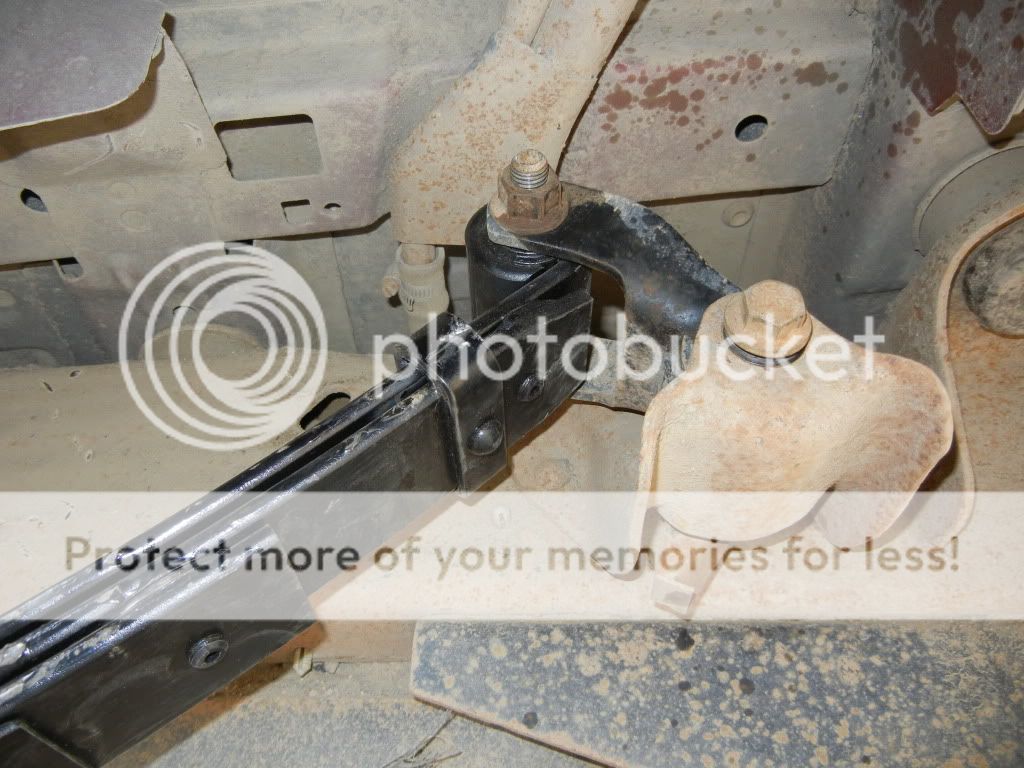
Step 8 - Repeated steps 4-7 for the driver's side.
The only difference is that to get the front spring bolt out you have to remove the 4 small nuts that hold the fuel lines on. The picture shows the fuel lines still with the nuts in place

Step 9 - Tightened all of the bolts
a - front spring bolts
b - spring/shackle bolts (Oh, did I forget to mention that I left these loose to help with alligning the other bolts)
c - shackle to frame bolts
d - u-bolts
Step 10 - Installed the shocks
Step 11 - re-installed the wheels
Done.
The only difference is that to get the front spring bolt out you have to remove the 4 small nuts that hold the fuel lines on. The picture shows the fuel lines still with the nuts in place
Step 9 - Tightened all of the bolts
a - front spring bolts
b - spring/shackle bolts (Oh, did I forget to mention that I left these loose to help with alligning the other bolts)
c - shackle to frame bolts
d - u-bolts
Step 10 - Installed the shocks
Step 11 - re-installed the wheels
Done.