1994 Ford F350 Project Build
#76
 07-07-2012, 11:40 PM

Join Date: May 2011
Posts: 339
Likes: 0
Received 0 Likes
on
0 Posts
So I got some major updates for everyone tonight.
First, I just dropped some serious cash on the truck. SMH, but it's done. I'm dropping her off on the 16th to 4wheelparts here in sac. I was going to do this myself, but I'm lacking seriously in time, and it's really a safety issue. The suspension is shot, tires need replacing, and more. Soooooooooooo, she's getting
New Pro Comp Leaf Springs up front with a 4" lift
Reverse Shackle Kit, giving it an additional 3" lift. But with the 2" negative sag up front it will end up as a 5" lift.
5" Pro Comp Lift blocks in back.
Pro Comp ES9000 Shocks all the way around
Skyjacker Dual Steering Stabilizer up front (don't make a dual Pro Comp Kit)
New tie rod ends
New SS brake lines
Drop Pitman arm
Alignment
and Pro Comp Xtreme All Terrain 35" tires
Oh she's gonna be nice when she gets done! All just in time for camping on the 18th! Have a feeling the wife isn't gonna be too happy with the height, but such is life! She won't bitch when the ride is softer that's for sure!
Next update is gonna take some time! 83 pictures uploading as we speak! As soon as they're ready I'll start posting!
#77
07-08-2012, 12:07 AM
Join Date: May 2011
Posts: 339
Likes: 0
Received 0 Likes
on
0 Posts
Ok, sit back and strap in cause here we go!
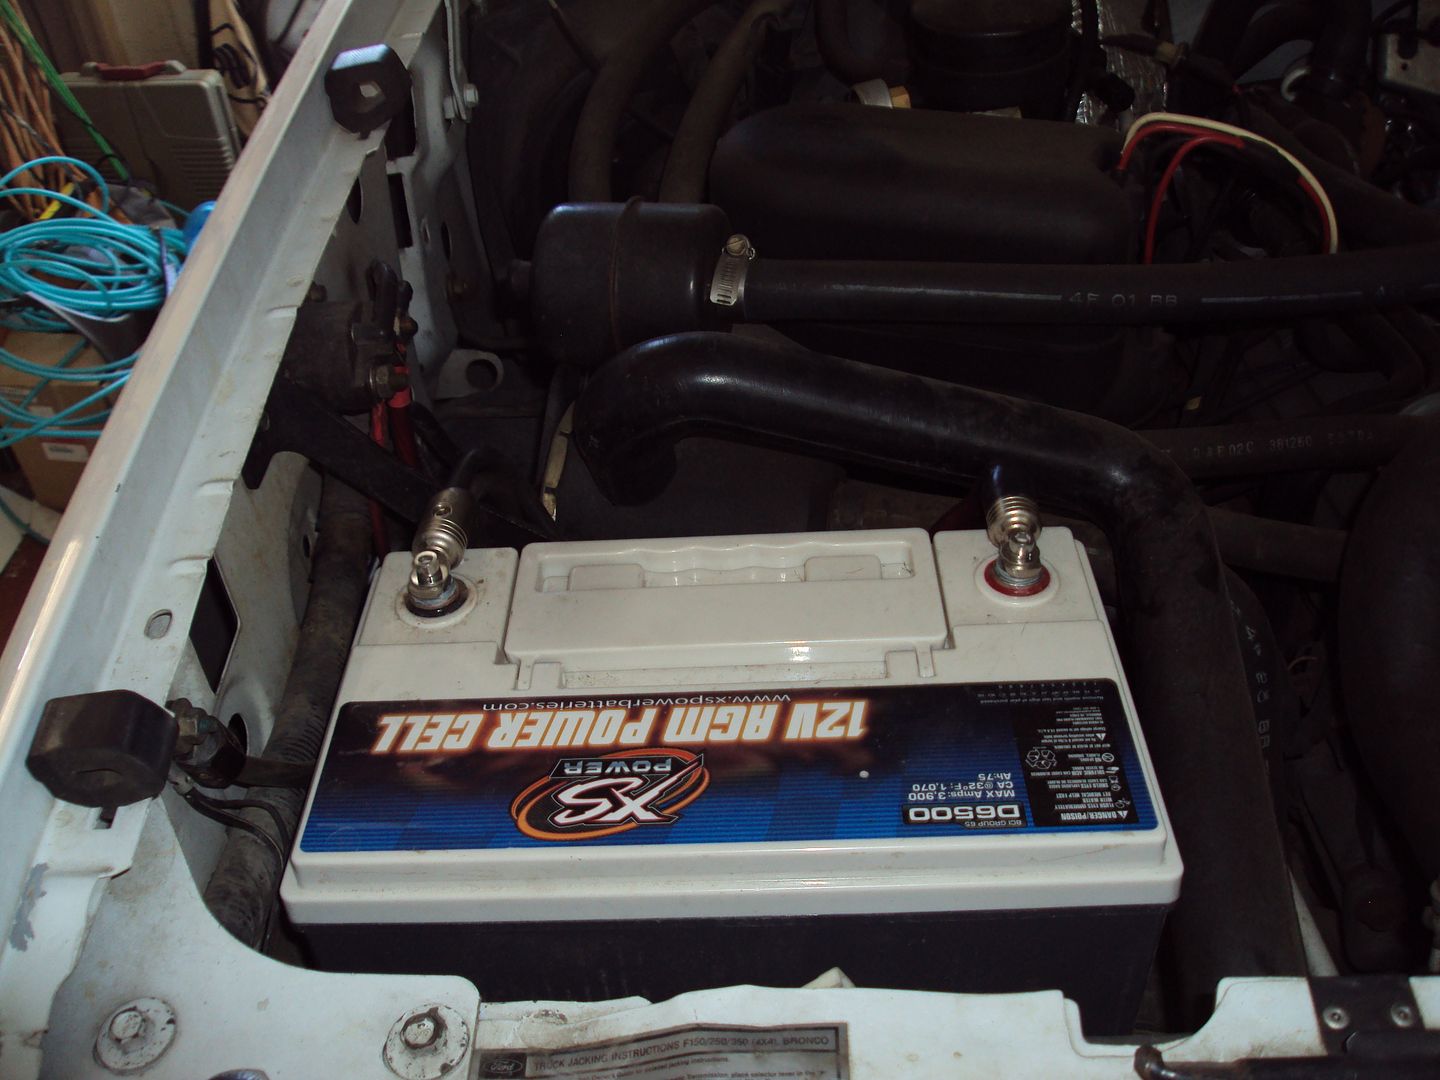
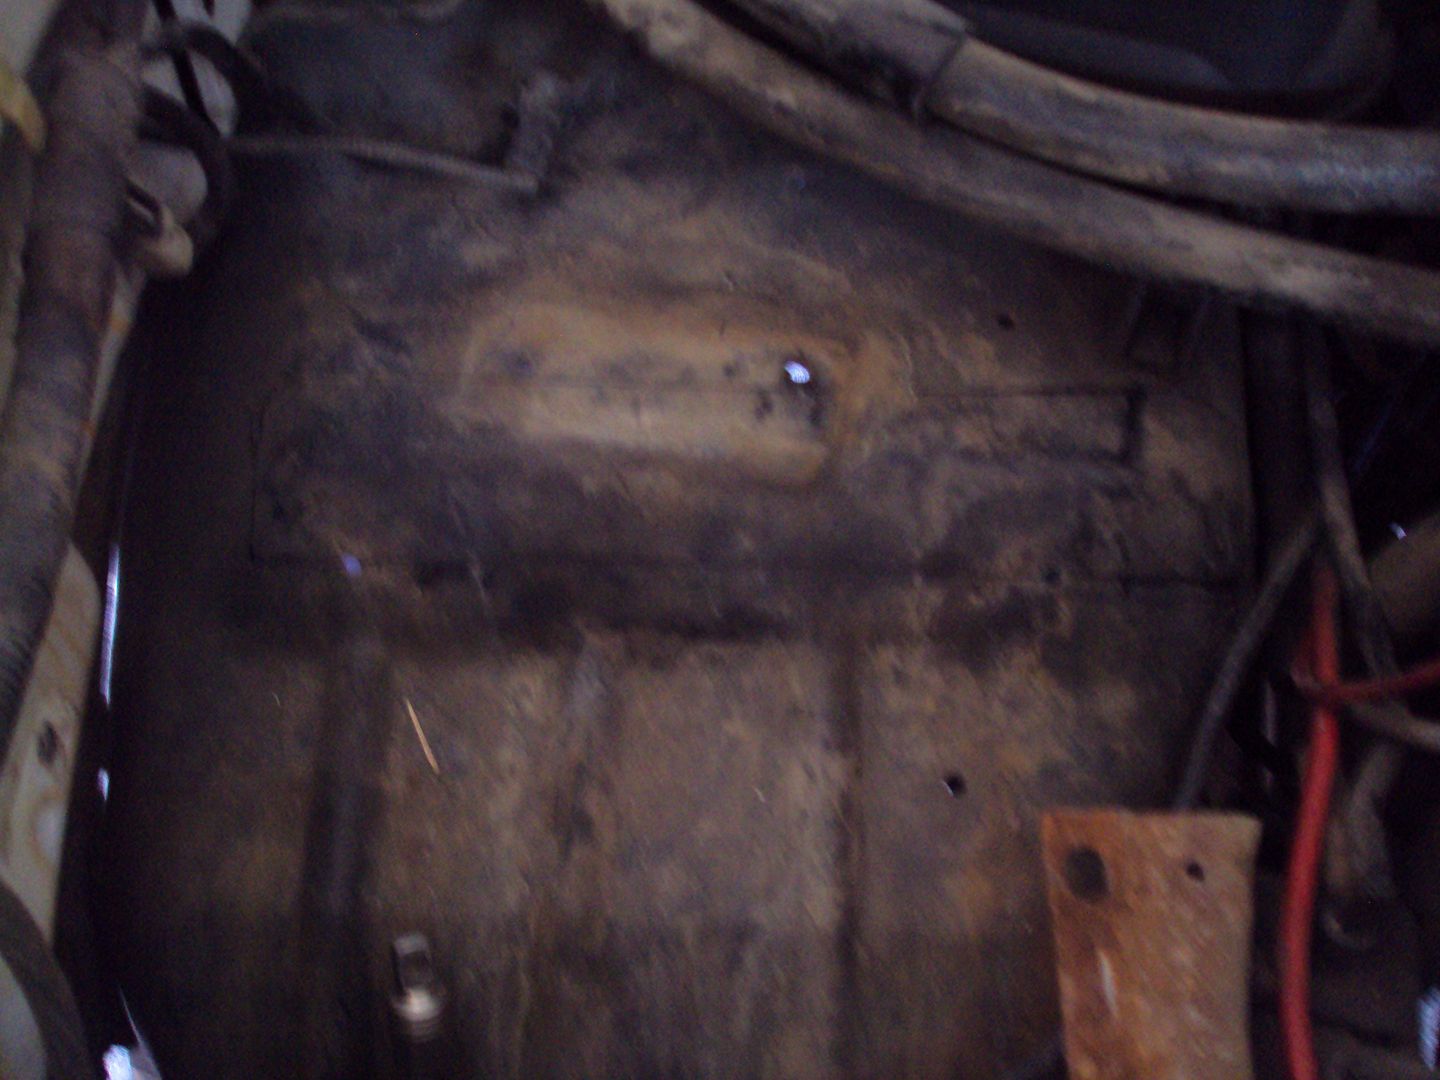
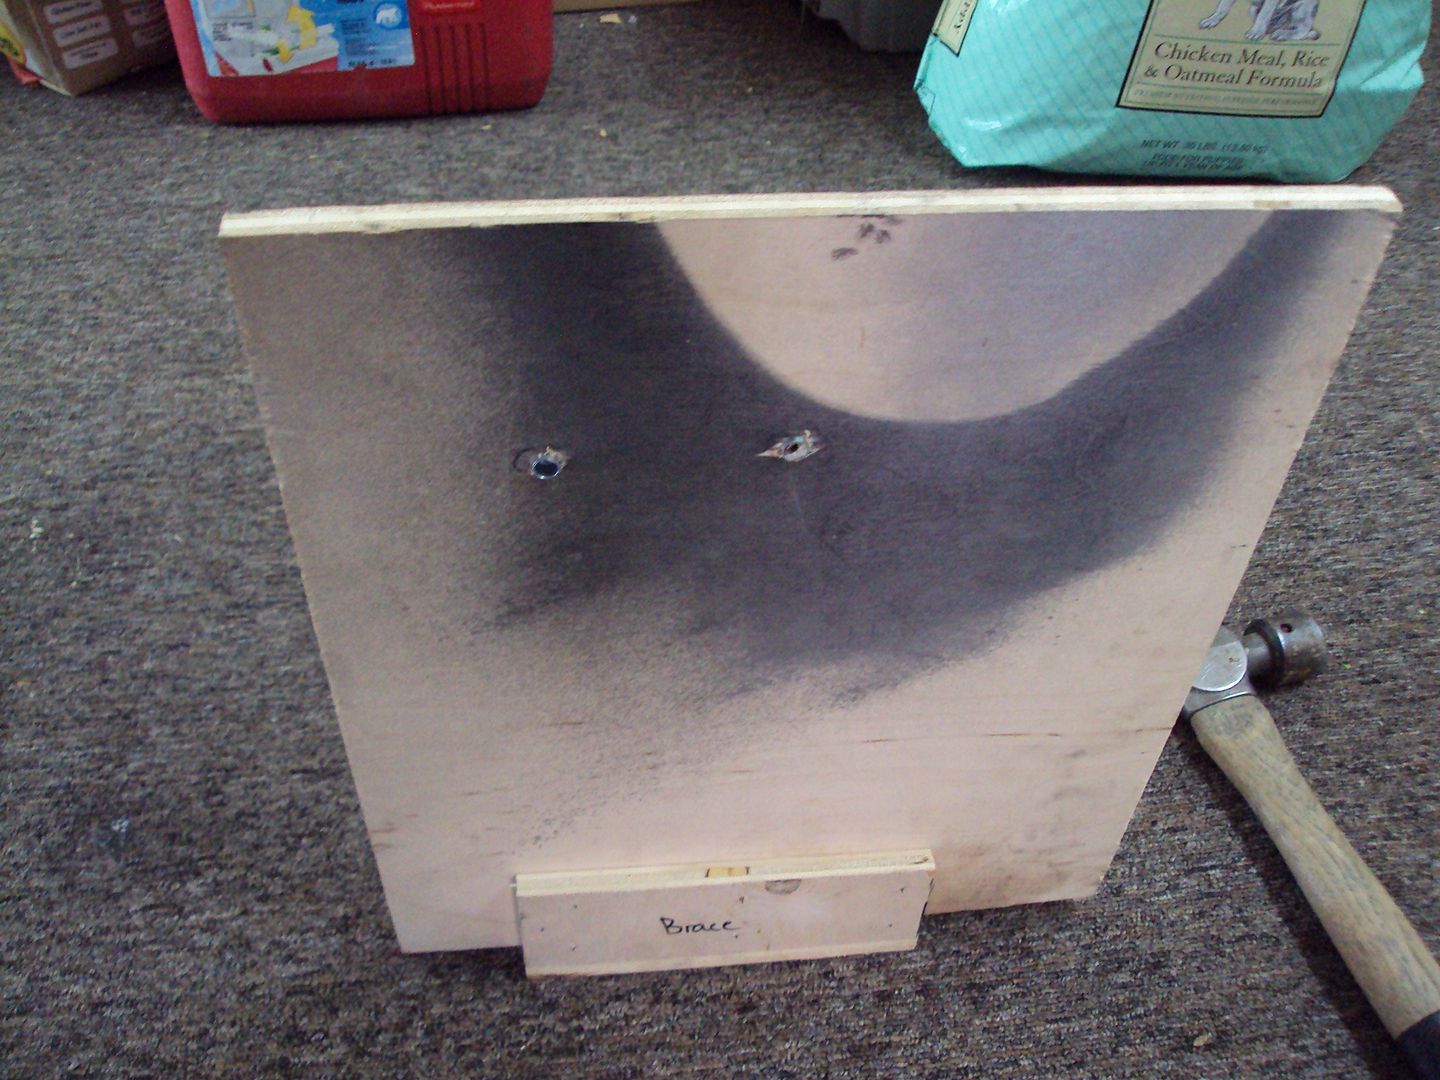
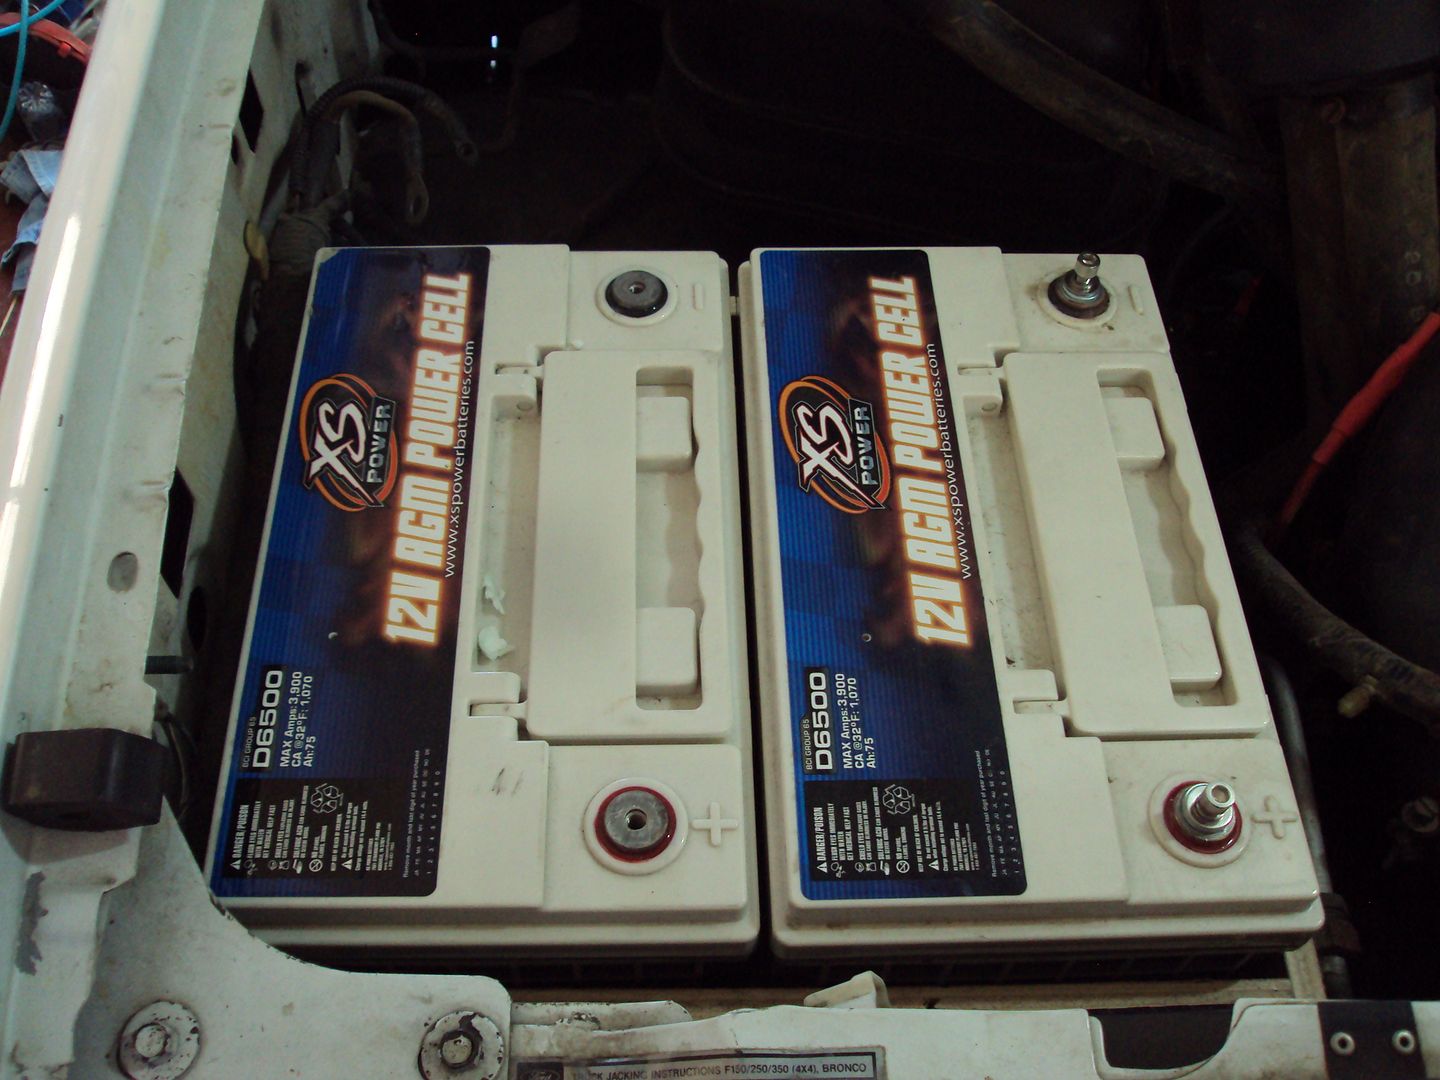
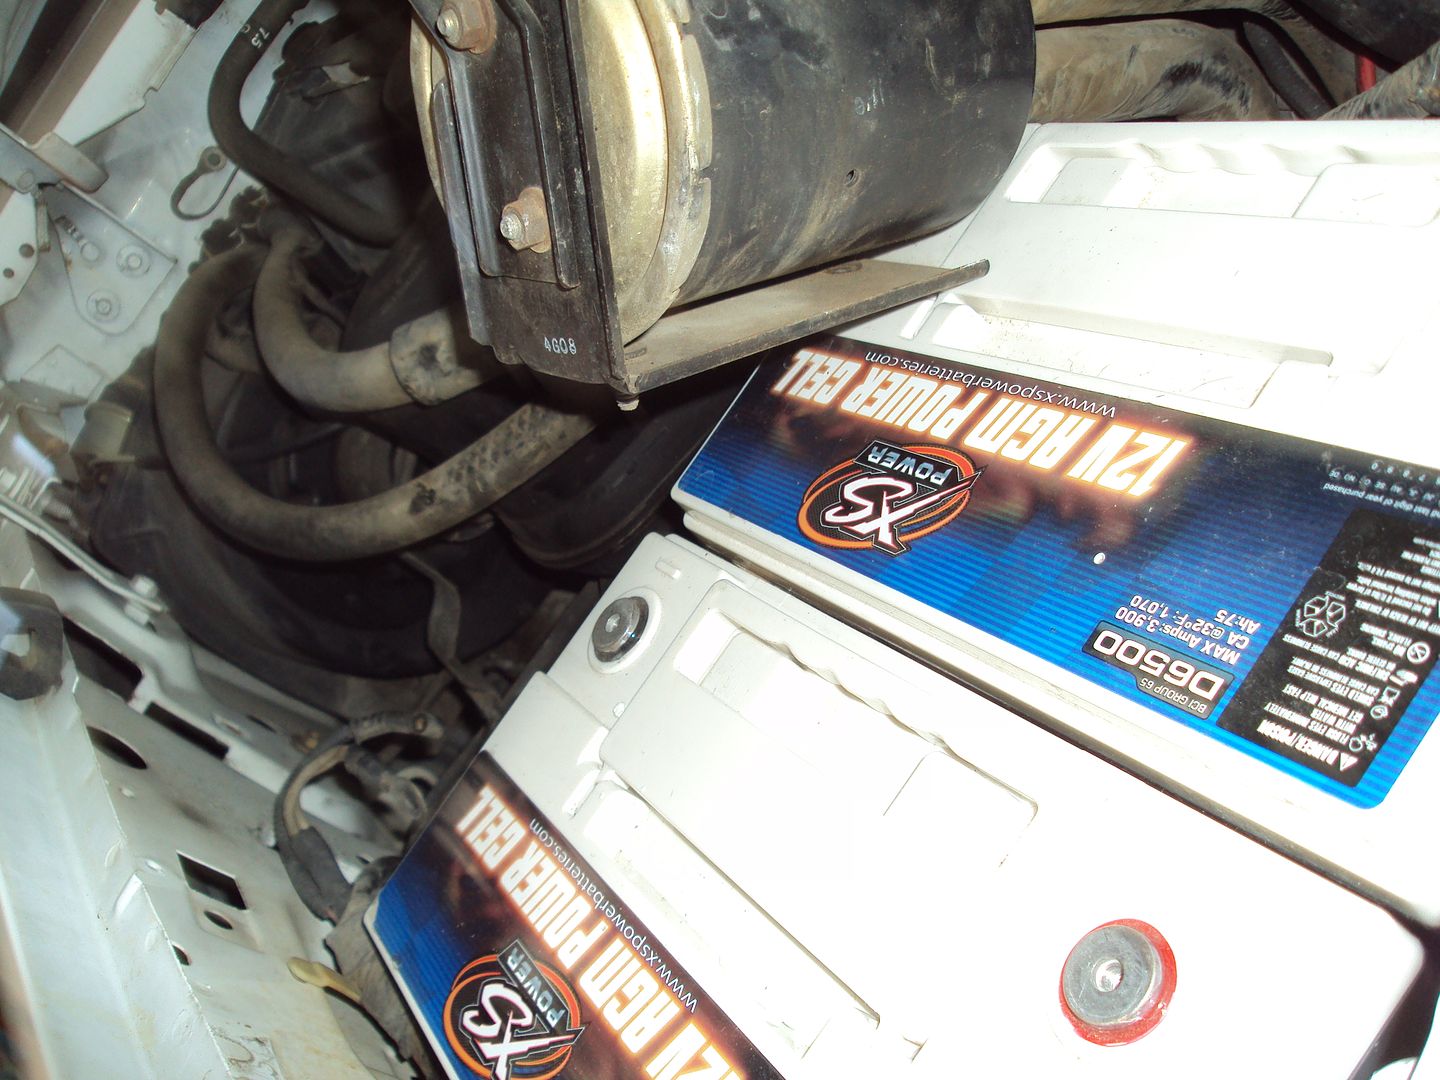
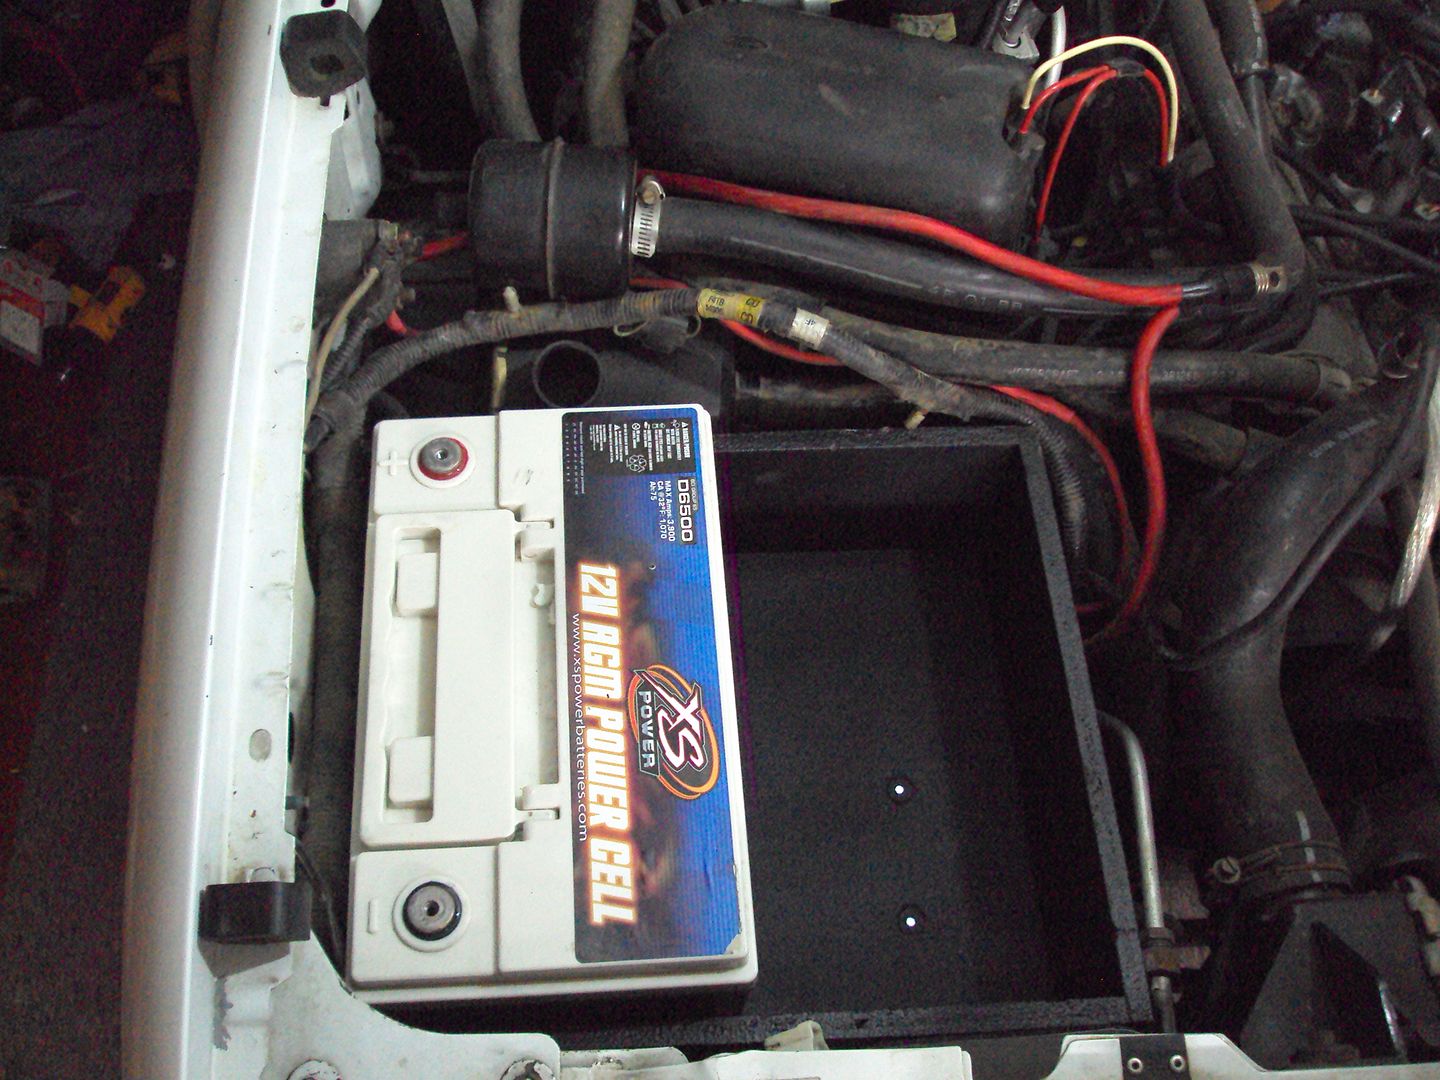
Here's the current battery situation.
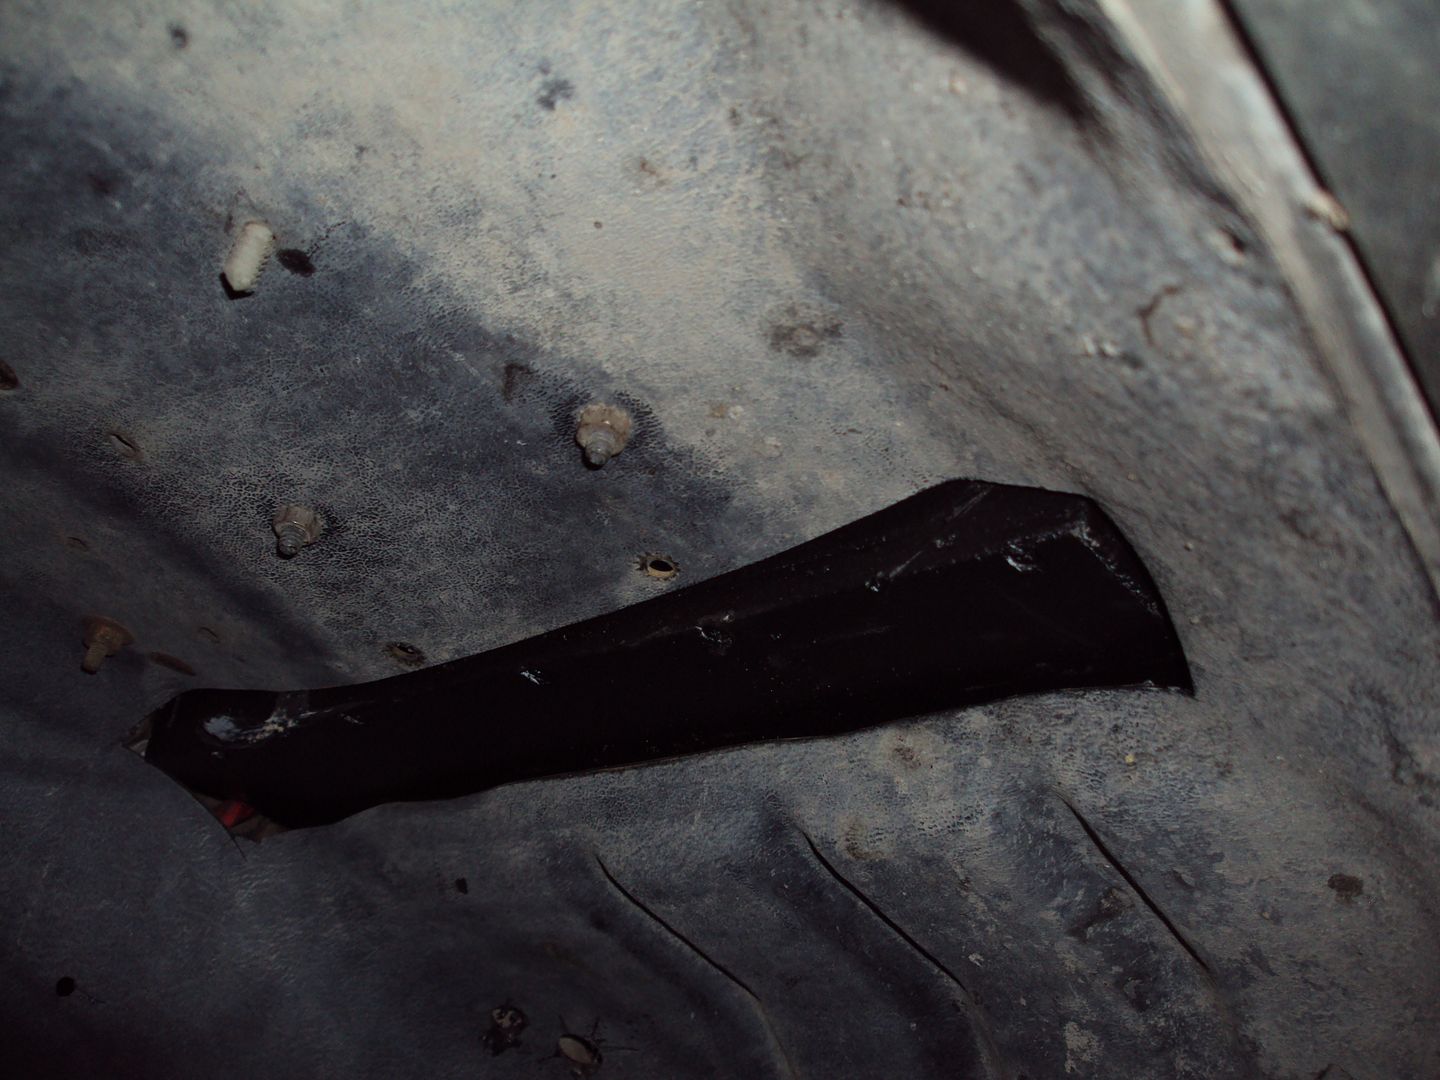
For some reason I thought I'd see what I could do about it today. So I started taking things apart! Removed the tray it sat on. Actually, let me back up. In the picture above you can see, barely, a black bar on the back left of the battery. That bracket is another brace for the battery tray. I tried to turn the battery sideways, and that was in the way. So I took the bolt out of it, and moved it out and the battery fit, sort of. So then I started tearing into it.

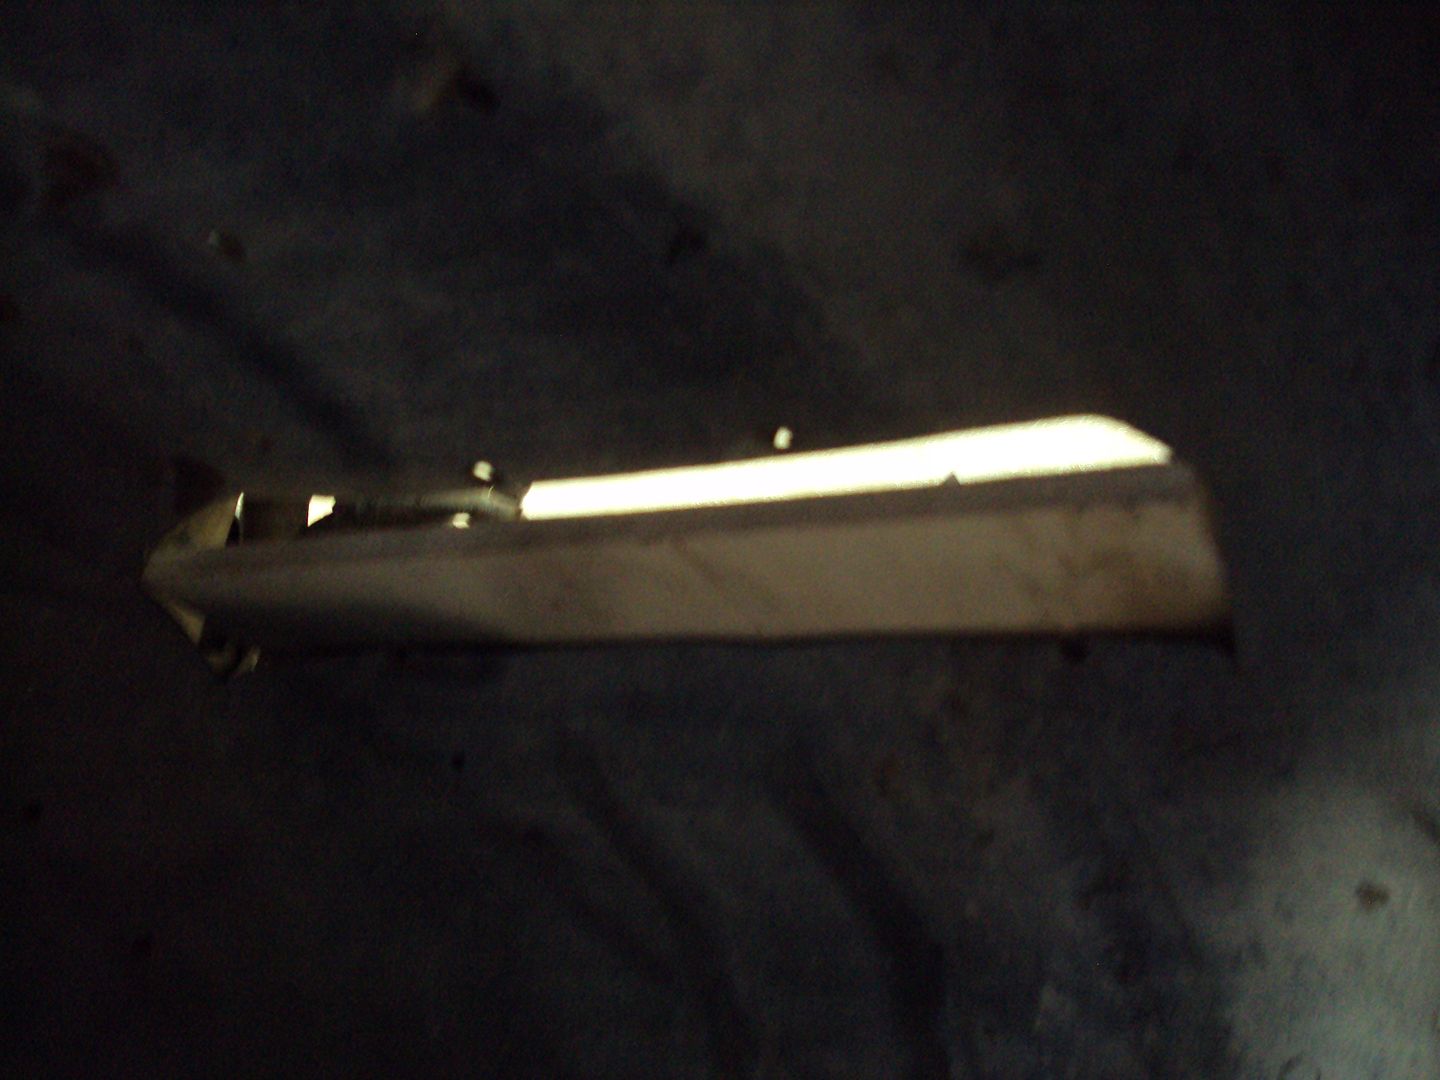
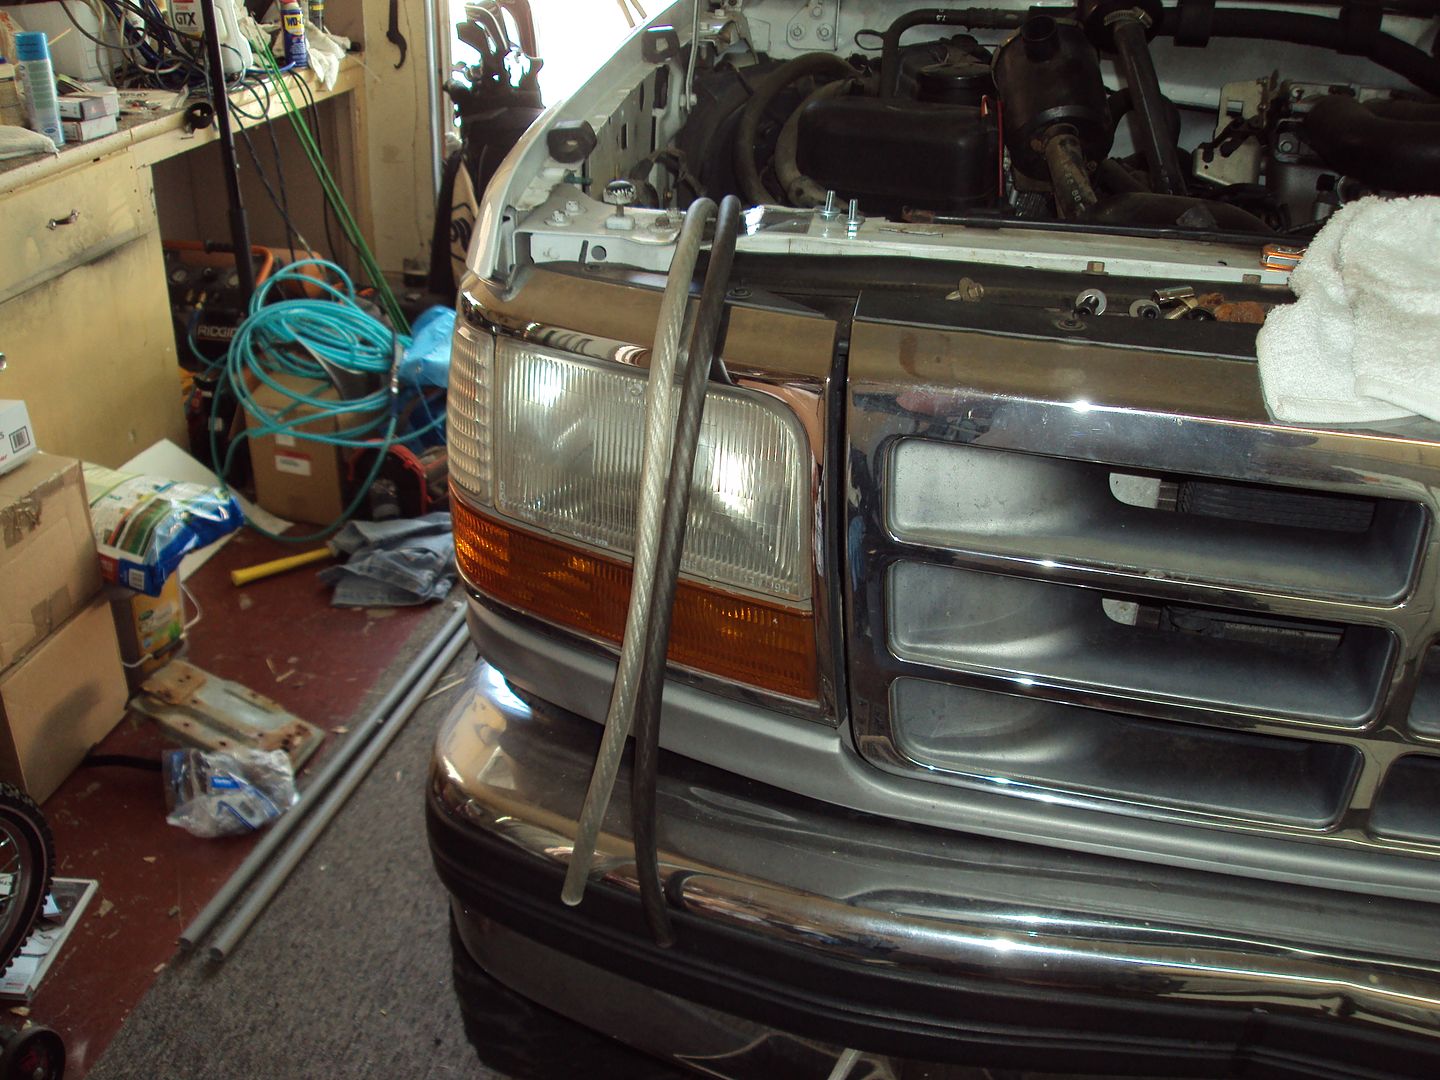
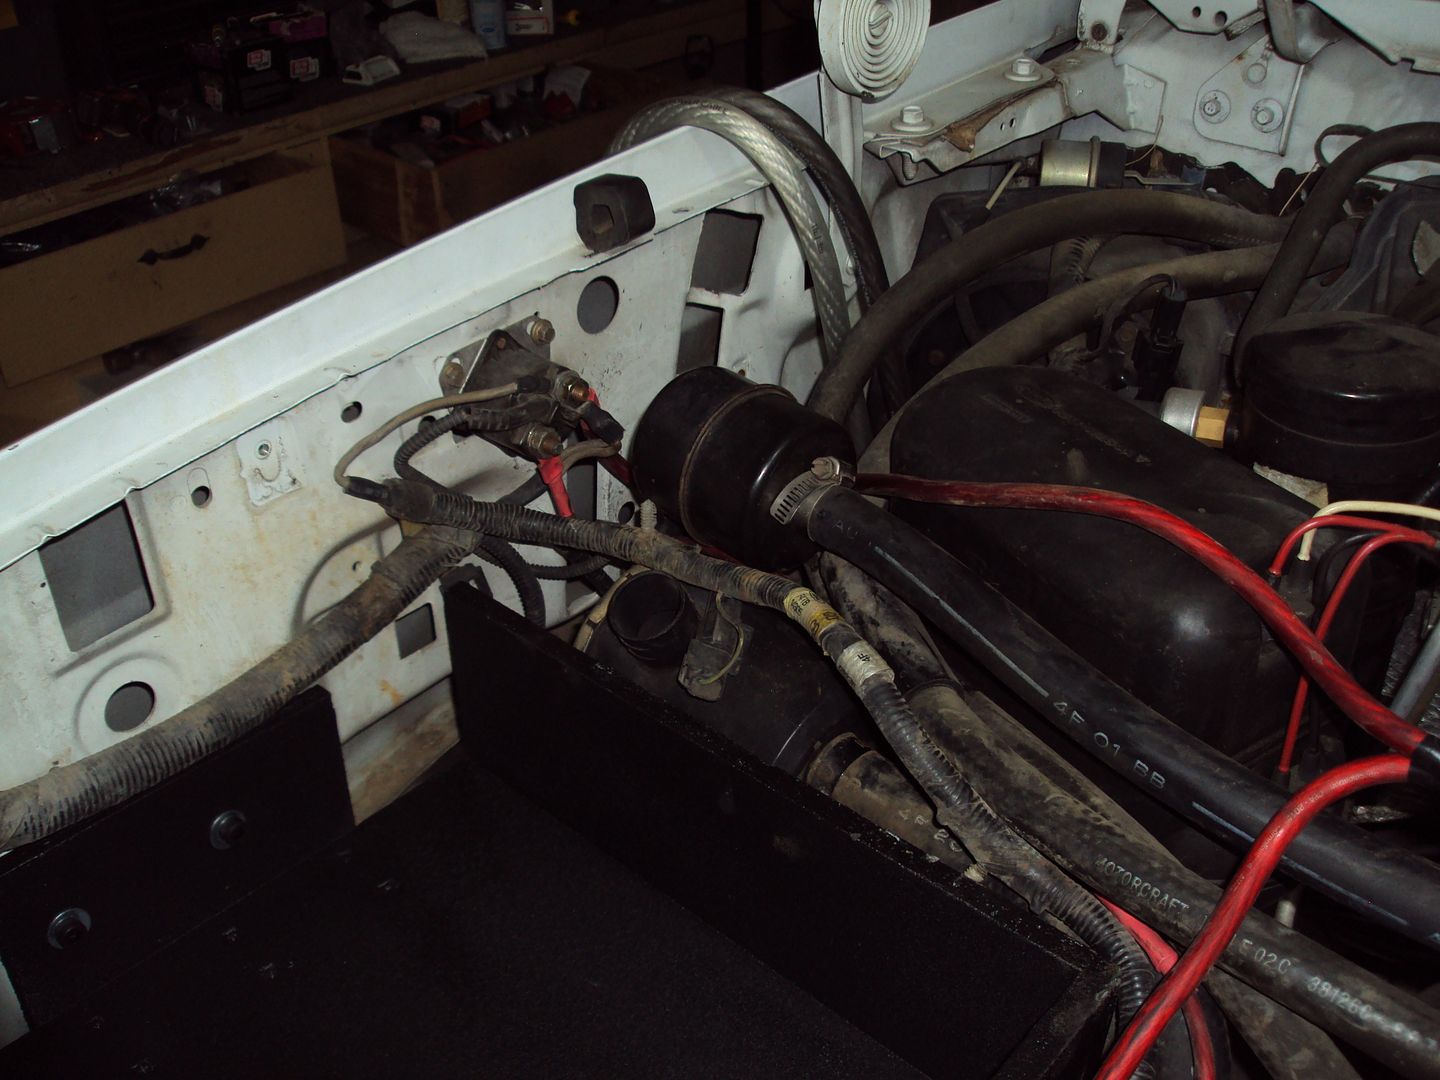
Removed the cylinder thing, I have no idea what it is. (for those of you on FTE forums, if you could enlighten me please). WEll I didn't really remove it, just really moved it out of the way for now.
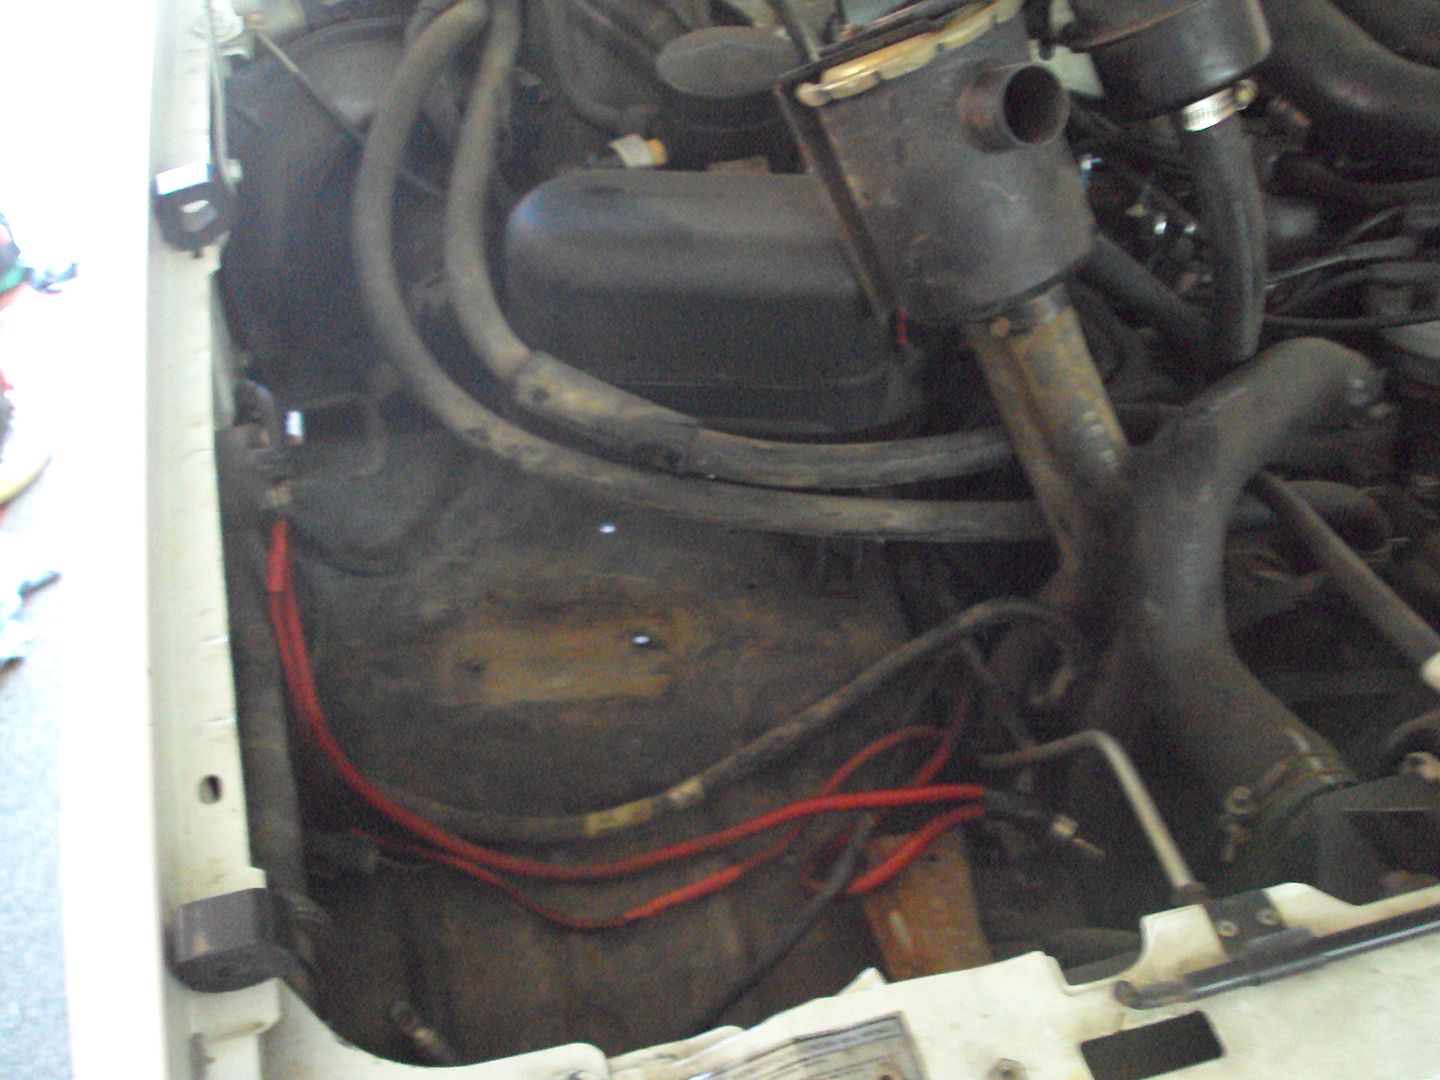
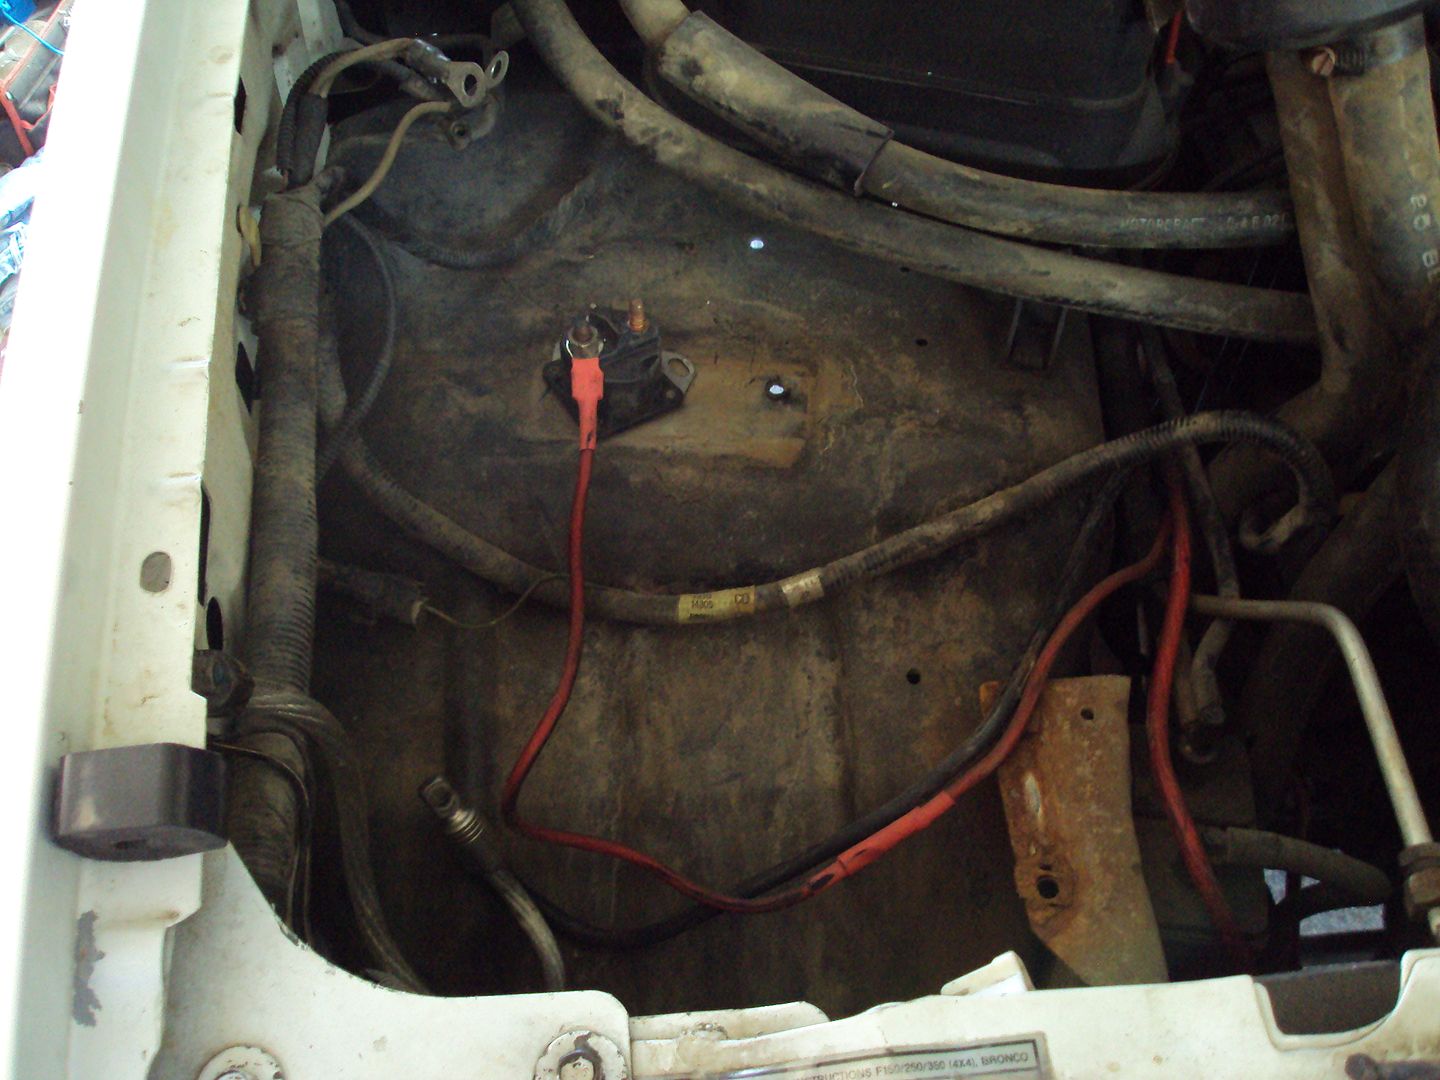
Then came down the starter solenoid. I hate that these are up here, it's really in the way!
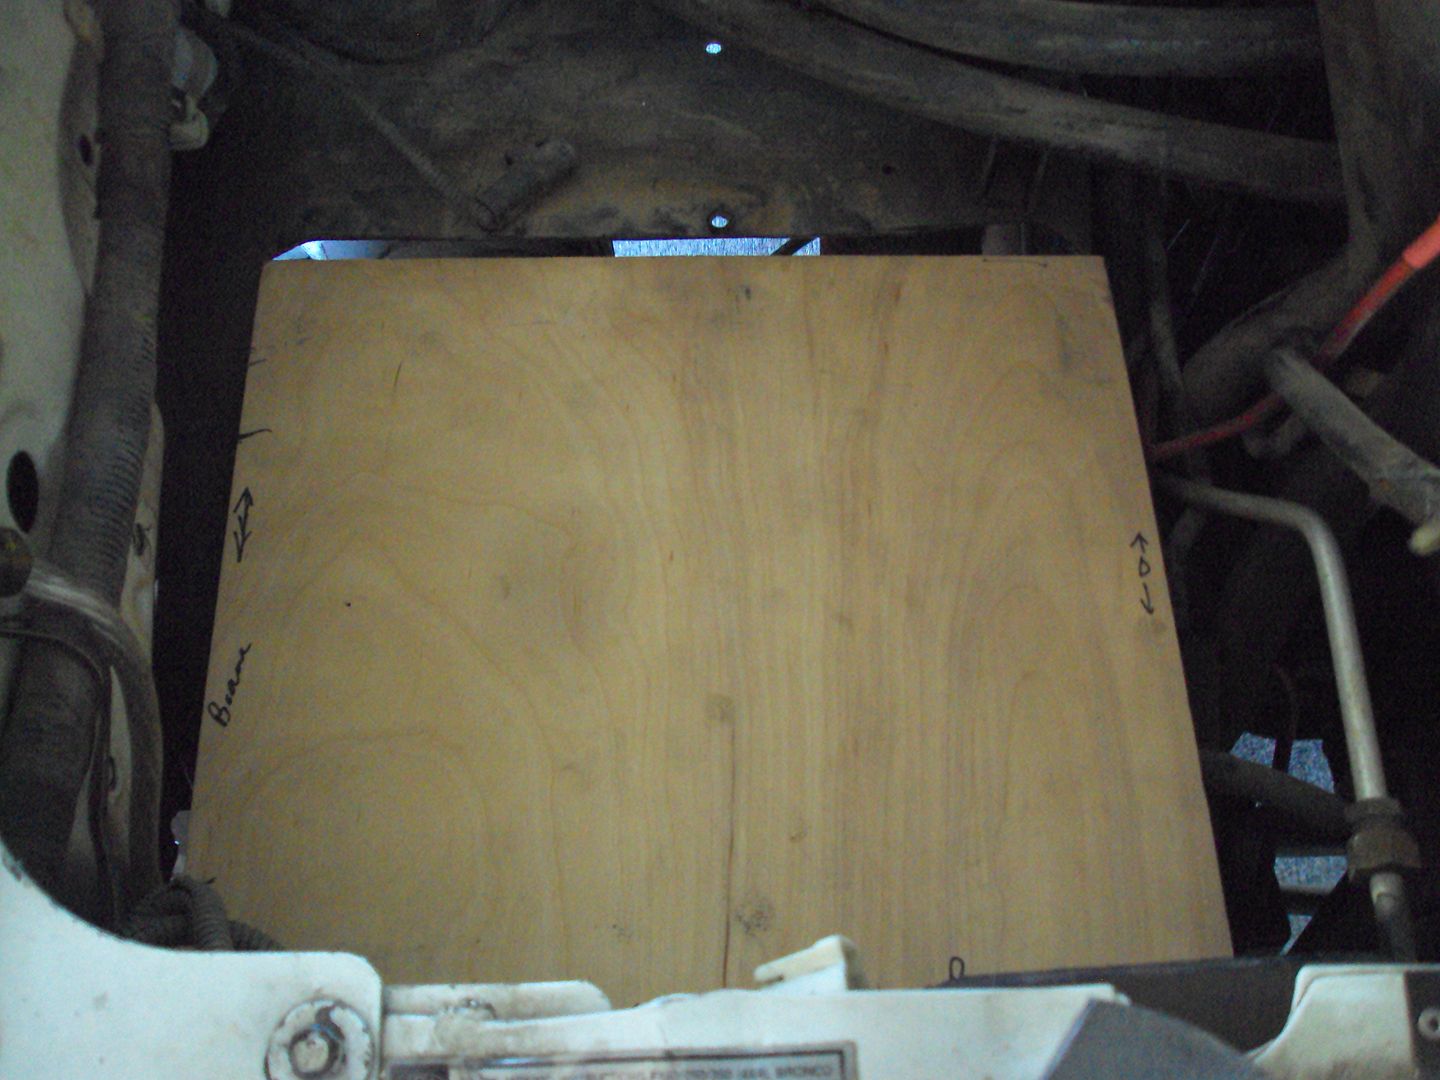
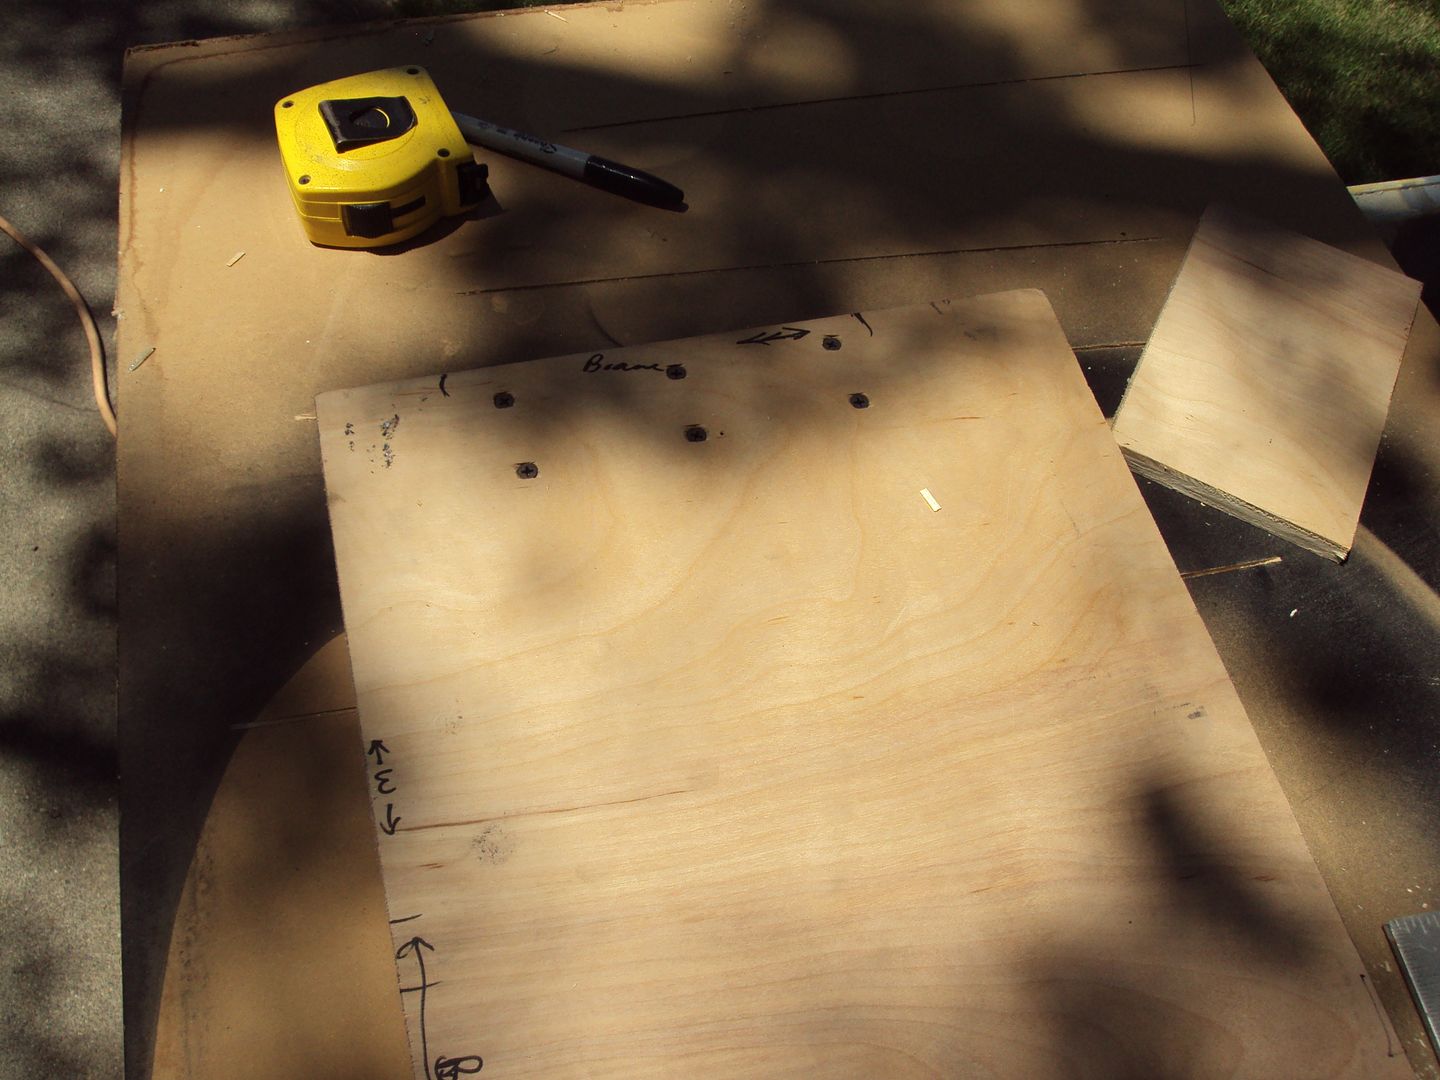
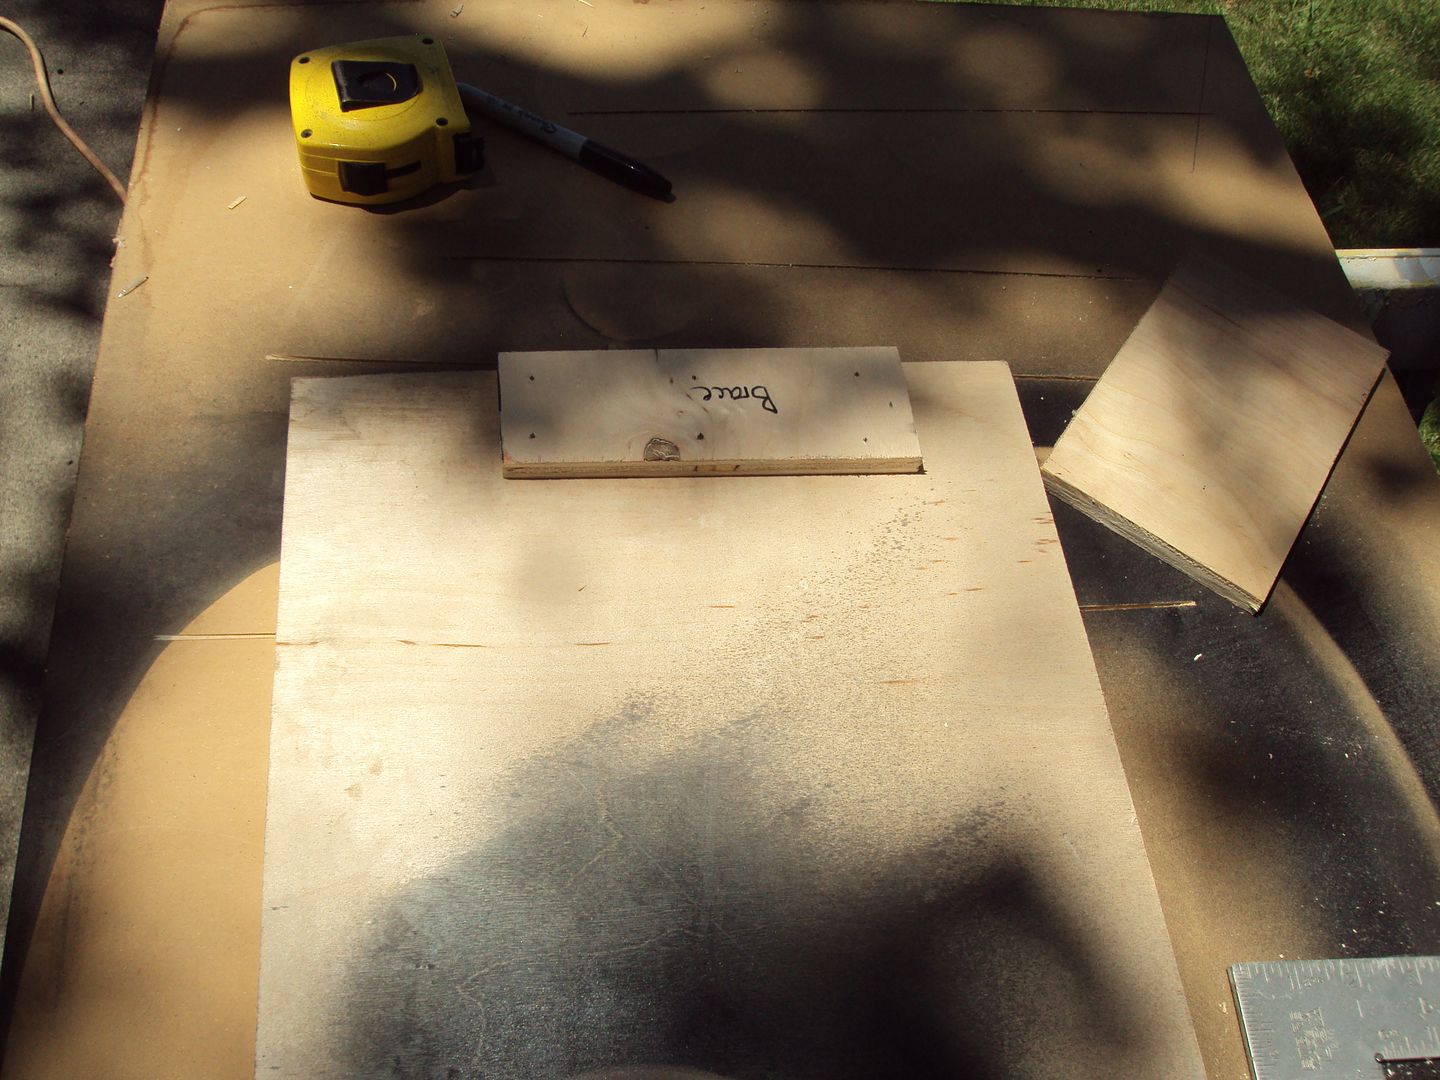
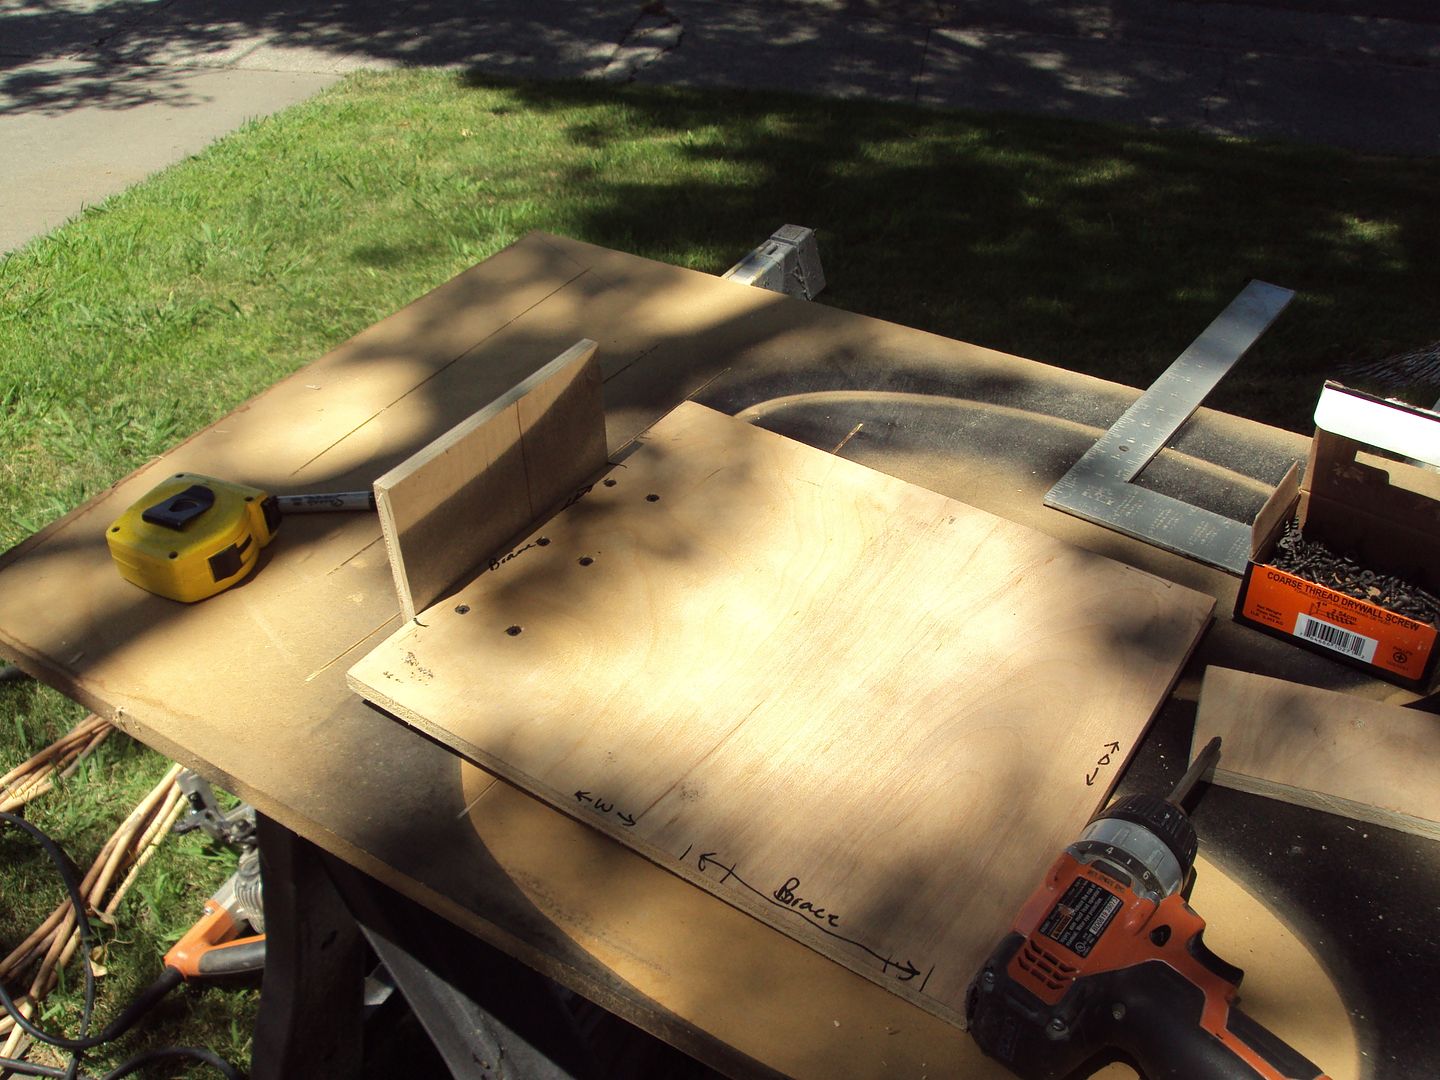
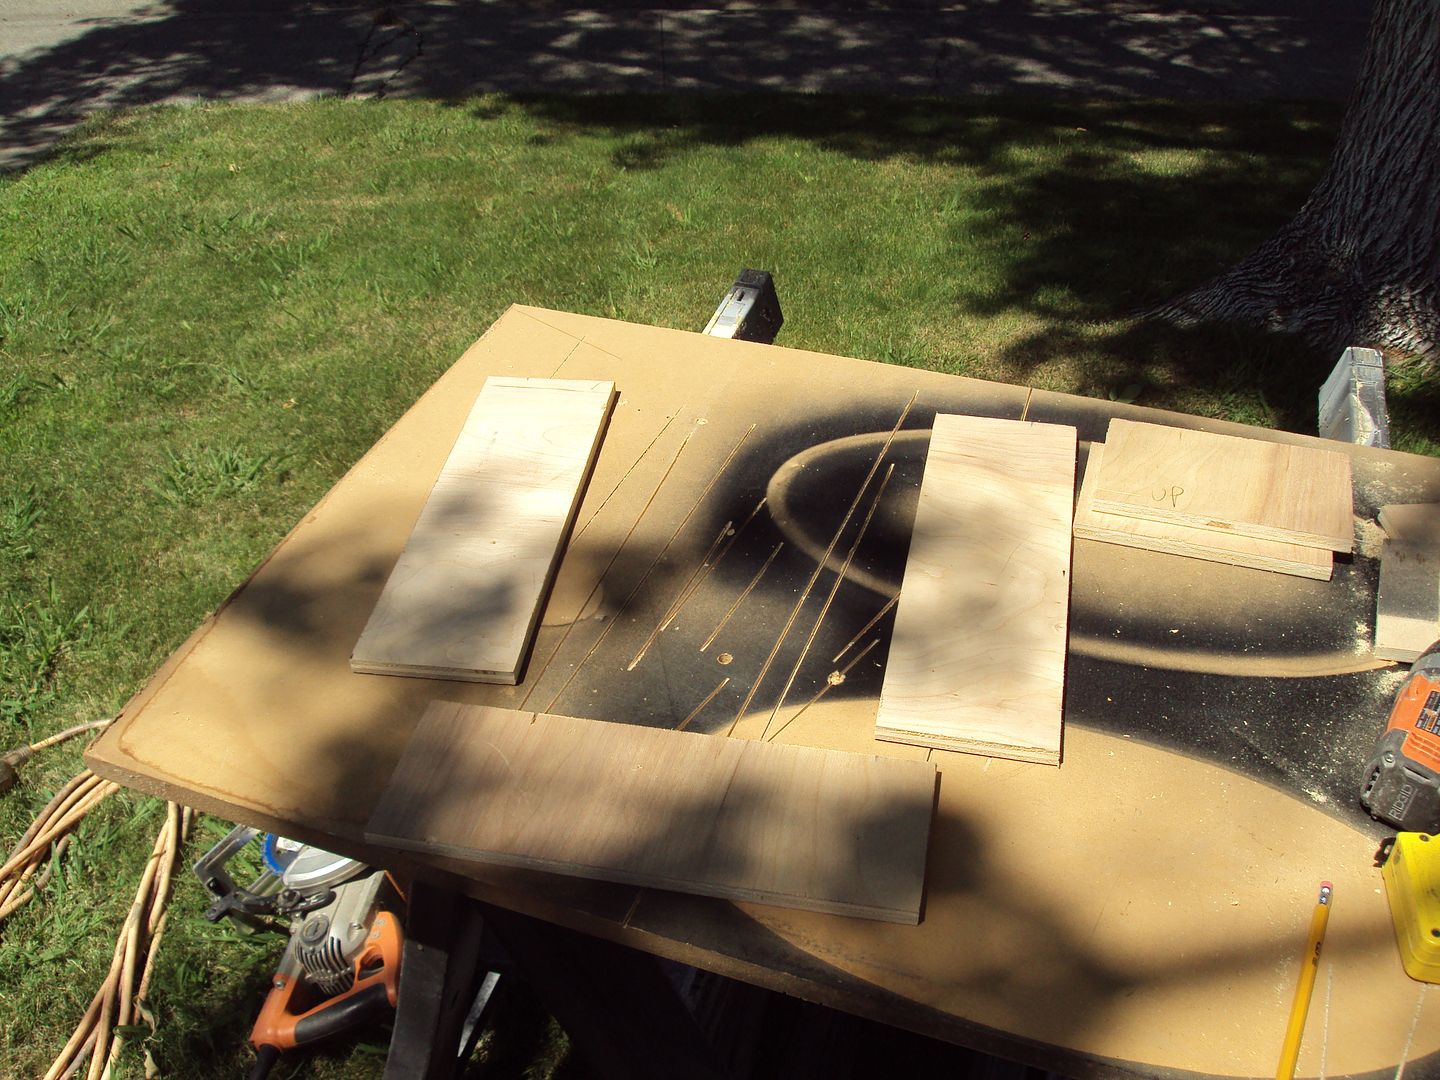
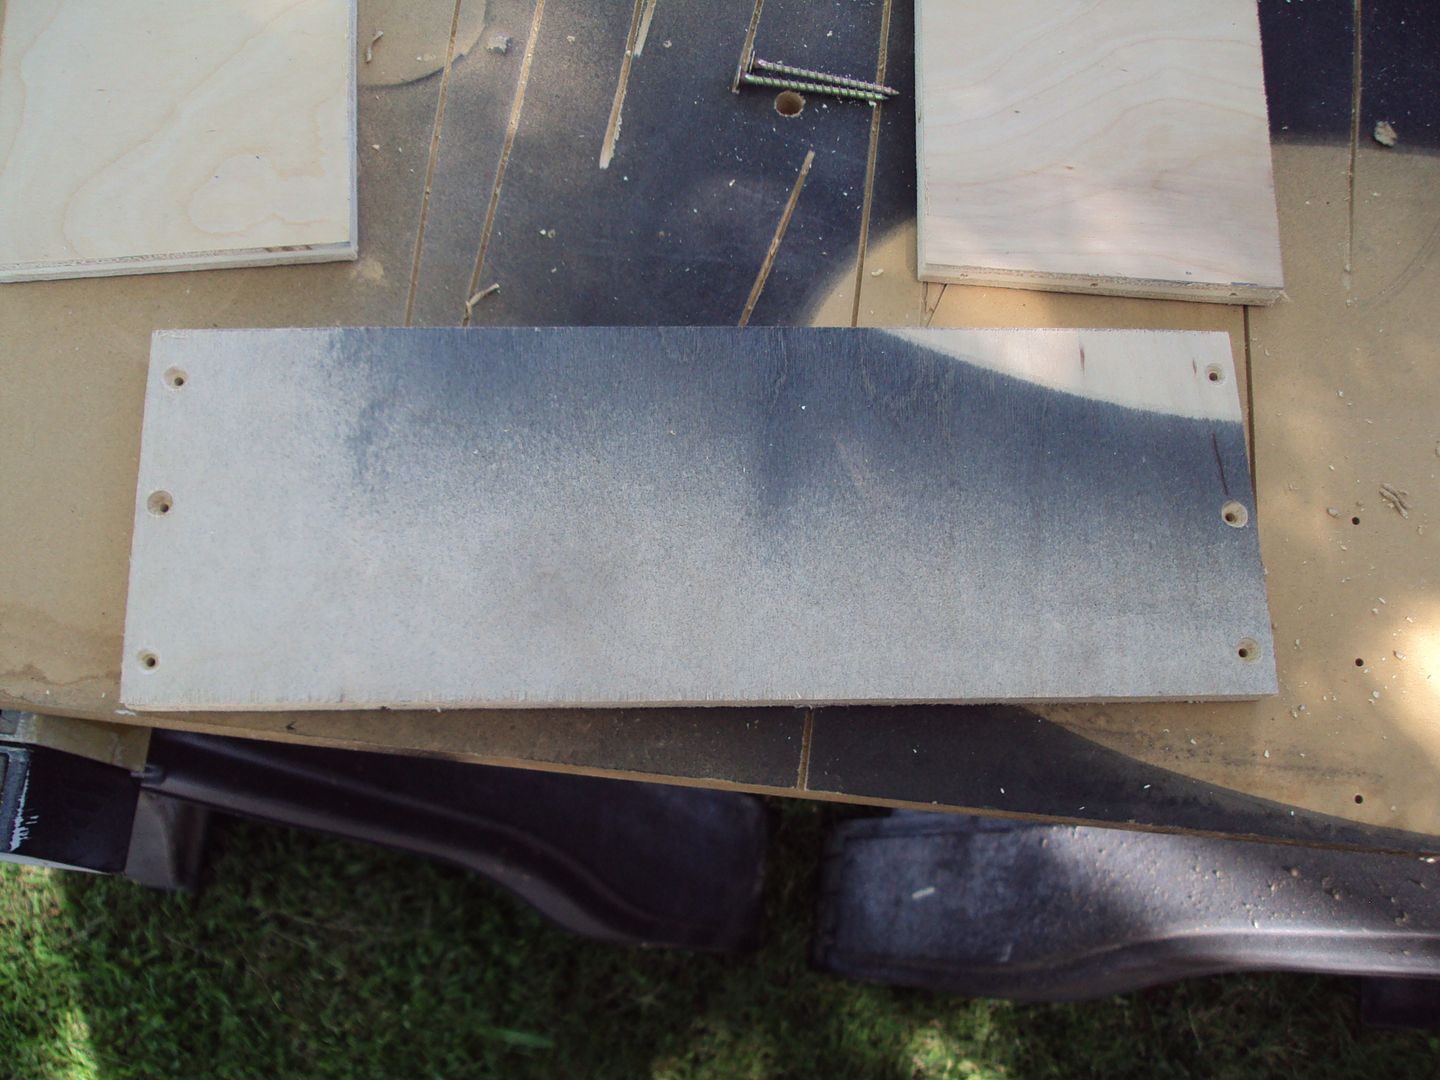
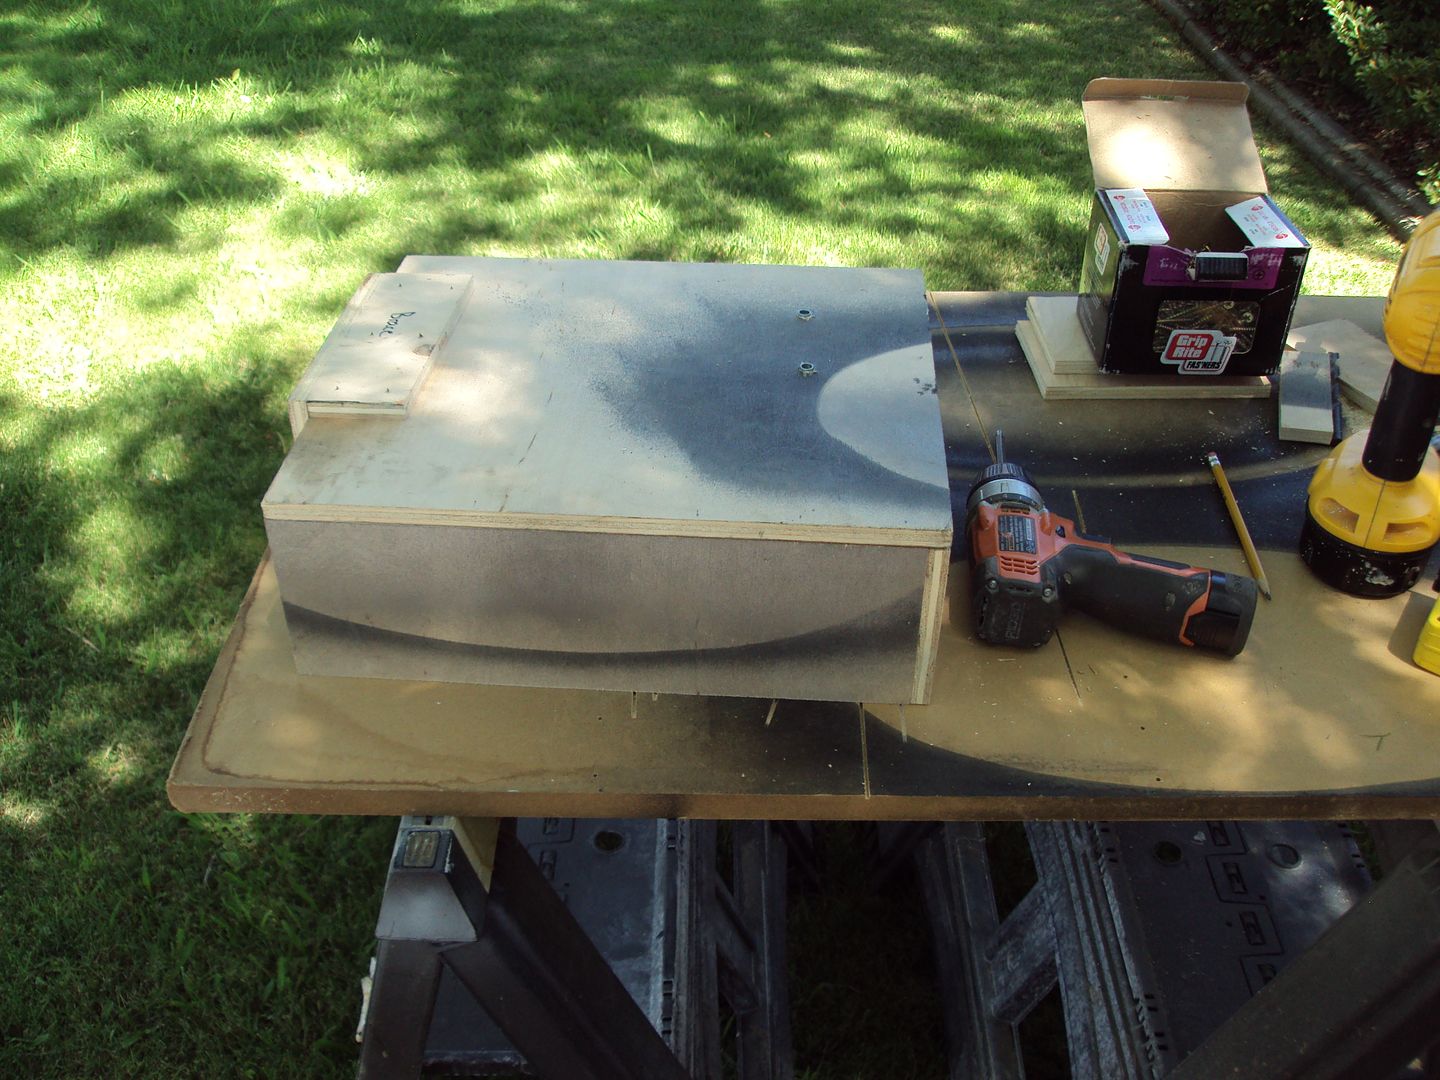
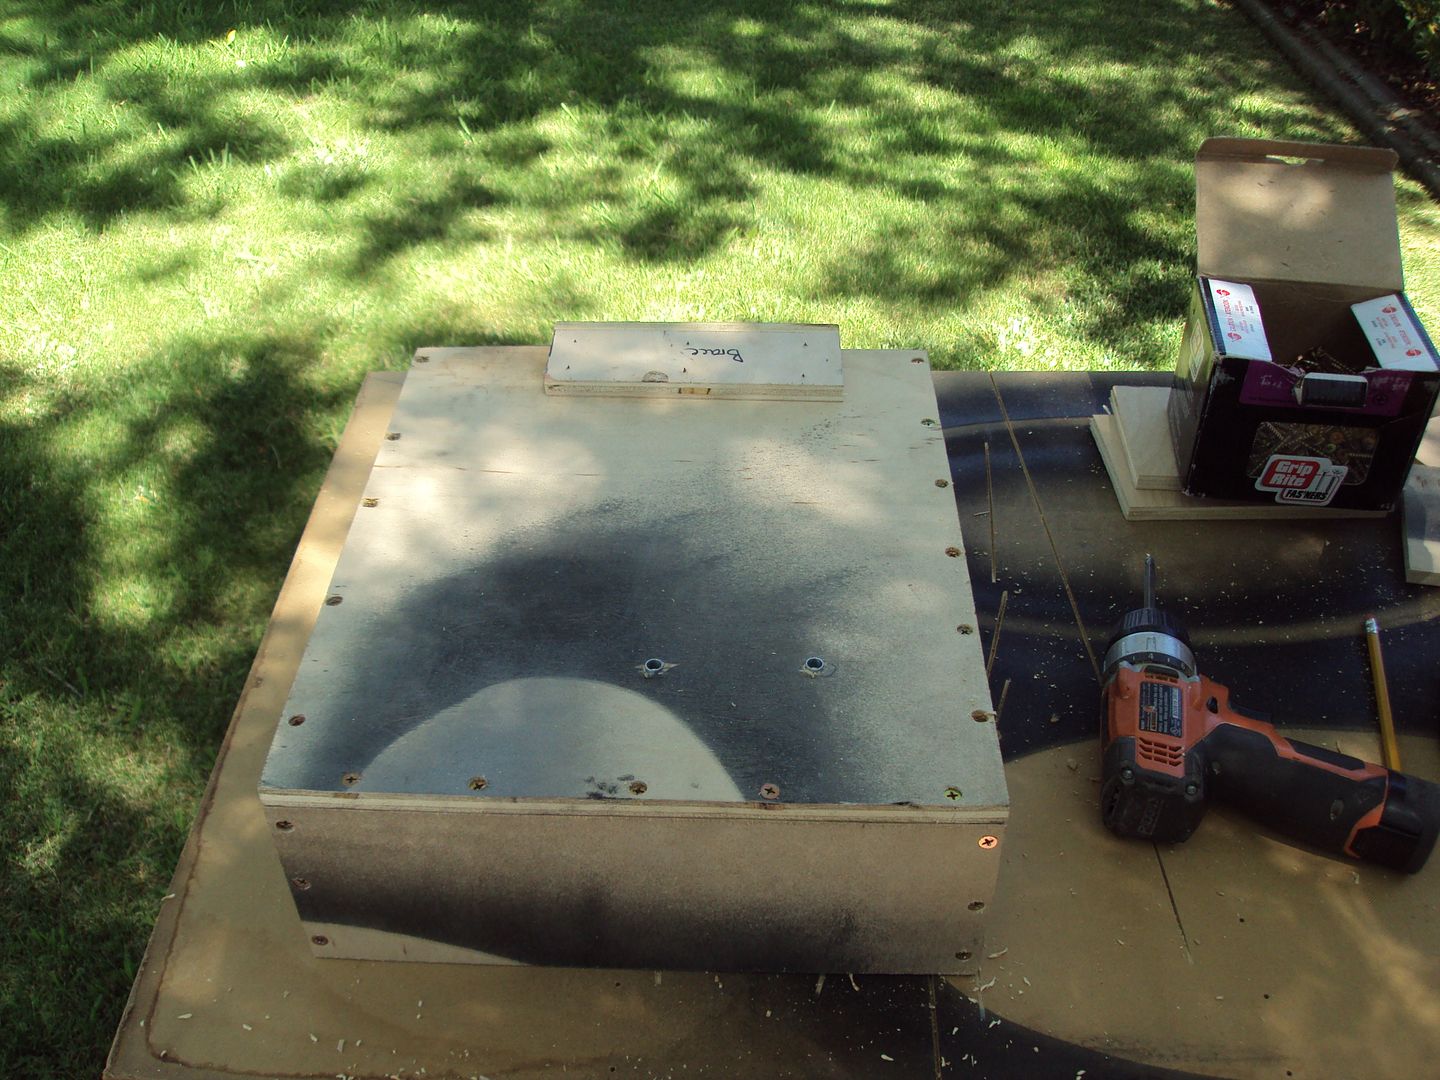
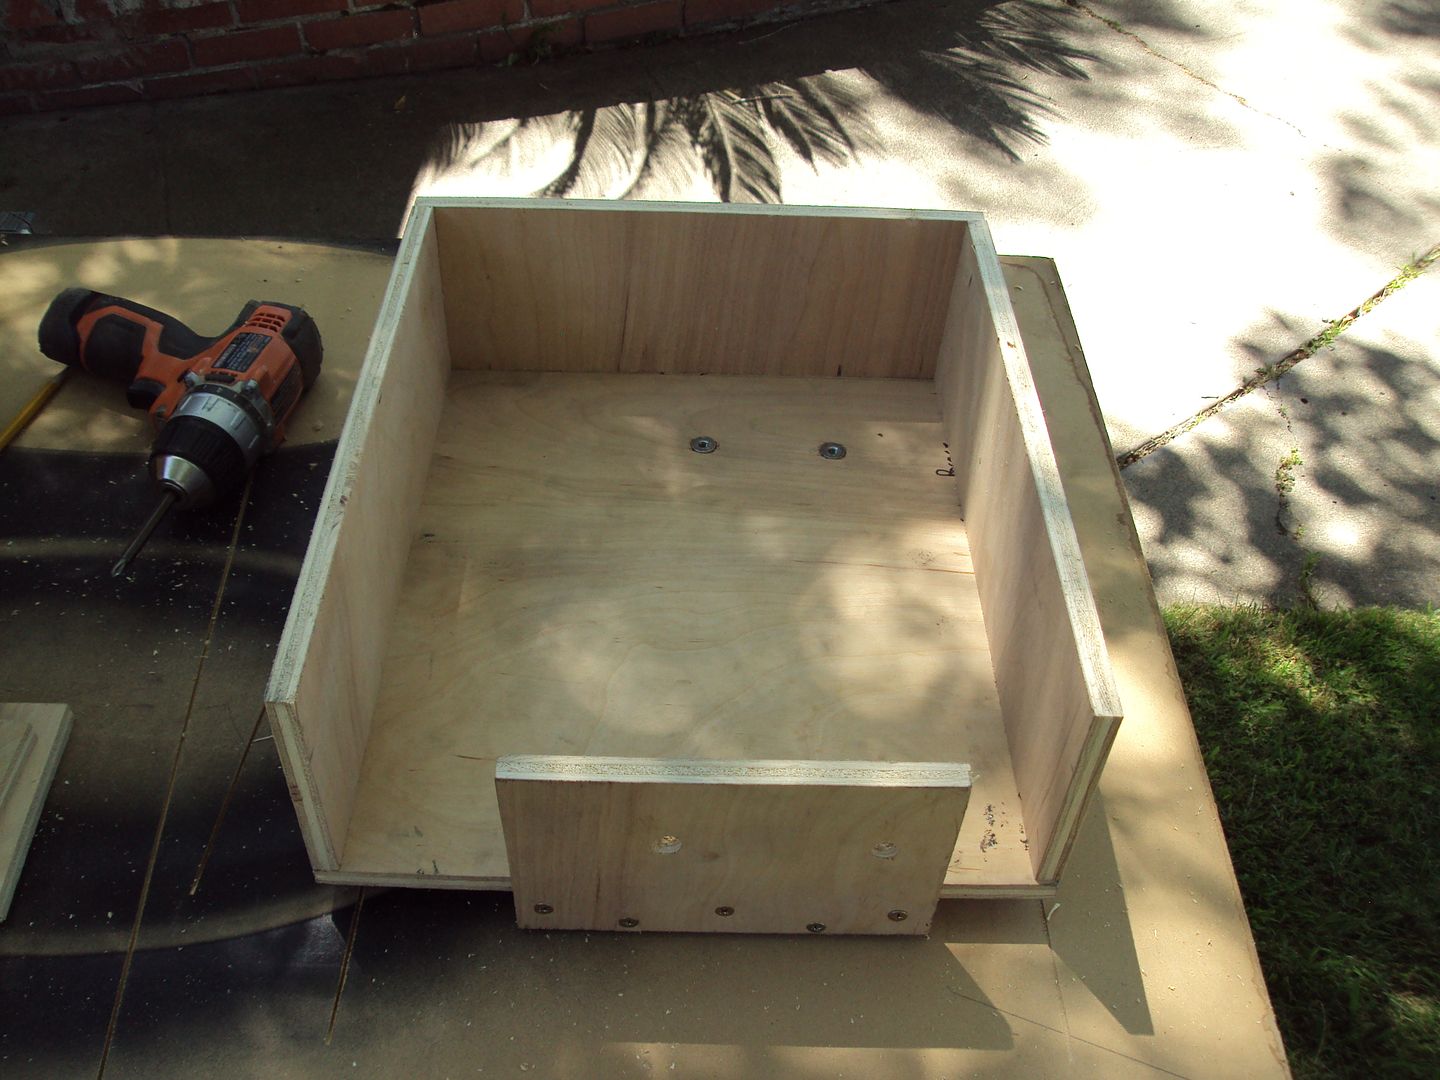
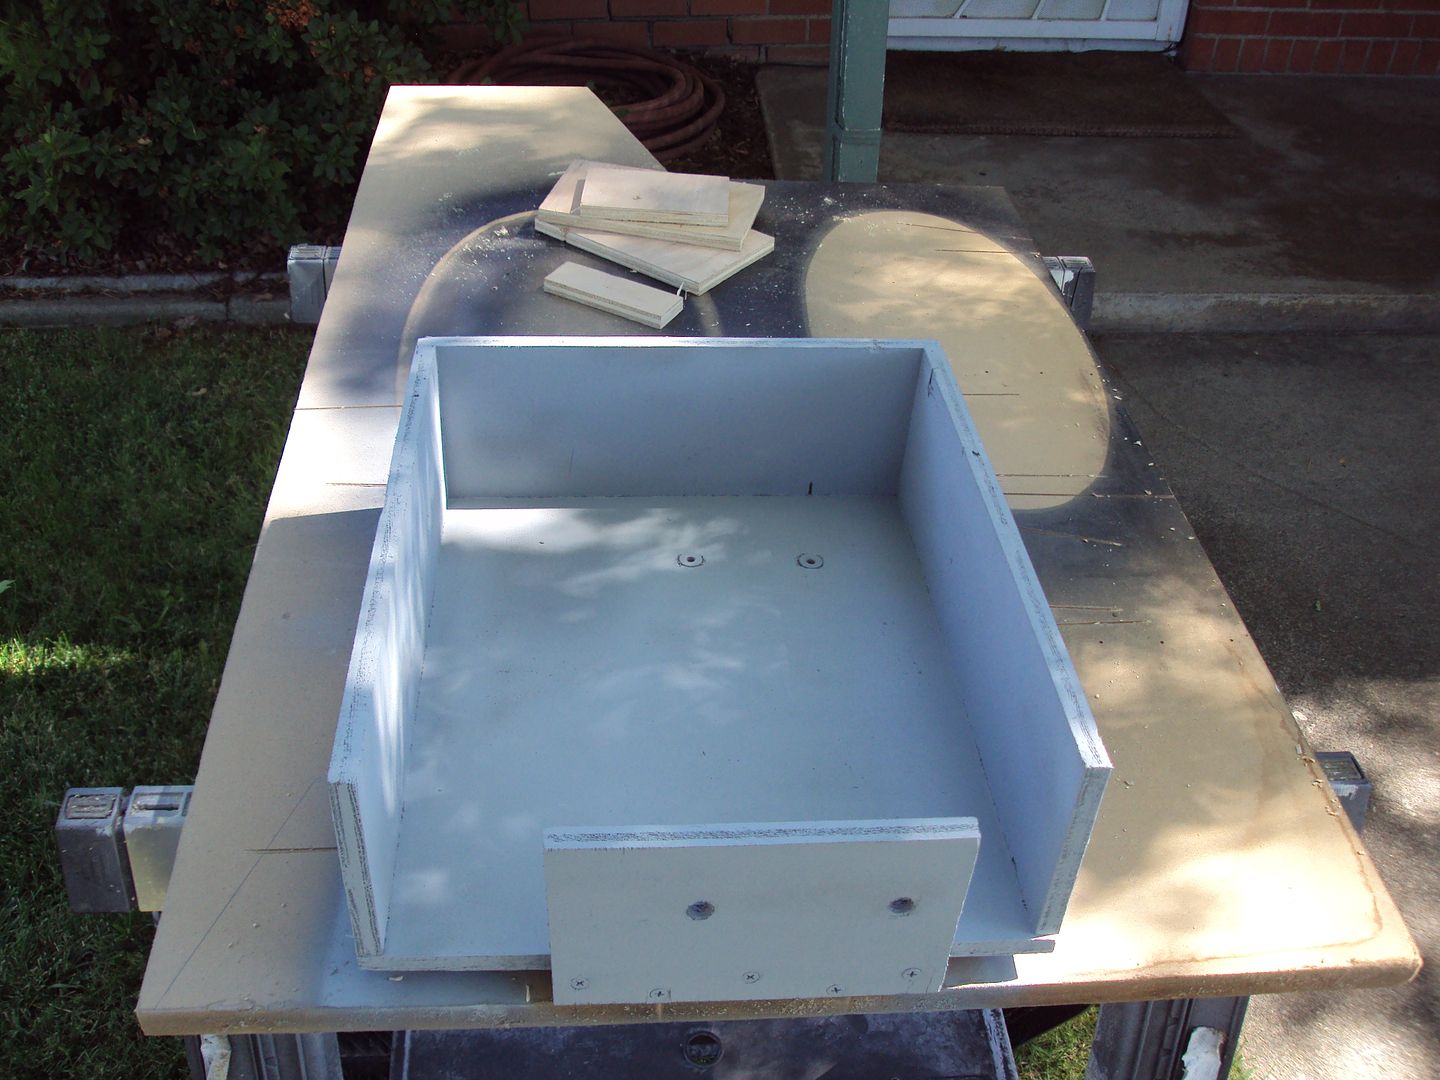
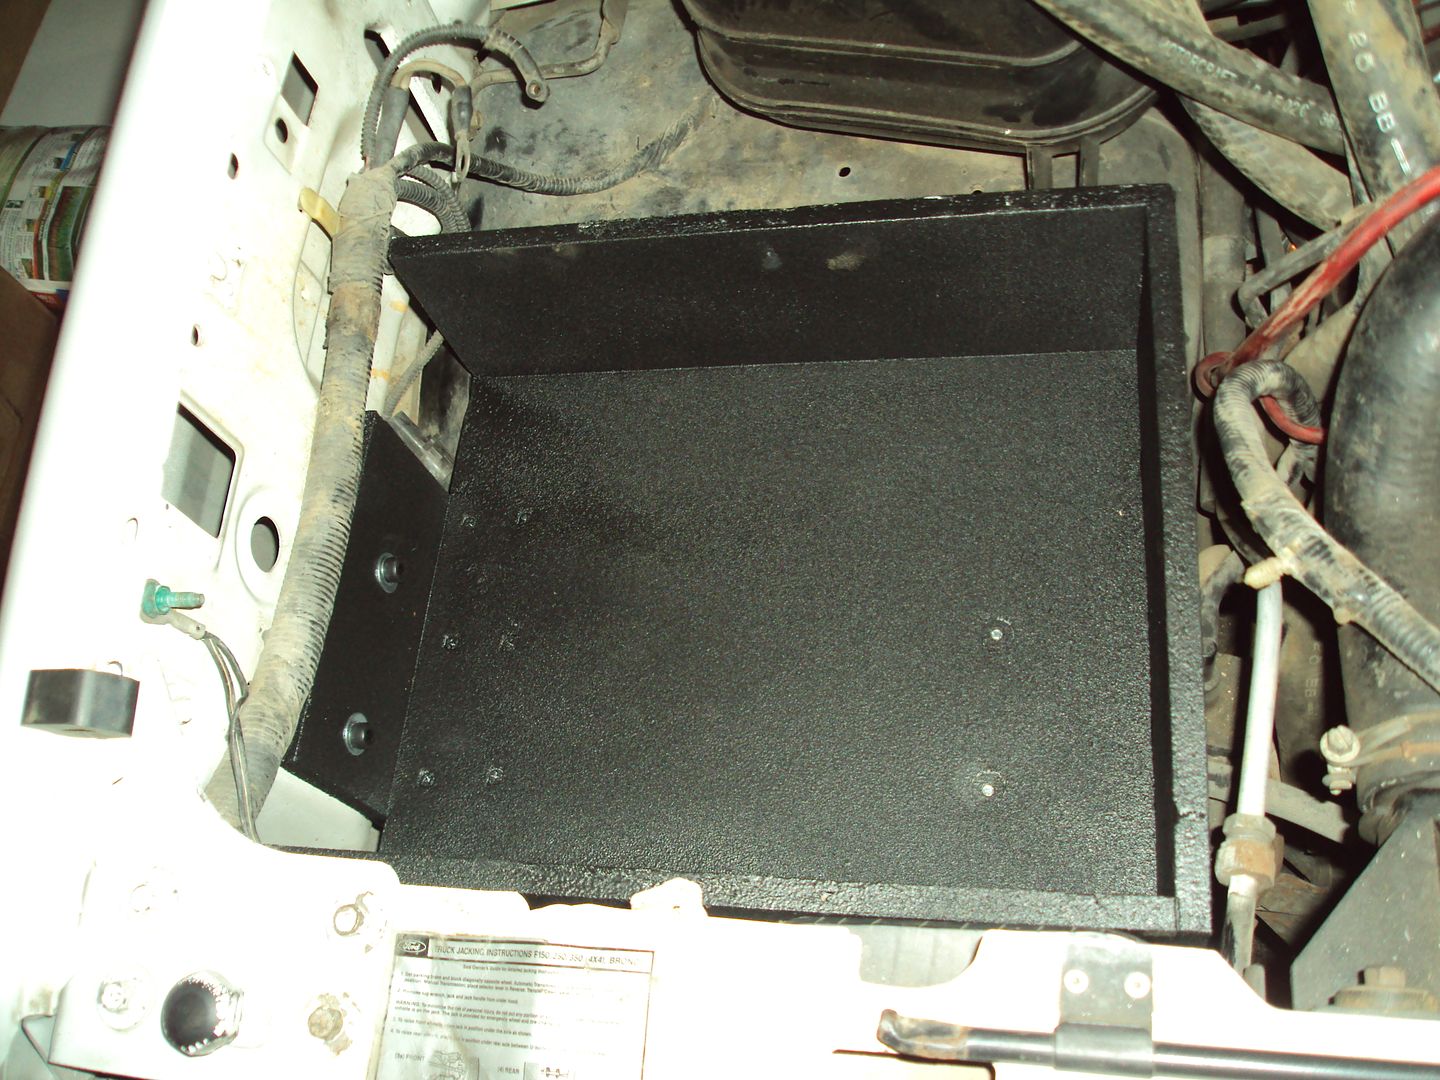
Took some measurements and grabbed a piece of foam board stock I had laying around. Made a template based on the size of the batteries, yes I said batterieS, and it worked out so I transferred it to wood!
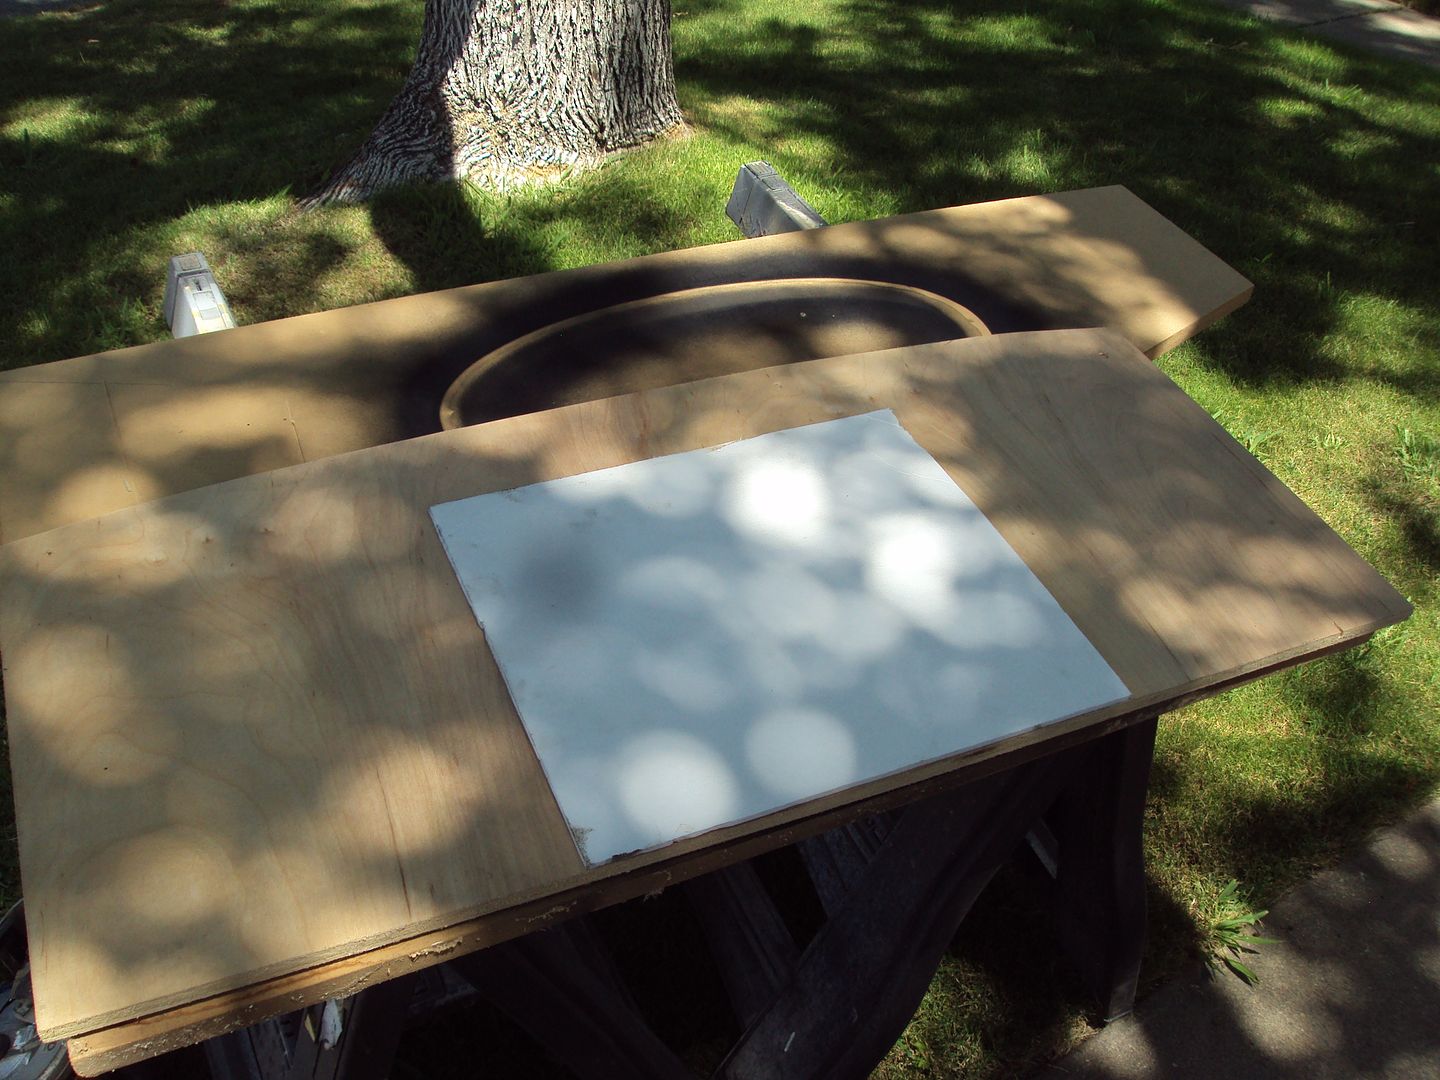
Put it in the space, and really it was looking really good! A couple shims under it on the old bracket, a brace in front, a brace on the side where the old one was, and we've got it made.......
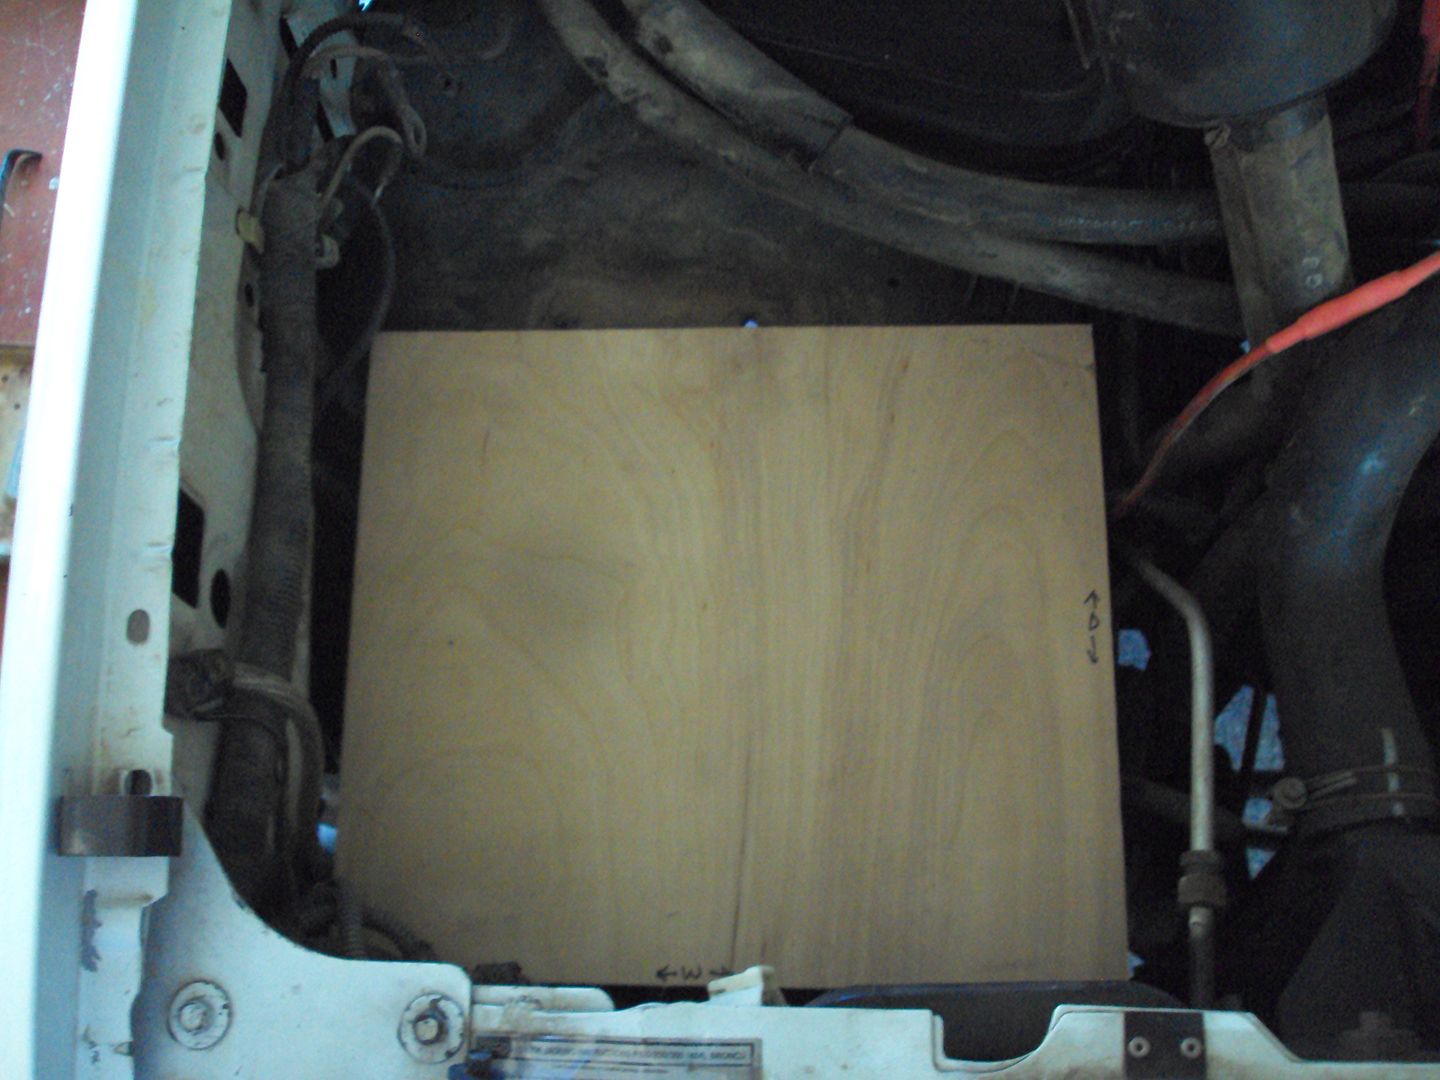
batteries on the tray
Then I started making braces for the front and the side. Notice I'm using all birch. Cause all I had on hand was 1/2" birch or 3/4" mdf. I figured birch would fare better in the elements.
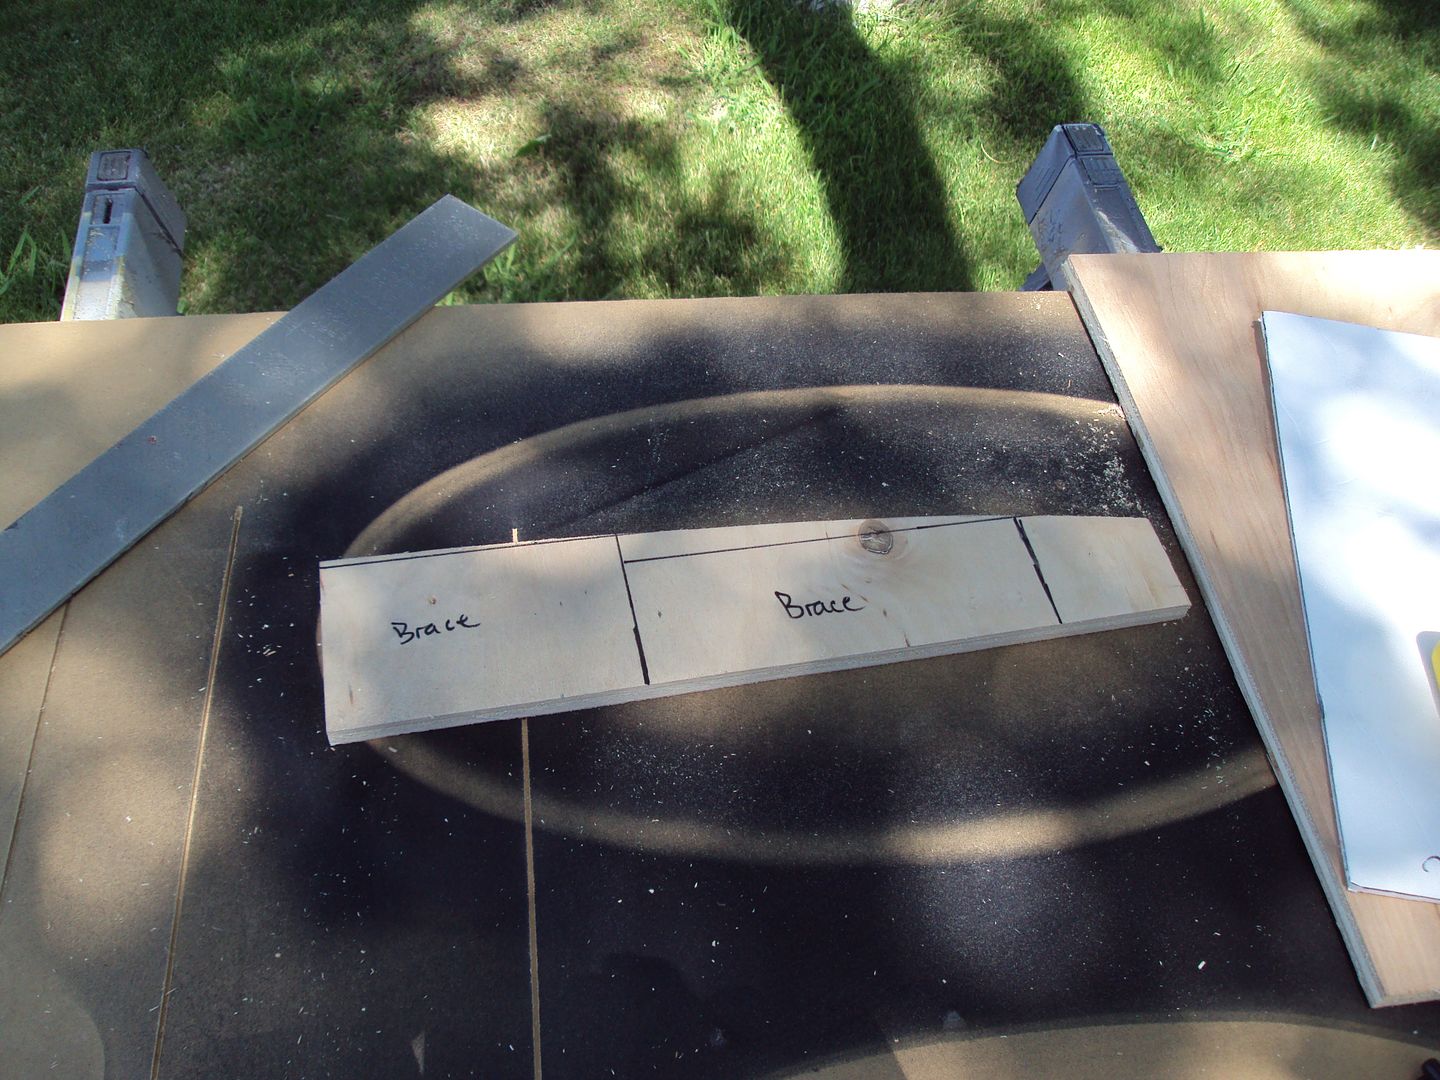
Also to that, let me really quickly stop and clarify something. If I knew how to weld, wood would not even come into play here. I'd make a new tray out of metal and that would be the end of it. However, I don't know how to weld, and for now, this will do in my opinion. I'll do another one later on down the road, cause I really do intend to learn to weld.
Ok let's move on.
Here's the current battery situation.
For some reason I thought I'd see what I could do about it today. So I started taking things apart! Removed the tray it sat on. Actually, let me back up. In the picture above you can see, barely, a black bar on the back left of the battery. That bracket is another brace for the battery tray. I tried to turn the battery sideways, and that was in the way. So I took the bolt out of it, and moved it out and the battery fit, sort of. So then I started tearing into it.
Removed the cylinder thing, I have no idea what it is. (for those of you on FTE forums, if you could enlighten me please). WEll I didn't really remove it, just really moved it out of the way for now.
Then came down the starter solenoid. I hate that these are up here, it's really in the way!
Took some measurements and grabbed a piece of foam board stock I had laying around. Made a template based on the size of the batteries, yes I said batterieS, and it worked out so I transferred it to wood!
Put it in the space, and really it was looking really good! A couple shims under it on the old bracket, a brace in front, a brace on the side where the old one was, and we've got it made.......
batteries on the tray
Then I started making braces for the front and the side. Notice I'm using all birch. Cause all I had on hand was 1/2" birch or 3/4" mdf. I figured birch would fare better in the elements.
Also to that, let me really quickly stop and clarify something. If I knew how to weld, wood would not even come into play here. I'd make a new tray out of metal and that would be the end of it. However, I don't know how to weld, and for now, this will do in my opinion. I'll do another one later on down the road, cause I really do intend to learn to weld.
Ok let's move on.
#78
07-08-2012, 12:19 AM
Join Date: May 2011
Posts: 339
Likes: 0
Received 0 Likes
on
0 Posts
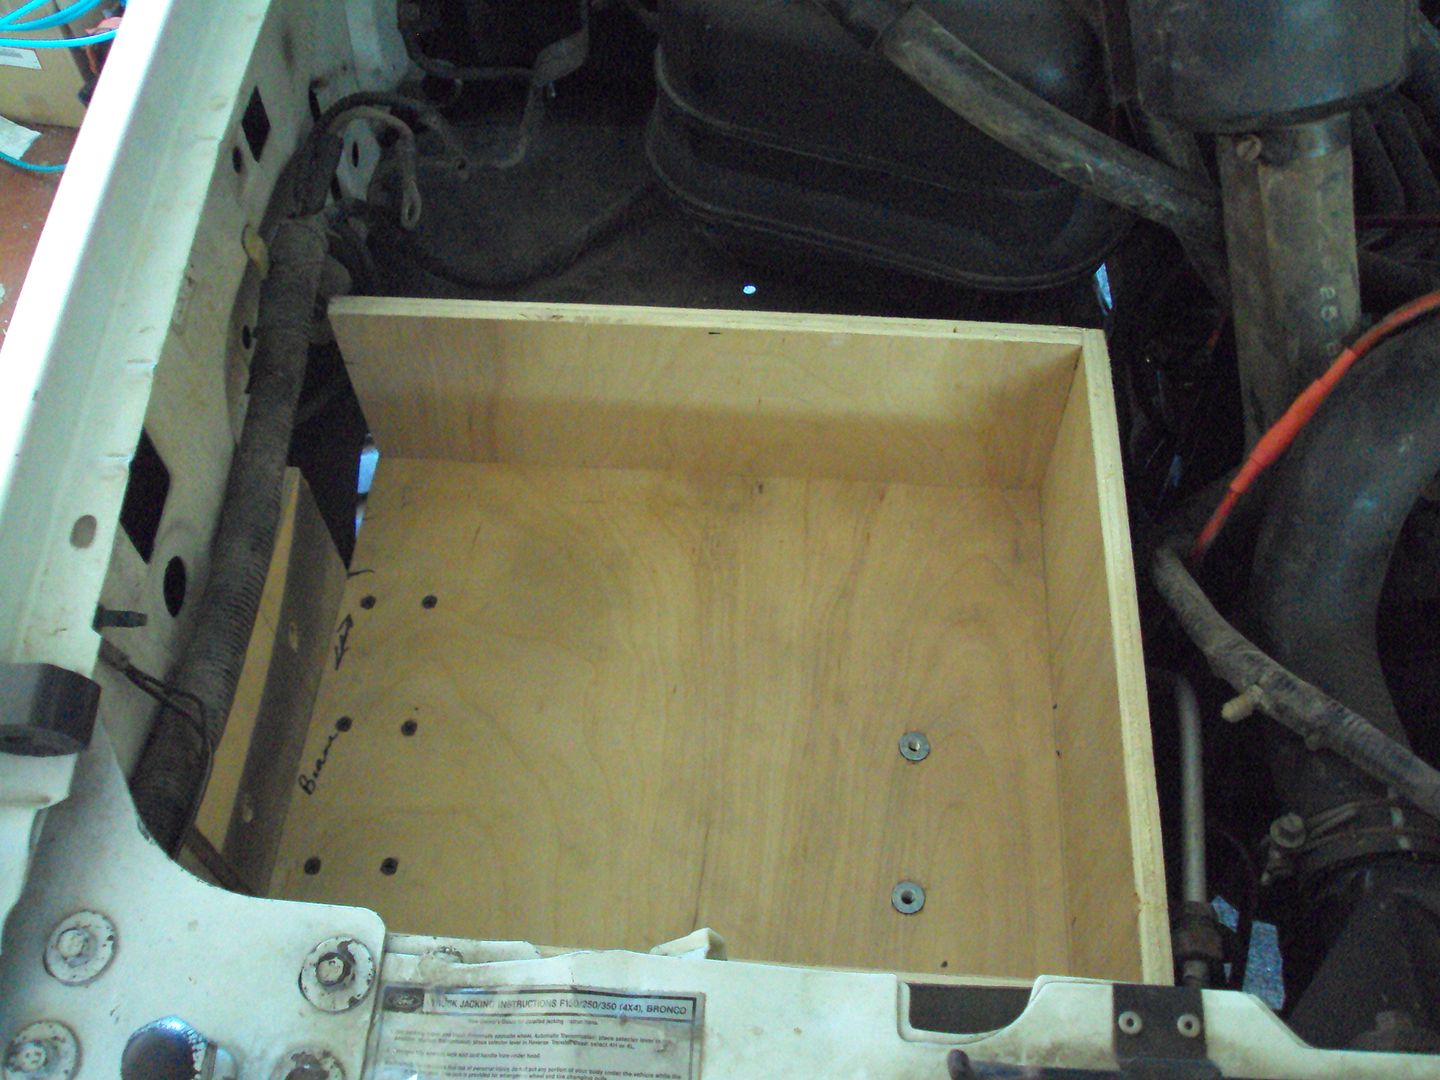
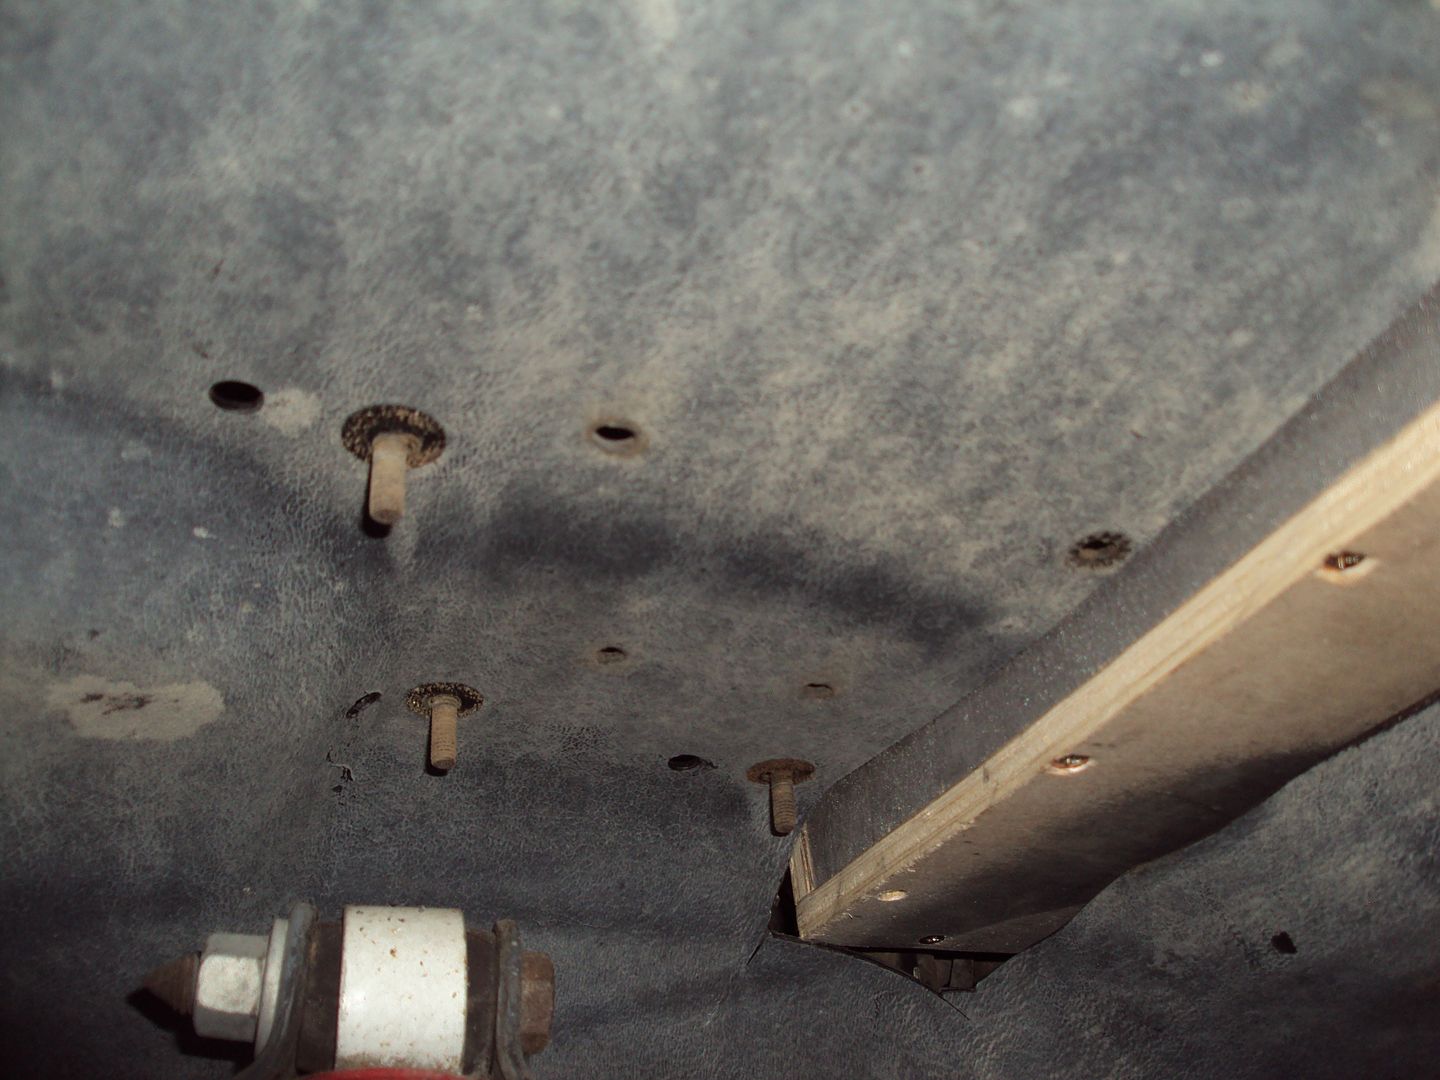
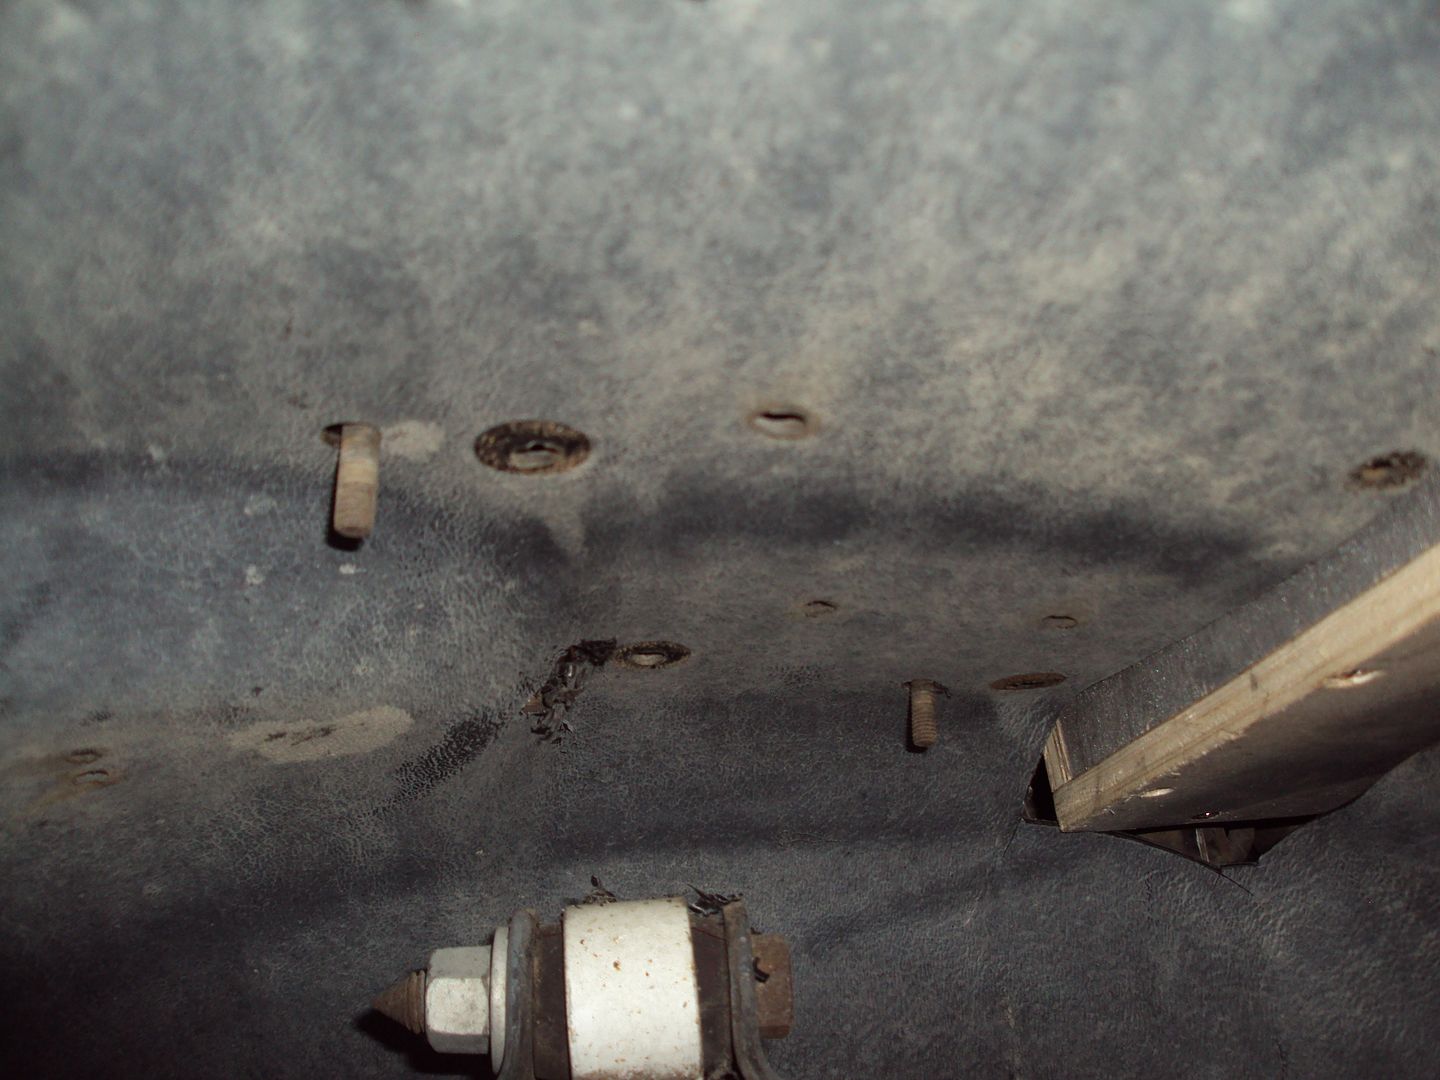
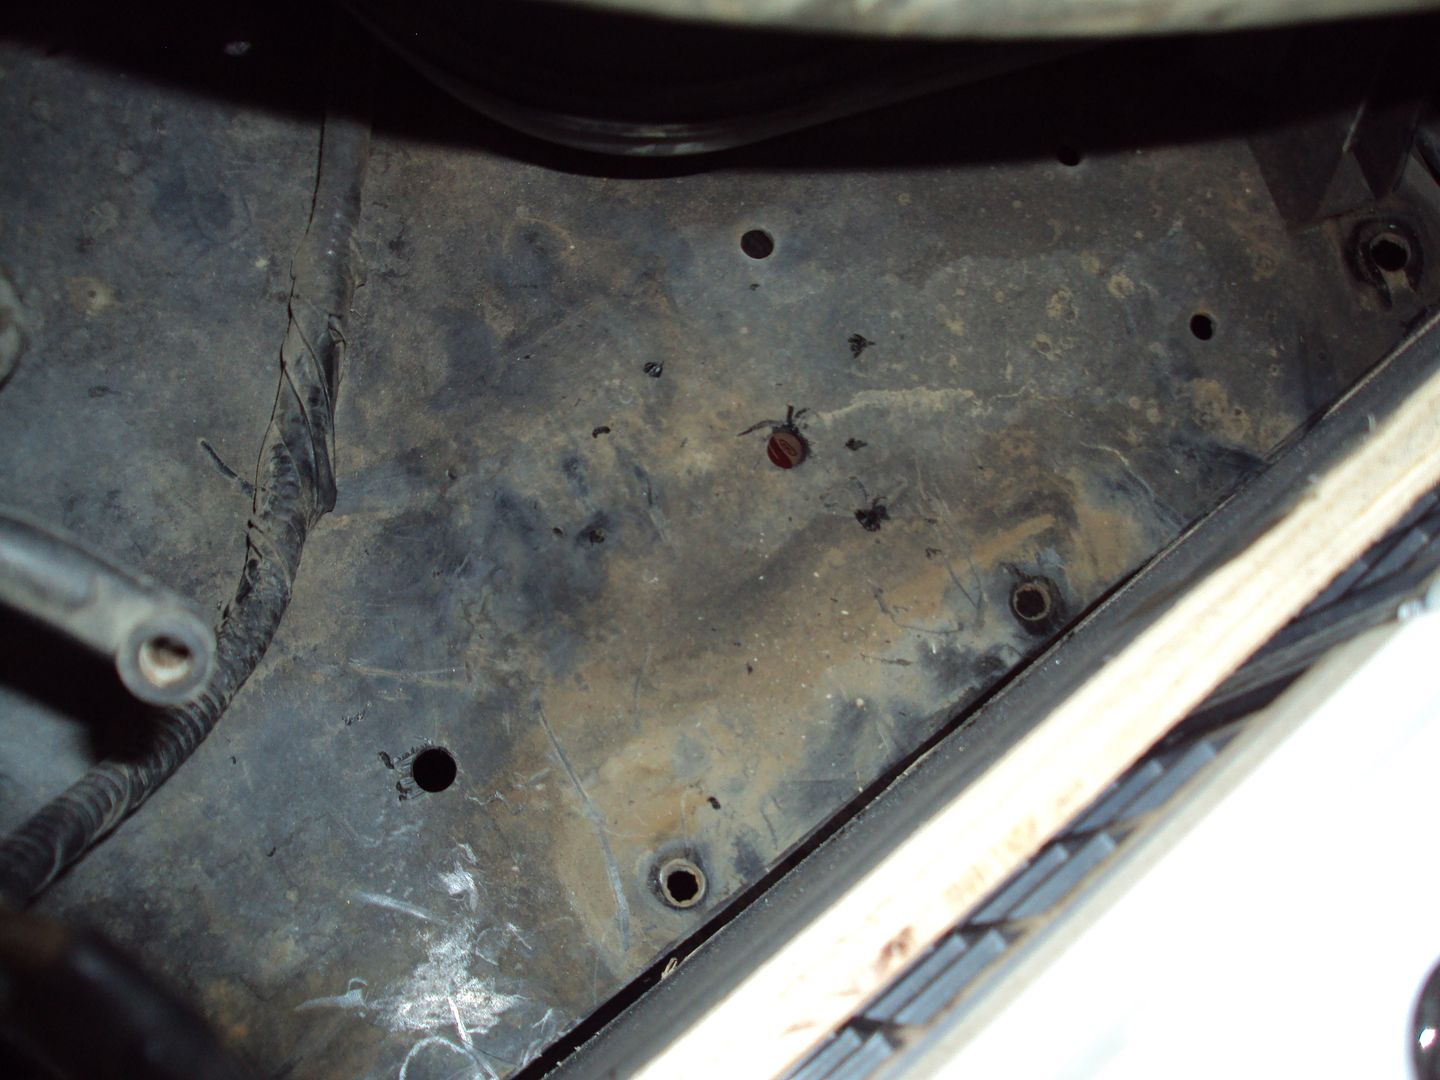
Sorry, this one was blurry for some reason. After looking at the tray, and stopping to measure, and doing some quick math and brainstorming, I realized that the tray really needed to sit on the bracket like the original tray. Well in order to make that happen I had to remove some material out of the wheel well. Not a big deal, and I'll get it fiberglassed in another time.
So this is where i measured to cut.
And here you can see why I need new tires BADLY!!
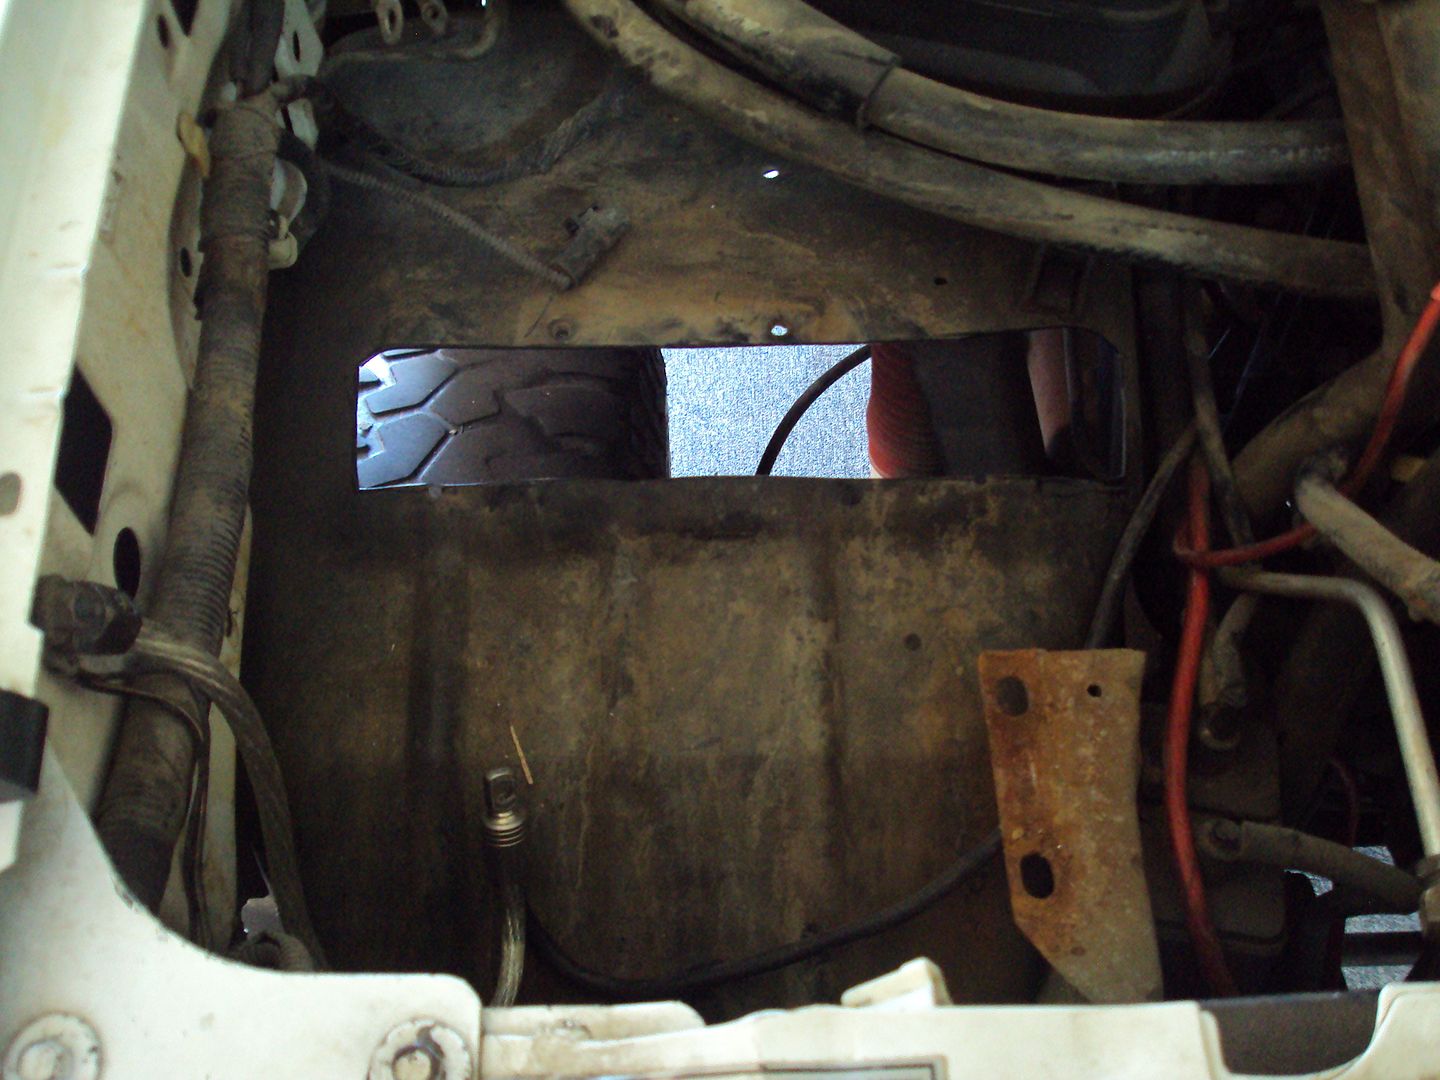
After a little fine trimming, it was in perfectly and sat flat as could be. I was very pleased!
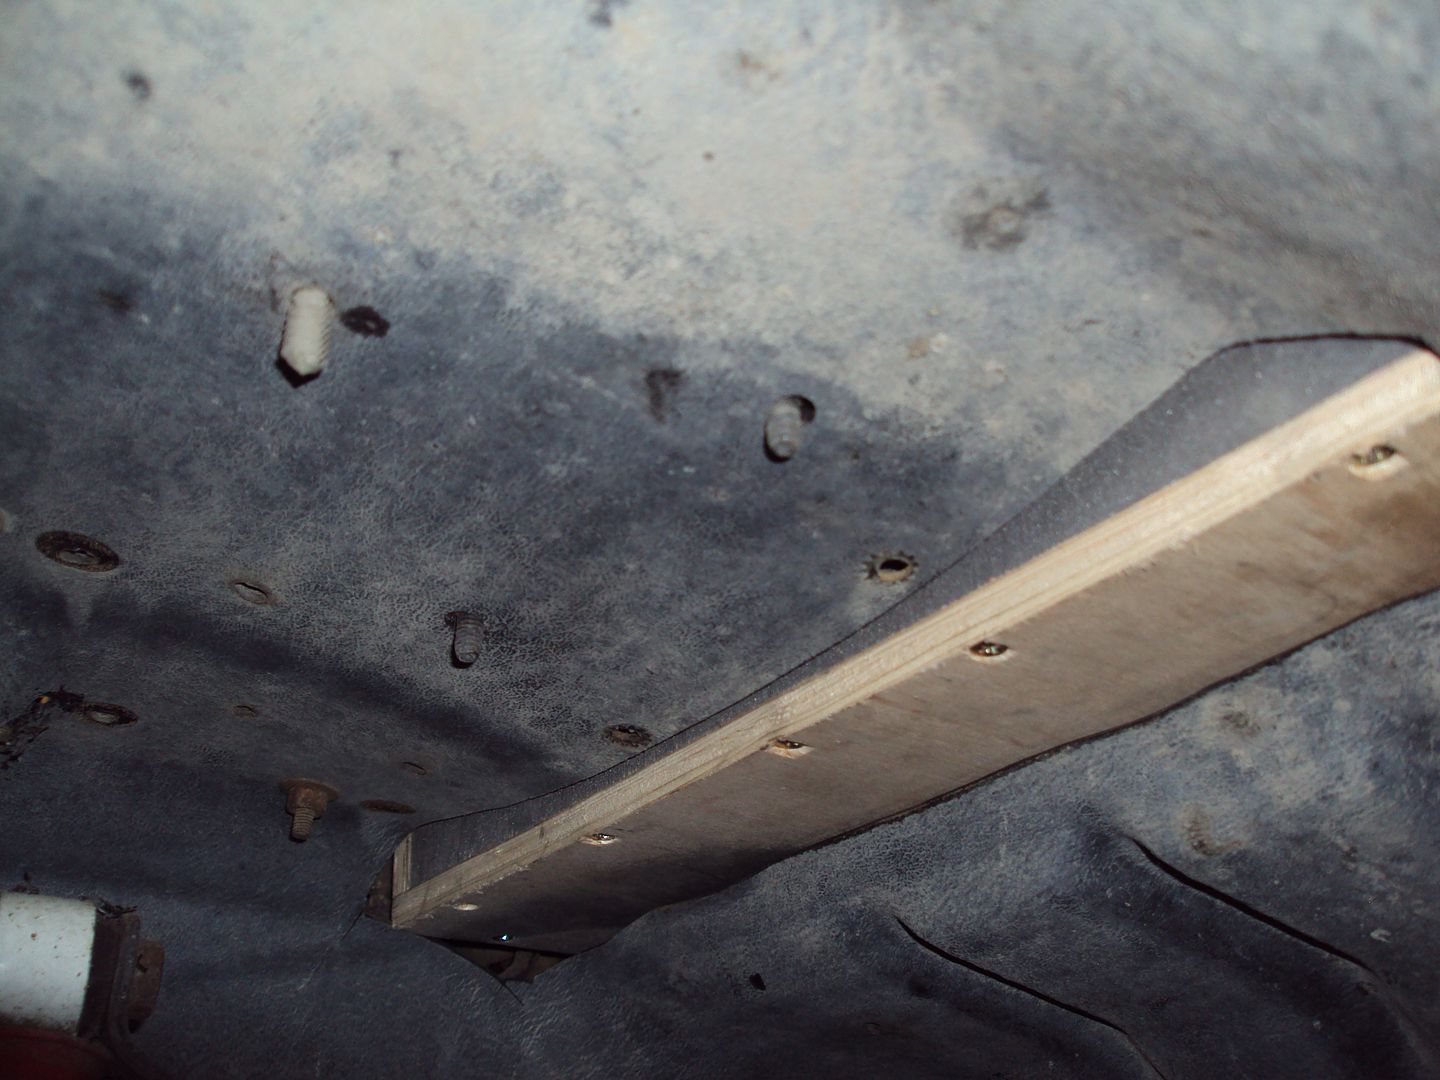
From underneath! Again blurry WTF!!!! I hate my camera!
Next I did a little brace under the tray, so I had more than a half inch of material to screw into for the side bracket.
bottom side. Screws just barely poke through. But that's ok, nothing under it to worry about poking, other than my DAMN FINGERS!
Next I got the side racket screwed on.
Had some allen head screws laying around and they just happened to be the same thread size as the bolt holes that the original tray bolted on to. Lucky right!?! I think so!

So I bet you're wondering how I got those holes to be the exact hole size and be positioned exactly where they're supposed to go. Obviously the fender is in the way and I couldn't just draw through it to mark the holes. So, I put the old bolts in, and tightened them down. Then I put the tray back in with the bracket on, and SMACKED IT WITH MY HAMMER! Really! It made an indentation on the wood and thus, I knew exactly where the holes were supposed to be drilled. There you have it! A little Carver (my last name) ingenuity!
Next I had to get the holes marked for the bottom bracket. That wasn't going to be so easy. There were clips that held those bolts in and they were so rusted, that when I tried to loosen the bolts, they broke. So, I got the tray in place, and tried to reach in where I cut the wheel well lining. Well it was too close for a marker to fit. So I grabbed one of my daughters 300 pencils, the teal one with the flowers, and I broke that sum bitch in half! Worked like a charm. Was able to trace the hole from under the liner.
So this is where i measured to cut.
And here you can see why I need new tires BADLY!!
After a little fine trimming, it was in perfectly and sat flat as could be. I was very pleased!
From underneath! Again blurry WTF!!!! I hate my camera!
Next I did a little brace under the tray, so I had more than a half inch of material to screw into for the side bracket.
bottom side. Screws just barely poke through. But that's ok, nothing under it to worry about poking, other than my DAMN FINGERS!
Next I got the side racket screwed on.
Had some allen head screws laying around and they just happened to be the same thread size as the bolt holes that the original tray bolted on to. Lucky right!?! I think so!
So I bet you're wondering how I got those holes to be the exact hole size and be positioned exactly where they're supposed to go. Obviously the fender is in the way and I couldn't just draw through it to mark the holes. So, I put the old bolts in, and tightened them down. Then I put the tray back in with the bracket on, and SMACKED IT WITH MY HAMMER! Really! It made an indentation on the wood and thus, I knew exactly where the holes were supposed to be drilled. There you have it! A little Carver (my last name) ingenuity!
Next I had to get the holes marked for the bottom bracket. That wasn't going to be so easy. There were clips that held those bolts in and they were so rusted, that when I tried to loosen the bolts, they broke. So, I got the tray in place, and tried to reach in where I cut the wheel well lining. Well it was too close for a marker to fit. So I grabbed one of my daughters 300 pencils, the teal one with the flowers, and I broke that sum bitch in half! Worked like a charm. Was able to trace the hole from under the liner.
#79
07-08-2012, 12:26 AM
Join Date: May 2011
Posts: 339
Likes: 0
Received 0 Likes
on
0 Posts
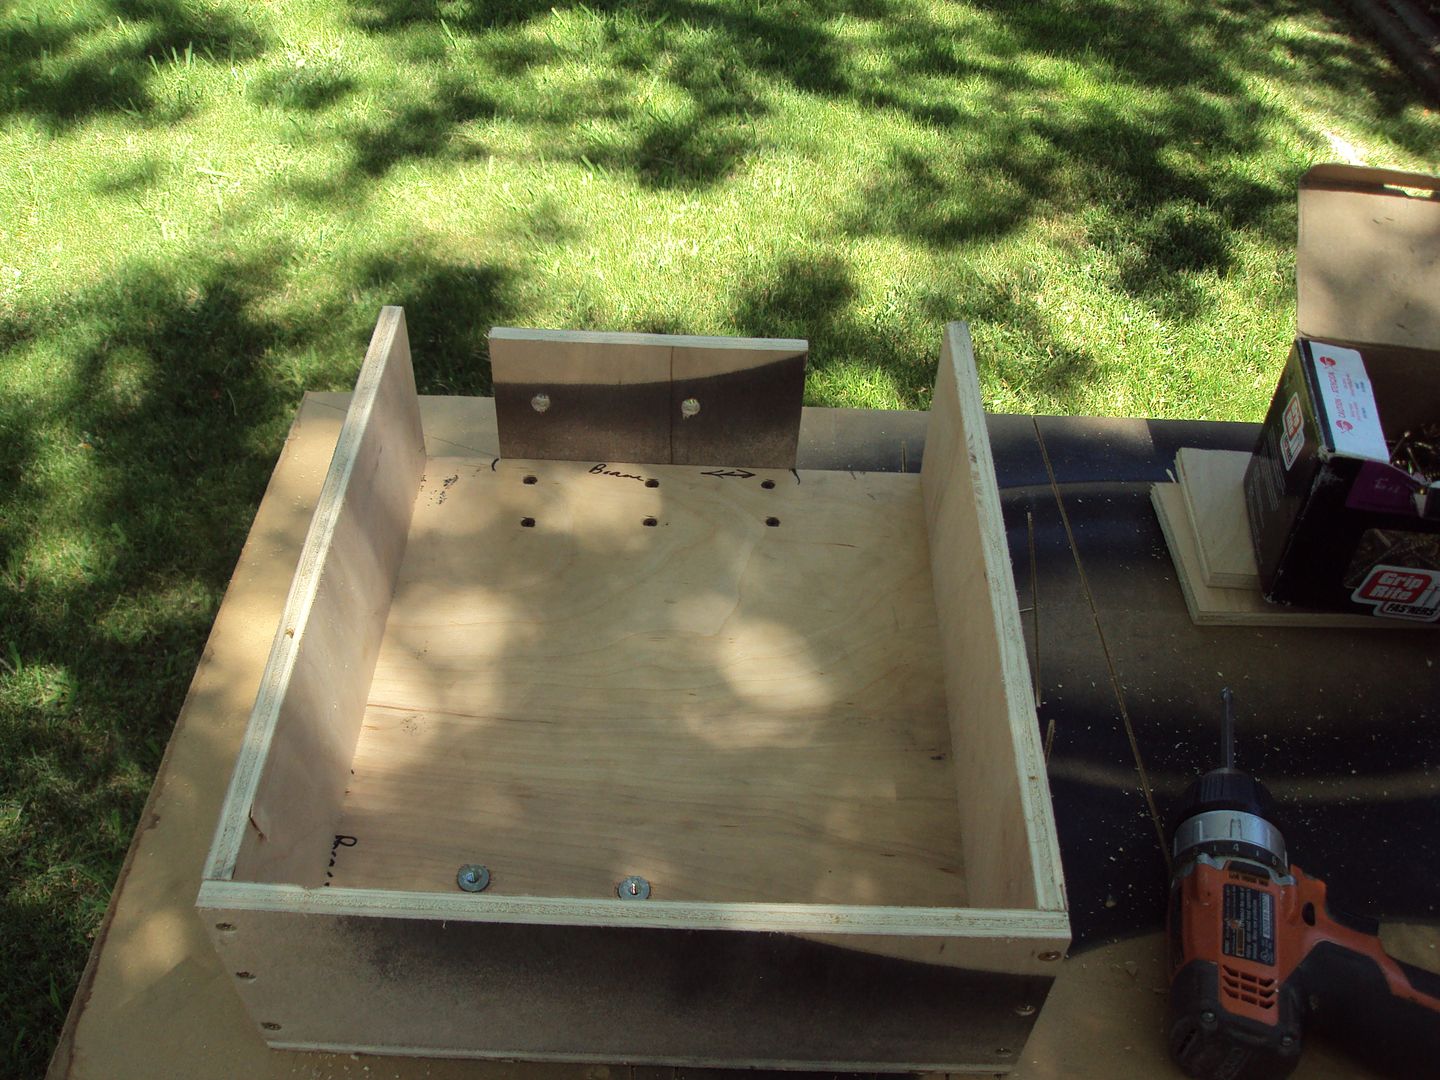
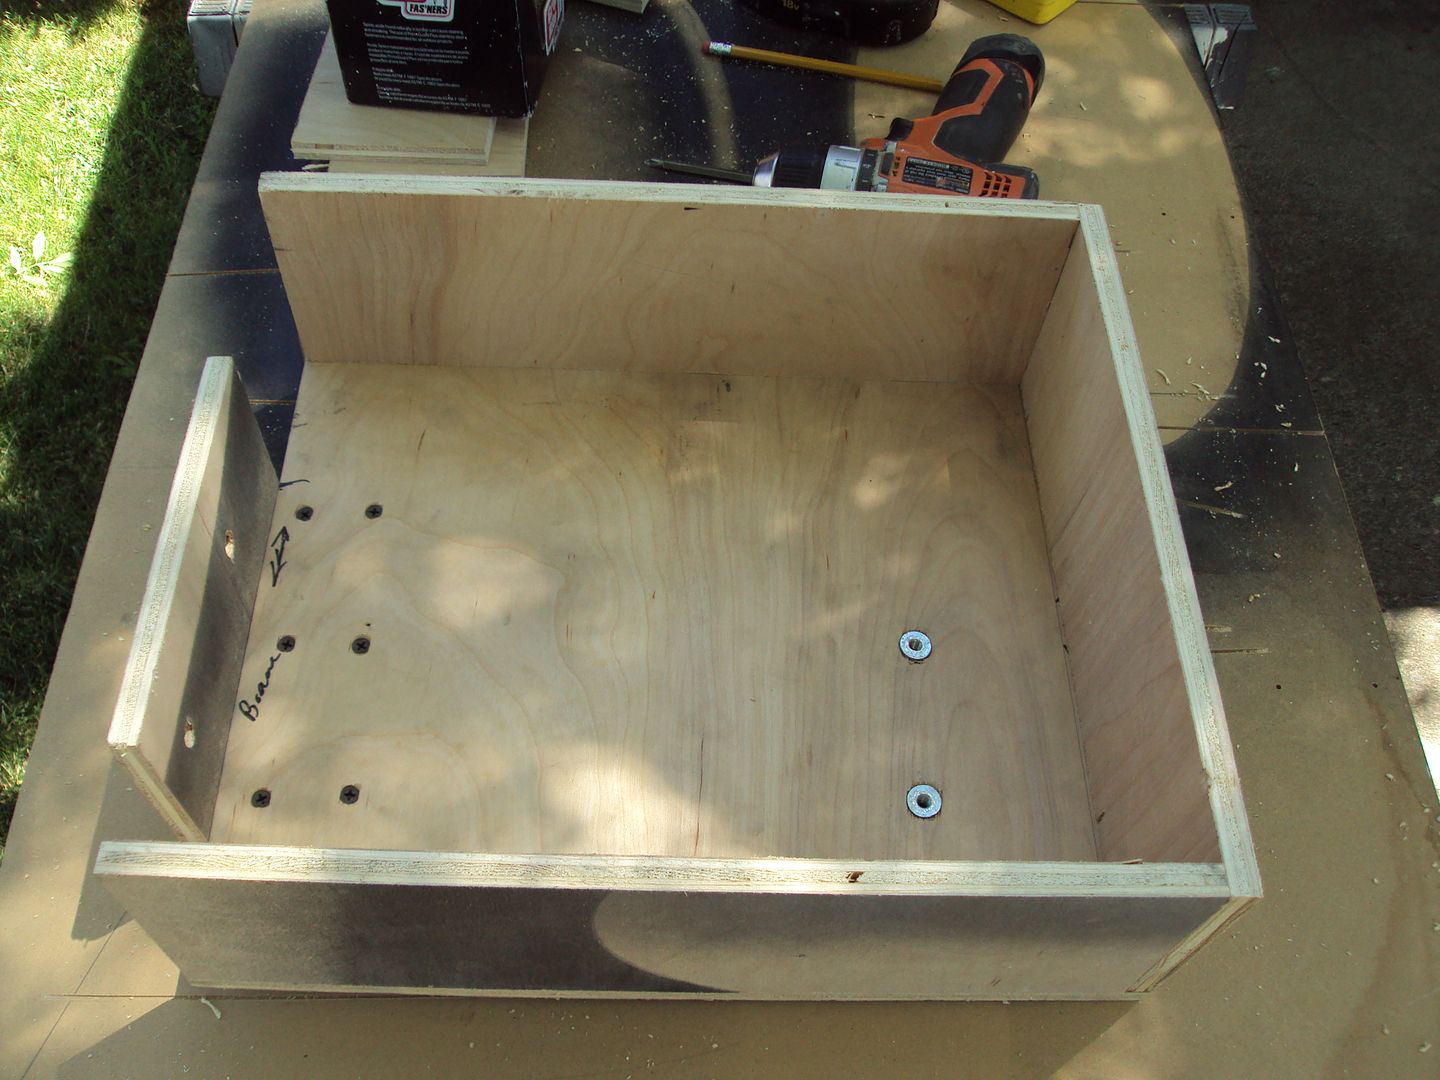
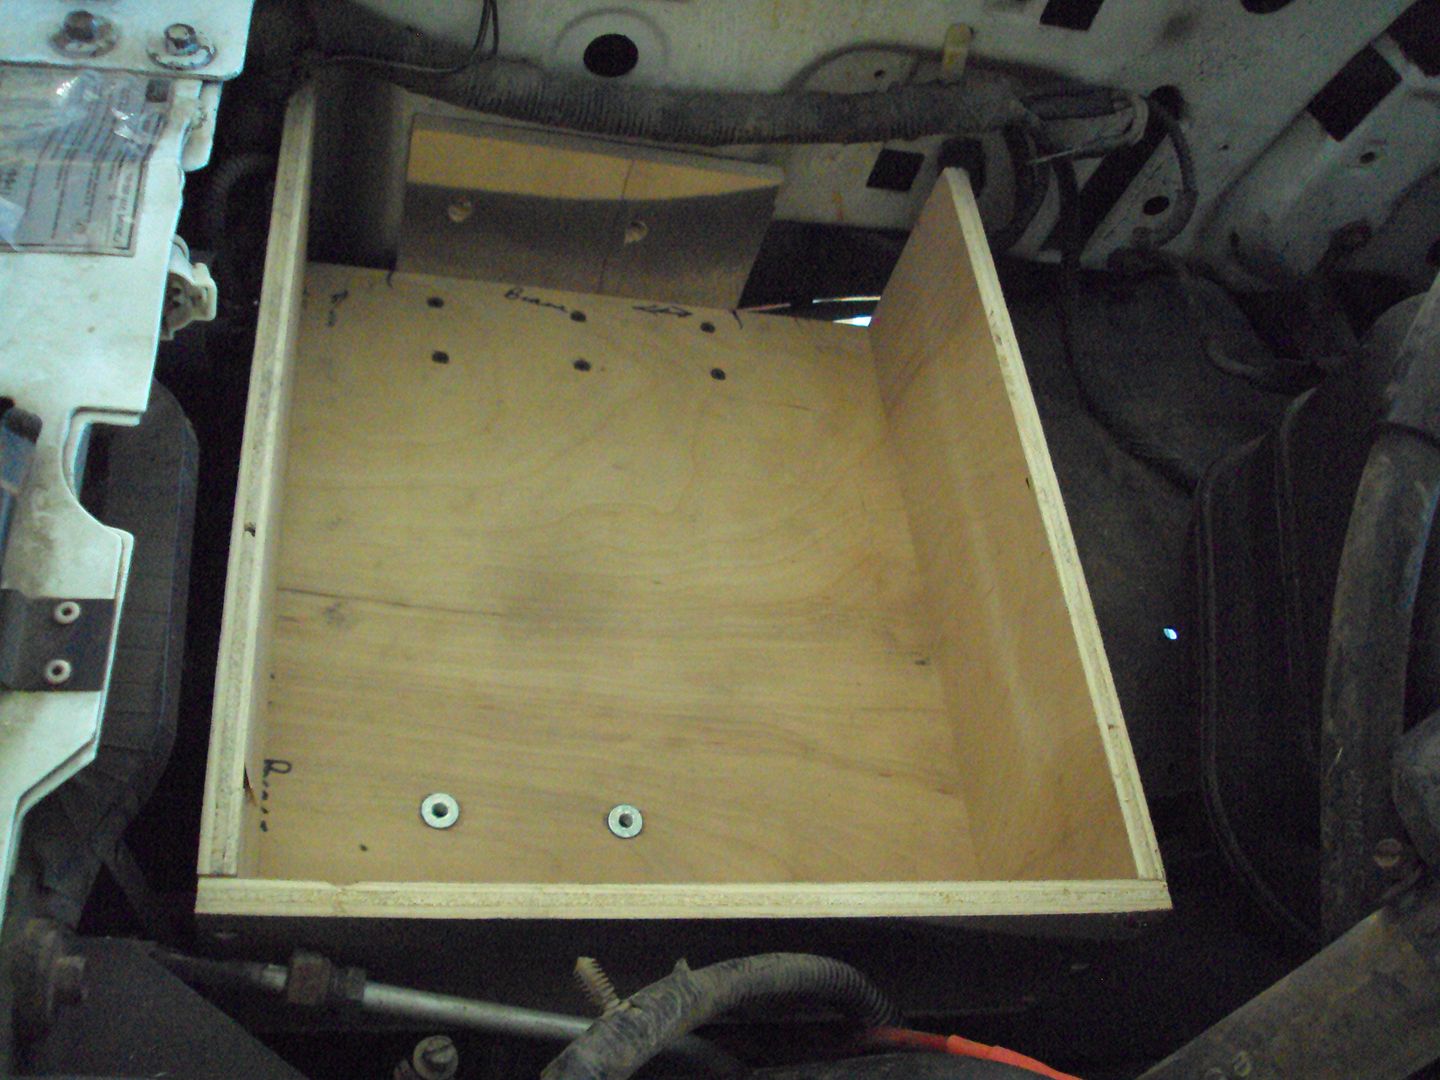
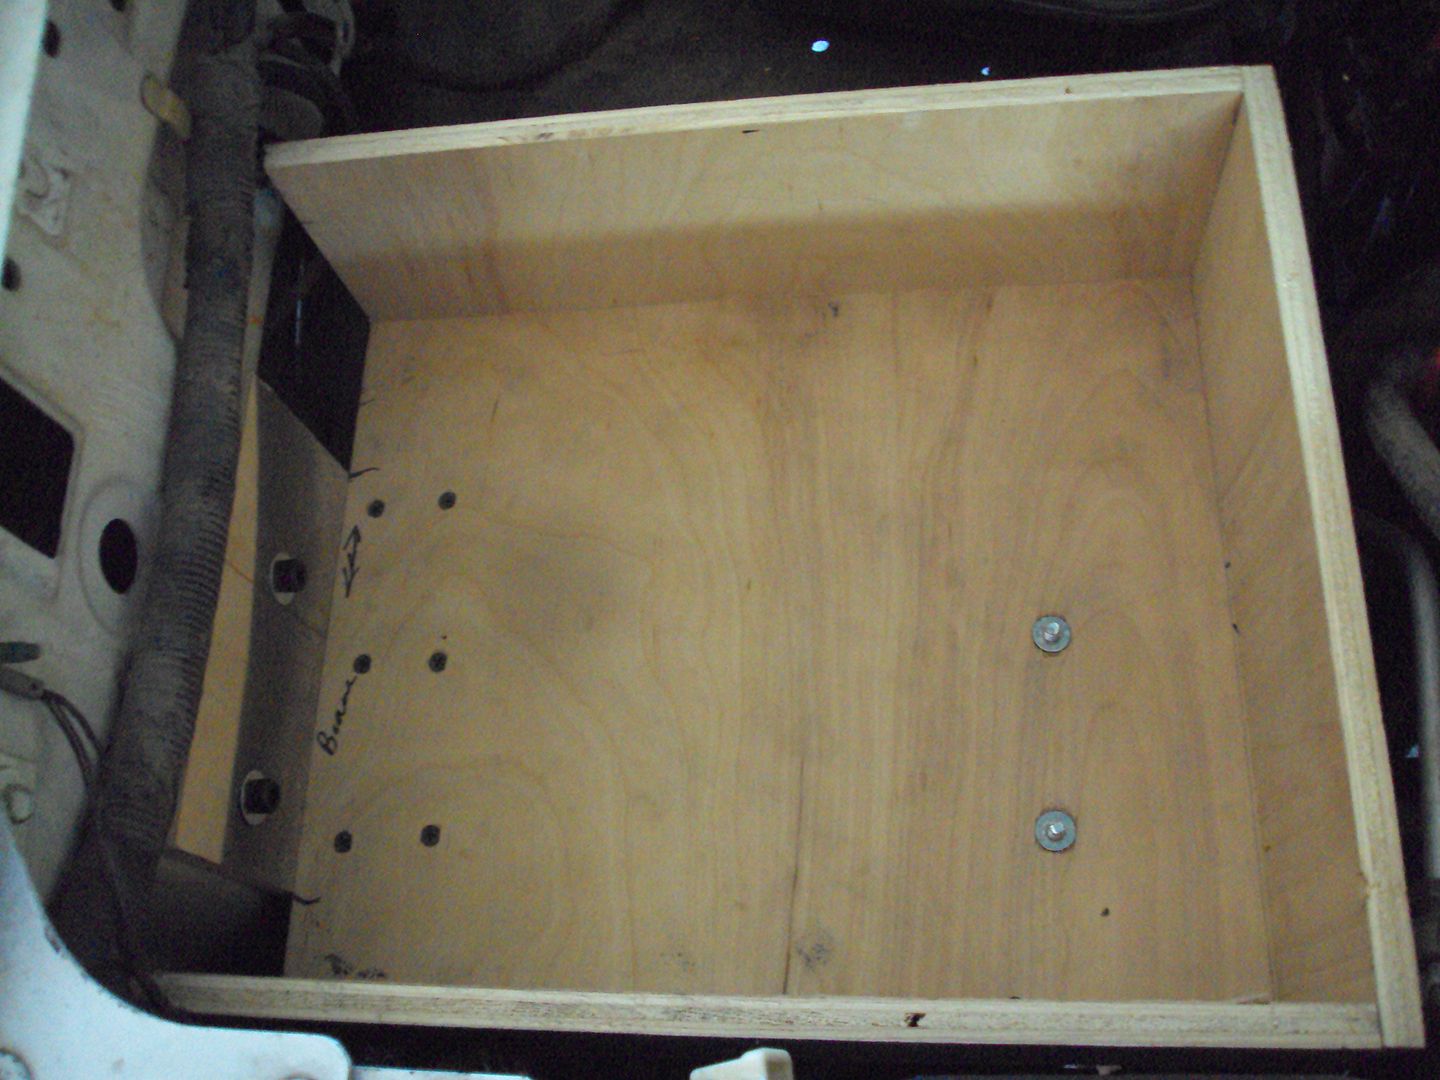
So the next part was figuring out, now that holes were in, how I was going to actually secure the tray to the bracket. Remember there aren't any threaded inserts on the bracket. So I decided to put some on the tray. If I could weld, again, I'd have tacked some nuts on the bracket and then I could've screwed, or bolted it down from the top. Instead I chose this pain in the *** solution.
Threaded inserts, with my trusty attitude adjuster! This was my tool of choice when I was framing. 19oz, dual head, I could take this head off and put a different one on, it also had a nice grip on it. Loved this hammer! She just doesn't get the love she used to! teardrop! Ok moving on!
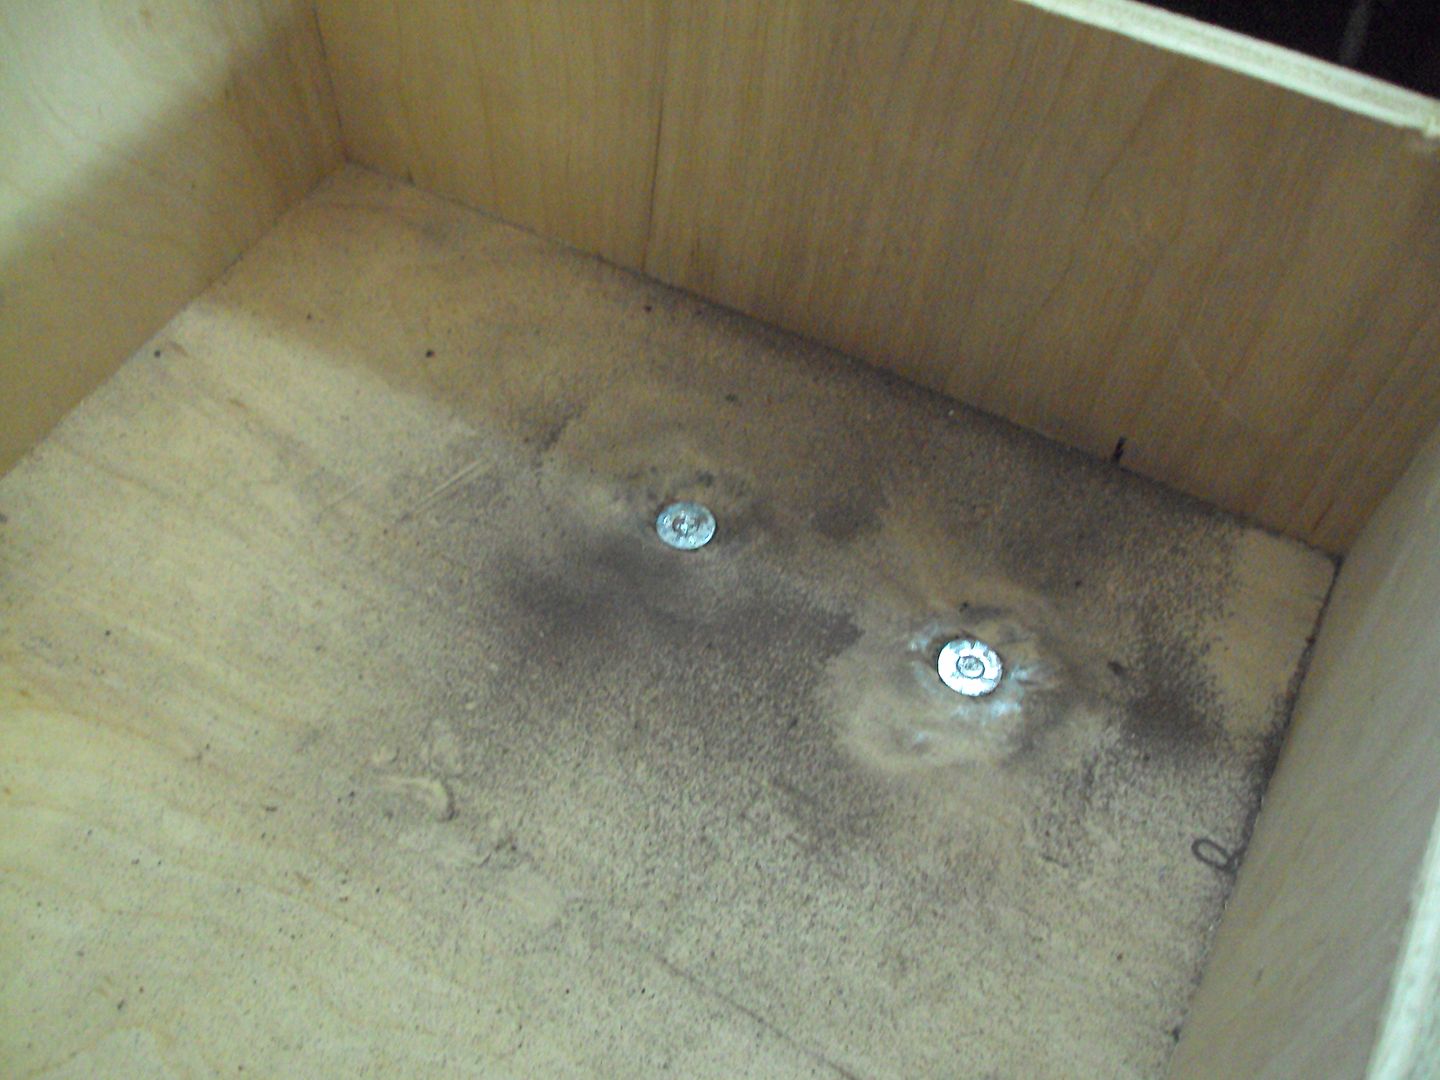
Inserts inserted!
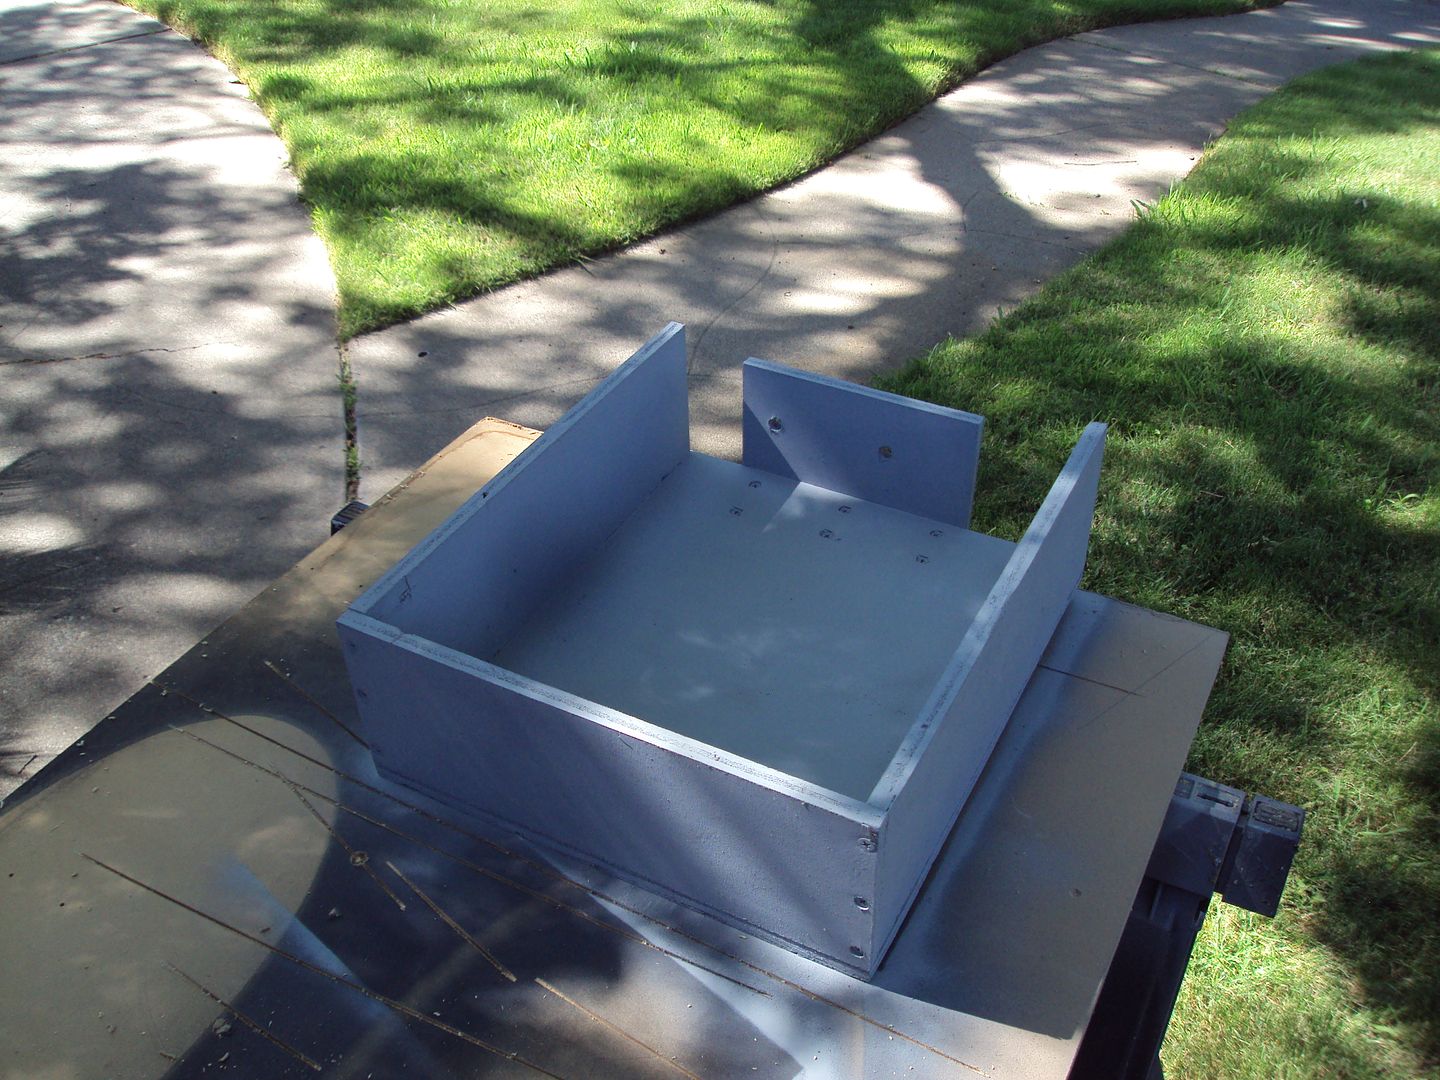
Now it was time to add some sides so these bad boys don't move!
Counter sunk holes
put together!
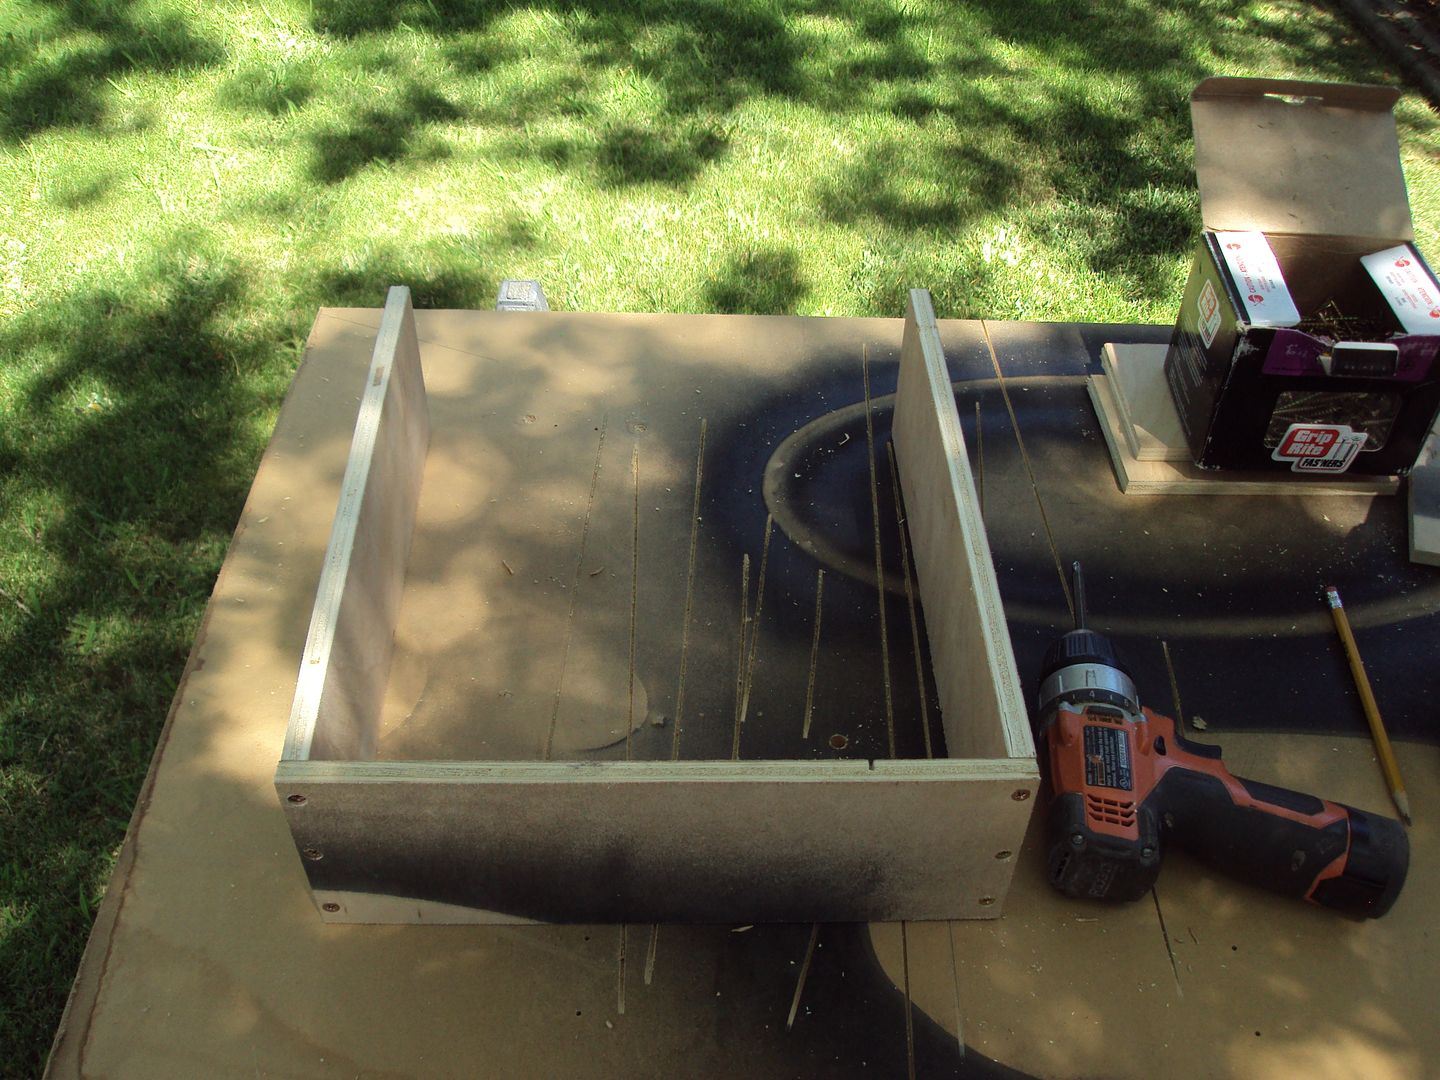
Now to put it on the base. All counter sunk holes with 2" screws! Wanted it as stout as possible for wood!
Top side
Threaded inserts, with my trusty attitude adjuster! This was my tool of choice when I was framing. 19oz, dual head, I could take this head off and put a different one on, it also had a nice grip on it. Loved this hammer! She just doesn't get the love she used to! teardrop! Ok moving on!
Inserts inserted!
Now it was time to add some sides so these bad boys don't move!
Counter sunk holes
put together!
Now to put it on the base. All counter sunk holes with 2" screws! Wanted it as stout as possible for wood!
Top side
#80
07-08-2012, 12:27 AM
Join Date: May 2011
Posts: 339
Likes: 0
Received 0 Likes
on
0 Posts
Some of the pictures seem to be hit and miss as far as working. Still using stupid failbucket for my photos. I really should change. I've noticed that if they're not working, and I refresh the page, they seem to come back. Just FYI. I know about it, not much I can do about it. Sorry.
Moving on.
Moving on.
#81
07-08-2012, 12:34 AM
Join Date: May 2011
Posts: 339
Likes: 0
Received 0 Likes
on
0 Posts
Ok, lets do a test fit with this bad boy!
Little tighter with the walls on, not when in place, but getting it in place. But she's there as you can see.
Bolted it in, and the bottom screws stuck up a bit. so I had to grind those down.
Have I ever mentioned that this is my favorite tool I own!

Now, lets get a little test fit of the goods!
Now that everything is in and fits good, I had to move a few more things around to make it all work right. These three bolts needed to move over about an inch to get that cylinder back in. These bolts go to a vaccume thing. It was in the way for the cylinder going back in. Move over bioch!
And these were the new holes for the cylinder. You can see the old ones right next to the tray.
#82
07-08-2012, 12:40 AM
Join Date: May 2011
Posts: 339
Likes: 0
Received 0 Likes
on
0 Posts
This is the cylinder thing again, ready to go back in.
In the new holes. "I love it when a plan comes together!"
A shot of the screws from under the tray.
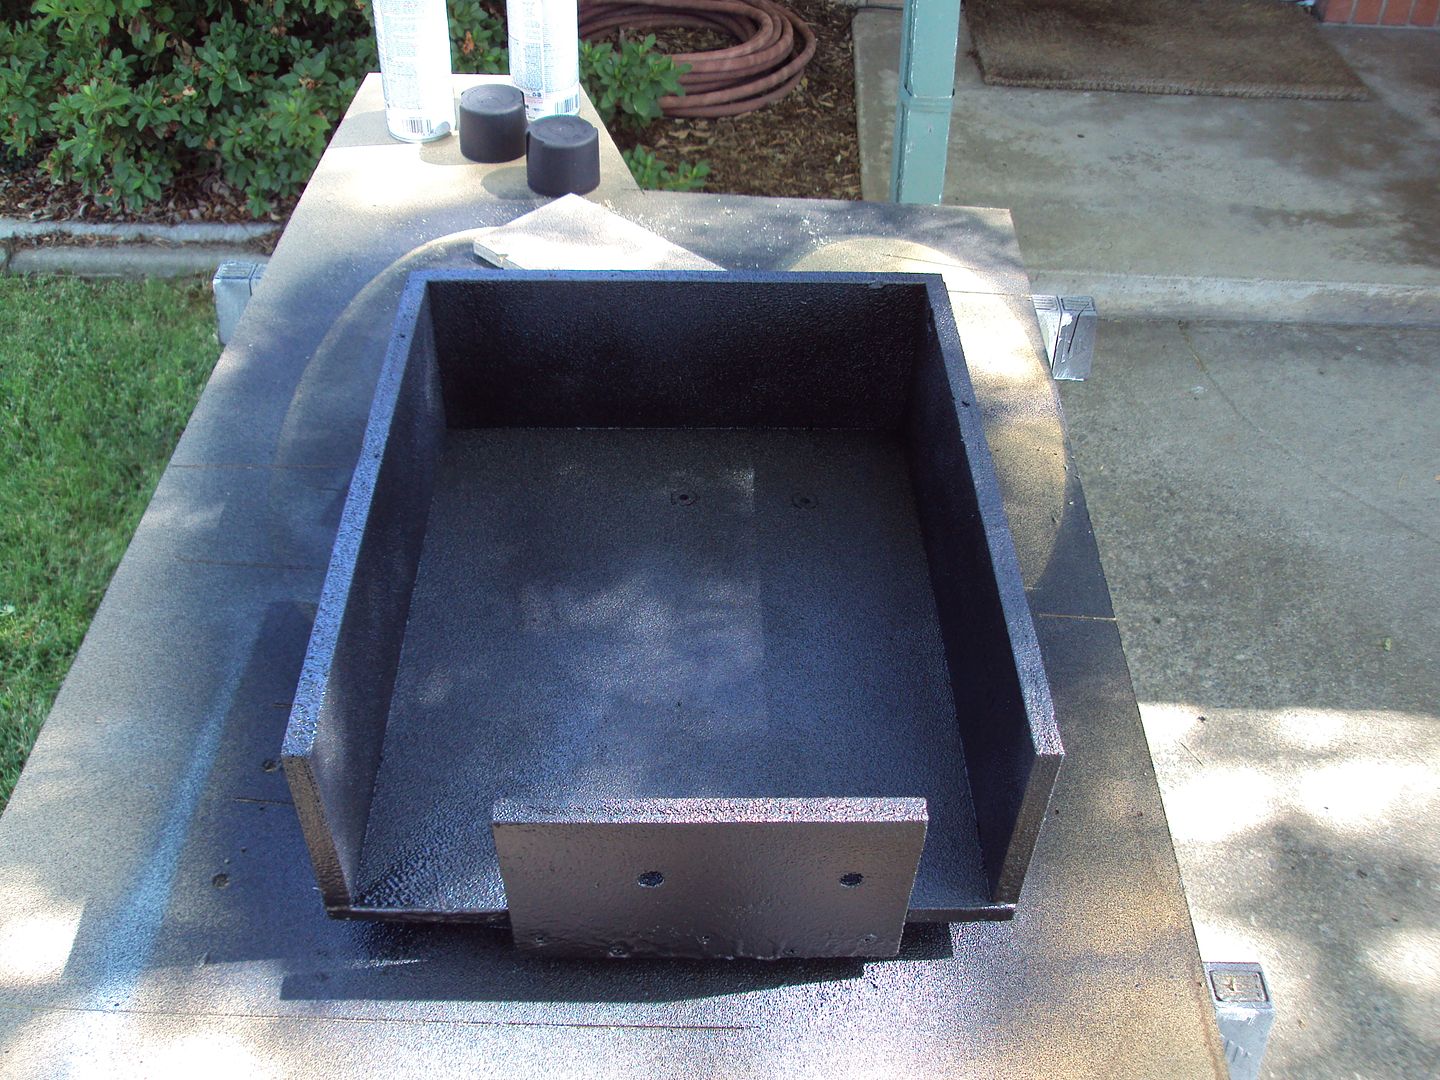
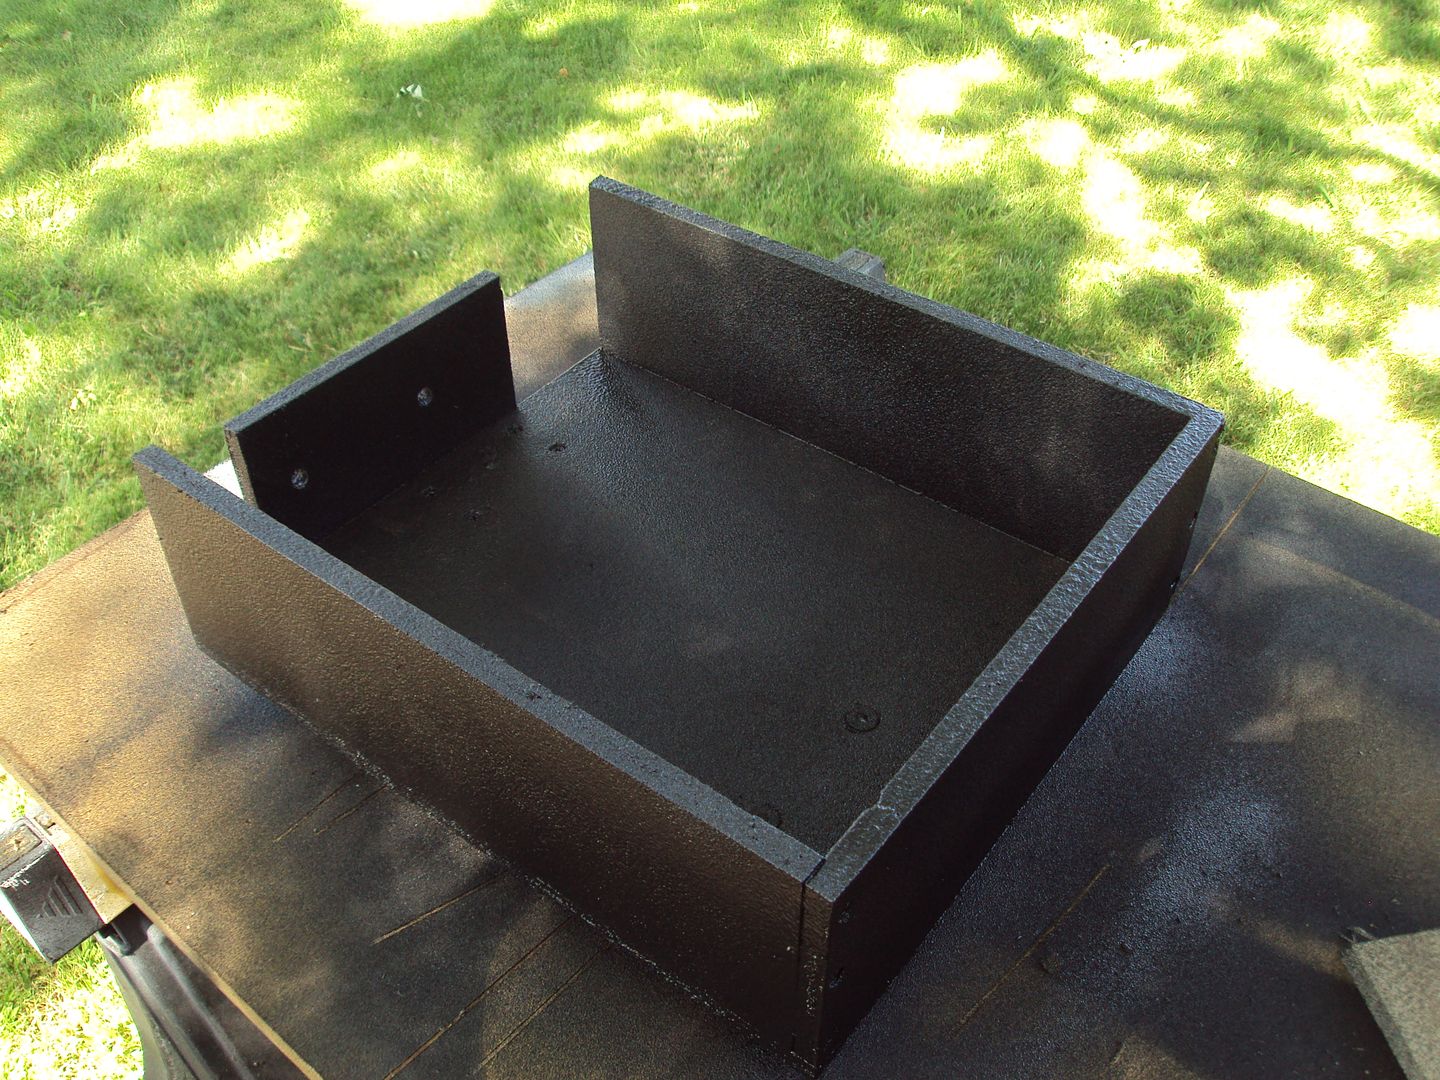
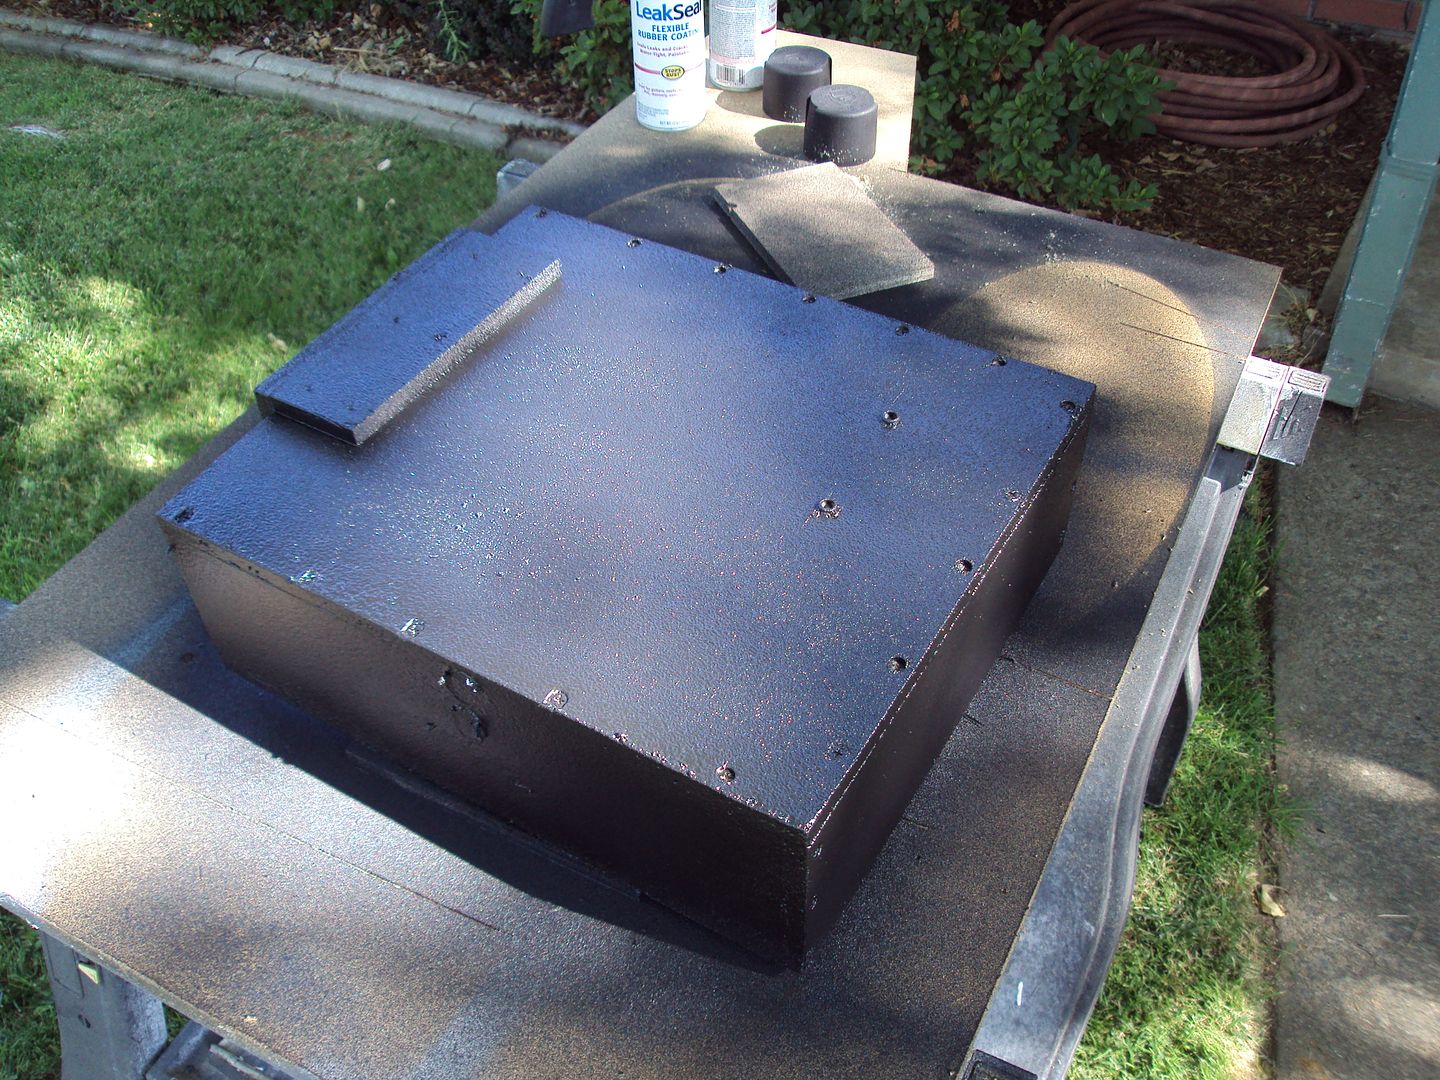
Now we can't just leave this as raw wood, so we must do something about it. I really should fiberglass it and seal it all in, but really I'm not sure how long I'm going to leave it like this so, for now we'll prime the hell out of it, and paint the hell out of it. Should seal it up nicely.

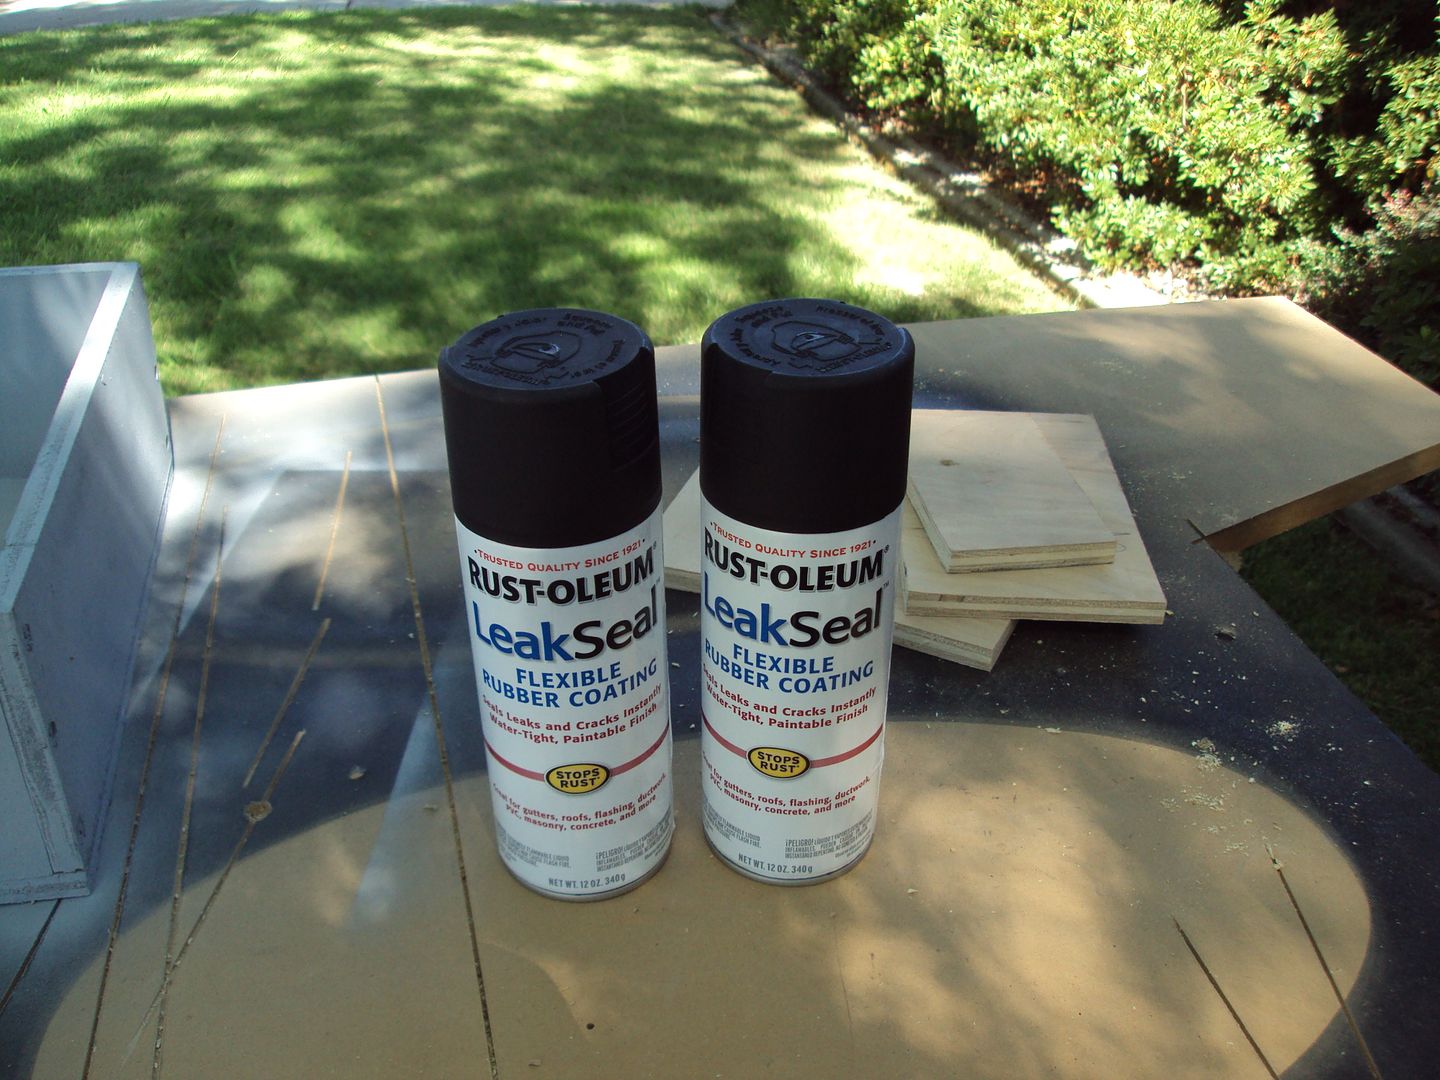
So I forgot that I didn't have any black paint, I used the rest of it for the amp rack and box. So I had to run to the hardware store around the corner. Should've known they didn't have crap! I hate that place, but they have just enough to keep me going there, except when I really need something specific. They did however, have this stuff. It's leak seal by Rustoleum. It's made to seal up cracks and stop water leaks etc. So I figured a few coats of this stuff would do me just perfectly! See, now I'll go back, cause they had this. DAMN THEM! Rope me in every time!
It really has a nice texture to it too.
In the new holes. "I love it when a plan comes together!"
A shot of the screws from under the tray.
Now we can't just leave this as raw wood, so we must do something about it. I really should fiberglass it and seal it all in, but really I'm not sure how long I'm going to leave it like this so, for now we'll prime the hell out of it, and paint the hell out of it. Should seal it up nicely.
So I forgot that I didn't have any black paint, I used the rest of it for the amp rack and box. So I had to run to the hardware store around the corner. Should've known they didn't have crap! I hate that place, but they have just enough to keep me going there, except when I really need something specific. They did however, have this stuff. It's leak seal by Rustoleum. It's made to seal up cracks and stop water leaks etc. So I figured a few coats of this stuff would do me just perfectly! See, now I'll go back, cause they had this. DAMN THEM! Rope me in every time!
It really has a nice texture to it too.
#83
07-08-2012, 12:54 AM
Join Date: May 2011
Posts: 339
Likes: 0
Received 0 Likes
on
0 Posts
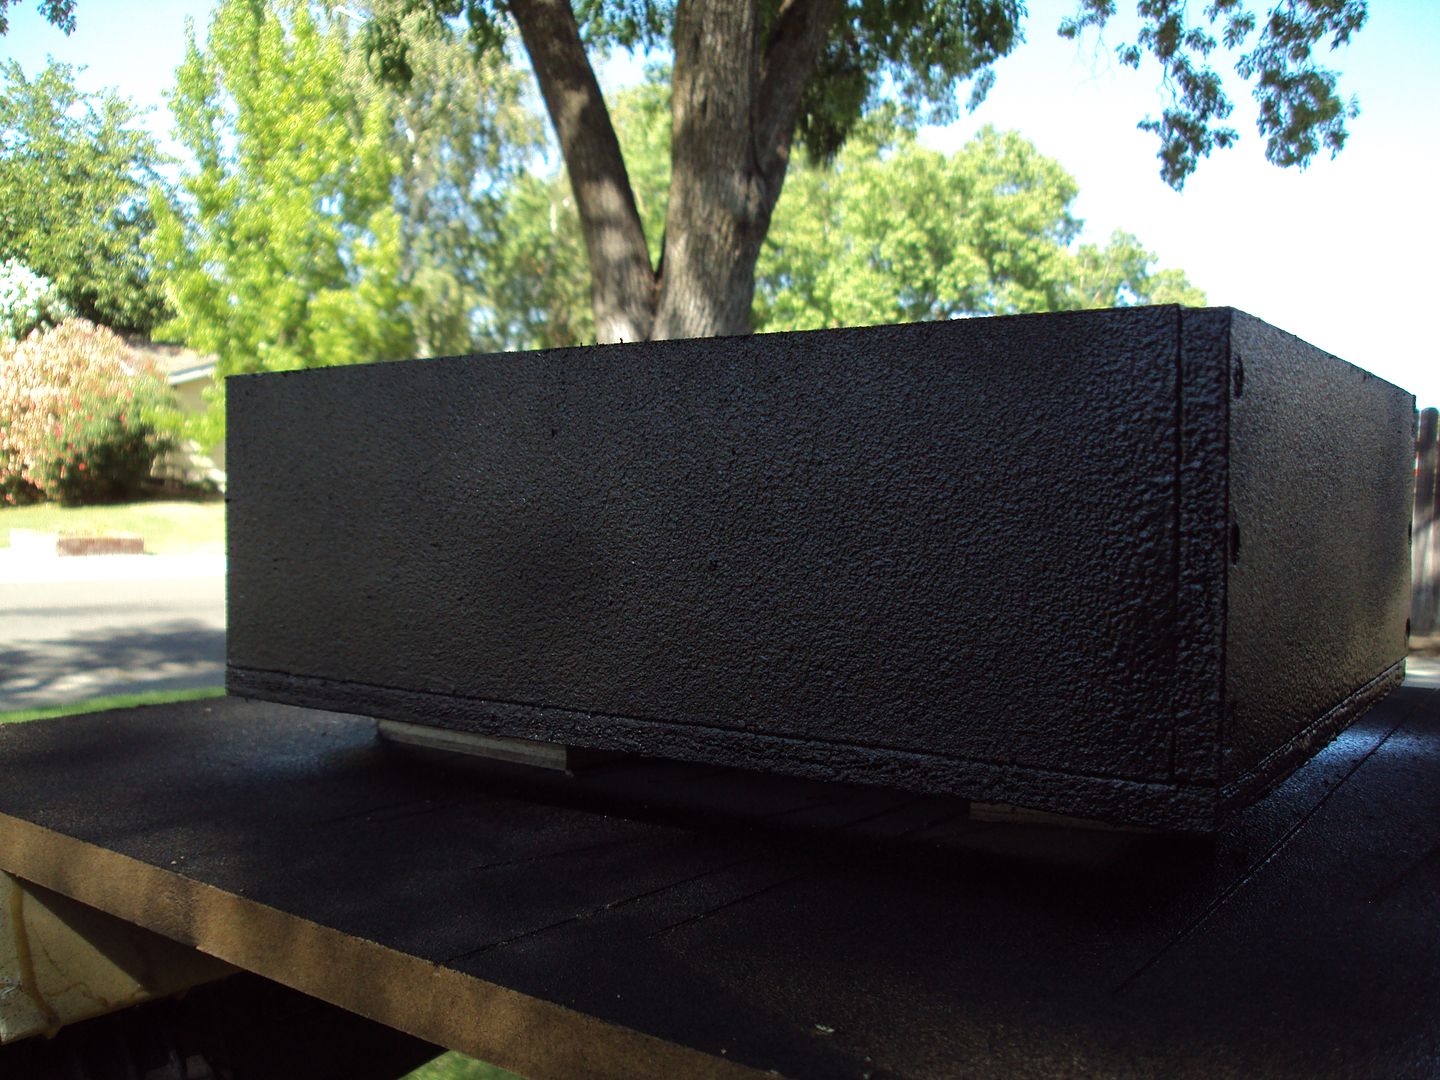
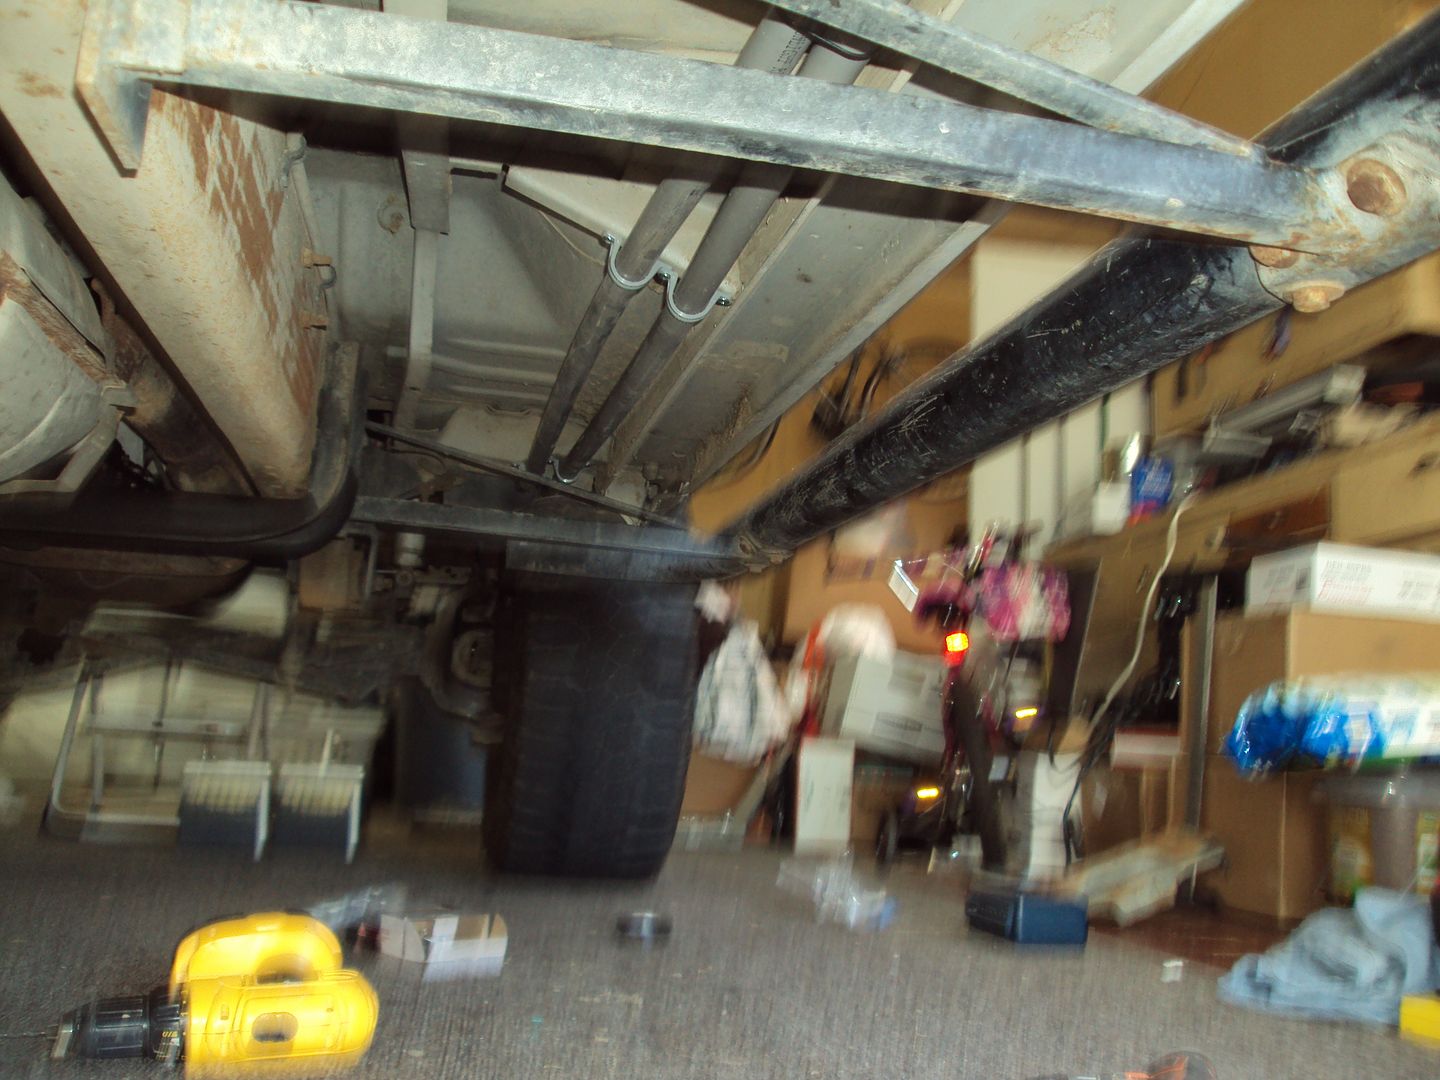
Ok, so now that the battery tray is done and drying, it was time to get on to the real work! Getting that power to the back of the truck! PVC runs, with brackets
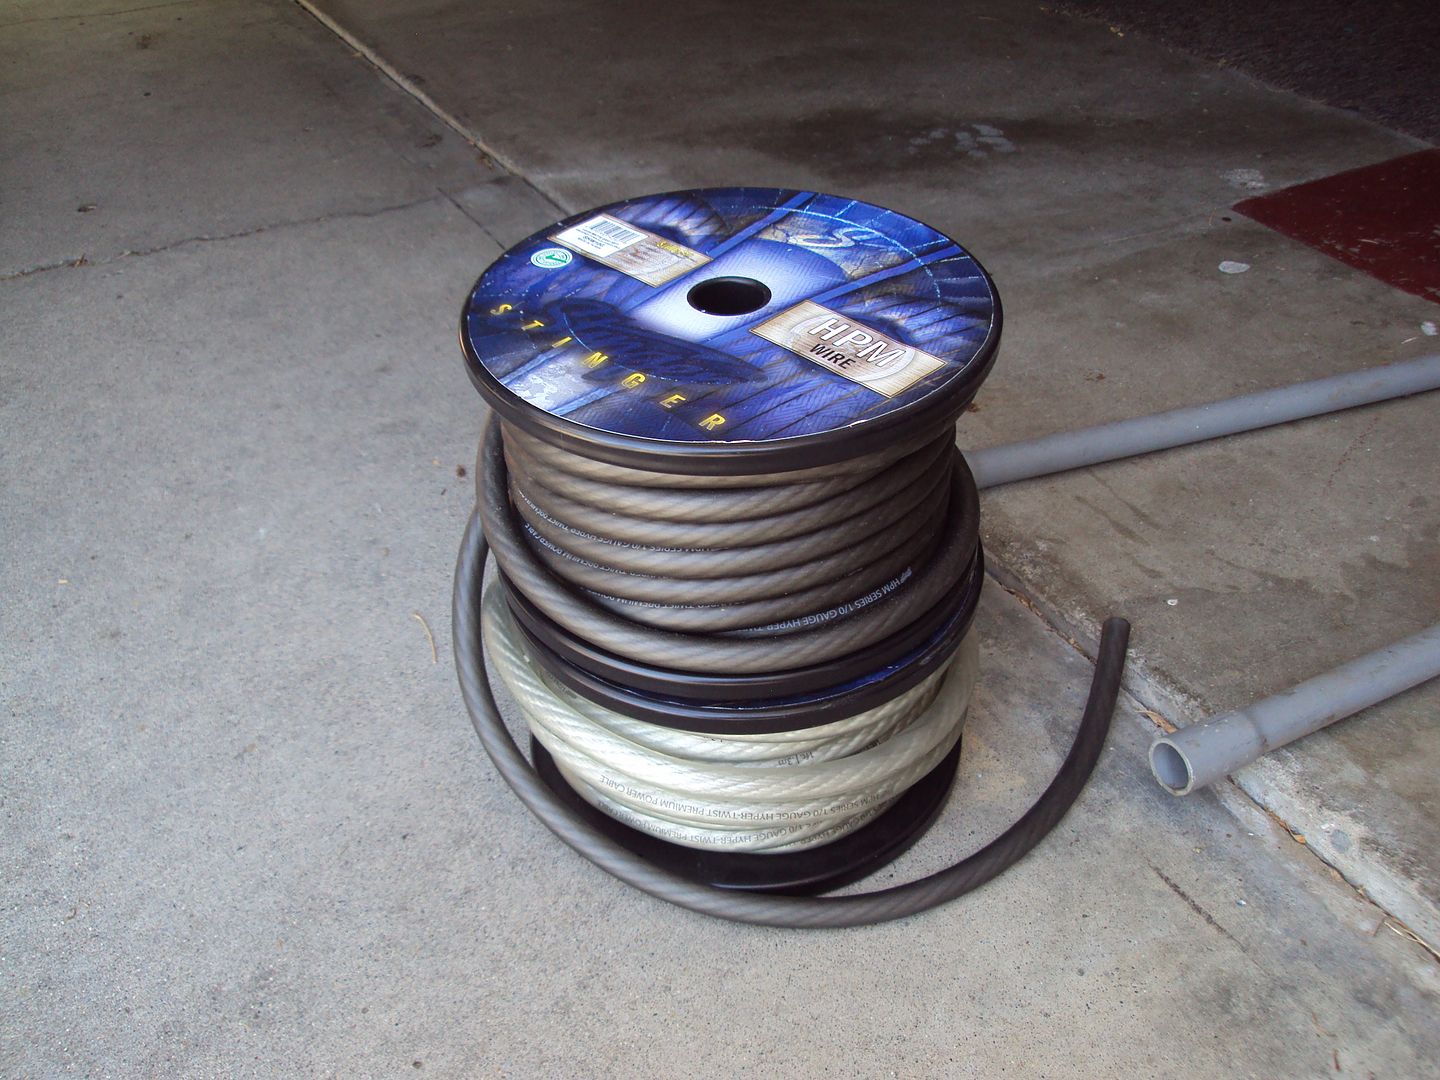
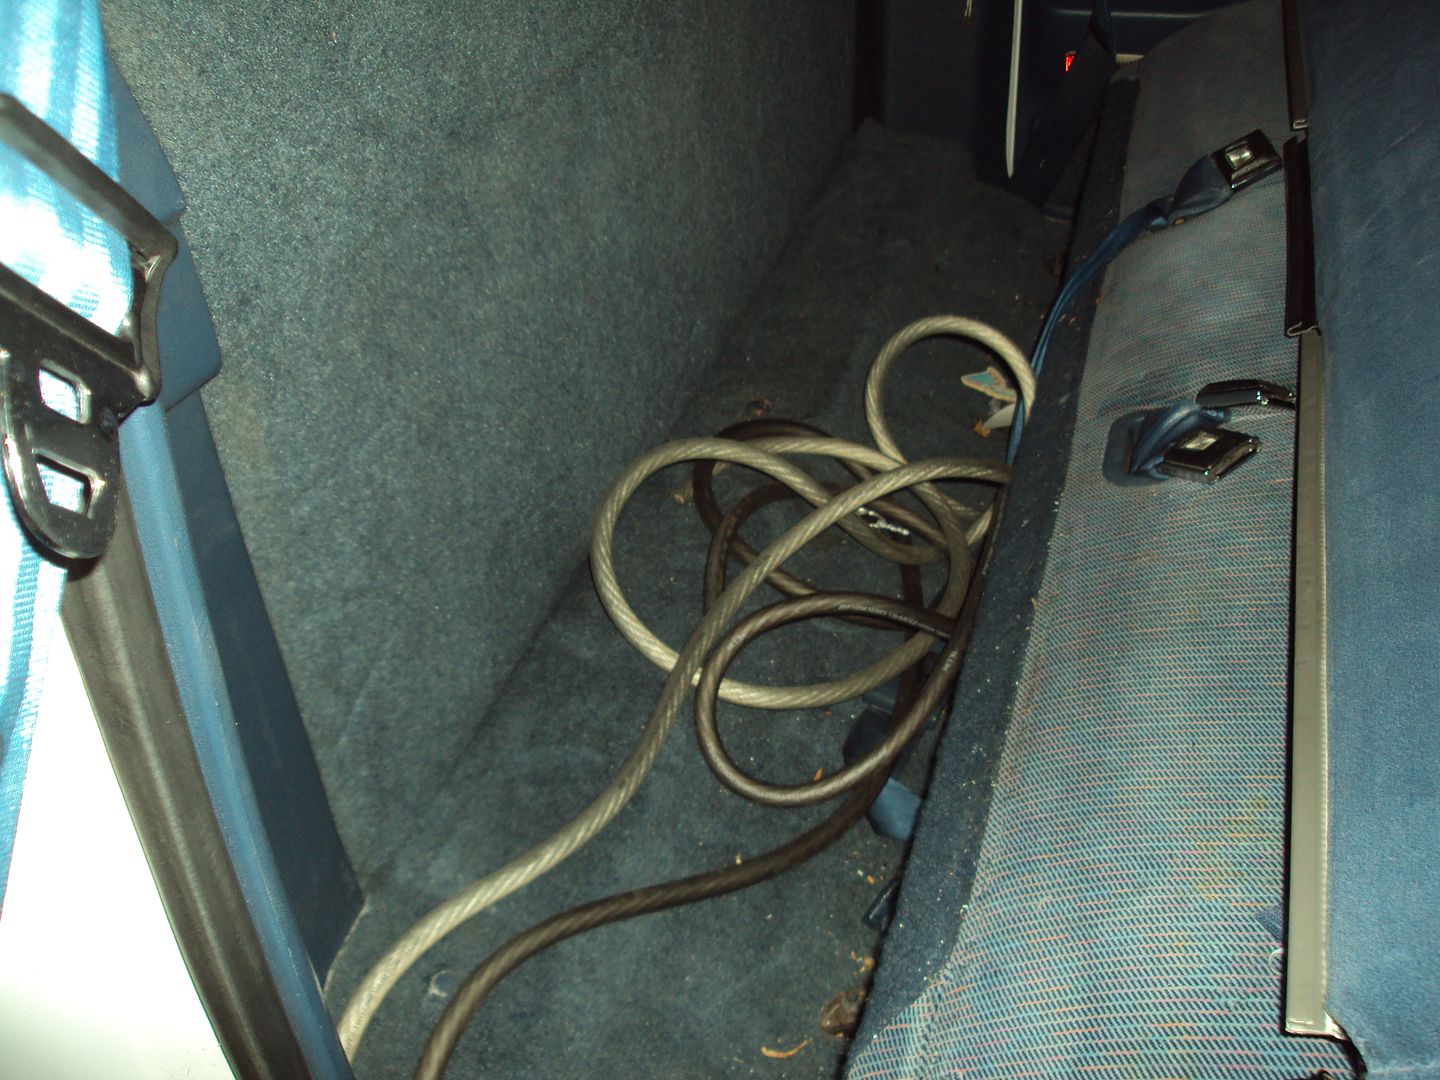
Stinger HPM 1/0 ga Ground and Positive cables!
Ready to run it!
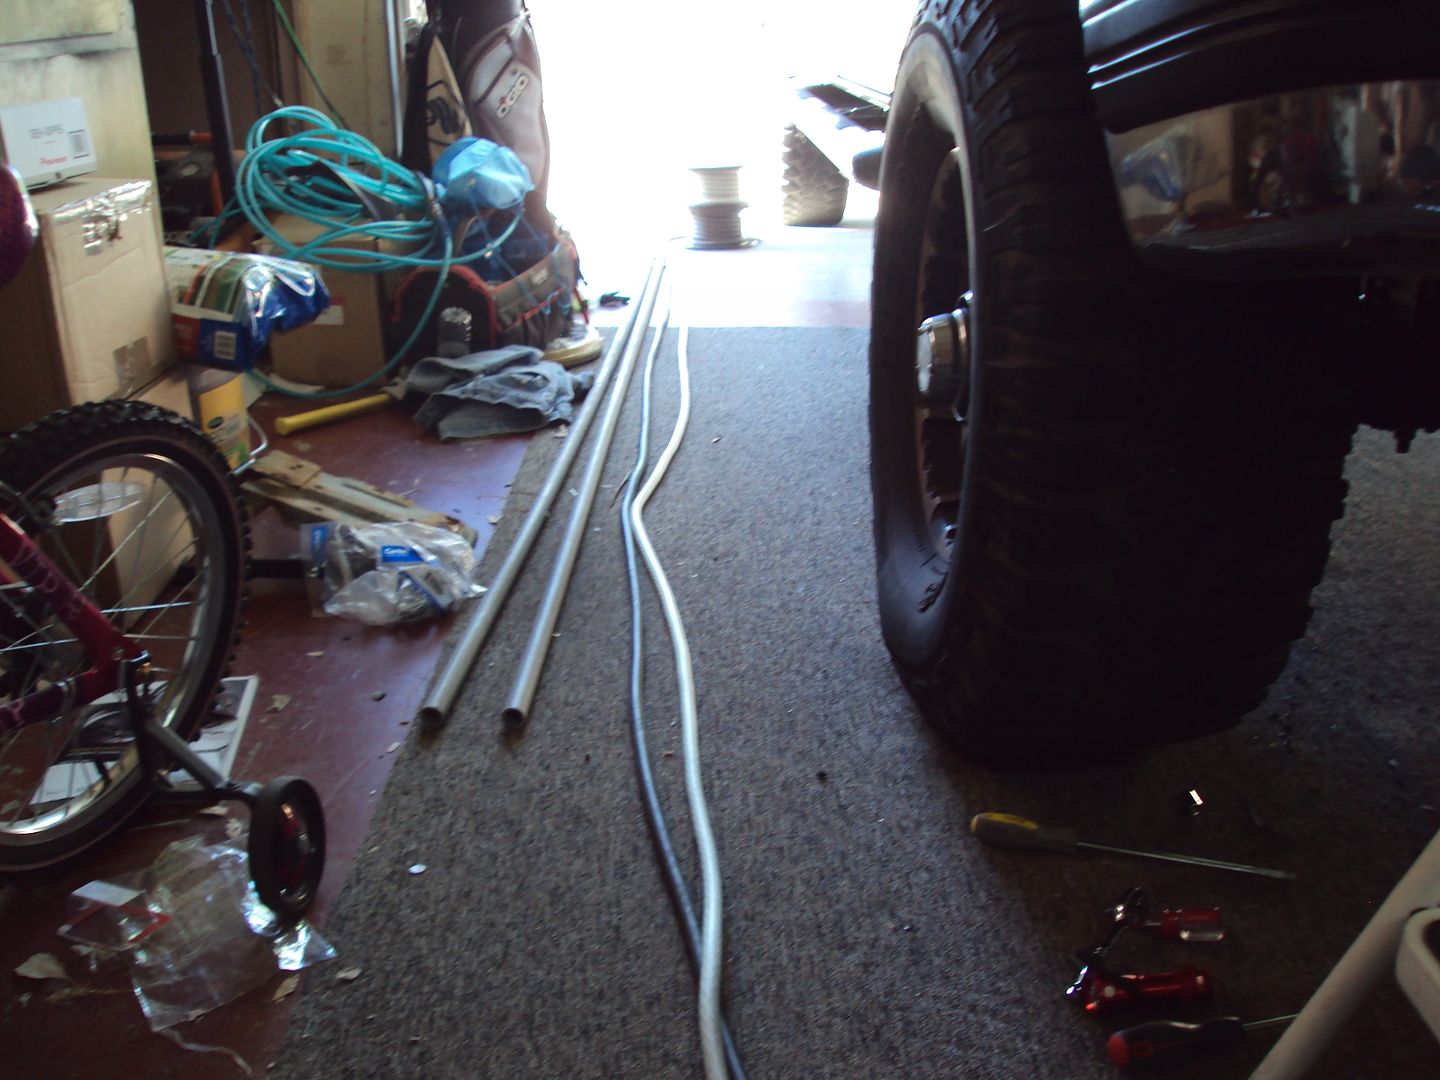
Let's get this party started!
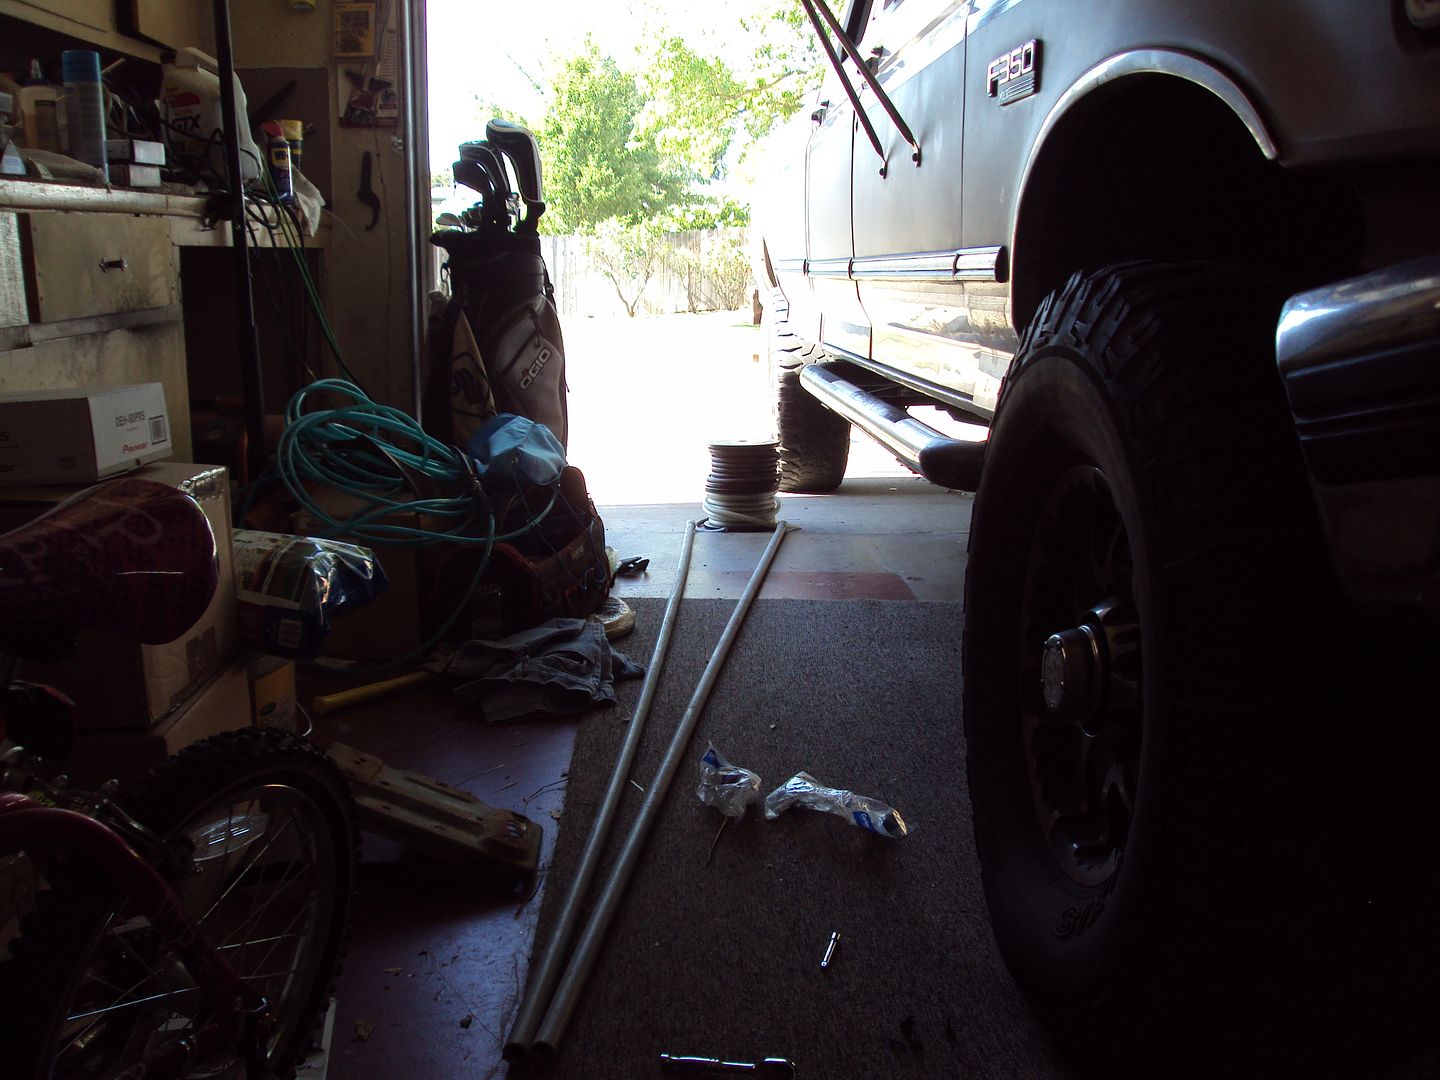
In case some of you don't know, the green stick is a fish tape, but in a stick! I think it's literally called a fish stick. For pulling electrical wires through walls and well anywhere really! It's been a life saver more than once for me! I hate crawling through attics!
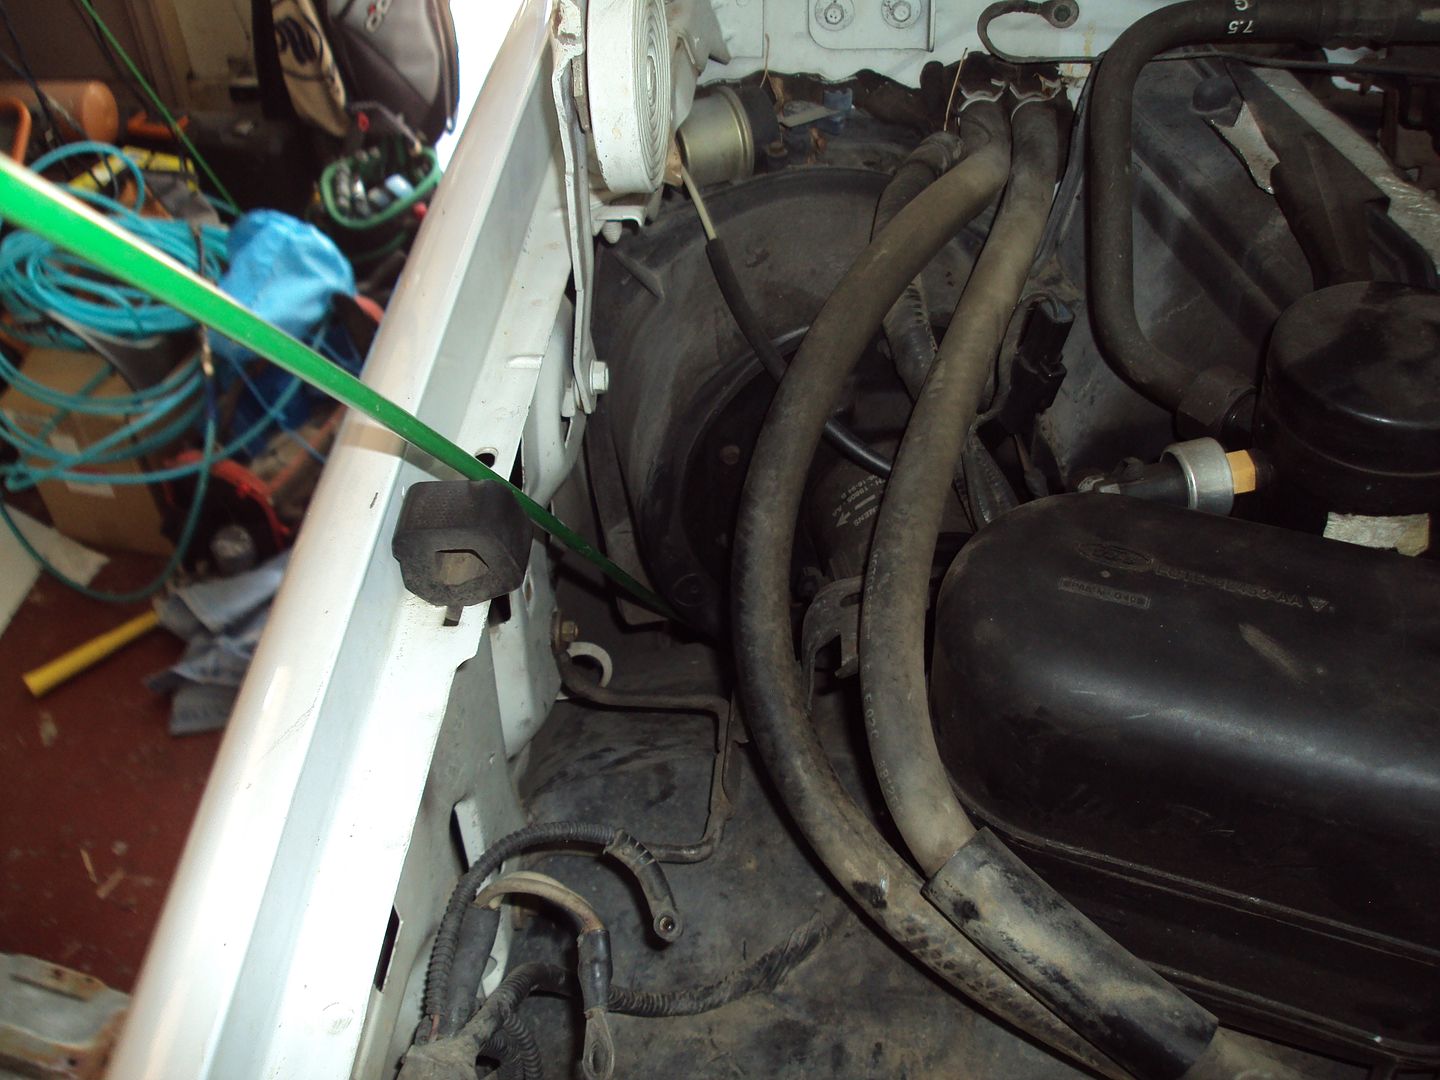
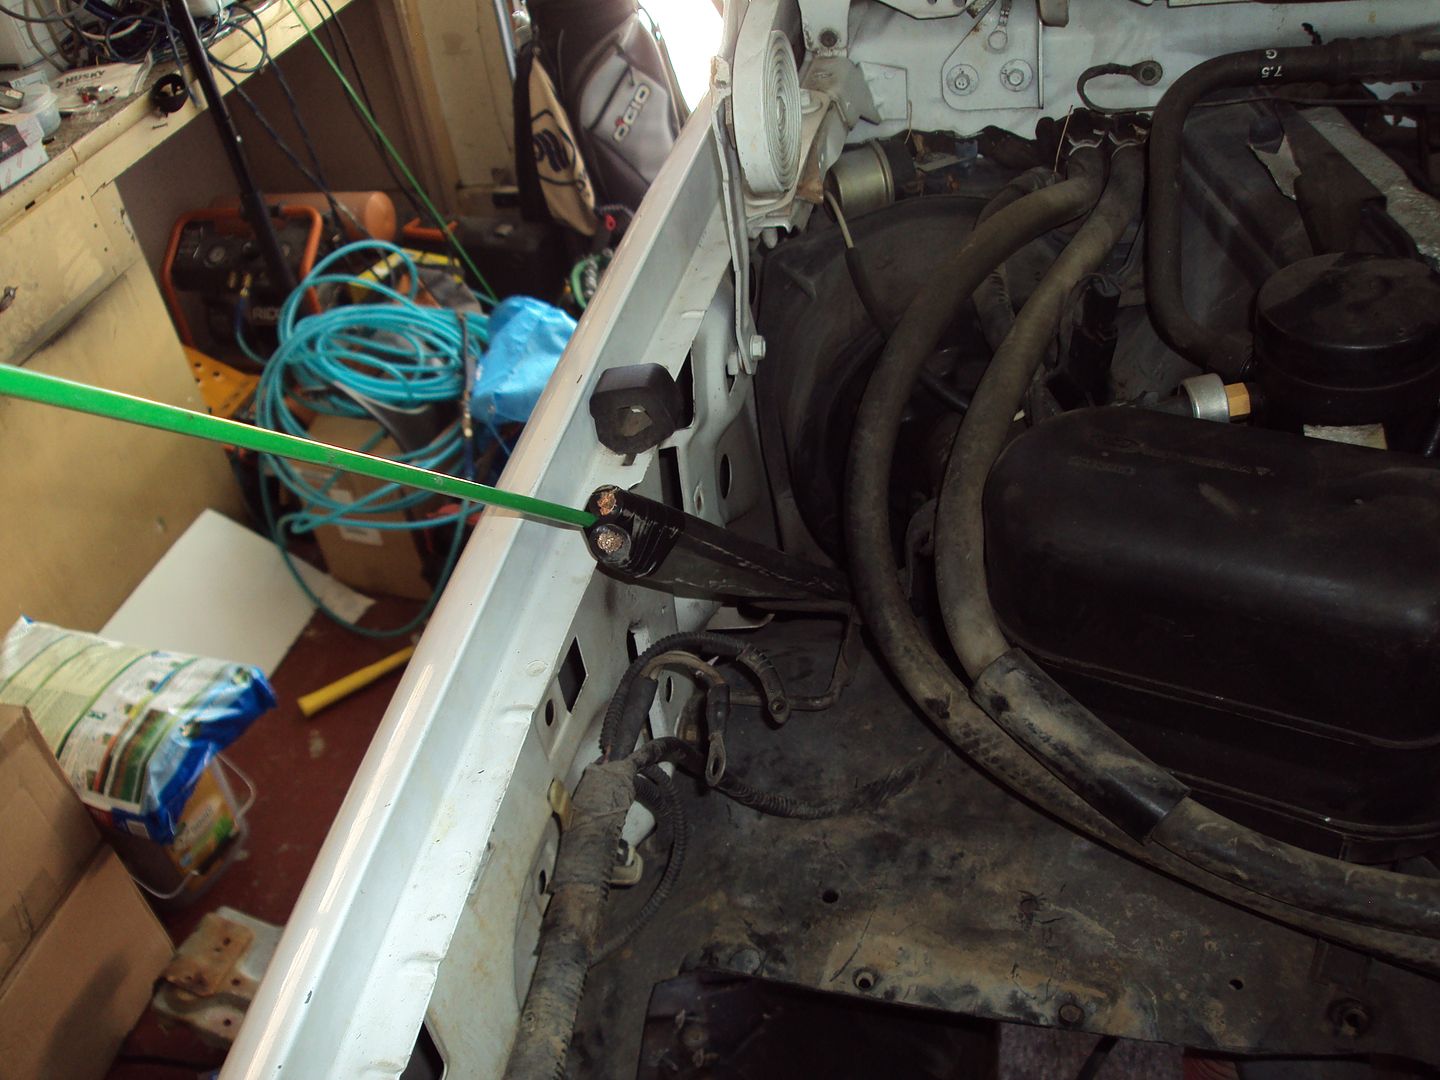
And we're good up front!
Went back and check on the box really quick. Painted the bottom side. Prematurely too, cause I put some finger marks on the sides. Oops!
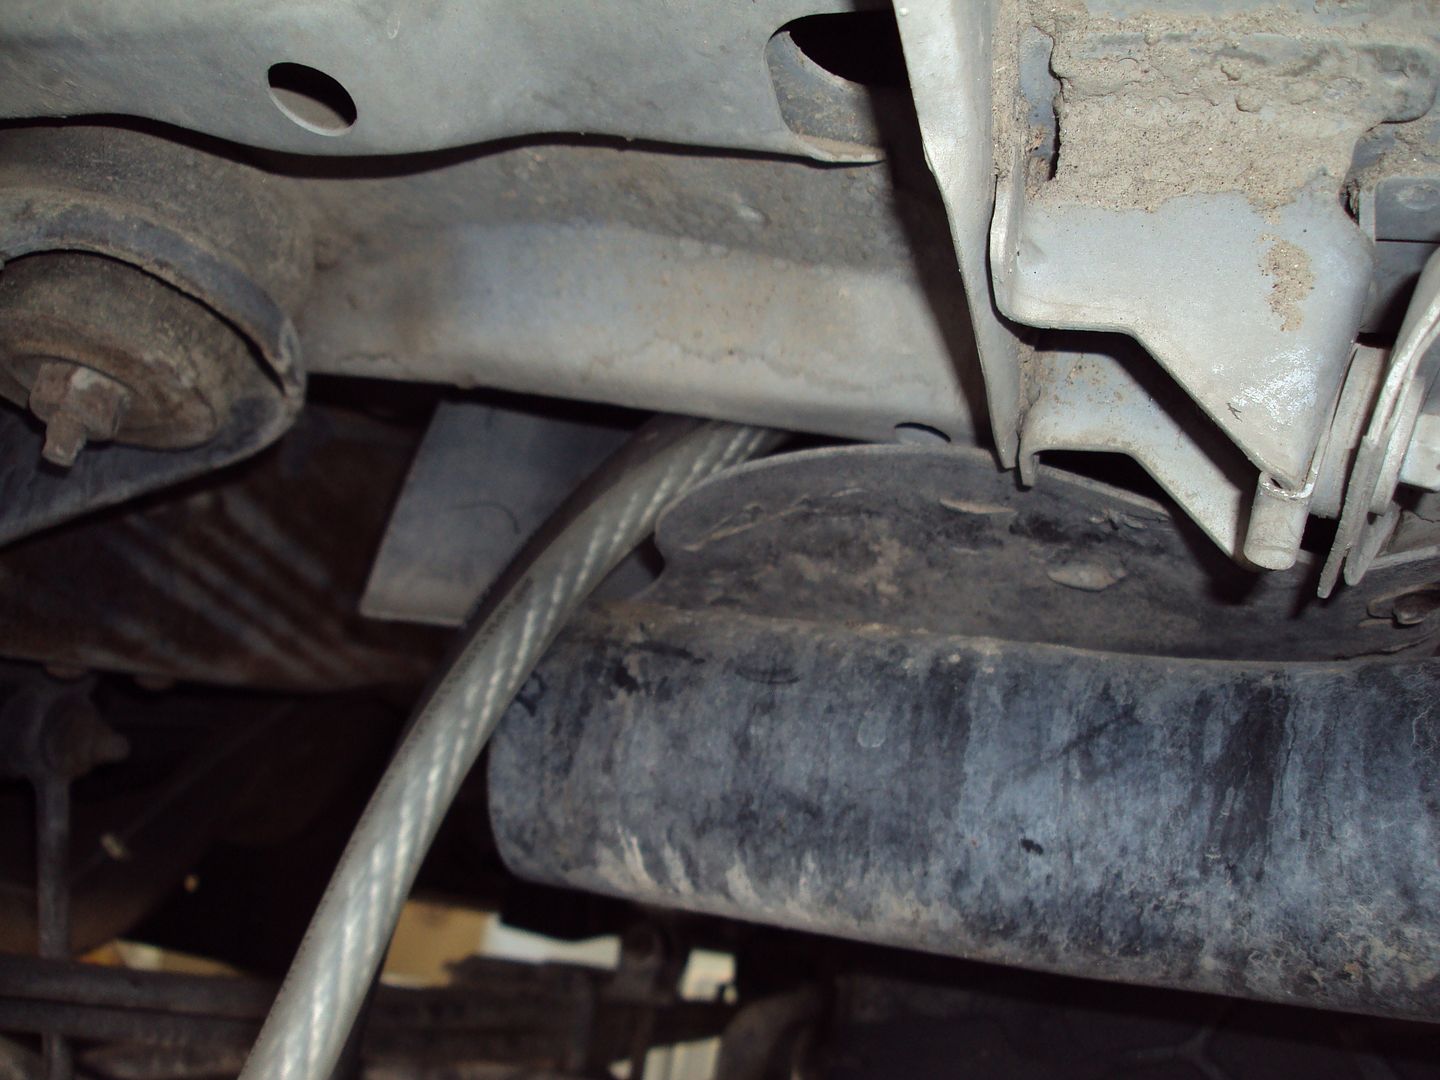
Now back to the cables. Ran them through the pvc and we're ready to mount them to the bottom of the truck.
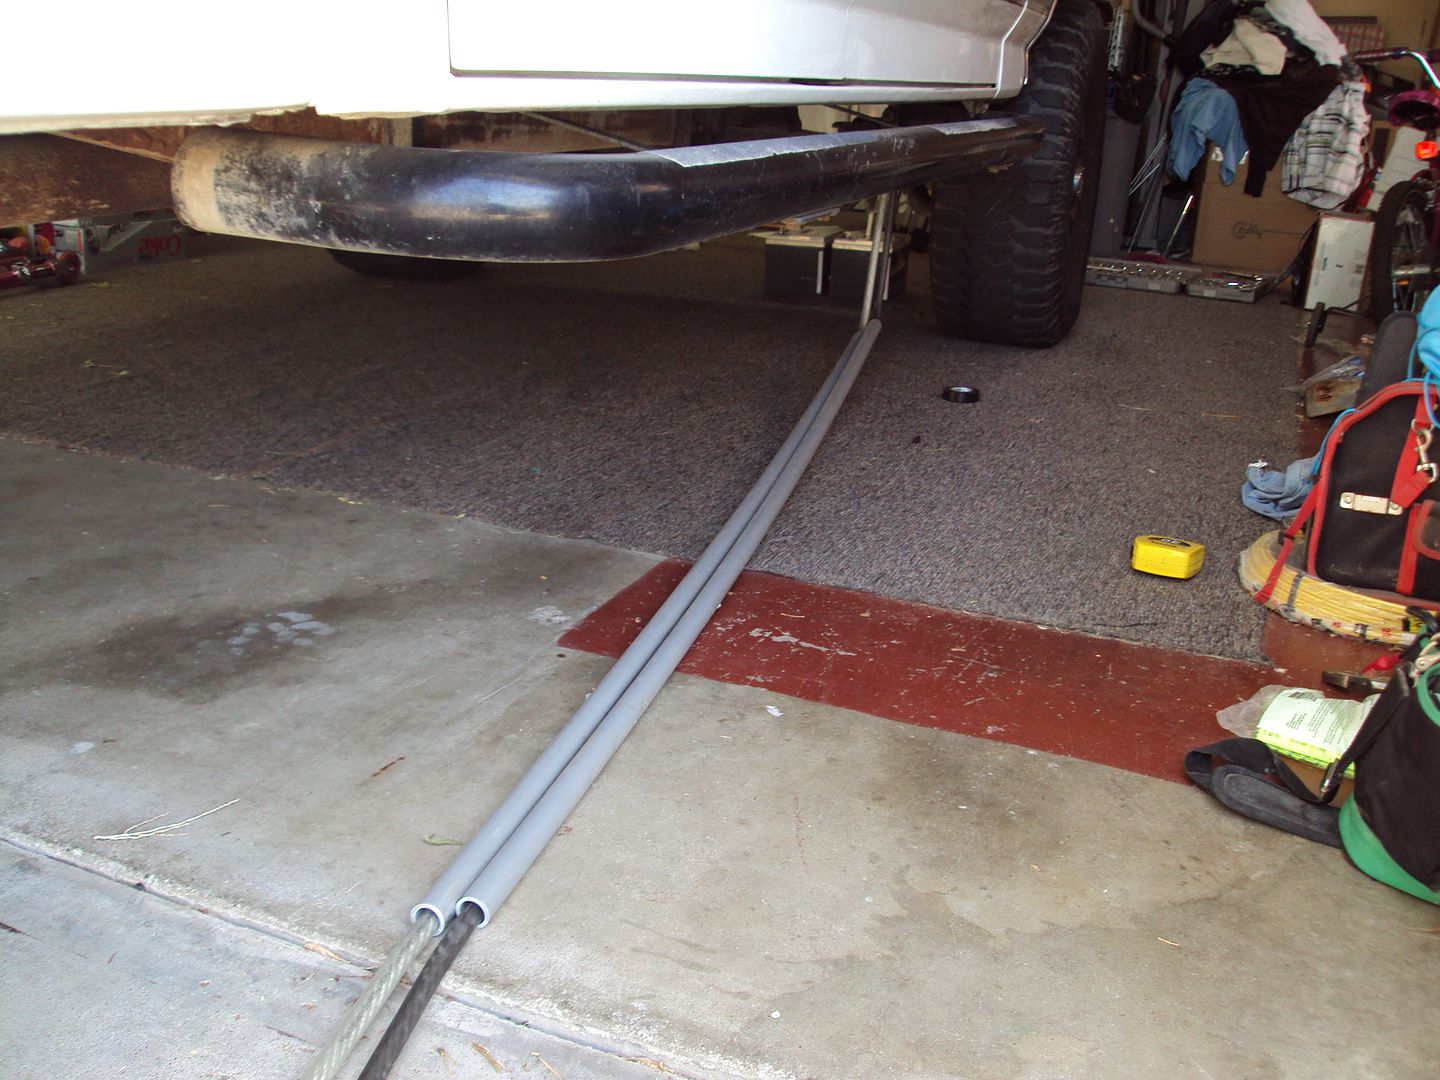
I chose to pass through the truck with some carlon elbows. They were a pain to get through cause they're a tight 90* and they're not full 3/4" like the pvc, but I managed! I probably should've grabbed some carlon while I was at the hardware store to make that little turn there, but I didn't think about it at the time.
Stinger HPM 1/0 ga Ground and Positive cables!
Ready to run it!
Let's get this party started!
In case some of you don't know, the green stick is a fish tape, but in a stick! I think it's literally called a fish stick. For pulling electrical wires through walls and well anywhere really! It's been a life saver more than once for me! I hate crawling through attics!
And we're good up front!
Went back and check on the box really quick. Painted the bottom side. Prematurely too, cause I put some finger marks on the sides. Oops!
Now back to the cables. Ran them through the pvc and we're ready to mount them to the bottom of the truck.
I chose to pass through the truck with some carlon elbows. They were a pain to get through cause they're a tight 90* and they're not full 3/4" like the pvc, but I managed! I probably should've grabbed some carlon while I was at the hardware store to make that little turn there, but I didn't think about it at the time.
#84
07-08-2012, 01:03 AM
Join Date: May 2011
Posts: 339
Likes: 0
Received 0 Likes
on
0 Posts
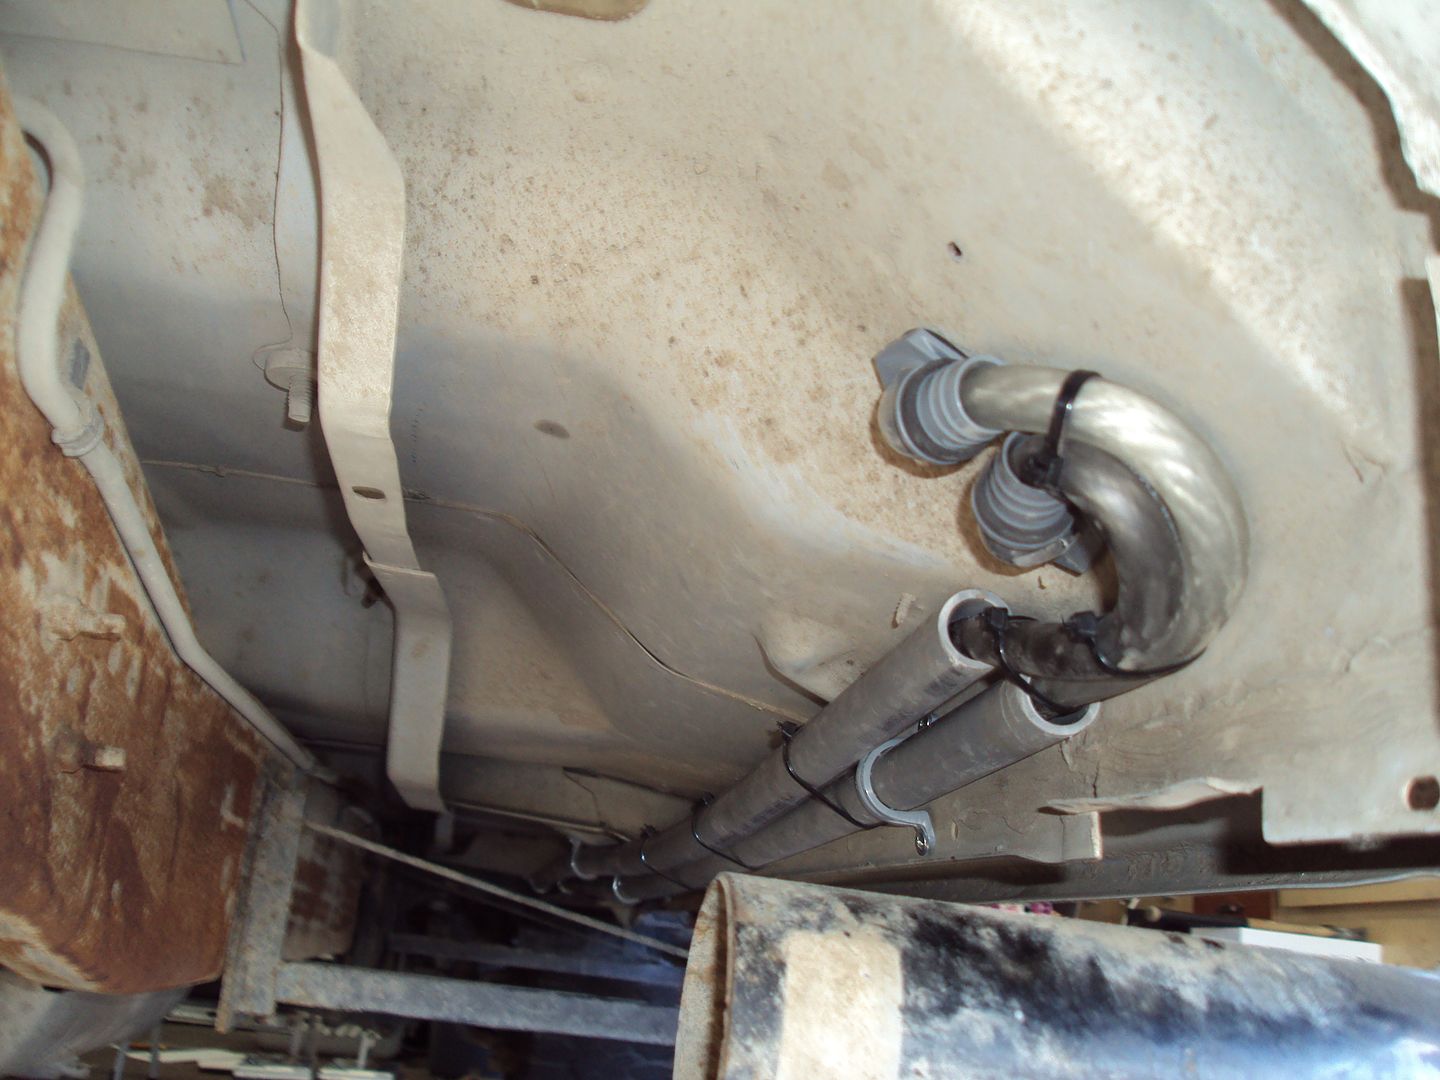
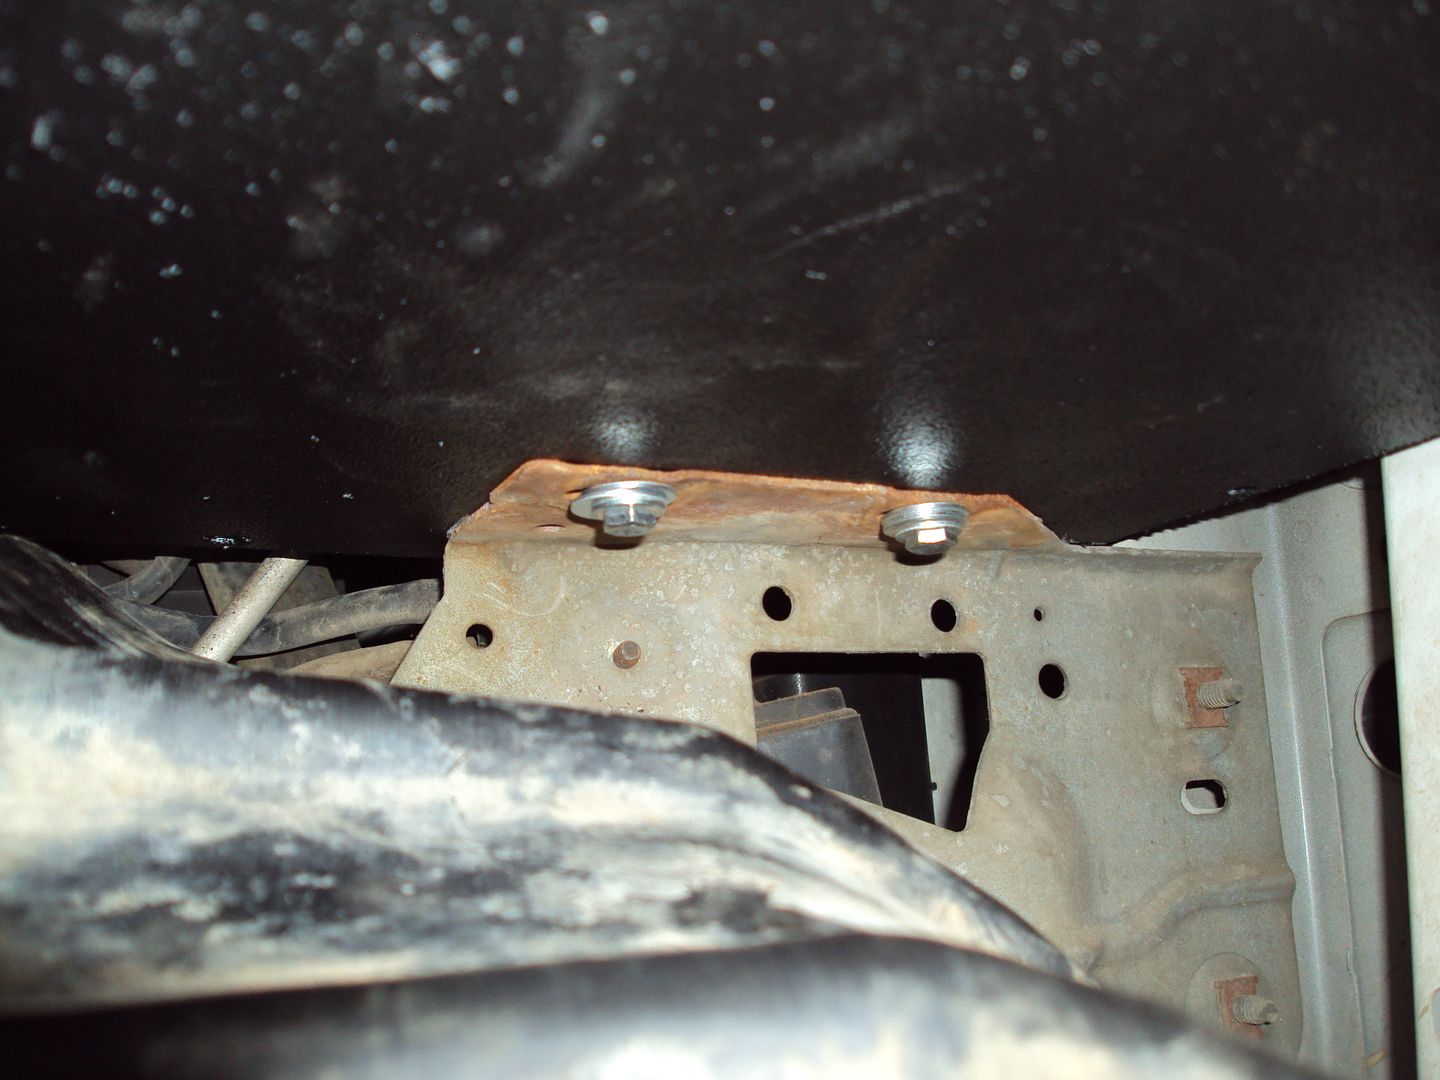
View from inside the cabin where the wires come through.
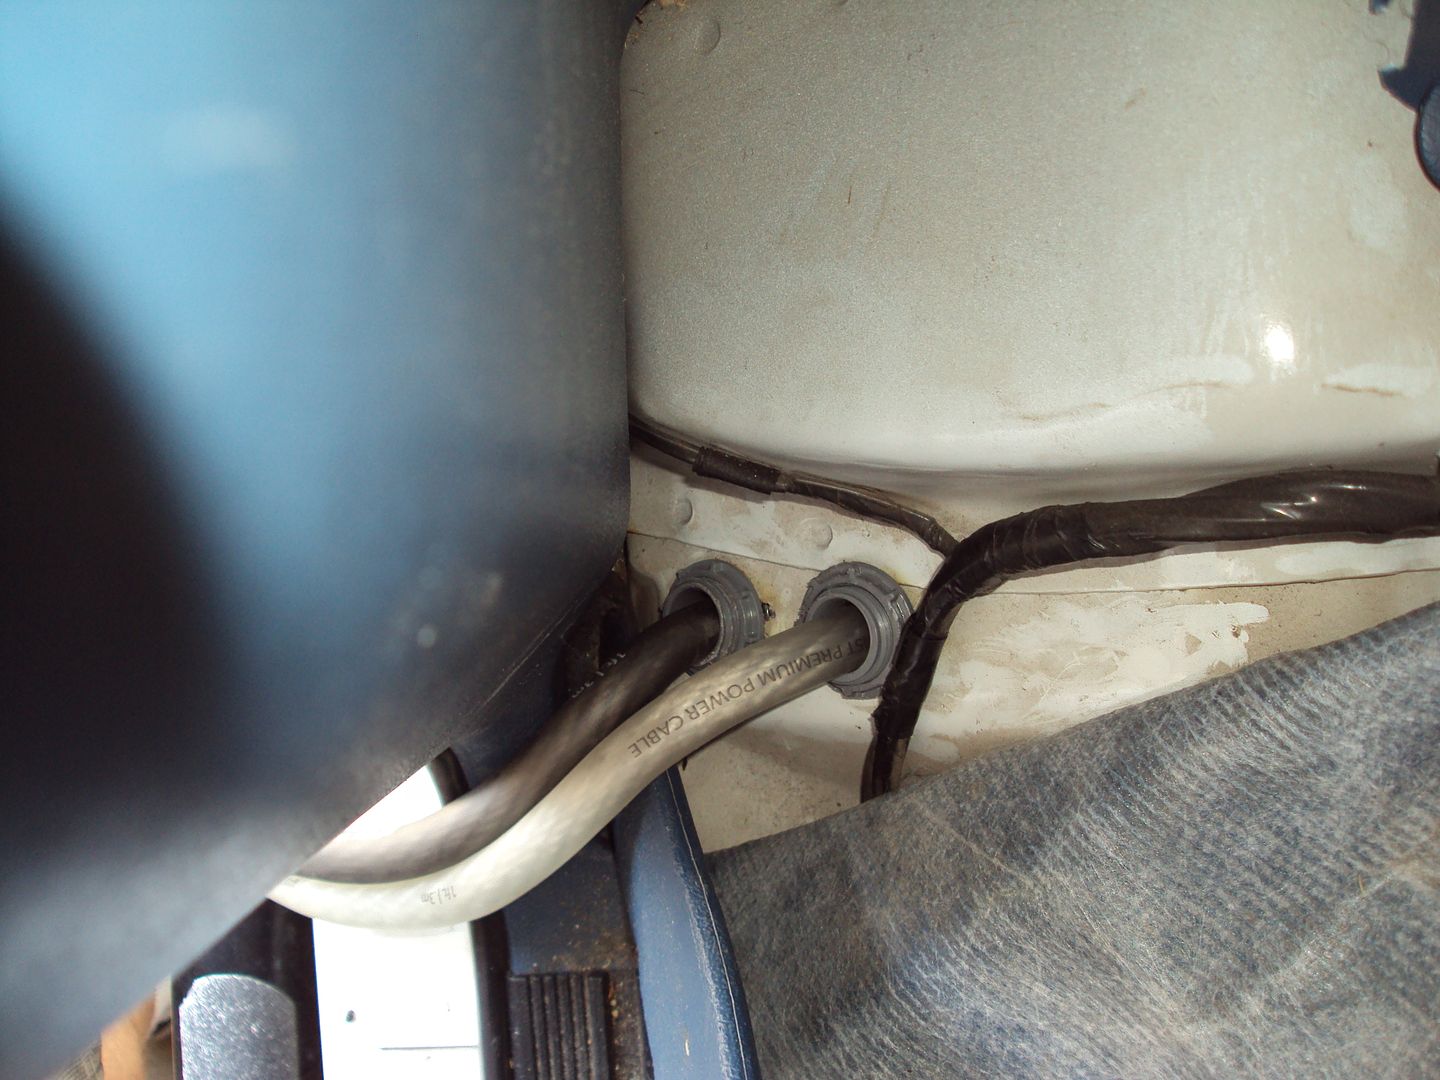
Cable is done!
Time to refuel!
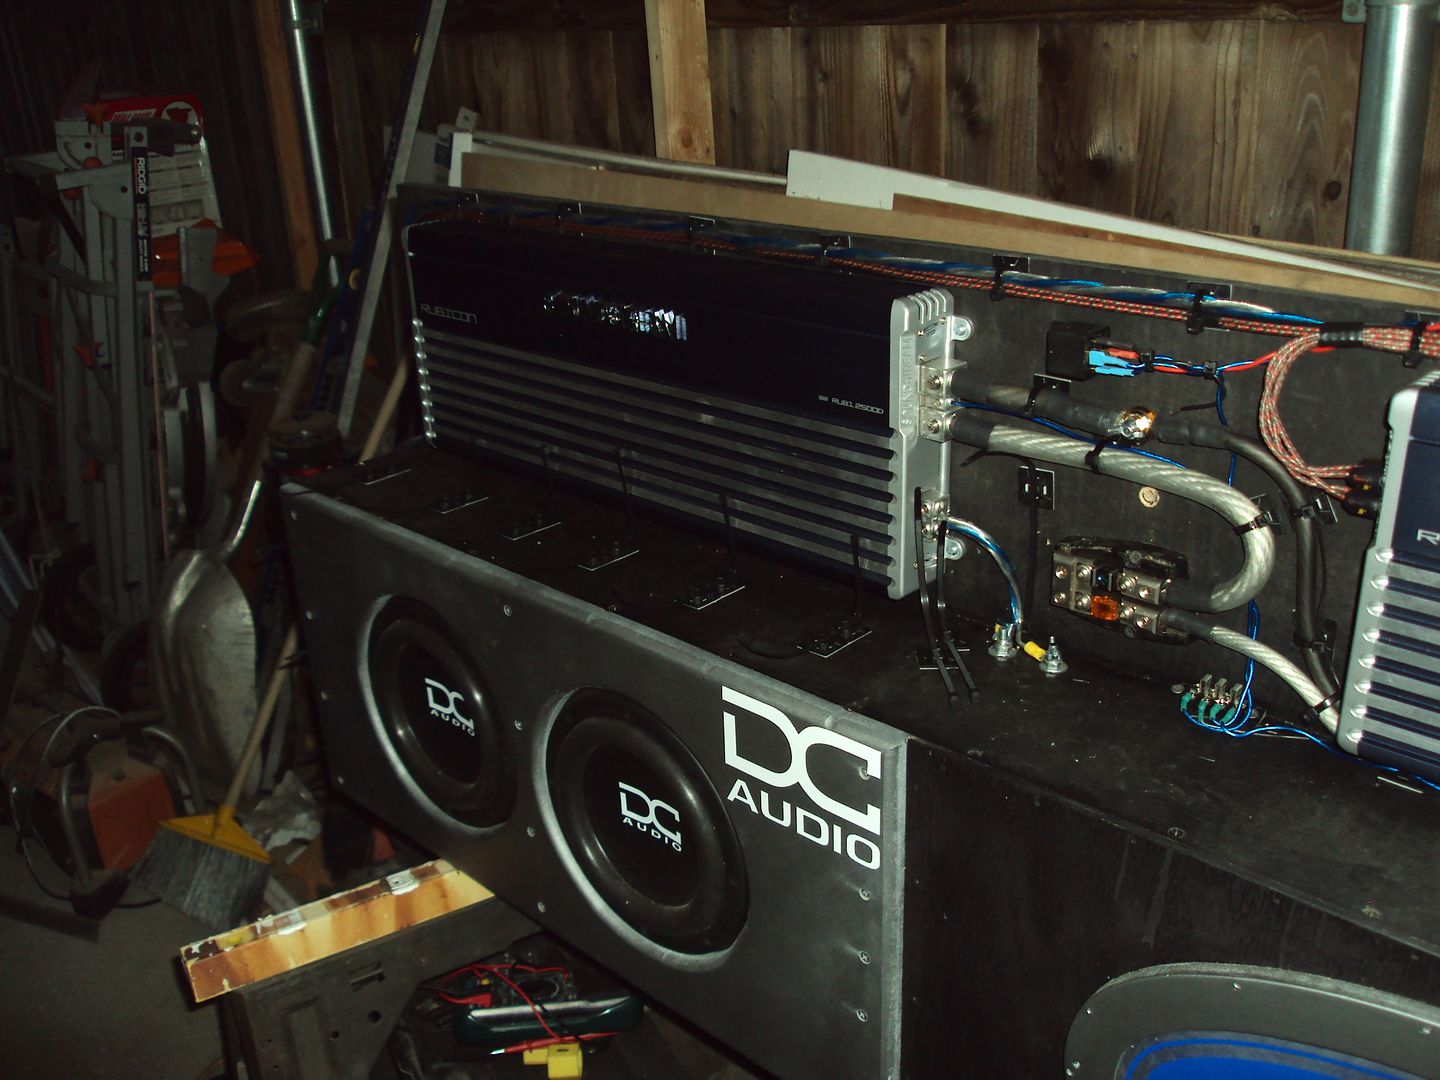
Now it was time to get back to wiring on the amp rack. Kind of looks like a mess, but just wait a minute, it'll clean up! The blue sticky note is the wiring for the relay. It's been so long I forgot how to do it, so I looked it up!
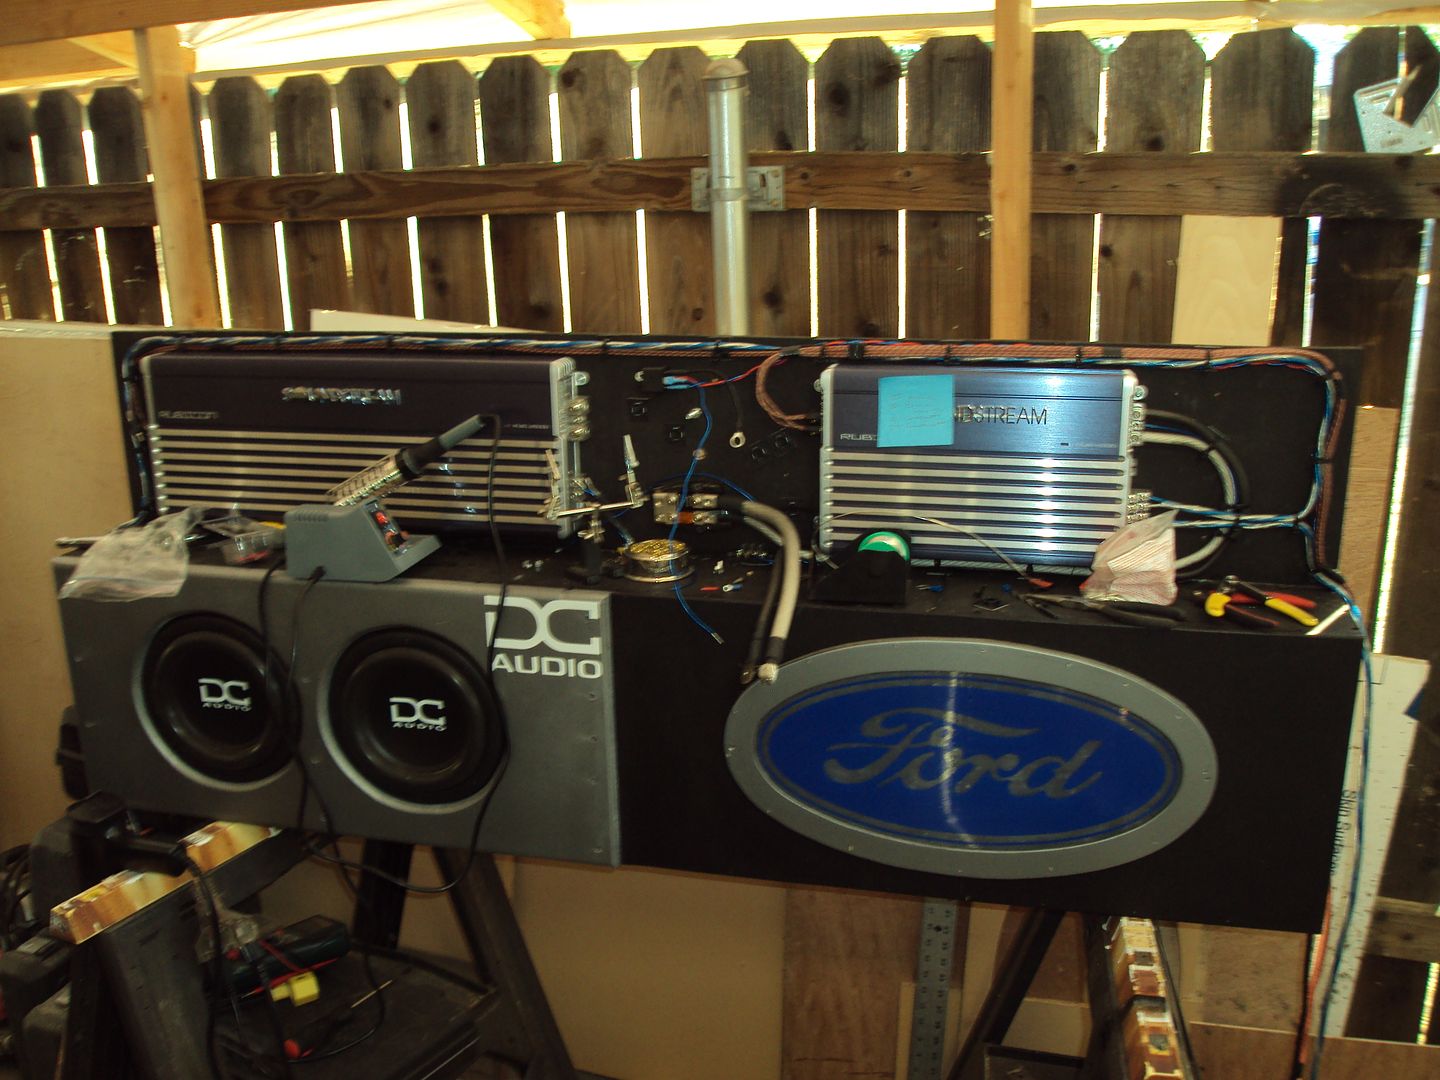
Relay done. Soldered and heat shrinked connectors.
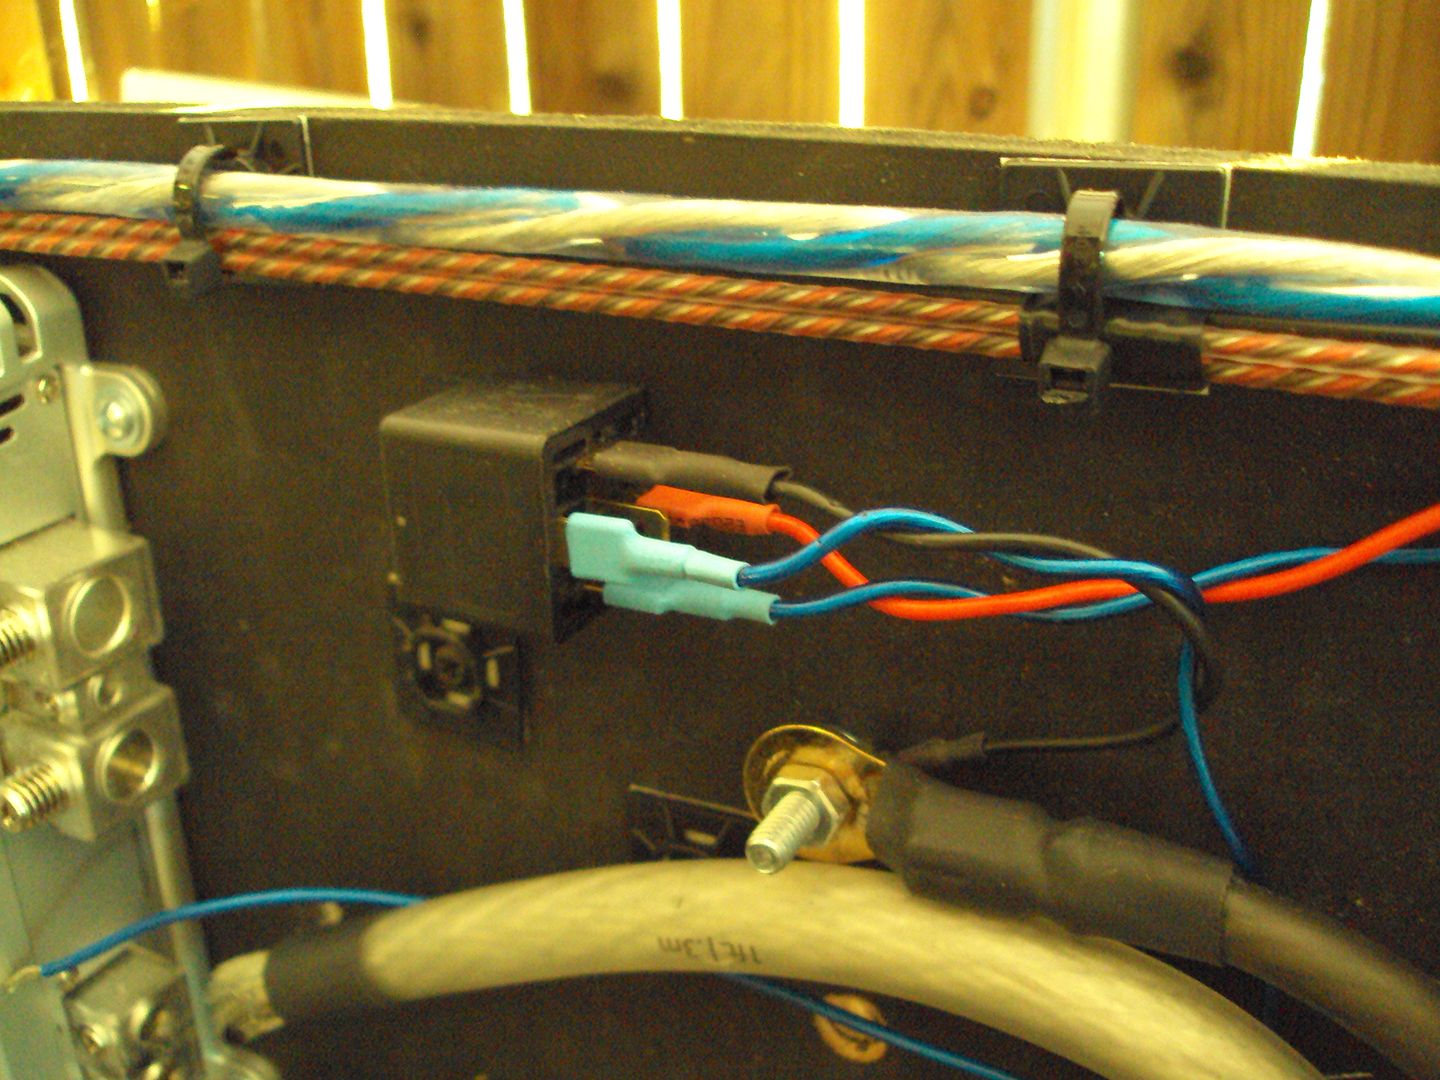
Remote turn on barrier strip, again soldered and heat shrink.

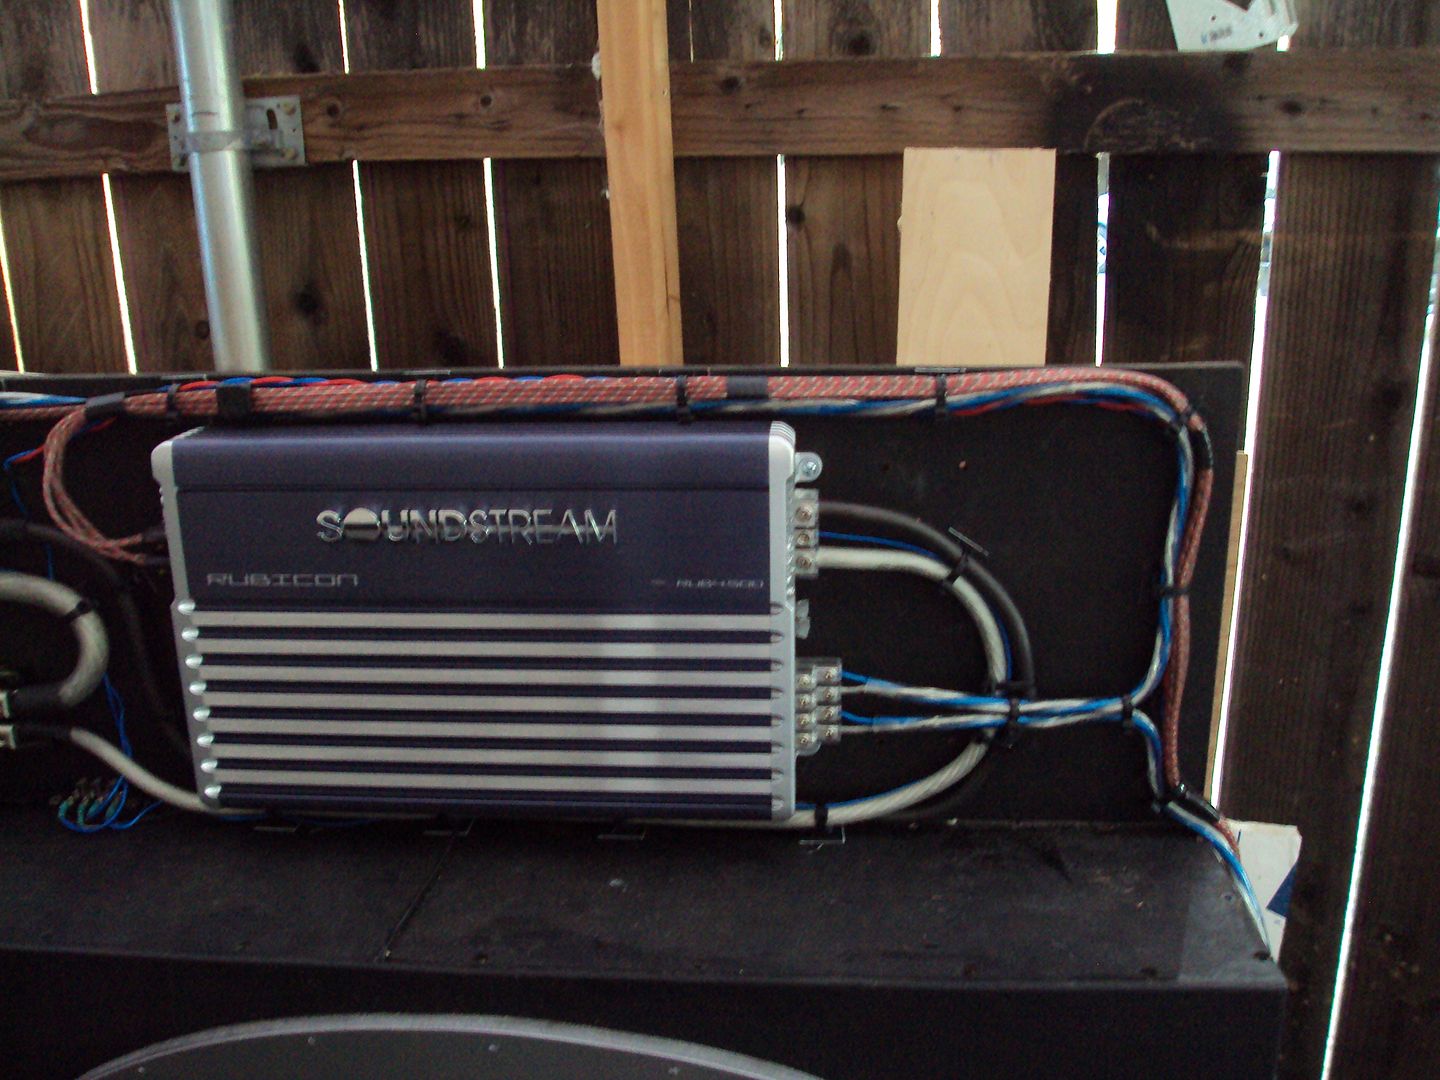
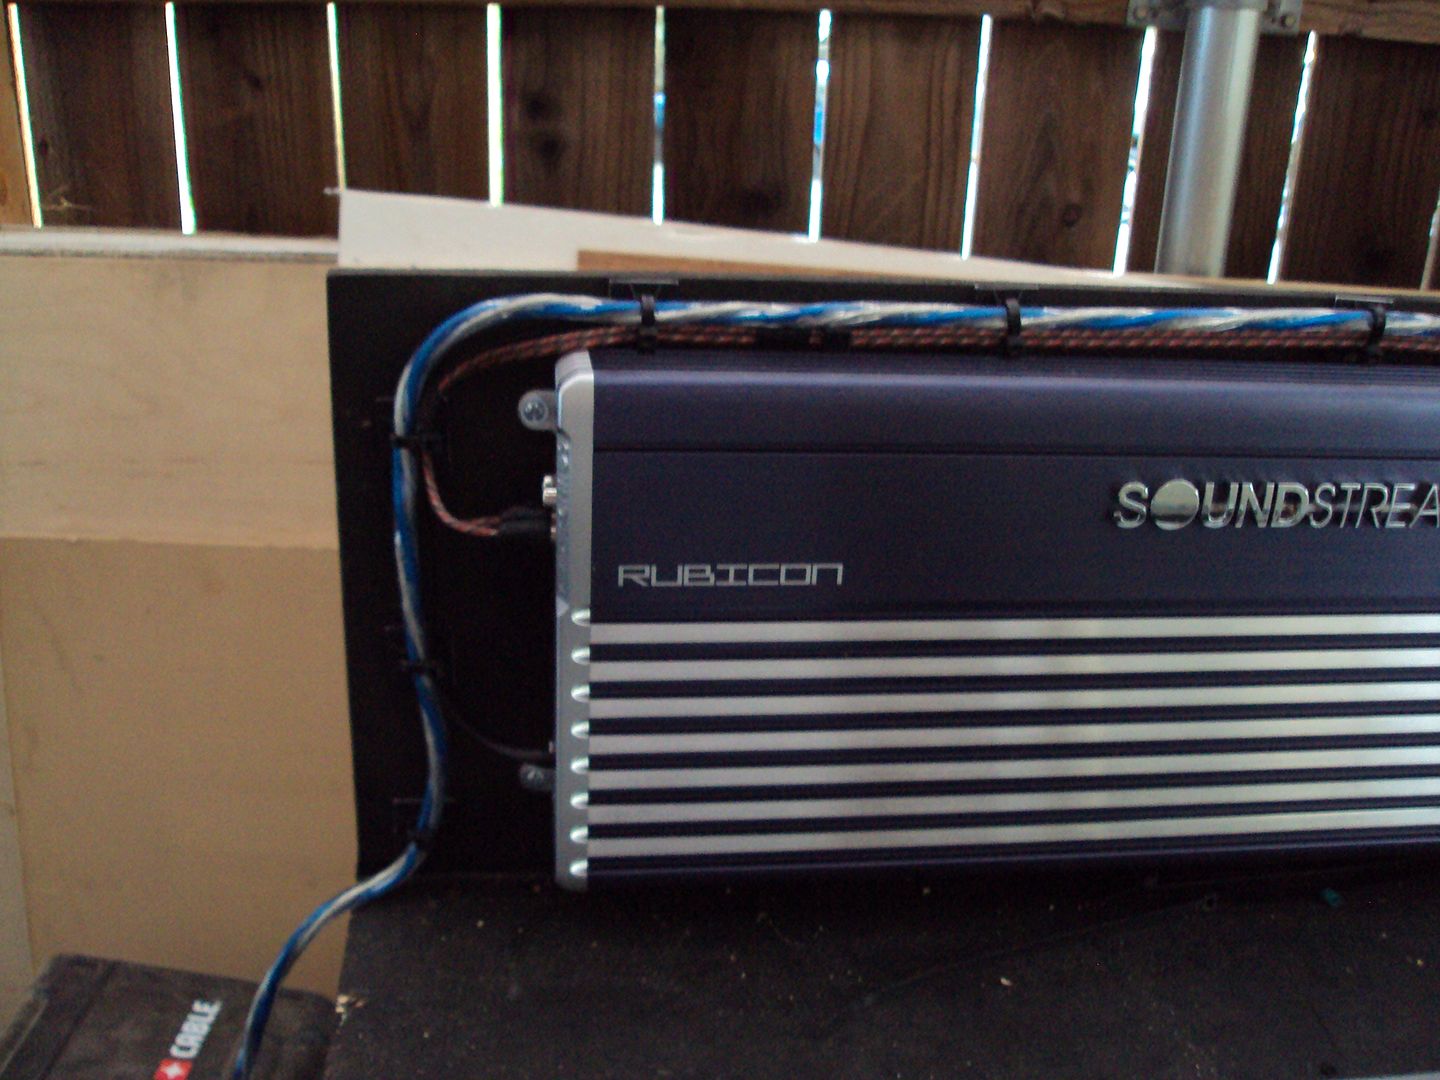
BAM! And done! See told you it would clean itself up! The only thing missing now is the power cable and the ground cable. Those will come when it's in the truck! Oh and the second set of speaker cables. I ran the one for the front, but the rears aren't really in the truck. I have those boxes I made that I'll plug in when needed. Those will go on the first and second channels (top 2) when they're used.
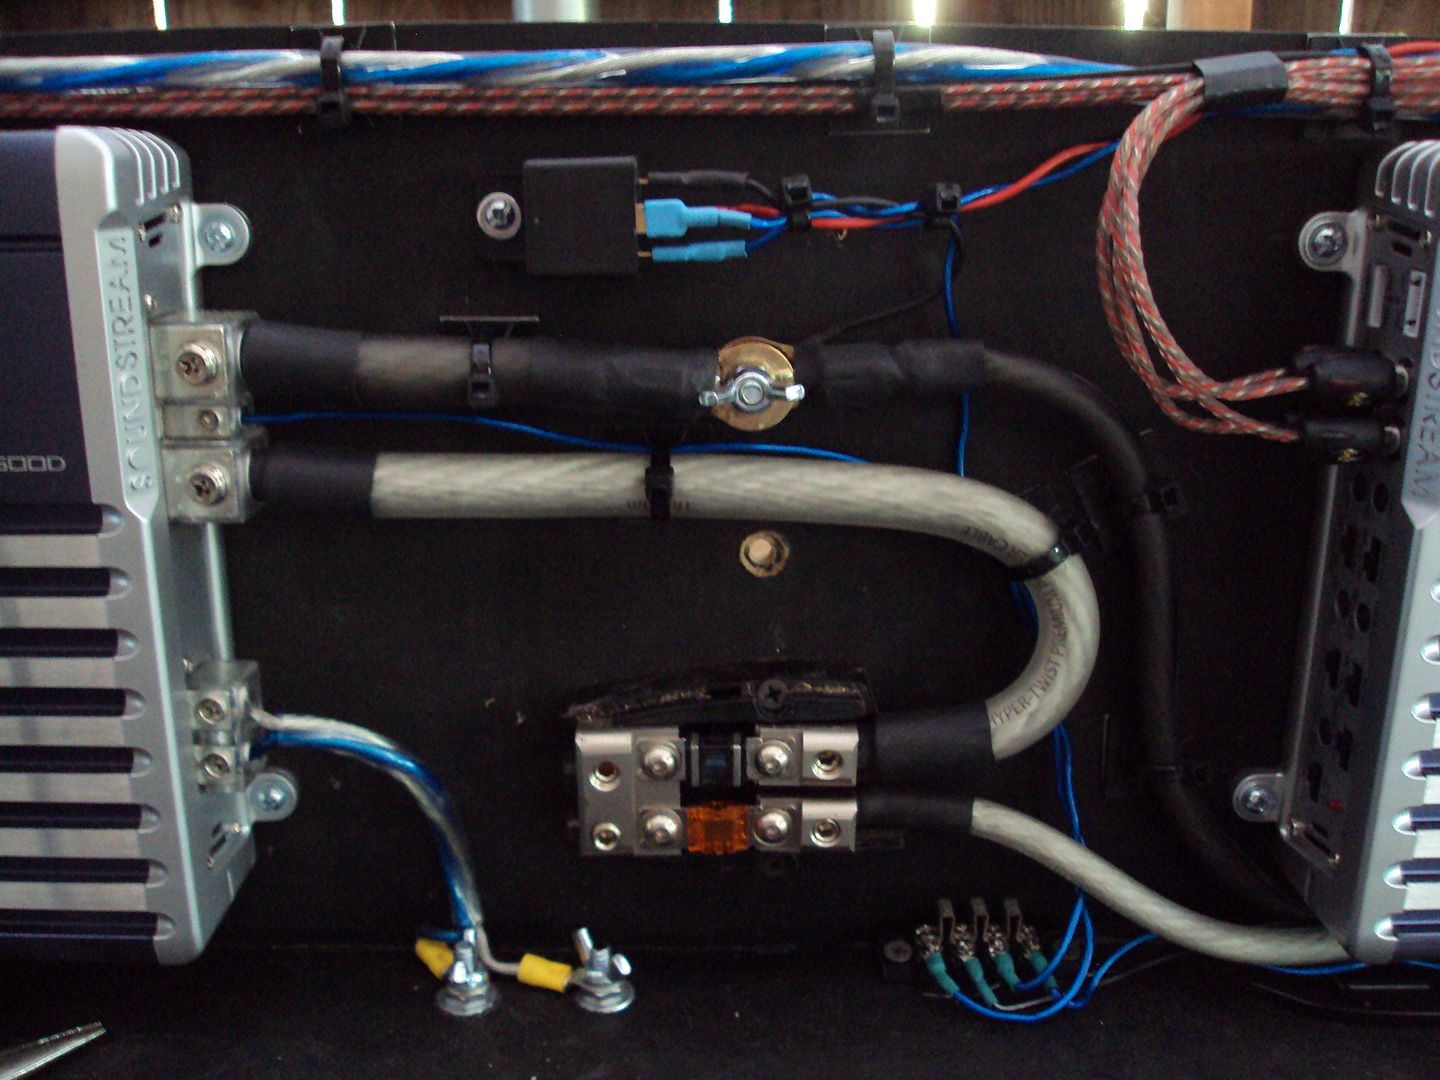
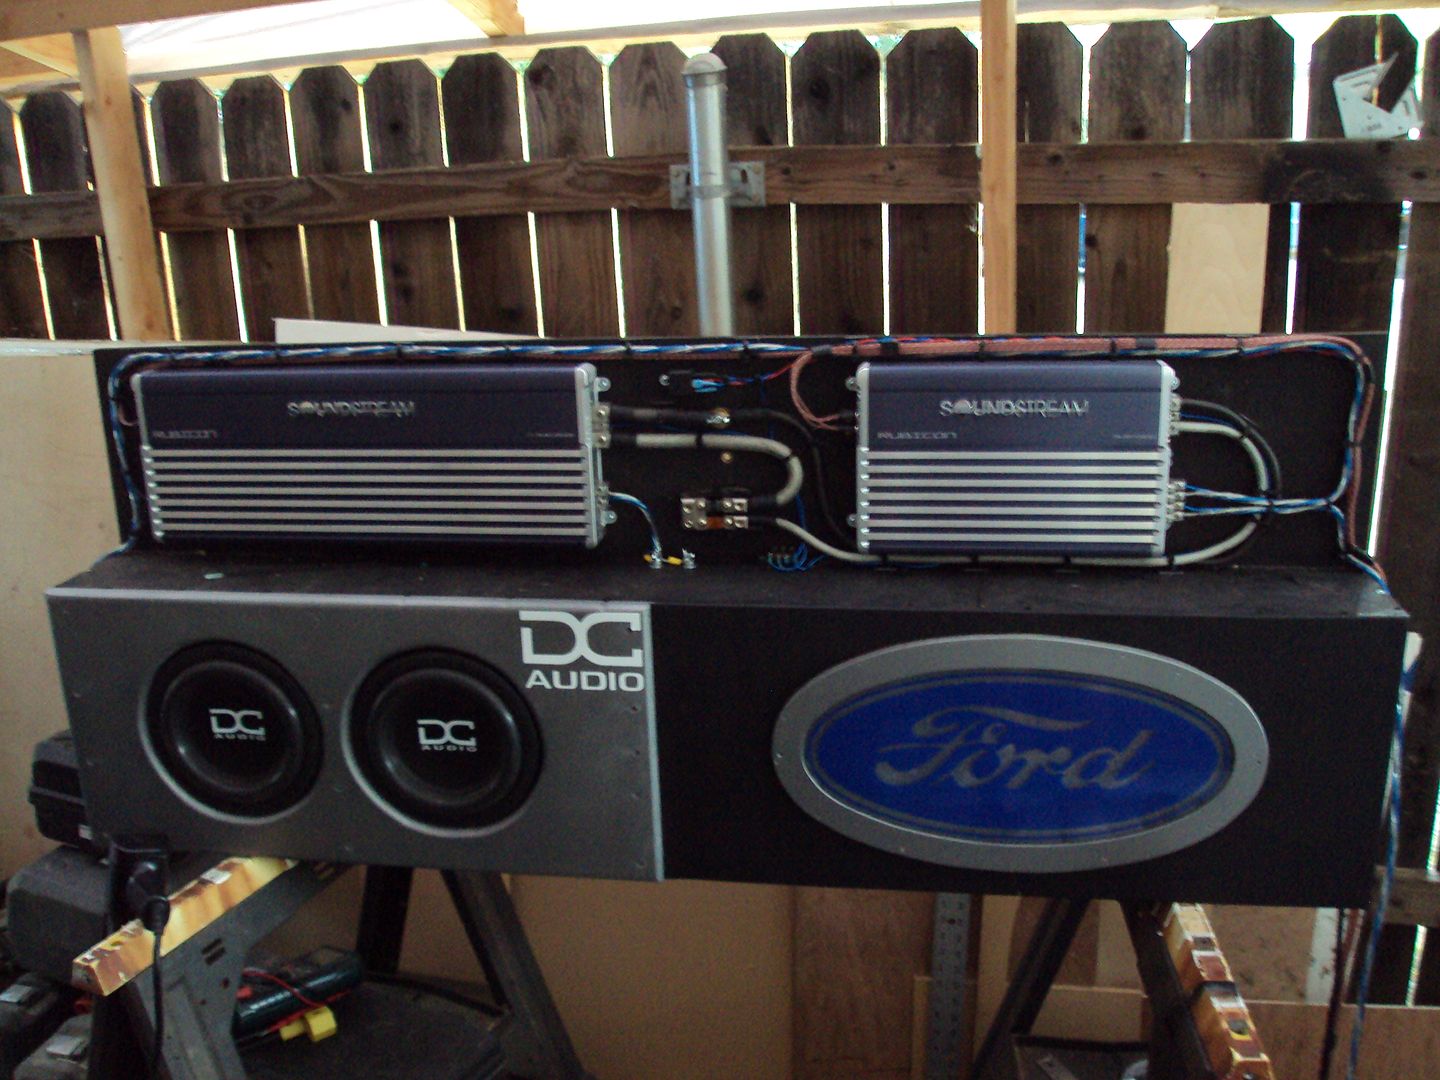
These are prepping for the power and ground cables. Ready to be laid and zip tied! Neat and tidy!
Cable is done!
Time to refuel!
Now it was time to get back to wiring on the amp rack. Kind of looks like a mess, but just wait a minute, it'll clean up! The blue sticky note is the wiring for the relay. It's been so long I forgot how to do it, so I looked it up!
Relay done. Soldered and heat shrinked connectors.
Remote turn on barrier strip, again soldered and heat shrink.
BAM! And done! See told you it would clean itself up! The only thing missing now is the power cable and the ground cable. Those will come when it's in the truck! Oh and the second set of speaker cables. I ran the one for the front, but the rears aren't really in the truck. I have those boxes I made that I'll plug in when needed. Those will go on the first and second channels (top 2) when they're used.
These are prepping for the power and ground cables. Ready to be laid and zip tied! Neat and tidy!
#85
07-08-2012, 01:17 AM
Join Date: May 2011
Posts: 339
Likes: 0
Received 0 Likes
on
0 Posts
All the way down the side of the box.
Also when I was at the hardware store, I picked up some hex bolts instead of screws. I was able to get a ratchet in there much easier than a screwdriver. Even a stubby was hard, I dropped it down in the fender well, which is why I had to pull the liner.
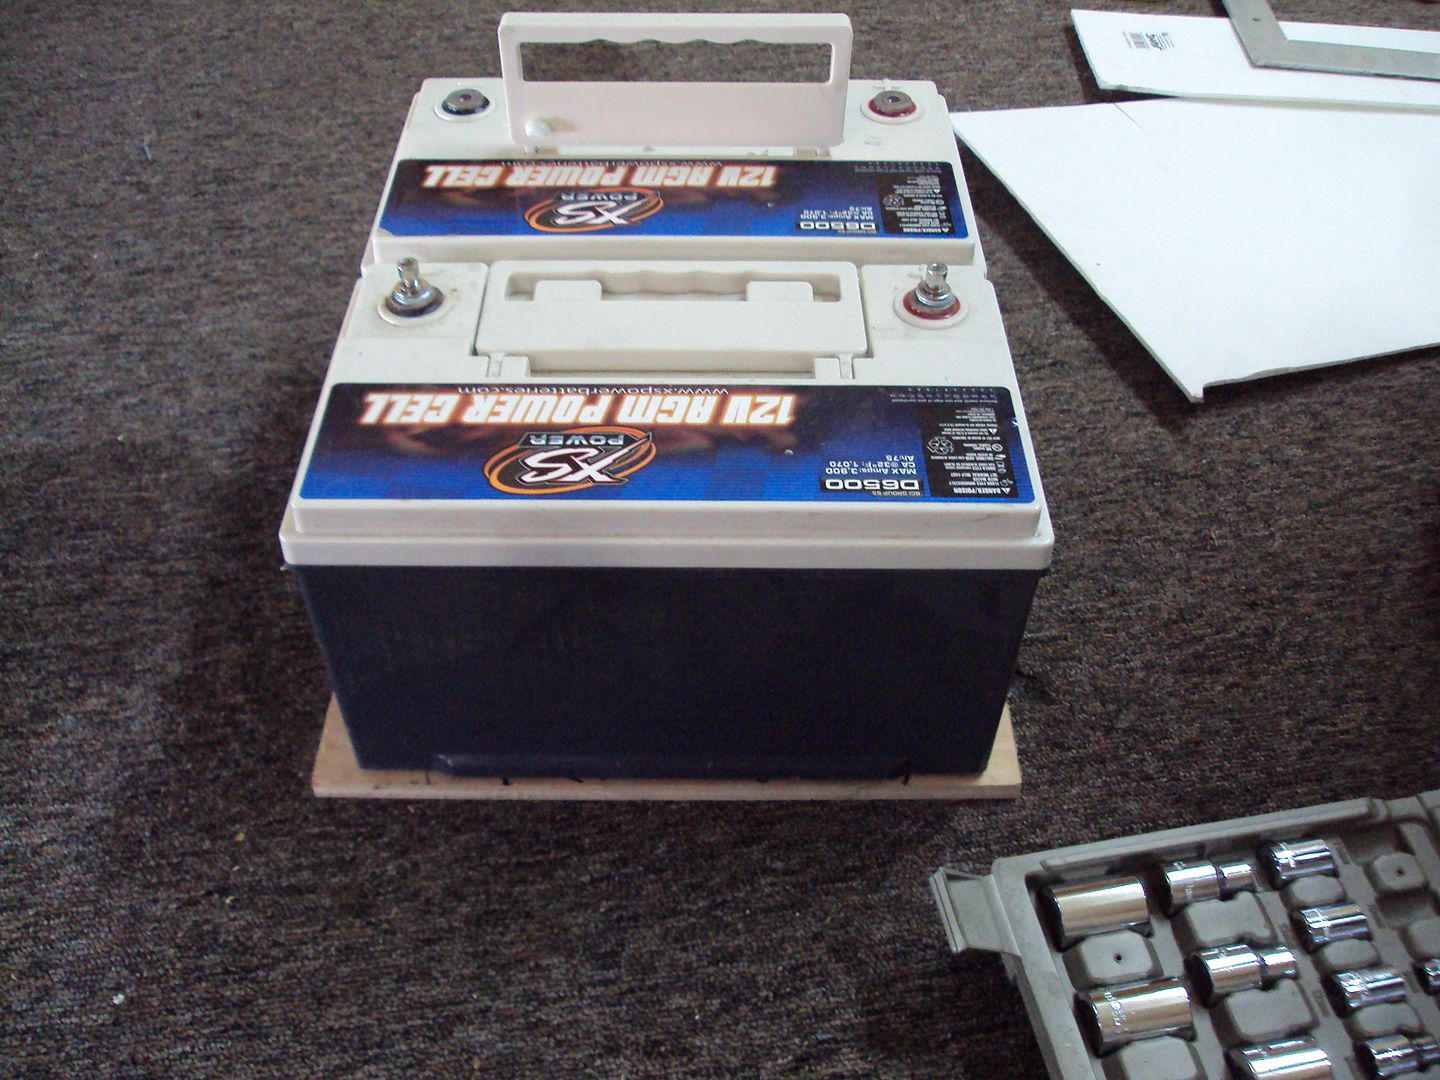
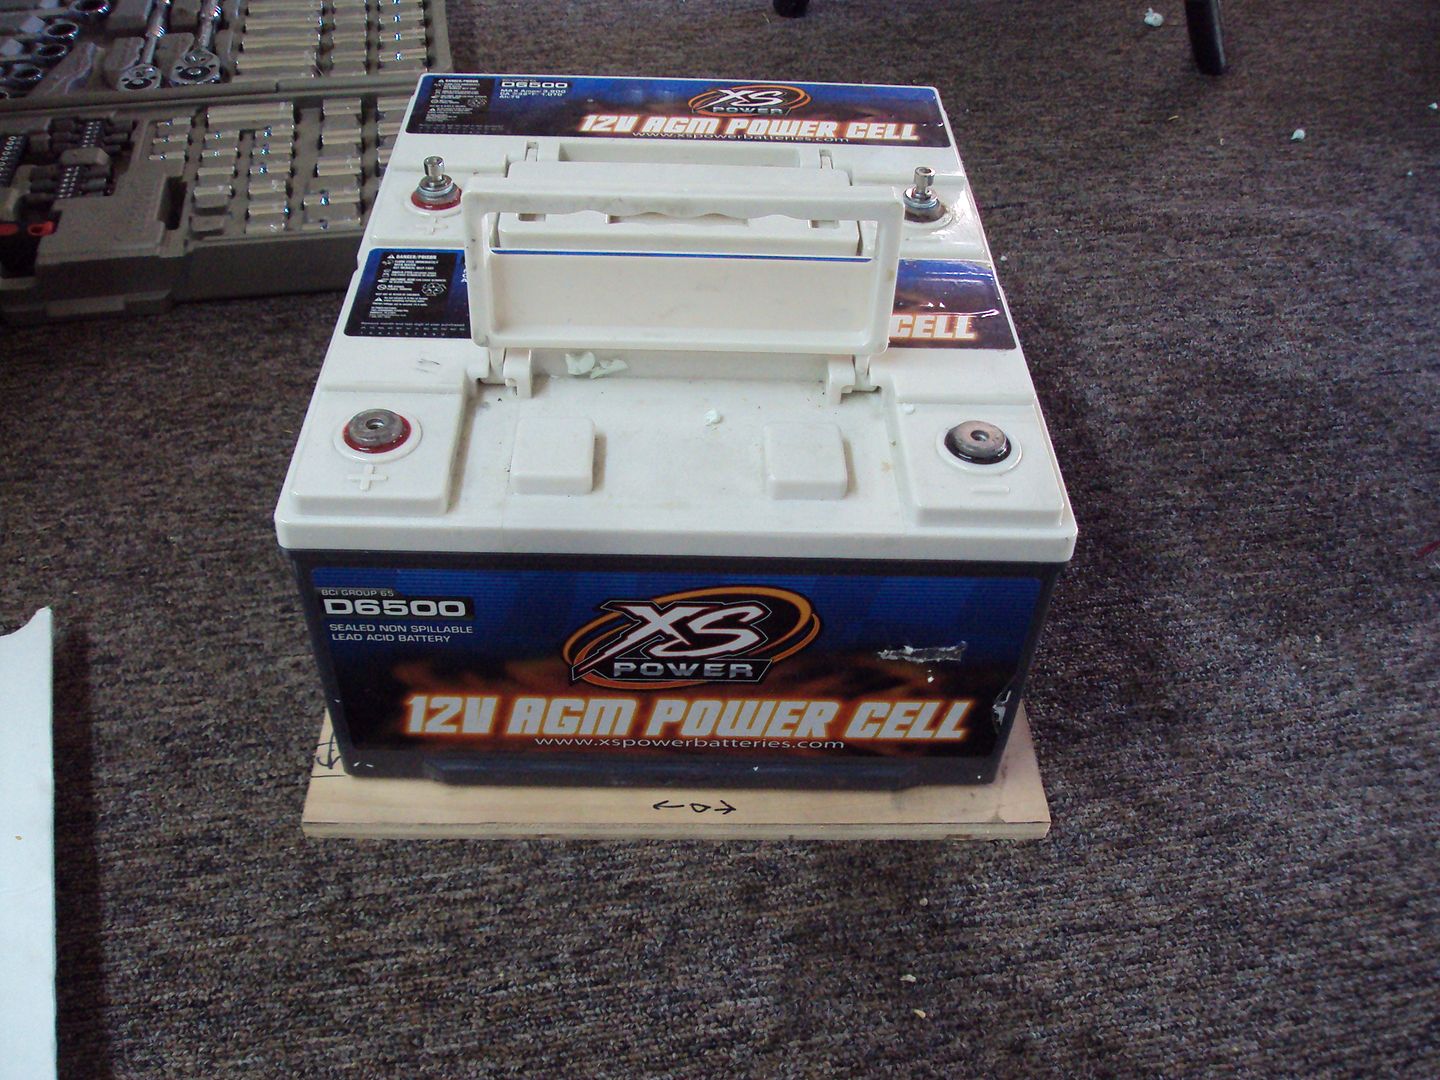
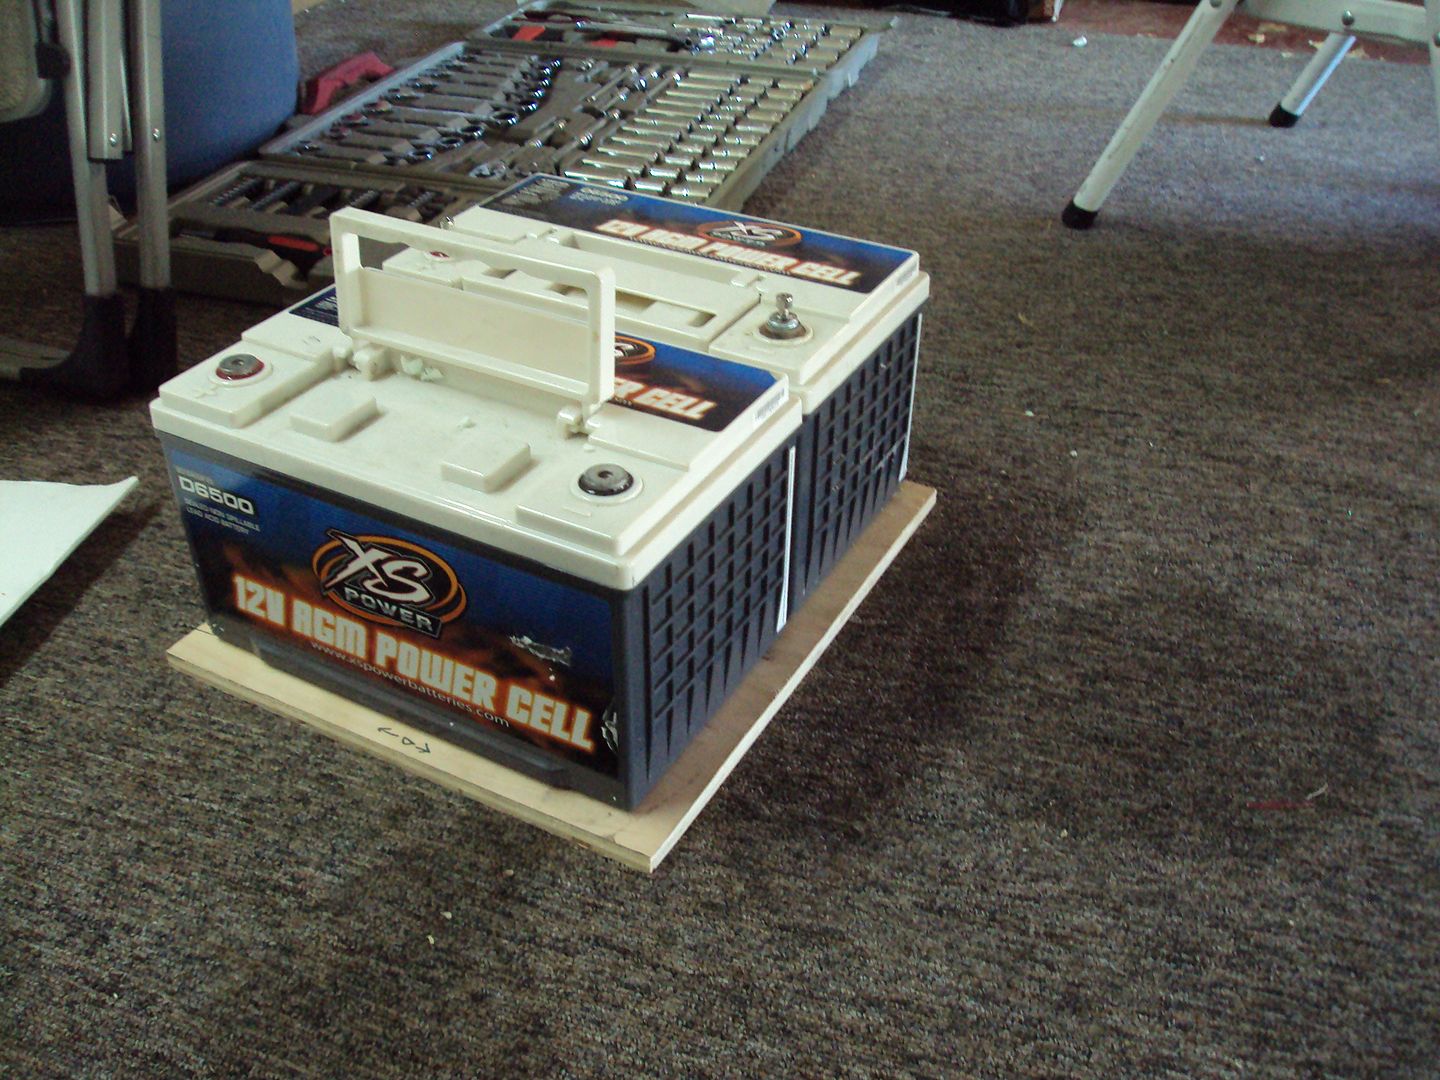
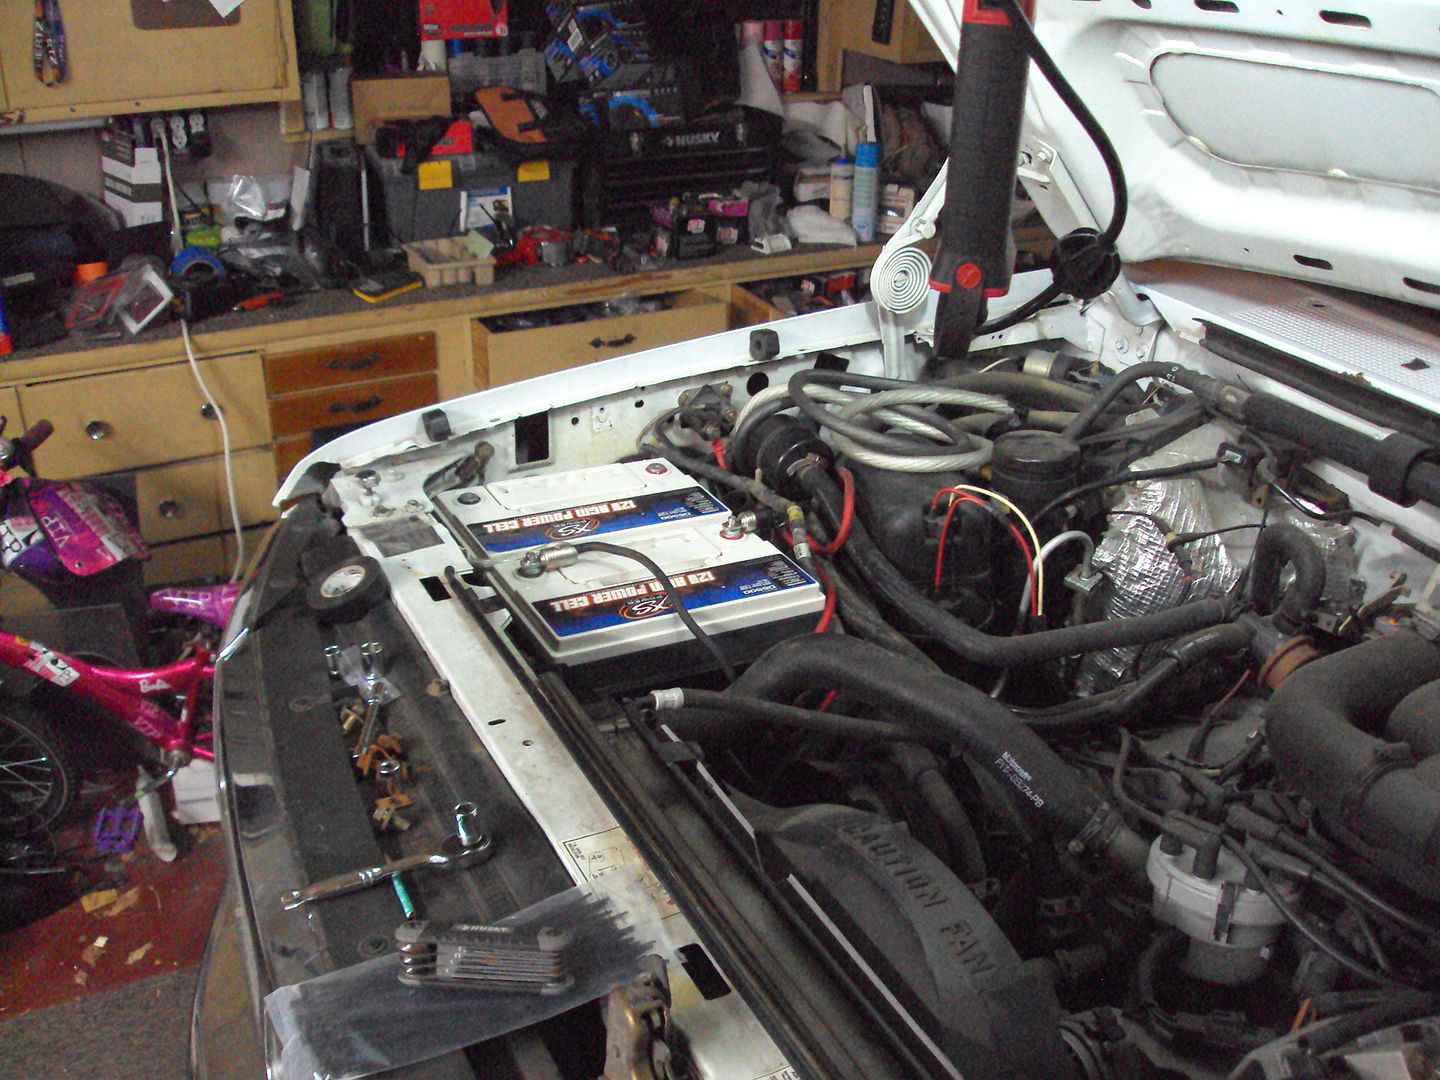
Battery tray finished and mounted! Sure am happy with how it turned out!
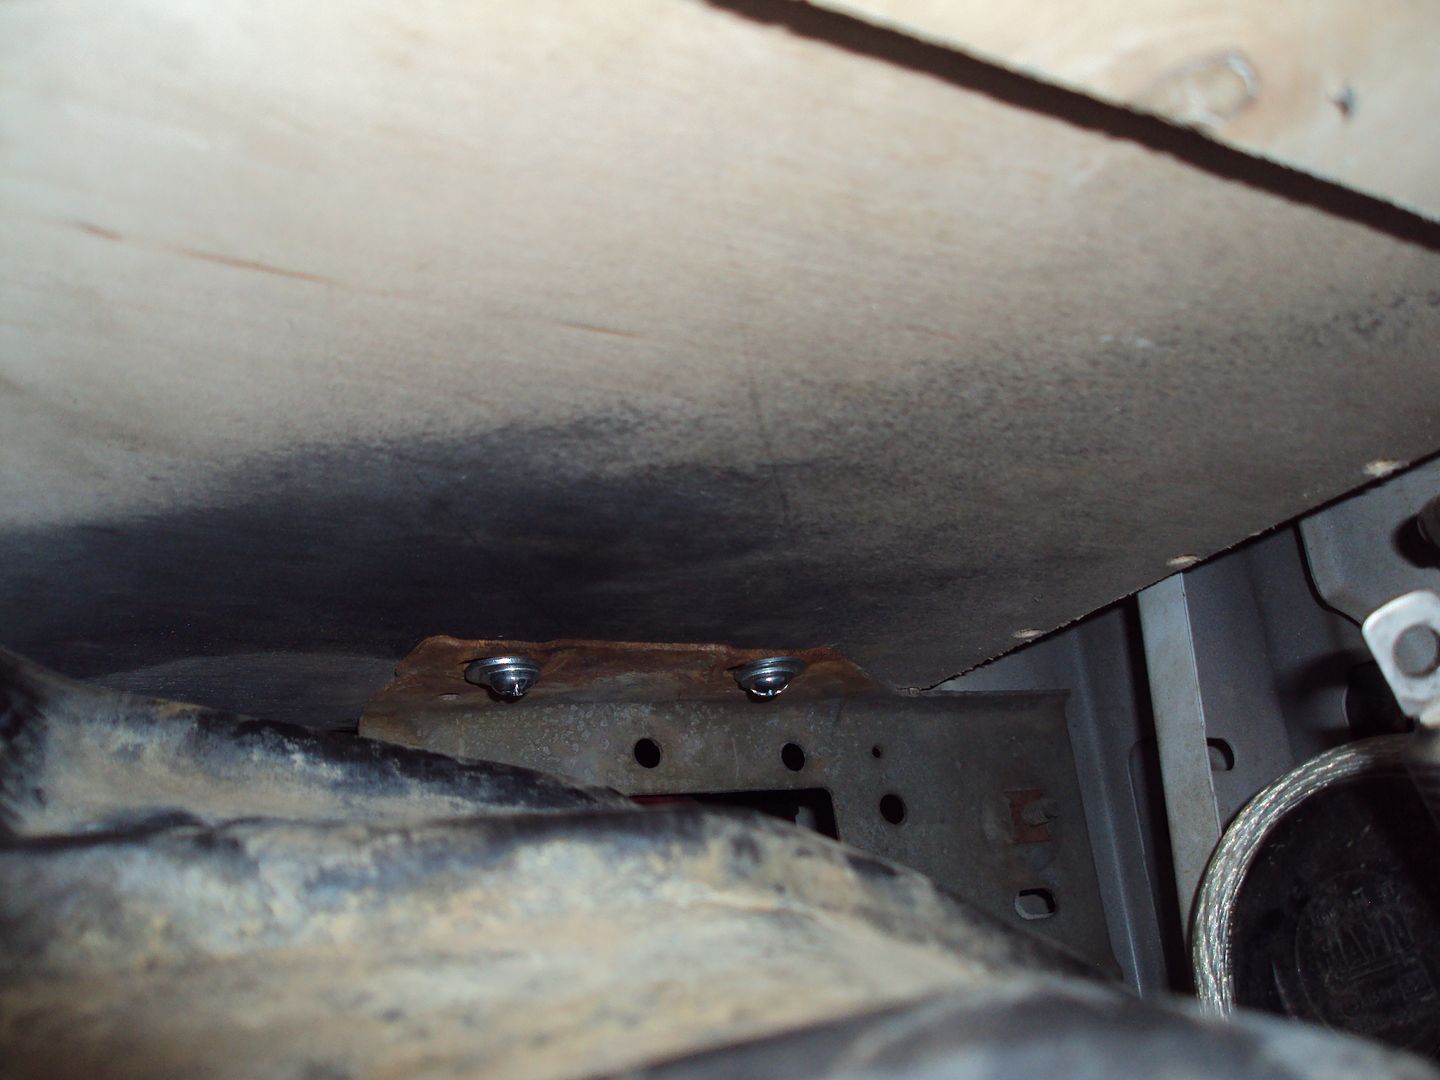
From under the well
Ah yes, it's a tight fit, but it's all in! Some of these wires are going to get changed here real soon too. Big 3 coming shortly, not this weekend, but in the next couple weeks.
The goods, waiting to go to they're new home.
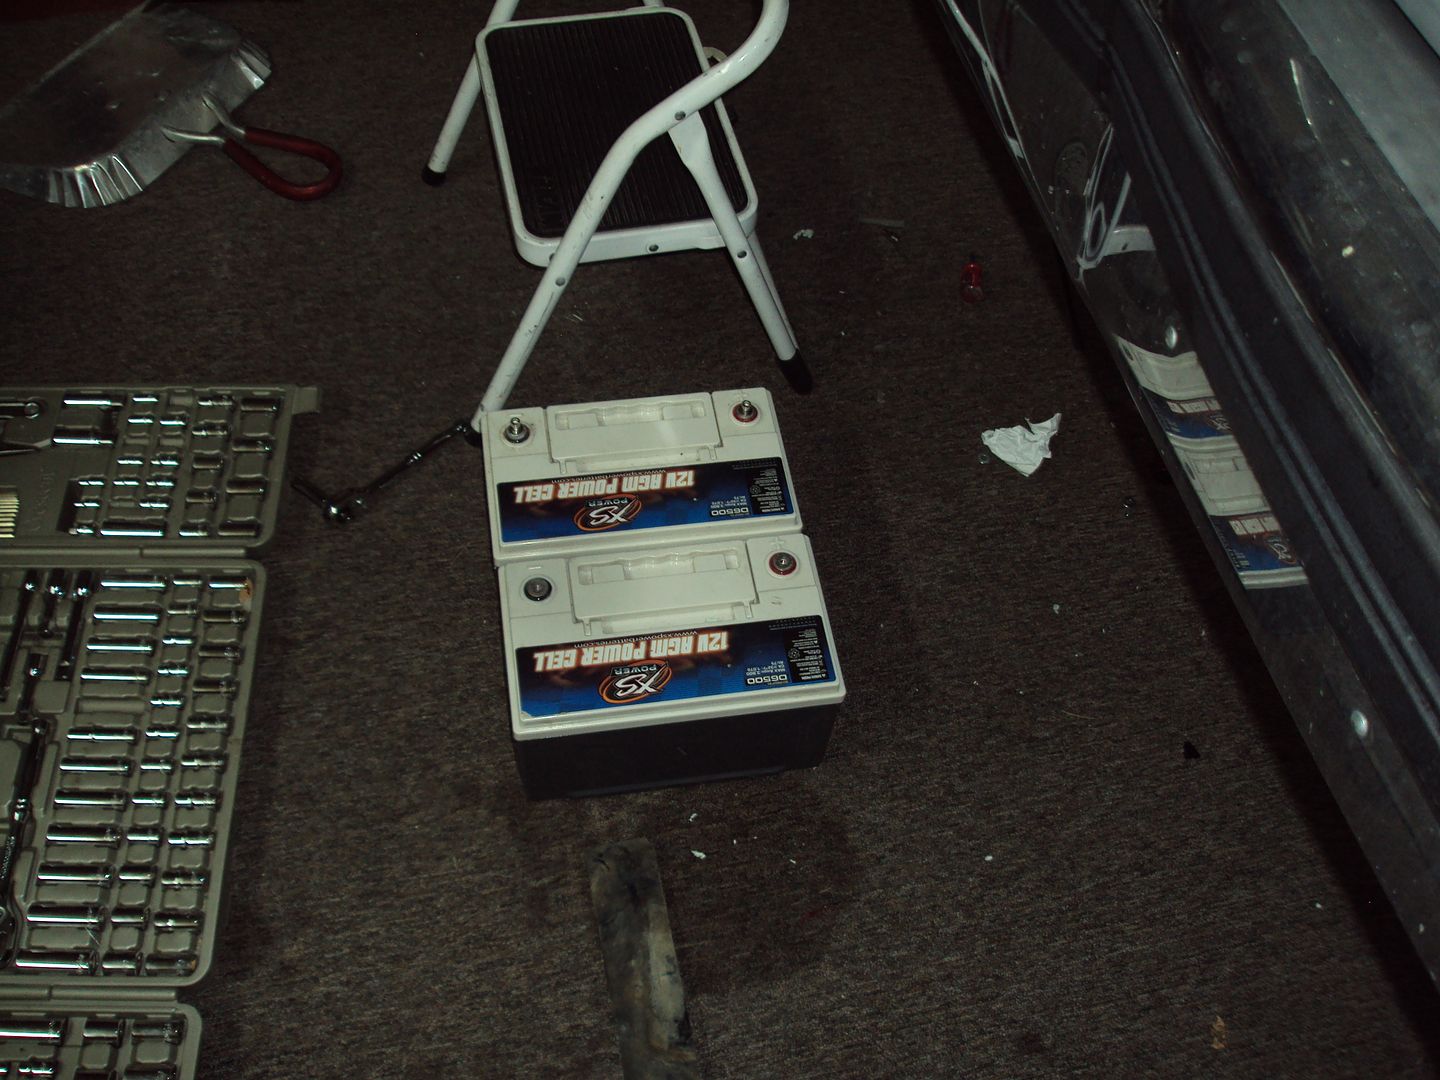
One snuggled in!
And they're home!
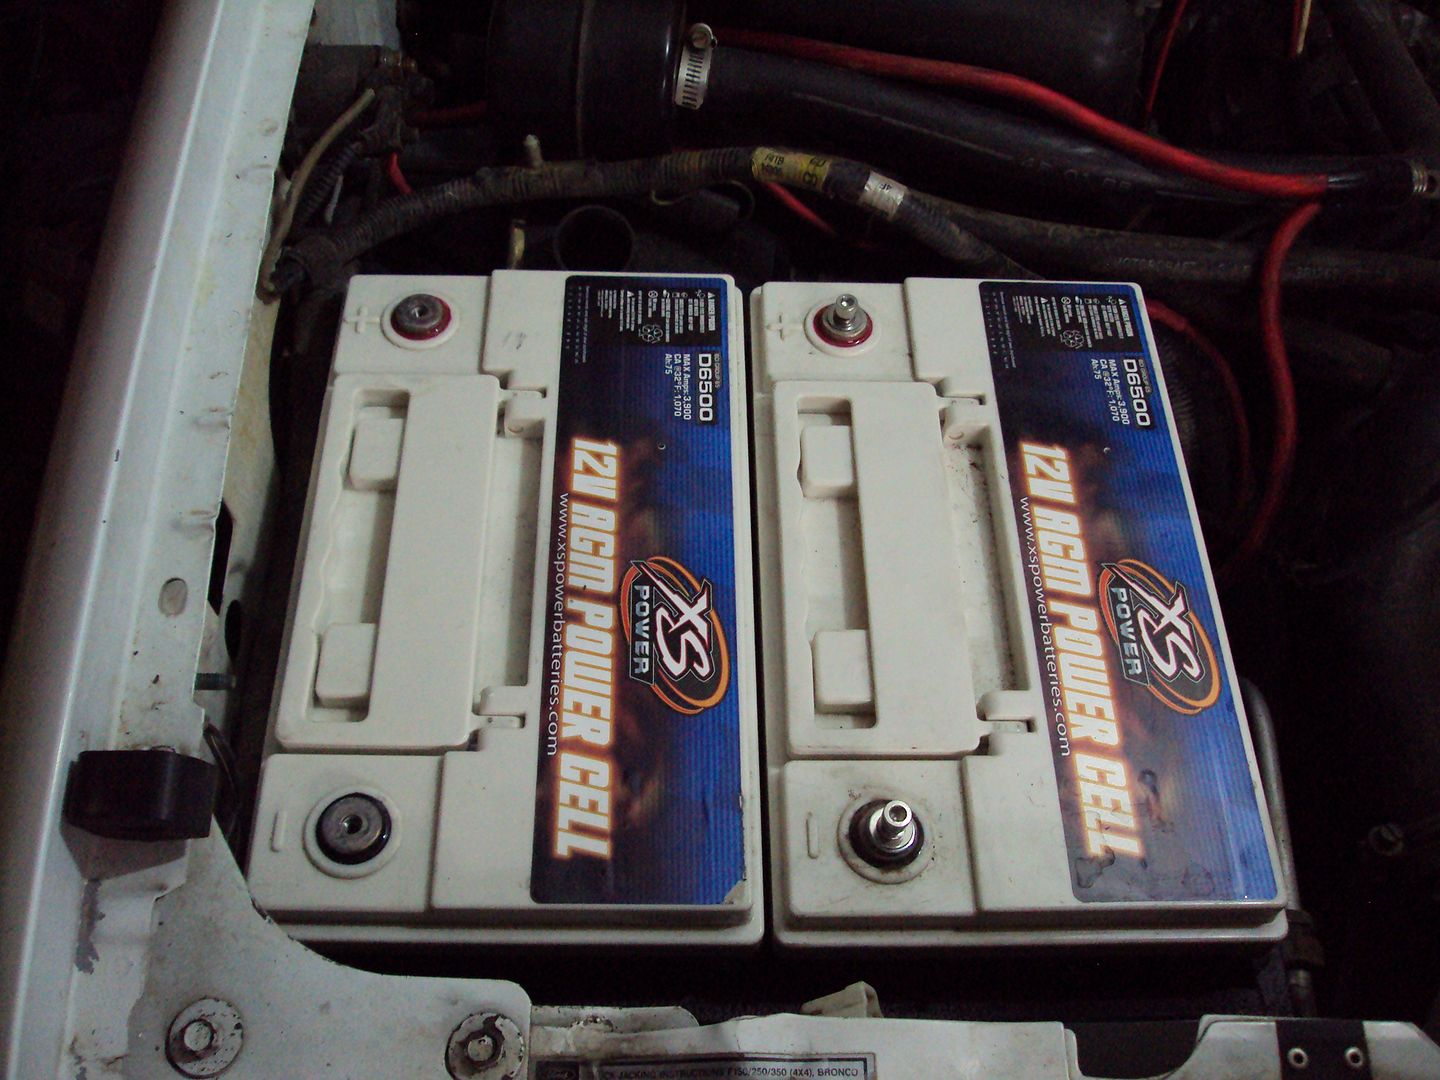
So I have buss bars for these, however, I didn't get the hardware with them. So I have to pick some up. I grabbed some earlier today but I grabbed the wrong thread type. So I had to temporarily get one battery hooked back up so I could move the truck. Mama wanted the garage! Not even arguing that one!
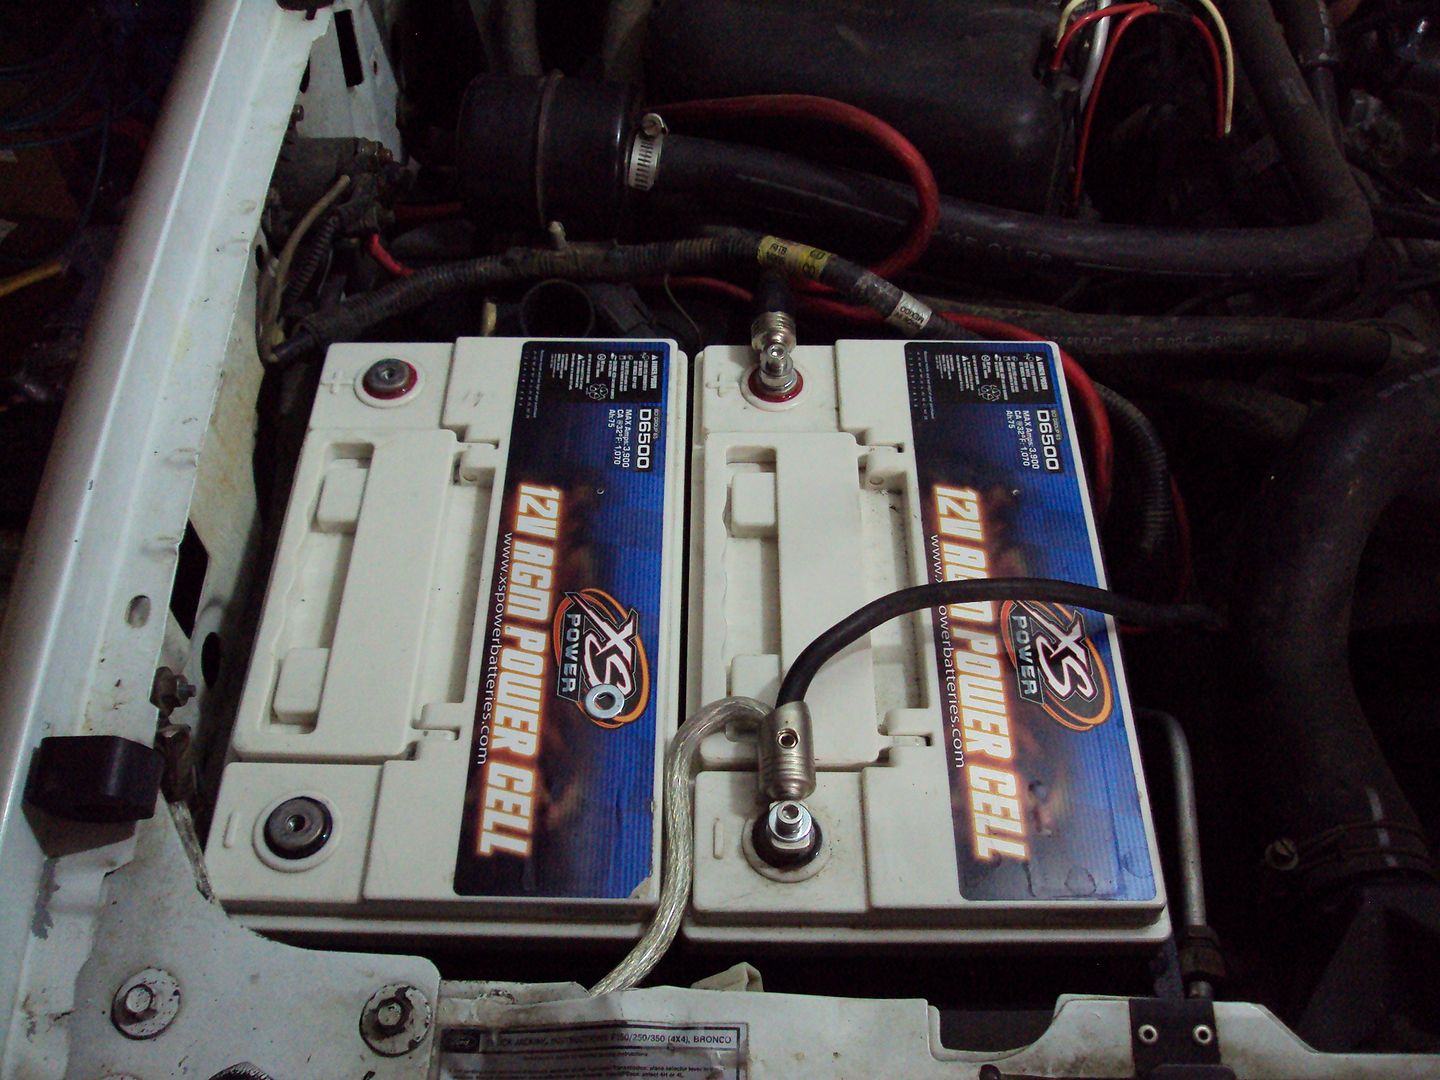
They look good in there! They'll look even better with some aluminum buss bar bling!
Also when I was at the hardware store, I picked up some hex bolts instead of screws. I was able to get a ratchet in there much easier than a screwdriver. Even a stubby was hard, I dropped it down in the fender well, which is why I had to pull the liner.
Battery tray finished and mounted! Sure am happy with how it turned out!
From under the well
Ah yes, it's a tight fit, but it's all in! Some of these wires are going to get changed here real soon too. Big 3 coming shortly, not this weekend, but in the next couple weeks.
The goods, waiting to go to they're new home.
One snuggled in!
And they're home!
So I have buss bars for these, however, I didn't get the hardware with them. So I have to pick some up. I grabbed some earlier today but I grabbed the wrong thread type. So I had to temporarily get one battery hooked back up so I could move the truck. Mama wanted the garage! Not even arguing that one!
They look good in there! They'll look even better with some aluminum buss bar bling!
#86
07-08-2012, 01:21 AM
Join Date: May 2011
Posts: 339
Likes: 0
Received 0 Likes
on
0 Posts
And finally the cables in the truck.
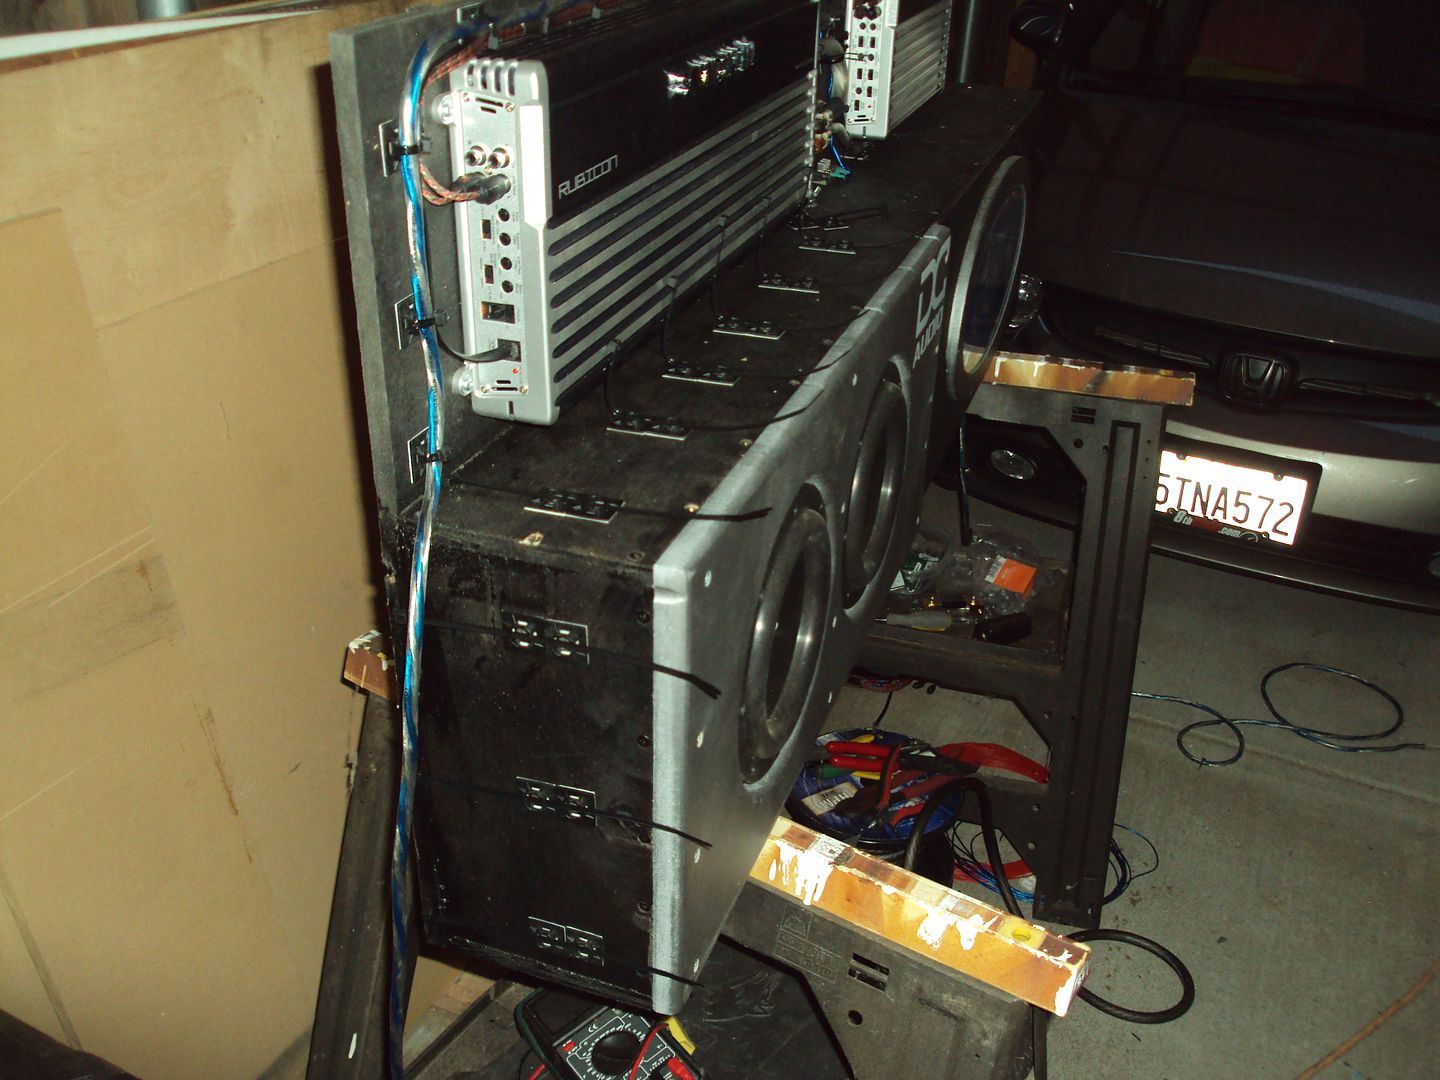
That's all I got for tonight. Not sure if I'll have more time tomorrow but I just ran out of gas to get it finished tonight. That box is a beast to lift on my own, and I didn't wanna risk puncturing a sub or scratching an amp. So I'll see if I can get it in tomorrow and running.
Sorry about the pics guys, I'm gonna send Photobucket an email asking WTF is going on. This is happening a lot lately! Not sure if it's just their site, if I have too many photos in my account, or what the hell it is! We'll find out. Or I'll just have to switch over, cause I'm tired of it frankly!
Good night all!
#87
07-08-2012, 12:29 PM
Join Date: May 2011
Posts: 339
Likes: 0
Received 0 Likes
on
0 Posts
#88
07-09-2012, 01:31 PM
Join Date: May 2011
Posts: 339
Likes: 0
Received 0 Likes
on
0 Posts
So I was talking to my lovely this morning and telling her I was going to try and get my brother over here to help me get the box in the truck. He lives way across the other side of town and isn't always that reliable. Anyway, she shocked the hell out of me and said, "well why don't I try and help you. Not sure I can be much help but I can at least try. You've been working hard on that thing and I'd hate for something to happen to it"! So after picking my lower jaw up off the ground from shock, I gladly accepted her help! So that bitch is going in the truck tonight!
I'm also going to head on over to harbor freight and pick up a rivet nut tool so I can neatly attach it to the wall. I'm also going to use this for other things too, the door panels, the back wall panel when it's done, the center console, and probably the center roof mount.................whoops did I let that out? eepwall" So anyway, I'm going to get one of those cause it'll come in good use for me. <~~~~~is that even a complete sentence! It must be Monday!
I'm also going to seriously look into a welder as well. I'm going to really need it soon for other parts of the truck. I need to do new side bars for the truck, or lower the current bars with brackets, and I need to make a new battery box at some point to replace my wooden one, I'll need to make battery boxes for under the truck, I'll at some point be seriously trying to do a dual alternator set up and need to do brackets for that, I'll have to replace my exhaust soon (want duals that terminate and drop down below the bed, not out of the back or sides), and I would love nothing more then to be able to make a nice beefy bumper for front and back! That would be SICK!! So I need to learn to weld, so that's getting bumped up on the list for sure!
Looking for a nice bed shell for an 8' bed which are not always easy to find on craigslist. If I can get that, I'd love to eliminate the truck box all together and just do a sub enclosure instead of a sub enclosure inside the tool box.
I'm just rambling things off now. So hopefully I'll get some pics taken tonight. Much more to come very soon! This should be playing, if I have anything to say about it, tomorrow night, latest Wednesday night!
I have a couple questions as well. I'm going to post another thread asking about them though. I'll link it here.
I'm also going to head on over to harbor freight and pick up a rivet nut tool so I can neatly attach it to the wall. I'm also going to use this for other things too, the door panels, the back wall panel when it's done, the center console, and probably the center roof mount.................whoops did I let that out?
eepwall" So anyway, I'm going to get one of those cause it'll come in good use for me. <~~~~~is that even a complete sentence! It must be Monday! I'm also going to seriously look into a welder as well. I'm going to really need it soon for other parts of the truck. I need to do new side bars for the truck, or lower the current bars with brackets, and I need to make a new battery box at some point to replace my wooden one, I'll need to make battery boxes for under the truck, I'll at some point be seriously trying to do a dual alternator set up and need to do brackets for that, I'll have to replace my exhaust soon (want duals that terminate and drop down below the bed, not out of the back or sides), and I would love nothing more then to be able to make a nice beefy bumper for front and back! That would be SICK!! So I need to learn to weld, so that's getting bumped up on the list for sure!
Looking for a nice bed shell for an 8' bed which are not always easy to find on craigslist. If I can get that, I'd love to eliminate the truck box all together and just do a sub enclosure instead of a sub enclosure inside the tool box.
I'm just rambling things off now. So hopefully I'll get some pics taken tonight. Much more to come very soon! This should be playing, if I have anything to say about it, tomorrow night, latest Wednesday night!
I have a couple questions as well. I'm going to post another thread asking about them though. I'll link it here.
#89
07-10-2012, 12:06 PM
Join Date: May 2011
Posts: 339
Likes: 0
Received 0 Likes
on
0 Posts
So my appointment for next week kind of got blown up a little bit. Apparently ORU is out of Reverse shackle kits for my truck, well they've rebuilt them but they're being powder coated right now, so they won't be ready by the time my appointment is here. So we're gonna have to reschedule that. But the tires and some other stuff will be done on Tuesday anyway. Then I'll get the rest when it comes in.
No work done last night. It was a rough night and the wife and I were just too tired to get out in the heat. Gonna try again tonight.
That's all for now.
No work done last night. It was a rough night and the wife and I were just too tired to get out in the heat. Gonna try again tonight.
That's all for now.
#90
07-11-2012, 04:11 PM
Join Date: May 2011
Posts: 339
Likes: 0
Received 0 Likes
on
0 Posts
So I got some major updates for everyone tonight.
First, I just dropped some serious cash on the truck. SMH, but it's done. I'm dropping her off on the 16th to 4wheelparts here in sac. I was going to do this myself, but I'm lacking seriously in time, and it's really a safety issue. The suspension is shot, tires need replacing, and more. Soooooooooooo, she's getting
New Pro Comp Leaf Springs up front with a 4" lift
Reverse Shackle Kit, giving it an additional 3" lift. But with the 2" negative sag up front it will end up as a 5" lift.
5" Pro Comp Lift blocks in back.
Pro Comp ES9000 Shocks all the way around
Skyjacker Dual Steering Stabilizer up front (don't make a dual Pro Comp Kit)
New tie rod ends
New SS brake lines
Drop Pitman arm
Alignment
and Pro Comp Xtreme All Terrain 35" tires
Oh she's gonna be nice when she gets done! All just in time for camping on the 18th! Have a feeling the wife isn't gonna be too happy with the height, but such is life! She won't bitch when the ride is softer that's for sure!
These are the things I'm currently thinking. First of all, the ORU kit isn't going to be in in time to do the project next tuesday, so that's going to be the week after. Tires and a couple other things are going to be done on Tuesday cause those simply cannot wait!
The other thing that's going on, as we speak, is the Master Cylinder is being replaced yet again. Recall I did this back in august of last year. Well that one failed. I didn't have time right now to do it, so I warrantied the part, and took it to my mechanic I use around the corner from work. Should be done today. He's also changing some stuff on the AC out to stop some leaks I have.
This weekend I'll be changing the steering box, and the power steering pump, as well as the fuel filter.
Plans for the future. I want to lift this thing. I've gotten the bug now, and I think that measly 3" just isn't going to do it for me. So I'm going to have to replace those front springs anyway down the line, so I'm thinking this:
Front - Replace sagging springs (-2") with Skyjacker Softride 4" lift and not using the add a leaf that's going in now. With the RSK it should put me at 7".
Rear - Do a 6" Leaf lift kit. Should level me out!
Obviously there will be some other things that need to be done, well I say obviously, but I could use some help with what those things are, if you guys will please.
I'm pretty sure I'm already getting a drop pitman arm from the ORU kit, and the SS brake lines. What else would I need to do the 6" - 7" lift?
Thanks guys! Hoping to get some more audio work done tonight or friday night.
