1994 Ford F350 Project Build

#137
 09-27-2012, 08:39 AM
Join Date: May 2011
Posts: 339
Likes: 0
Received 0 Likes
on
0 Posts
#138
09-27-2012, 10:38 PM
Join Date: May 2011
Posts: 339
Likes: 0
Received 0 Likes
on
0 Posts
Ok here goes! Check this out!
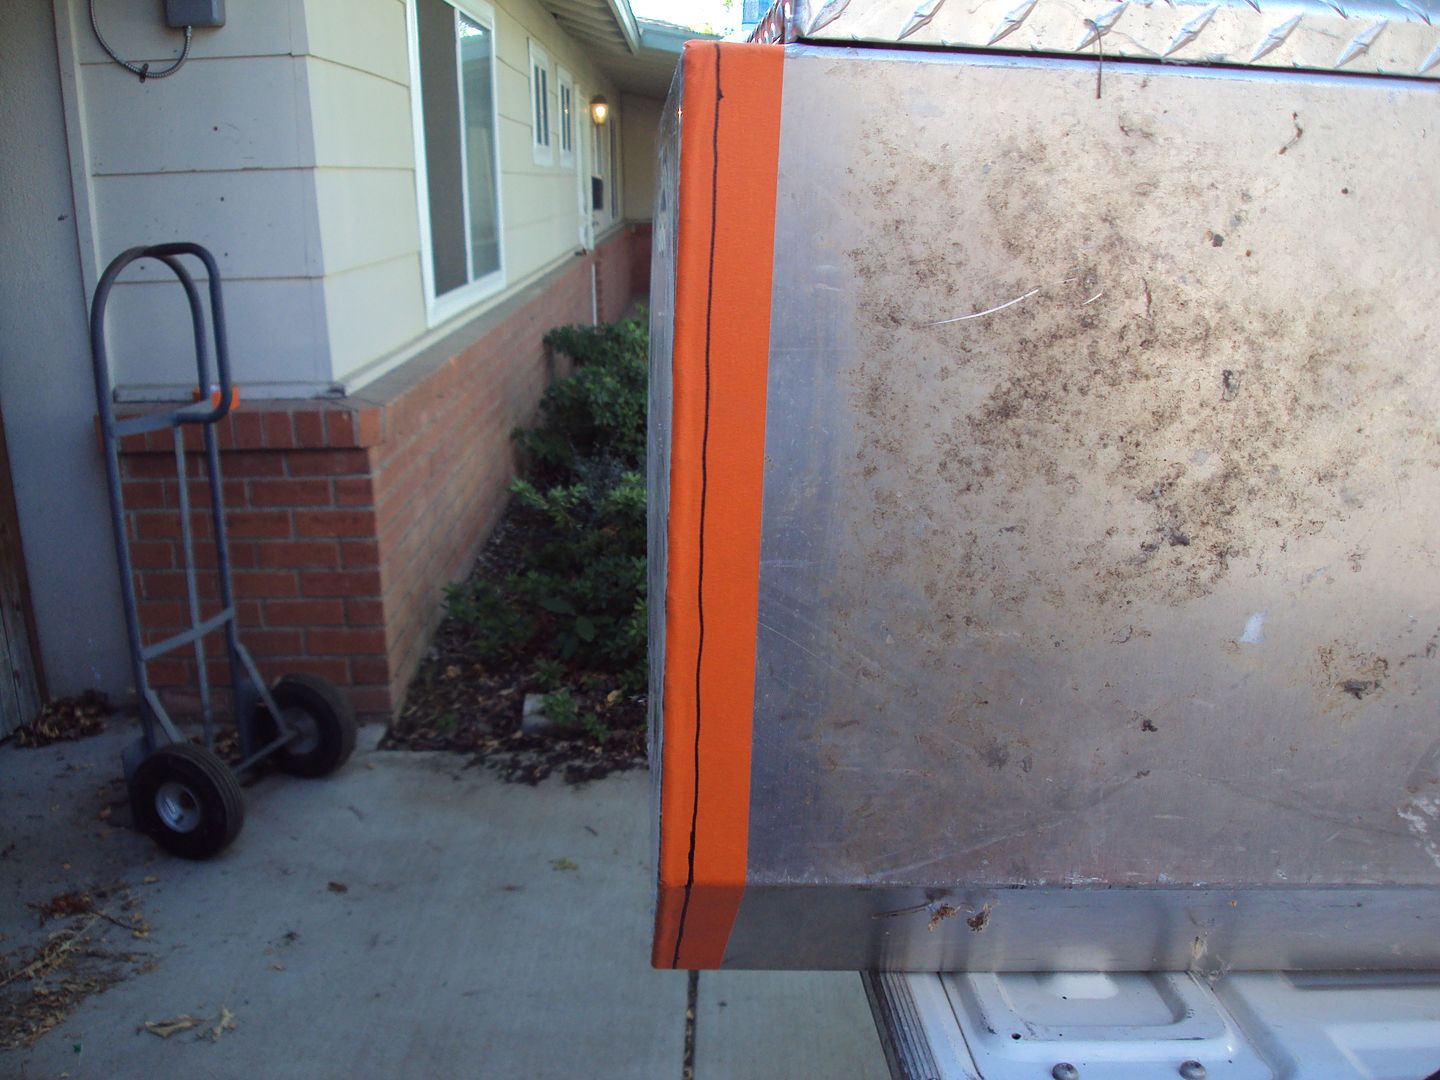
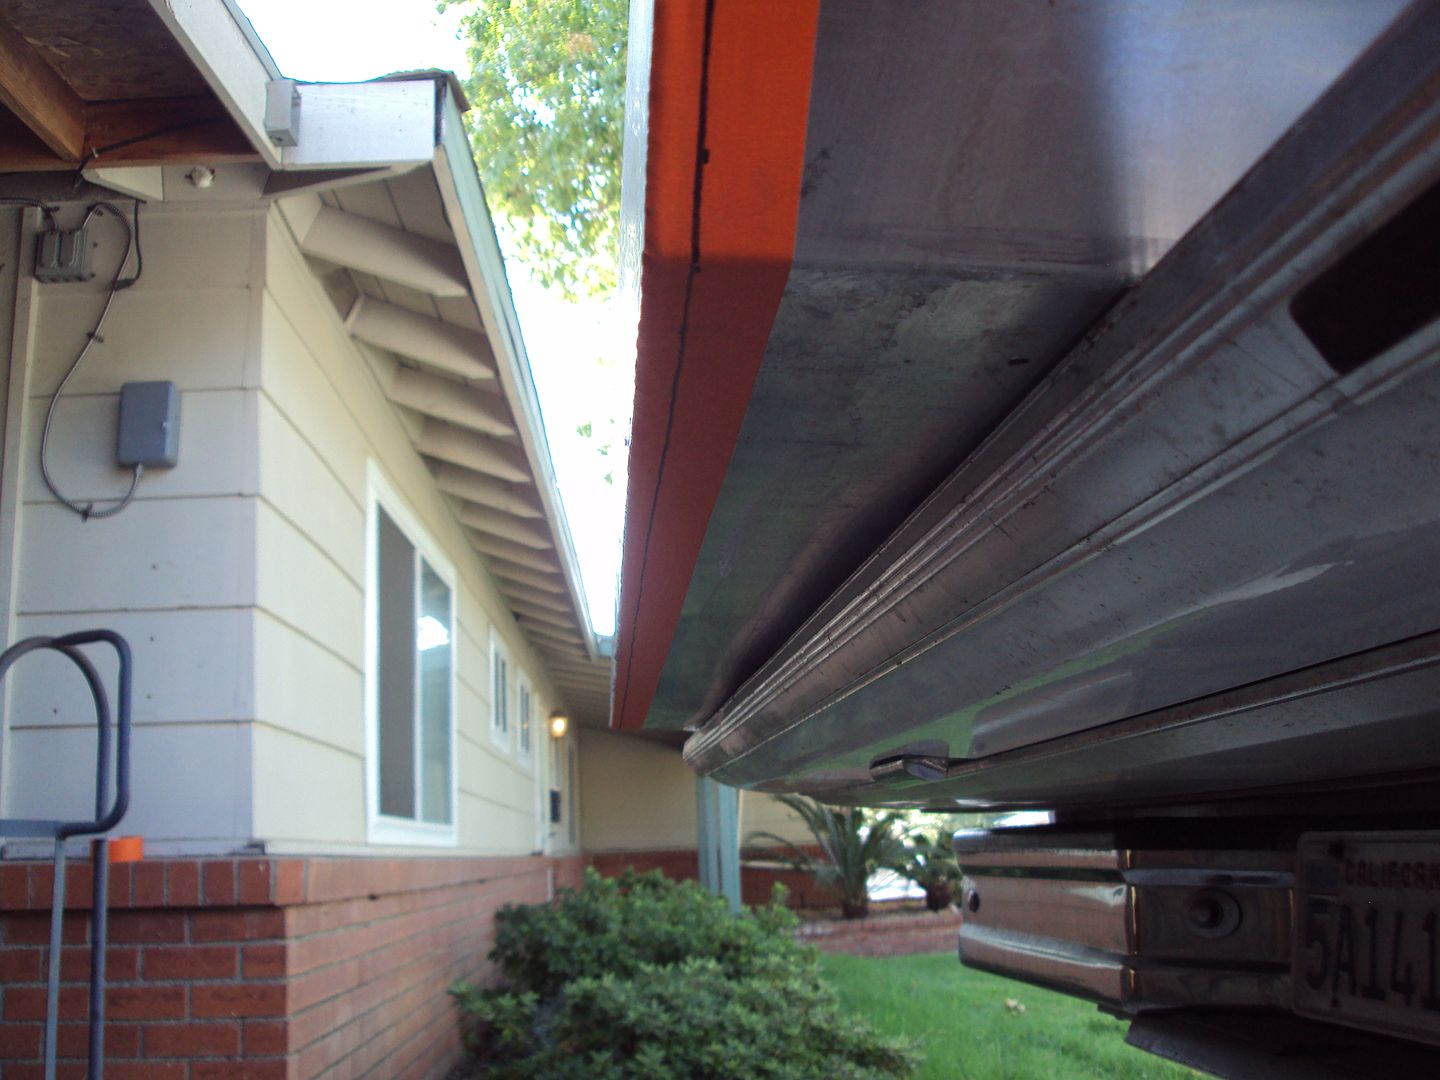
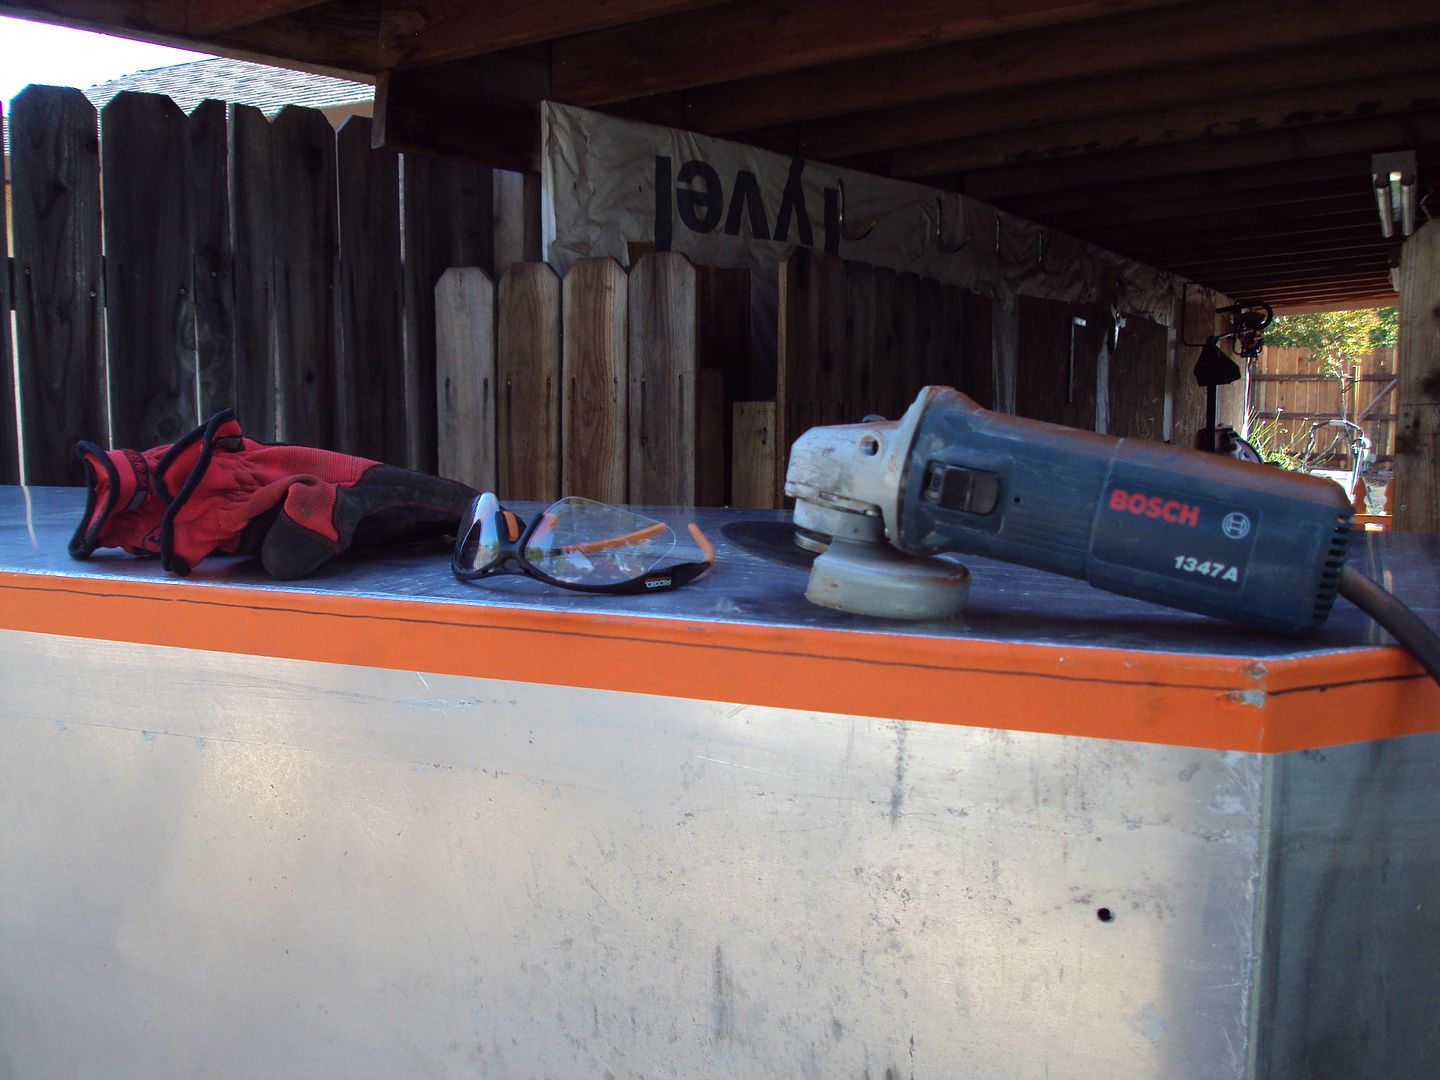
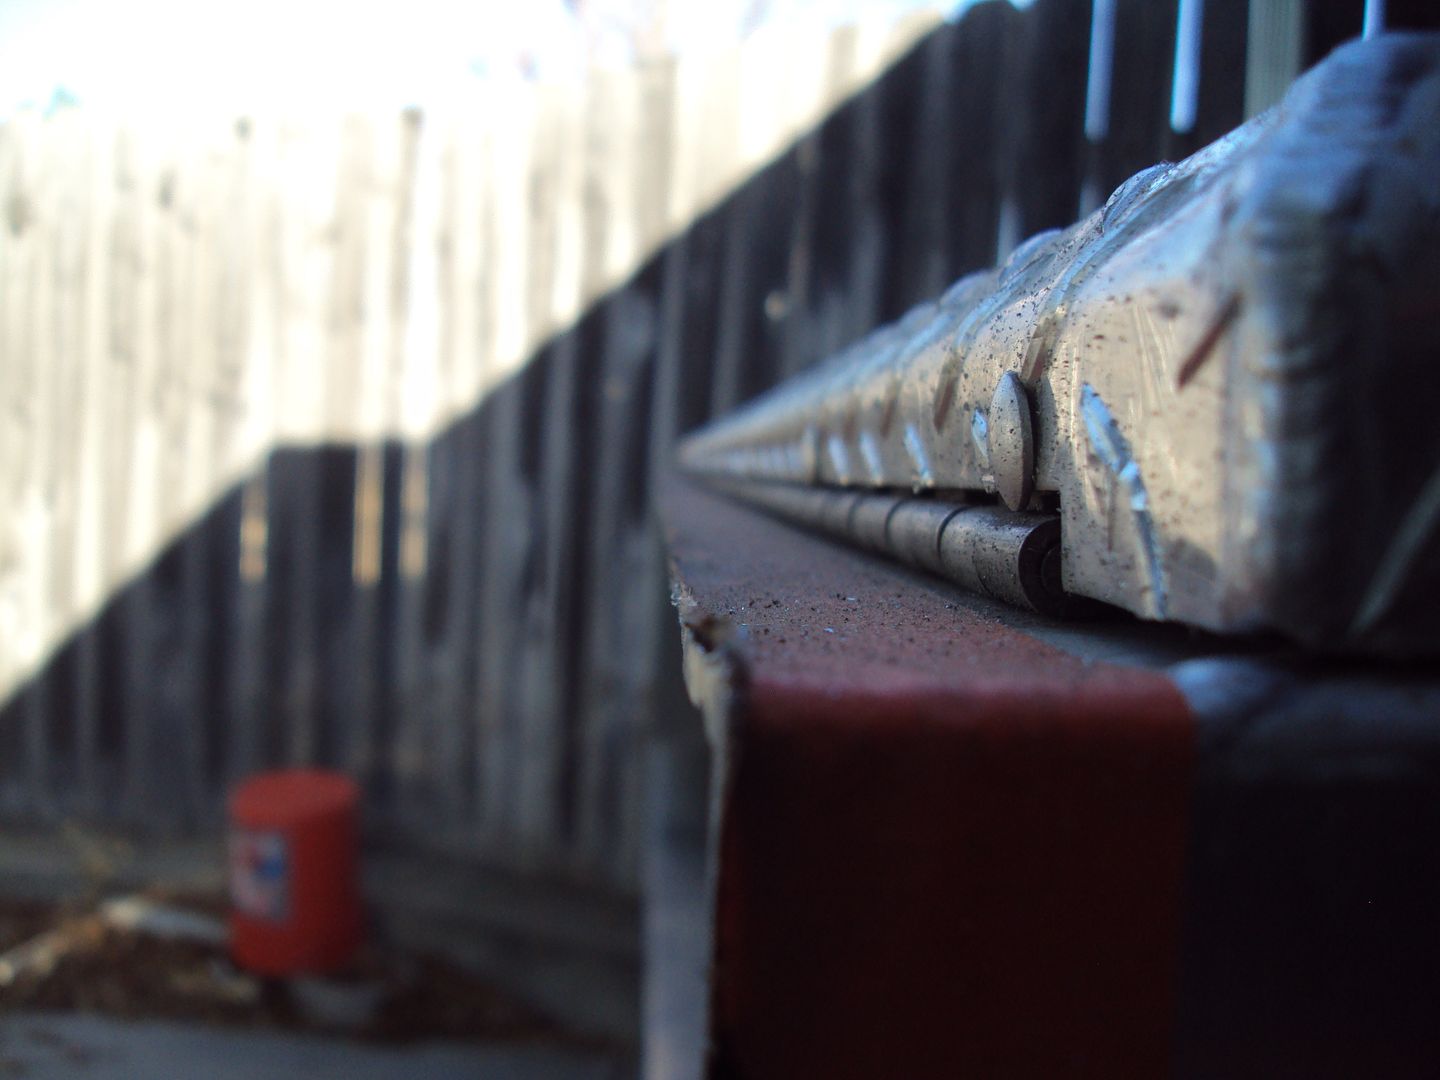
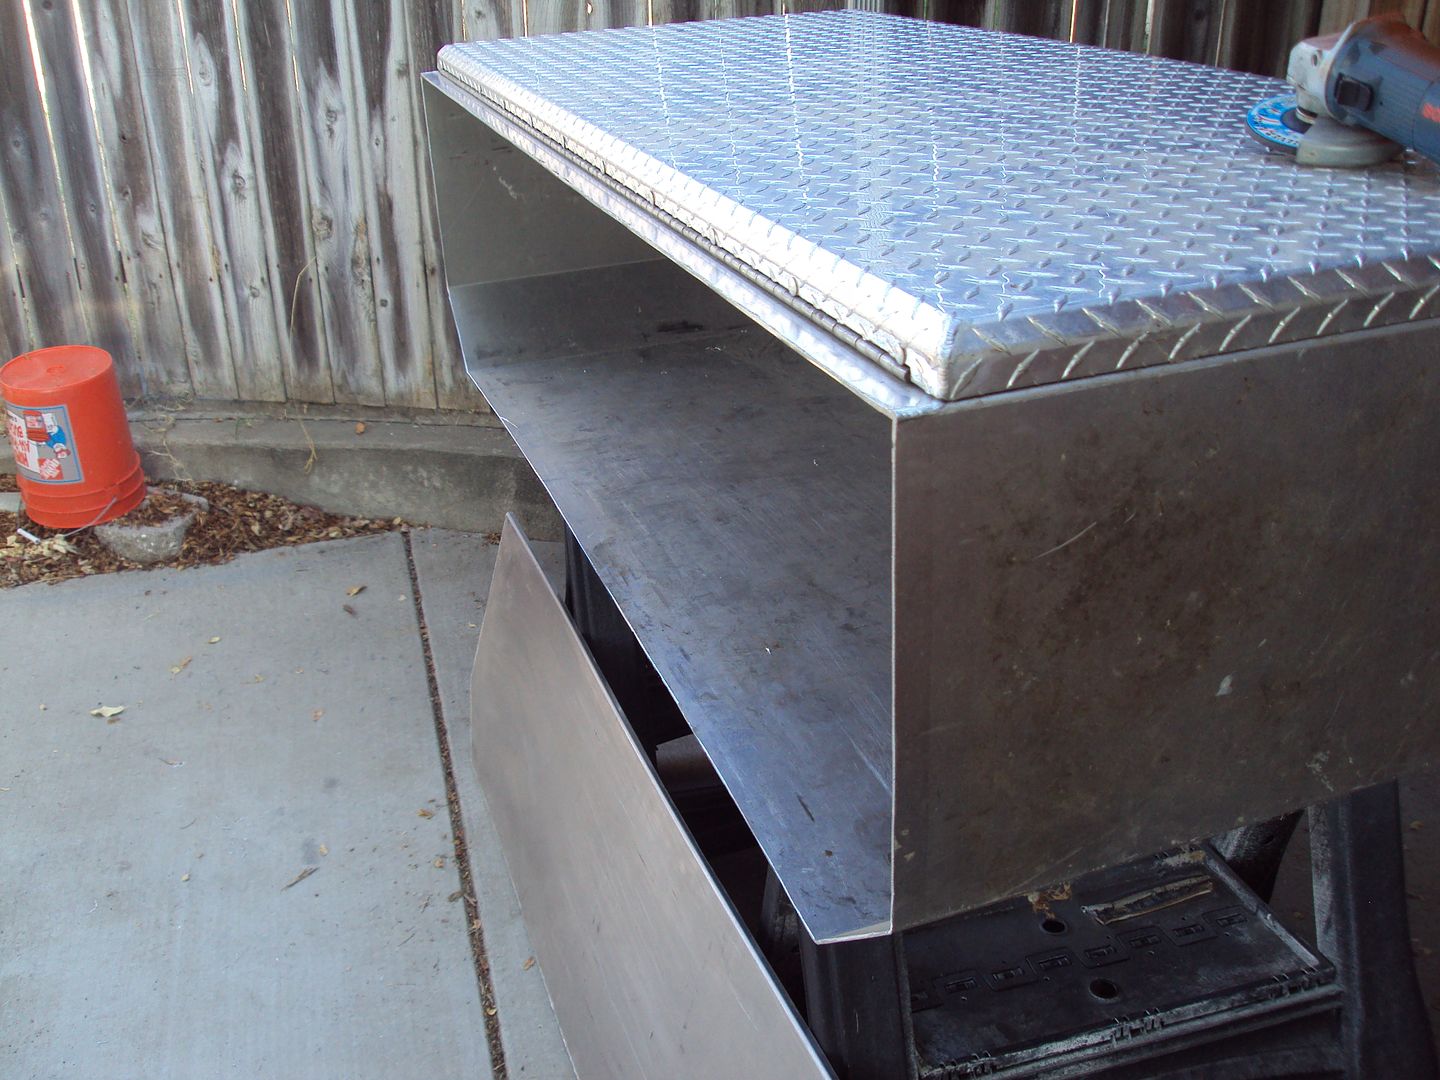
Got the Box out and prepped it up! This has to be done before anything else can be built inside of it or for it. Some different views.
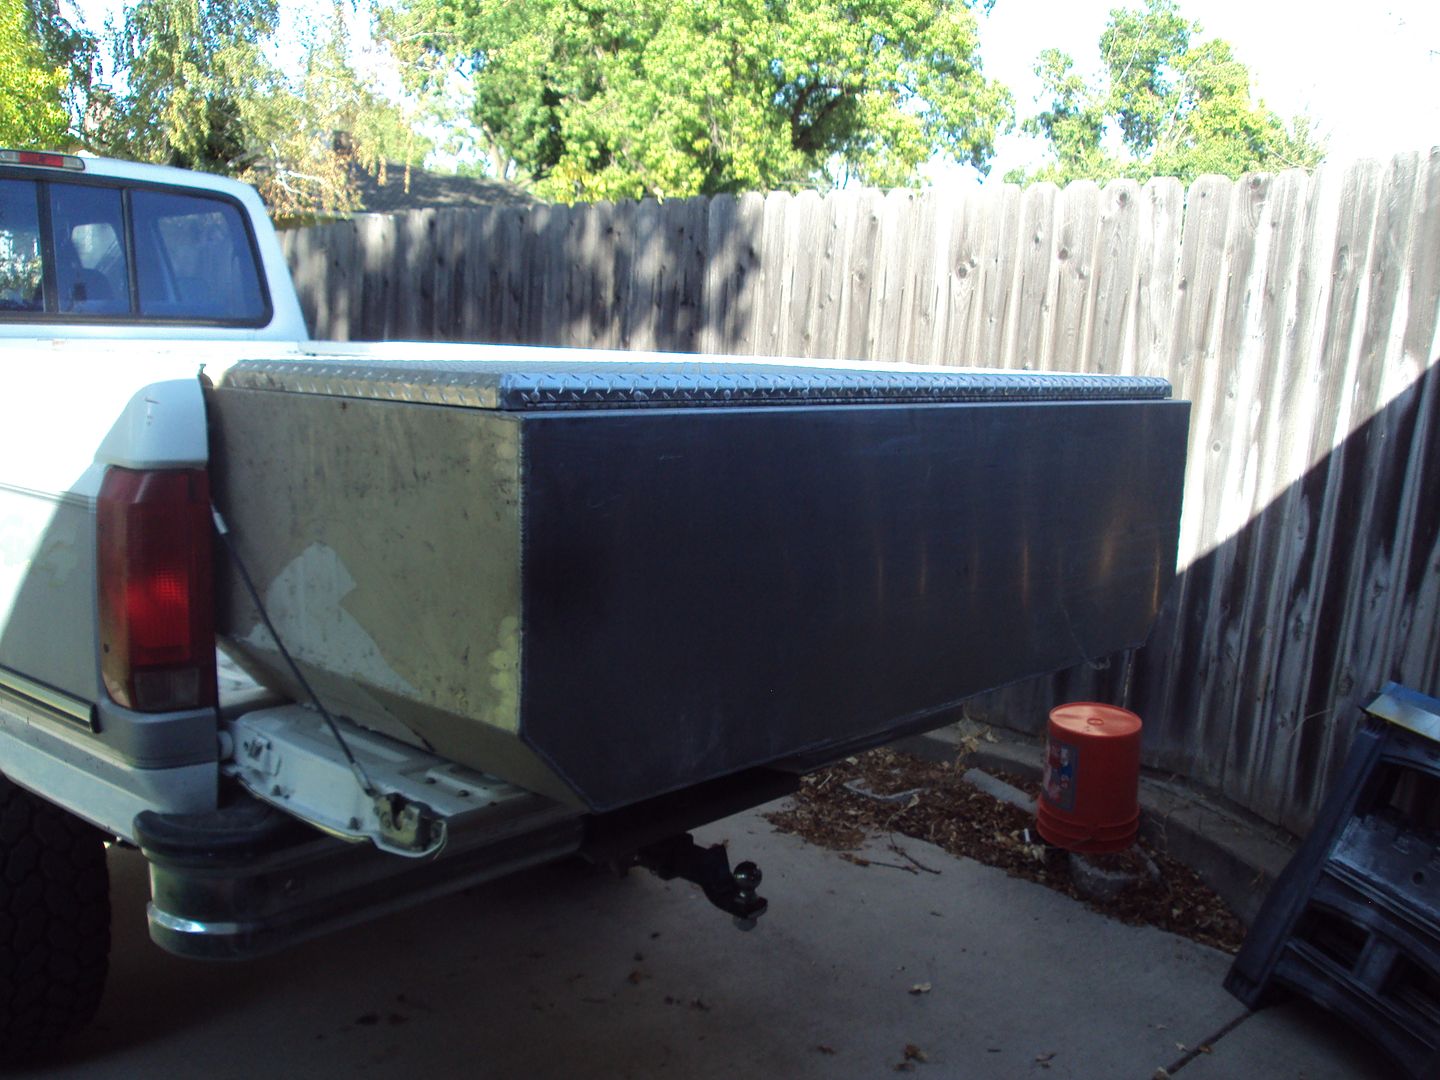
Got it tapped up and then drew my line. I decided on a 1/2", but I probably should've gone more like 1". Oh well.

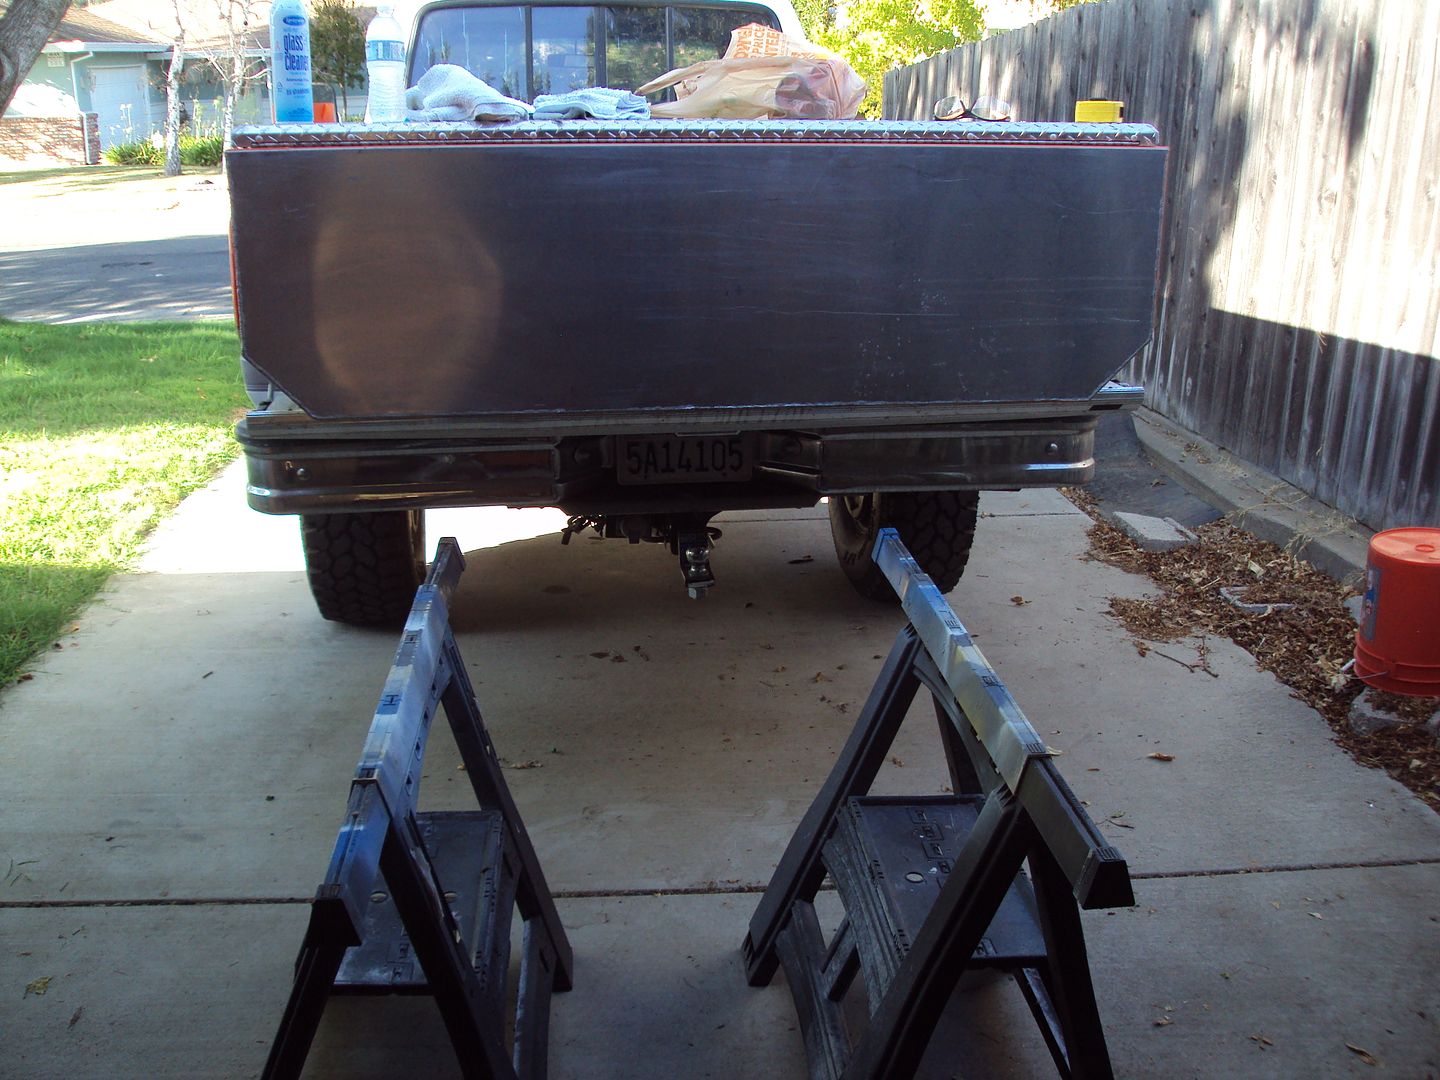
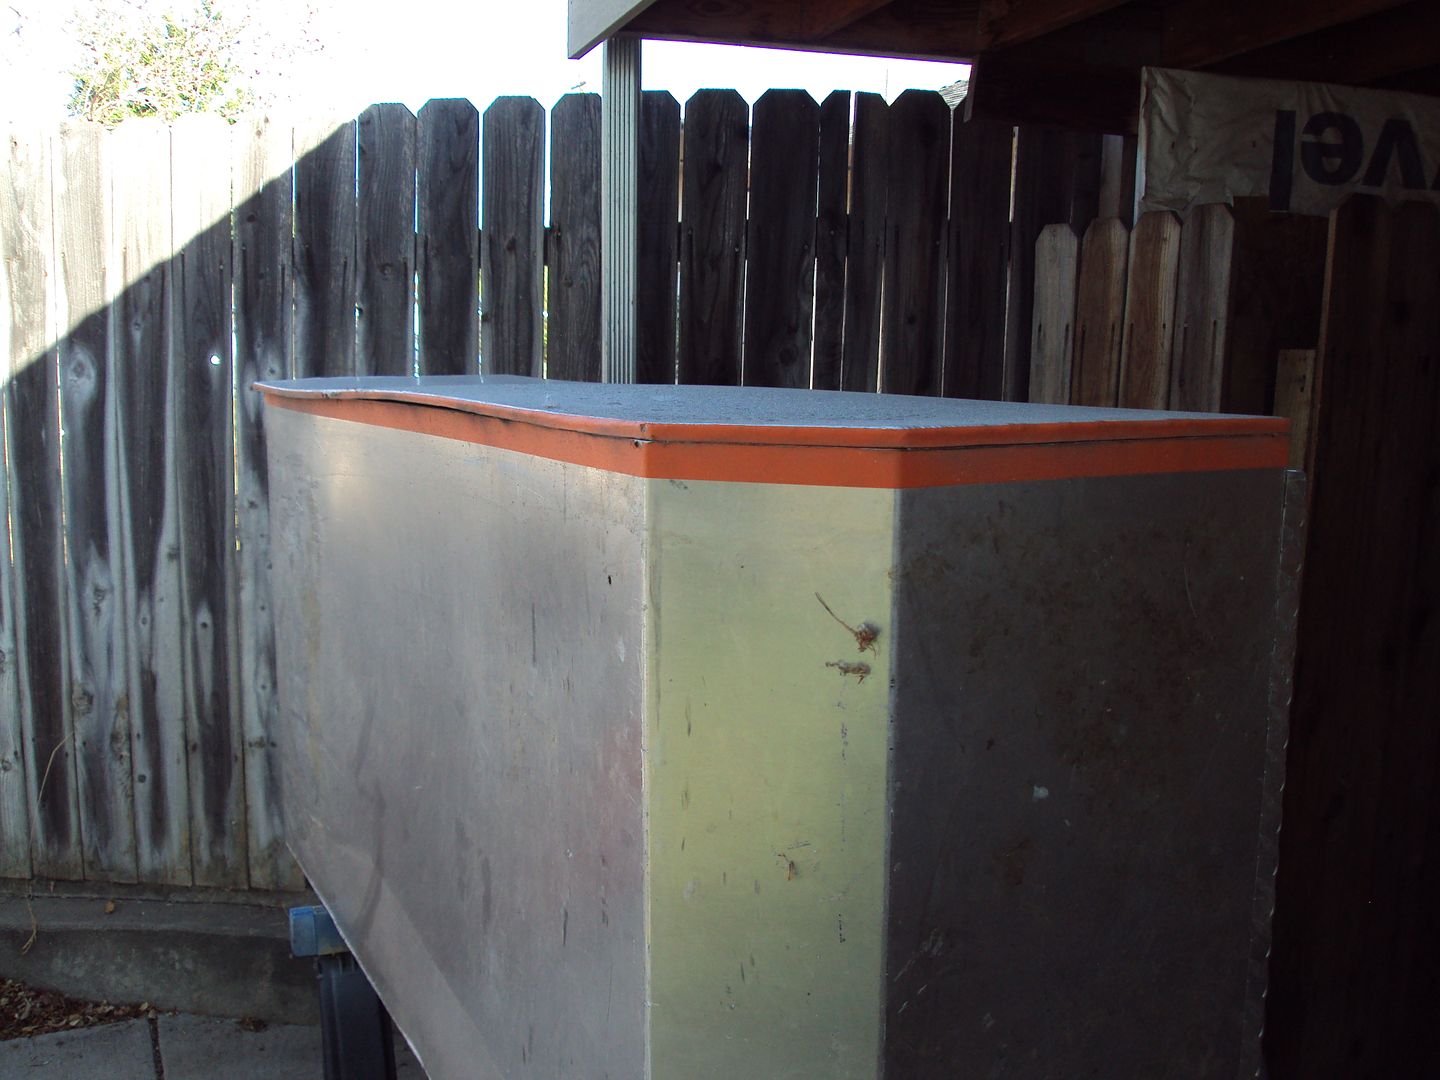
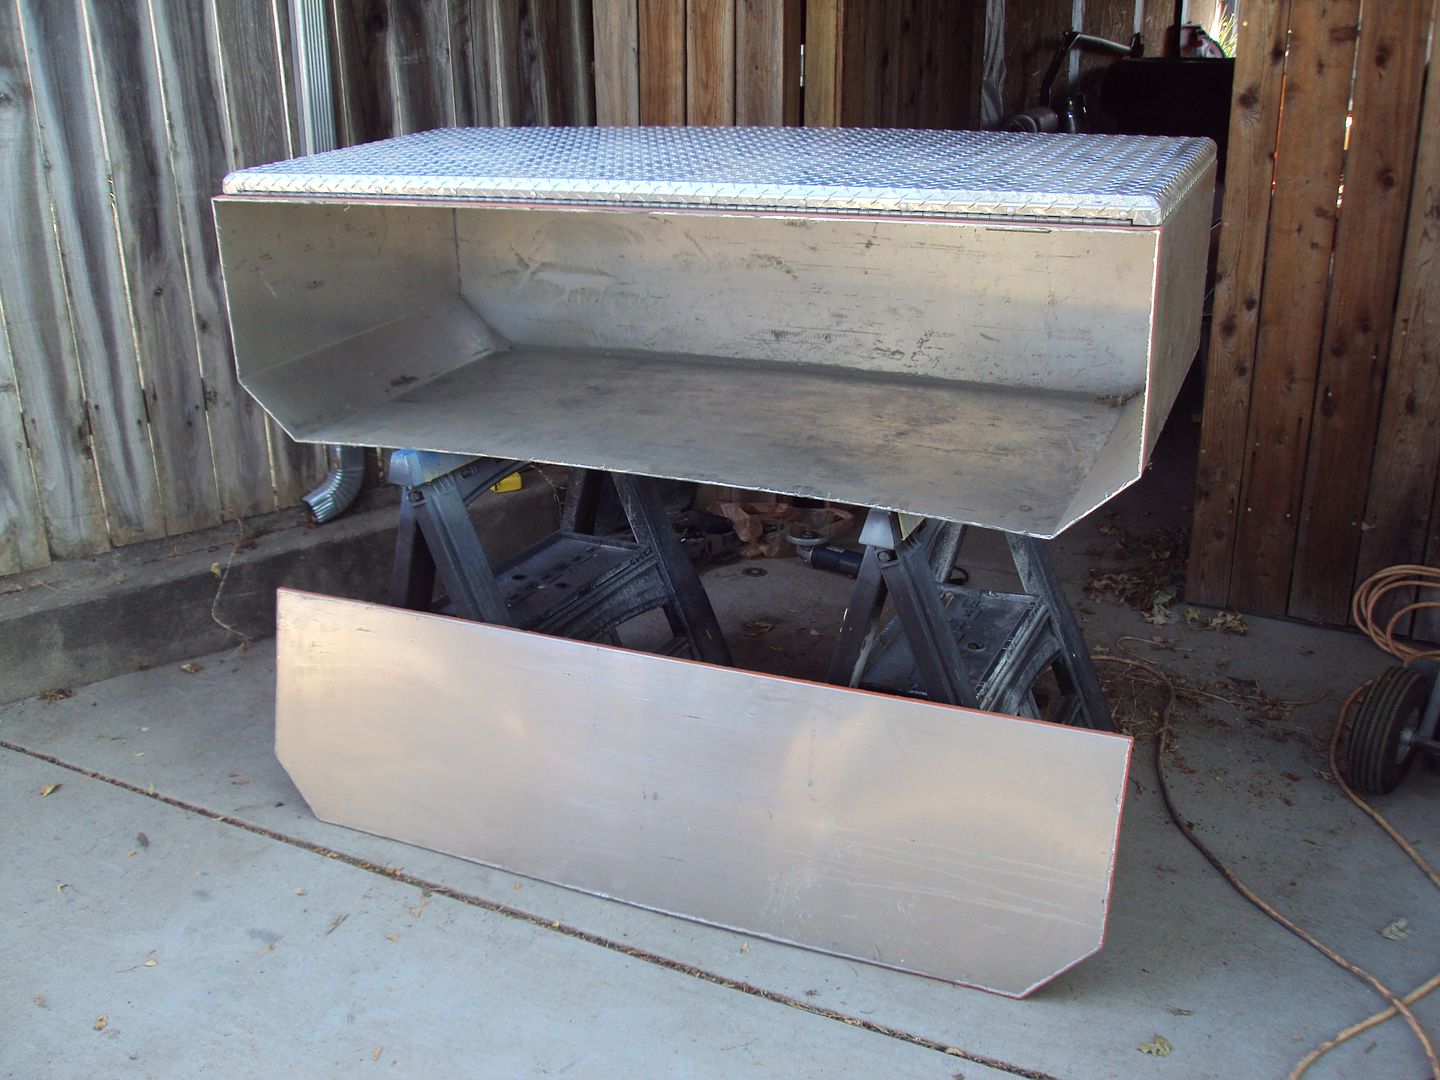
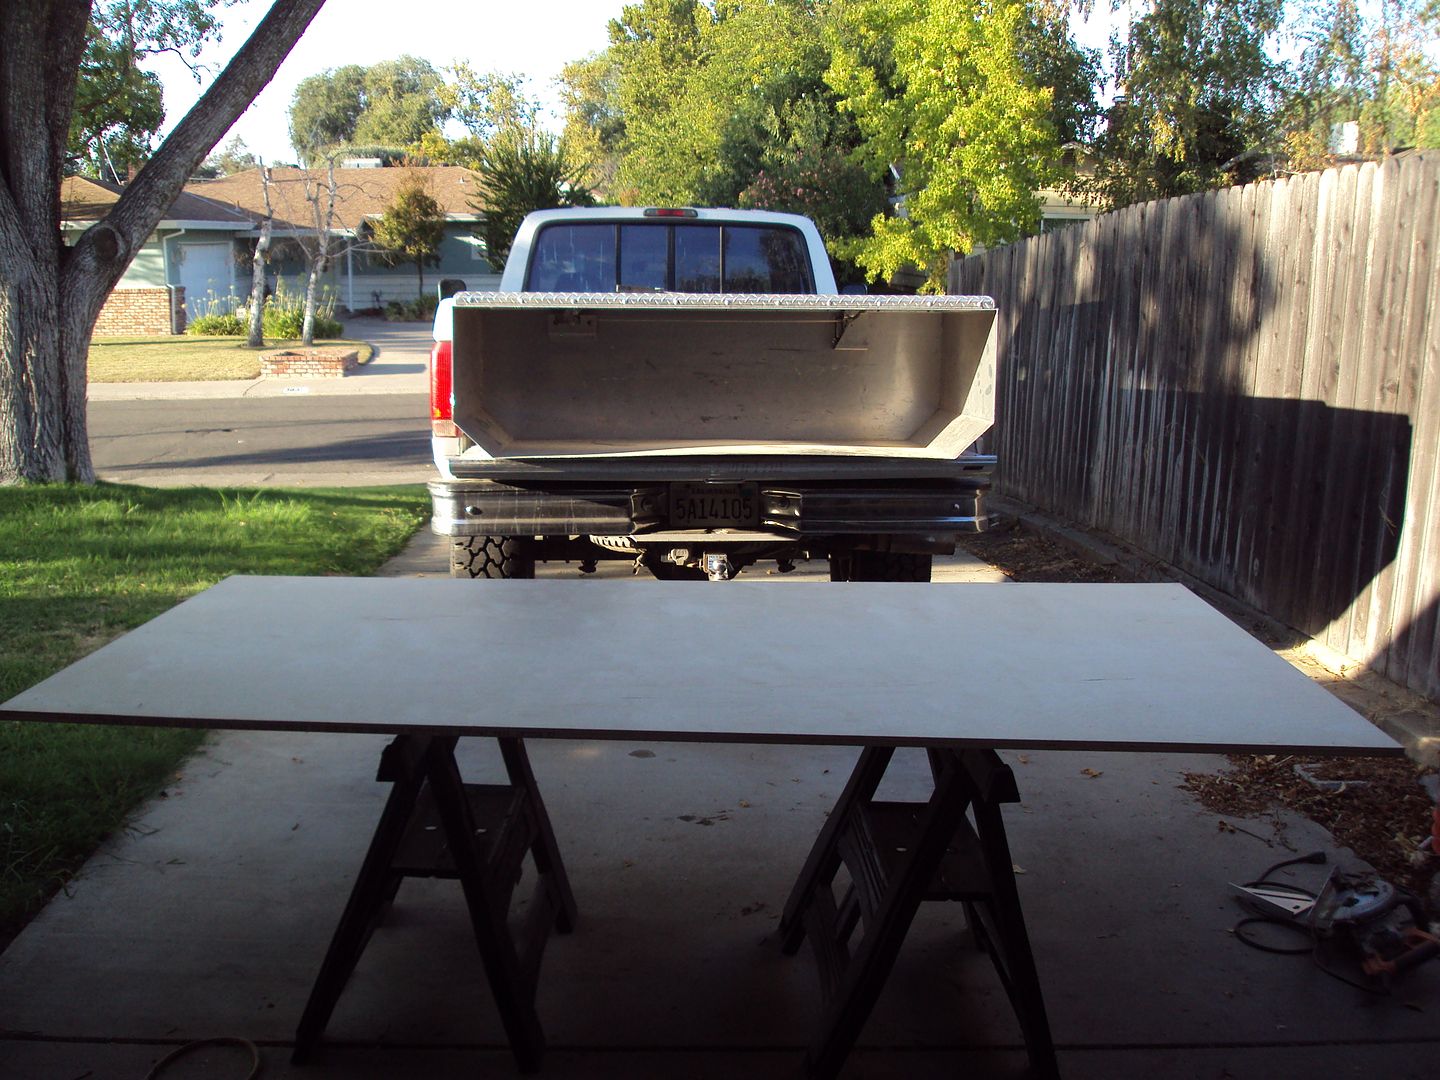
Now, on the back of the truck is not a bad place to do it, however, it's just too tall. So I decided to put it on some sawhorses to bring it down more to my level. This does tell me, however, that when this is all said and done, I'll be able to load it into the truck pretty easily from the saw horses! But, that won't be for a while I'm sure!
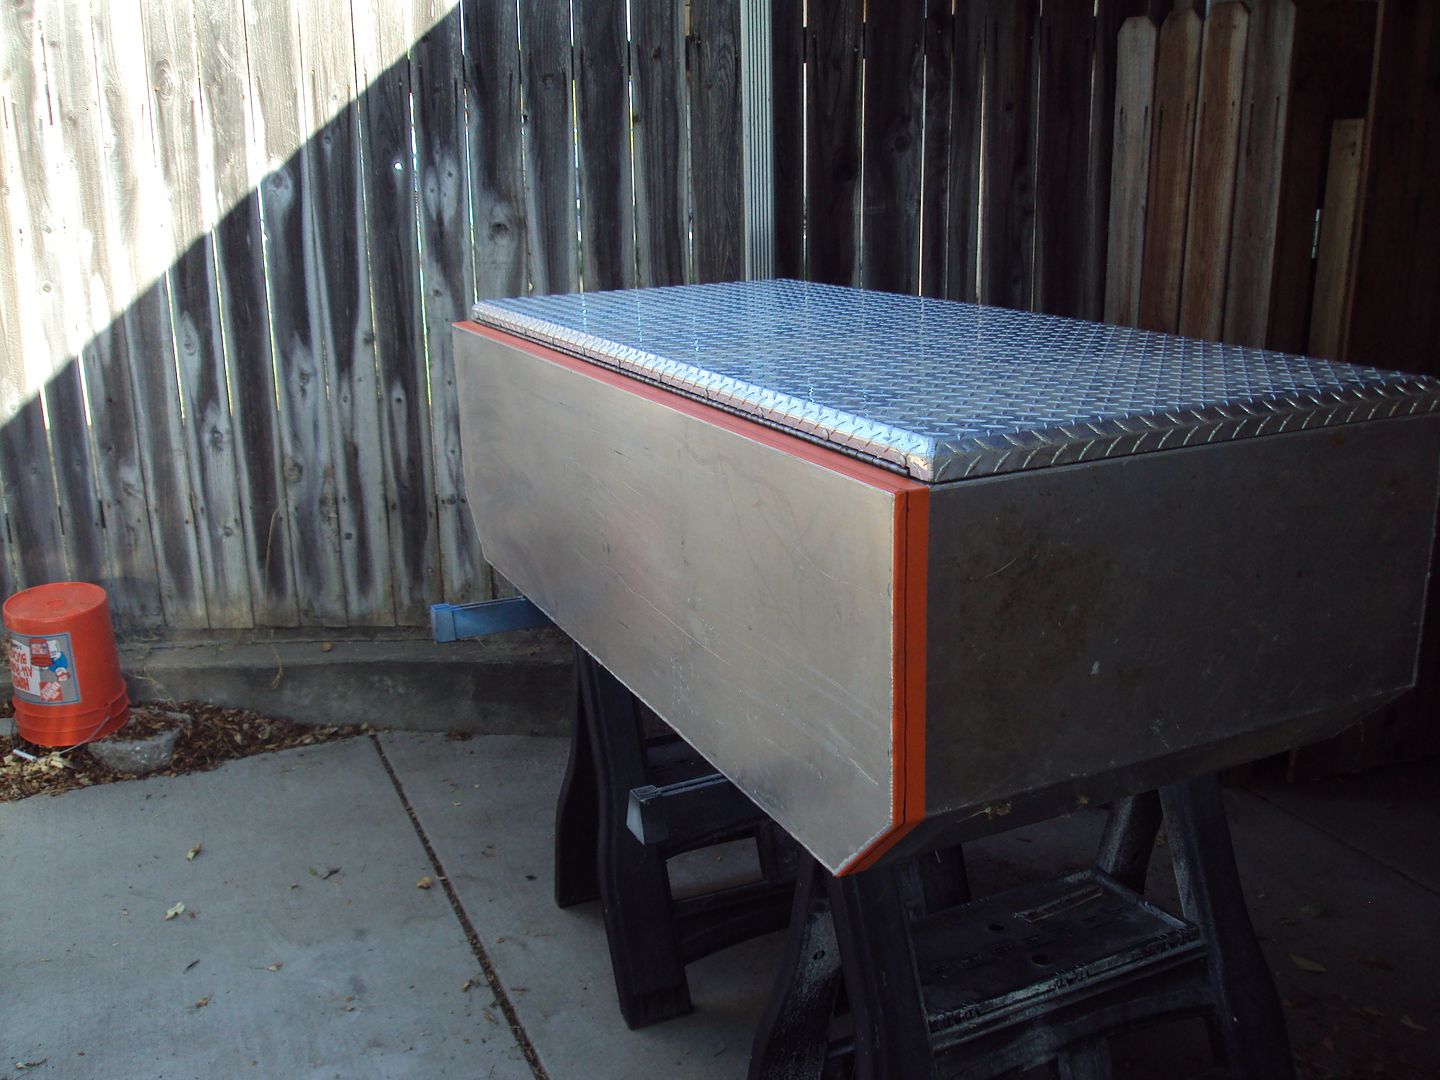
Now it's time for some fun! Safe fun, but fun! Got the gloves, got the safety glasses, don't need any metal in the eyes. And then the good ole trusty bosch grinder! This is a good tool!
Got the Box out and prepped it up! This has to be done before anything else can be built inside of it or for it. Some different views.
Got it tapped up and then drew my line. I decided on a 1/2", but I probably should've gone more like 1". Oh well.
Now, on the back of the truck is not a bad place to do it, however, it's just too tall. So I decided to put it on some sawhorses to bring it down more to my level. This does tell me, however, that when this is all said and done, I'll be able to load it into the truck pretty easily from the saw horses! But, that won't be for a while I'm sure!
Now it's time for some fun! Safe fun, but fun! Got the gloves, got the safety glasses, don't need any metal in the eyes. And then the good ole trusty bosch grinder! This is a good tool!
#139
09-27-2012, 10:47 PM
Join Date: May 2011
Posts: 339
Likes: 0
Received 0 Likes
on
0 Posts
Then fun ensued, and this was the result!
Let me give you a little tip if you've never done this, as I hadn't! WEAR LONG SLEEVES AS WELL AS GLOVES AND GLASSES!! Anyway, moving on, here's what we were after!
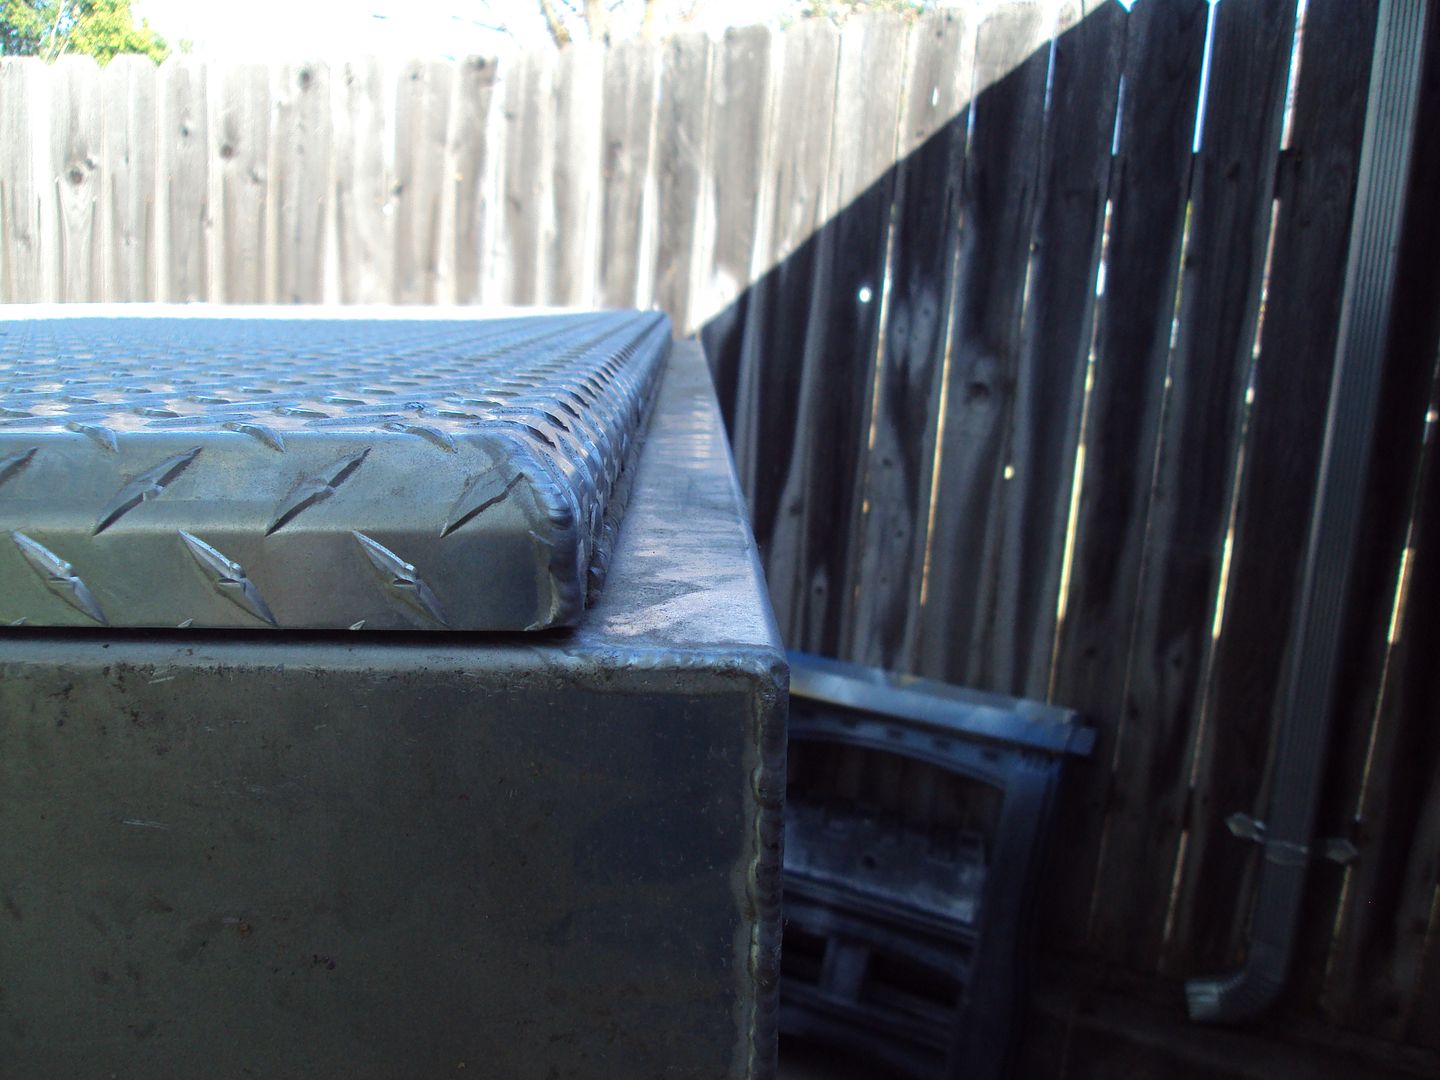
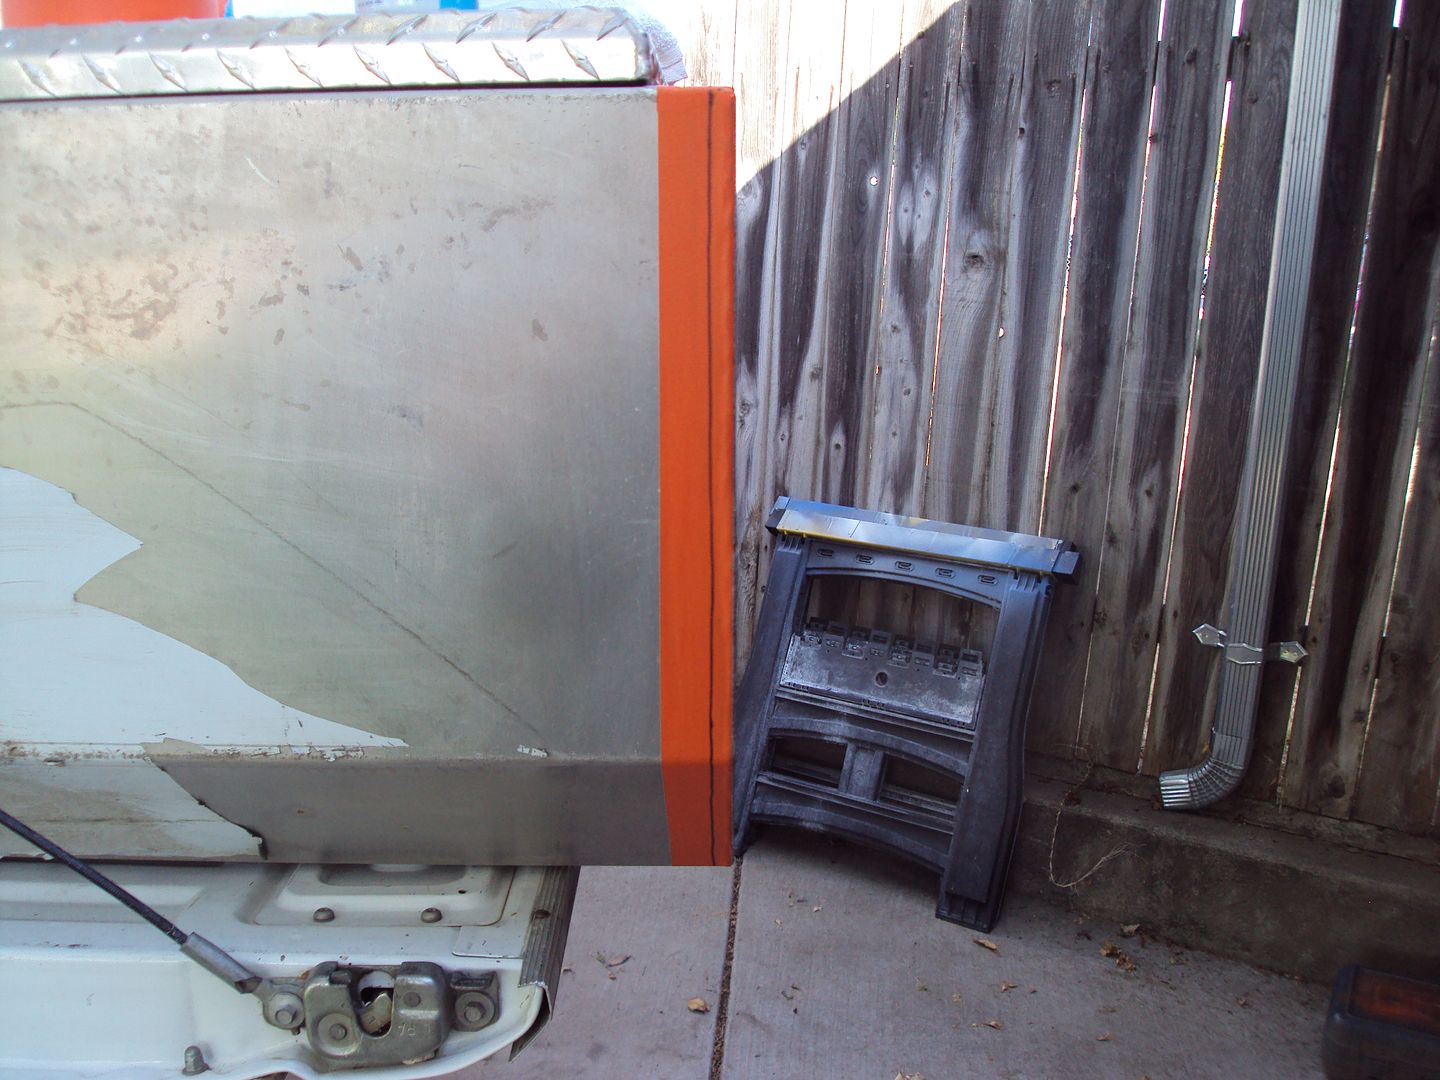
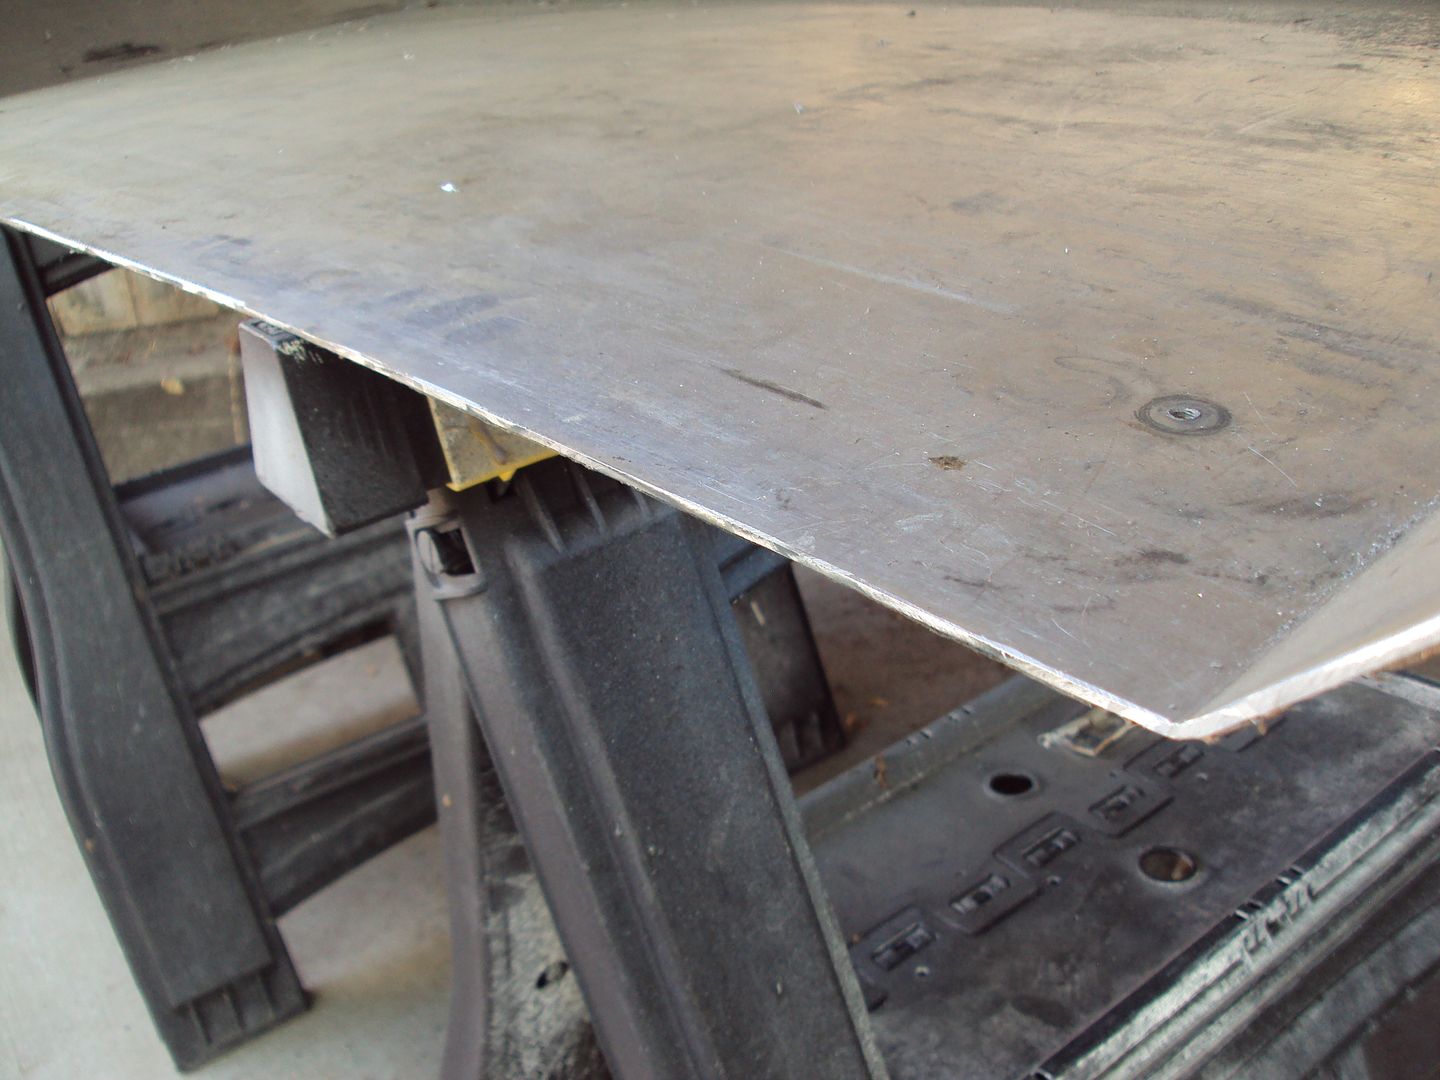
Got some jagged edges that need addressing


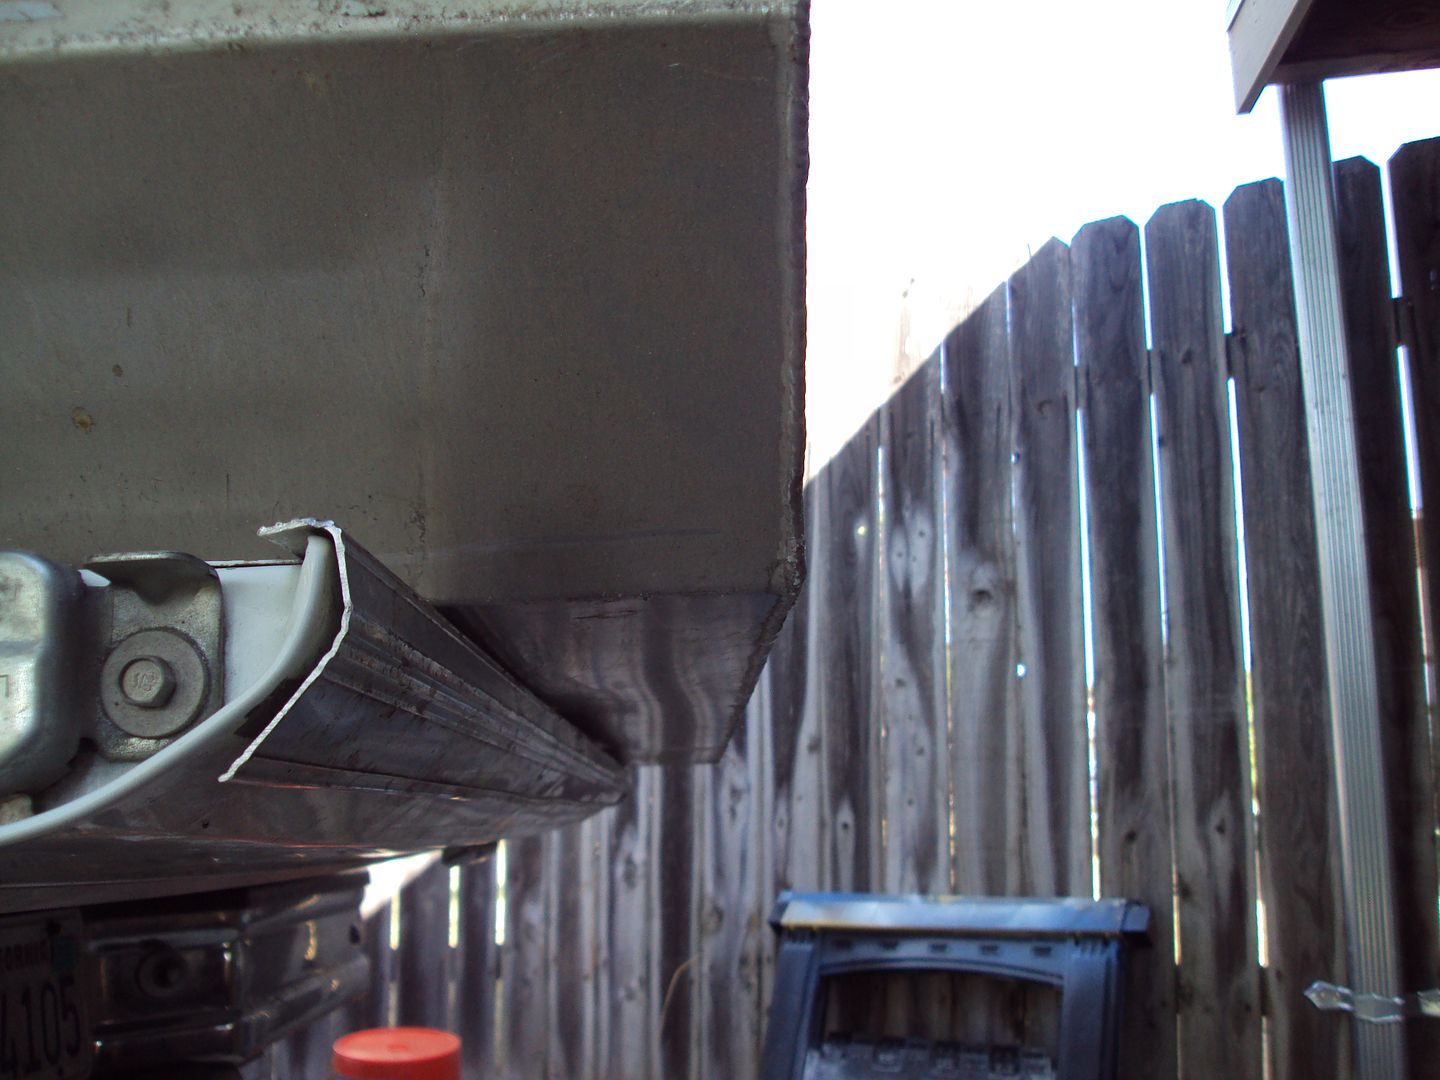
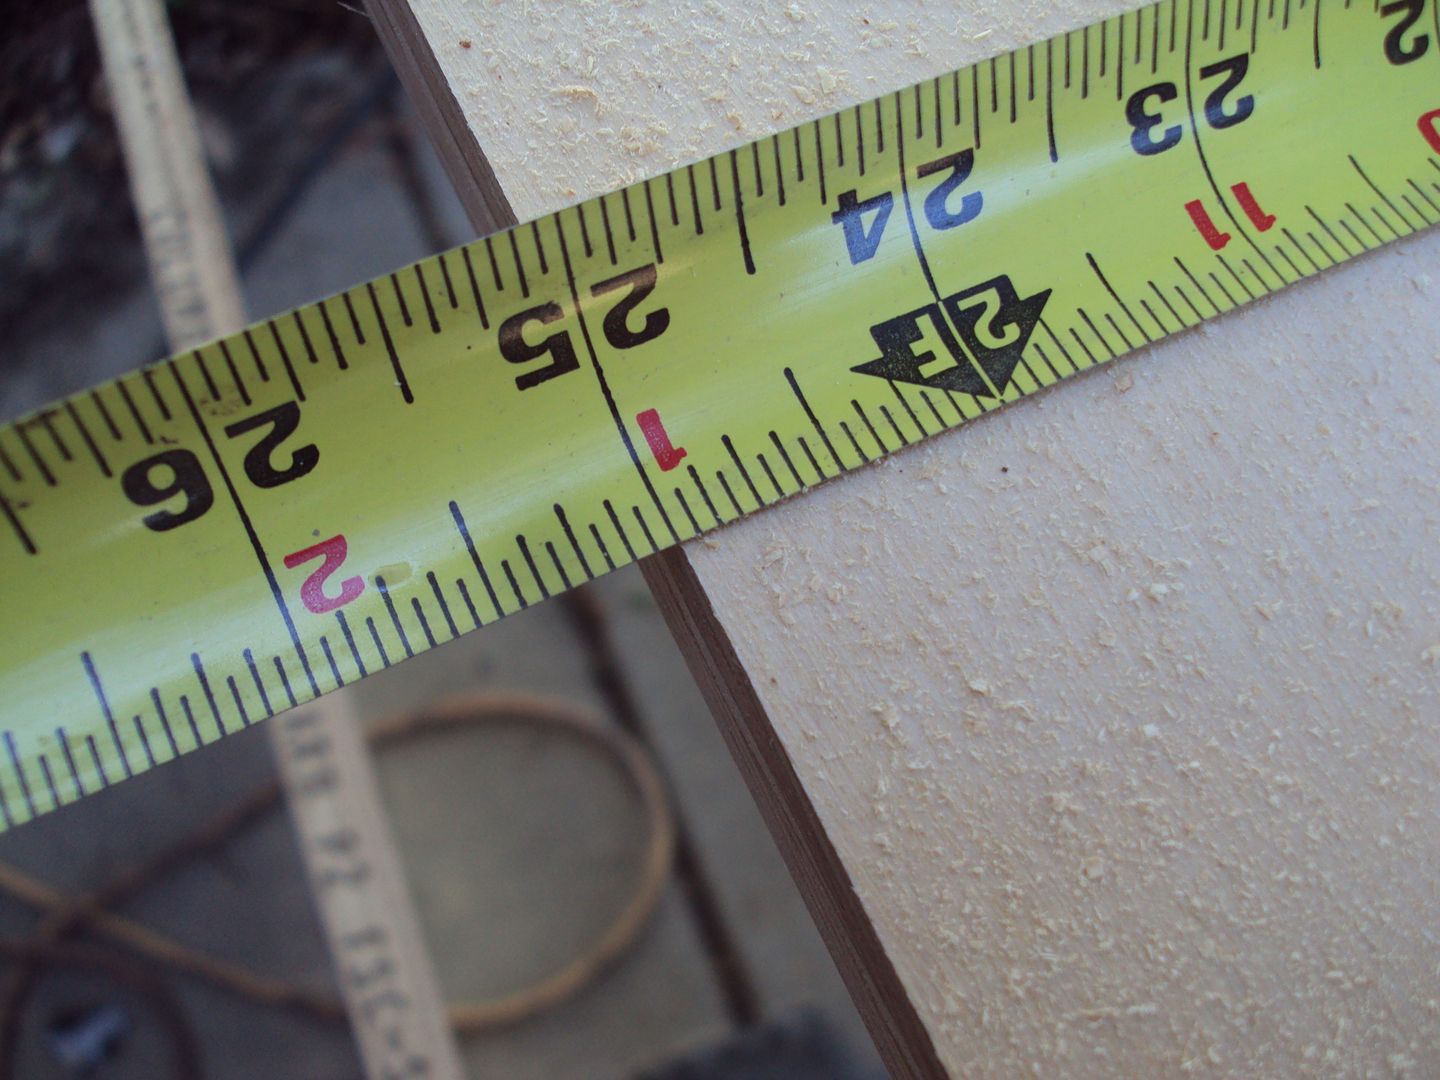
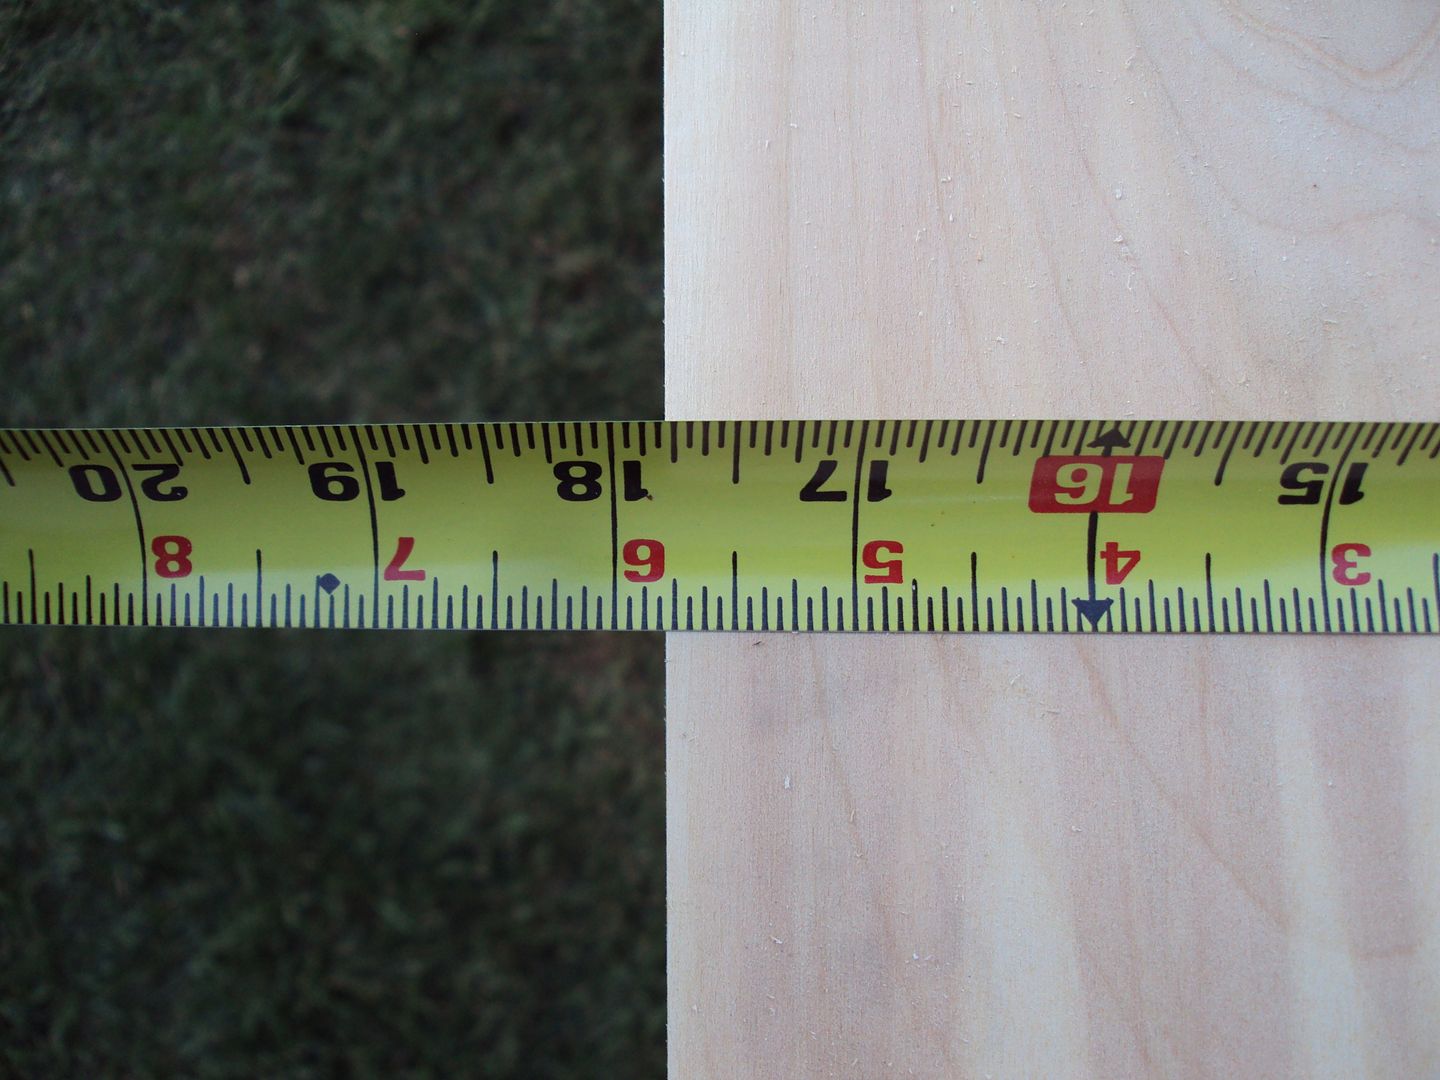
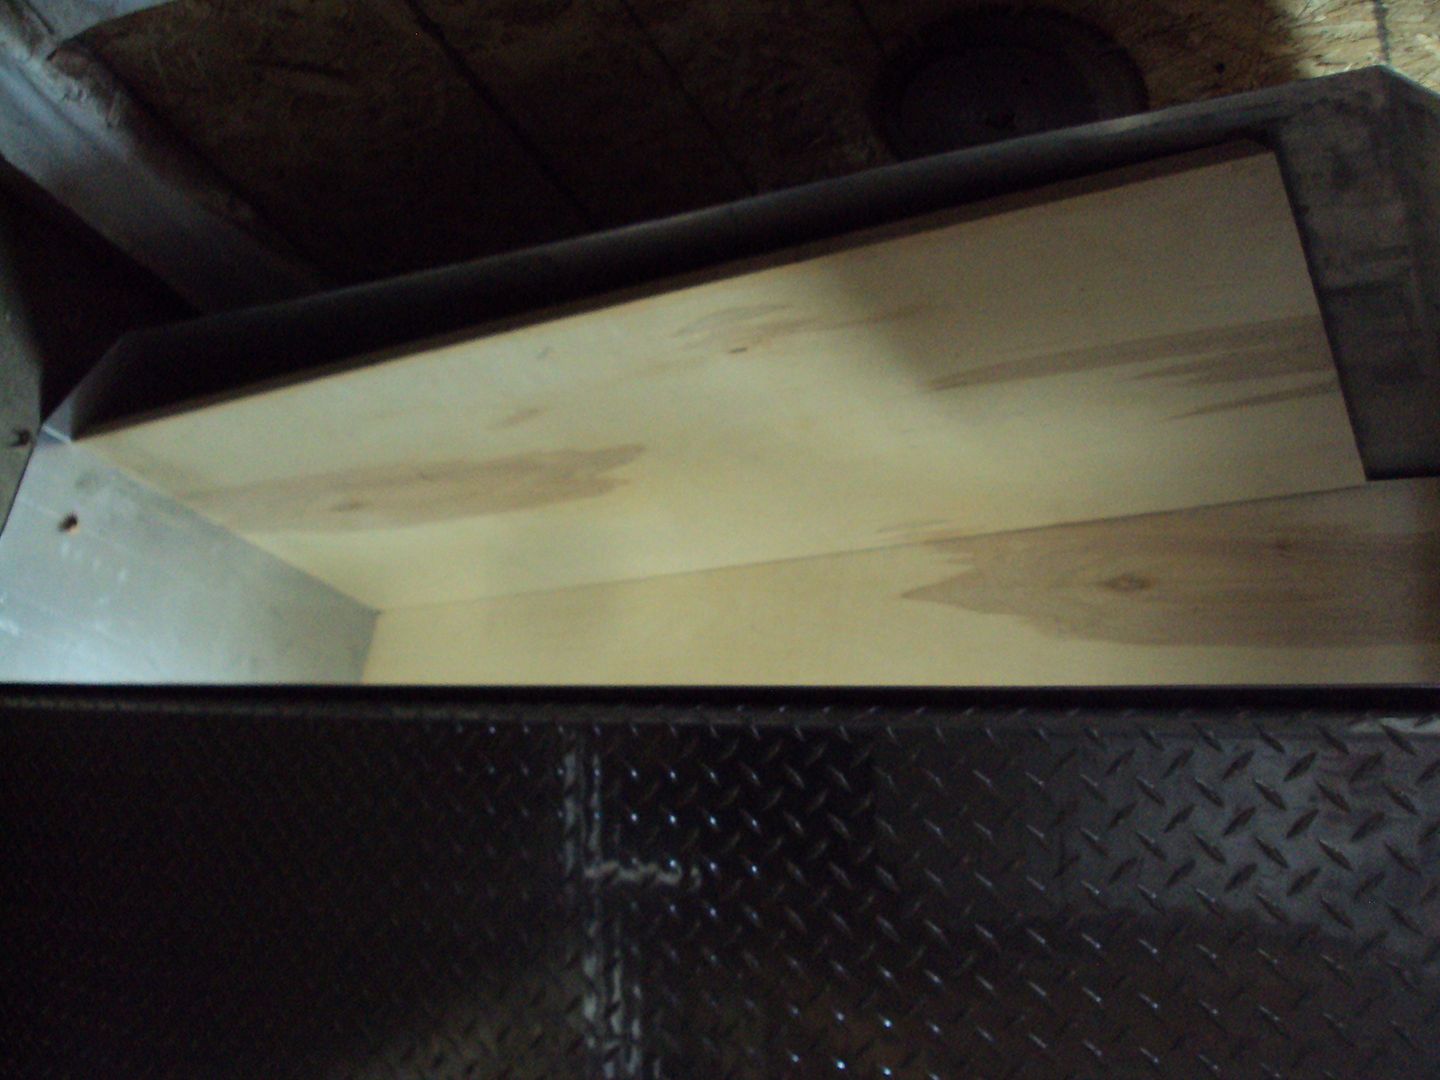
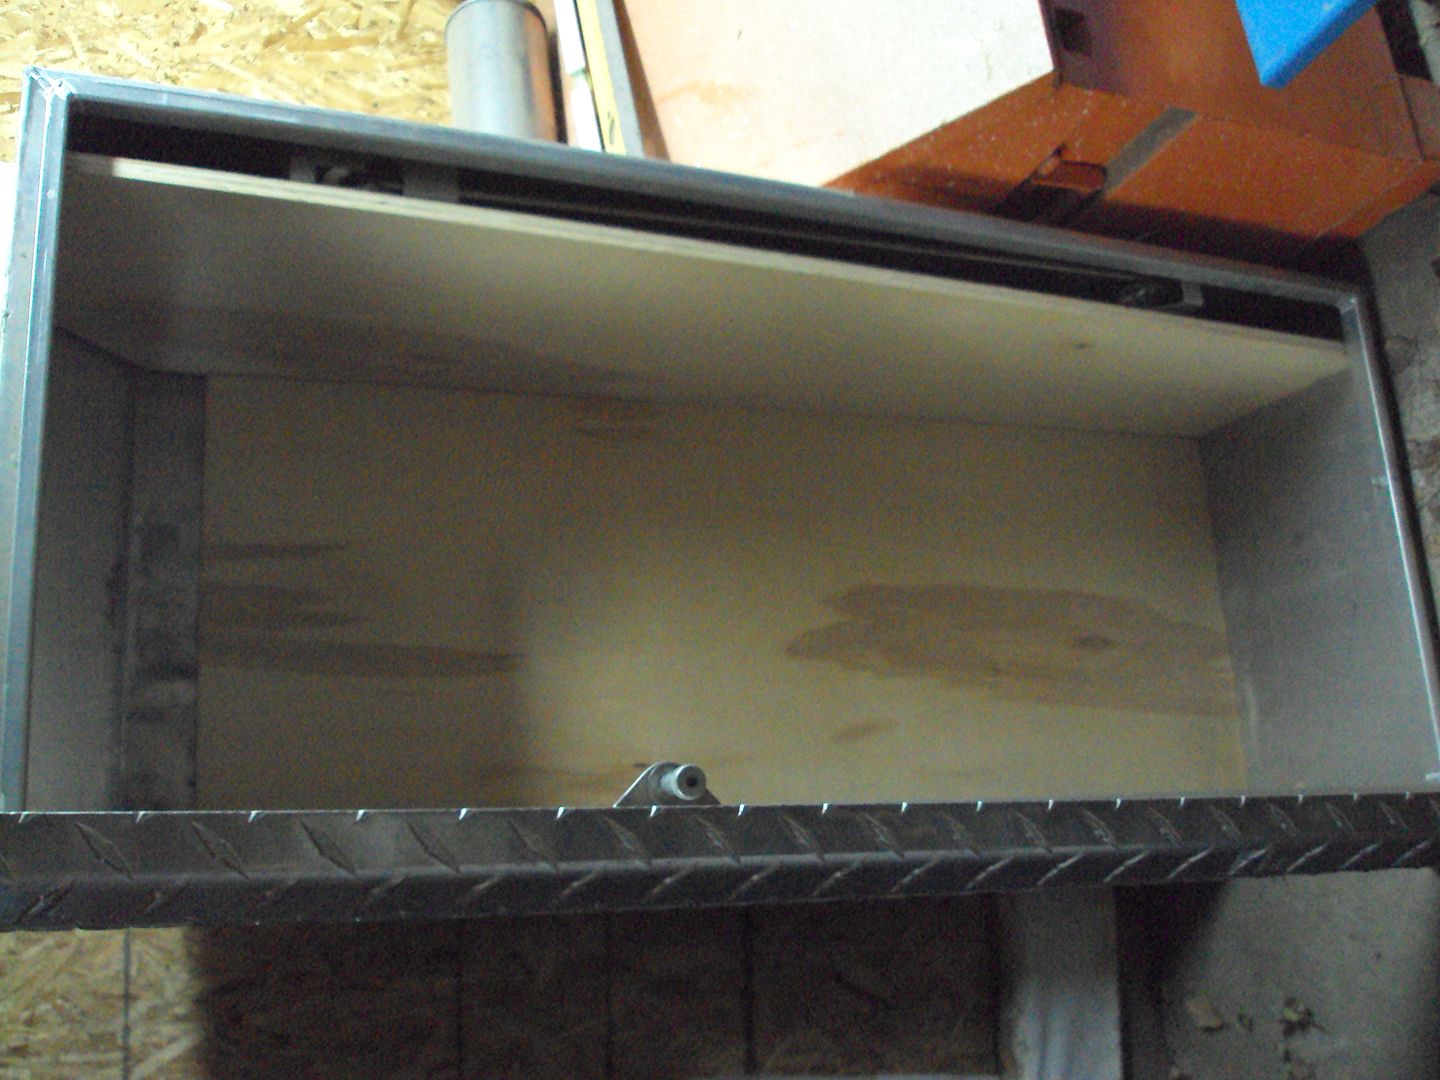
Little look at the amount of space I'm working with.
Depth
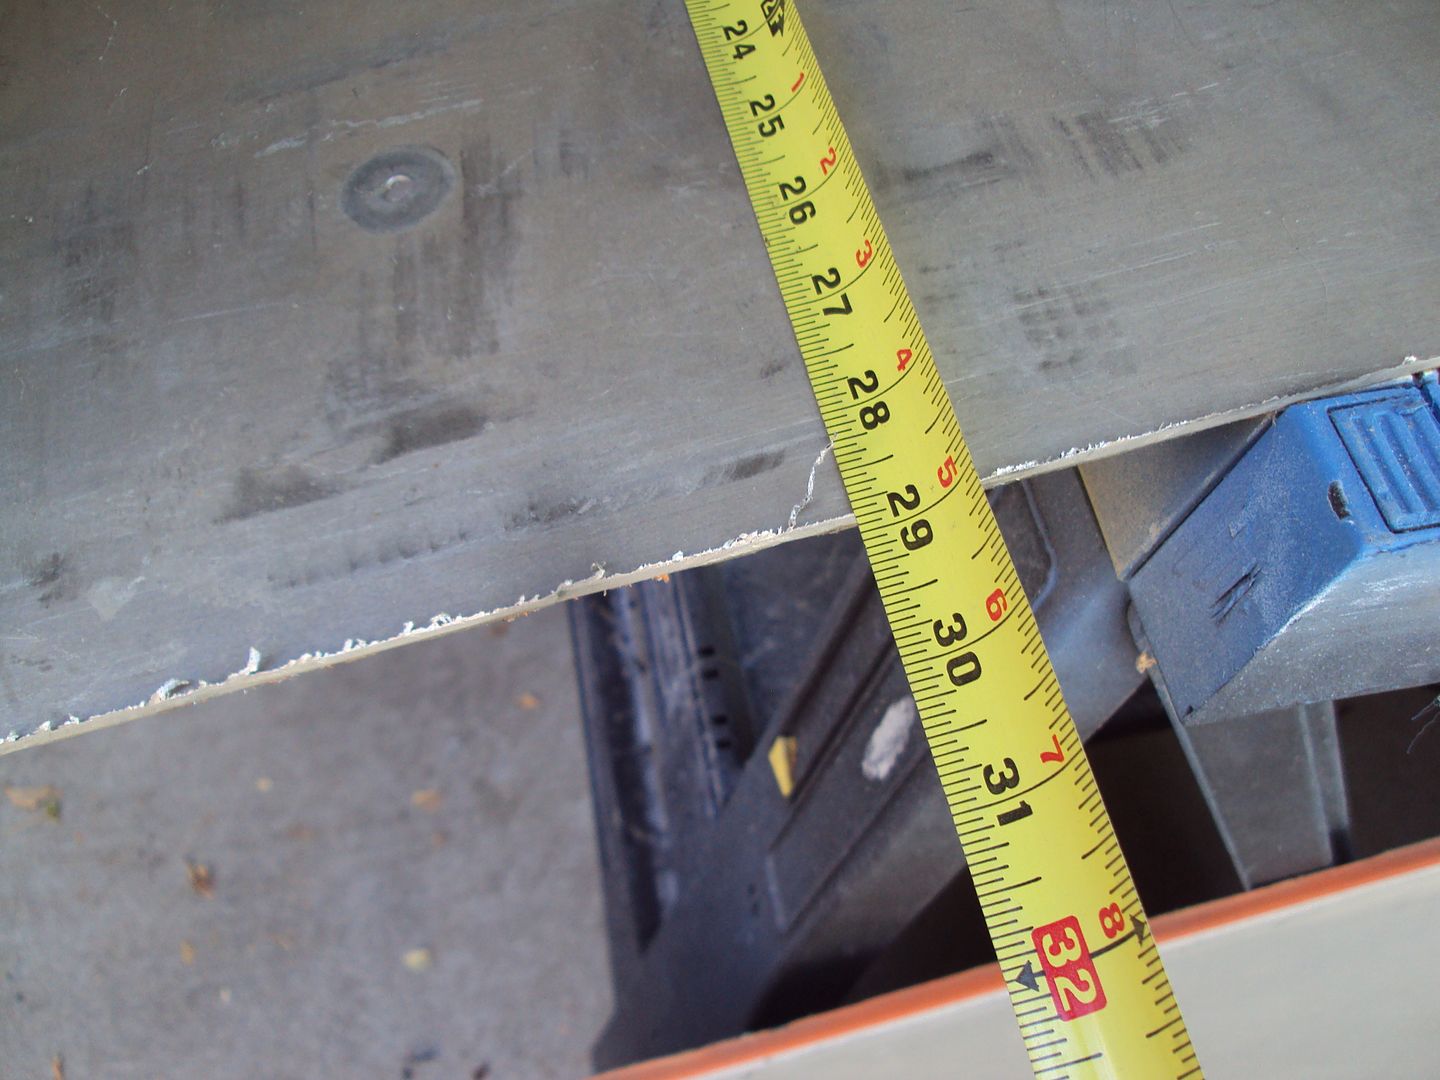
Width
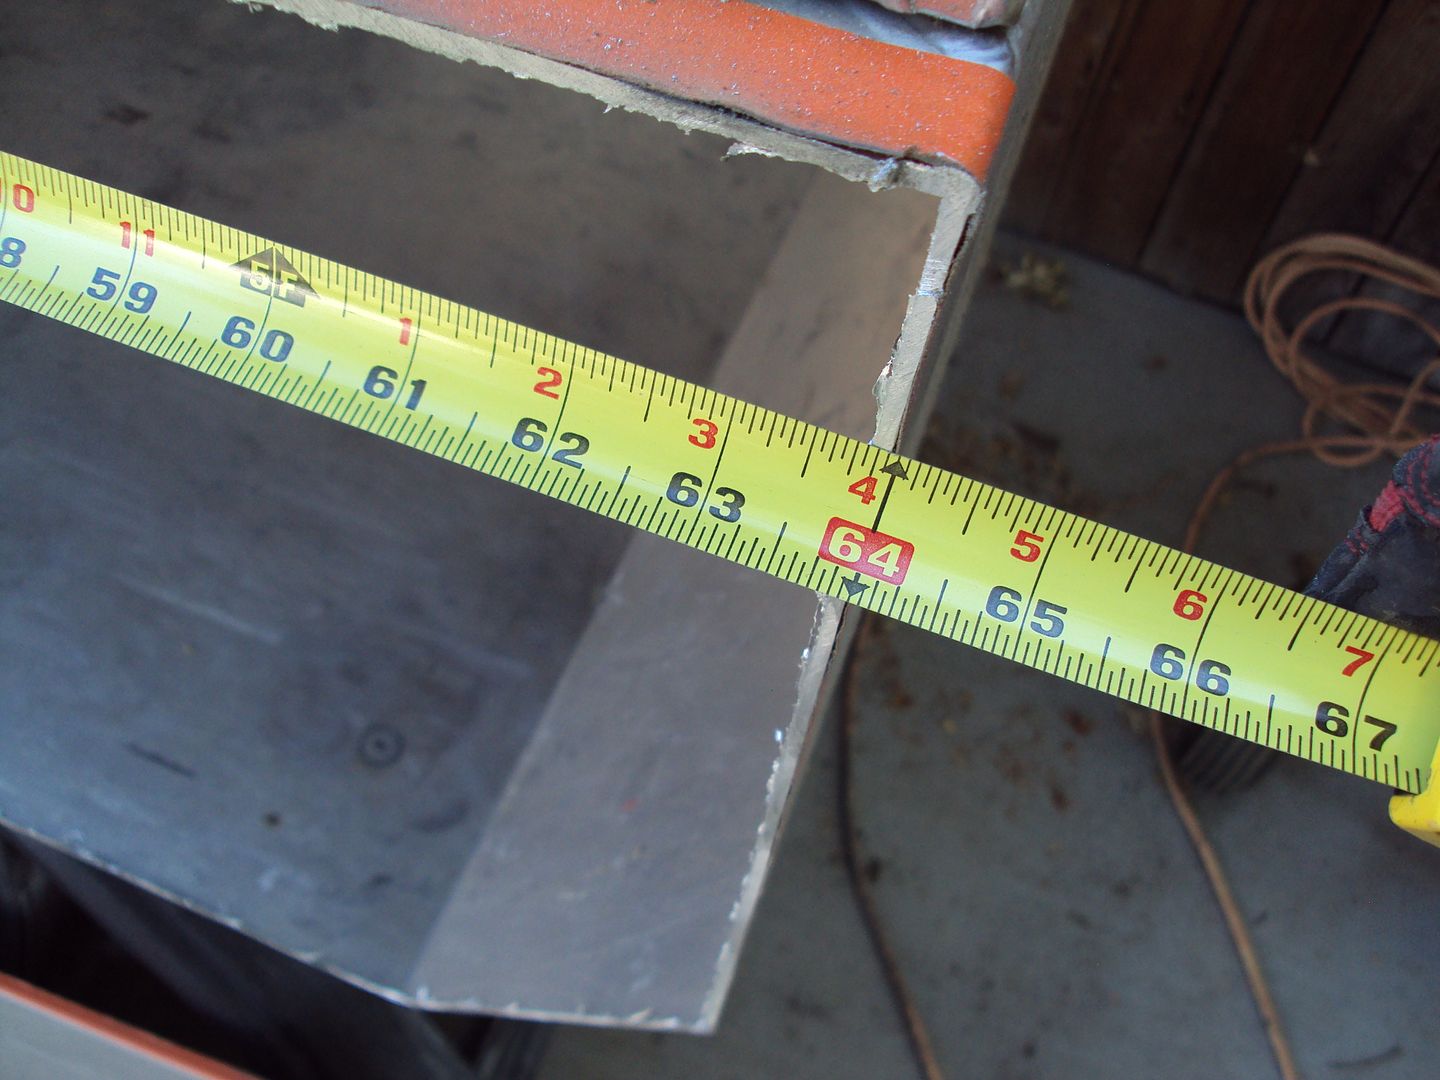
Couldn't really get a good measurement on the height cause the centers bow a bit. So it's basically about 17 3/4" tall.
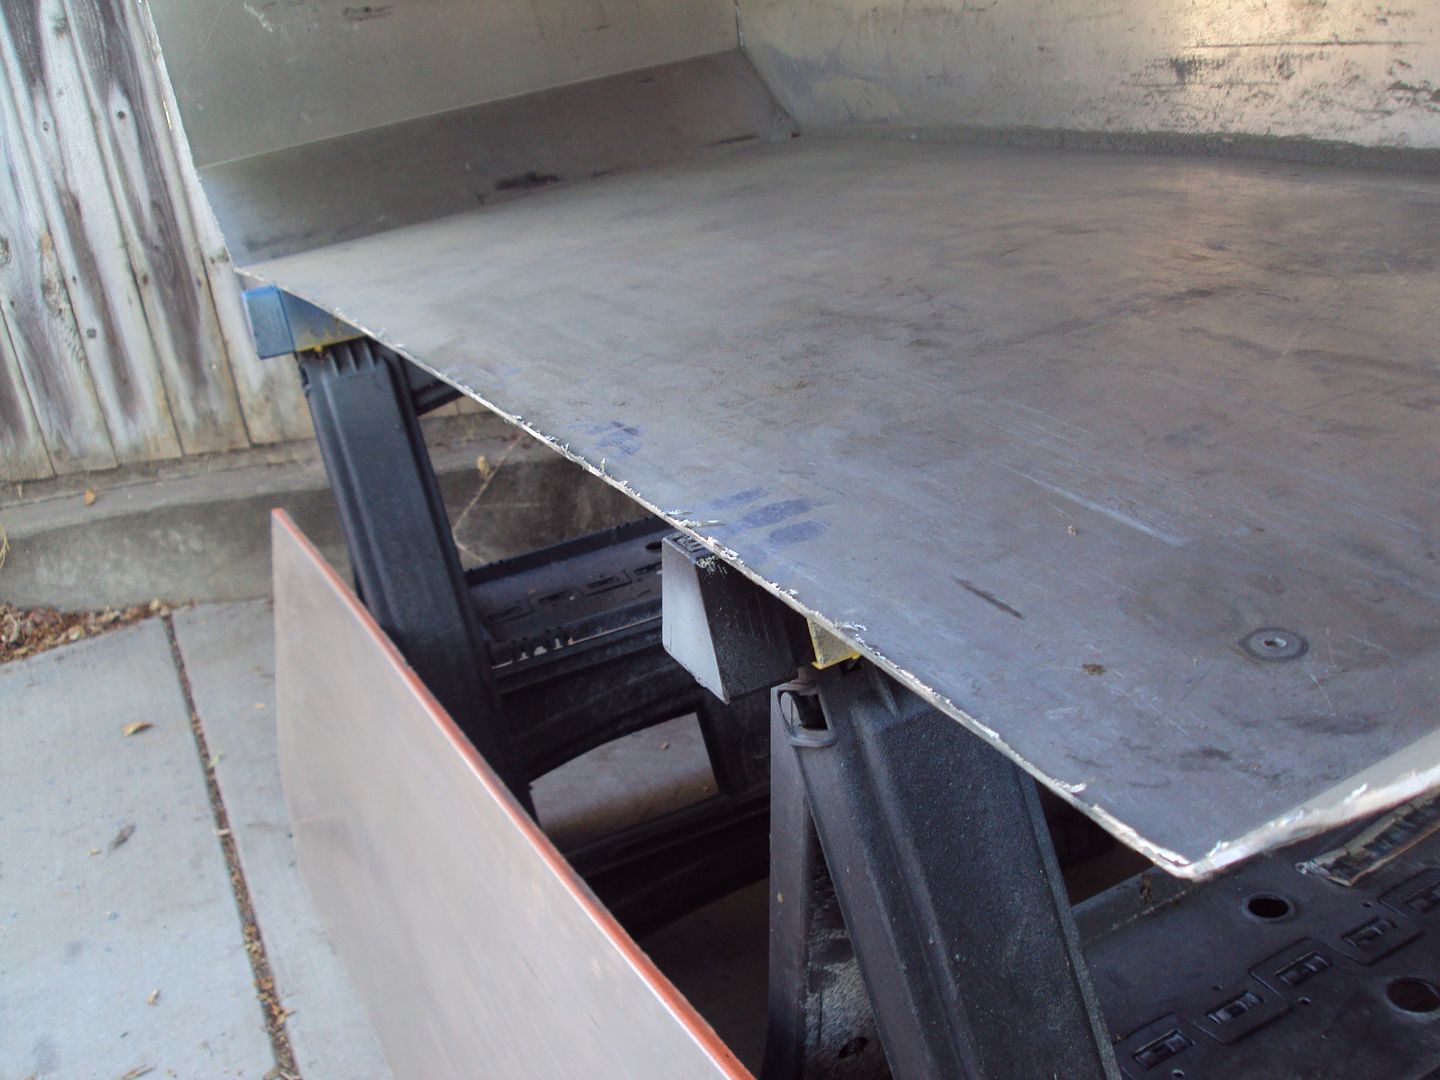
Then I got the grinder again with a grinding wheel this time, and cleaned up the edges! Burrs are gone!
Tried to get a sight down pic to show the line, but it isn't real clear.
Another pic with the smoothed edges.
Let me give you a little tip if you've never done this, as I hadn't! WEAR LONG SLEEVES AS WELL AS GLOVES AND GLASSES!! Anyway, moving on, here's what we were after!
Got some jagged edges that need addressing
Little look at the amount of space I'm working with.
Depth
Width
Couldn't really get a good measurement on the height cause the centers bow a bit. So it's basically about 17 3/4" tall.
Then I got the grinder again with a grinding wheel this time, and cleaned up the edges! Burrs are gone!
Tried to get a sight down pic to show the line, but it isn't real clear.
Another pic with the smoothed edges.
#140
09-27-2012, 10:54 PM
Join Date: May 2011
Posts: 339
Likes: 0
Received 0 Likes
on
0 Posts
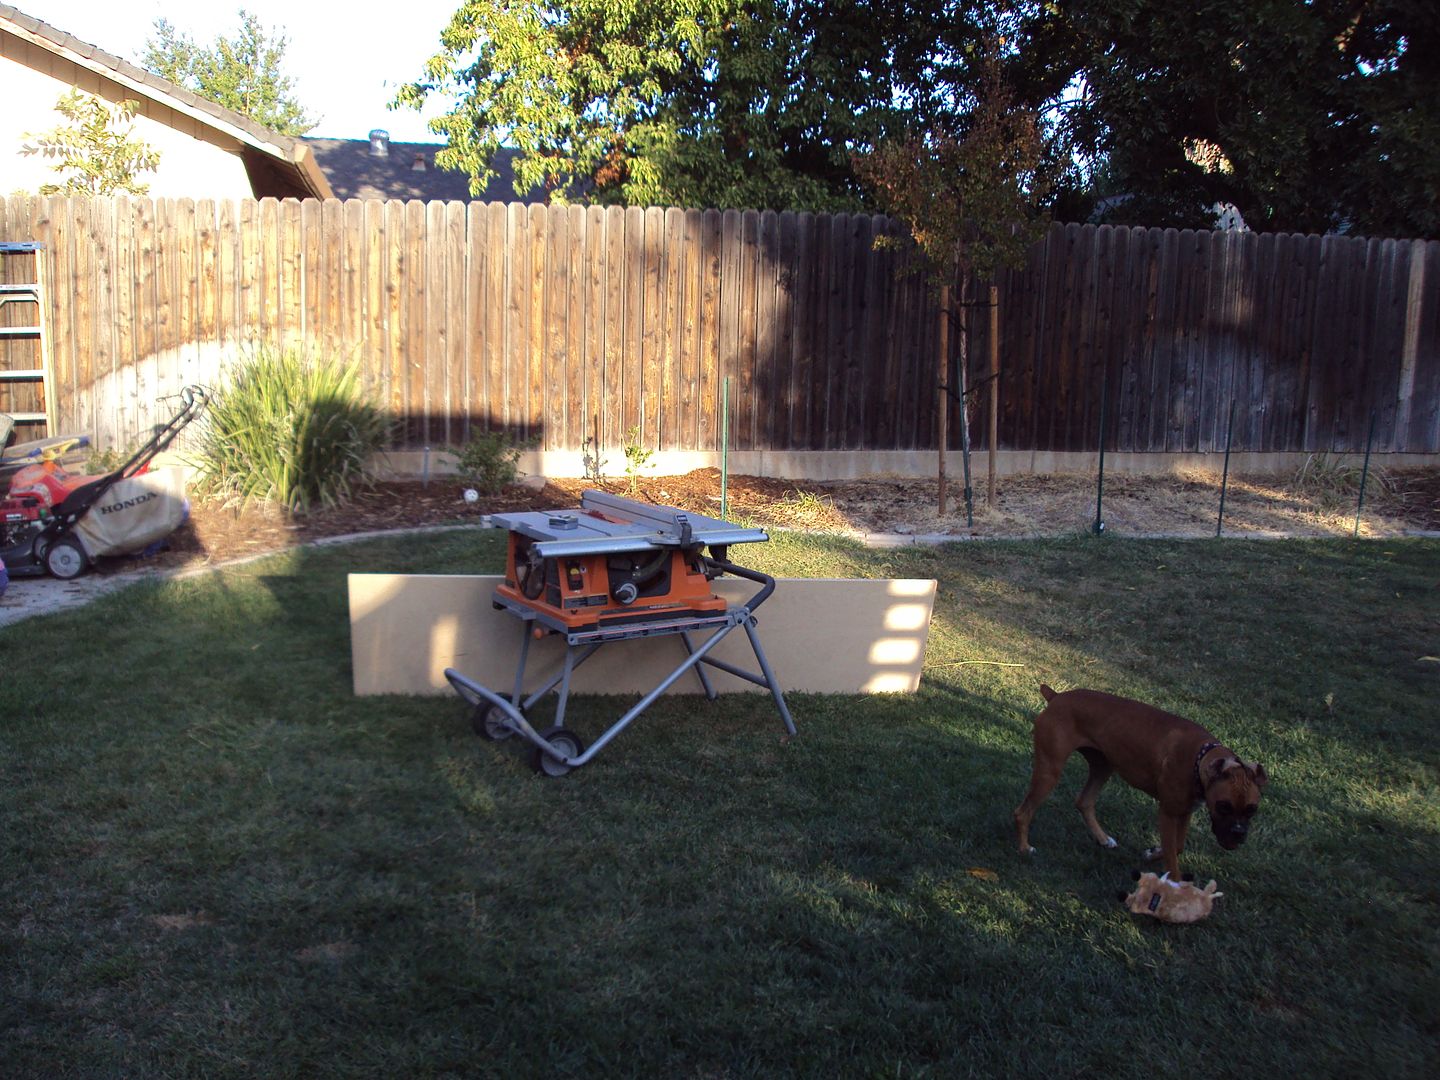
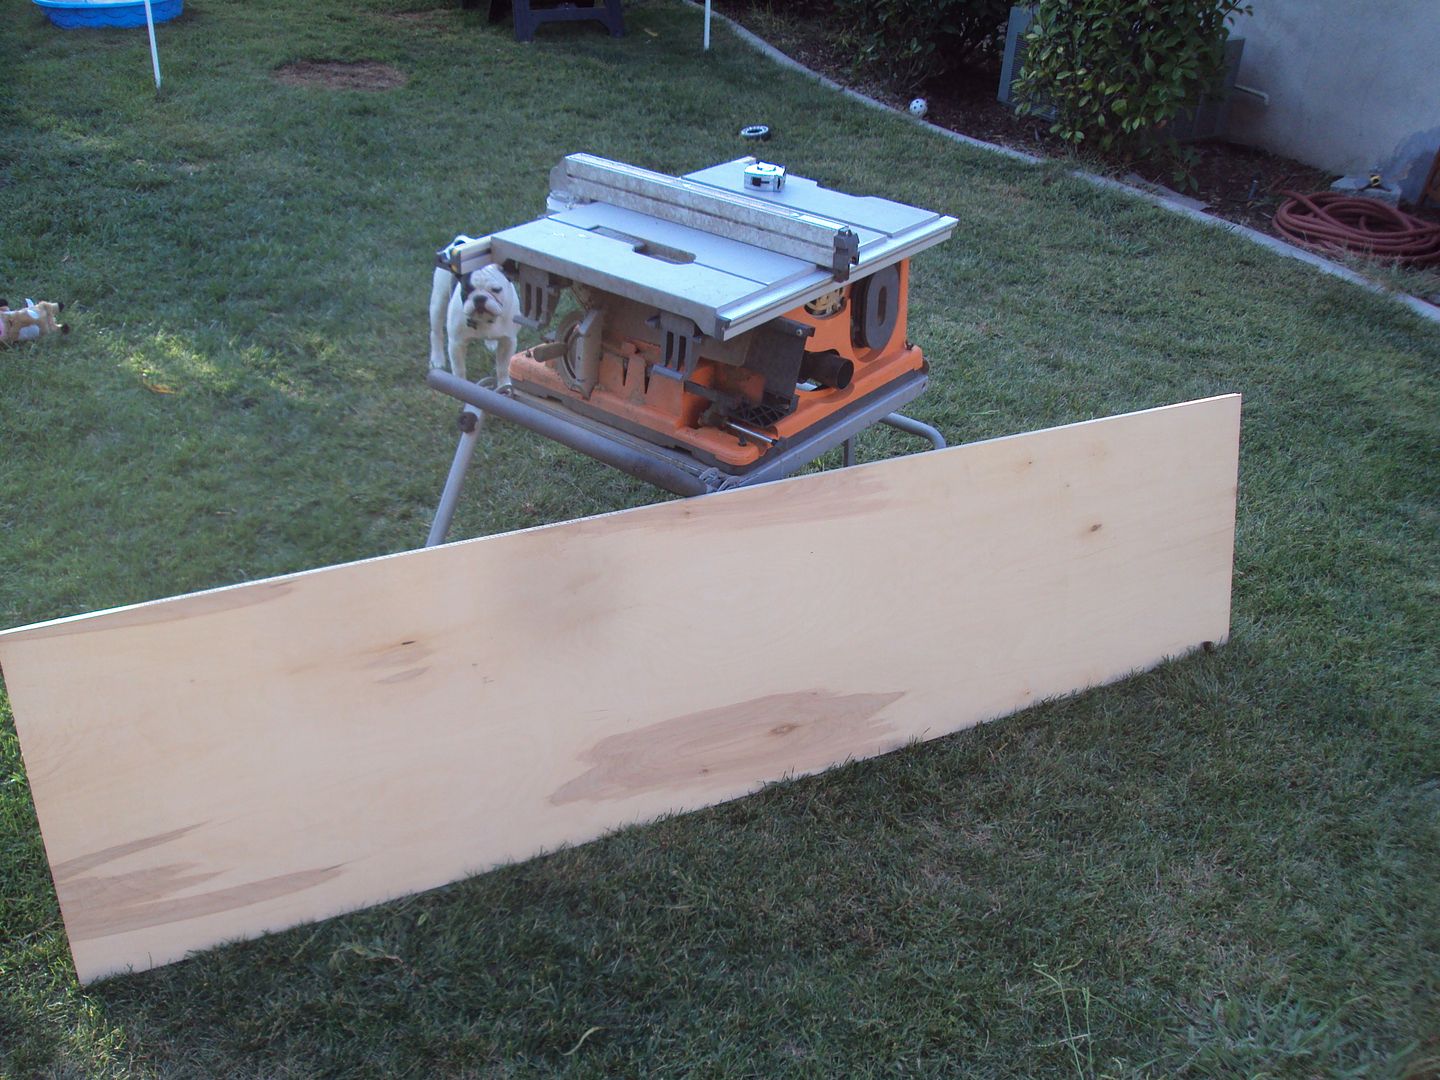
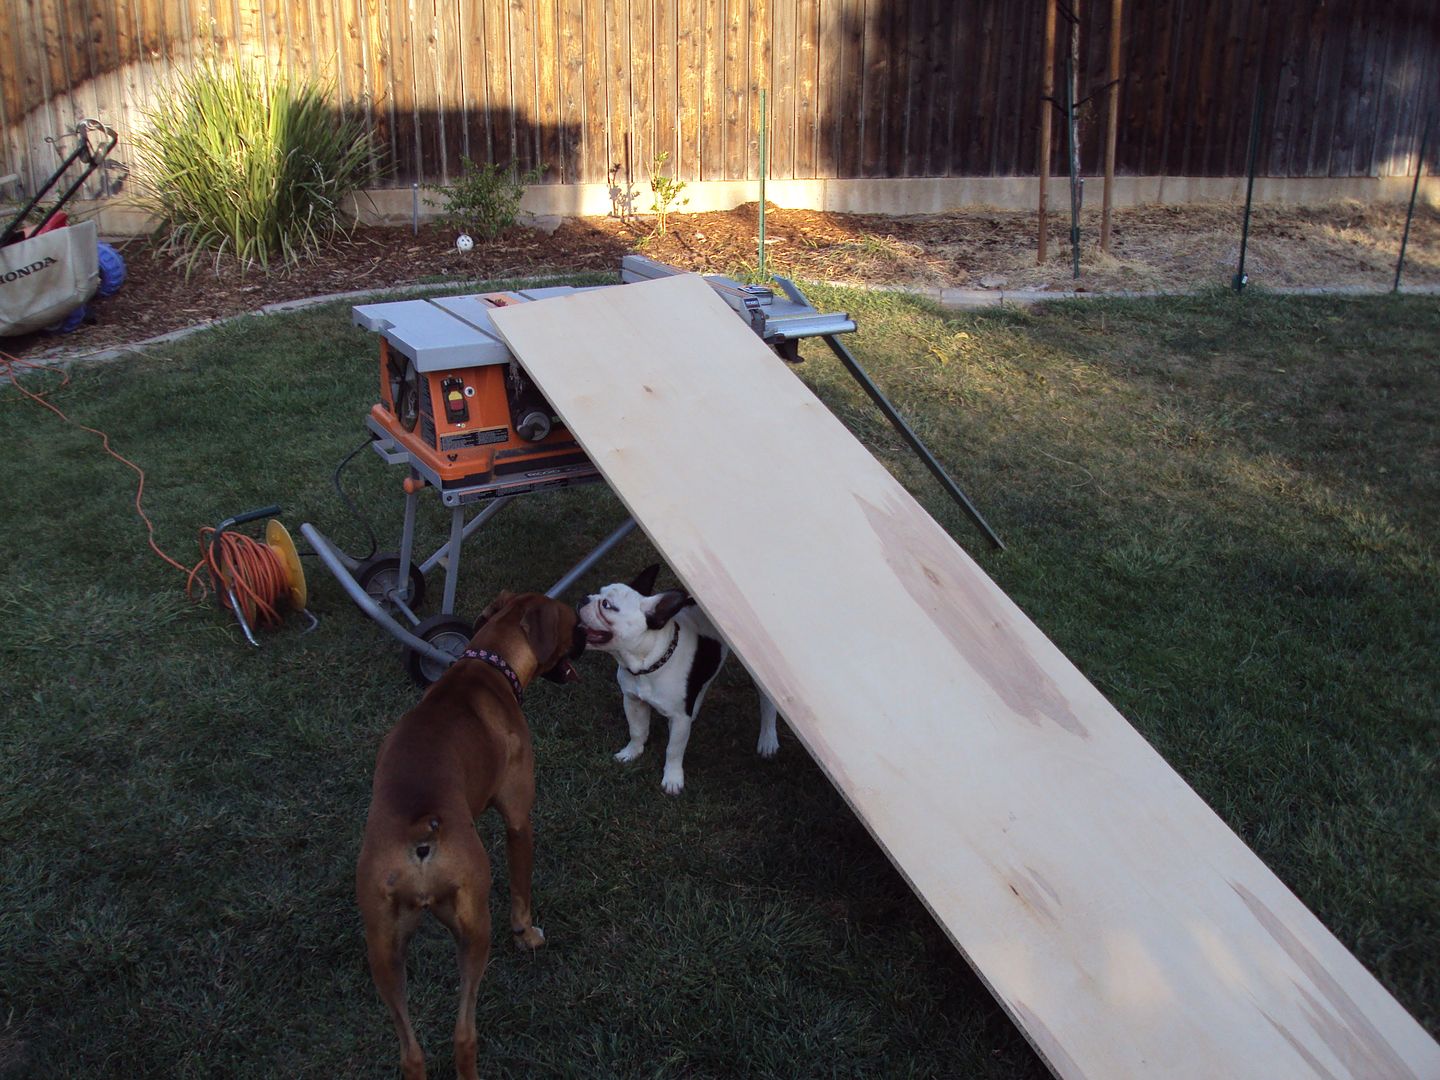
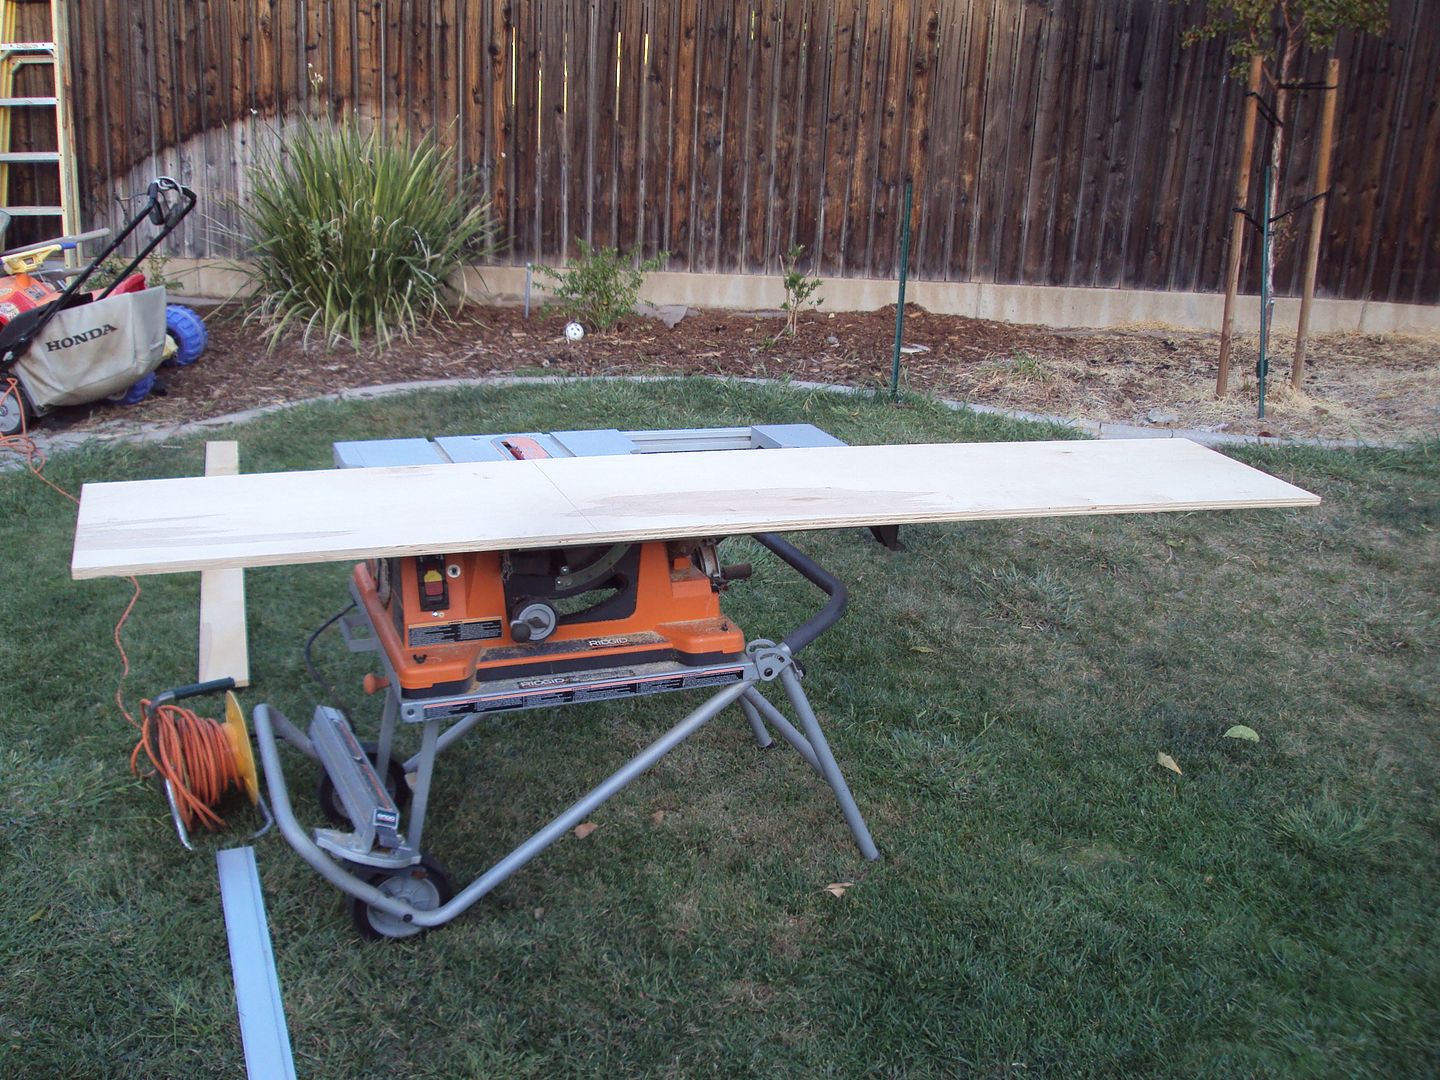
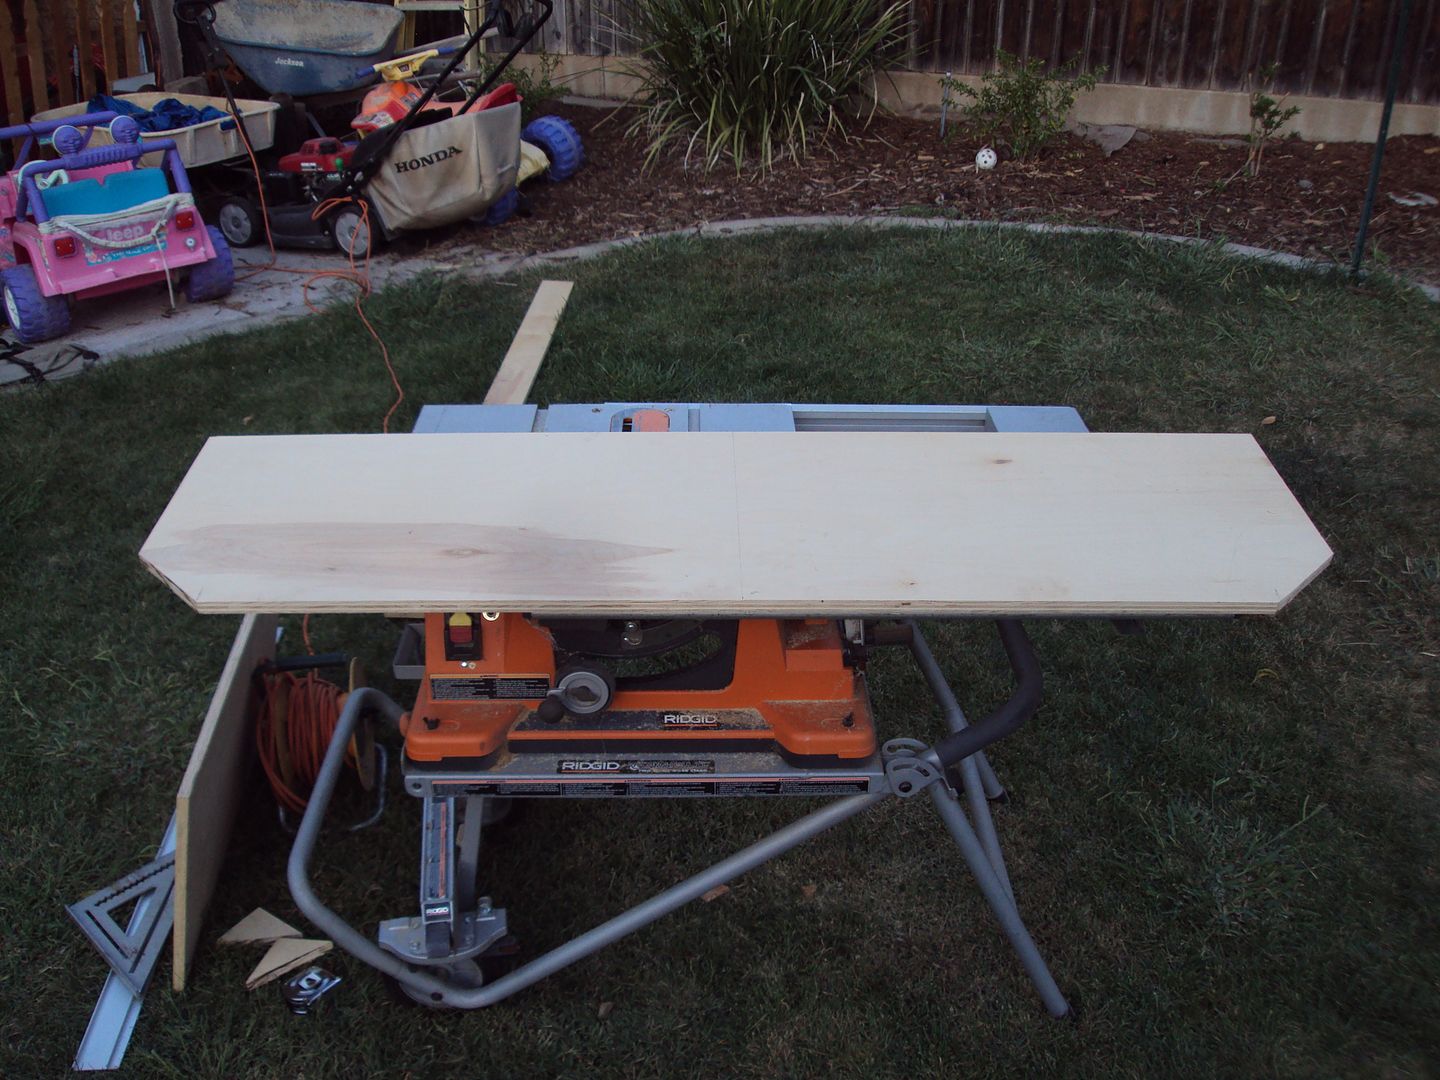
Then I decided that i still had some time before the family gets home, I thought I'd cut some wood! Love the smell of fresh cut wood! Especially Birch!
Got my measurement for the bottom panel. This needs a couple angle cuts, which happen to be 45's. So I got my straight edge out, and measured it out. I need a final of 25" for my depth. Let's get to cutting!

Yep, that'll do! Not bad with a straight edge and a hand saw! No table saw used here!
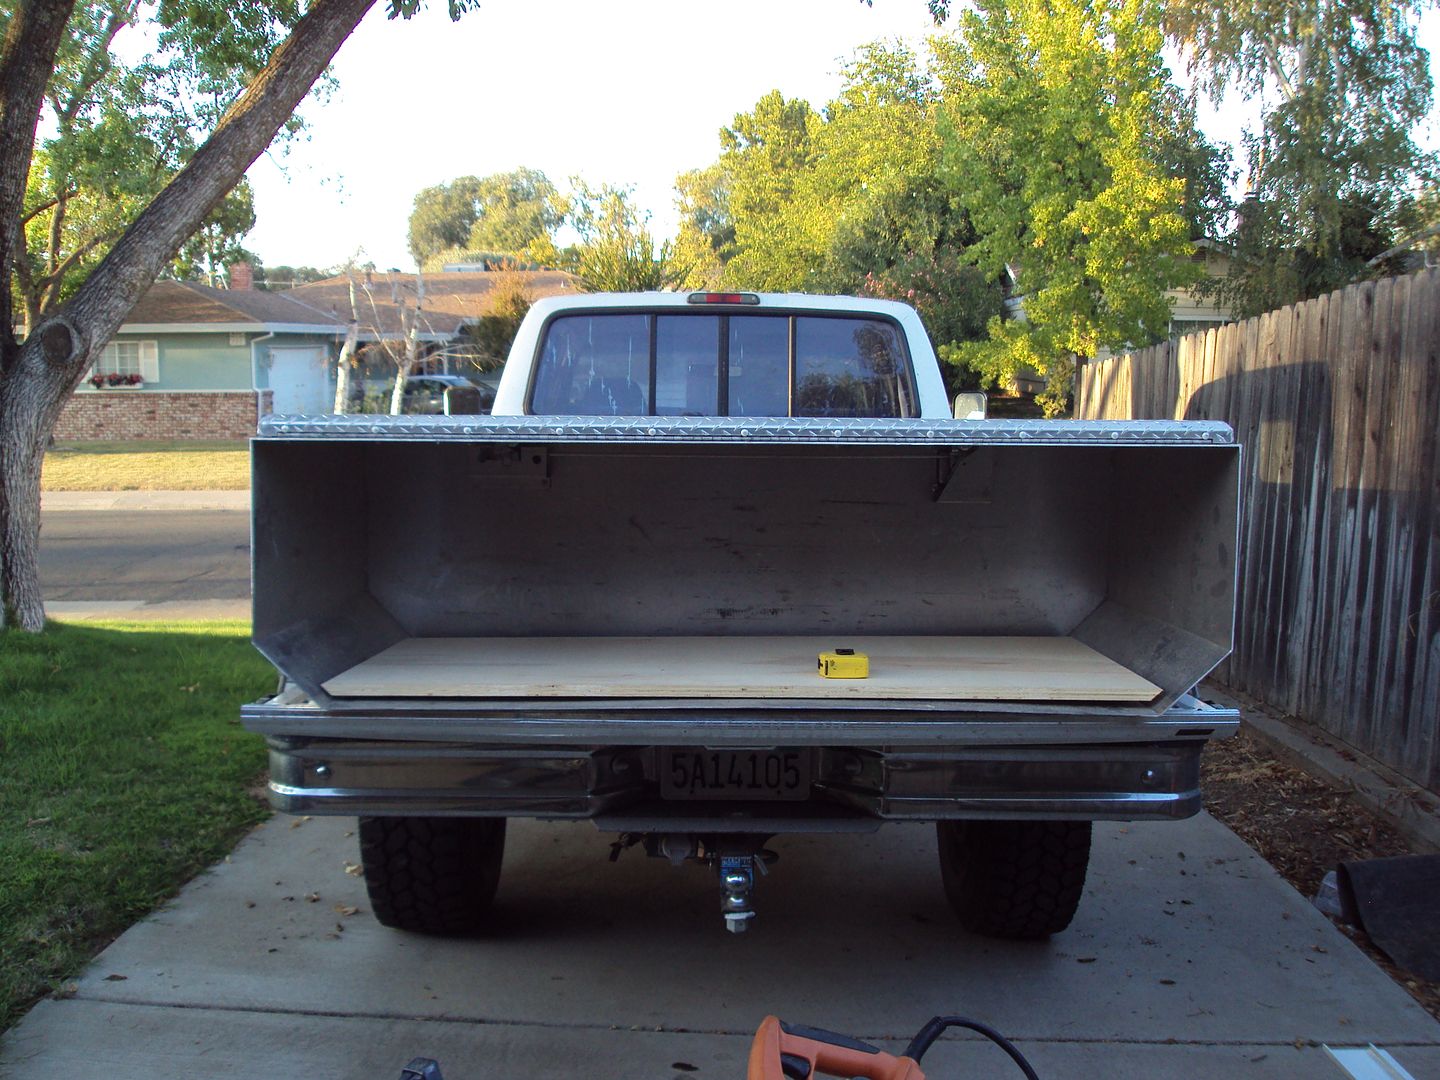
Now for a little test fit. This is a little deceiving because of the bow in the middle. I pushed on it and laid it down and it fits perfectly. There is a little issue though. That is that I'm putting deadener on the inside of this box, between it and the enclosure, so I'll need to account for that. But I think it'll be fine.
So that's what I got done tonight! I'm gonna see if I can get a couple things done here and there and get this thing built. We all know though, just building the enclosure is not the end of it. Lots of glasswork, and other odds and ends that need to be done.
So, just as a refresher, this is what's going in:
DC Audio XL 15's
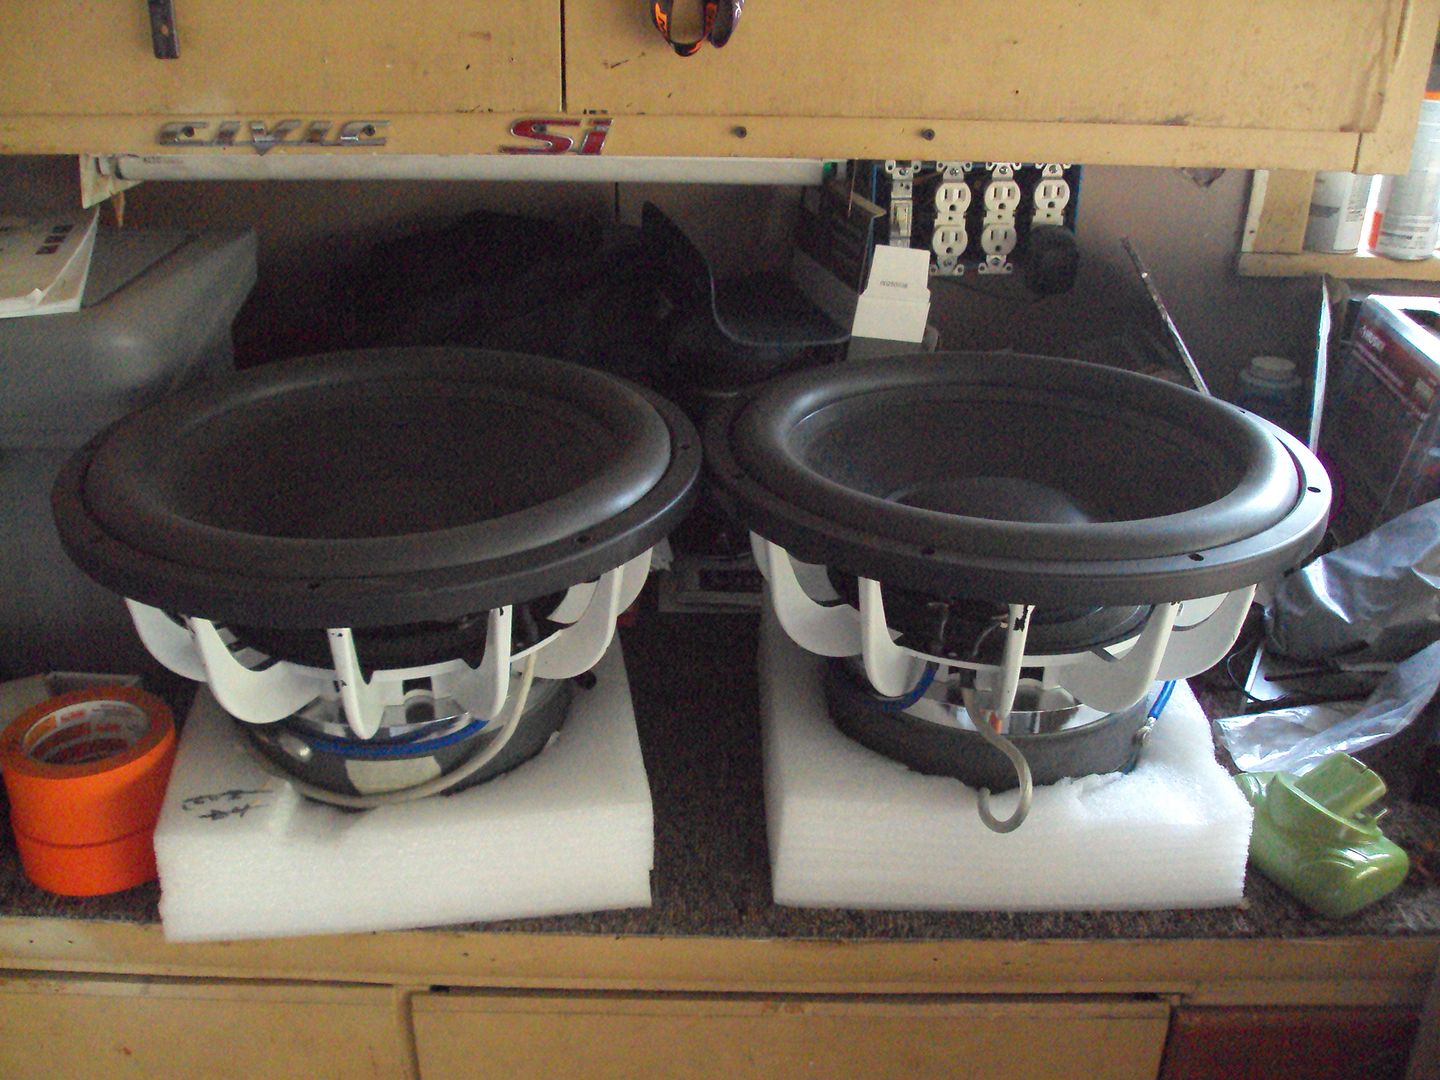
And this is what they're going in, what I'm building now:
More to come! Thanks for tuning in!
Got my measurement for the bottom panel. This needs a couple angle cuts, which happen to be 45's. So I got my straight edge out, and measured it out. I need a final of 25" for my depth. Let's get to cutting!
Yep, that'll do! Not bad with a straight edge and a hand saw! No table saw used here!
Now for a little test fit. This is a little deceiving because of the bow in the middle. I pushed on it and laid it down and it fits perfectly. There is a little issue though. That is that I'm putting deadener on the inside of this box, between it and the enclosure, so I'll need to account for that. But I think it'll be fine.
So that's what I got done tonight! I'm gonna see if I can get a couple things done here and there and get this thing built. We all know though, just building the enclosure is not the end of it. Lots of glasswork, and other odds and ends that need to be done.
So, just as a refresher, this is what's going in:
DC Audio XL 15's
And this is what they're going in, what I'm building now:
More to come! Thanks for tuning in!
#142
09-28-2012, 10:41 AM
Join Date: May 2011
Posts: 339
Likes: 0
Received 0 Likes
on
0 Posts
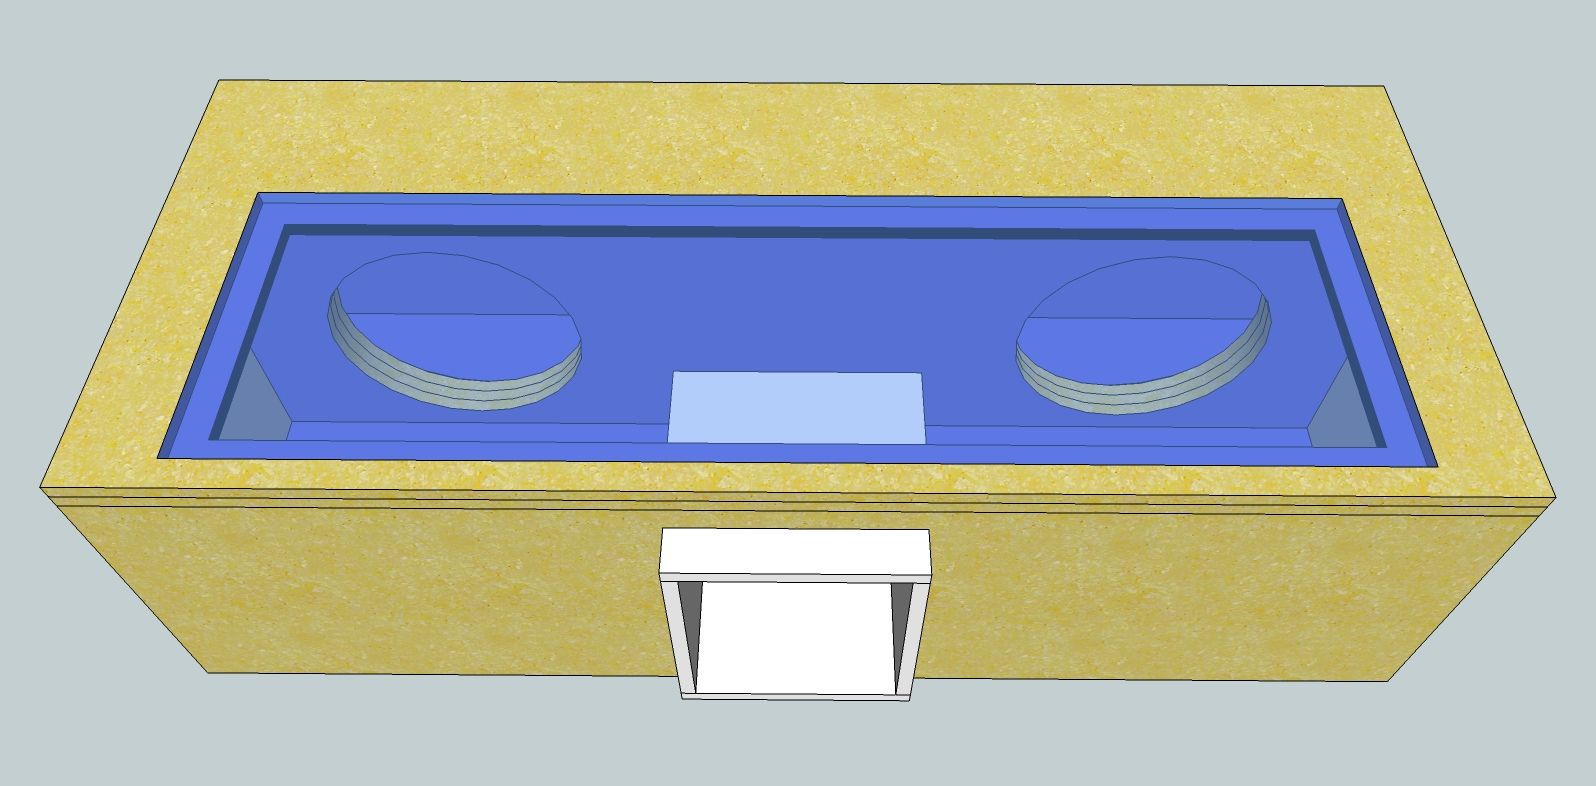
I'm building a 4th order sub enclosure inside of it, to protect it cause I don't have a shell or a tanneau cover, and for security. So in order to get it done correctly, angles etc, I had to cut the face off of it to get it built and then slide it inside of the box. Then I'll put it back on over the enclosure and seal it up. It's going to be a blow through, where only the port goes through the cabin, instead of doing a standard ported where I'd have to cut the entire cabin wall out basically. Didn't wanna go that route!
You said use the U code springs for the front. What vehicles am I looking for to get those off of please?
You said use the U code springs for the front. What vehicles am I looking for to get those off of please?
#144
09-30-2012, 09:54 AM
Join Date: May 2011
Posts: 339
Likes: 0
Received 0 Likes
on
0 Posts
Polyurethane to seal it up when I screw it back on to the box. Then I'll coat it with Rustoleum Leak Seal, and then on top of that I'll use bed liner to do the entire box. If I'm fortunate enough, I'll find a fiberglass bed cover on a steal and then I can just throw that over it and not have to worry about it for more protection. But it should be fine with 3 layers of protection. I'm also going to resin the outside of the enclosure, wood, and paint it as well. So the inside will have protection too.
Thanks, I'll go start looking at yards. I'm still waiting on the PMF RSK. Haven't heard anything or even gotten a tracking number yet. I'll call him on Monday I guess.
Thanks, I'll go start looking at yards. I'm still waiting on the PMF RSK. Haven't heard anything or even gotten a tracking number yet. I'll call him on Monday I guess.
#145
10-04-2012, 10:15 PM
Join Date: May 2011
Posts: 339
Likes: 0
Received 0 Likes
on
0 Posts
So last I left off, I had cut the bottom board of the enclosure. But in order to really get this thing off the ground I had to get the back wall done. That would allow me to get the whole thing built out of the box, instead of going back and checking measurements and this and that. SO, that's what I got accomplished today.
Problem was, I didn't exactly have the tools to do it. I'm doing a roofing job and my saw is up at the job which is 45 minutes away. So in order to not just waste the time I have, I decided to improvise! NOT ADVISED, but you can do it. Just not the safest way to do it.
Got out the ole trusty Ridigd portable table saw. Obviously some of it is easy to do, but it's the freehand cuts that become a little more dangerous! Oh and Grace my boxer out to help!
Ready to cut my piece. This was left over from the last time but it just needs a little trim to make it correct size.
My French Bull Dog peaking out to attack Grace before I get busy! Also, not safe!
See the little 5" slice in the back, that's what was cut off!
Nice!
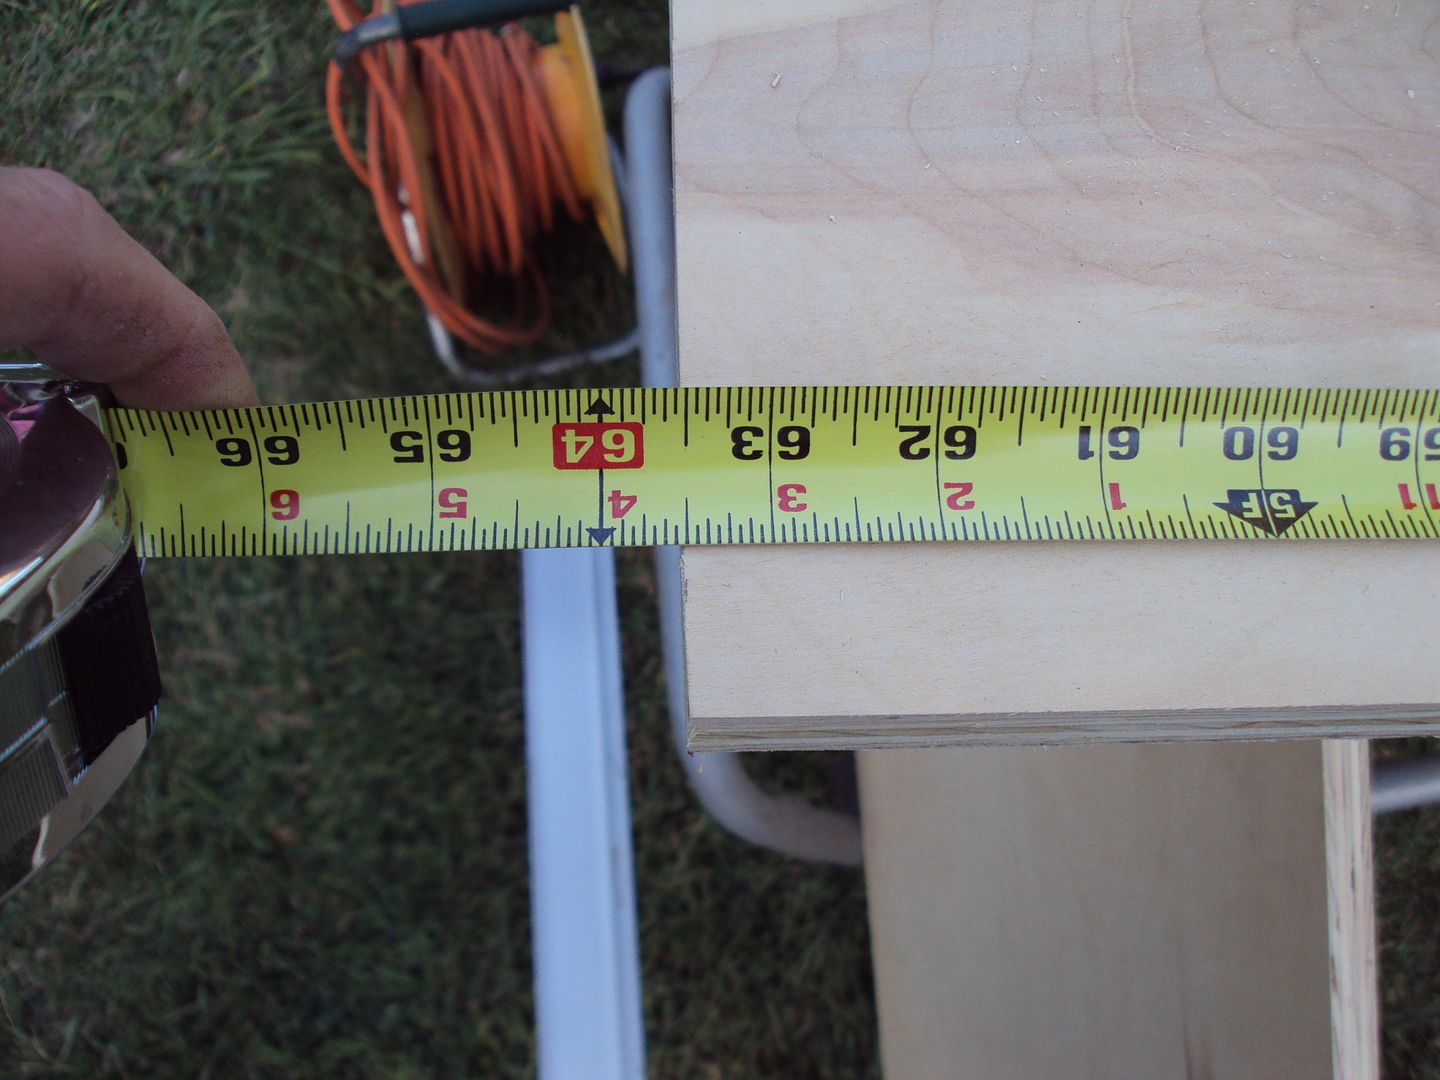
Forgot to take pics of the next one but I had to free hand that one at 63 1/2". Within a 1/16" I think is ok at this point. I'll get it closer when I get more time and my skill saw.
Next I cut the angles freehand. These were a little rougher! But it will work!
Picture of the back wall and the bottom plate in the box just sitting there. Not a good pic. The picture is correct, but the box is on it's side.
view with the lid open
So that's about it. I redid the number on the updated version of Torres and it was a bit off. Made some adjustments and I'm back on track. Not much going at a time, matter of fact at this rate I may be done cutting pieces by Christmas! LOL! No really! But I have to make the best of the time I have.
That's it for tonight! Thanks!
Problem was, I didn't exactly have the tools to do it. I'm doing a roofing job and my saw is up at the job which is 45 minutes away. So in order to not just waste the time I have, I decided to improvise! NOT ADVISED, but you can do it. Just not the safest way to do it.
Got out the ole trusty Ridigd portable table saw. Obviously some of it is easy to do, but it's the freehand cuts that become a little more dangerous! Oh and Grace my boxer out to help!
Ready to cut my piece. This was left over from the last time but it just needs a little trim to make it correct size.
My French Bull Dog peaking out to attack Grace before I get busy! Also, not safe!
See the little 5" slice in the back, that's what was cut off!
Nice!
Forgot to take pics of the next one but I had to free hand that one at 63 1/2". Within a 1/16" I think is ok at this point. I'll get it closer when I get more time and my skill saw.
Next I cut the angles freehand. These were a little rougher! But it will work!
Picture of the back wall and the bottom plate in the box just sitting there. Not a good pic. The picture is correct, but the box is on it's side.
view with the lid open
So that's about it. I redid the number on the updated version of Torres and it was a bit off. Made some adjustments and I'm back on track. Not much going at a time, matter of fact at this rate I may be done cutting pieces by Christmas! LOL! No really! But I have to make the best of the time I have.
That's it for tonight! Thanks!
#146
03-01-2013, 05:10 PM
Join Date: May 2011
Posts: 339
Likes: 0
Received 0 Likes
on
0 Posts
Ok so I know it's been forever since I've updated this. I've since moved, and the audio is stopping. I'm gonna do something with it, just not now. So now that we're in our new house, I have a small shop and rv access, quite large sized too, so the truck will go back there.
I'm going to be doing the RSK and lift etc in the next couple of months. It's a tricky time of year, cause I want to do it before the summer when we go camping, but at the same time I'm getting ready to start an audio build on my car. So i'd have to juggle them and I'm not sure I can do that. So we'll see how it goes.
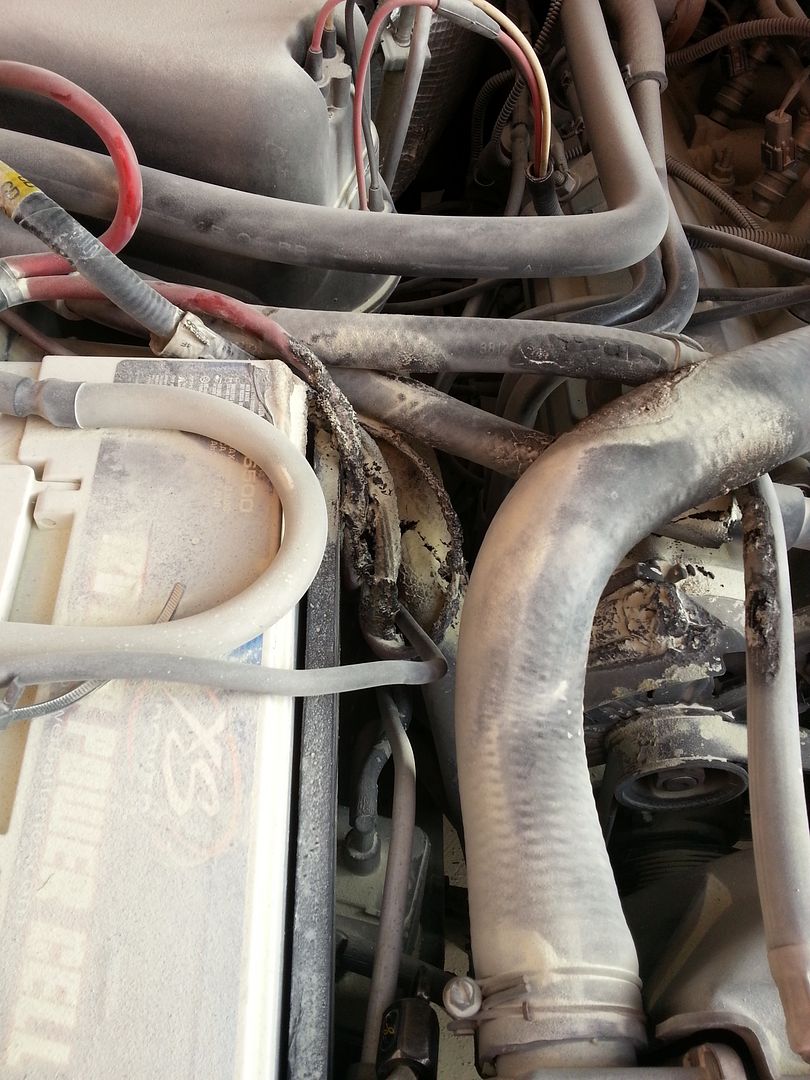
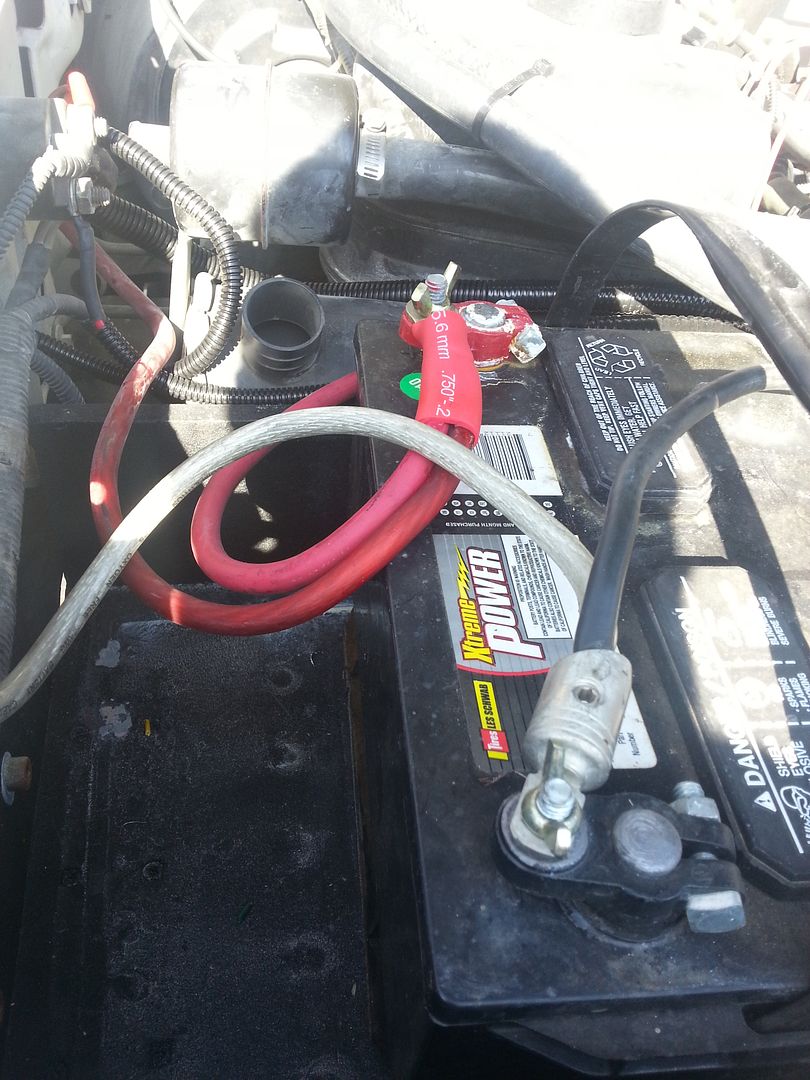
A little update on other stuff. Unfortunately I never did change out that 2g alternator and it ended up catching fire on me one day! BAD! So I would've loved to do the work on it but it just wasn't in the schedule so I had it fixed. I hate paying money for someone to do something I can very easily do myself! Pisses me off! But it works now. Here's some pics.
And the new!


So that's where I'm at now! I'll update when I have more! Thanks!
I'm going to be doing the RSK and lift etc in the next couple of months. It's a tricky time of year, cause I want to do it before the summer when we go camping, but at the same time I'm getting ready to start an audio build on my car. So i'd have to juggle them and I'm not sure I can do that. So we'll see how it goes.
A little update on other stuff. Unfortunately I never did change out that 2g alternator and it ended up catching fire on me one day! BAD! So I would've loved to do the work on it but it just wasn't in the schedule so I had it fixed. I hate paying money for someone to do something I can very easily do myself! Pisses me off! But it works now. Here's some pics.
And the new!
So that's where I'm at now! I'll update when I have more! Thanks!

#148
03-18-2013, 11:29 AM
Join Date: May 2011
Posts: 339
Likes: 0
Received 0 Likes
on
0 Posts
Thanks Smill.
Things have stalled out a bit, but they'll get going again soon. I still have yet to get my RSK and lift on, which I need desperately before the camping seasons start. So I may force that into effect very soon.
On another more important note, and I"ll start a different thread on this, but I'm noticing a lack of power in the truck. That's actually not the correct term, lack of power I guess, but I'll put it like this. If I'm sitting at a light or stop sign and take off, it's fine, but as soon as it gets to like 3rd and 4th gear it certainly drops off in power. I don't loose any like it becomes sluggish or anything like that, but what happens is if I go to pass someone, say on the freeway, I can floor it and it'll downshift to go, but just doesn't go anywhere.
I know it's not a ranger, or a smaller vehicle where it's gonna throw me back in my seat, but at the same time with a 7.5L it should put out the power. I have a hard time keeping it above 65-70. Feels like I have to force it to stay up there and I'm not so sure that's right.
I'm not a mechanic by any means, I can do things and put things together I take apart etc, but not a mechanic. SO I'm having a hard time figuring this out. The only thing I can think of off the top of my head is the gearing is off. Meaning I need to change the gearing in the rear.
I have the completely rebuilt tranny, which was less than 2 years ago and only has about 7k on it since, if that! I have 33's AT's on it, no lift yet, new brake system as well. I changed the spark plugs, wires, dist cap, etc a while back. New fuel filter just last summer, and again it's not driven much. I'm not sure what else everyone needs to know. I'm happy to get the info. I'll go take a pic of the door sticker, cause I have no idea how to figure out what gears I have.
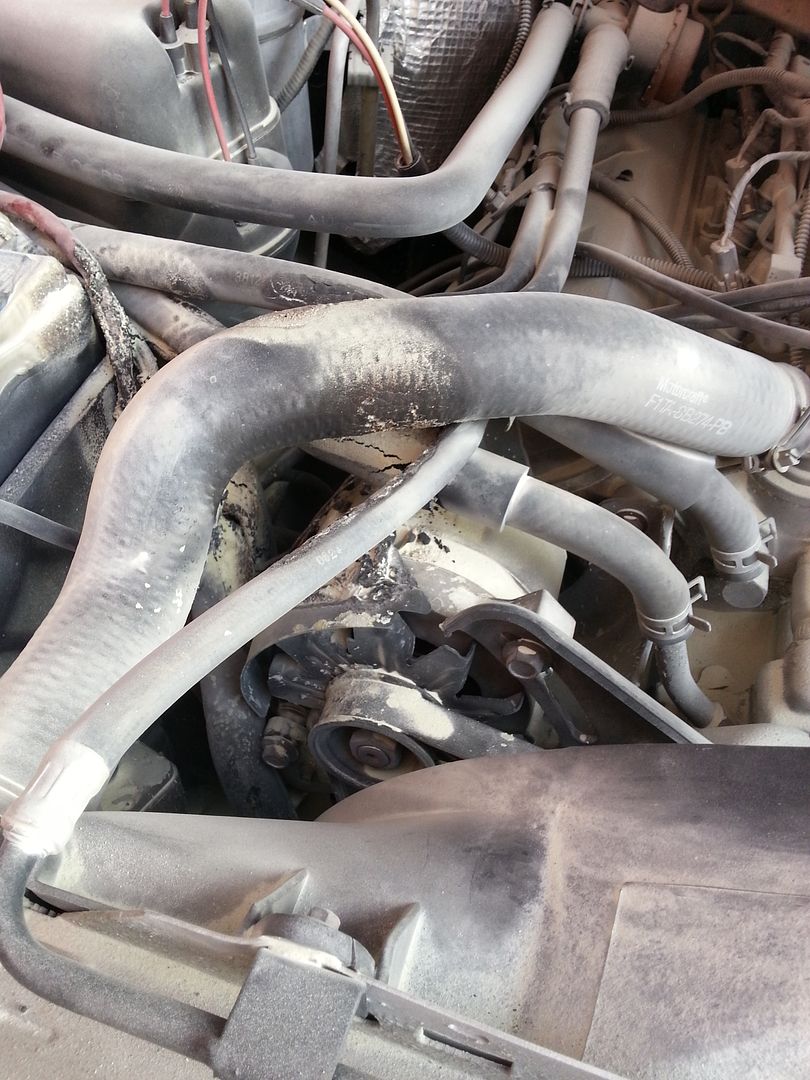
I also have pretty noisy exhaust. I don't think I have any aftermarket exhaust, but I know it's loud like it's got a small leak in it. I'm not sure if that would cause any issues at all. Again, not a mechanic.
Any help would be greatly appreciated. I just don't know otherwise and I don't have a ton of money to go throw at a shop to figure it out.
Things have stalled out a bit, but they'll get going again soon. I still have yet to get my RSK and lift on, which I need desperately before the camping seasons start. So I may force that into effect very soon.
On another more important note, and I"ll start a different thread on this, but I'm noticing a lack of power in the truck. That's actually not the correct term, lack of power I guess, but I'll put it like this. If I'm sitting at a light or stop sign and take off, it's fine, but as soon as it gets to like 3rd and 4th gear it certainly drops off in power. I don't loose any like it becomes sluggish or anything like that, but what happens is if I go to pass someone, say on the freeway, I can floor it and it'll downshift to go, but just doesn't go anywhere.
I know it's not a ranger, or a smaller vehicle where it's gonna throw me back in my seat, but at the same time with a 7.5L it should put out the power. I have a hard time keeping it above 65-70. Feels like I have to force it to stay up there and I'm not so sure that's right.
I'm not a mechanic by any means, I can do things and put things together I take apart etc, but not a mechanic. SO I'm having a hard time figuring this out. The only thing I can think of off the top of my head is the gearing is off. Meaning I need to change the gearing in the rear.
I have the completely rebuilt tranny, which was less than 2 years ago and only has about 7k on it since, if that! I have 33's AT's on it, no lift yet, new brake system as well. I changed the spark plugs, wires, dist cap, etc a while back. New fuel filter just last summer, and again it's not driven much. I'm not sure what else everyone needs to know. I'm happy to get the info. I'll go take a pic of the door sticker, cause I have no idea how to figure out what gears I have.
I also have pretty noisy exhaust. I don't think I have any aftermarket exhaust, but I know it's loud like it's got a small leak in it. I'm not sure if that would cause any issues at all. Again, not a mechanic.
Any help would be greatly appreciated. I just don't know otherwise and I don't have a ton of money to go throw at a shop to figure it out.
#149
01-27-2016, 03:58 AM
Posting Guru
Join Date: Apr 2013
Location: Lake Stevens, Washington
Posts: 1,770
Likes: 0
Received 0 Likes
on
0 Posts
#150
01-27-2016, 10:29 AM
Join Date: May 2011
Posts: 339
Likes: 0
Received 0 Likes
on
0 Posts
Actually I forgot about this to be honest.
I have done a ton to it. The lack of power was due to a blown head gasket between 6 & 7 and I decided to tear the entire top half down and rebuild it. I didn't do anything crazy, stock heads still and did all the prepwork and gaskets and cleaned and prettied it all up. But she runs so good now.
Subsequently I am selling her, because I have an 06 F250 now with a 6.0 and that's my every day vehicle now. So hopefully I can get this one sold soon and put some of that money I spent on it, back in my pocket.
I have a ton of pictures, I'll be happy to share. I just don't have time at the moment to throw them up. I will though.
If anyone has facebook, and you want to check it out in the meantime, here is the page I created for it: https://www.facebook.com/Ford-Beast-...6813864427748/
I'll work on pics in the next couple of days.

Thread
Thread Starter
Forum
Replies
Last Post
BIGDZL
6.7L Power Stroke Diesel
17
04-11-2018 11:29 AM