1975 Ford Crew Cab Build
#1
 02-02-2011, 11:17 AM


Join Date: Oct 2010
Location: Murrieta
Posts: 53
Likes: 0
Received 0 Likes
on
0 Posts
1975 Ford Crew Cab Build
Hi guys. Been posting over in the Engine Swap section. I thought the paint and bodywork section would be more appropriate for this.
Picked up a pretty rusty Crew Cab a few months back. Decided to swap in a Cummins. That's done now I'm on to Cab bodywork.
After tearing into this thing i realized it had a pretty bad resto job. Lot's of lead fill, bondo and rivets...
Here's the pics. I'm sure there's some pro's out there so any advice is welcome.
Here ya go...
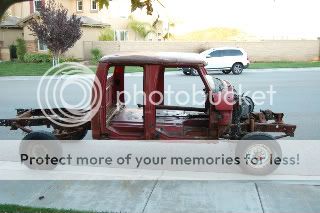
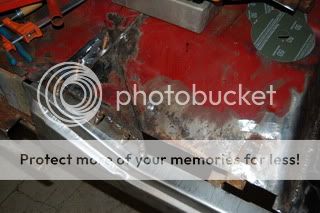
Here's what I started with

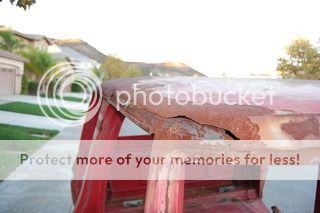
Roof could be peeled off like tuna can. (Going to be putting a Ford Econoline corrugated roof on eventually)
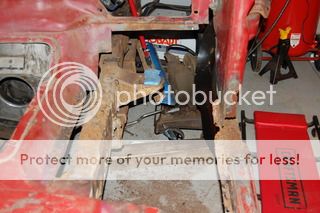
Floor was held together by galvanized sheet metal and rivets, oh and some silicone ha ha

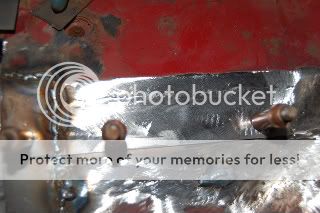
So I cut out all the bad metal and ordered my replacement panels.
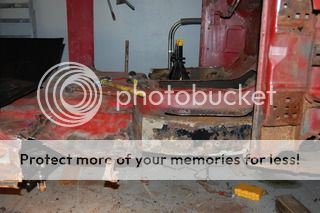
Inner and Outer Rocker panels removed
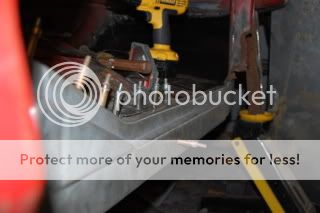
Here's everything coming back together

This part has no repair panels available so this is strictly sheet metal work. I intend to have this look exactly like OE when finished.
I am using a 4.5" angle grinder, a 30" Brake from Harbor Freight, Hobart Handler 120 MIG and basic body tools here. Cleco's are a lifesaver to hold things in place.

Picked up a pretty rusty Crew Cab a few months back. Decided to swap in a Cummins. That's done now I'm on to Cab bodywork.
After tearing into this thing i realized it had a pretty bad resto job. Lot's of lead fill, bondo and rivets...
Here's the pics. I'm sure there's some pro's out there so any advice is welcome.
Here ya go...
Here's what I started with
Roof could be peeled off like tuna can. (Going to be putting a Ford Econoline corrugated roof on eventually)
Floor was held together by galvanized sheet metal and rivets, oh and some silicone ha ha
So I cut out all the bad metal and ordered my replacement panels.
Inner and Outer Rocker panels removed
Here's everything coming back together
This part has no repair panels available so this is strictly sheet metal work. I intend to have this look exactly like OE when finished.
I am using a 4.5" angle grinder, a 30" Brake from Harbor Freight, Hobart Handler 120 MIG and basic body tools here. Cleco's are a lifesaver to hold things in place.
#2
02-02-2011, 05:17 PM
Looking good so far.....clecos are definatly good helper to have. I used to use small zip screws (still do on occasion) but when you have to keep taking off then putting back on the panel they make life easier.
If you have air, you might want to look at getting a angle die grinder with a 2" pad for Roloc pads to help with the welds though. Then you can use 26 grit sand paper to knock them down without all the extra heat a grinder brings. 1/4" Front Exhaust Air Angle Die Grinder - Grinders - Air Tools
If you have air, you might want to look at getting a angle die grinder with a 2" pad for Roloc pads to help with the welds though. Then you can use 26 grit sand paper to knock them down without all the extra heat a grinder brings. 1/4" Front Exhaust Air Angle Die Grinder - Grinders - Air Tools
#3
02-02-2011, 05:59 PM
Join Date: Oct 2010
Location: Murrieta
Posts: 53
Likes: 0
Received 0 Likes
on
0 Posts
Thanks,
I have the craftsman version with the 2" pads.
My problem is the compressor only pushes 6CFM so it puts quite a strain on my weekend warrior.
Miss my dual stage I had 10 years ago. Used to paint cars in the garage with that bad boy.
I use 36 grit like you said to keep warpage down. 22 ga steel kinda flexy.
Anyway this weekend making a parts run to pick up a '78 single cab, doghouse, and shortbed I picked up for $500.
The nice thing about these crews is they used many of the same panels the singles cabs did (except the middle section). I can use this as a donor to fix my cab.
#5
02-23-2011, 10:25 AM
Join Date: Oct 2010
Location: Murrieta
Posts: 53
Likes: 0
Received 0 Likes
on
0 Posts
The inner rocker is slightly different but the outer rocker is exactly the same.
The seam will be covered by the lower rear panel.
There is no good rocker repair panels that are as strong as the originals.
But in looking at the crew and standard cab you can see where there is basically a seam and they added a center section of floor to extend the cab. Up to this point they are the same.
The rear part of the crew is the same as the rear of the standard cab again the only difference being a seam where they joined the 2.
Almost done with the repair I'll be posting pics soon.


#7
02-24-2011, 08:51 AM
Posting Guru
Join Date: Mar 2006
Location: Parma, MI
Posts: 1,213
Likes: 0
Received 0 Likes
on
0 Posts
Trending Topics
#9
02-28-2011, 10:46 AM
Join Date: Oct 2010
Location: Murrieta
Posts: 53
Likes: 0
Received 0 Likes
on
0 Posts

#14
04-15-2014, 04:14 PM
Join Date: Oct 2010
Location: Murrieta
Posts: 53
Likes: 0
Received 0 Likes
on
0 Posts
Well guys judging by the last time i posted its been a few years.
This little guy was a year and a half old when this whole thing started.
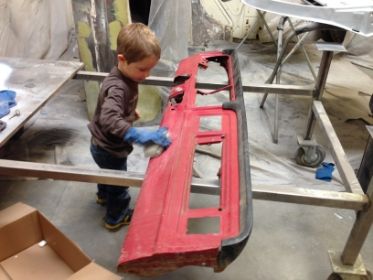
He starts kindergarten in 4 months. Yikes..
As with most of these projects the work took priority over posting.
Here's the update.
It's now at the painters getting final block sand and sealer.
Should have color by the end of the month.
Here are the pics so far.
This little guy was a year and a half old when this whole thing started.
He starts kindergarten in 4 months. Yikes..
As with most of these projects the work took priority over posting.
Here's the update.
It's now at the painters getting final block sand and sealer.
Should have color by the end of the month.
Here are the pics so far.
#15
04-15-2014, 04:18 PM
Join Date: Oct 2010
Location: Murrieta
Posts: 53
Likes: 0
Received 0 Likes
on
0 Posts

