Agri-Cover ROCKSTAR Hitch Mounted Mud Flaps Review
MonsterBaby
Ford-Trucks Enthusiasts
For years I have towed my pro-mod mud drag truck and car trailer down gravel roads having to repaint the front every year. Then after getting rid of that I bought a boat and have to haul it 5 miles down a gravel road to get where I prefer to launch it. What I have always found was rock damage and was looking for a way to have a mud flap that would prevent it so I wasn’t driving 5mph to get to the boat ramp.
Over the years I had tried several different ideas, but didn’t want to just screw mud flaps to my rear bumper. The little ones that screw to the wheel well opening are worthless. So several years ago I built one that mounted to my hitch. This worked but was pretty flimsy and frankly ugly.
So when I saw the rockstar hitch mounted mud flap from agricover http://www.agricover.com/rockstar/ I knew I wanted to check them out.
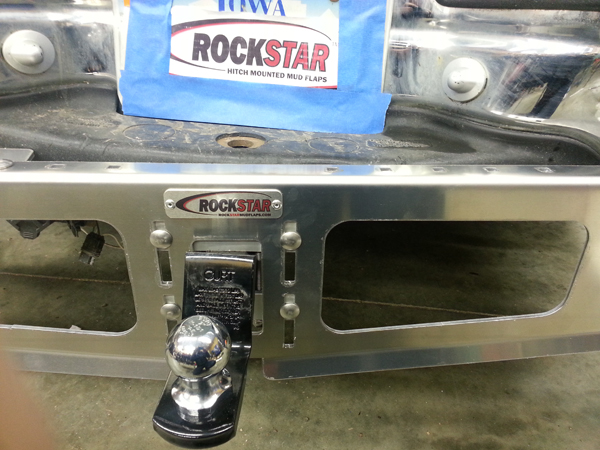
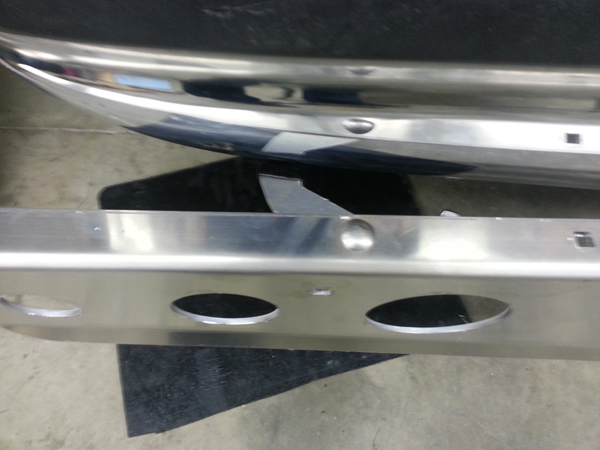
So the box arrived, and upon opening, initial impression was WOW. This thing is nice. The frame is made out of 3/16″ plate aluminum, the mud flaps themselves are ½” thick rubber.. This is important to those that live in the rust belts, upon further inspection, instead of the typical grade 2 bolts that rust and look ugly it’s rare to find someone that didn’t cheap out and actually used stainless.
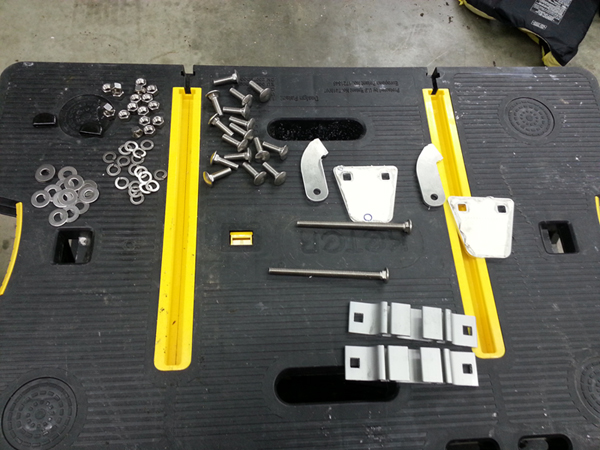
So now time to start putting this together. The instructions list needed items but basically it was a 9/16th socket, ratchet, torque wrench and a means to cut the mud flaps themselves. They say a utility knife but I used a sawzall (cutting ½” rubber with a utility knife doesn’t seem like fun).
So taking the time to careful read the instructions and take pics so I could do this write-up I got started. First step is assembling the clamp using the 2 long carriage bolts, nuts and washers and then attaching that to the frame leaving all the bolts finger tight.
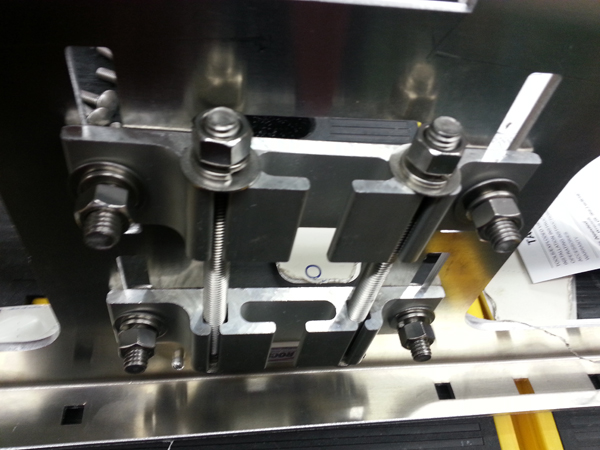
The next step is to put the hitch thru the clamp and insert into the receiver. This is where I ran into a minor problem. Even though I didn’t need it, I had been using a cat V hitch. This had a gusset on the bottom and was fairly short so I was unable to get it all the way into the receiver and install the pin. They do mention this about some hitches not being long enough and actually sell a longer hitch by Curt. So I ended up getting a new hitch. This one is about 6″ from the hole to the back of the drop. And it is plenty long on my truck.
Ok so with the hitch in the receiver it was time to install the support flanges. The idea is to install them as wide as possible for better support. I originally went one hole wider but wouldn’t allow the frame to be close enough to the bumper.
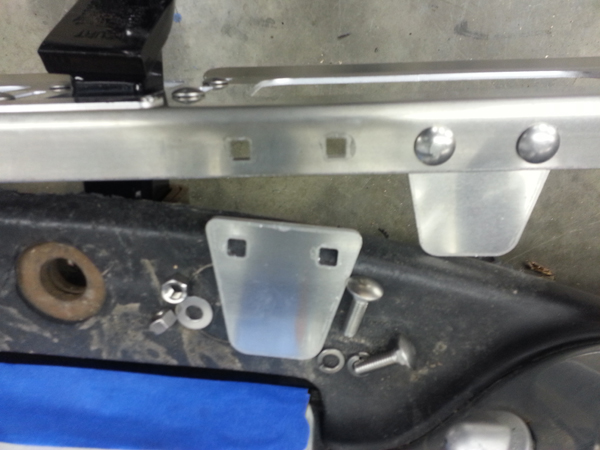
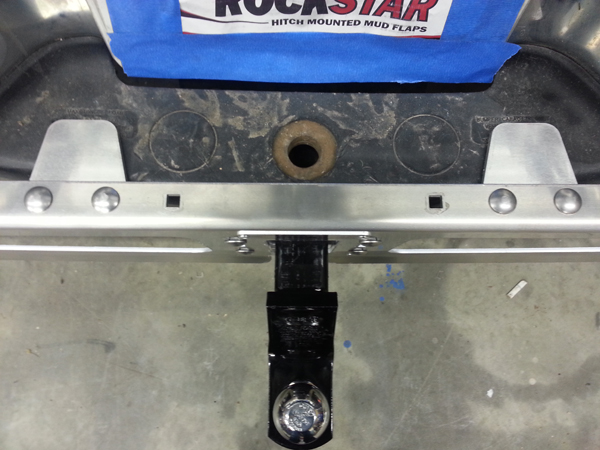
Then you adjust for height and distance from bumper. Make sure it’s level and even to the truck bumper and tighten the top 2 bolts that hold the clamp to the frame to 32ft/lbs. next tighten the clamp bolts themselves and finally the bottom 2 bolts.
So the next step was to measure and cut the mudflaps to length. They give you plenty of length for lifted trucks etc. recommendation is 5-7″ off the floor. I ended up at 4-½”. Basically stacked some wood to hold them up so could see where I wanted them. After deciding on the height it was easy to measure from the mounting holes on the frame to the wood and mark the mud flap itself with that. For mine I ended up cutting off 5.75″.
To cut them, I clamped the flap down to a work table using a 2×4 to hold them down and act as a guide. Forgot to take a picture but sure you get the idea. Then using my sawzall with a 6 tpi blade I was able to cut both at the same time.
Now this is where I ran into 2 issues with the instructions. Neither is a major issue and hopefully they will correct them in the future.
Issue one. These each have 2 cutouts for running your exhaust through if you have rear mounted exhaust. One is marked D and P and as you guess they would intend for them to be setup D towards drivers side P towards passenger. They also tell you that these cutouts should be pointed towards your tires. This creates a minor problem as you can see.
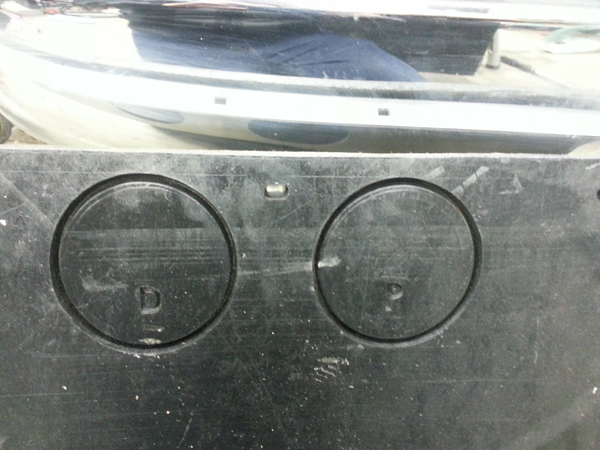
So I just ignored the letters and orientated them towards the tires.
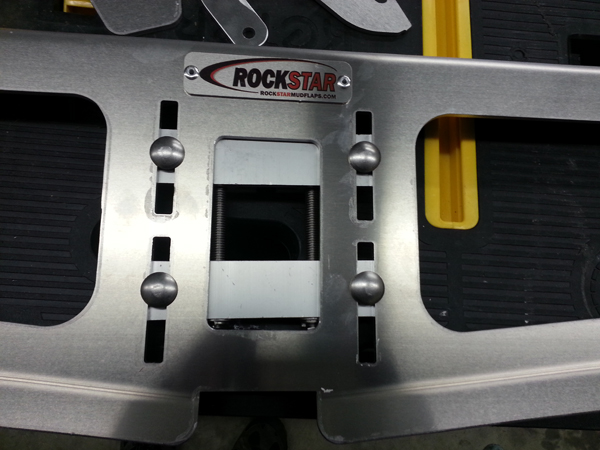
And then comes issue number 2. The next step in the instructions is to install the stabilizer brackets. Well when I tied ti found that the mud flap actually made it extremely difficult to start the nut and basically impossible to get a socket on it. So I ended up removing the mud flaps and reversing these to steps. Installing the stabilizer brackets first.
And then re-installing the mud flaps
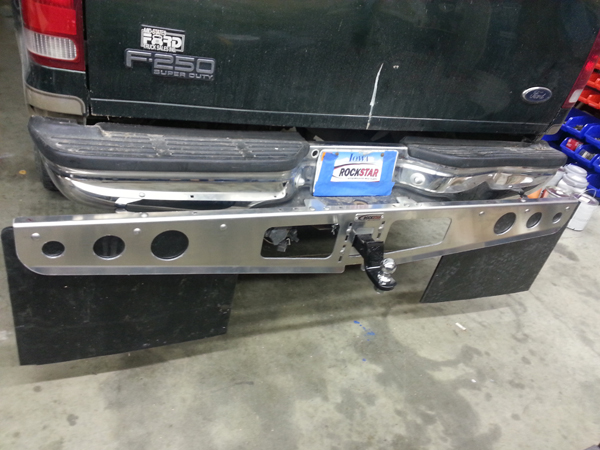
Finished product
So total initial install time was right at an hour. BUT this included reading and taking pictures as I stated and back tracking one step. If I was doing it again I am guessing I could get it done in under 30 minutes.
Only had it on for a couple days and already gotten several people ask me about it and compliment the looks. And did tow my car trailer down a gravel road with no sounds of rocks hitting the trailer so it appears to work as it should. I just wish I had found something like this 20yrs ago.
It takes less then a minute to take to off or put it back on (pull the pin, pull the hitch) But that brings up another suggestion on my part. I would and will be getting a locking pin for the hitch as it would only take a couple seconds for a thief to walk off with it too.
Overall it’s pretty stable (not a step) looks good, and works better. Being made out of rust resistant materials it’s going to last a long time even in rust belt. And nothing about it seems weak or cheap. I believe if you tow a travel trailer or a boat or whatever it’s going to save it’s cost plus in reduced damage. And drivers following you will appreciate it also. Well worth the money.
So it tallies up like this.
Pro: heavy materials, stainless hardware, stable, great design, easy to assemble, easy to remove and reinstall, looks great, and just a great idea.
Cons: And you knew there had to be one right? About the only bad thing I have to say is the edges are unfinished. Where the aluminum was cut it’s rough and in areas it’s actually a little sharp. If you wanted a die grinder or file would smooth it out nicely.
So the pros totally outway any cons. I would highly recommend this if you tow much at all.


