Ford F-150/F-250: How to Replace Fuel Line
The fuel line in your Ford F-150 or Super Duty is as important as it sounds. Leaking fuel is dangerous and can compromise your engine's performance. Here is how to save good money and replace it yourself.
This article applies to the Ford F-150 (2004-2014) and F-250 Super Duty (2005-2014).
The fuel line in your Ford F-150 or Super Duty is a charged line that delivers the fuel from your tank through a filter and into the engine, and it rarely needs changing. The filter normally needs replacement well before line will, however, removing the filter is not an easy task and sometimes the line itself can be damaged and will need replaced. If the fuel line is old, worn or cracked, consider replacing it as soon as possible. Unless your filter is brand new, replace it as well at the same time you replace your fuel line.

Material
- New fuel filter
- 3-22mm pipe cutter
- 3/8" ID fuel injected hose, 2-3 feet long
- 3 fuel injected hose clamps to fit 3/8 - 5/16" ID hoses
- Flat head screwdriver
- 13mm ratchet with extension
- Lubricant such as WD-40
- Bucket, safety goggles, and latex gloves
Pro Tip
Be sure to release the gas line pressure or drain as much gas out of the line as possible to avoid spraying gas when you disconnect the line from the fittings. Make sure you are working in a well-ventilated area and do not smoke or have any open flame or heat sources in your work space. Dispose of any gasoline soak materials in an appropriate waste dispenser.
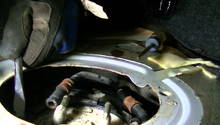
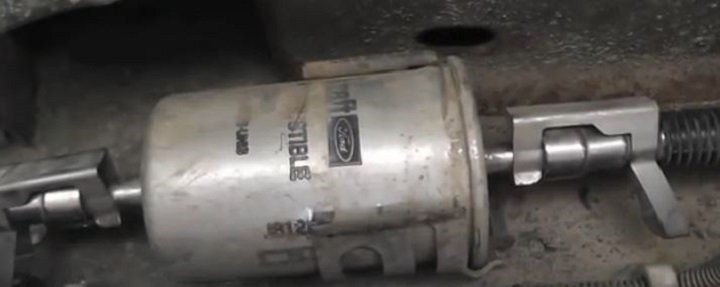
Step 1 - Disconnect the fuel filter
Disconnect the fuel line from the filter. You will either need to purchase special disconnect clips or fabricate your own using a piece of plastic tubing (like a marker cap) to disengage the safety clips in the coupler to remove the filter from the fuel line. Completely remove the filter from both ends of the line. Use caution as some fuel may spray or leak out of the line.
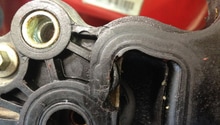
Step 2 - Remove the fuel rail bracket
Use the 13mm ratchet to remove the bolt that holds the fuel rail bracket onto the transmission. You may need to lubricate the bolt to help it break free. This will help with the tight space to do the rest of the work.

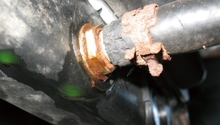
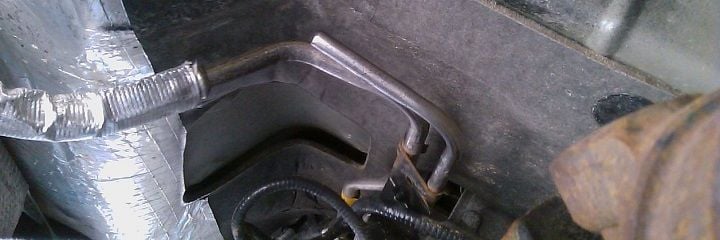
Step 3 - Cut the line off the pipe fitting above the bend
If you can remove the old hose off the access pipe, you can avoid cutting the pipe. If the hose will not budge or leaves reside on the pipe, use the pipe cutter to cut the pipe right at the end of the hold hose.
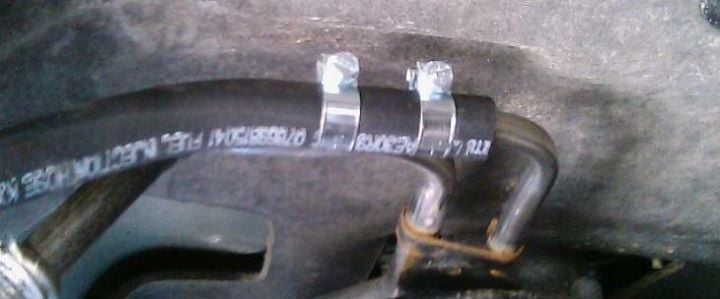
Step 4 - Connect the new fuel hose to the access pipe
Carefully insert the new hose over the access pipe, securing with two fuel injected 3/8"" hose clamps. If you prefer for added safety, you may flare out the end of the pipe to make it extra secure, but this is not necessary. Be careful not to over-tighten the clamps or they may break or cut the hose.
Step 5 - Attach the other end of the hose onto the filter
If you have the quick disconnect coupler, insert it into the other end of the new fuel line. If you are bypassing this part (which some people often do) connect the fuel filter directly to your new line and secure with the other 3/8" fuel injected host clamp. Bypassing the quick disconnect coupler is said to make replacing the fuel filter much easier in the future, without the need for special tools. Be sure to route the hose away from the catalytic converter and exhaust pipes and reattach the fuel rail bracket.

Step 6 - Check for leaks
Cycle your engine from "Off" to "Run" and listen for the fuel pump and look for leaks. Carefully inspect all of the connections. If anything appears wrong, release the pressure from the lines and check your work. Re-tighten any loose connections and fix any errors.

Related Discussions
- How to disconnect fuel line using specialty clips - Justanswers.com
- How to fix a damaged fuel line - F150online.com
- How to replace fuel hoses - DMV.org