Ford F-150/F-250: How To Replace Emergency Brake
Your emergency brake is more important than you might think. Here is how to replace your emergency brake on your Ford F-150 or Super Duty.
This article applies to the Ford F-150 (2004-2014) and F-250 Super Duty (2005-2014).
If your emergency brake isn’t working properly or is just plain worn out, these aren't hard fixes. This repair will take you the better part of an afternoon. For those who are somewhat mechanically inclined, it should only take an hour or two.

Materials Needed
- 4mm retainer pin
- Brake lubricant
- Socket/wrench set
- Phillips head screwdriver
- Emergency brake kit
- Jack and 2 jack stands
- Tire iron
- Rubber mallet
Step 1 - Prepare the truck
- Block the front wheels so the truck can’t roll in any direction.
- Loosen the lug nuts on the rear wheels.
- Using the jack, raise the rear end of the truck enough to get the jack stand underneath the rear axle, and remove the rear wheel on each side.

(Related Article: How to Change a Tire - Ford-Trucks.com)
Step 2 - Inside the truck
- Place your truck in neutral.
- Remove left A-pillar lower trim panel (pull back and it will unclip itself).
- Have an assistant pull on the intermediate parking brake cable until the parking brake rotating sector control stops.
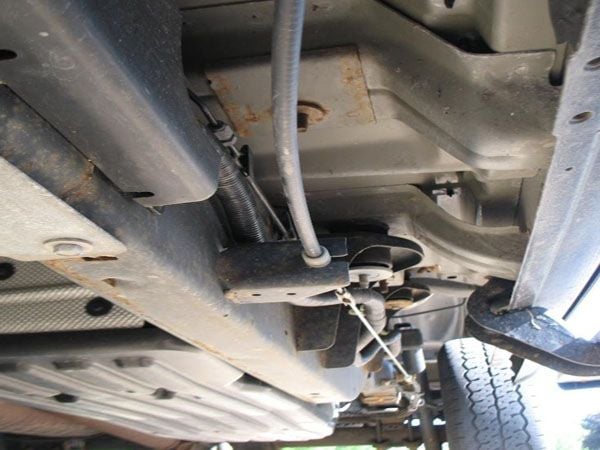
- While the assistant is holding the cable, insert the 4mm retaining pin to release the parking brake cable tension (as shown in Figure 2 below).
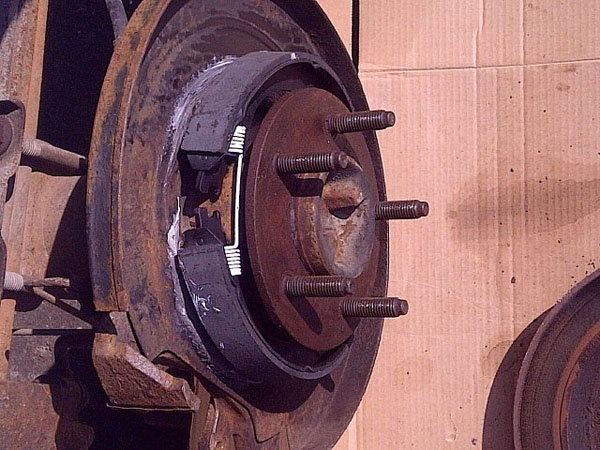
Step 3 - At the rear axle
- Disconnect the parking brake cable at the cable-to-cable union using the proper sized wrench or socket.
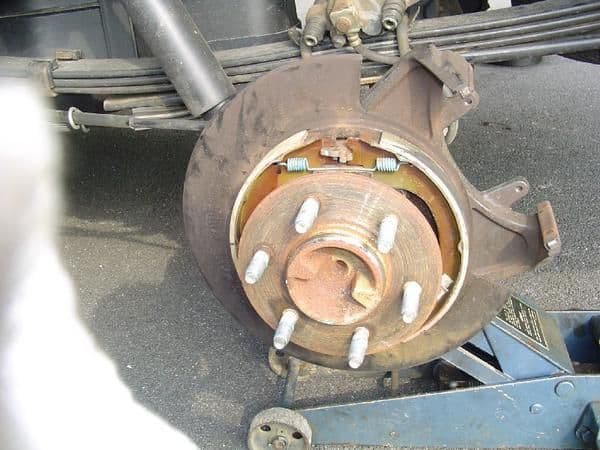
- Remove the rear brake disc.
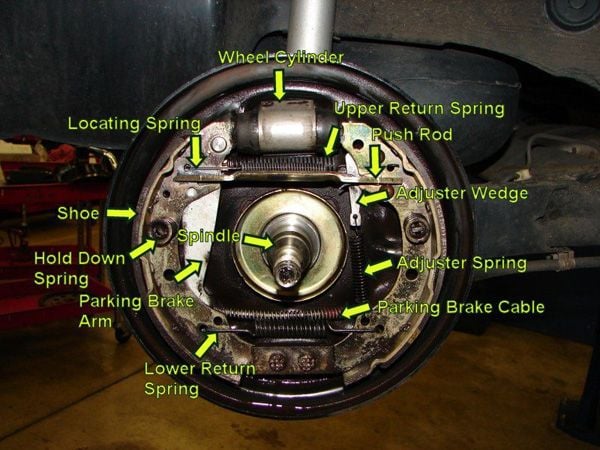
- Remove the brake shoe adjuster screw and brake shoe adjuster screw spring using the Phillips head screwdriver.
- Remove both brake shoe hold down springs, pins, and finally the brake shoe retracting spring.
- Remove the brake shoe.
- Using the brake lubricant, lubricate the new parking brake shoes where they will make contact with the wear pad.
- Install the new shoe and ensure that it is centered on the hub.
Step 4 - Finishing up
- Re-install all removed screws, springs, and pins in the reverse order they came off.
- Using the emergency brake shoe adjuster wheel, adjust the parking brake shoe clearance to .66mm.
- Repeat process for the opposite side of the truck.
- Reattach parking brake cables at the cable-to-cable unions.
- Remove the 4mm retaining pin.
- Reinstall the trim panel.
- Reinstall the wheels.
- Test the parking brake to ensure it works. You can test easily by parking on an incline, setting the brake, and then putting the truck in neutral. If there is no roll, the parking brake is set correctly. If the truck rolls, you may need to check the parking brake shoe clearance again.
Related Discussion and Site
- E-Brake Cable - F150forum.com
- Emergency Brake Cables - Ford-Trucks.com