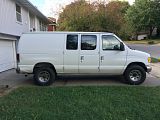
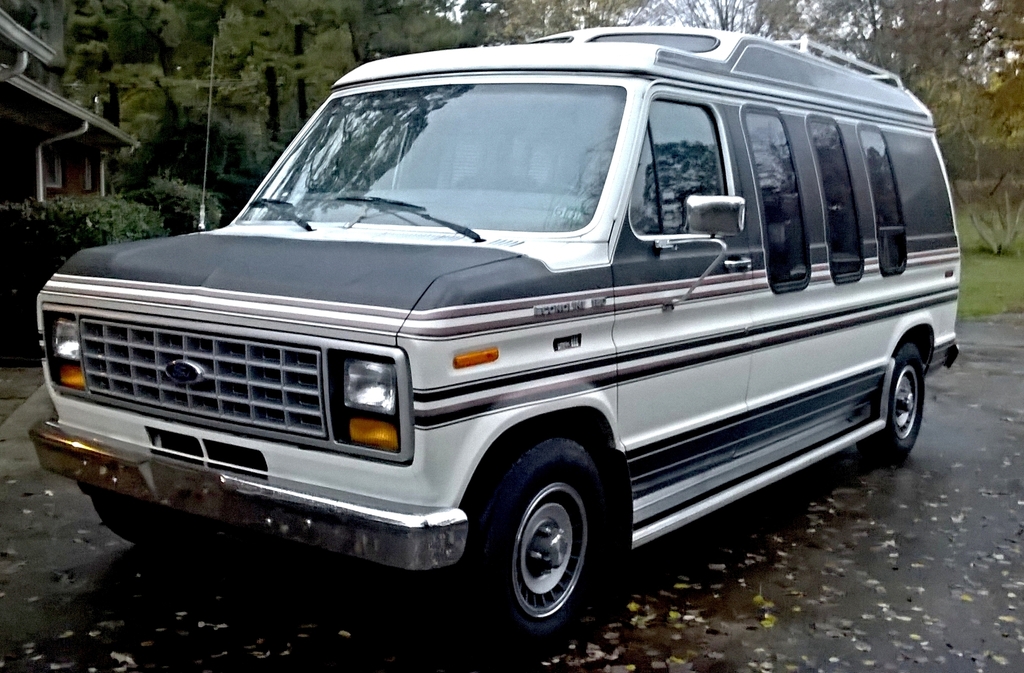
Florida Rain Gutter rust on 95 E350..
#1
 11-17-2016, 08:04 AM


Join Date: Oct 2012
Location: Iowa City
Posts: 150
Likes: 0
Received 0 Likes
on
0 Posts
Florida Rain Gutter rust on 95 E350..
I'm opening up a can of worms here, but I just can't watch rust eat away a van that could run another half million miles with the rebuilt cummins I installed.
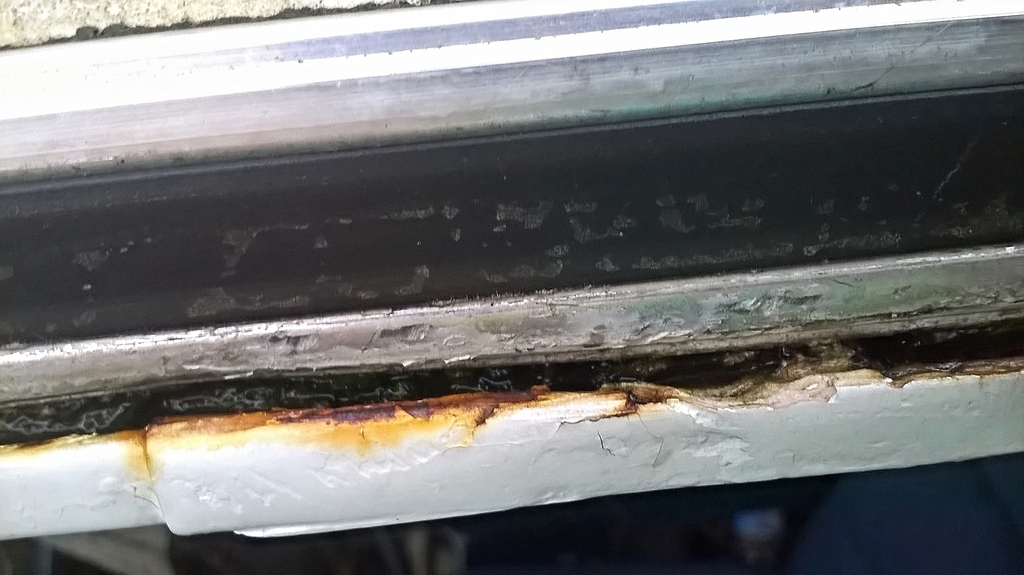
The under carriage is spotless, but my gutter has been repaired and filled by the PO down in Florida and it's starting to pop again. He didn't tell me about this gutter rust until I had flown down from Iowa and was standing there. "I thought everyone knew roofs in Florida rust" he said..
Current plan is to pry out the existing seam sealer with heat and a sharp screw driver and wire wheel the remainder to bare metal, access and repair.
I want to neutralize the rust (which one? Rust Reformer, por-15, OSPHO ) after grinding the old sealer/mud out because the gutter is a pinch point where rust will be hiding where you cant reach it. Then brush primer and paint (again which product) and fill the entire gutter level with 3M 5200 or Vulkem to prevent and shed any standing water. Iv also considered applying 3M extreme sealing tape designed for RV roof penetrations over the entire gutter when done. I'm not worried about a good looking finish as my van is simply a work van built to tow.
I just want it last.
Any additional suggestions on this plan or products to use?
Sorry for all the questions, but I'm not a autobody guy and the internet always raises more questions than gives answers.
Thanks!


#3
11-17-2016, 05:27 PM

#4
11-17-2016, 05:57 PM
i have a similar problem to on my 85 but it is only about a foot or so between the driver door and first rear window.. It too was in FL for part of its life and the PO did a repair there.. On my 88, the rain gutter is so full of calking it is clogged between the high top molding and rain gutter and the water runs down the driver door when parked with the front tilted down.
This is my 85 gutter above the driver door.
If mine rusts apart or gets totaled and the insurance wont pay off, I have a spare,, van that is..
1985

1988
This is my 85 gutter above the driver door.

If mine rusts apart or gets totaled and the insurance wont pay off, I have a spare,, van that is..
1985

1988

#5
11-18-2016, 12:25 PM
Join Date: Oct 2012
Location: Iowa City
Posts: 150
Likes: 0
Received 0 Likes
on
0 Posts
Ya think?

i have a similar problem to on my 85 but it is only about a foot or so between the driver door and first rear window.. It too was in FL for part of its life and the PO did a repair there.. On my 88, the rain gutter is so full of calking it is clogged between the high top molding and rain gutter and the water runs down the driver door when parked with the front tilted down.
Again.. I haven't really had much input regarding "limping" this problem along because anything short of welding in new metal is temporary. But I think something to neutralize the rust. Good primer and paint. And a very flexible seam sealer like Vulkem or a caulk Iv used outside on my house windows that has held up over ten years and never fully dries called geocel, leveled flat might work for another 10 years.

But I can say dont use silicone, because its difficult to remove and wont stick to itself after cured.
Rust in Gutters - Page 3 - Sportsmobile Forum
Some bad surface rust on the roof rain gutters - Page 2 - DodgeTalk : Dodge Car Forums, Dodge Truck Forums and Ram Forums
https://www.ford-trucks.com/forums/1...st-repair.html
#7
11-18-2016, 02:16 PM
Thanks for the links, very informative.. here are some I came across that you may not have seen yet. Just an array of different issues and fixes.
I don�t know what I will find with mine. Perhaps one advantage is mine has a high top and i was thinking to remove and re-seal it. The aluminum trim that goes around the top might hide any repairs. Without the hightop, it seems to me that it would be more work as you would have to finish it much better.
I guess the first step after doing some research is to actually clean the areas and see just what you are dealing with. In my case I will have to remove the interior so see what it looks under it.
Is your interior open or just a headliner?
Drip Rail Rain Gutter Reseal Repair
https://www.ford-trucks.com/forums/1...al-repair.html
I was just searching around and came across this site
1956 Ford F100 Panel Truck Build (dial up warning) ? How to Paint Your Own Car, Auto Body Discussion Forum & Videos ? AutoBody101.com
Which gave a link to
MetalMeet
MetalMeet - for Metalshaping Enthusiasts & Professional Metalshapers
Which you have to register to view but seems they know allot about restoring and making their own parts..
This guy goes way into the repair here making his own parts for the roof and gutter repair but had equipment to do it with
Tri-five Wagon Roof repair - ChevyTalk - FREE Restoration and Repair Help for your Chevrolet
There are also many different types of drip rails on the marker that you might be able to use.
do a goggle search for (drip rail gutter). There is plastic, aluminum , and steel. Perhaps something you could make work and look acceptable.
There is also some decent videos about �shaving drip rails�, �seam sealing drip rails�.
Trending Topics
#8
11-18-2016, 02:36 PM

Not to suggest any repair other than sandblast completely, treat the bare area with Ospho and a flexible body sealer, I have none. I will comment on the seller's comment about roof rust in FL. Any vehicle that gets a nightly or daily bath of salt air ( been anywhere near the coast) is subject to rust from the top down. If you can keep the vehicle garaged after the repair, the life will be extended greatly.
Let us know of the resolve.
Let us know of the resolve.
#9
11-18-2016, 05:56 PM
From what I have read on this, and what my tentative plan is.....
Remove all the old sealant and strip the area down to bare metal by either sandblasting or a wire wheel on a grinder. Use fiberglass patch, not normal Bondo, to repair any areas that look questionable. Seal with a few coats of good paint and fill the gutter with seal sealer. Not sure if it is better to paint, then fill with seam sealer and then add a few more coats or to fill it with seam sealer first and then cover with multiple coats of paint. Not sure how the seam sealer would adhere to a painted surface. This is important because you don't want water getting behind the sealer.
A lot of silicon is not good to use on metal because, depending on the type, it can release and acid when curing which would add to corrosion.
Of course, this is just from what I have read and I could be wrong.
#10
11-18-2016, 06:31 PM
I agree with Jayro88 one hundred....but as far as the OP .This is what I think........You are on the right track....do what you need to get down to solid chit............use Butlyl caulk ( it is synthetic rubber in a tube ) In Canada it is called Dymonic /Copperlastic /Tremco and a few more...........I recomend Installing POR 15....then regular approach which is prime /fill / prime / Wet sand / Final prime / Paint.....
#11
11-18-2016, 08:33 PM
I to agree with Jayro88. you have to get all the rust off that you can and treat with Ospho or other rust converter then go from there..
Below are some videos that might help out with advice...
I kind of liked the idea of just removing the drip rails but don’t know what problems that might create. In some cases it might be easier to cut the drip rail off, remove and treat any left behind rust areas, repair th3e area and then add new drip rails fastened to the outside..
seam sealer before primer according to this guy. He may be using direct to metal seam sealer
here is 3m video and they state to prime unless suing direct to metal sealer.
Preparing and Applying Seam Sealer to Roof Ditch
interesting drip rail to think about depending on how much of yours you need to remove and repair. In my case the upper lip would fit under the high top moulding. It also looks like it will bend around corners.
This guy removed his drip rail. many others do too. I don’t know what it would do to a van if you just removed the drip rail, welded the edges, then smooth them off for paint.
Here is another guy who just cuts the drip well off..
#12
11-18-2016, 09:31 PM

More Turbo
#13
11-19-2016, 01:08 PM
Join Date: Oct 2012
Location: Iowa City
Posts: 150
Likes: 0
Received 0 Likes
on
0 Posts
Not much. As long as I can postpone the inevitable.
I have a custom insulated vinyl interior with no fasteners showing, so its probably glued or double stick tape or something I cant reinstall.
I thought the top of the gutter was crimped over the roof panel but after removing the seam sealer, I'm wrong. I'm not sure how the roof is connected to the sides.
Thanks raytasch.
We have a sand blaster at my work. But how would you protect the paint on the side and top that is still good though?
Is fiberglass body filler flexible?
The van was from Florida and why it's spotless underneath. Now it's in Iowa and I have a 7' garage door. I bought some junk rims and tires so I can air down and get it under the door for repair.
Agreed. I'm also unsure on the order. Prime and paint first, seam sealer first? Prime first and then sealer then paint? lol
Thanks for that extra info on silicone. It just reaffirms silicone is the cheapest and the worst crap to use. The only place I still hear people suggesting it is on shower and bath enclosure corners. But I still disagree because its practically impossible to completely remove and it wont stick to itself.
Thanks blageurt.
Butlyl huh? Is that because its easily removed and stays soft? I used Butlyl tape all over my toyhauler, but it was always pinched between two surfaces. On the aluminum roof seam I used Proflex by geocel with good results, but I didn't own the hauler long enough to know how long the proflex really lasts.
The more I research which caulk to use, the more I'm leaning toward Geocel 2300. Also read solarseal, 3M4200, NP1 , Vulkem 116 , Sika Flex, Dymonic, but not so much 3M probably because of the price.
Geocel 2300 stays flexible and pliable in all kinds of temperature extremes, resists any type moisture and isn't as prone to UV degradation over time.
Agreed. Seam sealer hardens and is designed to be painted over. I don't need shinny paint. I need something that stays soft and lasts for 10 years or more.
So the order of operation is fairly clear for me.. Its the products I will use that are difficult to decided on. Por 15 is good as long as you use the Por 15 metal prep because it both neutralize any rust and etch any clean bare metal.
I guess it will take more research or asking stupid "whats the best" questions. But I'm betting metal roofing forums will be the best place to research and ask.
Thanks everyone.
I thought the top of the gutter was crimped over the roof panel but after removing the seam sealer, I'm wrong. I'm not sure how the roof is connected to the sides.
Sandblast completely, treat the bare area with Ospho and a flexible body sealer. I will comment on the seller's comment about roof rust in FL. Any vehicle that gets a nightly or daily bath of salt air ( been anywhere near the coast) is subject to rust from the top down. If you can keep the vehicle garaged after the repair, the life will be extended greatly.
Let us know of the resolve.
Let us know of the resolve.
We have a sand blaster at my work. But how would you protect the paint on the side and top that is still good though?
Is fiberglass body filler flexible?
The van was from Florida and why it's spotless underneath. Now it's in Iowa and I have a 7' garage door. I bought some junk rims and tires so I can air down and get it under the door for repair.
What my tentative plan is.....
Remove all the old sealant and strip the area down to bare metal by either sandblasting or a wire wheel on a grinder. Use fiberglass patch, not normal Bondo, to repair any areas that look questionable. Seal with a few coats of good paint and fill the gutter with seal sealer. Not sure if it is better to paint, then fill with seam sealer and then add a few more coats or to fill it with seam sealer first and then cover with multiple coats of paint. Not sure how the seam sealer would adhere to a painted surface. This is important because you don't want water getting behind the sealer.
A lot of silicon is not good to use on metal because, depending on the type, it can release and acid when curing which would add to corrosion.
Thanks for that extra info on silicone. It just reaffirms silicone is the cheapest and the worst crap to use. The only place I still hear people suggesting it is on shower and bath enclosure corners. But I still disagree because its practically impossible to completely remove and it wont stick to itself.
As far as the OP .This is what I think........You are on the right track....do what you need to get down to solid chit............use Butlyl caulk ( it is synthetic rubber in a tube ) In Canada it is called Dymonic /Copperlastic /Tremco and a few more...........I recommend Installing POR 15....then regular approach which is prime /fill / prime / Wet sand / Final prime / Paint.....
Butlyl huh? Is that because its easily removed and stays soft? I used Butlyl tape all over my toyhauler, but it was always pinched between two surfaces. On the aluminum roof seam I used Proflex by geocel with good results, but I didn't own the hauler long enough to know how long the proflex really lasts.
The more I research which caulk to use, the more I'm leaning toward Geocel 2300. Also read solarseal, 3M4200, NP1 , Vulkem 116 , Sika Flex, Dymonic, but not so much 3M probably because of the price.
Geocel 2300 stays flexible and pliable in all kinds of temperature extremes, resists any type moisture and isn't as prone to UV degradation over time.
So the order of operation is fairly clear for me.. Its the products I will use that are difficult to decided on. Por 15 is good as long as you use the Por 15 metal prep because it both neutralize any rust and etch any clean bare metal.
I guess it will take more research or asking stupid "whats the best" questions. But I'm betting metal roofing forums will be the best place to research and ask.
Thanks everyone.
#15
11-23-2016, 08:42 PM

I'm a big fan of the POR-15 products. Check out a product of theirs called POR patch. It's basically a thicker version of POR-15 and works great in rain gutters. It works a whole lot better then regular seam sealer. It cures hard but still stays flexible. POR-15 is some tough stuff.
POR-15� POR Patch
Use POR Patch and POR-15 on them and you shouldn't have any more issues for a long time. I'm going to be doing this on the rain gutters on my 89 E350.
And if you have any bigger holes they have some two part epoxy putty that works great. I'm going to be using this on my van too. I've got some rust holes starting at the top corners of my windshield post. And I don't want to remove the windshield and headliner to cut out the area and weld in patches. My van is going to be a work van/daily driver not a show vehicle.
POR-15 also has some fiberglass cloth that you use with POR-15 instead of resin if the holes are too big for the putty.
The POR-15 stuff isn't the cheapest but I like the results I get with it.