Injector Removal w/ pics
#1
 06-13-2010, 12:29 PM

Join Date: Sep 2007
Posts: 198
Likes: 0
Received 0 Likes
on
0 Posts
Injector Removal w/ pics
Ok so this is my first try at a write up with pics. Feel free to add anything I missed or an easier way to do something.
So to start, I would suggest have a pair of ratchet wrenches. They will make the job alot easier. And maybe a swivel joint for 1/4" and 3/8".
Start by taking the two 8mm bolts out of the top of the overflow bottle on the drivers side. Move the bottle to disconnect the two have inch lines on the front and side, and the 1" hose on bottom. Them loosen the hose clamp in the middle of the air intake. This makes removal of the air filter housing easier. Be sure to unplug the sensor on top and there is a small one on bottom of the intake tube as well. Then loosen the hose clamp at the turbo and remove the other portion of the intake tube.
Move to the passenger side and remove the boost tube to the intercooler by loosening the 11mm nut on the banjo clamp on top and bottom. Then remove the inner passenger fender well by removing the 4 7/32" bolts on the outer lip of the fender well and the 3 12mm nuts just above the shock tower. Then there are two 10mm bolts with big washers holding the well to the frame. Once those are all removed, take the fender well out. This allows easier access to the back of the head.
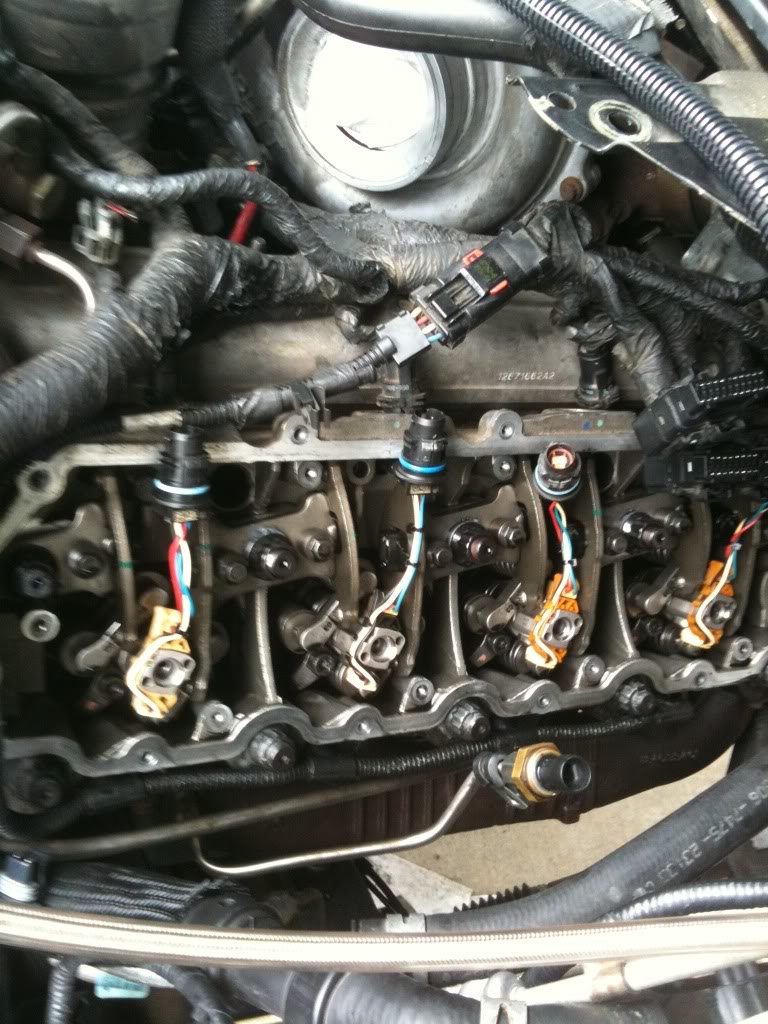
The module on top of the passenger cover has 4 10mm nuts holding it to the valve cover bolts. If your lucky, the valve cover bolt will come out to, saving time. After the module is removed, remove the 12mm bolts holding down the valve cover. There is one hiding on the very back next to the lifting ring on the head. The fender well creates easy access to it and a few more on the bottom. Remove the fill tube by unscrewing it. Unplug the sensor going through the valve cover and now your ready to take it off. It will be easier to disconnect the 3/4 or 1" heAter hose directly above it and zip tying it out of the way. It's a tight spot, but lift it up, and try to slide it forward t get the front past the alternator. Then it should lift out. For the drivers side, 4 10 mm nuts hold down the module and then it can be removed. The mounting brackets are held down by the same 10mm nuts connected to the valve cover bolts. Once removed. Put tape on them to mark the front or back bracket. Then remove the 12mm bolts holding the cover down and it should just lift off. Remove both gaskets as well. I believe they are reusable.
Next is the oil rail. Let me tell you the passenger side is a biotch. There are 9 torx 30 bolts holding it down.
for the few at the back of the head, use the inner fender well. There are two on the bottom of the rail they are really hard to get to. I used this
along with a 1/4" wrench to loosen them. The rest I used a socket with the T-30 on it and a swivel joint. On the back portion of the oil rail is an 8 mm Allen wrench nut that needs to be removed in order to get it out. It's an oil tube going into the head. It's two pieces like this.
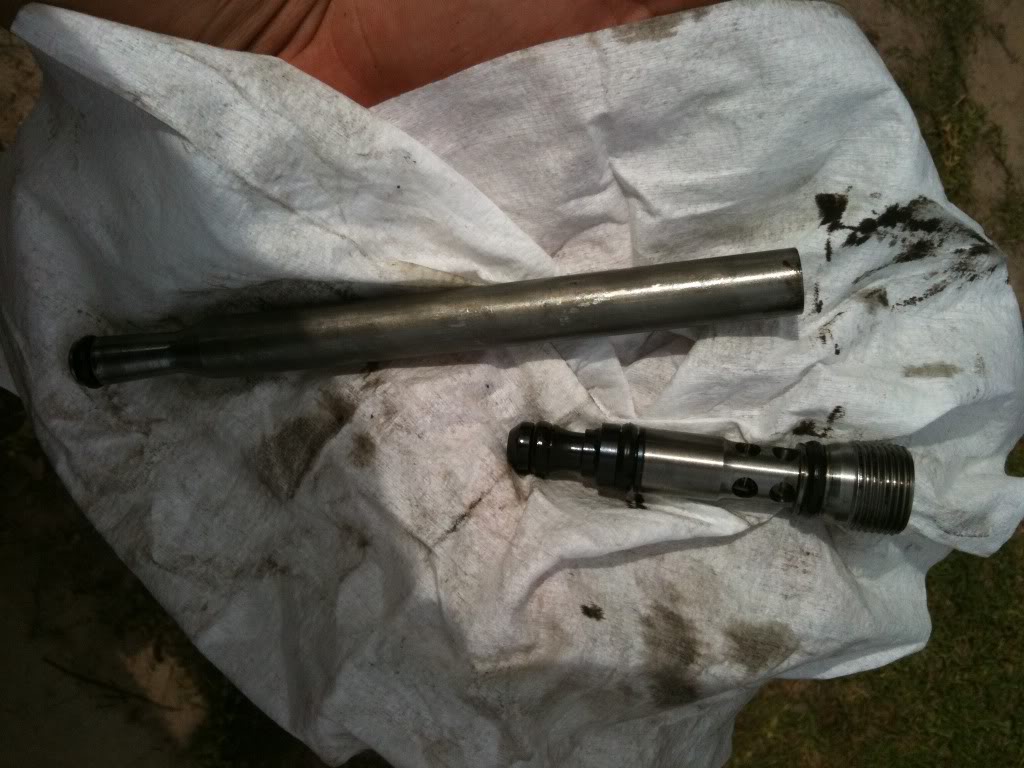
seperate the two pieces and the rail should come out. Then remove the other half of the tube. Now the tops of the injectors are visible. Removethe drivers side oil rail as well. It has 9 T-30 bolts as well. Although alot easier to get to. It has the oil tube on the back portion as well, but it can come out in one piece.
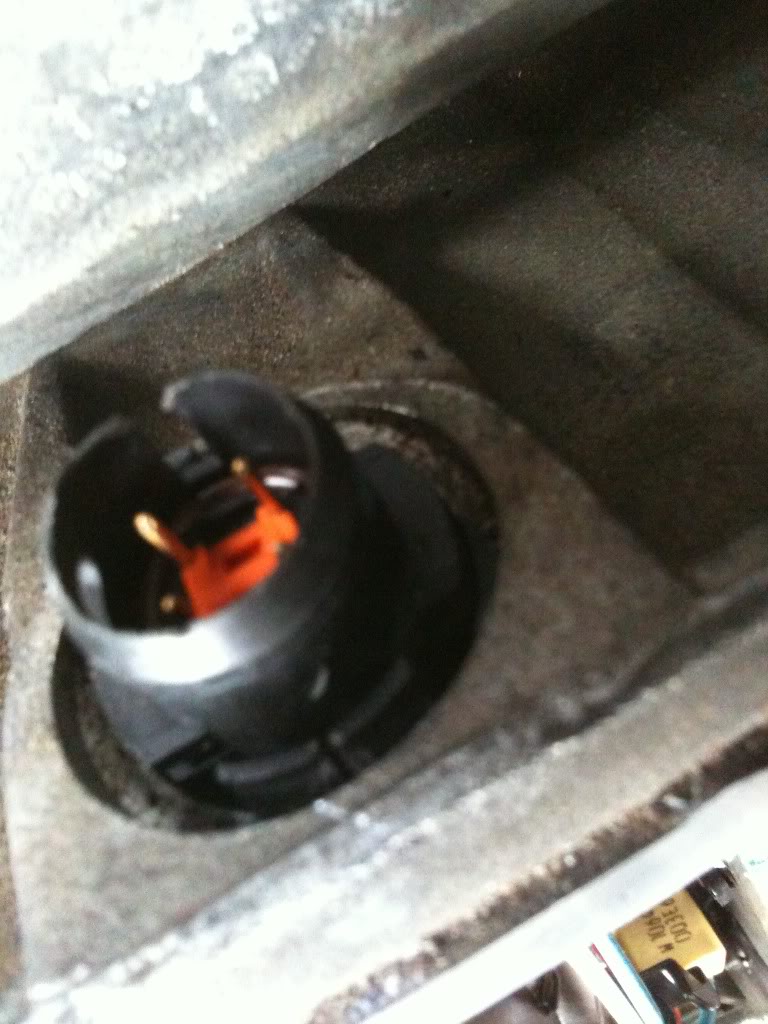
now the injectors have plugs going into the tops of the heads. There are 4 per side. Remove the keeper pins with either needle nose or a flat head to pry the pin out. DO NOT DROP THE PINS. Hold onto them with your life.
now the top of the plug should just slide off.
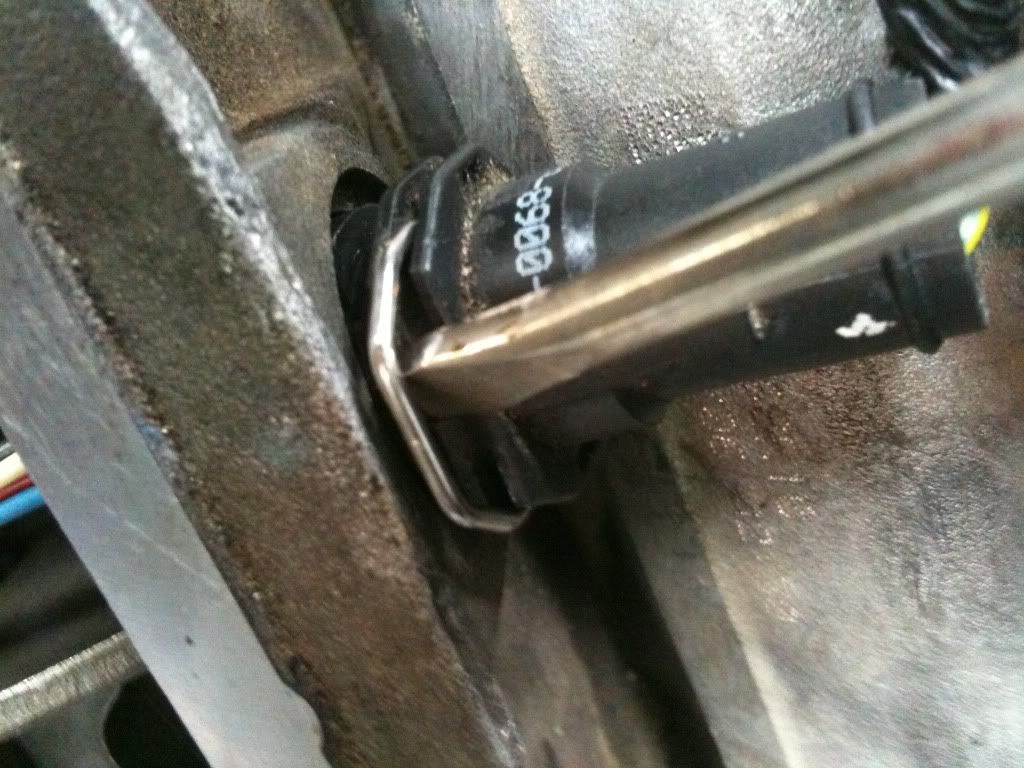
This is the remainder of the plug.
The plug that is snapped into the head requires a 19mm 12pt socket to remove. Just set it down like so
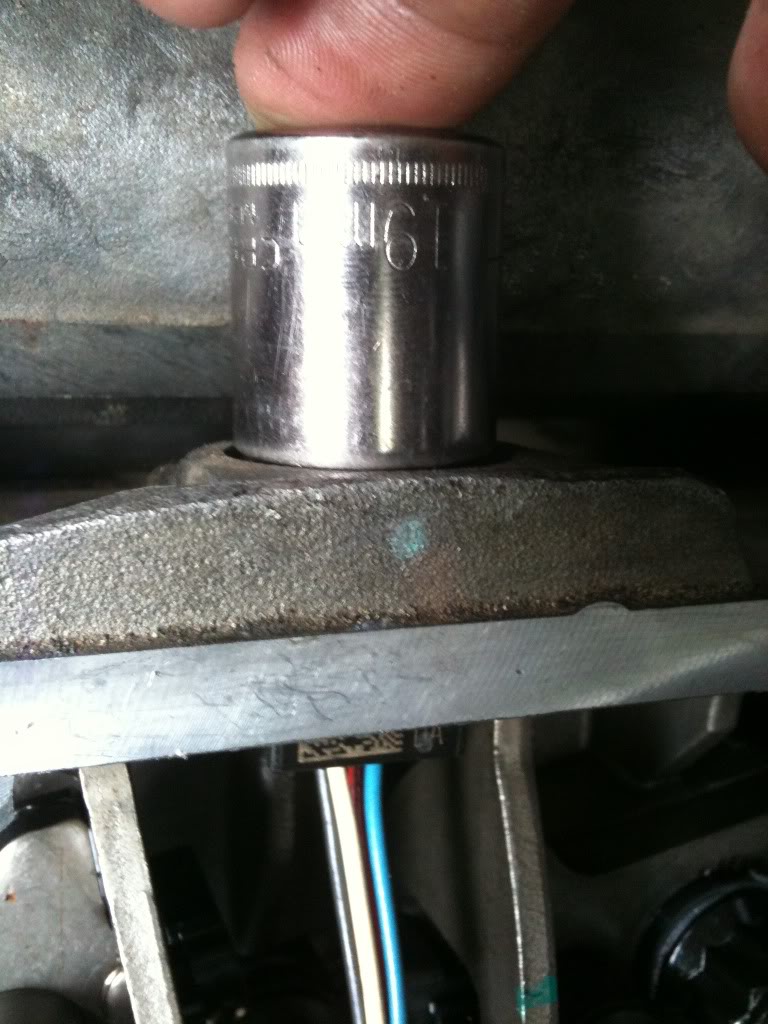
and gently pull the injector plug down while pushing it with the socket.
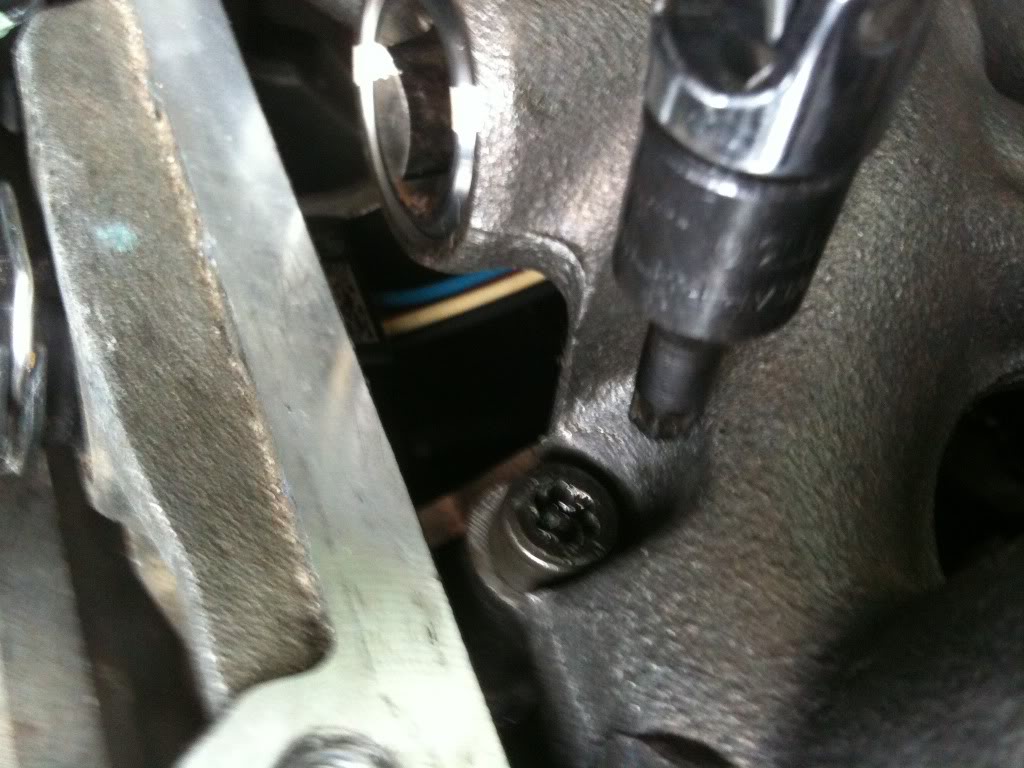
now the injectors are held down by a T-45 bolt on the bottom left of eac injector.
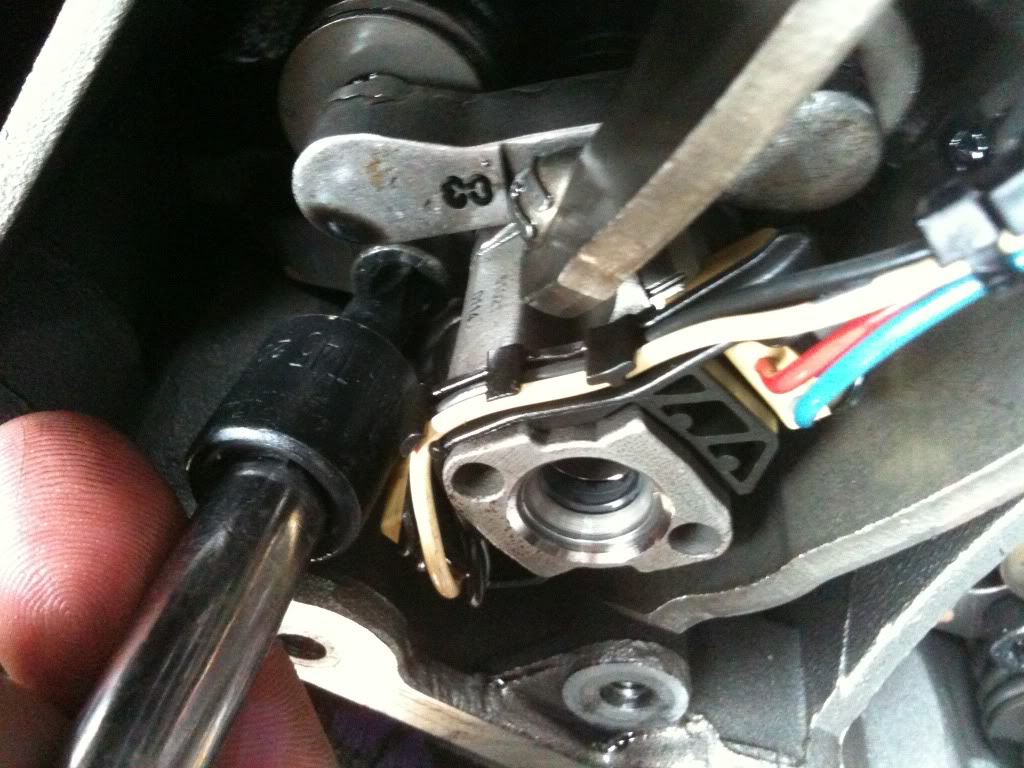
This bolt is held into the hold down collar, so just hold the hold down the collar while you gently slide the injector out.
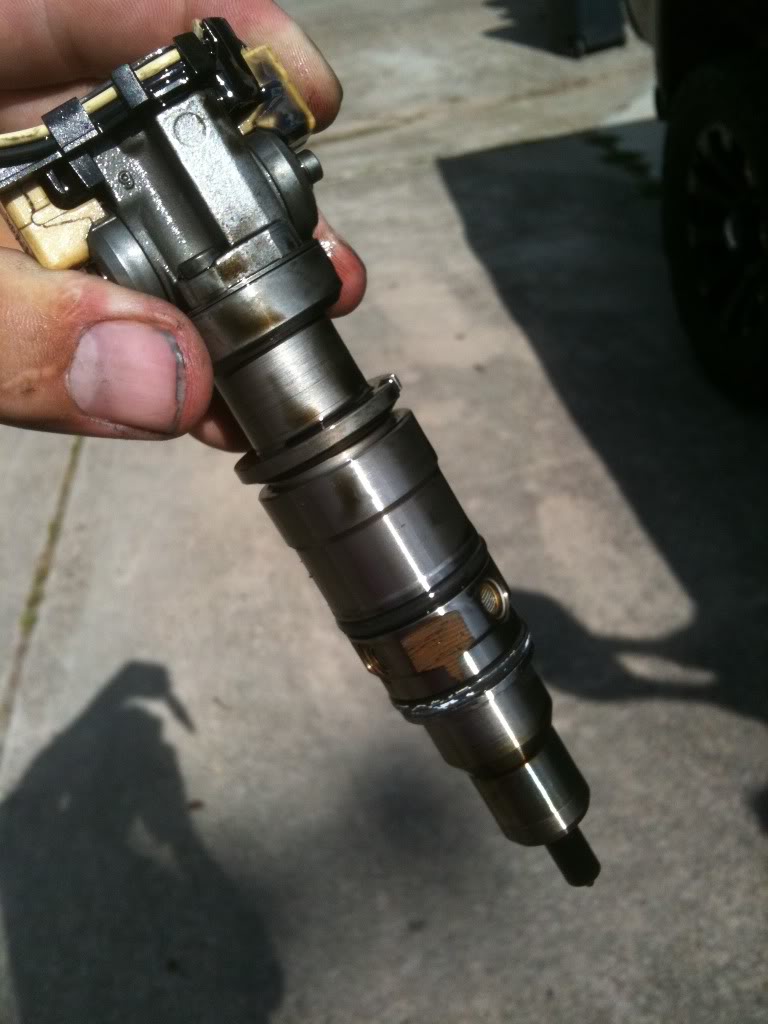
The end result is
So to start, I would suggest have a pair of ratchet wrenches. They will make the job alot easier. And maybe a swivel joint for 1/4" and 3/8".
Start by taking the two 8mm bolts out of the top of the overflow bottle on the drivers side. Move the bottle to disconnect the two have inch lines on the front and side, and the 1" hose on bottom. Them loosen the hose clamp in the middle of the air intake. This makes removal of the air filter housing easier. Be sure to unplug the sensor on top and there is a small one on bottom of the intake tube as well. Then loosen the hose clamp at the turbo and remove the other portion of the intake tube.
Move to the passenger side and remove the boost tube to the intercooler by loosening the 11mm nut on the banjo clamp on top and bottom. Then remove the inner passenger fender well by removing the 4 7/32" bolts on the outer lip of the fender well and the 3 12mm nuts just above the shock tower. Then there are two 10mm bolts with big washers holding the well to the frame. Once those are all removed, take the fender well out. This allows easier access to the back of the head.
The module on top of the passenger cover has 4 10mm nuts holding it to the valve cover bolts. If your lucky, the valve cover bolt will come out to, saving time. After the module is removed, remove the 12mm bolts holding down the valve cover. There is one hiding on the very back next to the lifting ring on the head. The fender well creates easy access to it and a few more on the bottom. Remove the fill tube by unscrewing it. Unplug the sensor going through the valve cover and now your ready to take it off. It will be easier to disconnect the 3/4 or 1" heAter hose directly above it and zip tying it out of the way. It's a tight spot, but lift it up, and try to slide it forward t get the front past the alternator. Then it should lift out. For the drivers side, 4 10 mm nuts hold down the module and then it can be removed. The mounting brackets are held down by the same 10mm nuts connected to the valve cover bolts. Once removed. Put tape on them to mark the front or back bracket. Then remove the 12mm bolts holding the cover down and it should just lift off. Remove both gaskets as well. I believe they are reusable.
Next is the oil rail. Let me tell you the passenger side is a biotch. There are 9 torx 30 bolts holding it down.
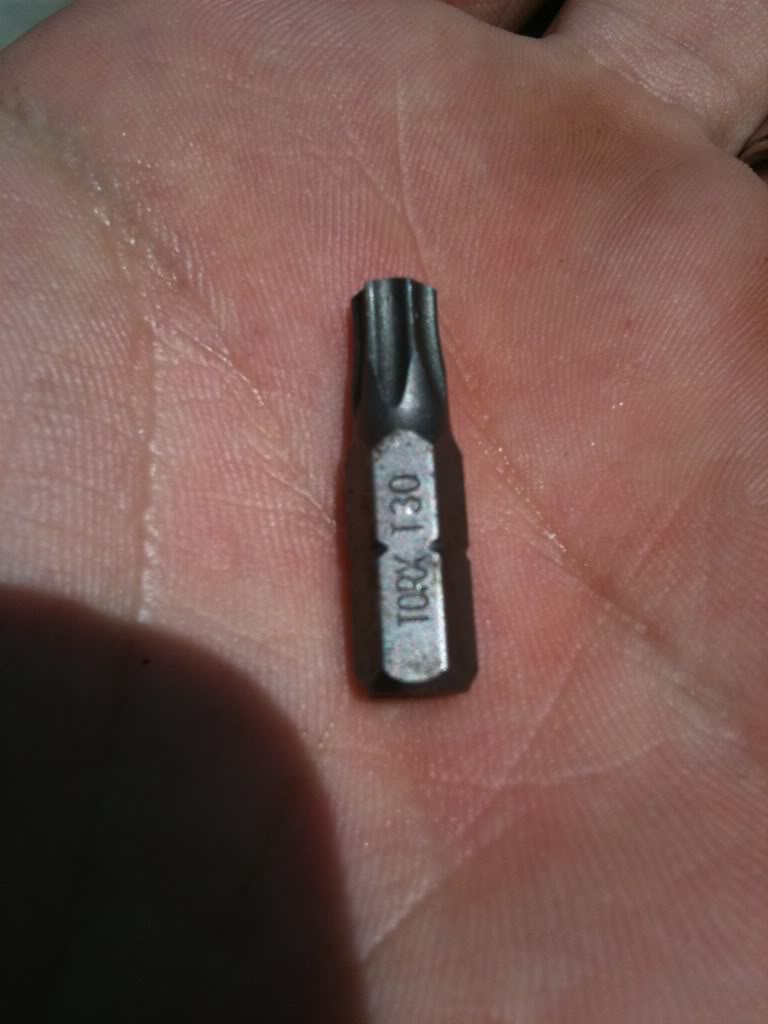
for the few at the back of the head, use the inner fender well. There are two on the bottom of the rail they are really hard to get to. I used this
along with a 1/4" wrench to loosen them. The rest I used a socket with the T-30 on it and a swivel joint. On the back portion of the oil rail is an 8 mm Allen wrench nut that needs to be removed in order to get it out. It's an oil tube going into the head. It's two pieces like this.
seperate the two pieces and the rail should come out. Then remove the other half of the tube. Now the tops of the injectors are visible. Removethe drivers side oil rail as well. It has 9 T-30 bolts as well. Although alot easier to get to. It has the oil tube on the back portion as well, but it can come out in one piece.
now the injectors have plugs going into the tops of the heads. There are 4 per side. Remove the keeper pins with either needle nose or a flat head to pry the pin out. DO NOT DROP THE PINS. Hold onto them with your life.
now the top of the plug should just slide off.
This is the remainder of the plug.
The plug that is snapped into the head requires a 19mm 12pt socket to remove. Just set it down like so
and gently pull the injector plug down while pushing it with the socket.
now the injectors are held down by a T-45 bolt on the bottom left of eac injector.
This bolt is held into the hold down collar, so just hold the hold down the collar while you gently slide the injector out.
The end result is
Last edited by jwheatley20; 06-13-2010 at 02:10 PM. Reason: Spelling

#3
06-13-2010, 01:33 PM

great pics,
with that said, look at how you are removing the injector clips. they push in and not pull out. if you put the screwdriver in the grove and lean it on to the clip so the clips is forced farther in to the connector then pull up it will release the hardshell.
I need to take a pic and post it up.
none the less reps for the good pics.
#5
06-13-2010, 01:41 PM
Post Fiend
#6
06-13-2010, 01:50 PM
Posting Guru
#7
06-13-2010, 02:00 PM

Trending Topics
#8
06-13-2010, 02:08 PM
Join Date: Sep 2007
Posts: 198
Likes: 0
Received 0 Likes
on
0 Posts
Lol no, i wish it were a new motor. I was forced to do it in the truck.
And the reason for the upgrade was 4 injector spool valves were stuck/ bad. And the lift pump went out. So I just upgraded instead of letting the dealership put back in the weak ford injectors.
And bismic, I see what ur saying. It is easier to just push them in. You don't have to worry about dropping them like I did lol. Thank God for the flexible magne with l.e.d light and the small flexible mirrors lol.
#9
06-13-2010, 02:15 PM


#10
06-13-2010, 03:47 PM
I hate to bust your bubble here, but there is only ONE manufacturer in the WORLD for these injectors. Siemens. RCD can't do anything special that any other rebuilder can do. The spool valves are identical on every one. The only differences between what the different rebuilders do are the nozzles and what they do to increase the size of the barrels so they will hold and inject more fuel.
#11
06-13-2010, 05:58 PM
Join Date: Sep 2007
Posts: 198
Likes: 0
Received 0 Likes
on
0 Posts
Well the factory injectors are weak with a programmer is what I meant. programmers put out to much fuel for the stock tubes I assume? I know RCD doesn't do anything special as the injectors I got back were my original ones. They were out of cores so I had to send mine. They looked exactly the same, so that told me they only upgraded/enlarged the internals.
The new injectors already had new o-rings installed.
I can do the re-assembly write up when I take it apart to make sure everything is still tight. A ghost in my head keeps teling me I forgot to tighten something. Even though I triple checked everything lol.
The new injectors already had new o-rings installed.
I can do the re-assembly write up when I take it apart to make sure everything is still tight. A ghost in my head keeps teling me I forgot to tighten something. Even though I triple checked everything lol.
Last edited by jwheatley20; 06-13-2010 at 05:59 PM. Reason: Spelling
#13
06-13-2010, 06:08 PM
#14
06-13-2010, 06:36 PM
Join Date: Sep 2007
Posts: 198
Likes: 0
Received 0 Likes
on
0 Posts

Thread
Thread Starter
Forum
Replies
Last Post
79F150/F600
1987 - 1996 F150 & Larger F-Series Trucks
64
11-25-2015 12:33 AM
F150xlt
1980 - 1986 Bullnose F100, F150 & Larger F-Series Trucks
16
07-23-2011 12:39 PM
JoeG
1987 - 1996 F150 & Larger F-Series Trucks
19
04-13-2010 07:23 AM