I wanted to add a navigation unit to my expedition and I preferred the stock look in the dash. I reeaaaally considered going aftermarket just for the added benefits and perks of those units but the real deal breaker for me was at the time that I was looking (I actually did this install in June of 2008), there was not a company that made an adapter for the aftermarket HU to work with the rear DVD system (there is one now though). I bought my unit off of ebay for about $900 for the unit, oem antenna, and it was programmed to my vehicle. They can be had cheaper now, but at that time that was about the going rate.
FYI, all 06-08 non-sync Ford/Lincoln/Mercury nav units will work in any of those three makes. The one big deal to look out for is the subwoofer plug. Some of them do not have these plugs, so if you have a sub, be sure to get one with that plug as well. Usually the units have to be programmed to show your vehicle logo(ford, lincoln, etc) at startup, as well as all other things (dvd, sirius, line in, etc). You might get lucky and buy one off of ebay that is programmed for your exact specifications, but usually they have to be programmed. A lot of dealerships cant do this but it is cheaper anyways to send it off to get it done. There is a business on ebay that offers the programming for $85. You send it off and they send it back usually next day. The company name is H&H distributors. The guys there are very helpful. I was going to use them for my programming but I bought mine from a dealership on ebay that offered the programming. I actually was able to get an 06 unit so that i had the MUTE button that worked and not a dummy PHONE button, but he programmer at the dealership changed out the buttons so that I could have the chrome rings from an 08.
1)First of all, I am not responsible for any damage that you may cause your vehicle trying to follow these instructions. Don't blame me, I am just trying to help you out.
2)You are supposed to disconnect the negative battery terminal anytime that you work on your car. I did not but if you are really, really **** about safety then you can go ahead and do that.
3)You are going to have to take off the dash piece that surrounds your factory radio. I have seen posts where people put their thumbs into the cigarette lighter and just pull out.
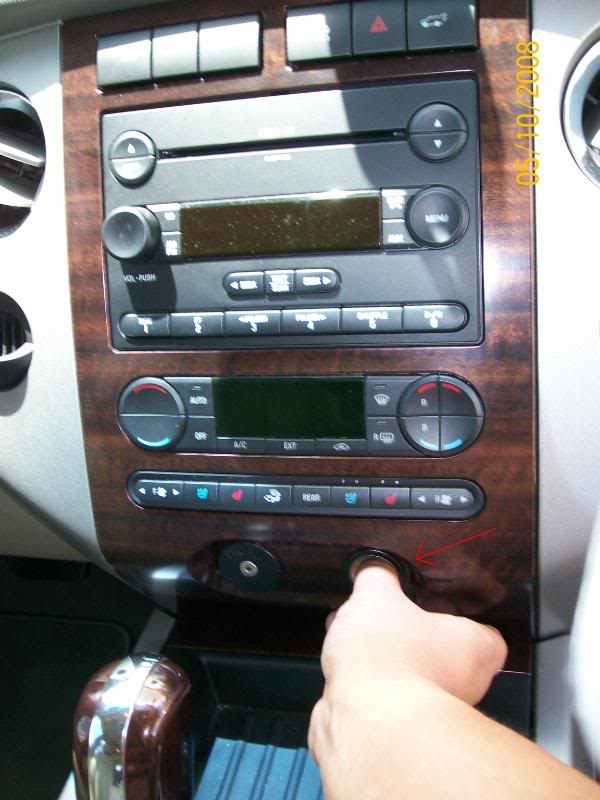
This did not work for me because it felt like it was going to break. I tried another method. I taped off the edges of the dash piece and the dash using painters tape (less residue), be sure ti put the tape down into the crevice between these two pieces as well. I then used a door panel puller and pried the piece off at the 6 clips. This worked much better for me.
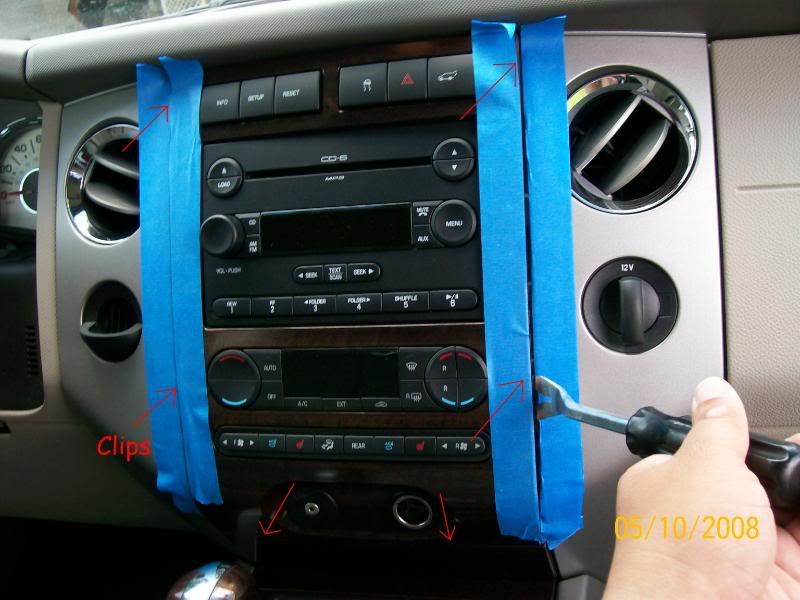
.
I did not take the piece completely off as I could not disconnect the wiring harness that is attached. No big deal though as you can work around it.
4)The radio is bolted in with 4 bolts. I am sorry that I did not document the size, but hopefully you can figure it out

Take out those 4 bolts and it slides right out.
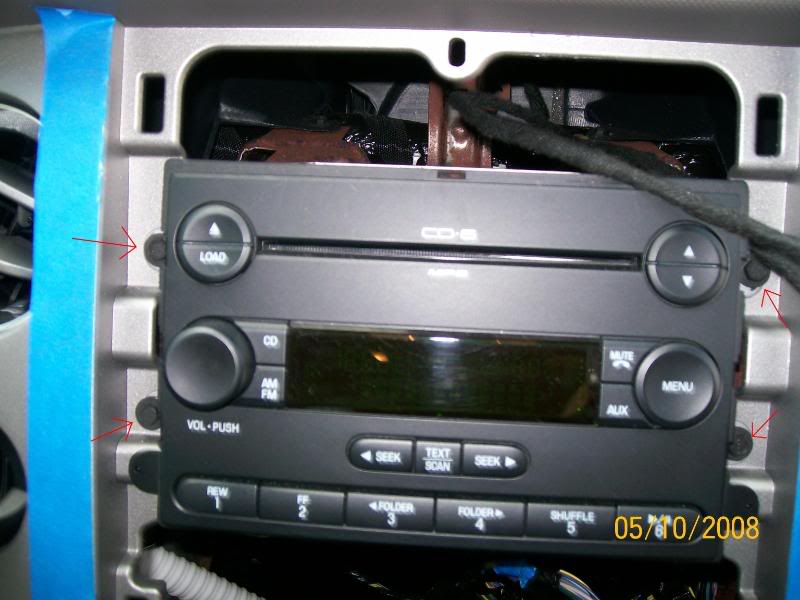
Undo the harnesses from the back and VOILA! You have a big hole in your dash.
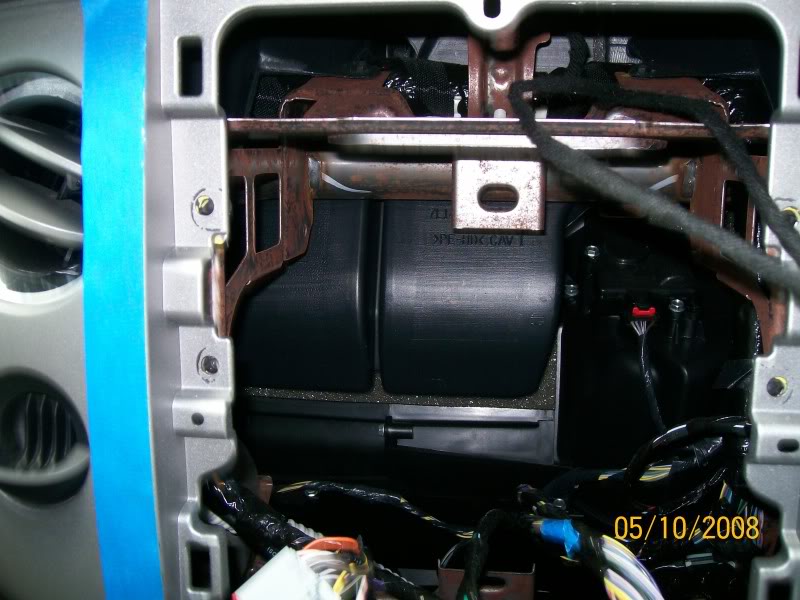
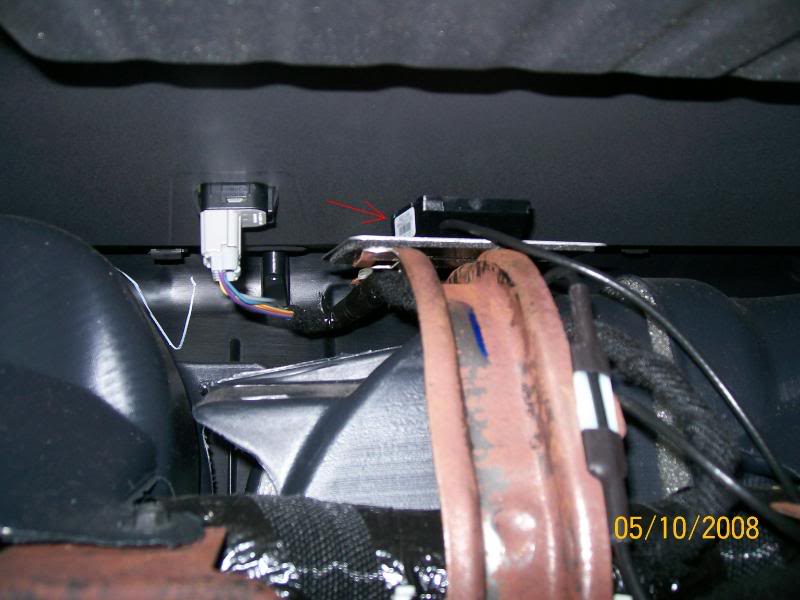
5)Next you have to mount the navigation antenna. This place where I mounted mine is a common place that the F150 guys use. It works great and I have never had a problem. My antenna is an OEM antenna and came with my nav unit. OEM and aftermarket can be found on ebay pretty cheap. They have double sided tape to put anywhere you want. I mounted mine on the big rusty looking bracket that is dead center behind the radio.
6)Time for the new nav unit to go back in. Plug in all of the harnesses that you disconnected from the radio in addition to the nav antenna that you just installed. You should hear a click and/or feel that it is a solid connection. Slide the nav unit in using the alignment tabs.
Bolt down the 4 bolts and it is in. I went ahead and tested it out at this step to make sure that it was getting power and to make sure that my new car was not going to blow up.

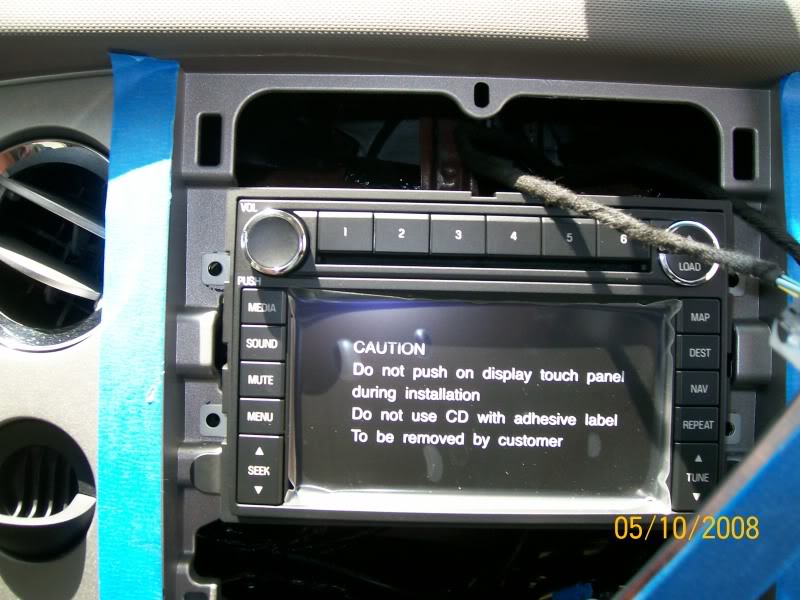
7)It is in and now all that is left is to replace the dash piece. Line it up using the alignment tabs and push it back in where the clips are. Now it is installed! Remove the tape and power up the unit. Install the Nav DVD and it will start an install process. It tells you not to mess with it until it is finished. LISTEN to it. After that, follow the instructions and you are finished.

8)Program your radio stations and enjoy. This install took me about 15-20 minutes and that includes taking about 25 or so pictures. Very easy install.
************************************************** *****
If you want to use the factory nav unit without the driving restrictions, here are the instructions (from wiingnut here on FTE). Use at your own risk. I have done this and it works great.
1. Take vehicle outside and agree to nav instructions. The gps needs to know its position.
2. Push hard nav button (on right side of radio). Go to your address book. Pick any of one of your saved addresses. Now that address is highlighted, look to right and push soft edit button. You will now see name of saved address.
3. Clear name of saved address and type in
F-DEVELOP ON
(make sure to put space between DEVELOP and ON).
4. Now look to the upper left corner and you will see the word ADDRESS. Place your finger directly under the A and hold. If you do this right, the screen should change to the map screen.
5. Now push your hard menu button (on left side of radio). Across top of radio push soft SECURITY button. You have now entered security screen. You will see nothing in the bottom right most corner of nav screen. Push your finger and hold in that position till the screen changes.
6. You now have entered a parameter screen. Locate DRIVING RESTRICTIONS release. When you push the button it should change to driving restrictions stop. Exit the screen by pushing the soft BACK button.
7. Congrats you have just programmed your factory nav radio.
NOTE: Every time you turn your vehicle off, you will need to repeat steps 5 & 6.
Good luck and enjoy.
If you choose to monkey around with your other parameters, do so at your own risk. I will not be responsible for your dealer service call. If you have any further questions, please pm me and I will do my best to help. This programming sequence should work for only the so called first generation navs. It will not work in the MY09, second generation. This has been used to reprogram many MY 07 and MY 08 Ford vehicles.
************************************************** ************
Stay tuned: My next mod will be installing a lockpick and OEM reverse camera that displays on the navigation unit.