
Interior Green to Blue LED "how-to" w/pics
#1
 09-22-2010, 03:23 PM

Join Date: Nov 2009
Location: Tampa, FL
Posts: 230
Likes: 0
Received 0 Likes
on
0 Posts
Interior Green to Blue LED "how-to" w/pics
Hey all, as promised here is the write up w pics on how to change over your interior OEM green color backlighting to an exciting bright new blue! For the door panels Im using a radio shack item 276-0013
Rectangular High-Brightness Blue LED Lamp - RadioShack.com
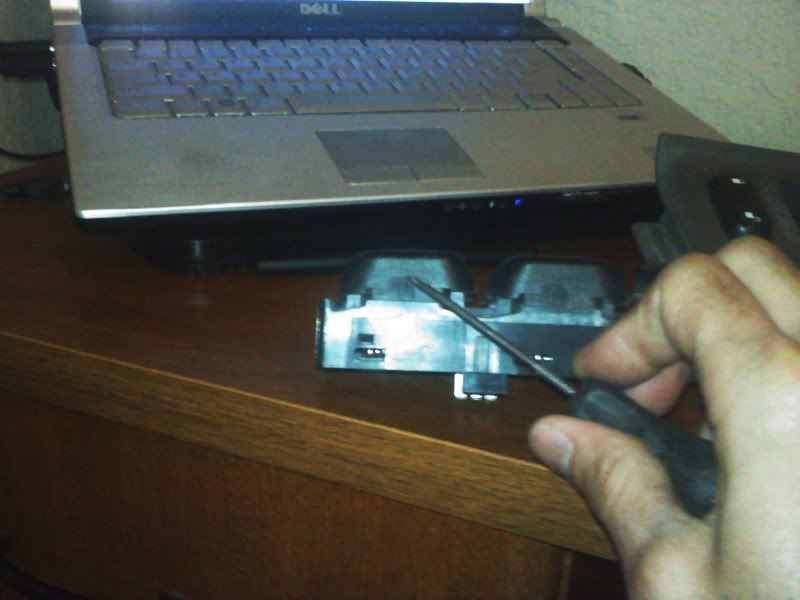
Remove your door button cluster and bring it on inside.
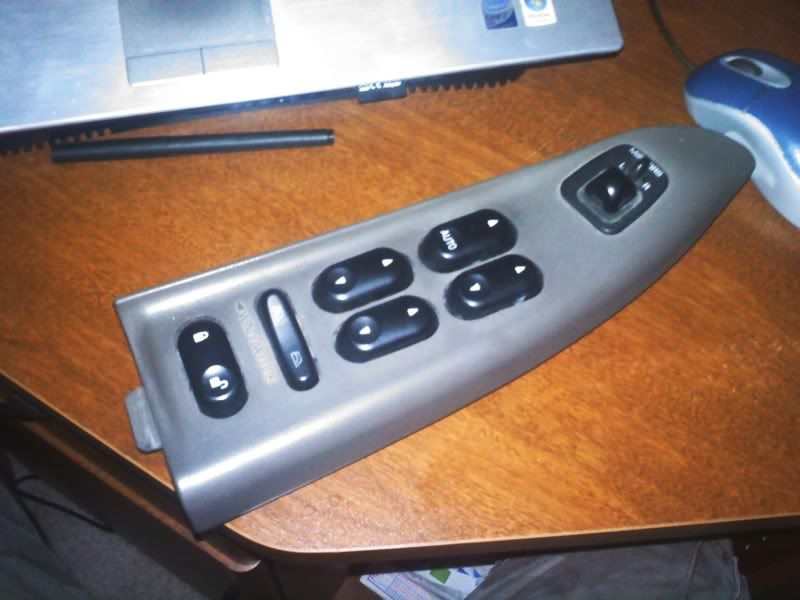
On the backside you will find little clips holding in the button assemblys themselves. With either a pick or small screwdrivers, just gently spread the housing to release both sides. Might take a little patients and wiggling but it comes out fairly easy.
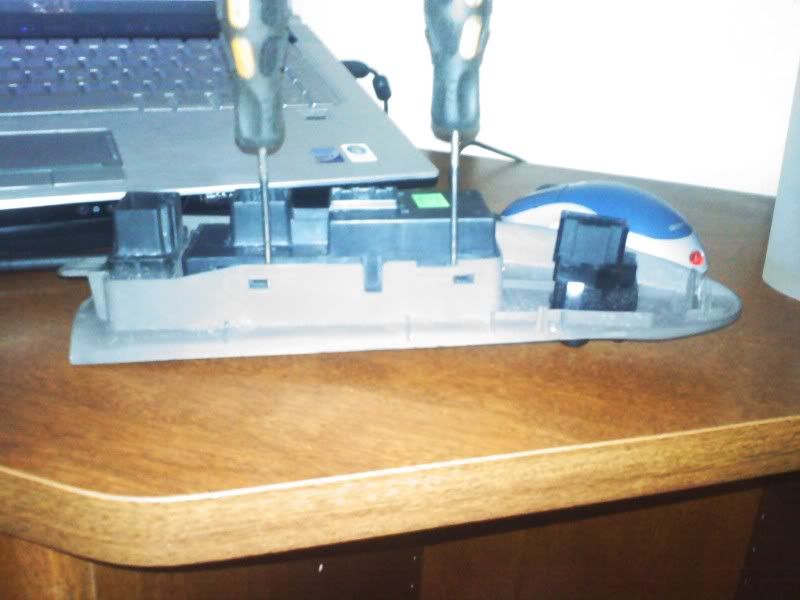
Now you will see the same clips on the button assemblys themselves. Do the same thing. This will remove the back cover where the plugs get connected to.

Tadaaa!!
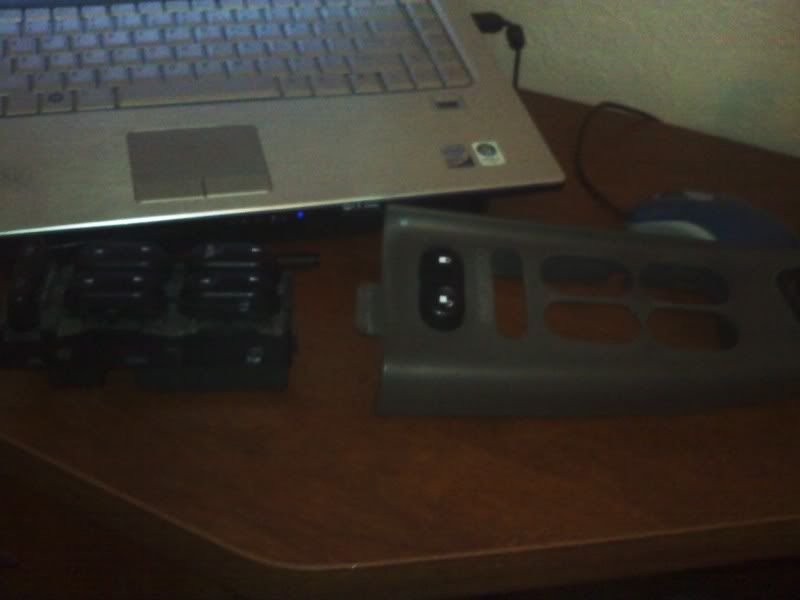
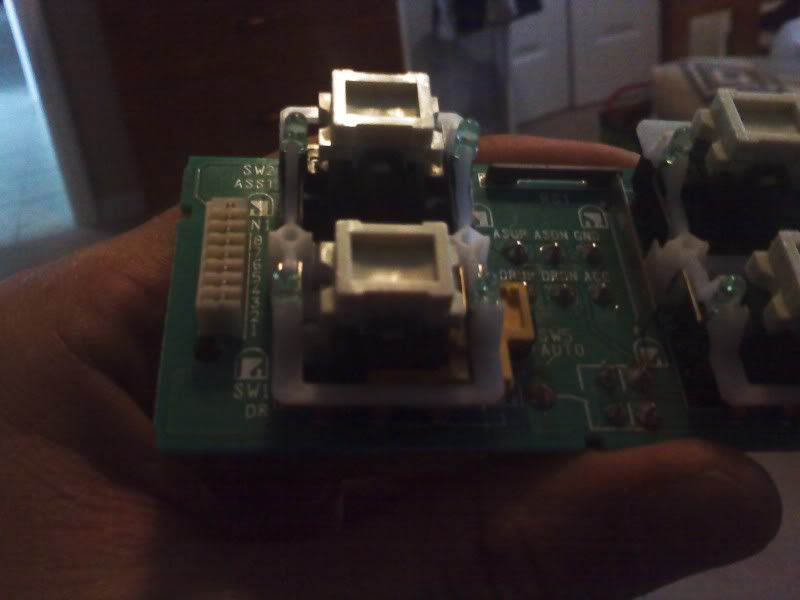
Next with the pick or small screwdriver gently pry up under one side of the rocker switch. Stick it up in there as far as you can get it to get more leverage. A little working with get one side up. Once you got one side up you can either pry the other side up or slide the pick in a little more from the same side and pry back down. You'll get it.
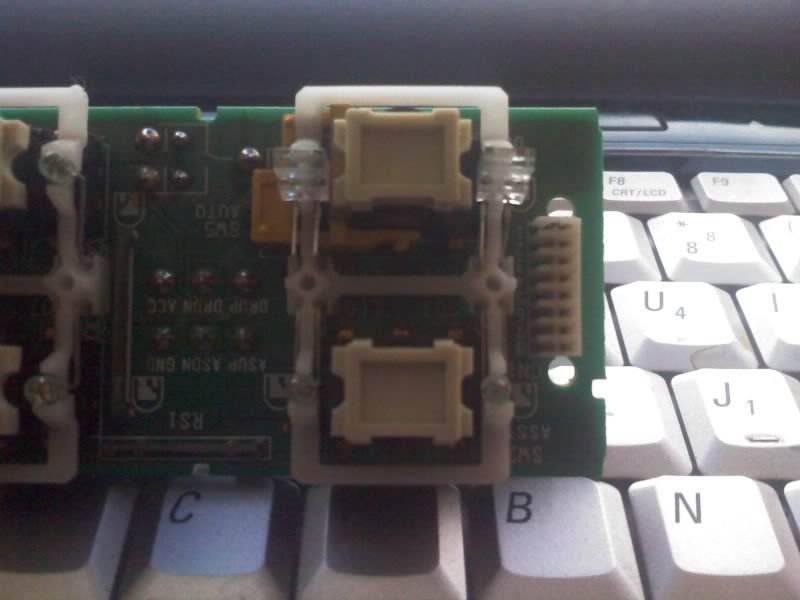
After you get all the rockers off the board comes right out.
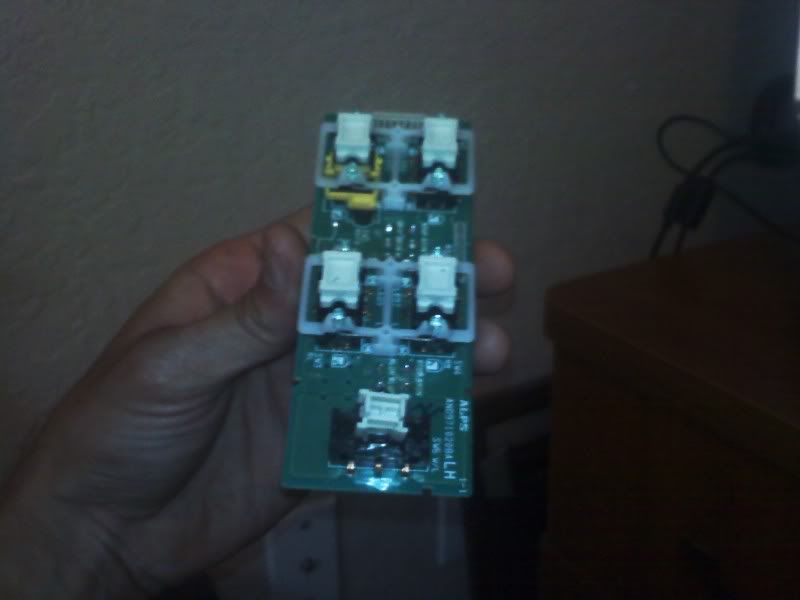
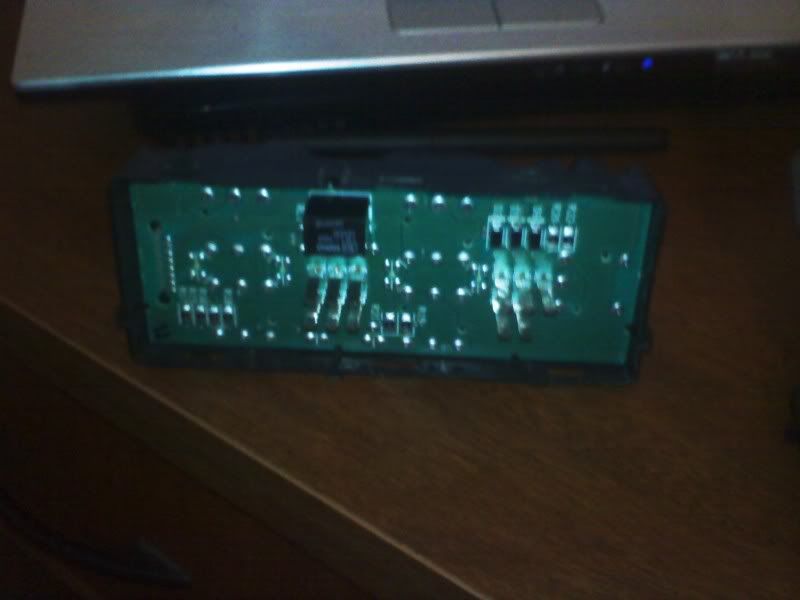
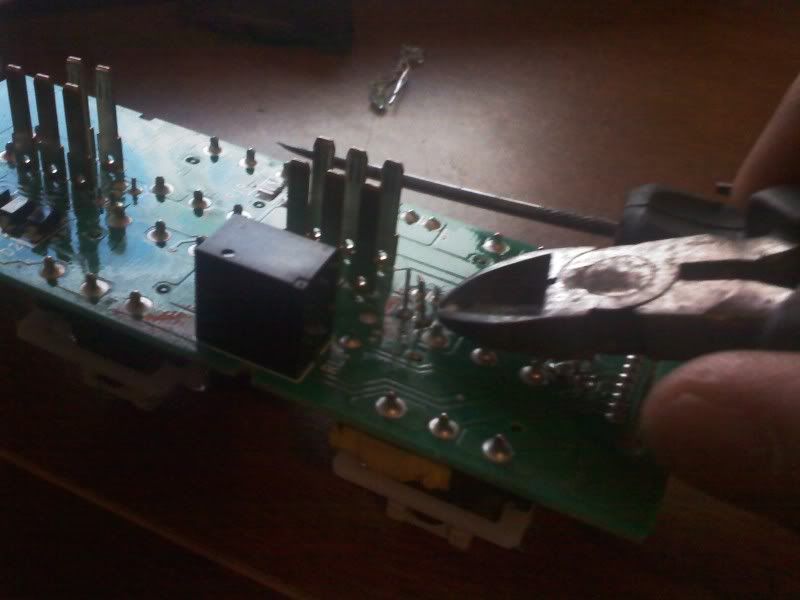
As you can see the tiny little green LEDs on the tops and bottoms of each switch. They sit in the little plastic holder thing.
If you're gonna use the blue LEDs I referenced above, you'll have to take a tiny pair of cutters and snip the little side of the housing to let the new LED sit in there because it's width is a little bigger than the original LED. If you can see it in the pic, im pointing to it.
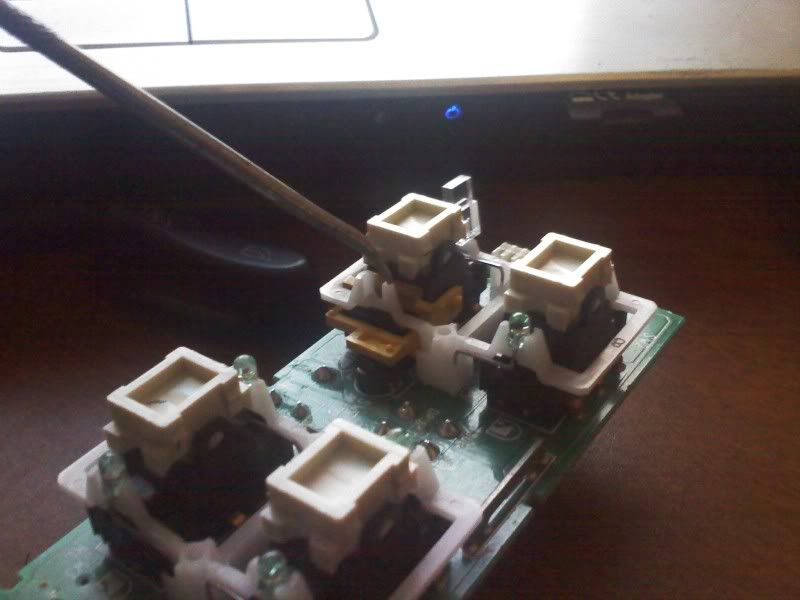
The trickiest part is bending and shaping the new LED to fit in there. I can't explain it but if you're taking on this project you can certainly figure it out. Also VERY IMPORTANT: make sure you put the new LED in the same way polarity wise or else it wont light. When you look inside the LED it has two sides, a wide and a narrow side. The wide side is usually the negative and you have to put the new one in the same way the old one came out. On mine there's a diagram on the board as well showing the wide and narrow side. After you removed the old LED and put the new one in and its all shaped, solder the connections underneath and cut the excess off the terminals.
You should put the rocker back on to see if the lights clear. They probably will as there is more than enough room under the switch for them. Here you can see the driver's window switch is complete.
You don't have to check it each time you finish each switch but I would check it before you reassemble the entire thing in case something went wrong or a connection isn't being made. Here you can see the incredible difference in brightness.
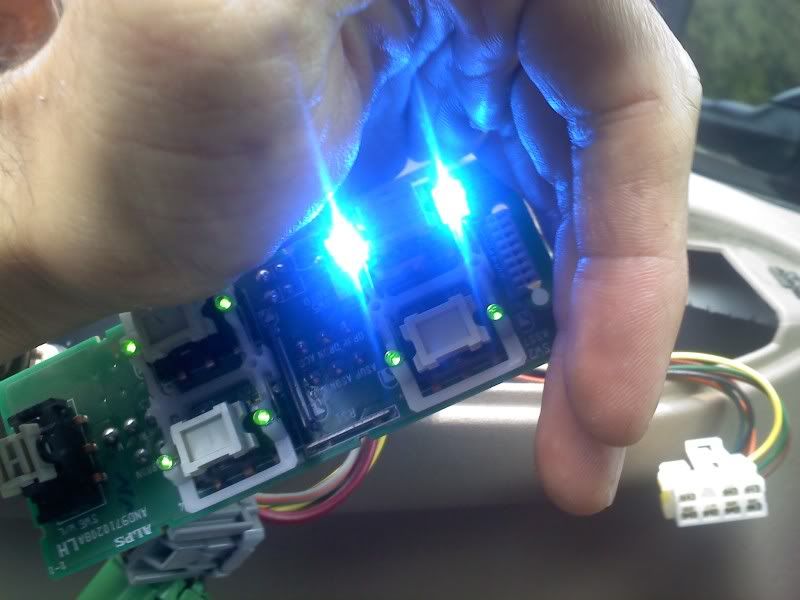
Keep in mind the lights come on with the key, NOT with the headlights switch. That's pretty much it for the doors. Reassemble and reinstall. FYI, the driver's side is harder than the others. I would recommend doing the pass and rear doors first to get some practice. Any other questions feel free to ask! I'll be tackling the dash and other panels maybe later today or this week. Enjoy!
Rectangular High-Brightness Blue LED Lamp - RadioShack.com
Remove your door button cluster and bring it on inside.
On the backside you will find little clips holding in the button assemblys themselves. With either a pick or small screwdrivers, just gently spread the housing to release both sides. Might take a little patients and wiggling but it comes out fairly easy.
Now you will see the same clips on the button assemblys themselves. Do the same thing. This will remove the back cover where the plugs get connected to.
Tadaaa!!
Next with the pick or small screwdriver gently pry up under one side of the rocker switch. Stick it up in there as far as you can get it to get more leverage. A little working with get one side up. Once you got one side up you can either pry the other side up or slide the pick in a little more from the same side and pry back down. You'll get it.
After you get all the rockers off the board comes right out.
As you can see the tiny little green LEDs on the tops and bottoms of each switch. They sit in the little plastic holder thing.
If you're gonna use the blue LEDs I referenced above, you'll have to take a tiny pair of cutters and snip the little side of the housing to let the new LED sit in there because it's width is a little bigger than the original LED. If you can see it in the pic, im pointing to it.
The trickiest part is bending and shaping the new LED to fit in there. I can't explain it but if you're taking on this project you can certainly figure it out. Also VERY IMPORTANT: make sure you put the new LED in the same way polarity wise or else it wont light. When you look inside the LED it has two sides, a wide and a narrow side. The wide side is usually the negative and you have to put the new one in the same way the old one came out. On mine there's a diagram on the board as well showing the wide and narrow side. After you removed the old LED and put the new one in and its all shaped, solder the connections underneath and cut the excess off the terminals.
You should put the rocker back on to see if the lights clear. They probably will as there is more than enough room under the switch for them. Here you can see the driver's window switch is complete.
You don't have to check it each time you finish each switch but I would check it before you reassemble the entire thing in case something went wrong or a connection isn't being made. Here you can see the incredible difference in brightness.
Keep in mind the lights come on with the key, NOT with the headlights switch. That's pretty much it for the doors. Reassemble and reinstall. FYI, the driver's side is harder than the others. I would recommend doing the pass and rear doors first to get some practice. Any other questions feel free to ask! I'll be tackling the dash and other panels maybe later today or this week. Enjoy!

#3
09-22-2010, 03:36 PM
Mikey. Great write up. But I cant see the pics! This computer doesn't let me see the photobucket images. I know it may be a lot to ask but can you either copy - paste this onto a word doc and email it to me with the pics? or maybe upload the pics to your gallery and copy - paste the codes into the write up? I really want to start on this project today as well. I have been reading into the whole meal deal on the led's behind the instrument cluster. I'm thinking that it will look better if we only do the one behind the odometer and the ones in the steering wheel and door panels etc. Because the pointers do not light up enough with the LED's behind them. We can scrape the green off of the liner and use a blue glass paint.
So basically do this first (minus the blue LED's behind the fuel gauge etc):

And have it look like this without the faded blue in spots or faded pointers:

What do you think?
So basically do this first (minus the blue LED's behind the fuel gauge etc):
And have it look like this without the faded blue in spots or faded pointers:
What do you think?
#4
09-22-2010, 03:42 PM
Join Date: Nov 2009
Location: Tampa, FL
Posts: 230
Likes: 0
Received 0 Likes
on
0 Posts
Mikey. Great write up. But I cant see the pics! This computer doesn't let me see the photobucket images. I know it may be a lot to ask but can you either copy - paste this onto a word doc and email it to me with the pics? or maybe upload the pics to your gallery and copy - paste the codes into the write up? I really want to start on this project today as well. I have been reading into the whole meal deal on the led's behind the instrument cluster. I'm thinking that it will look better if we only do the one behind the odometer and the ones in the steering wheel and door panels etc. Because the pointers do not light up enough with the LED's behind them. We can scrape the green off of the liner and use a blue glass paint.
So basically do this first (minus the blue LED's behind the fuel gauge etc):
And have it look like this without the faded blue in spots or faded pointers:
What do you think?
So basically do this first (minus the blue LED's behind the fuel gauge etc):
And have it look like this without the faded blue in spots or faded pointers:
What do you think?
Bryce I believe I have your email I can email them to you. You might have a security setting or something on your computer set wrong. As for the dash, believe me I'll figure something out when I get to that part.
Stay tuned....
#5
09-22-2010, 03:47 PM
#6
09-22-2010, 03:51 PM
Join Date: Nov 2009
Location: Tampa, FL
Posts: 230
Likes: 0
Received 0 Likes
on
0 Posts
Its 2 per button. 18 for all the buttons. I haven't gotten any further than that yet. Damn radio shack doesn't have enough in all the stores I've been to. Heres a tip tho, if you go to the store and order them to be shipped to the house you don't pay shipping cost. If you order it online thru their site you will.
#7
09-22-2010, 06:32 PM
Trending Topics
#8
09-22-2010, 06:42 PM
Join Date: Nov 2009
Location: Tampa, FL
Posts: 230
Likes: 0
Received 0 Likes
on
0 Posts
Ahh the art of soldering lol. Theres a kit at radio shack that has an iron and solder for a few bucks. That'll get you started. Its hard to teach by typing but I'll try. If you're soldering 2 wires together you apply solder to the end of each wire by heating the wire and touching the wire with the tip of solder. Then with a combination of pinkys and other objects keep the wires together as you heat both soldered ends which will join them. Remove the heat, hold it for a few seconds until the solder hardens.
Electronics are harder because if you solder for any more than about 3 seconds you could damage components like resistors and diodes and such. Which for those of you that don't know LED's are Light Emitting Diodes which are heat sensitive. There's also different types of solder for different applications. So make sure you're using the right one otherwise it wont stick.
Electronics are harder because if you solder for any more than about 3 seconds you could damage components like resistors and diodes and such. Which for those of you that don't know LED's are Light Emitting Diodes which are heat sensitive. There's also different types of solder for different applications. So make sure you're using the right one otherwise it wont stick.
#9
09-22-2010, 09:32 PM
Elder User
Join Date: Sep 2008
Location: TALLAHASSEE FL
Posts: 996
Likes: 0
Received 0 Likes
on
0 Posts
Mikey. Great write up. But I cant see the pics! This computer doesn't let me see the photobucket images. I know it may be a lot to ask but can you either copy - paste this onto a word doc and email it to me with the pics? or maybe upload the pics to your gallery and copy - paste the codes into the write up? I really want to start on this project today as well. I have been reading into the whole meal deal on the led's behind the instrument cluster. I'm thinking that it will look better if we only do the one behind the odometer and the ones in the steering wheel and door panels etc. Because the pointers do not light up enough with the LED's behind them. We can scrape the green off of the liner and use a blue glass paint.
So basically do this first (minus the blue LED's behind the fuel gauge etc):
And have it look like this without the faded blue in spots or faded pointers:
What do you think?
So basically do this first (minus the blue LED's behind the fuel gauge etc):
And have it look like this without the faded blue in spots or faded pointers:
What do you think?
#10
09-22-2010, 09:40 PM
#11
09-22-2010, 09:54 PM
Join Date: Nov 2009
Location: Tampa, FL
Posts: 230
Likes: 0
Received 0 Likes
on
0 Posts
baker, If Im not mistaken on the back of the steering wheel behind the button is a small circle cap. I believe theres a screw under the cap that will release it from the wheel.
hiredgun - not really. There are only a few "user serviceable" bulbs such as the dashboard lights and maybe a few others. I havent gone into the dash and other panels yet but just going by previous experiences. The headlight, ac/heater, door panels I believe are only solder. Its really not hard to learn how to solder. Im sure you can find a video on youtube or somewhere on the net that'll show you. Just make sure you don't use an iron thats too powerful/hot. Mine is a 30watt.
hiredgun - not really. There are only a few "user serviceable" bulbs such as the dashboard lights and maybe a few others. I havent gone into the dash and other panels yet but just going by previous experiences. The headlight, ac/heater, door panels I believe are only solder. Its really not hard to learn how to solder. Im sure you can find a video on youtube or somewhere on the net that'll show you. Just make sure you don't use an iron thats too powerful/hot. Mine is a 30watt.
#12
09-22-2010, 10:20 PM

Senior User
Join Date: Sep 2010
Location: Diamond in the Rough, Oh
Posts: 164
Likes: 0
Received 0 Likes
on
0 Posts
#13
09-22-2010, 10:57 PM
Join Date: Nov 2009
Location: Tampa, FL
Posts: 230
Likes: 0
Received 0 Likes
on
0 Posts
CLICKYhey Bryce do you have wideband LEDs... I know trying to buy the cheap one from ebay isnt always the best...
Havent done this but plan to do all of my cars... 4 cars is going to be slightly expensive...
Havent done this but plan to do all of my cars... 4 cars is going to be slightly expensive...
#14
09-23-2010, 08:53 AM
CLICKYhey Bryce do you have wideband LEDs... I know trying to buy the cheap one from ebay isnt always the best...
Havent done this but plan to do all of my cars... 4 cars is going to be slightly expensive...
Havent done this but plan to do all of my cars... 4 cars is going to be slightly expensive...
eBay - New & used electronics, cars, apparel, collectibles, sporting goods & more at low prices
eBay - New & used electronics, cars, apparel, collectibles, sporting goods & more at low prices
eBay - New & used electronics, cars, apparel, collectibles, sporting goods & more at low prices
LED WHITE 12" STRIP INTERIOR LIGHTS xenon hid INFINITI: eBay Motors (item 200521618995 end time Sep-20-10 13:42:48 PDT)
eBay - New & used electronics, cars, apparel, collectibles, sporting goods & more at low prices
eBay - New & used electronics, cars, apparel, collectibles, sporting goods & more at low prices
2x 3157 3156 WHITE 24-LED Turn Brake Car Light Bulbs: eBay Motors (item 110580124935 end time Sep-02-10 12:36:46 PDT)
Mikey... I need help now... I followed the write up but I started on the passenger side because the local radio shack only had 2 bulbs in stock and I wanted to at least test out one button. I FAILED ! The passenger side isn't like the driver's side. There isn't a board that comes out. The button assembly comes apart but I tried to pop out the original green led and it broke, so I had the 2 probe wires left sticking up. I tried to snip away at the plastic around the original bulb and shorten the probe wire things on the new LED to make room for the button to still function and hopefully connect the New LED. It didn't work. I will have to clip a lot more of that housing away to get this bad boy to fit. And even then, when/if it does fit in there, I will have no way to access the connection to solder it.
I decided to stop while I was behind. I put it all back together and threw it back in the truck. Now my passenger side window button does not light up at all even though it has one good LED in it.
 I should have just started with the drivers side like your write up but I didn't want to get that in depth just to put it all back together with only 2 new LED's.
Anyways. Have you done the passenger side yet. Let me know how in the heck you did it....
Thanks.
