
Melling LPOP Install
#1
 08-23-2010, 01:44 AM


Melling LPOP Install
I have been having cold start problems for some time now. Key in, let the GPs fire, crank and start normal. The truck would run for 20 to 30 seconds and then die. Key in, WTS, long crank and fire. What I started to notice was that in that initial start and die, the oil pressure gauge on the dash never came up. Periodically, on fresh oil and not too cold in the morning, the truck would fire, run, then sputter and start to die. Then the oil pressure would come up, and so would the RPMs. This led me to a failing or worn LPOP. I have been hearing more and more of this from other people. The one thing in common is we all have more than 200K on our trucks.
I went to my local Autozone and ordered Melling M208. It was about $75 ish plus tax. Had it in 2 days.
I began the process by removing the fan shroud and fan/fan clutch. You an find the steps for this elsewhere. Once that was removed, you need a 15/16" impact socket and a breaker bar. You could use an impact gun but you may need to remove the radiator to have room. Now, if you try to remove the crank pulley bolt with the breaker bar, you will succeed in turning over the engine. However, if you brace the breaker bar against the frame and bump the starter, the bolt comes right loose. (sorry, no picture here)
From there, rent a harmonic balancer puller and thread the 3 bolts in:
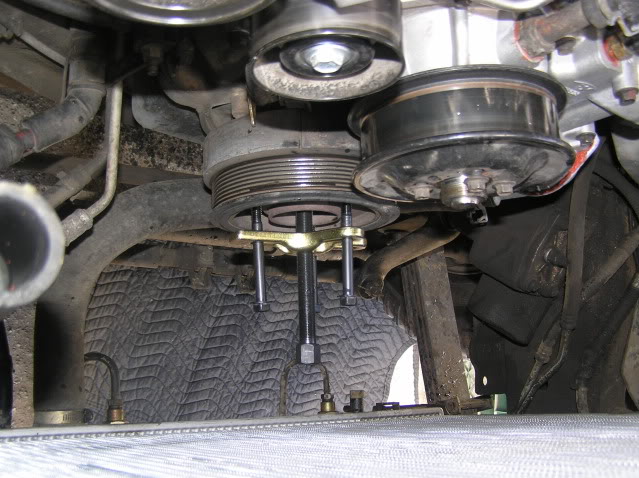
Crank on that big bolt in the center and:
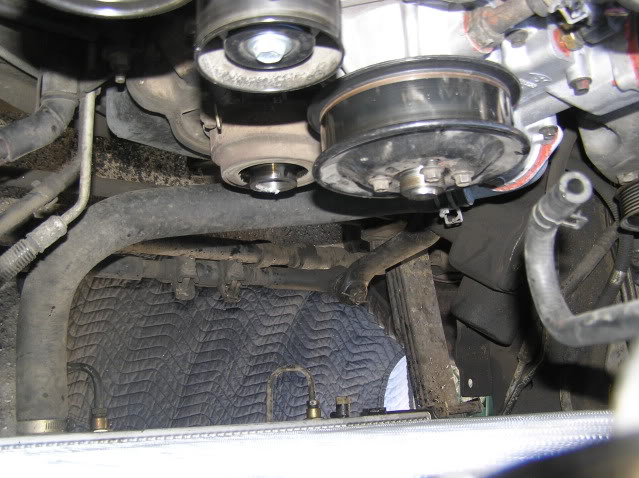
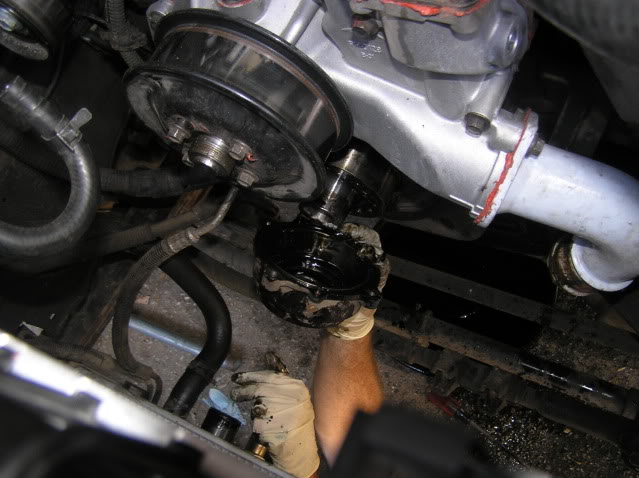
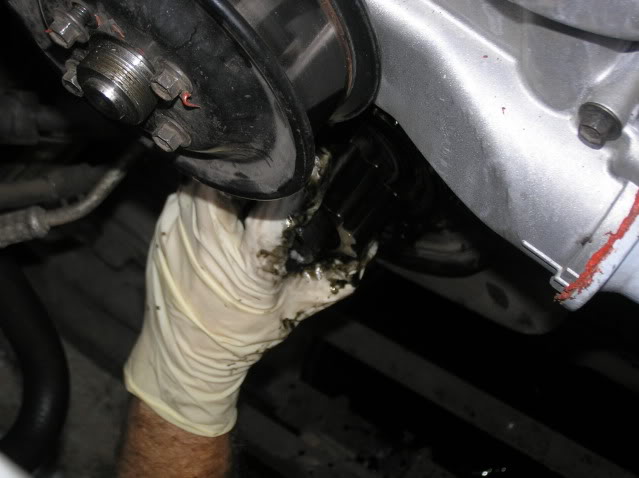
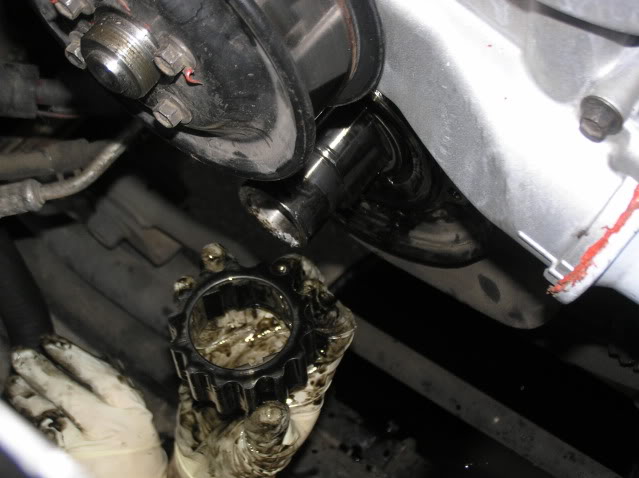
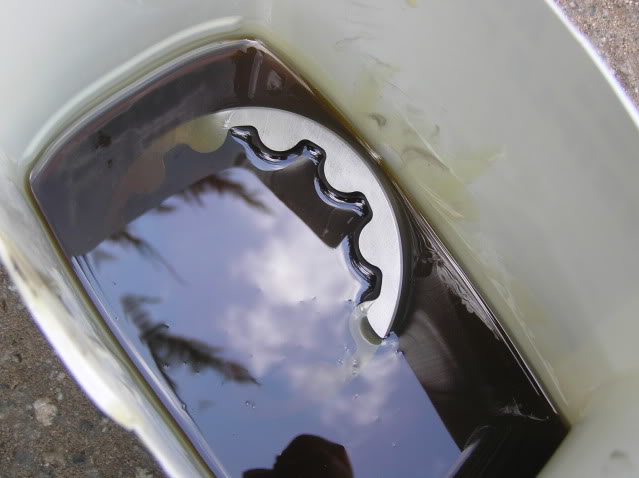
The LPOP is held in by 4 10mm bolts. Remove those and scratch your head on how to remove the pump body from the block.
We did not get pics of what worked but if you look at the above picture, there is a gap between the pump body and the snout of the crank, there is a lip in there you can pry on (gently) or use a 3 jaw puller turned inside out.
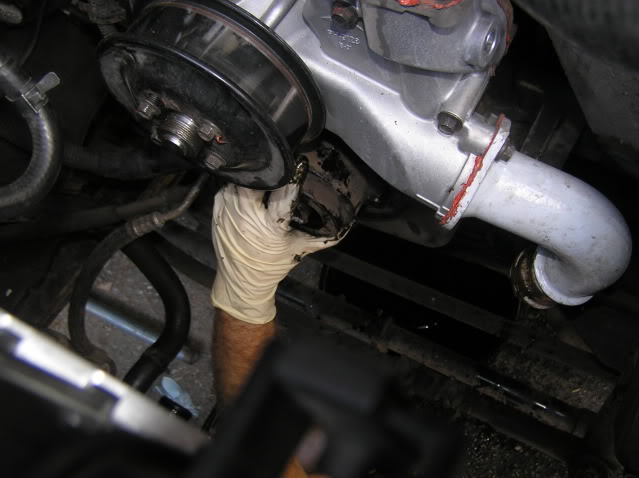
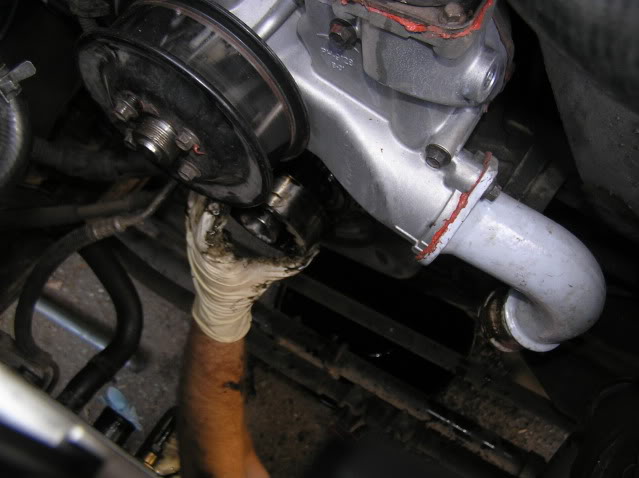
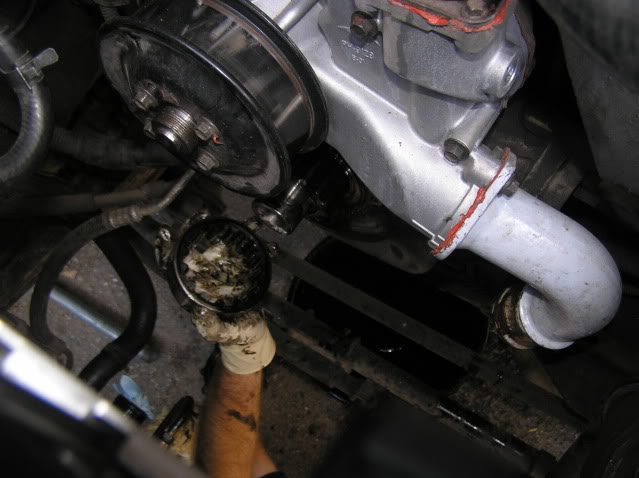
Once the body is off,
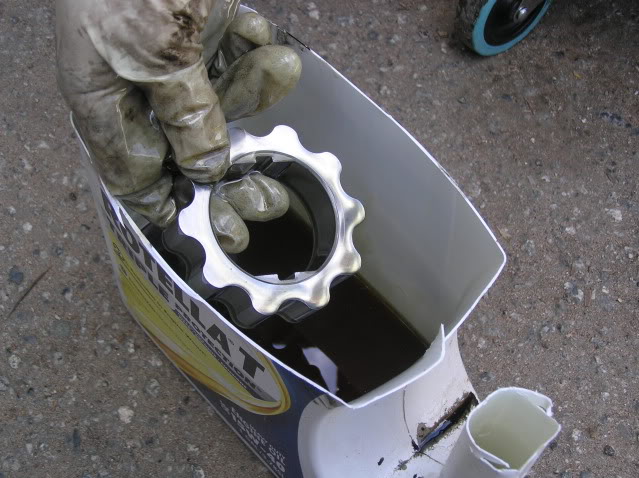
remove the outer pump rotor:
Then the inner rotor:
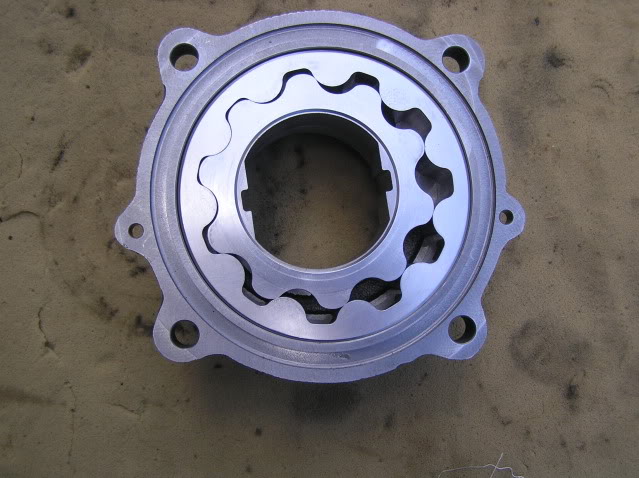
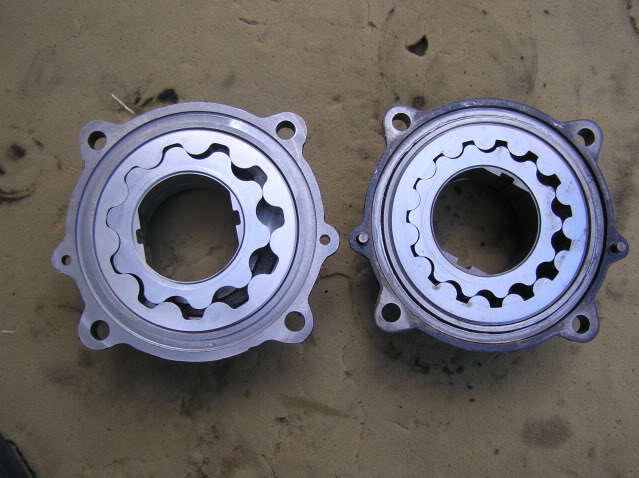
Now, the Melling M208 has less "teeth" on its rotors as opposed to the OEM pump. According to Melling, this allows for greater volume at equal psi. Also, the Melling is narrower than the OEM pump. Notice the difference in clearance from the old to the new. It was worn out:

For once, installation is literally the reverse of removal. A couple of notes, the instructions tell you to place the body of the new pump on the dowel pins on the block. Well, those came out with the old pump and had to be tapped out and moved over.
Secondly, should you chose to use a new OEM pump, the rotors are stamped "damper" on one side:
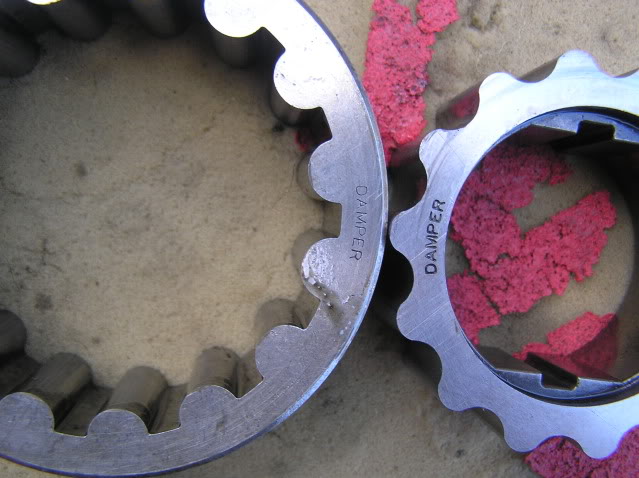
and must only be installed with that side towards the harmonic balancer. Otherwise, save your money for a new front cover. The Melling on the other hand, is universal and may be installed either way. Be sure to coat both rotors liberally with oil prior to install.
Initial impressions are, it fired right up and ran great this morning. Of course, this is the warmest morning we have had all year...
BIG THANKS to Stewart for the pics and help. Also to Corey (Ziggy) for the tips. And of course to FTE.
I went to my local Autozone and ordered Melling M208. It was about $75 ish plus tax. Had it in 2 days.
I began the process by removing the fan shroud and fan/fan clutch. You an find the steps for this elsewhere. Once that was removed, you need a 15/16" impact socket and a breaker bar. You could use an impact gun but you may need to remove the radiator to have room. Now, if you try to remove the crank pulley bolt with the breaker bar, you will succeed in turning over the engine. However, if you brace the breaker bar against the frame and bump the starter, the bolt comes right loose. (sorry, no picture here)
From there, rent a harmonic balancer puller and thread the 3 bolts in:
Crank on that big bolt in the center and:
The LPOP is held in by 4 10mm bolts. Remove those and scratch your head on how to remove the pump body from the block.
We did not get pics of what worked but if you look at the above picture, there is a gap between the pump body and the snout of the crank, there is a lip in there you can pry on (gently) or use a 3 jaw puller turned inside out.
Once the body is off,
remove the outer pump rotor:
Then the inner rotor:
Now, the Melling M208 has less "teeth" on its rotors as opposed to the OEM pump. According to Melling, this allows for greater volume at equal psi. Also, the Melling is narrower than the OEM pump. Notice the difference in clearance from the old to the new. It was worn out:
For once, installation is literally the reverse of removal. A couple of notes, the instructions tell you to place the body of the new pump on the dowel pins on the block. Well, those came out with the old pump and had to be tapped out and moved over.
Secondly, should you chose to use a new OEM pump, the rotors are stamped "damper" on one side:
and must only be installed with that side towards the harmonic balancer. Otherwise, save your money for a new front cover. The Melling on the other hand, is universal and may be installed either way. Be sure to coat both rotors liberally with oil prior to install.
Initial impressions are, it fired right up and ran great this morning. Of course, this is the warmest morning we have had all year...
BIG THANKS to Stewart for the pics and help. Also to Corey (Ziggy) for the tips. And of course to FTE.
The following users liked this post:
#2
08-23-2010, 02:51 AM

As always when we get together Pete, it was a fruitful day of wrenching.
The LPOP was a lot easier to swap out than I expected.
A bearing puller woulda worked well, but the reason I didn't take any pictures was because while Pete was working from under the Ex, I was working from the top.
Using a flat head screwdriver, we both gently pried around the lip Pete referred to and after a few different pry's from different angles, we got the body popped off. It actually came off fairly easy, even though we were being overly cautious so as not to bend, gouge, or screw anything up.
Also, in putting the crank pulley back on, trying to press it into place without an installer tool was useless. Tapping it with a hammer simultaneously from the top and bottom was a tactic quickly abandoned.
Since the original bolt that secures the pulley cannot reach the block until the pulley is pressed back into place, a longer bolt was needed.
After running to the hardware store for Pete, he was able to use the longer bolt to reach the threads, which pressed the pulley back into position, so the original bolt could be reinstalled to secure the pulley.
The only true glitch we couldn't work around was getting the proper torque on the crank pulley bolt after Pete reinstalled it.
In the Lightning world from whence I came, new L owners replace their crank pulley with a larger pulley to increase boost. Changing the crank pulley is sort of looked at as a right of passage, since it's one of the first mods a noob L owner does that involves major wrenching, plus the fact it has a pucker factor attached to the job because of the "POP" inducing noise when the bolt breaks free. (LOL, when I helped my buddy install his 6lb lower, when the "POP" happened, I looked "shocked" and told him "Ah sh** dude! We just broke your transmission!" He freaked out until he saw me laughing my azz off at his reaction!)
Anyway, with the larger crank pulley comes a flywheel lock "tool" (installed via the 4R100's inspection plate) that keeps the crank from spinning, allowing you to torque the crank bolt back to specs when reinstalling. (Installing this lockup tool on the flywheel is why my buddy believed me, thinking his trans broke when the "POP" occurred.)
Well, I wasn't thinking. Had I been thinking, I would have brought my flywheel lock tool, because it works on our PSD's too, since the L's use the 4R100 trans, just in a different case.
Stewart
The LPOP was a lot easier to swap out than I expected.
The LPOP is held in by 4 10mm bolts. Remove those and scratch your head on how to remove the pump body from the block.
We did not get pics of what worked but if you look at the above picture, there is a gap between the pump body and the snout of the crank, there is a lip in there you can pry on (gently) or use a 3 jaw puller turned inside out.
We did not get pics of what worked but if you look at the above picture, there is a gap between the pump body and the snout of the crank, there is a lip in there you can pry on (gently) or use a 3 jaw puller turned inside out.
Using a flat head screwdriver, we both gently pried around the lip Pete referred to and after a few different pry's from different angles, we got the body popped off. It actually came off fairly easy, even though we were being overly cautious so as not to bend, gouge, or screw anything up.
Also, in putting the crank pulley back on, trying to press it into place without an installer tool was useless. Tapping it with a hammer simultaneously from the top and bottom was a tactic quickly abandoned.
Since the original bolt that secures the pulley cannot reach the block until the pulley is pressed back into place, a longer bolt was needed.
After running to the hardware store for Pete, he was able to use the longer bolt to reach the threads, which pressed the pulley back into position, so the original bolt could be reinstalled to secure the pulley.
The only true glitch we couldn't work around was getting the proper torque on the crank pulley bolt after Pete reinstalled it.
In the Lightning world from whence I came, new L owners replace their crank pulley with a larger pulley to increase boost. Changing the crank pulley is sort of looked at as a right of passage, since it's one of the first mods a noob L owner does that involves major wrenching, plus the fact it has a pucker factor attached to the job because of the "POP" inducing noise when the bolt breaks free. (LOL, when I helped my buddy install his 6lb lower, when the "POP" happened, I looked "shocked" and told him "Ah sh** dude! We just broke your transmission!" He freaked out until he saw me laughing my azz off at his reaction!)
Anyway, with the larger crank pulley comes a flywheel lock "tool" (installed via the 4R100's inspection plate) that keeps the crank from spinning, allowing you to torque the crank bolt back to specs when reinstalling. (Installing this lockup tool on the flywheel is why my buddy believed me, thinking his trans broke when the "POP" occurred.)
Well, I wasn't thinking. Had I been thinking, I would have brought my flywheel lock tool, because it works on our PSD's too, since the L's use the 4R100 trans, just in a different case.
Stewart
#5
08-23-2010, 01:45 PM
#6
08-23-2010, 03:24 PM
Join Date: Feb 2005
Location: Oregon
Posts: 1,319
Likes: 0
Received 0 Likes
on
0 Posts
#7
08-23-2010, 03:54 PM
Join Date: Jul 2004
Location: Yuba City, CA.
Posts: 3,156
Likes: 0
Received 0 Likes
on
0 Posts
Trending Topics
#10
08-23-2010, 04:19 PM
#12
08-23-2010, 05:46 PM
#13
08-23-2010, 10:06 PM
Mostly that the gauge comes right up on start up. It was 48* out when I started my truck this morning. Fired right up and the oil pressure came up immediately.
#15
08-25-2010, 12:10 PM
Join Date: Feb 2007
Location: Williamston, MI
Posts: 775
Likes: 0
Received 0 Likes
on
0 Posts
Peter, how long would the idiot light (low oil pressure) stay on prior to the pump replacement? I've noticed mine stayin on long at start up and it has been an issue I've been keeping my eye on. I also switched to syn oil because mine would not start when cold. I don't want to run the syn oil but also didn't want to switch back to dino each summer either.