
Superduty bed swap pictorial
#1
 08-13-2010, 10:22 AM

Superduty bed swap pictorial
Here's the problem:
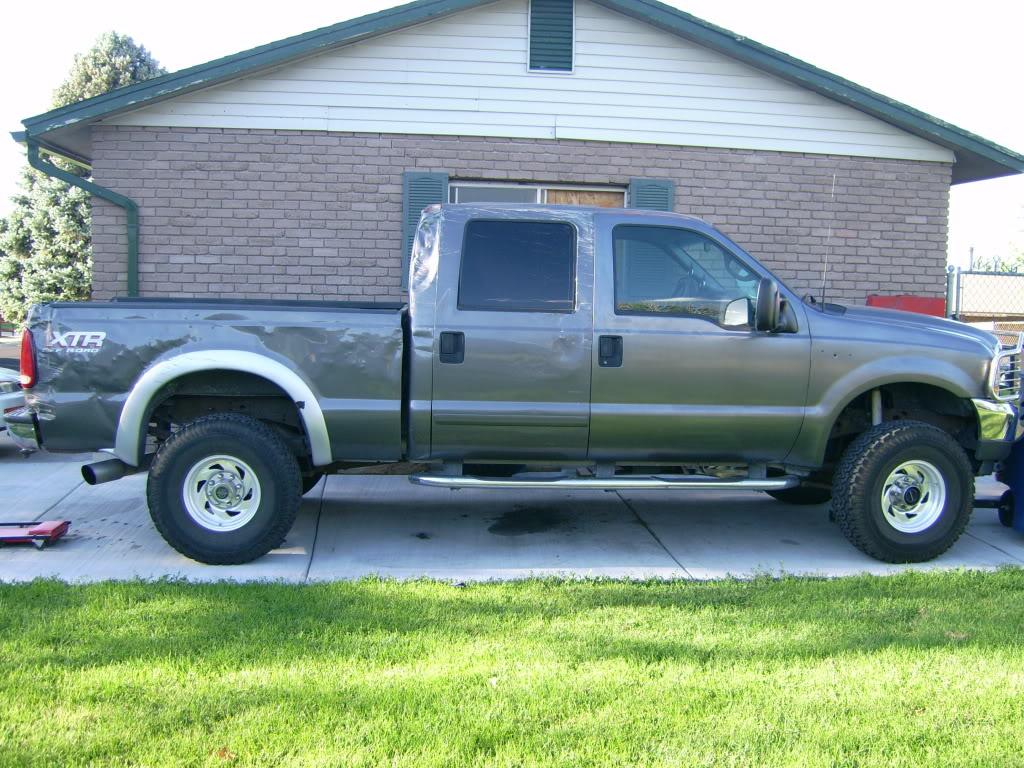
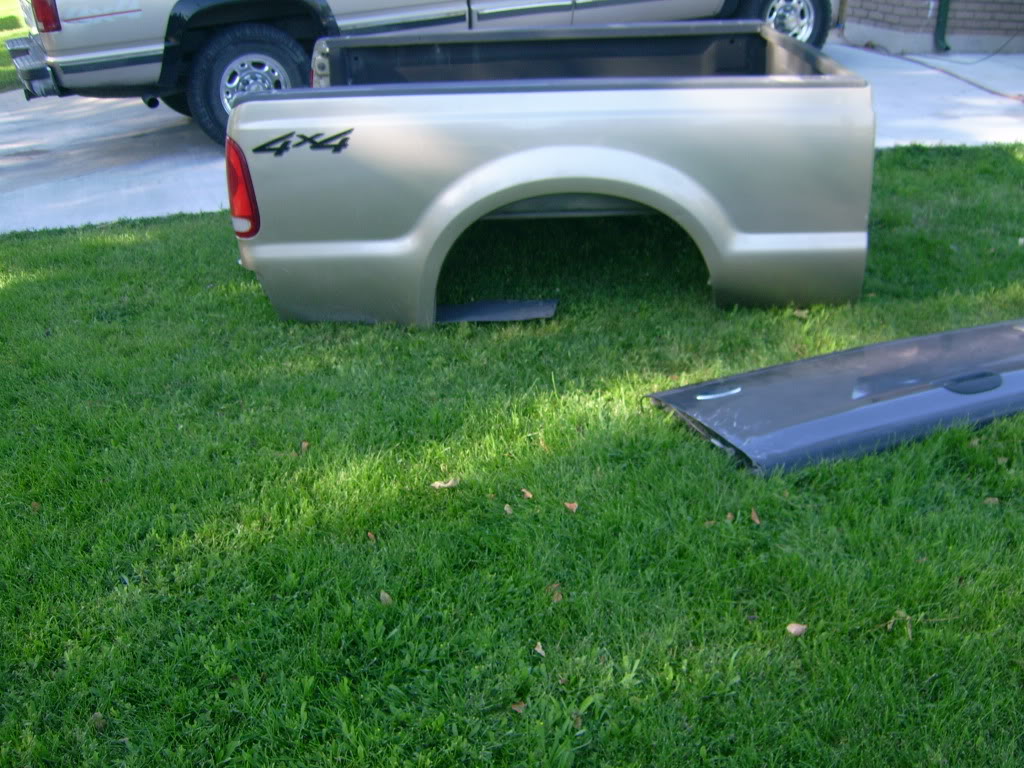
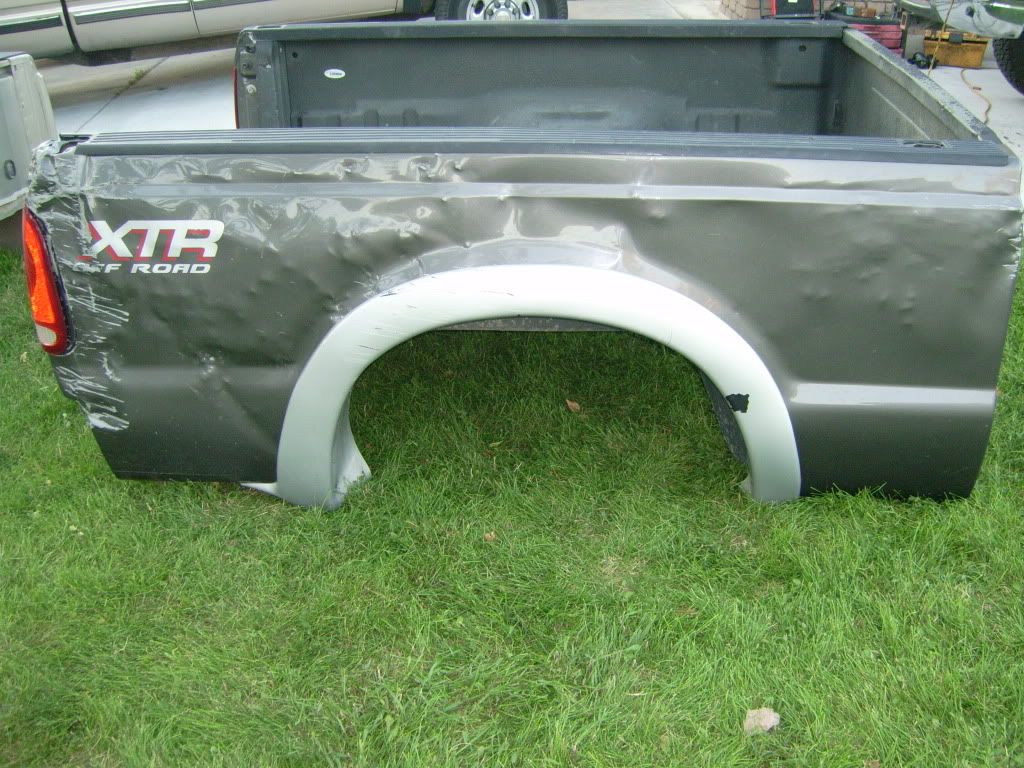
I picked up my 02 F350 for just pennies a couple of years ago because it had been in an accident. I was tipped over on it's side in the snow. I've allready changed out the brush-guard, front fender, bumper, and the front door. I just got a really good deal on this used bed ($500, delivered to my house):
So what follows are pics and an expaination of what was involved in swapping the boxes.
First things, I got under the truck with a can of WD40 and soaked down all 8 of the bolts (Just a note, the bed on the truck has 8 bolts, but the tan one only has holes for 6. I'm going to drill holes for the other 2):
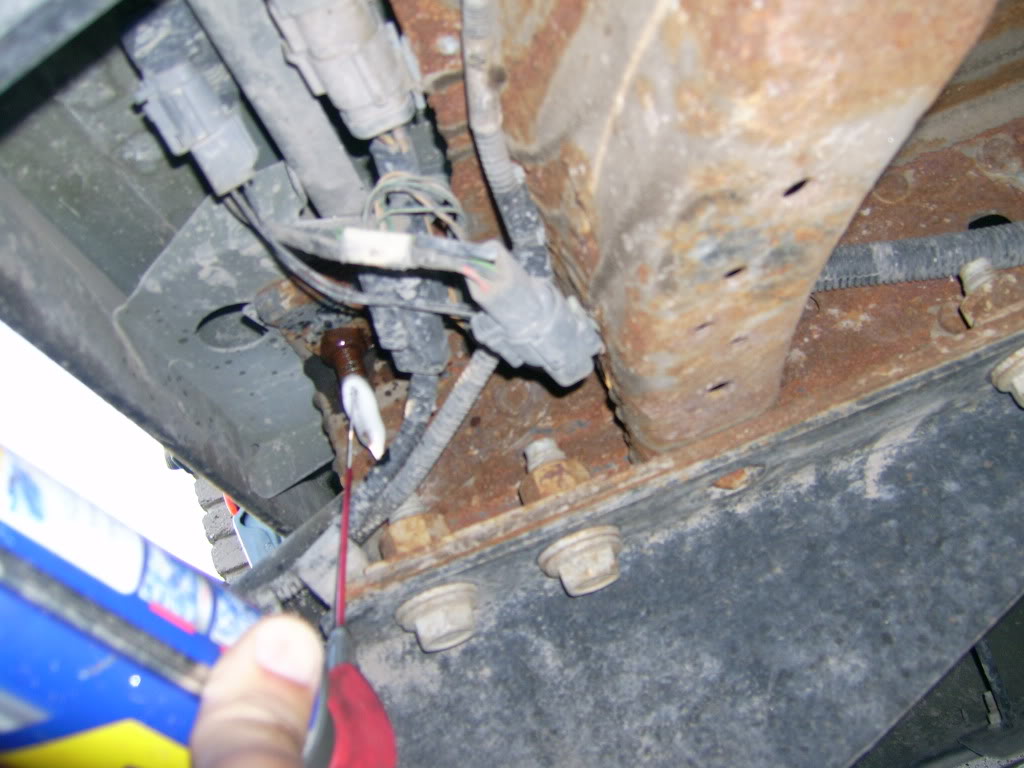
Next thing I did was dissconnect the fuel filler neck from the bed. There are only 3 screws holding in place. I removed them, then I crawled under the truck and muscled the filler neck out of the hole, and secured it out of the way:
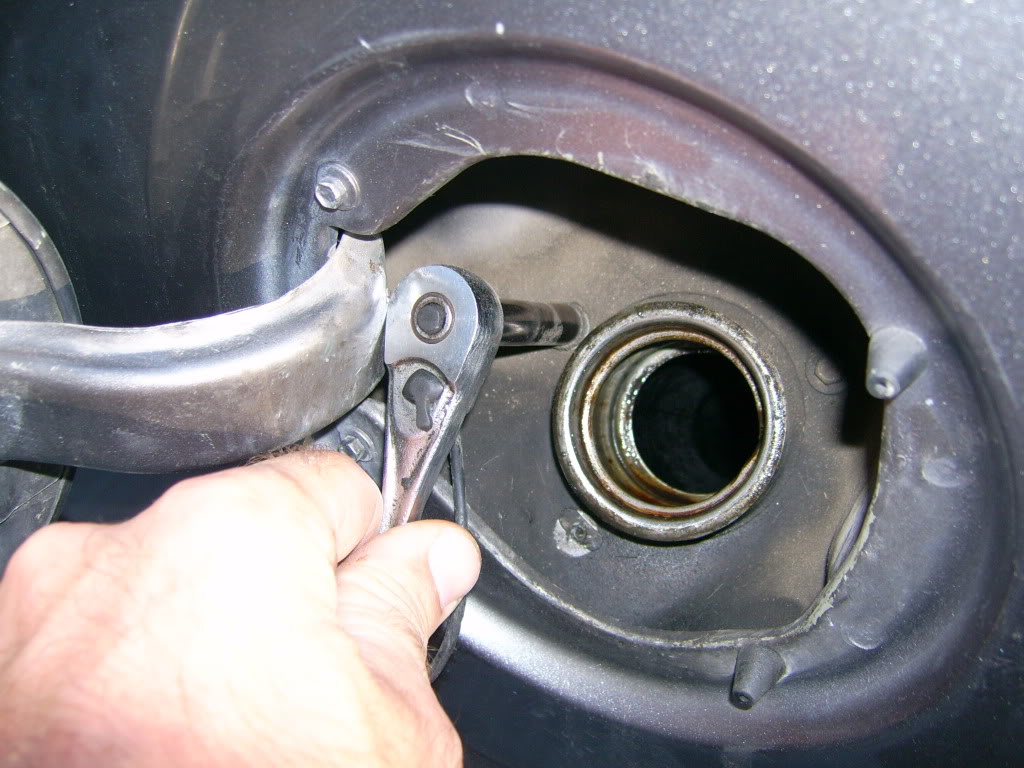
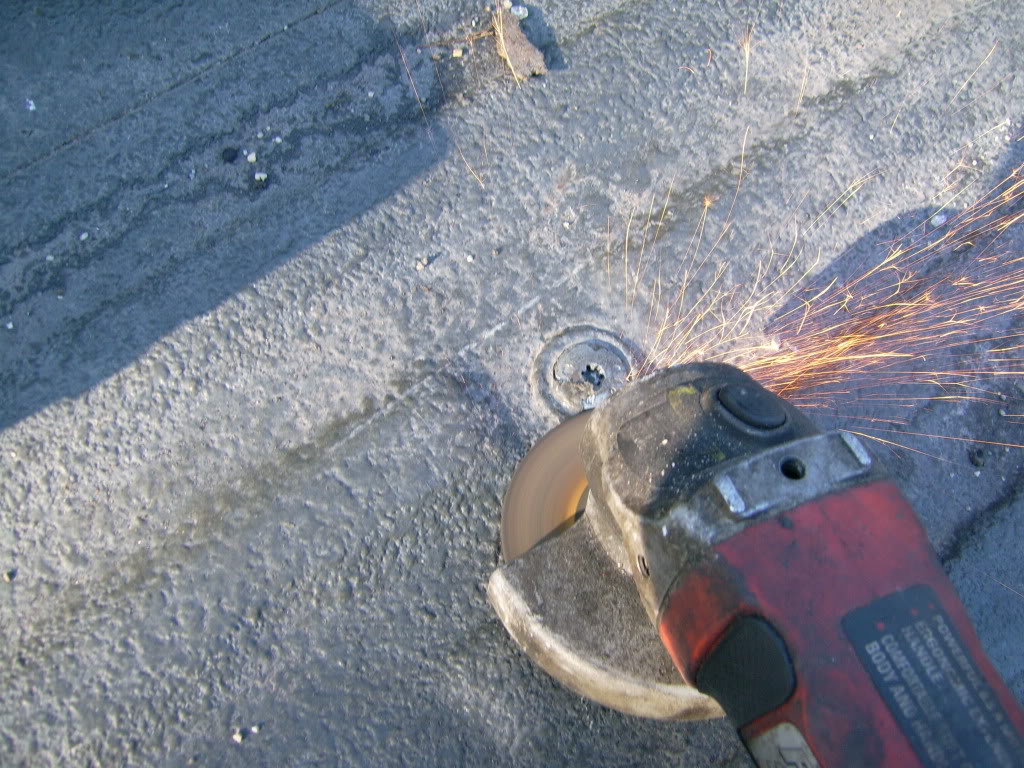
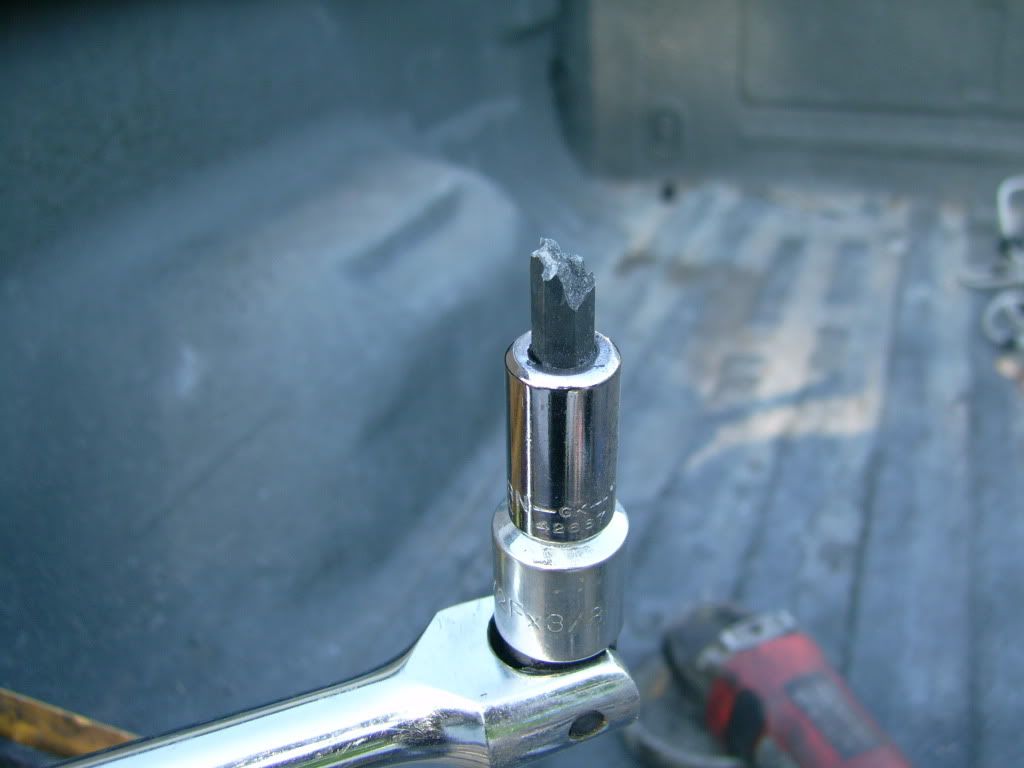
Since the nuts on the bottom of the frame rails are retained by little clips, you dont have to have a wrench on the bottom backing you up, so I got out my trusty old T50 Torx socket and went to work loosening the bolts. Or that's how it should have gone. What really happened is the first bolt came right out, then I broke the socket on the next one:

So off to Autozone to exchange the socket for a new one. It broke. So back to Autozone to exchange it for another new one. Then to Sears to buy a Craftsman socket. It broke. So I said "Screwit! I'm getting out the grinder!" and I cut of the remaining 7 bolts:
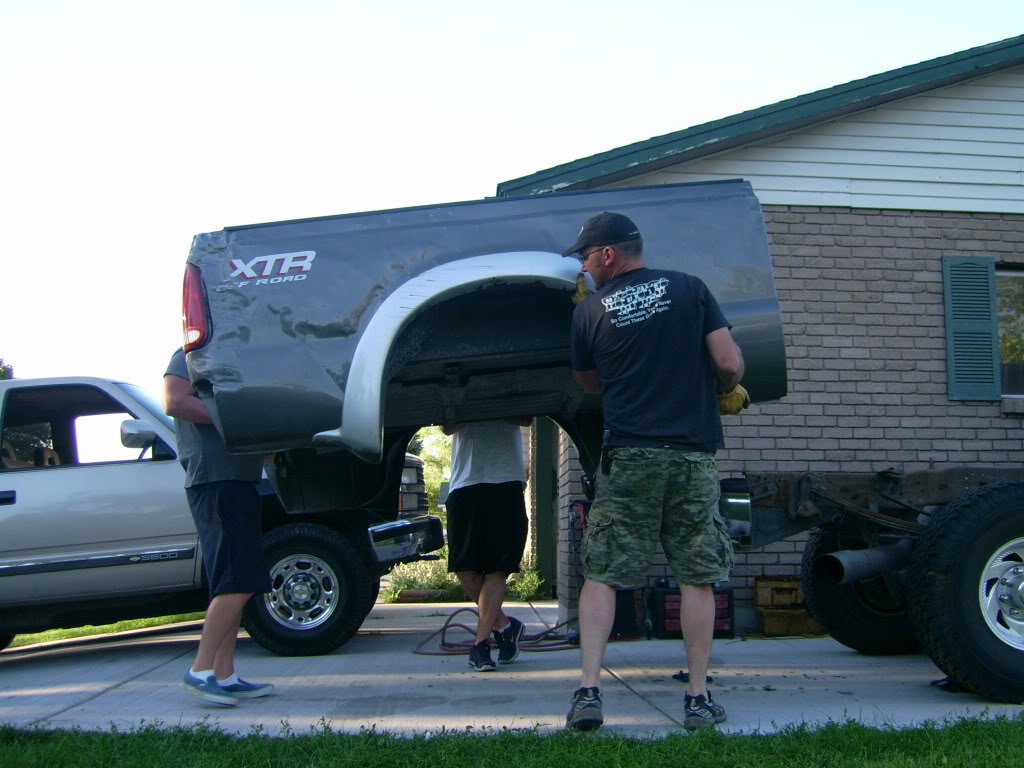
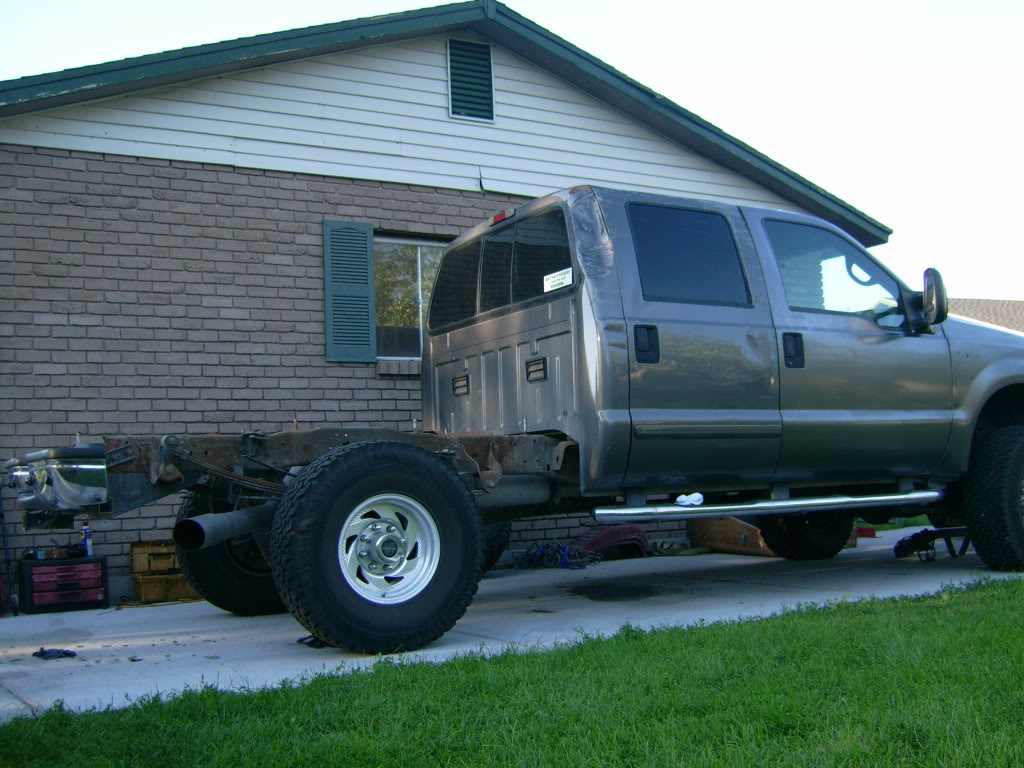
Next step was to dissconnect the wiring (sorry no picture), there are just 2 connectors behind the driver's side frame rail. After those were free, it was time to round up a couple of friends to help lift. These beds are surprisingly light. Just the 3 of us moved it with minimal effort:
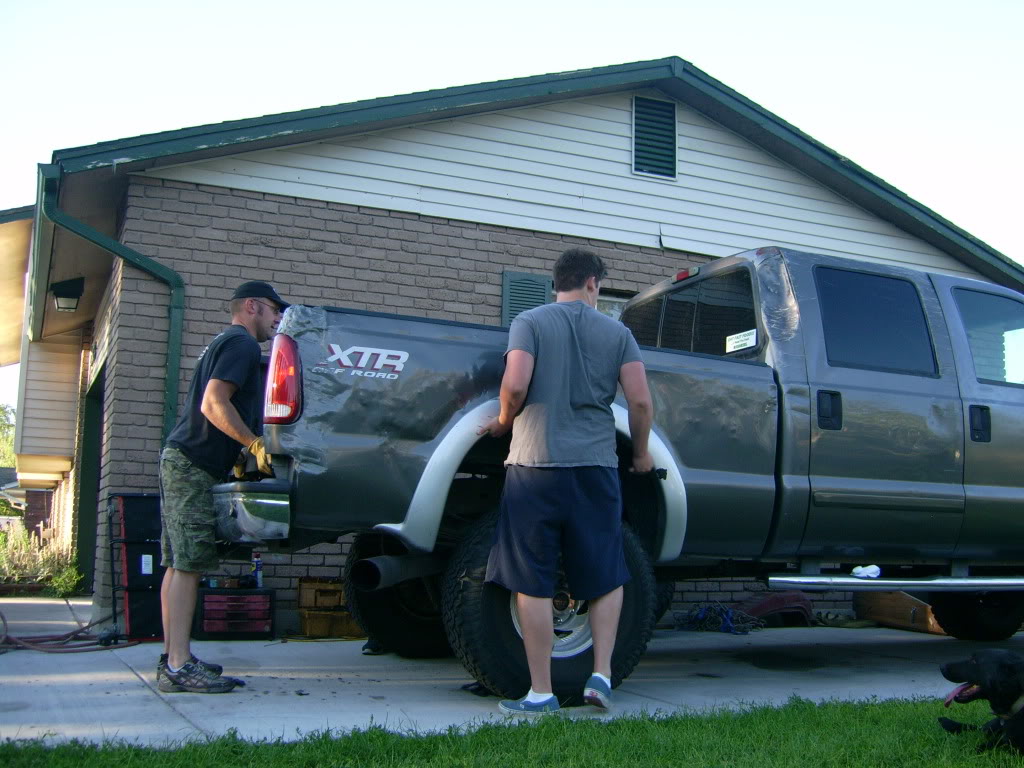
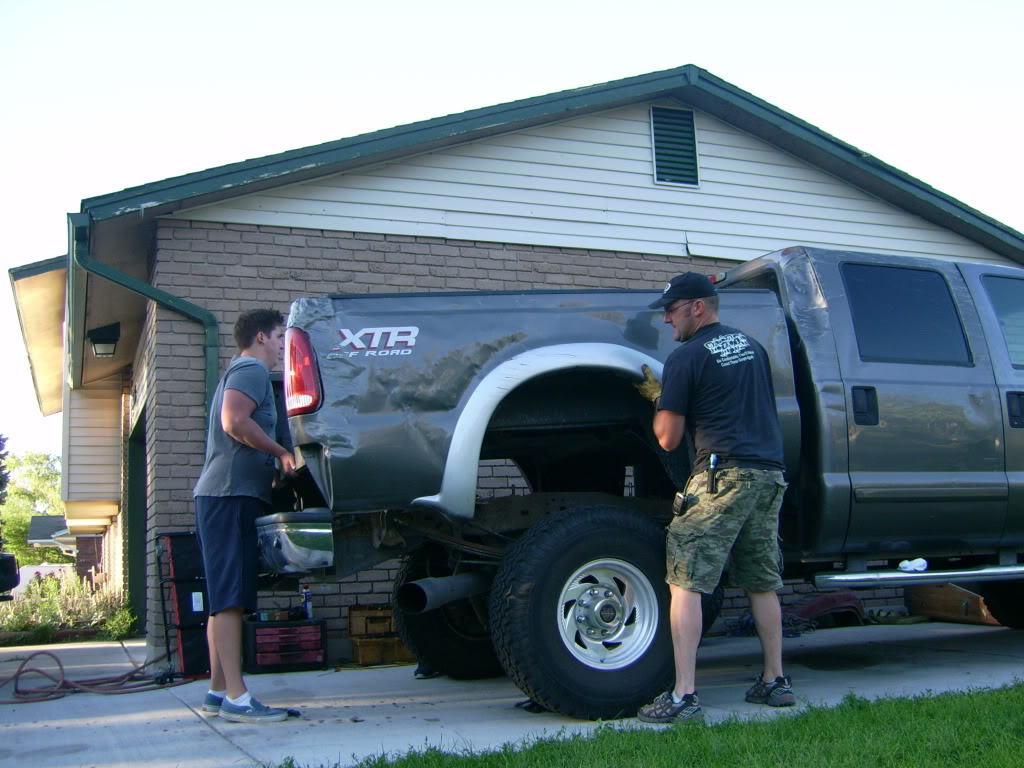
By the way, what does that XTR sticker mean anyway?
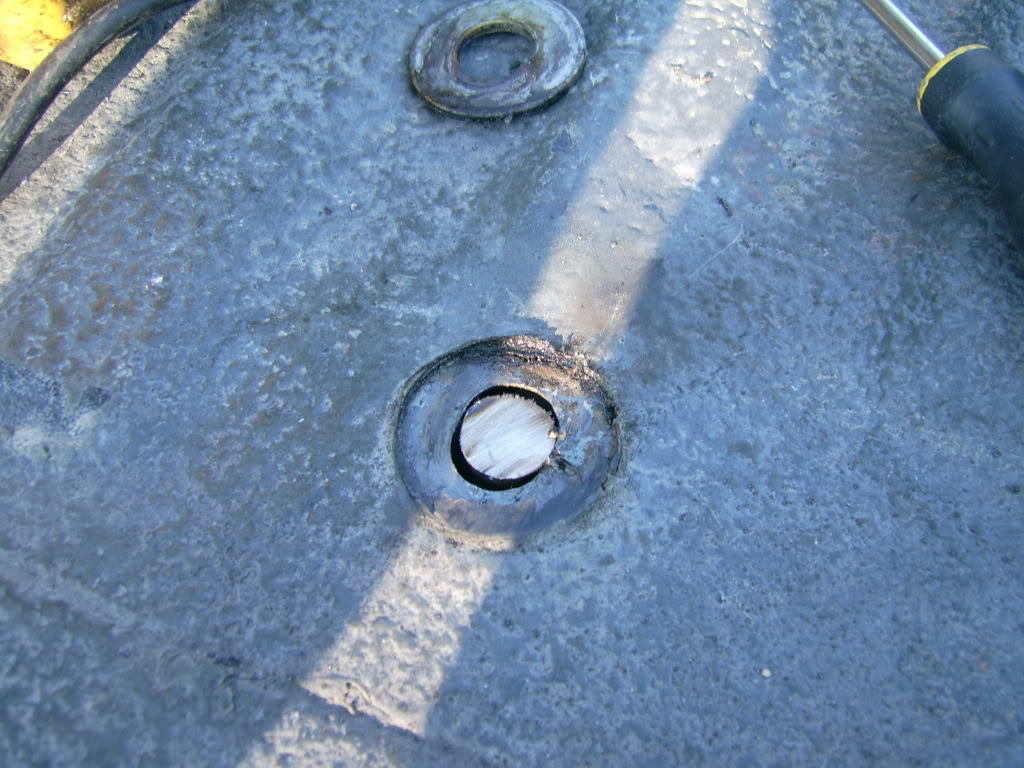
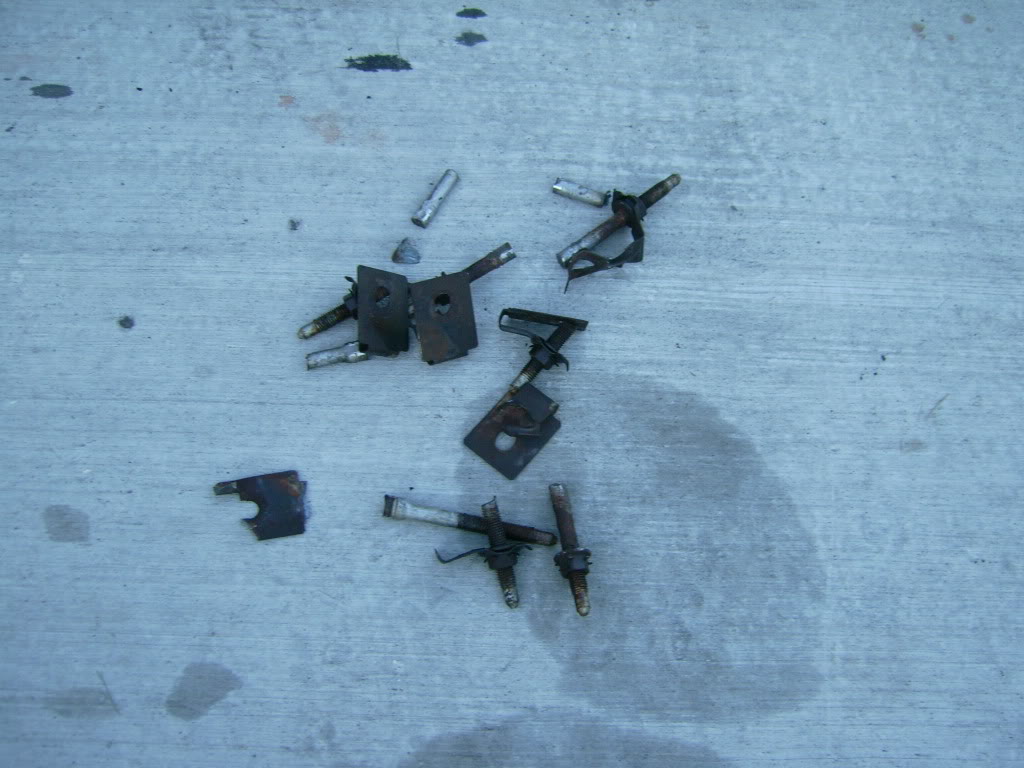
Now it was time to remove the stubborn bolts and rusted retainer clips using copious amounts of WD40 and brute force:
The ones that didn't want to come off with mere brute force and copious amounts of WD40 were chopped up. Here's the pile of offending hardware when I finished:
By this time, it was starting to get dark out, and I couldn't really do anything else, as my buddies had gone home and the Ford parts department was closed, so I couln't buy the new fasteners, so I called it a night. I'm thinking I'm going to perform a snorkellectomy before I install the new bed, seing as it's sitting there in the open and all.
Tune in shortly for the next chapter!
I picked up my 02 F350 for just pennies a couple of years ago because it had been in an accident. I was tipped over on it's side in the snow. I've allready changed out the brush-guard, front fender, bumper, and the front door. I just got a really good deal on this used bed ($500, delivered to my house):
So what follows are pics and an expaination of what was involved in swapping the boxes.
First things, I got under the truck with a can of WD40 and soaked down all 8 of the bolts (Just a note, the bed on the truck has 8 bolts, but the tan one only has holes for 6. I'm going to drill holes for the other 2):
Next thing I did was dissconnect the fuel filler neck from the bed. There are only 3 screws holding in place. I removed them, then I crawled under the truck and muscled the filler neck out of the hole, and secured it out of the way:
Since the nuts on the bottom of the frame rails are retained by little clips, you dont have to have a wrench on the bottom backing you up, so I got out my trusty old T50 Torx socket and went to work loosening the bolts. Or that's how it should have gone. What really happened is the first bolt came right out, then I broke the socket on the next one:
So off to Autozone to exchange the socket for a new one. It broke. So back to Autozone to exchange it for another new one. Then to Sears to buy a Craftsman socket. It broke. So I said "Screwit! I'm getting out the grinder!" and I cut of the remaining 7 bolts:
Next step was to dissconnect the wiring (sorry no picture), there are just 2 connectors behind the driver's side frame rail. After those were free, it was time to round up a couple of friends to help lift. These beds are surprisingly light. Just the 3 of us moved it with minimal effort:
By the way, what does that XTR sticker mean anyway?
Now it was time to remove the stubborn bolts and rusted retainer clips using copious amounts of WD40 and brute force:
The ones that didn't want to come off with mere brute force and copious amounts of WD40 were chopped up. Here's the pile of offending hardware when I finished:
By this time, it was starting to get dark out, and I couldn't really do anything else, as my buddies had gone home and the Ford parts department was closed, so I couln't buy the new fasteners, so I called it a night. I'm thinking I'm going to perform a snorkellectomy before I install the new bed, seing as it's sitting there in the open and all.
Tune in shortly for the next chapter!

#4
08-13-2010, 11:44 AM
I've got a stud welder ordered. I'm going to pull it out myself. Thankfully the truck went over in deep snow, so the door frame is still in pretty good condition, so I think that pulling the dent is all I'm going to need to do (meaning that the door still seals up allright, so I'm not planning on cutting and welding in a new cab corner).
#6
08-13-2010, 11:49 AM
Posting Guru
#7
08-13-2010, 11:50 AM
Posting Guru
I was thinking of doing that too. What coating did you use?
I've got a stud welder ordered. I'm going to pull it out myself. Thankfully the truck went over in deep snow, so the door frame is still in pretty good condition, so I think that pulling the dent is all I'm going to need to do (meaning that the door still seals up allright, so I'm not planning on cutting and welding in a new cab corner).
I've got a stud welder ordered. I'm going to pull it out myself. Thankfully the truck went over in deep snow, so the door frame is still in pretty good condition, so I think that pulling the dent is all I'm going to need to do (meaning that the door still seals up allright, so I'm not planning on cutting and welding in a new cab corner).
Trending Topics
#9
08-13-2010, 12:32 PM
Postmaster
Join Date: Oct 2007
Location: Illinois
Posts: 4,202
Likes: 0
Received 0 Likes
on
0 Posts
I was thinking of doing that too. What coating did you use?
I've got a stud welder ordered. I'm going to pull it out myself. Thankfully the truck went over in deep snow, so the door frame is still in pretty good condition, so I think that pulling the dent is all I'm going to need to do (meaning that the door still seals up allright, so I'm not planning on cutting and welding in a new cab corner).
I've got a stud welder ordered. I'm going to pull it out myself. Thankfully the truck went over in deep snow, so the door frame is still in pretty good condition, so I think that pulling the dent is all I'm going to need to do (meaning that the door still seals up allright, so I'm not planning on cutting and welding in a new cab corner).
I used POR-15. I hope it lasts a long time...

#11
08-13-2010, 01:20 PM
What's a "wiggle wire"?
#12
08-13-2010, 01:38 PM

#13
08-13-2010, 01:47 PM
#15
08-13-2010, 02:03 PM
Since the nuts on the bottom of the frame rails are retained by little clips, you dont have to have a wrench on the bottom backing you up, so I got out my trusty old T50 Torx socket and went to work loosening the bolts. Or that's how it should have gone. What really happened is the first bolt came right out, then I broke the socket on the next one:
So off to Autozone to exchange the socket for a new one. It broke. So back to Autozone to exchange it for another new one. Then to Sears to buy a Craftsman socket. It broke. So I said "Screwit! I'm getting out the grinder!" and I cut of the remaining 7 bolts:
So off to Autozone to exchange the socket for a new one. It broke. So back to Autozone to exchange it for another new one. Then to Sears to buy a Craftsman socket. It broke. So I said "Screwit! I'm getting out the grinder!" and I cut of the remaining 7 bolts:
I think the bolts are stainless and so they gall on installation so there isn't much you can do to prevent it except apply never seize on assembly.
Way to go Ford for the **** poor over priced nuts and bolts.
 The guy who designed that setup must have done so after a nooner on friday.