
What did you do to the X today?
#2296
 11-17-2011, 09:03 AM


She's fixed!!!!
After staying up till 4:00 this morning, I was able to find the cause of mine and my trucks unhappiness: Injector #1
It was the cause of the embarrassing clouds of white smoke on cold mornings and misfiring when warm. It was pulled and replaced with another Stage I injector and now runs awesome, the way she used to...

Next on the list: an oil change and programming changes
It was the cause of the embarrassing clouds of white smoke on cold mornings and misfiring when warm. It was pulled and replaced with another Stage I injector and now runs awesome, the way she used to...
Next on the list: an oil change and programming changes
#2297
11-17-2011, 09:19 AM

ssdesigns, that was not the point of failure, it was the adhesive on the backside of it. The velcro stuck together very well and is very hard to separate. I even made sure that I cleaned the plastic off of the pillar since it had been cleaned and finished with Armour All before not making a very good surface to try and stick anything to.
#2298
11-17-2011, 09:32 AM
After staying up till 4:00 this morning, I was able to find the cause of mine and my trucks unhappiness: Injector #1
It was the cause of the embarrassing clouds of white smoke on cold mornings and misfiring when warm. It was pulled and replaced with another Stage I injector and now runs awesome, the way she used to...
Next on the list: an oil change and programming changes
It was the cause of the embarrassing clouds of white smoke on cold mornings and misfiring when warm. It was pulled and replaced with another Stage I injector and now runs awesome, the way she used to...
Next on the list: an oil change and programming changes
It feels good to have a properly operating bus now doesn't it...
Did you sell your f5 yet or are you going to hang on to it?

#2299
11-17-2011, 03:02 PM
#2300
11-17-2011, 03:56 PM

#2301
11-17-2011, 04:26 PM
Freshman User
Join Date: Dec 2010
Location: Salt Lake City, Utah
Posts: 48
Likes: 0
Received 0 Likes
on
0 Posts
#2303
11-17-2011, 05:28 PM
Cargo Master
#2304
11-17-2011, 05:46 PM
Cargo Master
Running Board LIghts
Bought the running board lights off of E-Bay (can't remember who posted about them - if you know let me know so I can spread some love their way).
Very easy to do...three bolts on each light, one at the end of the running board (front or rear respectively), one bolt inboard of the center and one outboard.
I bought 2 sets:

I didn't realize it but they came with bulbs and sockets. The sockets are straight (not 90 degrees like stock) but they fit fine with some clearance left between it and the bracket you remove to get to it.
The driver side on my rig was totall wrecked, (old on right, new on left):

The driver side front was the top one, just cloudy with a wrecked socket...the driver side rear was cracked (you can see it on the bottom) and the bulb and socket had become one.
I was hoping I could save the factory wiring harness plug, but it goes directly into the socket (no wire pigtail off of the factory socket), so have 4 butt connectors and some shrink wrap or the waterproof connectors.
I couldn't get the old ones out without tearing them up...just too tight. I found the easiest way is once you get the bracket off and the bulb out, you should see two clips (take your pick - bottom or top)...take a large flat head screwdriver, break those babies off, then spin it around and pop the back of the reflector with the back of the screwdriver a few times (alternate inboard and outboard) and they'll pop right out.
All new and shiny now and CRAZY bright compared to the old.
If your bulbs are good keep them, they fit in the new socket. Took maybe 20 minutes total to do all 4.
Now to figure out how to get some additional material in the door stops:

The prior owner of mine apparently tried to open the door in a hurricane and it opened too far, creasing the forward edge of the door (maybe 3/4" to 1" long). I'm guessing this stop on the passenger door (driver door shown above) is cracked or crushed...wondering if I can a) replace it and b) add some additional rubber so it won't open so far.
Not sure about you guys, but I don't need anywhere near the amount of room she gives me to get in at full swing on the doors - even in my utilities with my thigh rig on...
Very easy to do...three bolts on each light, one at the end of the running board (front or rear respectively), one bolt inboard of the center and one outboard.
I bought 2 sets:
I didn't realize it but they came with bulbs and sockets. The sockets are straight (not 90 degrees like stock) but they fit fine with some clearance left between it and the bracket you remove to get to it.
The driver side on my rig was totall wrecked, (old on right, new on left):
The driver side front was the top one, just cloudy with a wrecked socket...the driver side rear was cracked (you can see it on the bottom) and the bulb and socket had become one.
I was hoping I could save the factory wiring harness plug, but it goes directly into the socket (no wire pigtail off of the factory socket), so have 4 butt connectors and some shrink wrap or the waterproof connectors.
I couldn't get the old ones out without tearing them up...just too tight. I found the easiest way is once you get the bracket off and the bulb out, you should see two clips (take your pick - bottom or top)...take a large flat head screwdriver, break those babies off, then spin it around and pop the back of the reflector with the back of the screwdriver a few times (alternate inboard and outboard) and they'll pop right out.
All new and shiny now and CRAZY bright compared to the old.
If your bulbs are good keep them, they fit in the new socket. Took maybe 20 minutes total to do all 4.
Now to figure out how to get some additional material in the door stops:
The prior owner of mine apparently tried to open the door in a hurricane and it opened too far, creasing the forward edge of the door (maybe 3/4" to 1" long). I'm guessing this stop on the passenger door (driver door shown above) is cracked or crushed...wondering if I can a) replace it and b) add some additional rubber so it won't open so far.
Not sure about you guys, but I don't need anywhere near the amount of room she gives me to get in at full swing on the doors - even in my utilities with my thigh rig on...
#2305
11-17-2011, 05:48 PM
Join Date: Jun 2011
Location: Jacksonville, Florida
Posts: 312
Likes: 0
Received 0 Likes
on
0 Posts
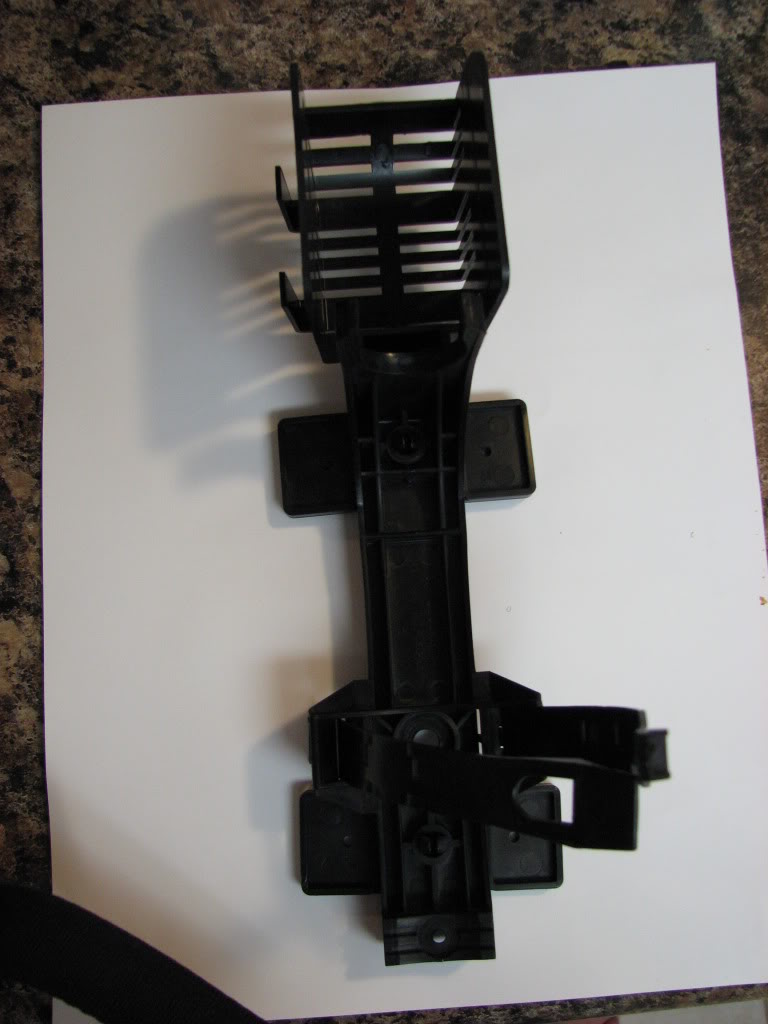
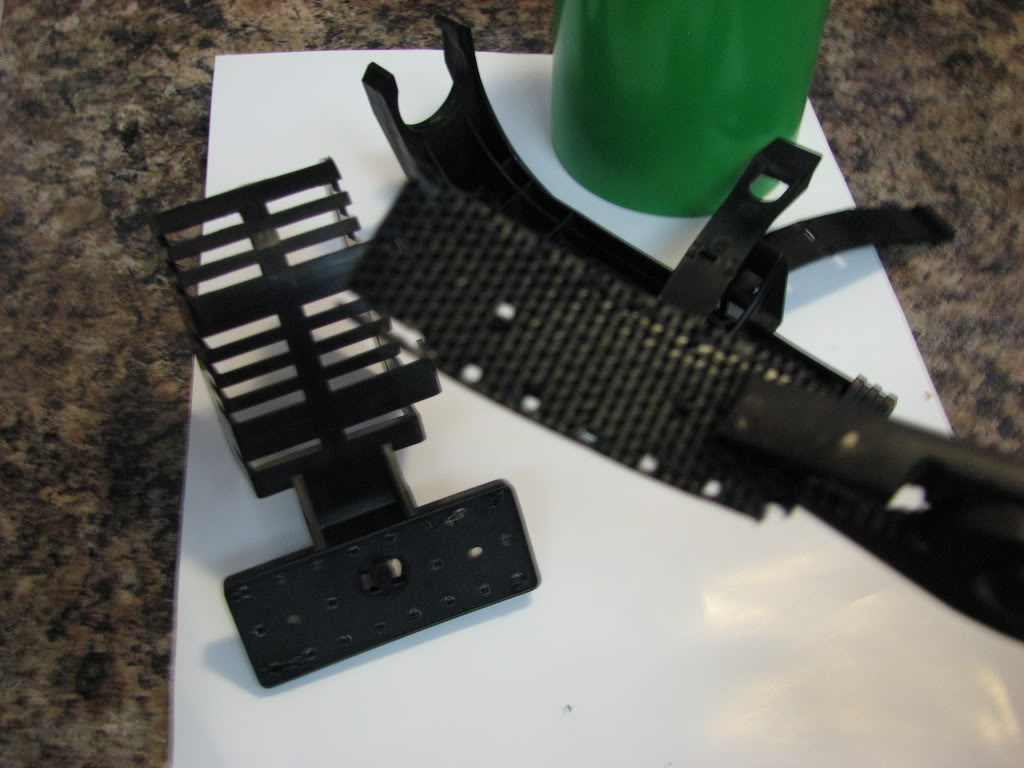
Well after I got home I decided to tackle the Fire Extinguisher mount. After a closer inspection I found that it was not going to be as easy as to just remove the T-bars off of the bracket for the cleaner look that I desired.
The bottom one popped right off while the upper one was attached to the shield that surrounded the head of the unit...
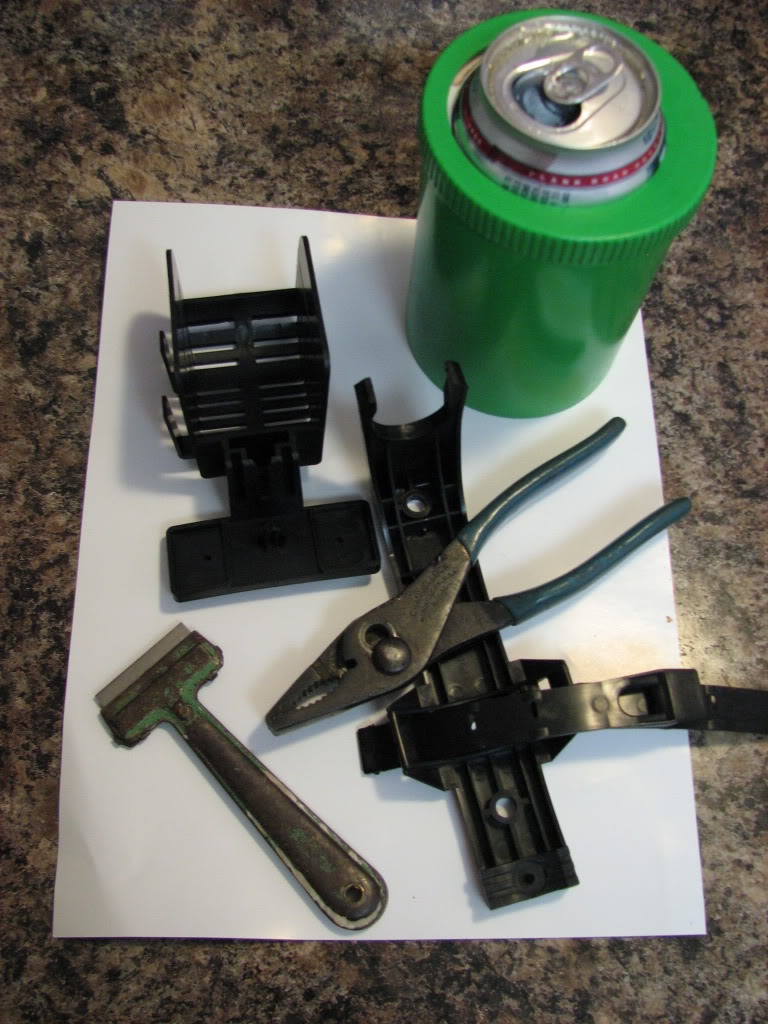
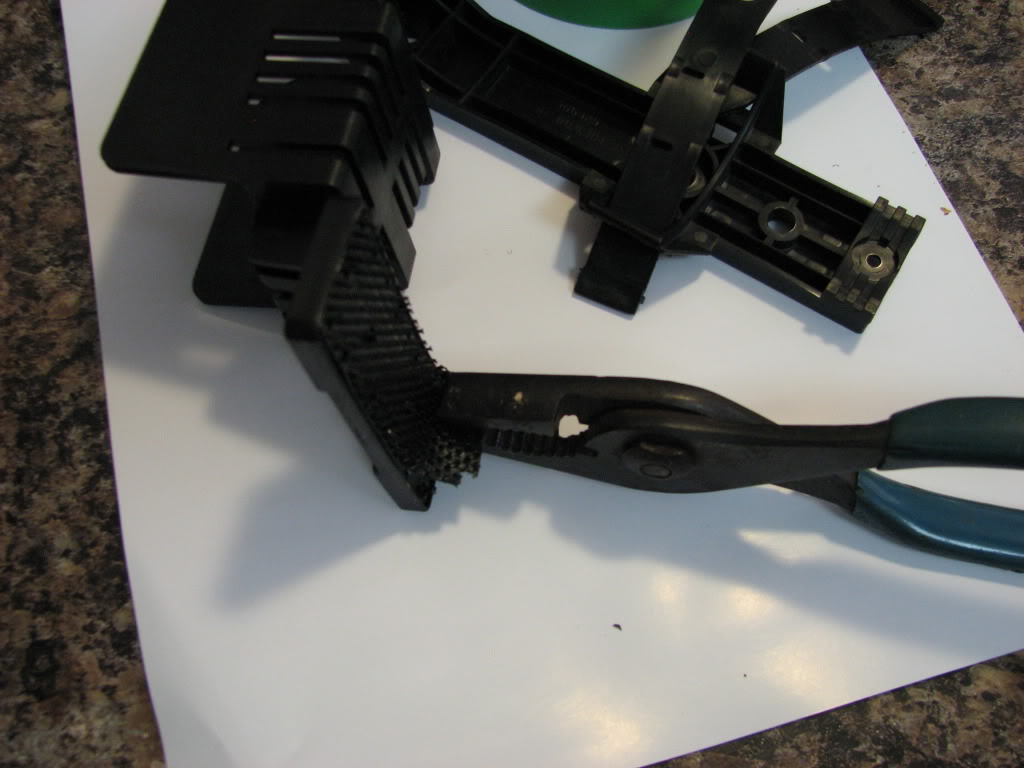
So some modifications were in order, the tools needed... 1936 pair of pliers... CHECK, 1945 modified Razor Blade Scraper... CHECK, Beer Alignment Tool... CHECK & CHECK...
The Mac Tool Truck guy swung by but I told him that I was good...
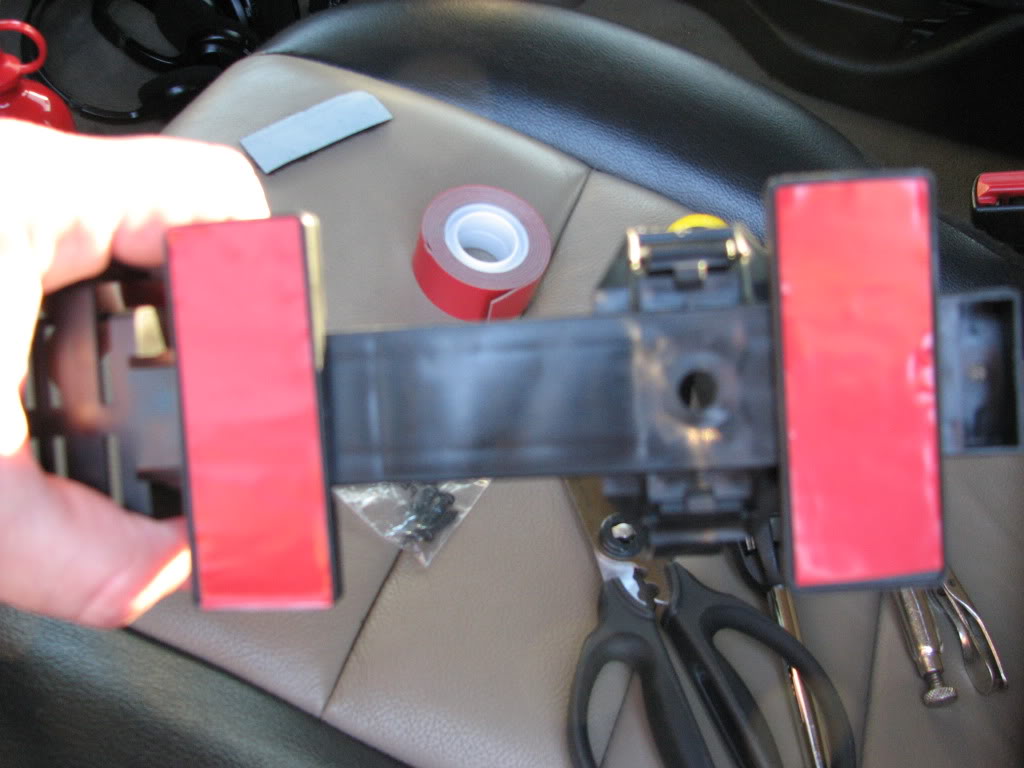
Use the 1936 pair of pliers to rip the velcro, actually it was the same stuff that Steve pointed out, Molded Hook Tape MVA #8, off of the T-bar. It was actually not glued or adhesived, rather they plastic spot welded it to the T-bar...
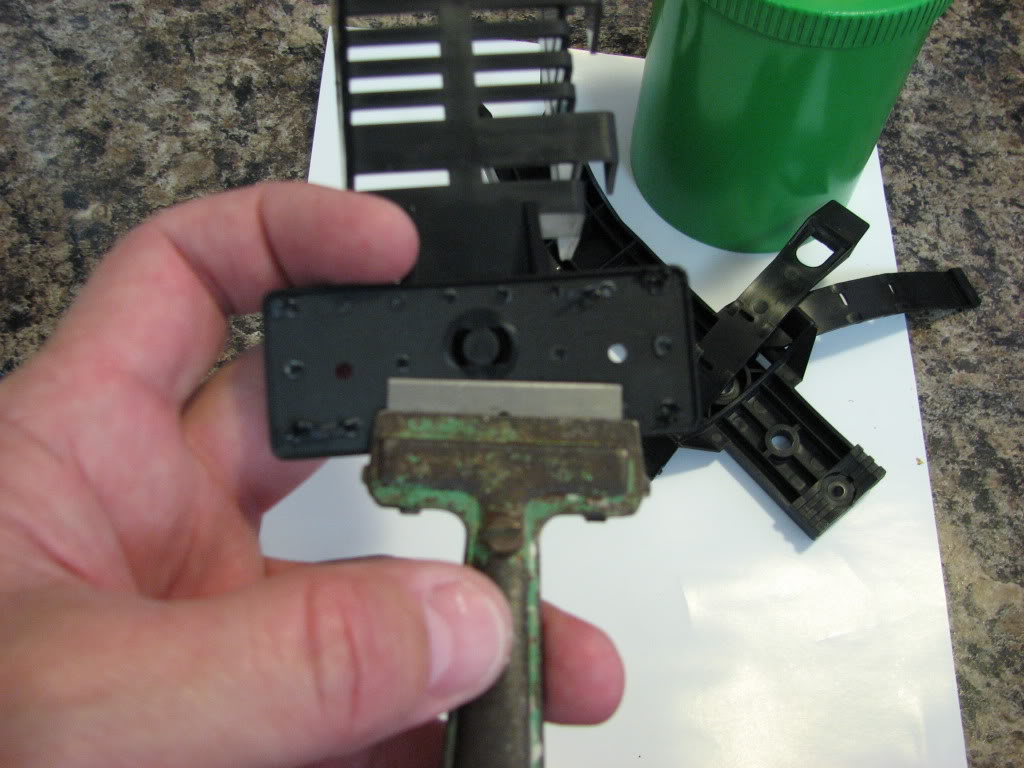
Take a drink of Beer Alignment Tool and break out the 1945 modified Razor Blade Scraper to smooth the surfaces... steady...
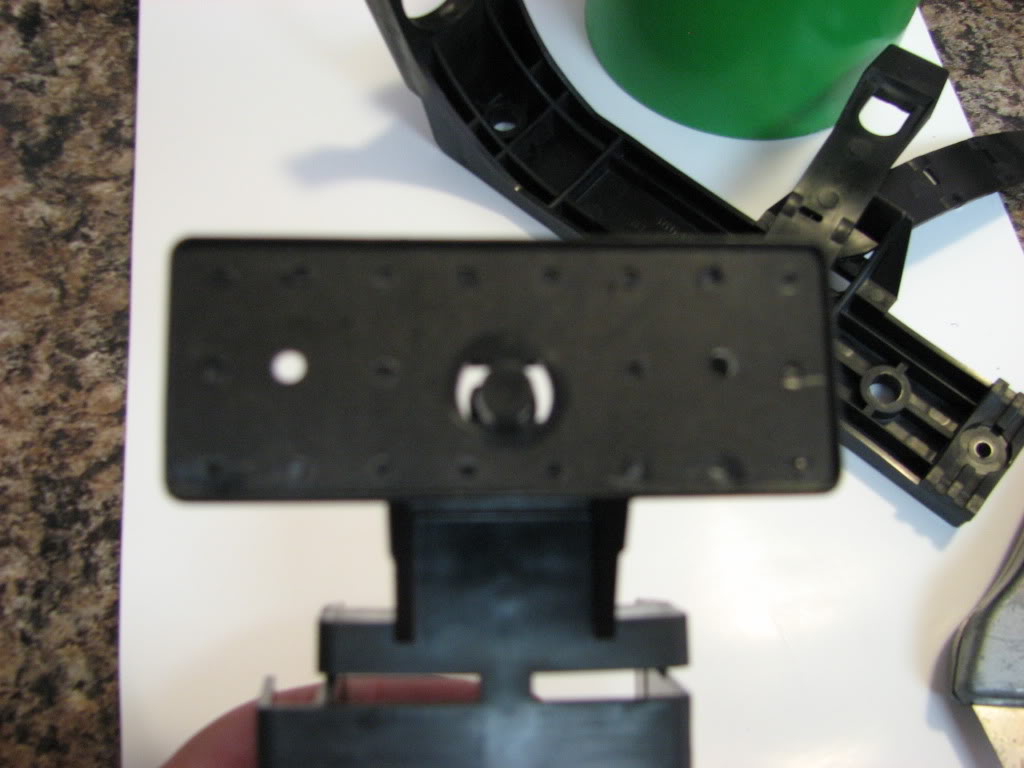
Head back out to the EX to finish...
Add the double-sided tape, (I used the outdoor one because it was rated to hold 5lbs rather than just 2lbs)...
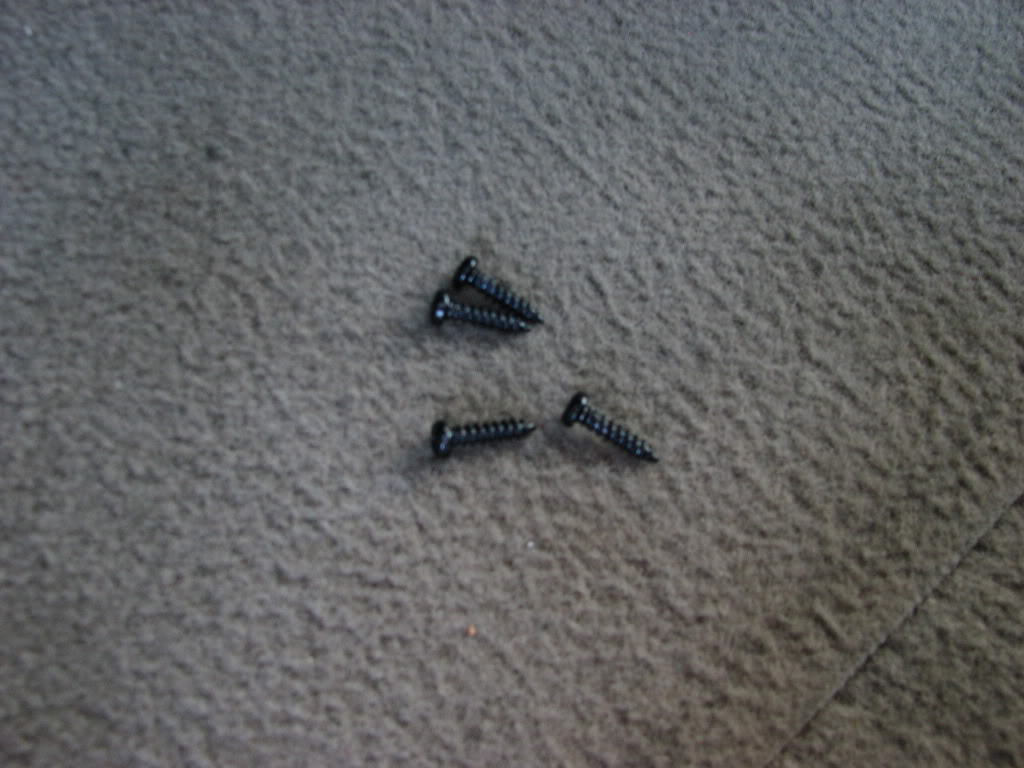
Located some little black screws...
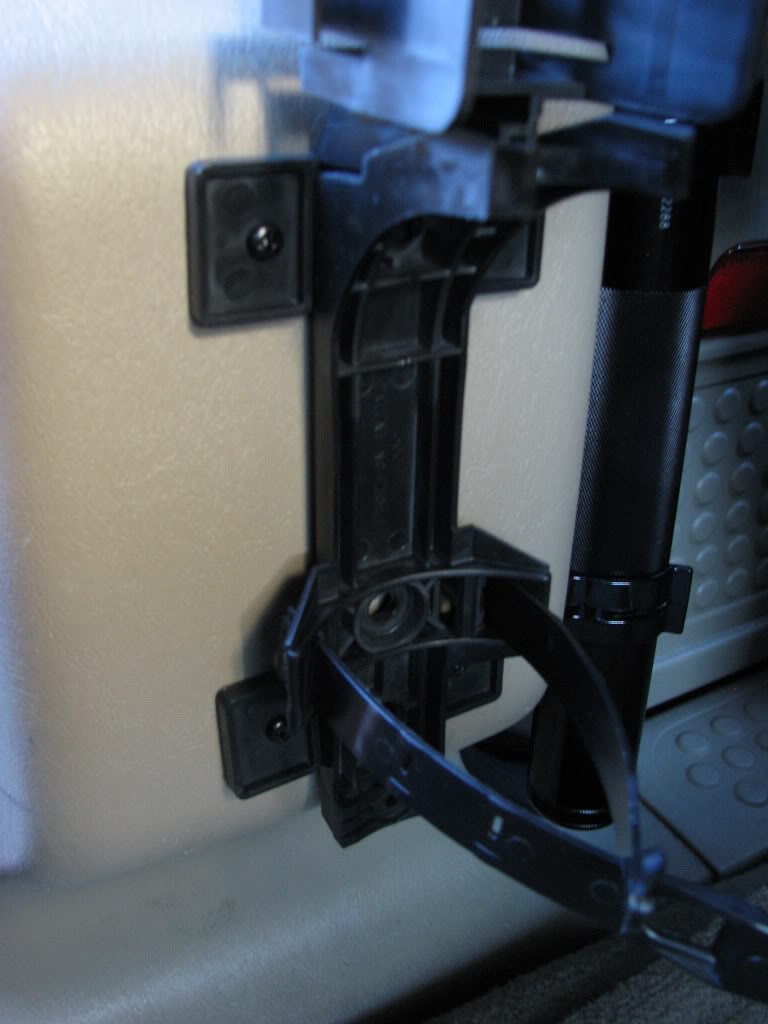
Stuck the bracket back to the proper location and screwed in the screws...
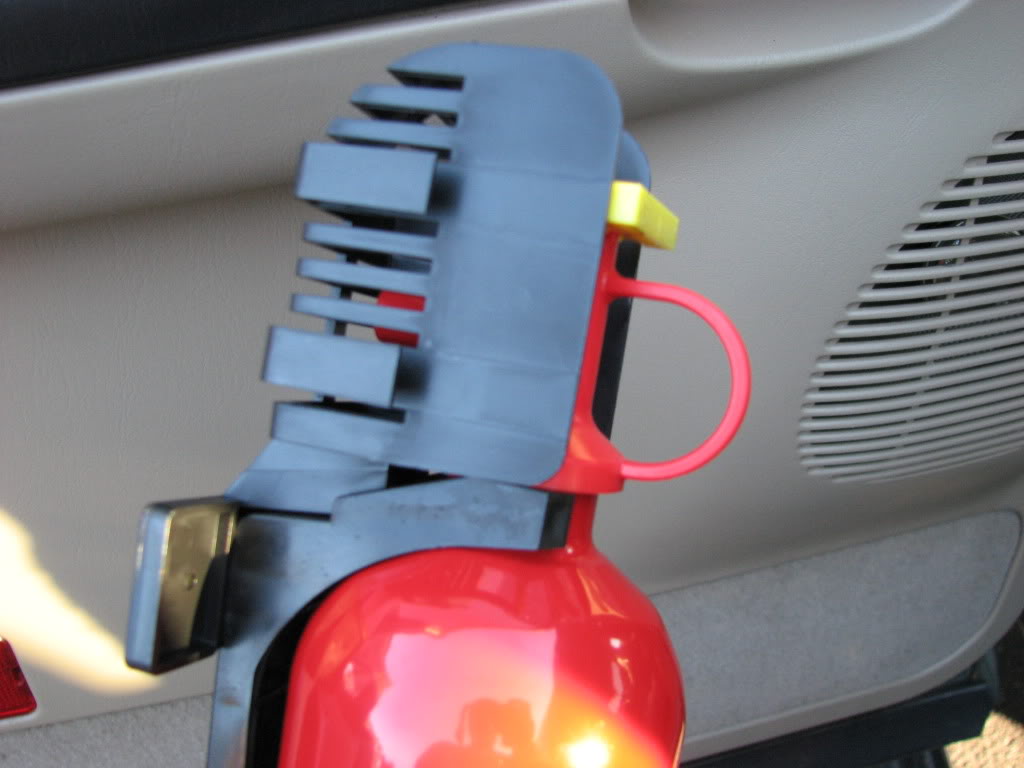
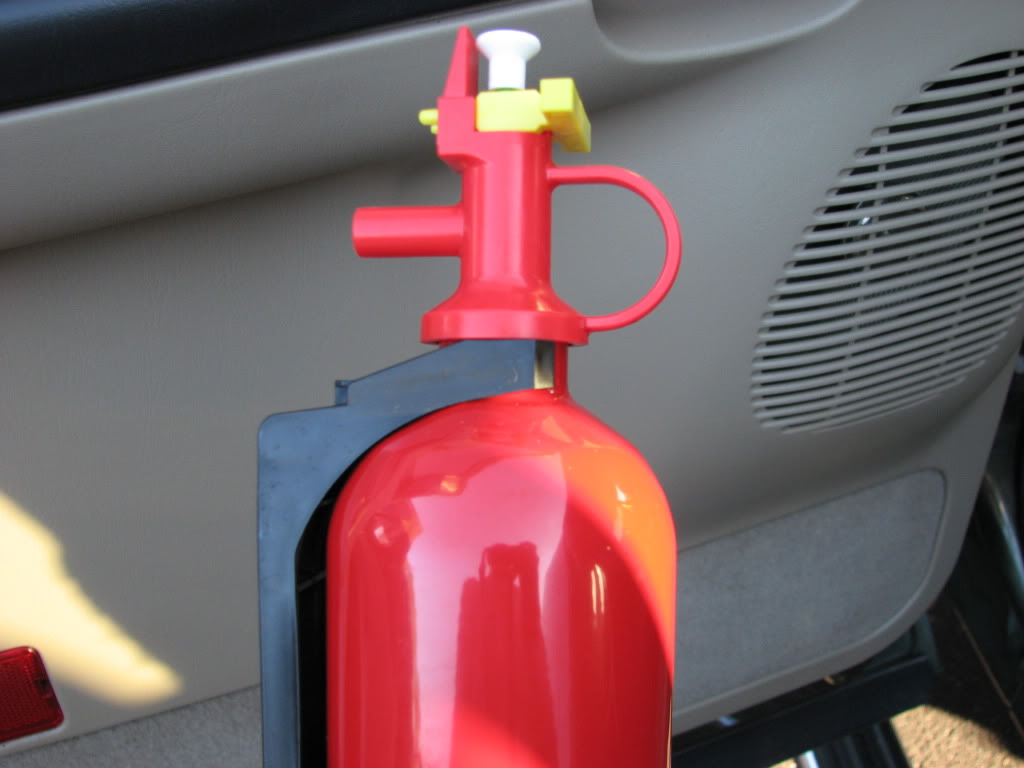
And there you have it, take two of the Fire Extinguisher install...
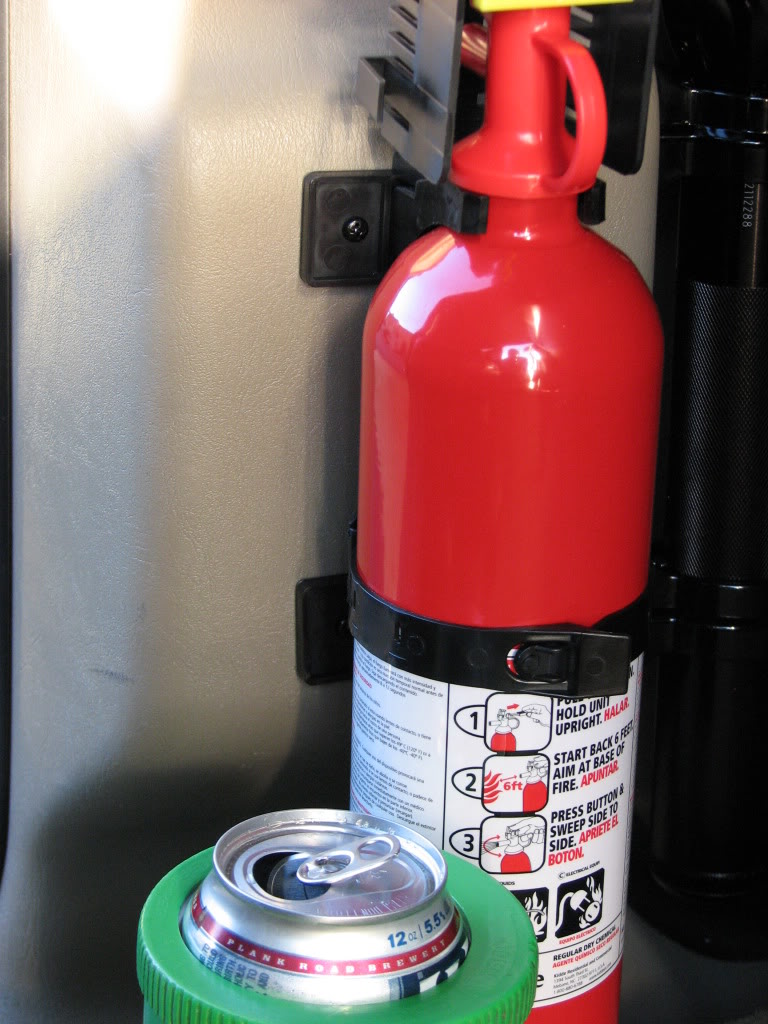
Looks good and all lined up with the Beer Alignment Tool...
The mods didn't take but about two thirds of the Beer Alignment Tool, so that was not that bad...
I actually felt a little frisky and went for more punishment...
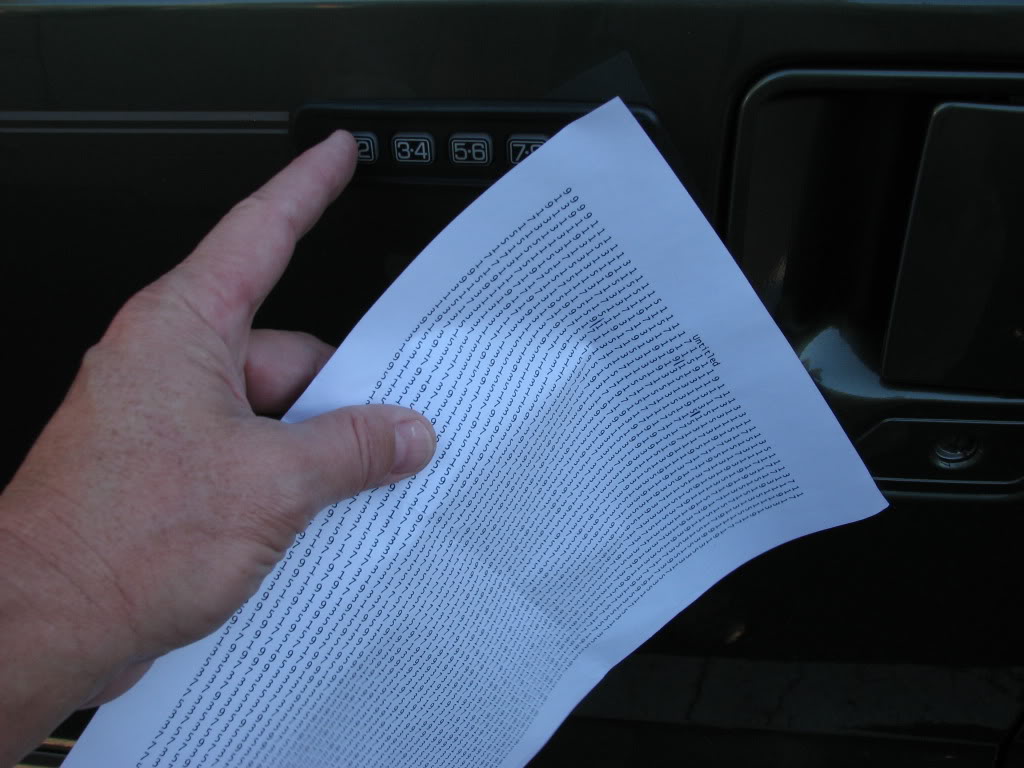
Yup, that is the dreaded code sheet to try and hack my way in to finding the factory code for the keyless entry. I only made it through about 5 lines, which is more than you realize when doing it by yourself. It would be easier if someone was calling them out to you.
The bottom one popped right off while the upper one was attached to the shield that surrounded the head of the unit...
So some modifications were in order, the tools needed... 1936 pair of pliers... CHECK, 1945 modified Razor Blade Scraper... CHECK, Beer Alignment Tool... CHECK & CHECK...
The Mac Tool Truck guy swung by but I told him that I was good...
Use the 1936 pair of pliers to rip the velcro, actually it was the same stuff that Steve pointed out, Molded Hook Tape MVA #8, off of the T-bar. It was actually not glued or adhesived, rather they plastic spot welded it to the T-bar...
Take a drink of Beer Alignment Tool and break out the 1945 modified Razor Blade Scraper to smooth the surfaces... steady...
Head back out to the EX to finish...
Add the double-sided tape, (I used the outdoor one because it was rated to hold 5lbs rather than just 2lbs)...
Located some little black screws...
Stuck the bracket back to the proper location and screwed in the screws...
And there you have it, take two of the Fire Extinguisher install...
Looks good and all lined up with the Beer Alignment Tool...
The mods didn't take but about two thirds of the Beer Alignment Tool, so that was not that bad...
I actually felt a little frisky and went for more punishment...
Yup, that is the dreaded code sheet to try and hack my way in to finding the factory code for the keyless entry. I only made it through about 5 lines, which is more than you realize when doing it by yourself. It would be easier if someone was calling them out to you.
#2306
11-17-2011, 05:55 PM
Cargo Master

If I read right you have a 2005? If so I believe it only takes 5 codes before it makes you reset...might be easier/less annoying to have someone in the truck to turn the key on and off to reset the timer when you hit that 35th character. Don't forget to back up 4 numbers when you re-start the next 35 character string!!

#2307
11-17-2011, 06:01 PM
Posting Guru
Join Date: Jul 2007
Location: Charles Town, WV
Posts: 1,360
Likes: 0
Received 0 Likes
on
0 Posts
#2308
11-17-2011, 06:03 PM
Cargo Master

#2309
11-17-2011, 06:05 PM
Join Date: Jun 2011
Location: Jacksonville, Florida
Posts: 312
Likes: 0
Received 0 Likes
on
0 Posts
If I read right you have a 2005? If so I believe it only takes 5 codes before it makes you reset...might be easier/less annoying to have someone in the truck to turn the key on and off to reset the timer when you hit that 35th character. Don't forget to back up 4 numbers when you re-start the next 35 character string!!
[EDIT]You can actually see my marks in the picture... DOH!!![/EDIT]
#2310
11-17-2011, 06:07 PM
Posting Guru
Join Date: Jul 2007
Location: Charles Town, WV
Posts: 1,360
Likes: 0
Received 0 Likes
on
0 Posts