My D60 swap into '96 CCSB PSD
#1
 05-20-2014, 06:17 PM

My D60 swap into '96 CCSB PSD
Eventually a RSK with SD springs front and back will be installed. Before that happens I'll get the D60 under her with F350 front springs, and rear blocks if needed. This multi step process may not be the most cost efficient, but it is necessary for my needs.
I've already added longer brake lines and will reuse my calipers. One less thing to to during the swap.
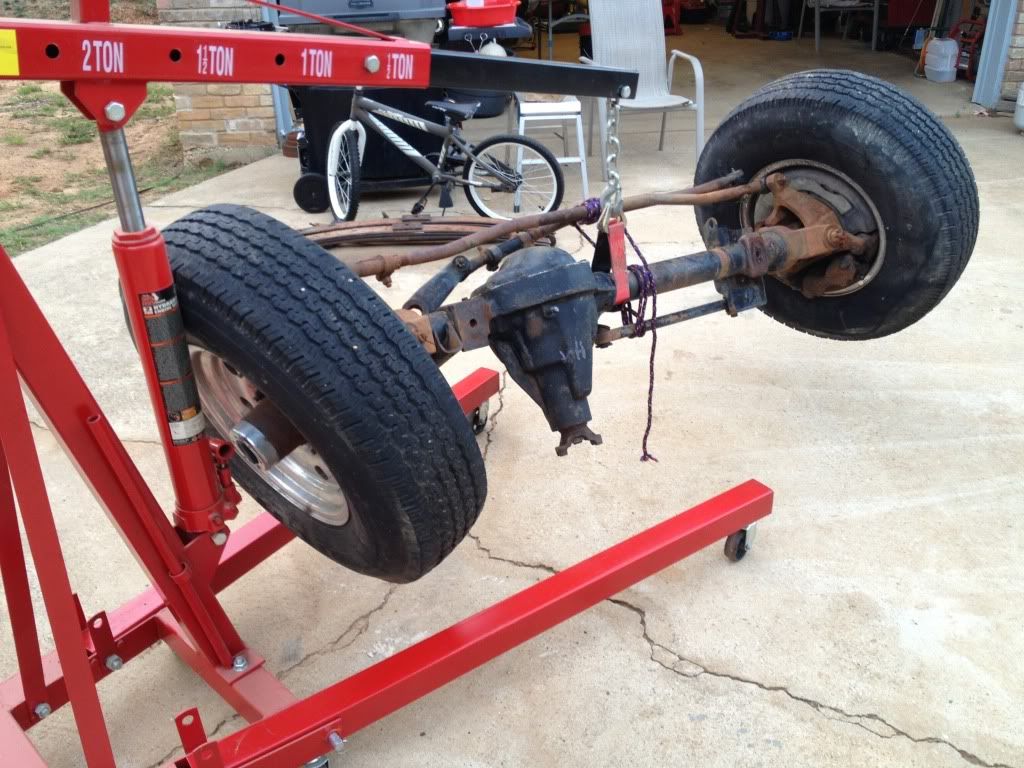
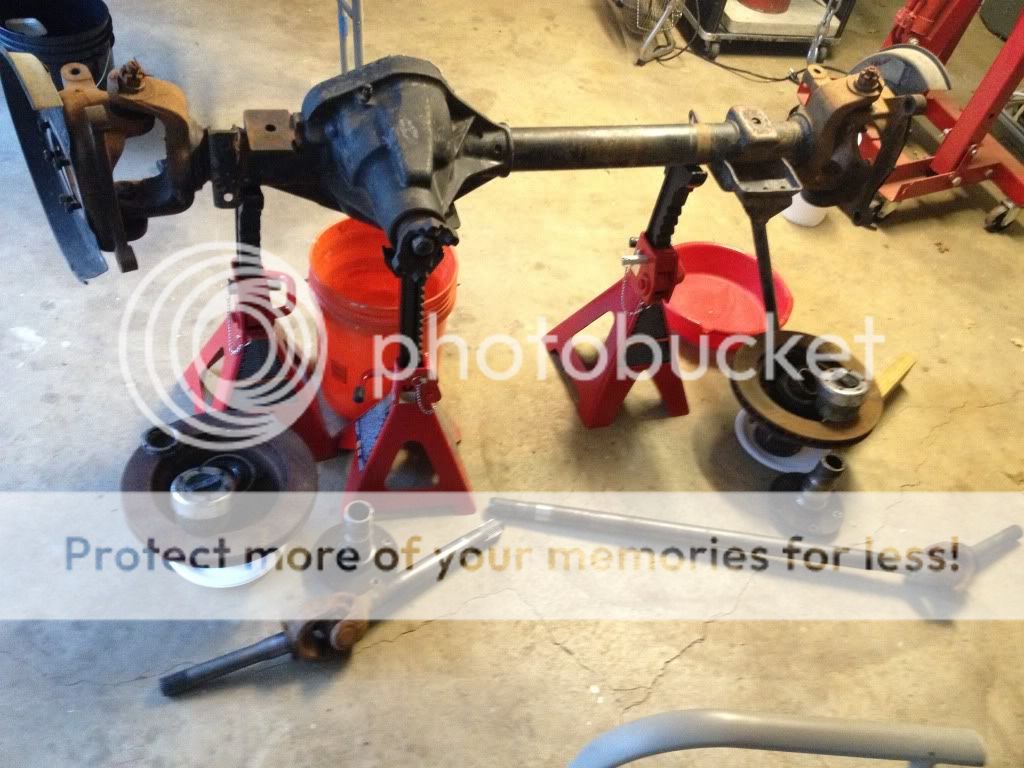
I just spun the yoke a few times to make sure it had 3:55 gears. I picked up the front and rear axles, Alcoa to Alcoa, including what may be usable tires for $700. Got the U bolt bracket, the track bar and bracket and even the steering arm. I couldn't talk the seller out of his front yoke but I still feel I got a great deal.
Bought it from a guy turning his '95 F350 into a 6 wheel drive with military 2 ton (something like that) axles.
This thing is heavy! Now I know why they call it a 1 ton axle...
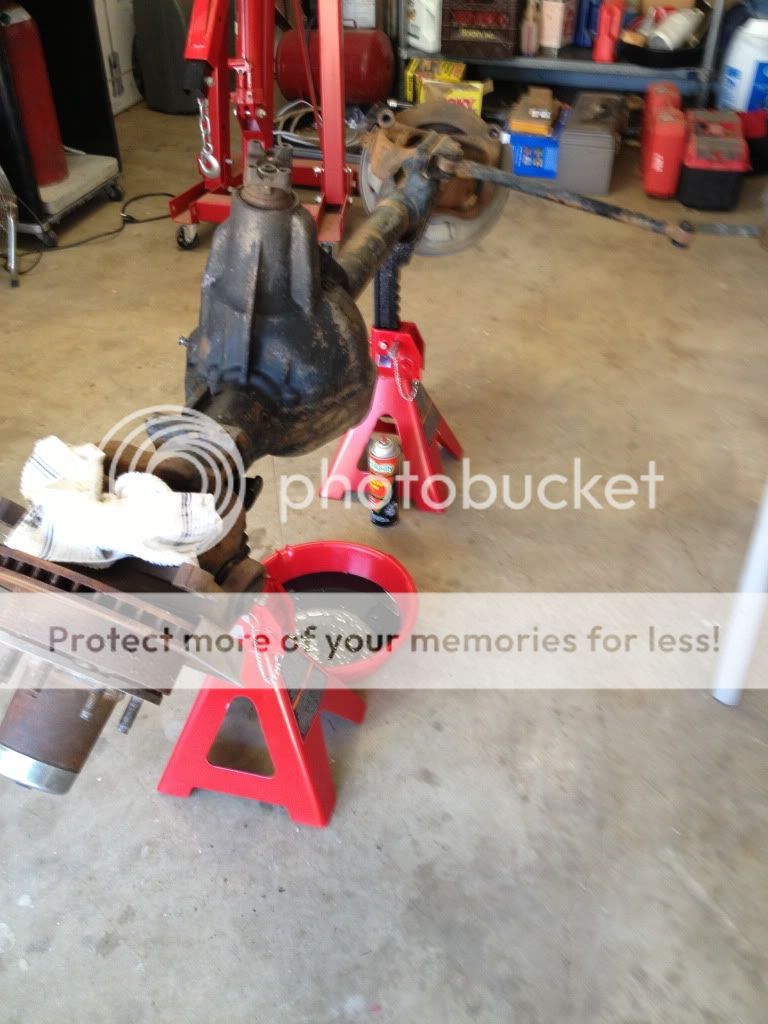
With my brother's help we rolled the axle down to the driveway in preparation for a good pressure wash before I open it up to change the u joints, ball joints and whatever bearings can't be regreased.

Edited 6/10/14 to add a few pics of some of the "must grab" items when you are sourcing your axle.
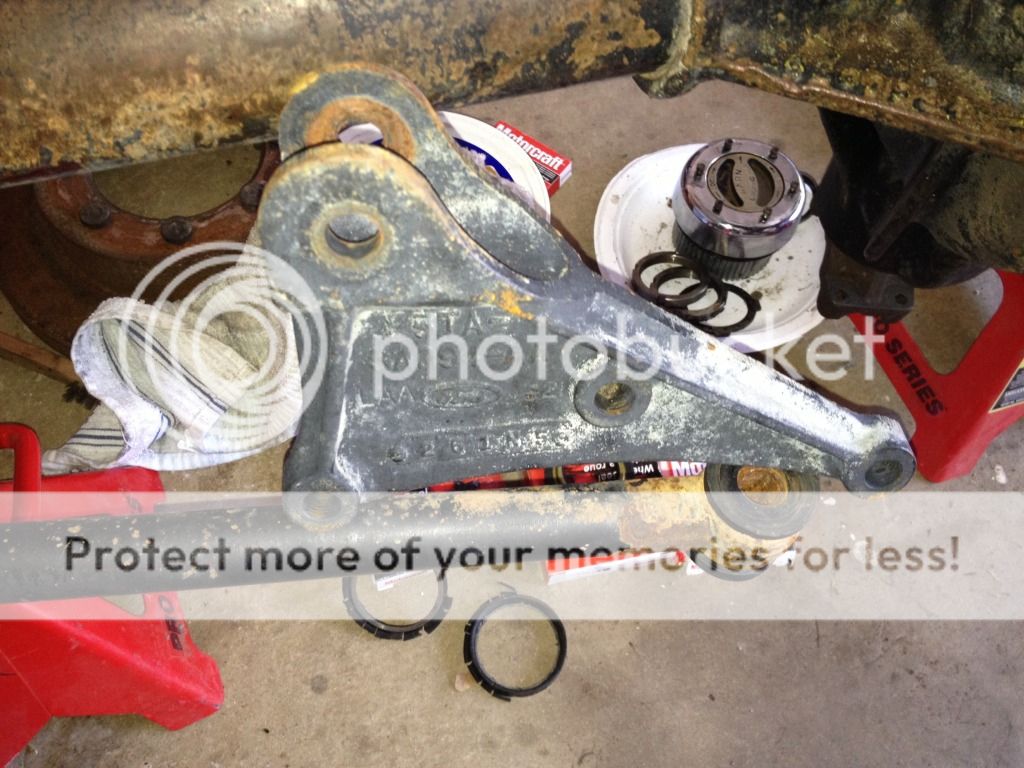
The driver's springs ride just off the edge of the center section and a part of the casting makes for an uneven spot for the nut end of the U joints to bolt to. This is the factory cast piece that makes it simple. As most junkyards simply cut the U bolts with a torch, this piece is likely on the ground, unnoticed and unretrieved. It will likely still have the stub ends of the U bolts in it. Watch for them as you walk through the junkyard for other reasons. These are gold to the person that doesn't get one with his axle. I don't know of a source for these, apparently Ford doesn't make them anymore. Some people grind down the offending hump.

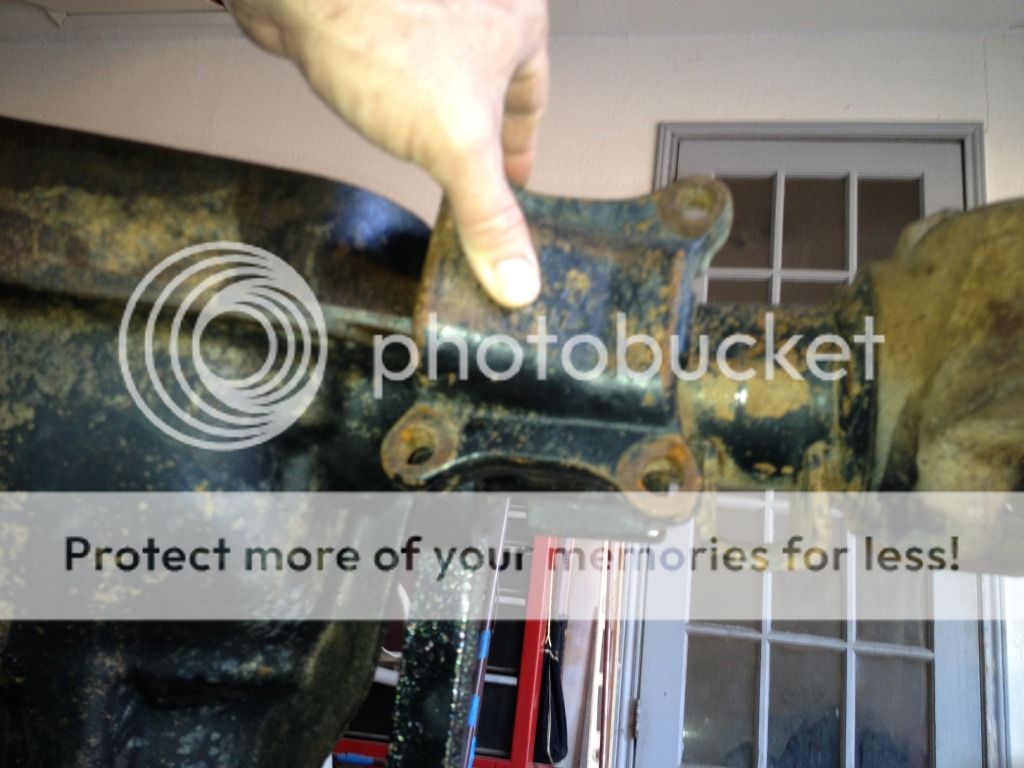
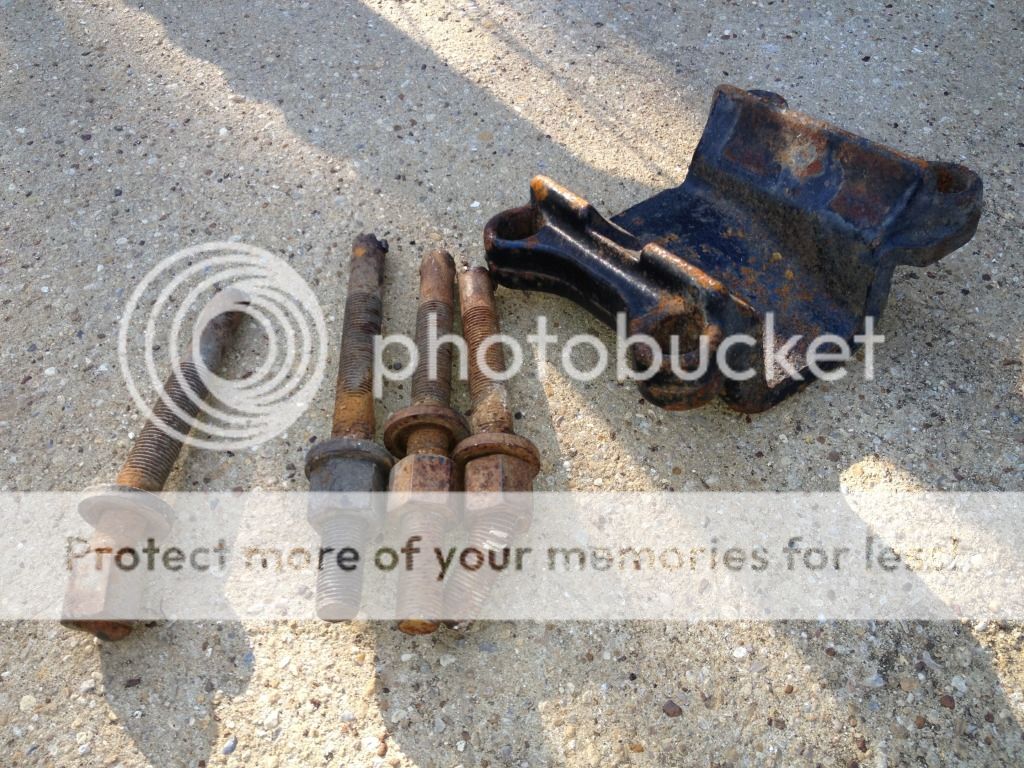
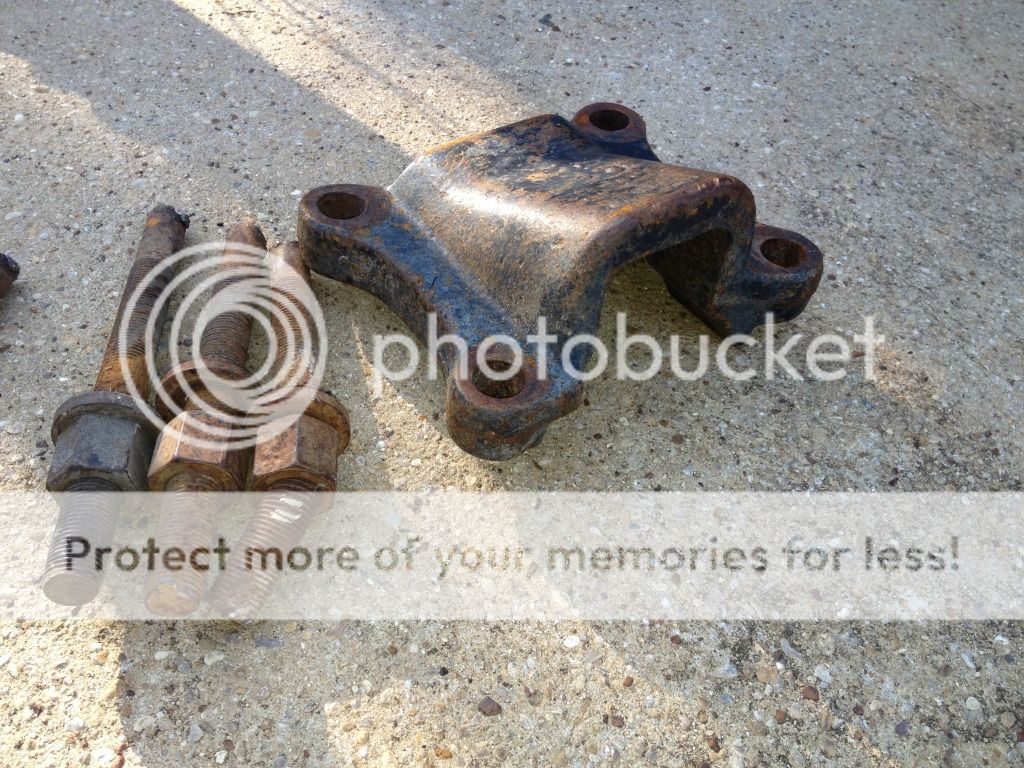
The passenger side has a plate welded to the axle for the nut end of the U bolt. Can't loose this piece.
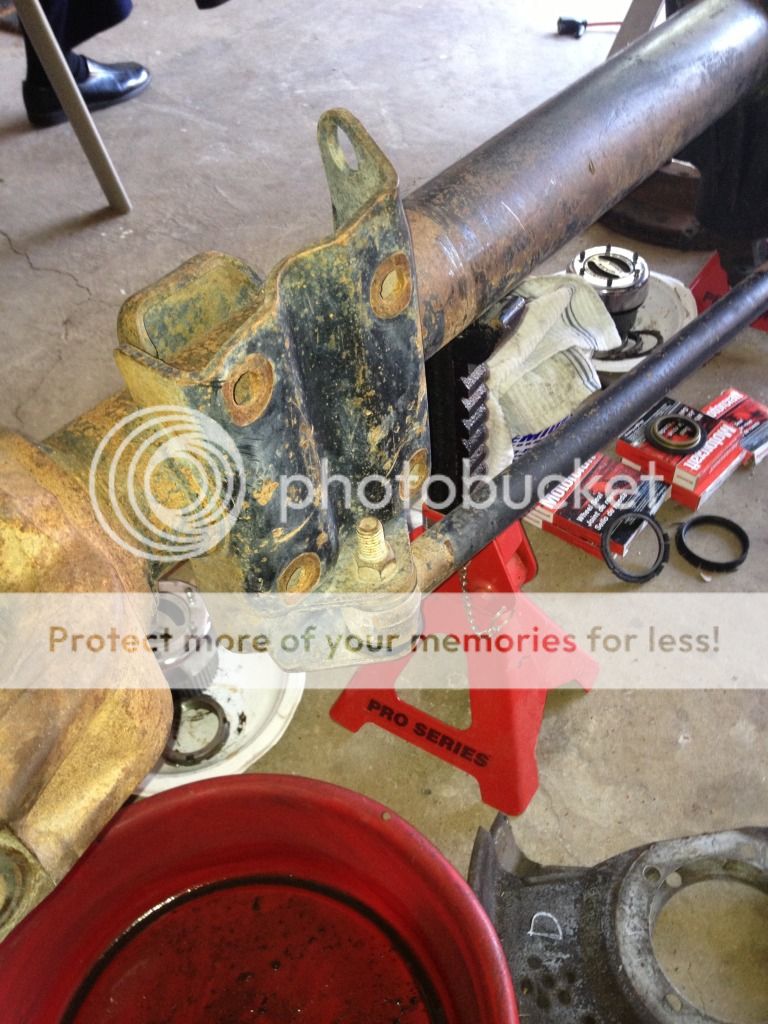
This is also an important part to retrieve. The panard bar, or track bar, bolts to the axle end via a welded bracket. The other end mounts under the oil pan, in existing holes, about where the TTB pivot brackets are bolted. This is available in the aftermarket as lifting the truck usually requires this mounting point be lowered the same amount of lift to keep it somewhat horizontal. The panard or track bar is also readily available.
The pitman arm (the 6" heavy piece that is splined onto the steering box) is longer on the F350 than the F250 and is a recommended part of the swap. I am not sure if the actually allows more steering angle of the wheels or not, but the shorter F250 pitman arm will not move the wheels as far as they can be turned. These are also available from Ford. If you are going to lift the truck, do some research as to when you need a dropped pitman arm to keep all the steering components in line. I don't know the dimensions of these, and will research them if I lift my truck. What I do know is that some of the sellers of these aftermarket pitman arms don't know the dimensions either, so don't count on too much help from them.
Another couple of goodies to retrieve is the front drive shaft and the yoke off the transfer case. Though the F250 drive shaft will work, the F350 drive shaft has a double U joint that eliminates vibration over 45mph that some people report with the F250 drive shaft. But, the F350 driveshaft requires the front yoke from the F350 transfer case. I suspect you could find a hybrid sized U joint to couple the F350 driveshaft to the F250 yoke if you find a parts guy willing to do so. This seems to be another item Ford doesn't make. I found one on ebay ror $150. Try really hard to get the one from the donor truck.
I've already added longer brake lines and will reuse my calipers. One less thing to to during the swap.
I just spun the yoke a few times to make sure it had 3:55 gears. I picked up the front and rear axles, Alcoa to Alcoa, including what may be usable tires for $700. Got the U bolt bracket, the track bar and bracket and even the steering arm. I couldn't talk the seller out of his front yoke but I still feel I got a great deal.
Bought it from a guy turning his '95 F350 into a 6 wheel drive with military 2 ton (something like that) axles.
This thing is heavy! Now I know why they call it a 1 ton axle...
With my brother's help we rolled the axle down to the driveway in preparation for a good pressure wash before I open it up to change the u joints, ball joints and whatever bearings can't be regreased.
Edited 6/10/14 to add a few pics of some of the "must grab" items when you are sourcing your axle.
The driver's springs ride just off the edge of the center section and a part of the casting makes for an uneven spot for the nut end of the U joints to bolt to. This is the factory cast piece that makes it simple. As most junkyards simply cut the U bolts with a torch, this piece is likely on the ground, unnoticed and unretrieved. It will likely still have the stub ends of the U bolts in it. Watch for them as you walk through the junkyard for other reasons. These are gold to the person that doesn't get one with his axle. I don't know of a source for these, apparently Ford doesn't make them anymore. Some people grind down the offending hump.
The passenger side has a plate welded to the axle for the nut end of the U bolt. Can't loose this piece.
This is also an important part to retrieve. The panard bar, or track bar, bolts to the axle end via a welded bracket. The other end mounts under the oil pan, in existing holes, about where the TTB pivot brackets are bolted. This is available in the aftermarket as lifting the truck usually requires this mounting point be lowered the same amount of lift to keep it somewhat horizontal. The panard or track bar is also readily available.
The pitman arm (the 6" heavy piece that is splined onto the steering box) is longer on the F350 than the F250 and is a recommended part of the swap. I am not sure if the actually allows more steering angle of the wheels or not, but the shorter F250 pitman arm will not move the wheels as far as they can be turned. These are also available from Ford. If you are going to lift the truck, do some research as to when you need a dropped pitman arm to keep all the steering components in line. I don't know the dimensions of these, and will research them if I lift my truck. What I do know is that some of the sellers of these aftermarket pitman arms don't know the dimensions either, so don't count on too much help from them.
Another couple of goodies to retrieve is the front drive shaft and the yoke off the transfer case. Though the F250 drive shaft will work, the F350 drive shaft has a double U joint that eliminates vibration over 45mph that some people report with the F250 drive shaft. But, the F350 driveshaft requires the front yoke from the F350 transfer case. I suspect you could find a hybrid sized U joint to couple the F350 driveshaft to the F250 yoke if you find a parts guy willing to do so. This seems to be another item Ford doesn't make. I found one on ebay ror $150. Try really hard to get the one from the donor truck.
Last edited by LeoJr; 06-10-2014 at 08:17 PM. Reason: Added the "must grab" photos and comments.
The following users liked this post:

#4
05-22-2014, 04:50 PM
#5
05-22-2014, 04:50 PM

#6
05-22-2014, 04:51 PM
But my first "uh oh" moment came when there wasn't a bolt head where I expected to see one… (Edited to add..all of the parts diagrams I found on the net show this is typical)
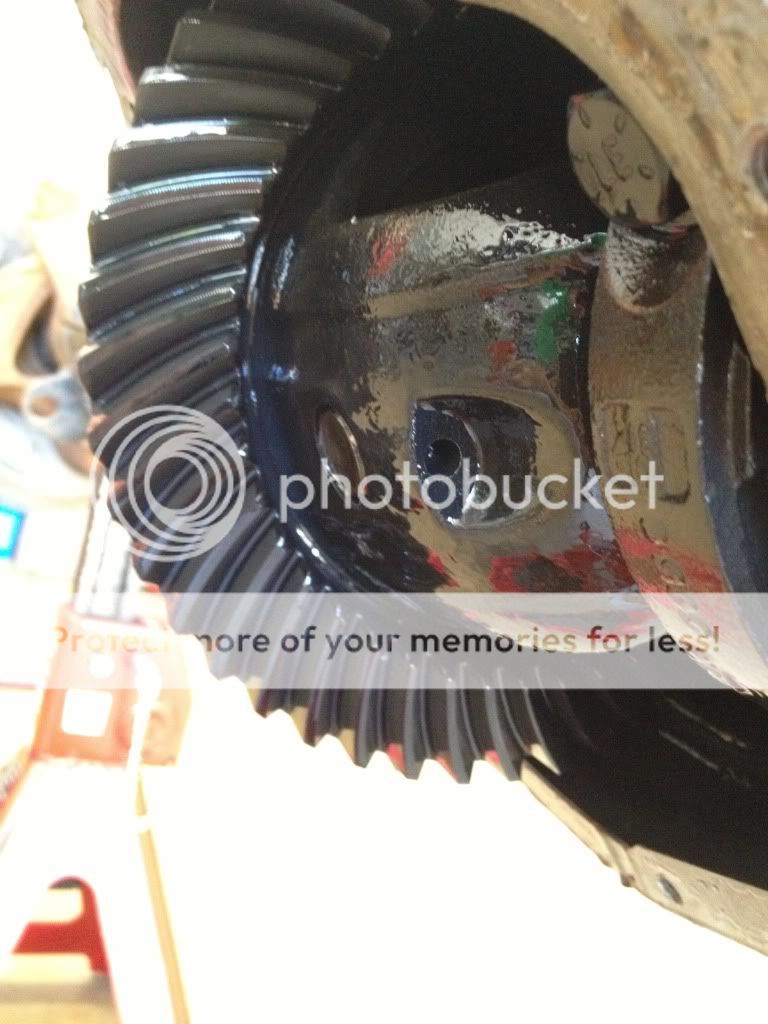
Looking at the top of the mirror you can see in the hole at what may be a broken bolt…. (Edited to add..all of the parts diagrams I found on the net show this is typical)
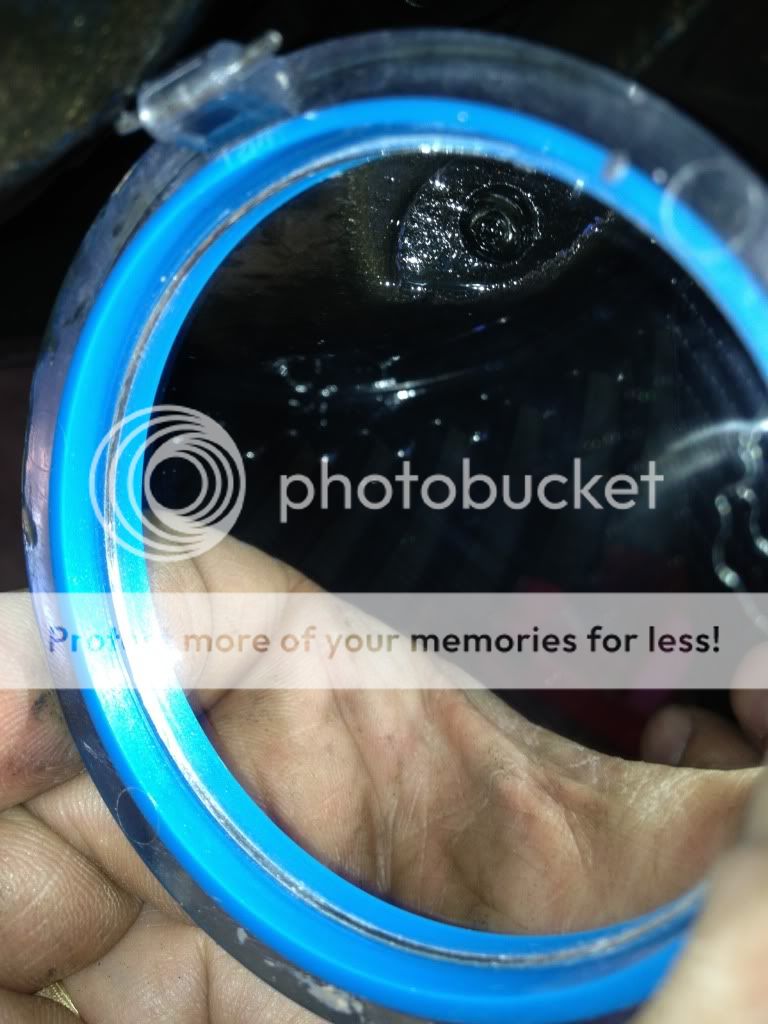
Spraying it with cleaner, the red tube sunk all the way in...it's a roll pin. Does anyone know if this is a fix (seems like an acceptable one) or is this how it s supposed to be? (Edited to add..all of the parts diagrams I found on the net show this is typical)
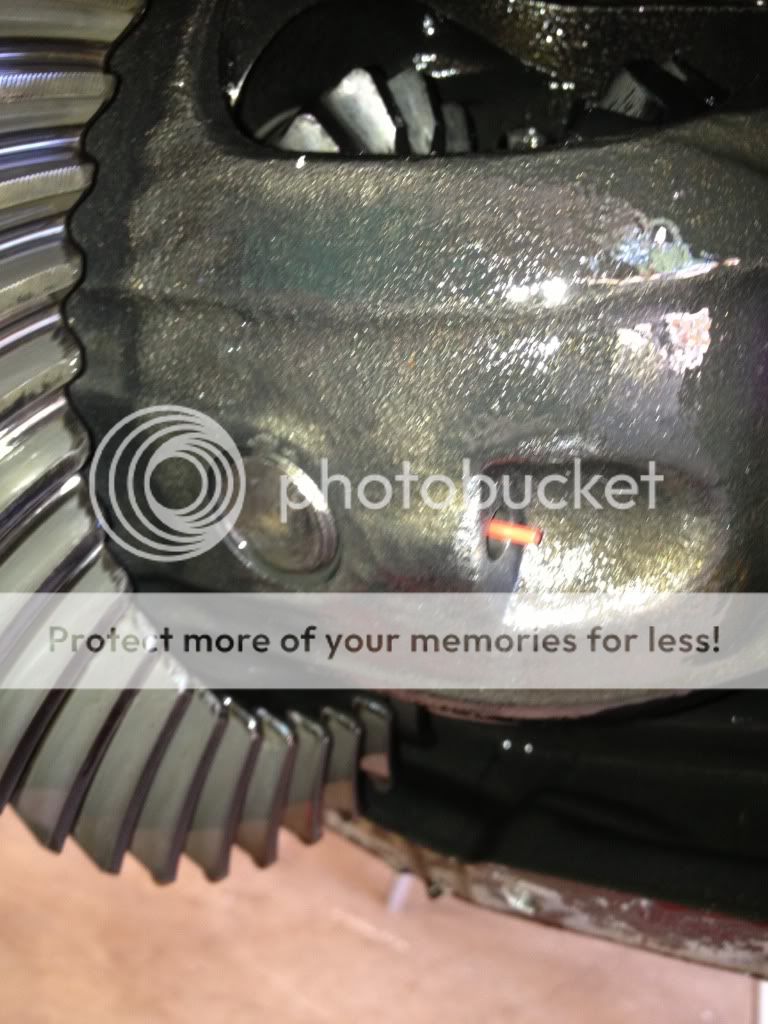
The hole goes all the way through the carrier so the roll pin can be pounded back out. I say it is factory but I'm open to feedback. (Edited to add..all of the parts diagrams I found on the net show this is typical)
Looking at the top of the mirror you can see in the hole at what may be a broken bolt…. (Edited to add..all of the parts diagrams I found on the net show this is typical)
Spraying it with cleaner, the red tube sunk all the way in...it's a roll pin. Does anyone know if this is a fix (seems like an acceptable one) or is this how it s supposed to be? (Edited to add..all of the parts diagrams I found on the net show this is typical)
The hole goes all the way through the carrier so the roll pin can be pounded back out. I say it is factory but I'm open to feedback. (Edited to add..all of the parts diagrams I found on the net show this is typical)
#7
05-22-2014, 04:52 PM
Trending Topics
#8
05-23-2014, 09:32 AM
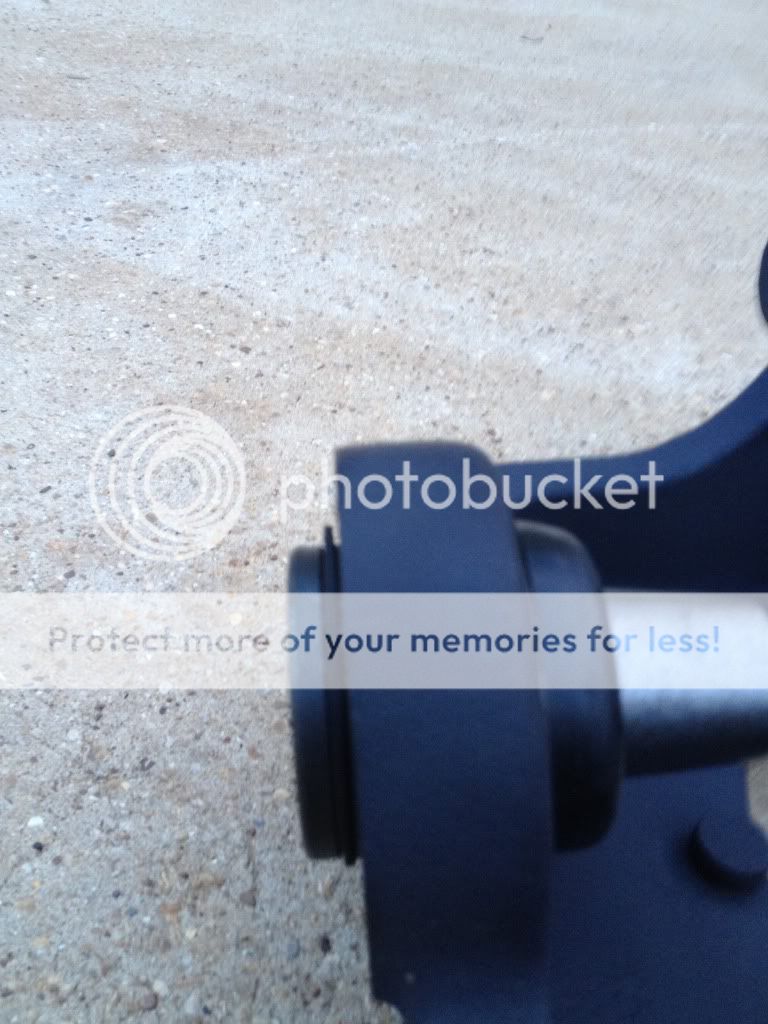
Removed the manual lockouts.
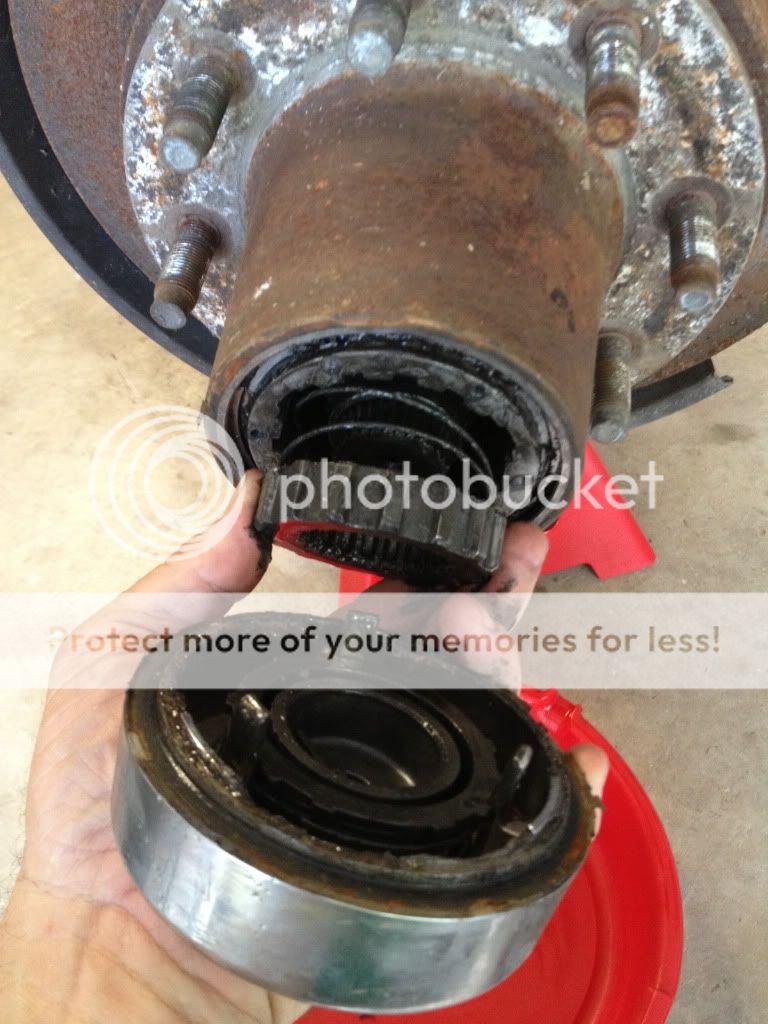
Both nuts on both sides showed that using the long 4 pronged socket is hard to apply torque to the nut and not let the socket to angle off of engagement and the tooth of the socket will slip out of its groove on the nut. The picture says this better. A 1/2" drive T handle (like a 4 way tire nut wrench) would be handy if there was such a device.
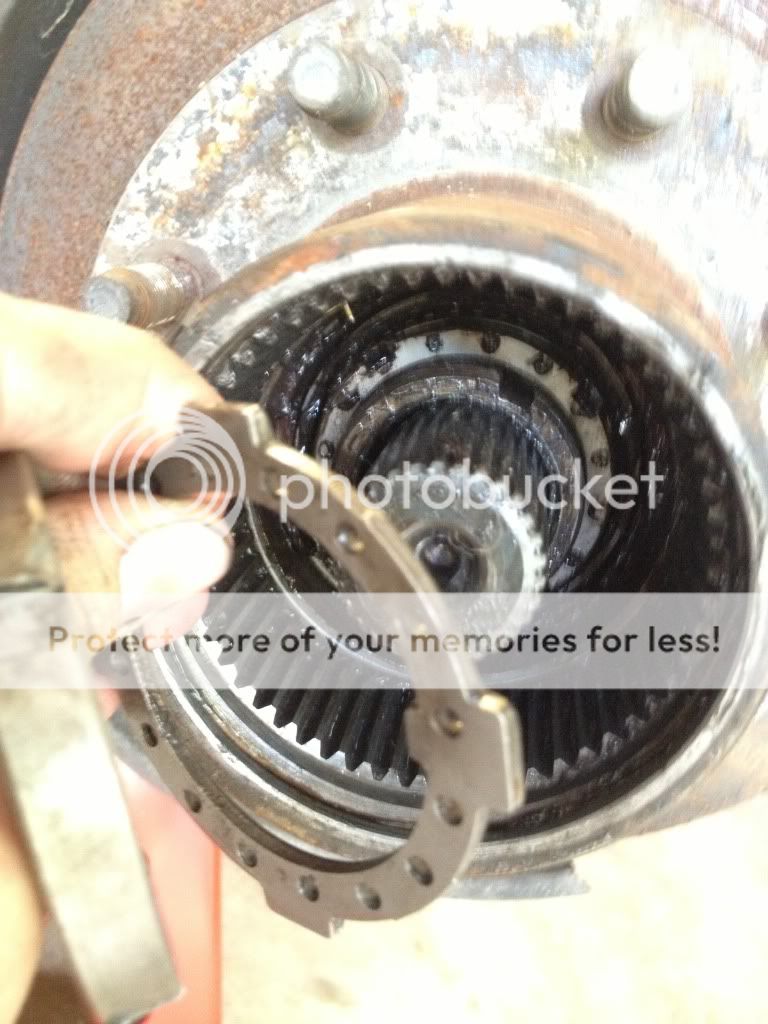
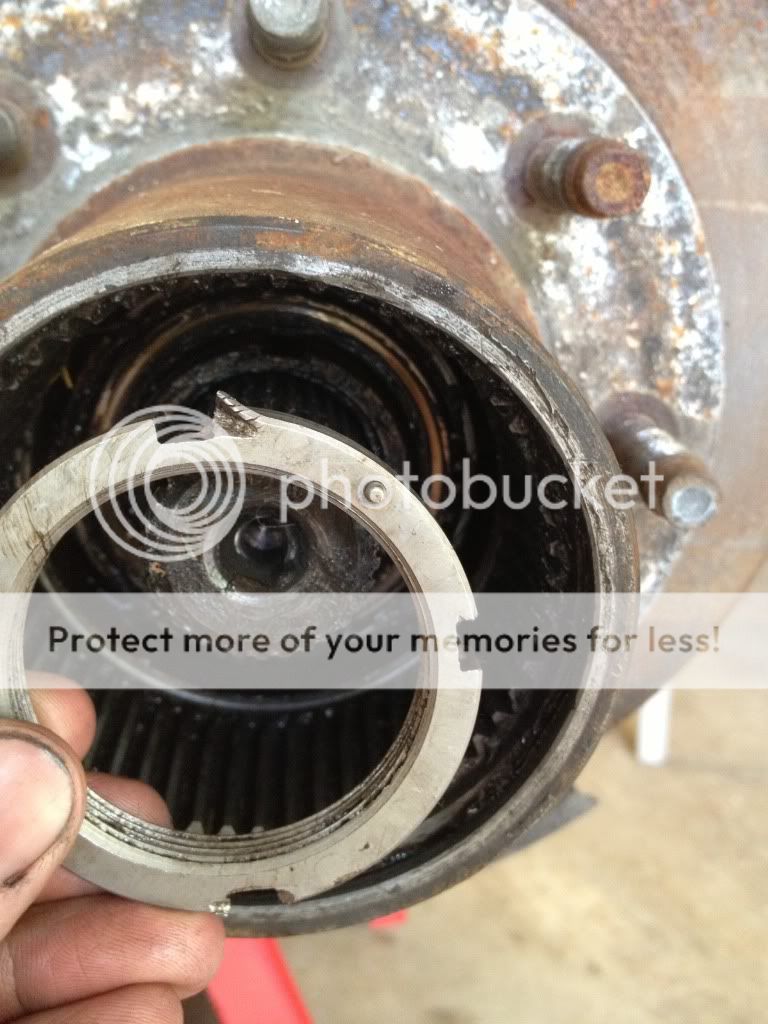
Both nuts on both sides showed that using the long 4 pronged socket is hard to apply torque to the nut and not let the socket to angle off of engagement and the tooth of the socket will slip out of its groove on the nut. The picture says this better. A 1/2" drive T handle (like a 4 way tire nut wrench) would be handy if there was such a device.
#11
05-24-2014, 10:40 AM
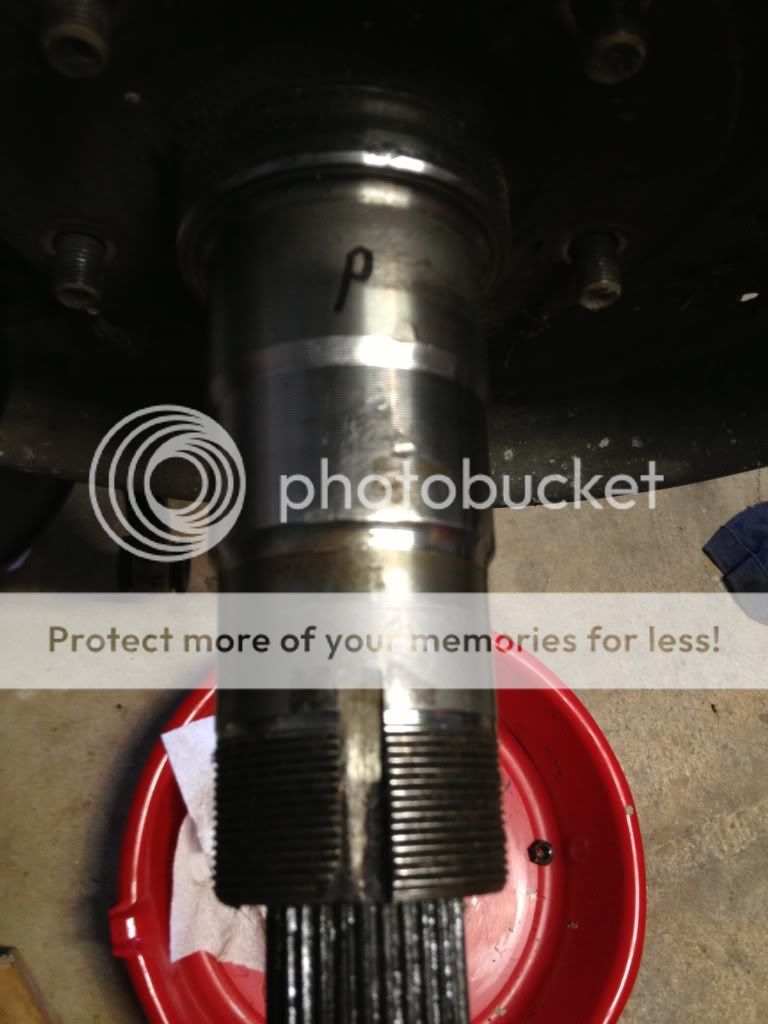
Little to show for today, but not for a lack of effort. Got a late start after collecting some seals from the Ford house, tools from O'Reillys and lunch with the Wife. Still don't have one (I do have the other) correct castellated nut as one of the upper ball joints came with a half thickness nut...not sure for what application. It was the correct thread/pitch, just not castellated and about a 1/3 as tall...must be for a lower ball joint application. Not the same wrench/socket size, so I'll work this out later.
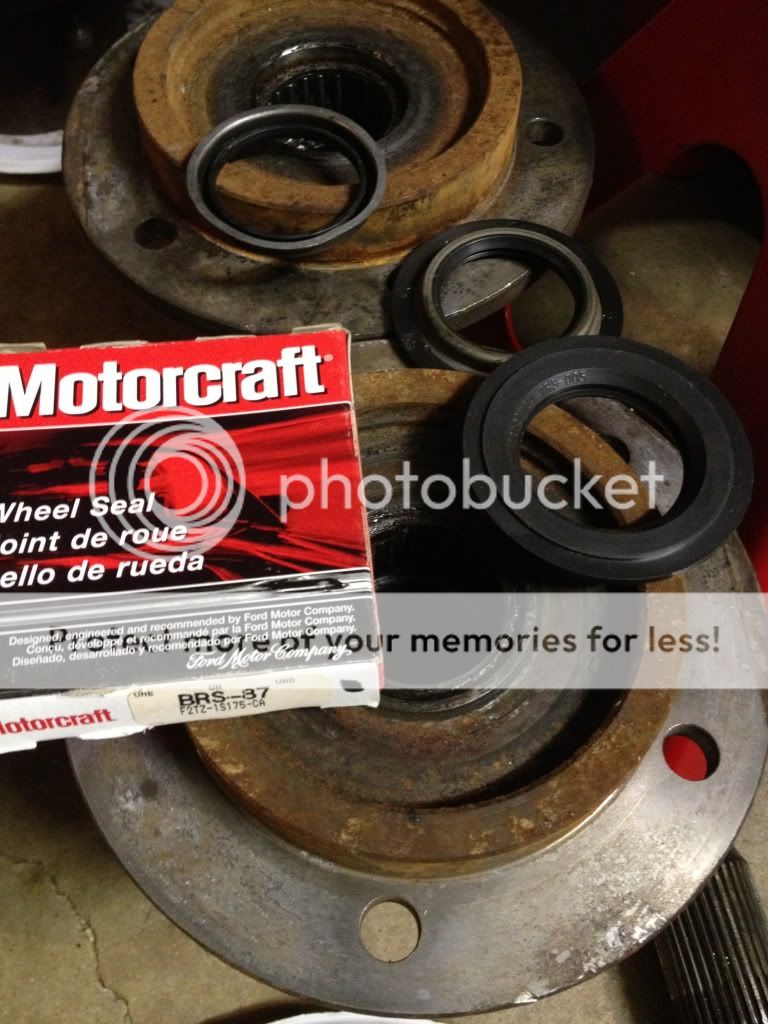
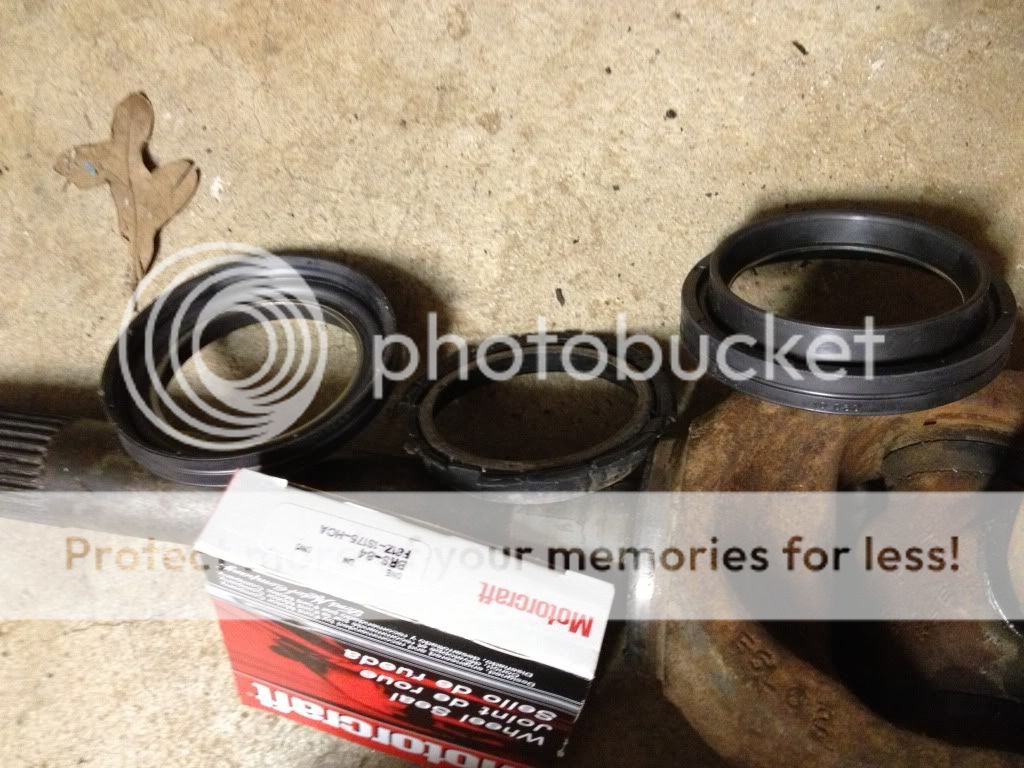
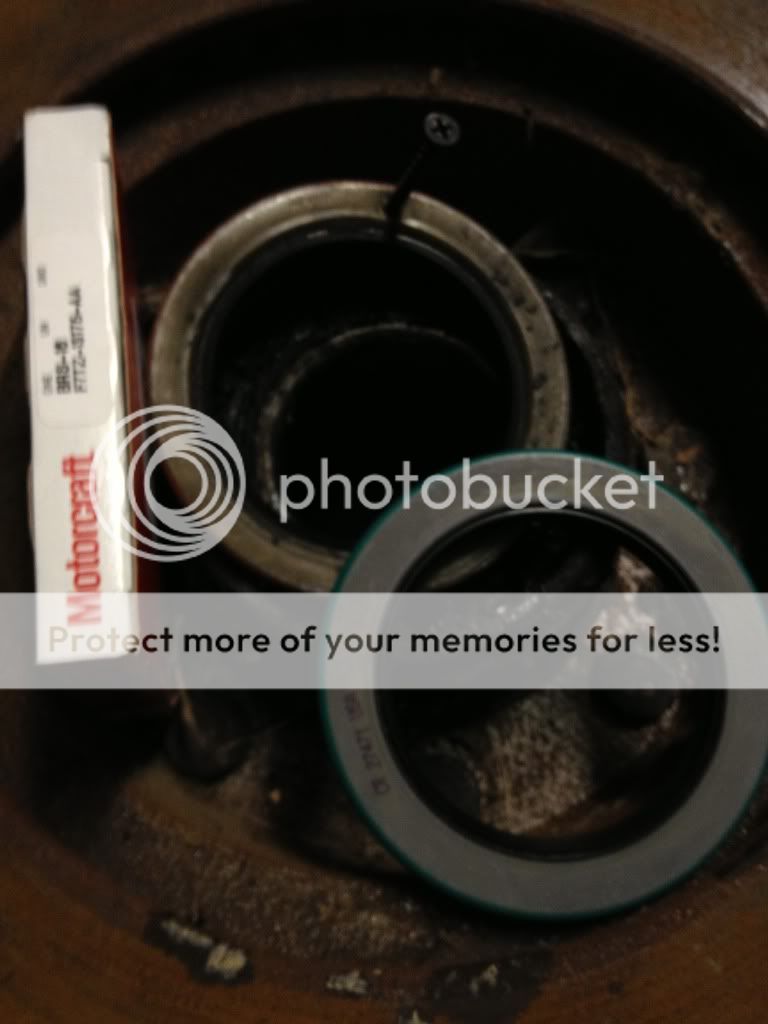
Always, always, inspect every part or open every box. The oh so patient Ford parts lady ordered in two different seals as the parts list and diagram were not clear. i needed one seal for each side. There were 2 options, so 4 (2 and 2) were ordered. I brought in the original seals (and phone pics can really be helpful!). We first thought the all 4 were wrong (because we only opened 2 boxes) but after we opened each box we realized we had 2 correct, and 2 incorrect items.
Always, always, inspect every part or open every box. The oh so patient Ford parts lady ordered in two different seals as the parts list and diagram were not clear. i needed one seal for each side. There were 2 options, so 4 (2 and 2) were ordered. I brought in the original seals (and phone pics can really be helpful!). We first thought the all 4 were wrong (because we only opened 2 boxes) but after we opened each box we realized we had 2 correct, and 2 incorrect items.
#12
05-24-2014, 02:48 PM
I'll start a different thread to find the answer, but I seated the bottom ball joint all the way in and it leaves a gap between the C clip. I suspect this is correct but I wonder if I should push it back in against the C clip. (Edited to add that the general concensous is that the truck's weight would push the it back to where I have it now, so it is correctly installed.)
#14
05-25-2014, 09:56 PM
Didn't take pictures of today's efforts, just too messy to do so. Bought a $5 turkey roaster pan a few days ago to wash parts...its all stainless. My plan was to clean up the hub and rotor assembly, the bearings to see if I needed to replace any, and to clean up the manual locking hub parts.
After monkeying the first hub/rotor through its gas bath, I took the second one out to the driveway, placed it rotor down on to a short piece of 2x12, and knocked the wheel studs out. Each only took 2 hits each. Cleaning the hub without the rotor attached was the difference between giving a 50 pound cat a bath and a 20 pound puppy a head pat.
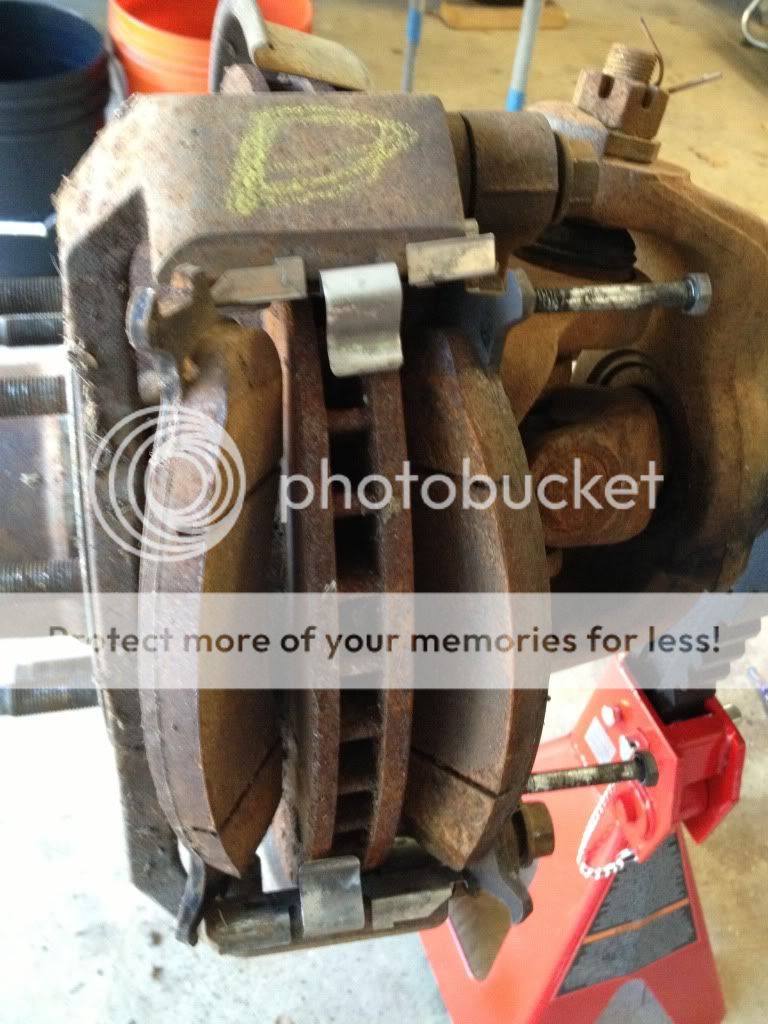
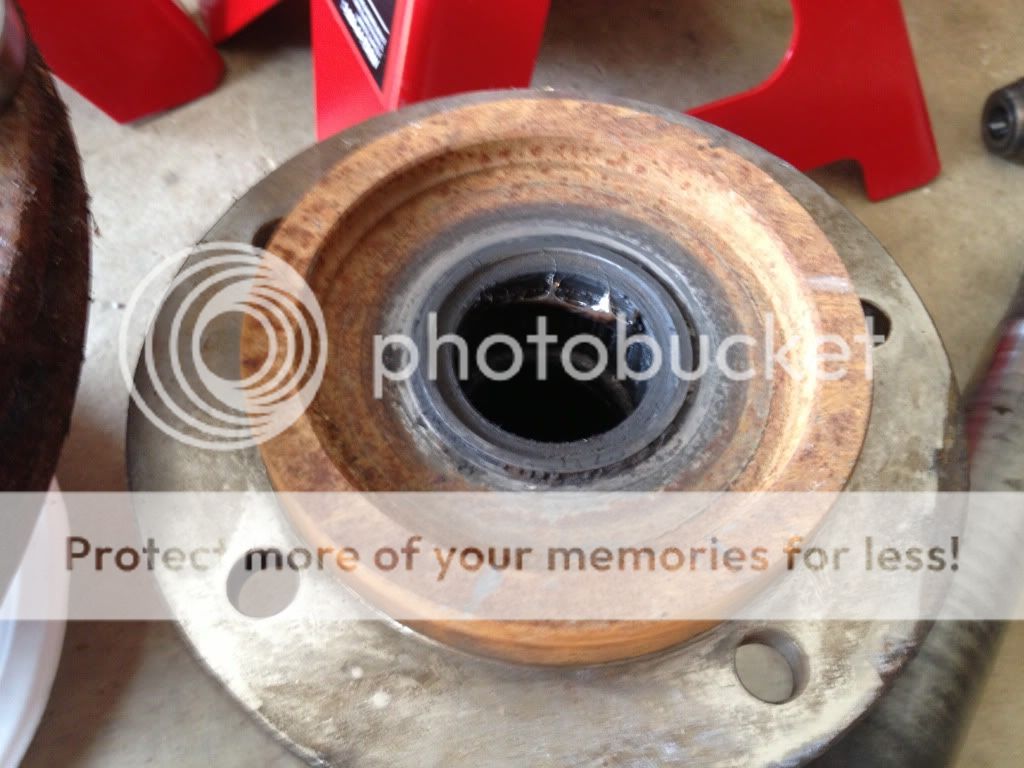
The passenger's side had some marks on the spindle looking like someone got inside with many poorly placed hammer swings rather than using a 2x4 or similar to soften the hammer blows. The manual locking hub was also full of sticky, white, presumably lithium or marine grease. There were other odd dings in and on the hub. Also, there was a lot of hammering on the outer knuckle, looks like they were trying to get the tie rod removed without a fork by beating on the knuckle itself...a lot. The inner and our bearings will be replaced as the each have a few rollers that are rust pitted. Looks like this side of the donor truck has had a hard life.
The driver's side was completely normal and the bearings look fine.
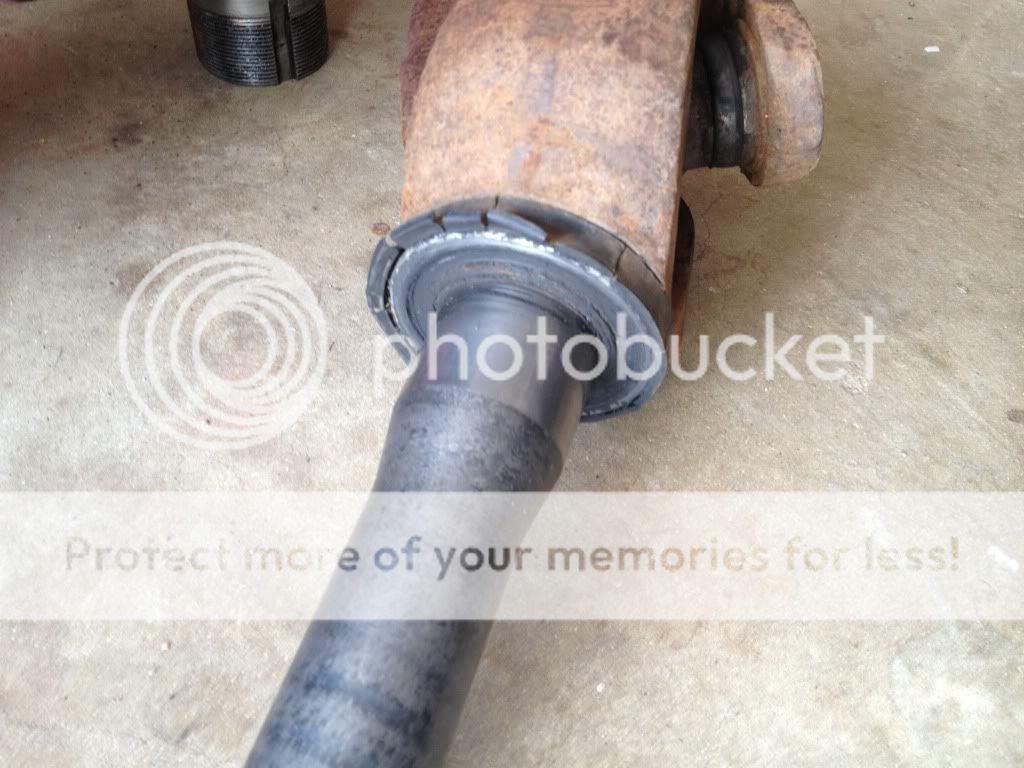
This axle does not have a seal at the ends of each axle tube. This seems to be a lot of concern on some of the truck boards I have followed. I could only fill a shot glass with the sand and gunk I scraped out of both tubes. It's a non issue in my mind. I will make sure I clean enough of the tube when I replace the inner axle seals (by pulling the ring gear and carrier out) but that is about all I will concern myself on this topic. If I ever pull the axles I'll try to make a mental note to pull the diff cover (I would assume I would anyway) and as I slid the axles back in I would do so slowly, wiping any crud off the splines as they came through the inner seal and before they engaged the differential.
My next effort will be to clean the spindles, decide if I need to remove the roller bearings or jut clean and service them in place.
I'll need some time to swap these no-named manual locking hubs on to my F250 as I want the Warn premiums on it moved to this D60 going back in. One less thing to do on swap day.
After monkeying the first hub/rotor through its gas bath, I took the second one out to the driveway, placed it rotor down on to a short piece of 2x12, and knocked the wheel studs out. Each only took 2 hits each. Cleaning the hub without the rotor attached was the difference between giving a 50 pound cat a bath and a 20 pound puppy a head pat.
The passenger's side had some marks on the spindle looking like someone got inside with many poorly placed hammer swings rather than using a 2x4 or similar to soften the hammer blows. The manual locking hub was also full of sticky, white, presumably lithium or marine grease. There were other odd dings in and on the hub. Also, there was a lot of hammering on the outer knuckle, looks like they were trying to get the tie rod removed without a fork by beating on the knuckle itself...a lot. The inner and our bearings will be replaced as the each have a few rollers that are rust pitted. Looks like this side of the donor truck has had a hard life.
The driver's side was completely normal and the bearings look fine.
This axle does not have a seal at the ends of each axle tube. This seems to be a lot of concern on some of the truck boards I have followed. I could only fill a shot glass with the sand and gunk I scraped out of both tubes. It's a non issue in my mind. I will make sure I clean enough of the tube when I replace the inner axle seals (by pulling the ring gear and carrier out) but that is about all I will concern myself on this topic. If I ever pull the axles I'll try to make a mental note to pull the diff cover (I would assume I would anyway) and as I slid the axles back in I would do so slowly, wiping any crud off the splines as they came through the inner seal and before they engaged the differential.
My next effort will be to clean the spindles, decide if I need to remove the roller bearings or jut clean and service them in place.
I'll need some time to swap these no-named manual locking hubs on to my F250 as I want the Warn premiums on it moved to this D60 going back in. One less thing to do on swap day.
#15
05-26-2014, 08:10 PM
Had other distractions today, didn't get too much done.
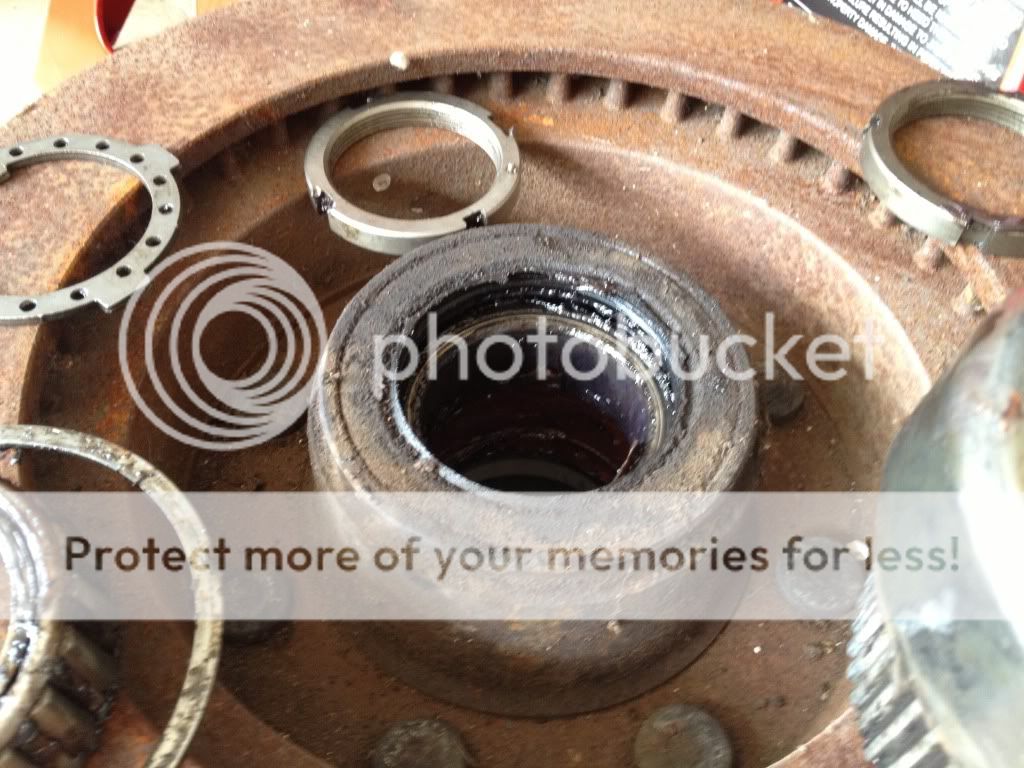
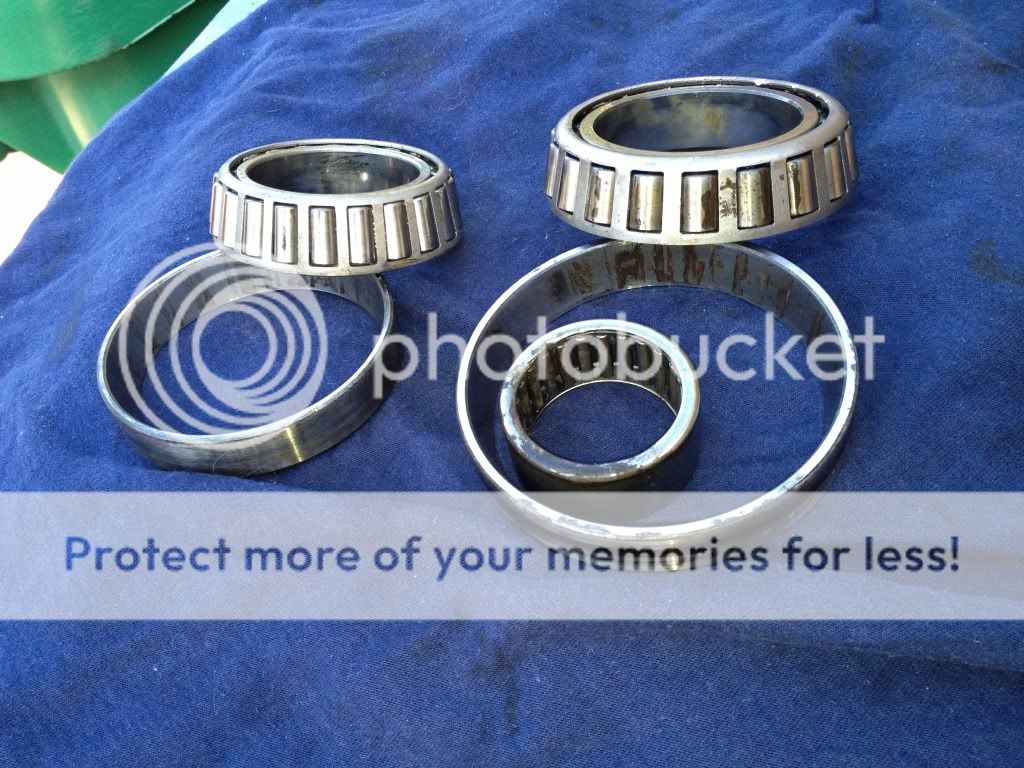
Looking on line for replacement Timken bearings I found that the race is sold separately. I hope this is because there are different outside diameter races because I always believed the bearing and race were always replaced together.
So, I knocked out thinner and outer race to get the part numbers. The bigger inner (race and bearing) are marked Timken. The smaller outer race is marked Timken but the bearing is marked NTN, made in Japan. I found a Timken cross reference document that had this NTN part number and also found that (paraphrasing from memory) "some beings are manufactured by an independent company" or something similar.
Took both spindles to O'Reilly's to rent an inside jaw slide hammer. I have no preference to O'Reilly's other than I believe they are about the closest to me and also the close to some of the other errands I might need to run; grocery store, gas/diesel/beer/cigarette store, tire store, Ultimate Cheeseburger and 2 tacos for $.99 store…
I expected this to either be a 5 minute effort in the parking lot or "2 blood blister" effort at home as there was not enough of a lip to drive the bearing out from the back side so a complete cage destruction and extraction would be required. Took the rented tool to the truck bed, popped both caged needle spindle bearings out, returned the tool and went home. Whew, glad it was the 5 minute effort. I also saw that some sites offer a bushing replacement instead, a hard black plastic piece.
The driver's side continues to be what I would expect for a typical truck. The passenger's side continues to make me think the original truck was parked in a horse trough.
Plan for next week:
*Source of replacement races and bearings, find a replacement pinion nut (or at least figure out the correct socket size) and locate a pinion nut socket so I can replace the pinion seal.
*Replace the inner axles seals (requires removal/replacement of the differential)
*Source U joins for both drive axles and replace.
*Look at the springs as I recall they need a few bolts, rivets and slip pads (between the leaves).
*Find my factory 4" F350 rear lift blocks.
*Locate a source for rear U bolts to swap in the 4" blocks prior to swapping in the from D60.
*Swap these no-named manual hub lockers onto the truck so I can clean up the Warn Premium hubs and install them on the D60.
This photo shows only about half the rust and stains. The smaller inner has a few nasty wear spots on some of the rollers. The visible stains cannot be removed with a wire brush. I'm not taking any chances and replacing them. And as I always change both headlights/brake lights when one is bad, I'll be using new races and bearings on the other side too. If I was being more budget conscious I would have reused the other side with little reservations.