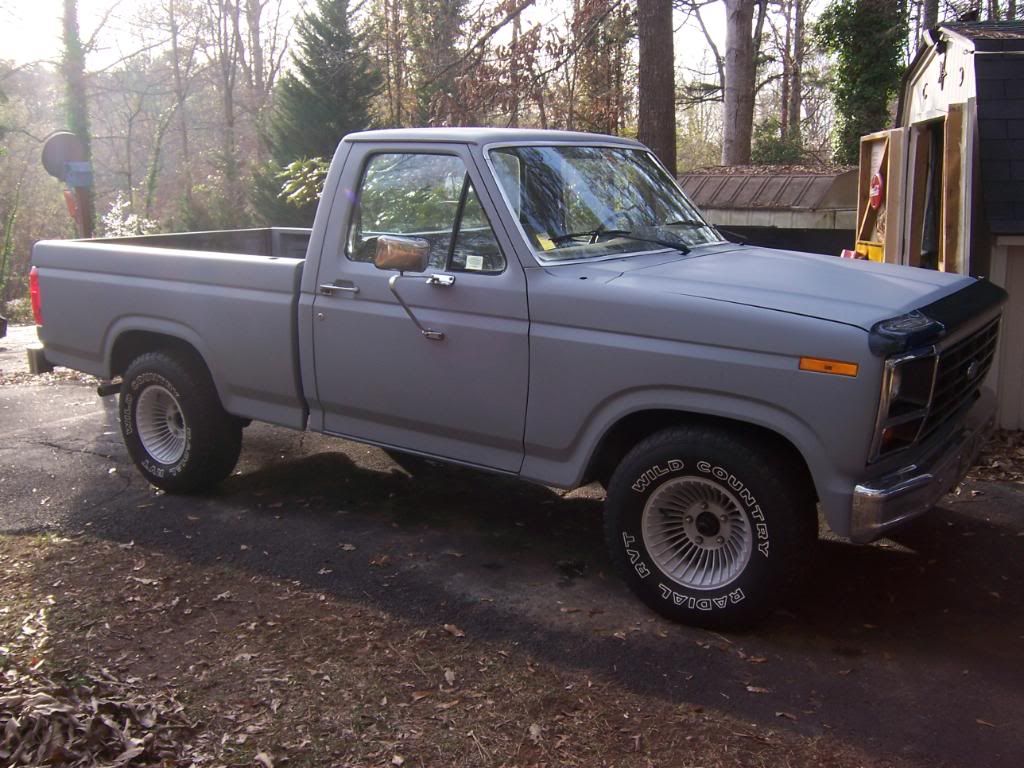
My '85 F150 4x2 project/build log.
#76
 10-19-2011, 07:38 AM

I am using this epoxy primer; Request Information
And I am using this 2K primer; http://www.southernpolyurethanes.com...ech%202006.pdf
The SPI homepage is; Home
The SPI products page; Product Lines
The SPI Forum page is; SPI User Forums
I hope this helps you out. There is a ton of good quality information in their forum. It seems that most of the people there are professionals, and treat the forum as such. And the pictures are sweet too. Reading through it has given me quite a bit of information and inspiration (as has the FTE site).
#77
10-19-2011, 07:32 PM

Elder User
Grubb, I came over from another thread where you had mentioned chassis savor and you were using the yellow can and not the red one. Did you use the high build on that? Did you thin it with the P8, IIRC? I have been using the gloss black (red can) in high build. I cant see spraying this w/o the P8 and was wondering how much you cut it down.
Good stuff BTW. Coming along nice!
Good stuff BTW. Coming along nice!
#79
10-20-2011, 08:14 AM
Grubb, I came over from another thread where you had mentioned chassis savor and you were using the yellow can and not the red one. Did you use the high build on that? Did you thin it with the P8, IIRC? I have been using the gloss black (red can) in high build. I cant see spraying this w/o the P8 and was wondering how much you cut it down.
Good stuff BTW. Coming along nice!
Good stuff BTW. Coming along nice!
I'm not sure which thread you are talking about. Can you refresh my memory? The Chassis saver that I used was the one that dries to a black satin color. I used the yellow can (Antique-Satin Black), and brushed it on. I did not thin it with anything. After prepping, I brushed on 2 coats of Chassis Saver, then a coat of Gloss Black Rustoleum paint. The reason I used the Satin was because that is what the supply house got for me. The reason I used the gloss black paint was to see what I had covered. In retrospect, I probably should have done the colors in reverse ( Gloss black Chassis Saver and Satin Black paint). I have also been reading on another forum, and they have been using a black epoxy primer instead. These are professional body shop guys and the claim it lasts better. Some of them also use a spray on bedliner over the epoxy primer on the underside of the vehicles, sometimes even in the interiors.
And thanks for the vote of confidence.
#80
10-31-2011, 10:18 AM
This weekend I did some more sanding and got another coat of primer on. I also had to do an oil change on my daily driver, put a headlight in my wife's car. I wanted to replace the lights in pairs, but my wife said wait till the other one goes out before replacing it. Guess what, it went out this morning. Oh well, I also have to do an oil change on her car this week. I also did some re-purposing of an old student desk, converting it to a chair and repainting it. We also babysat one of our granddaughters this weekend.

Next up, I have a few small dings to bondo. Then more sanding and another coat of primer. I'm still trying to get as much done as I can before it gets too cold to do any more body work.
Next up, I have a few small dings to bondo. Then more sanding and another coat of primer. I'm still trying to get as much done as I can before it gets too cold to do any more body work.
#82
11-07-2011, 08:02 AM
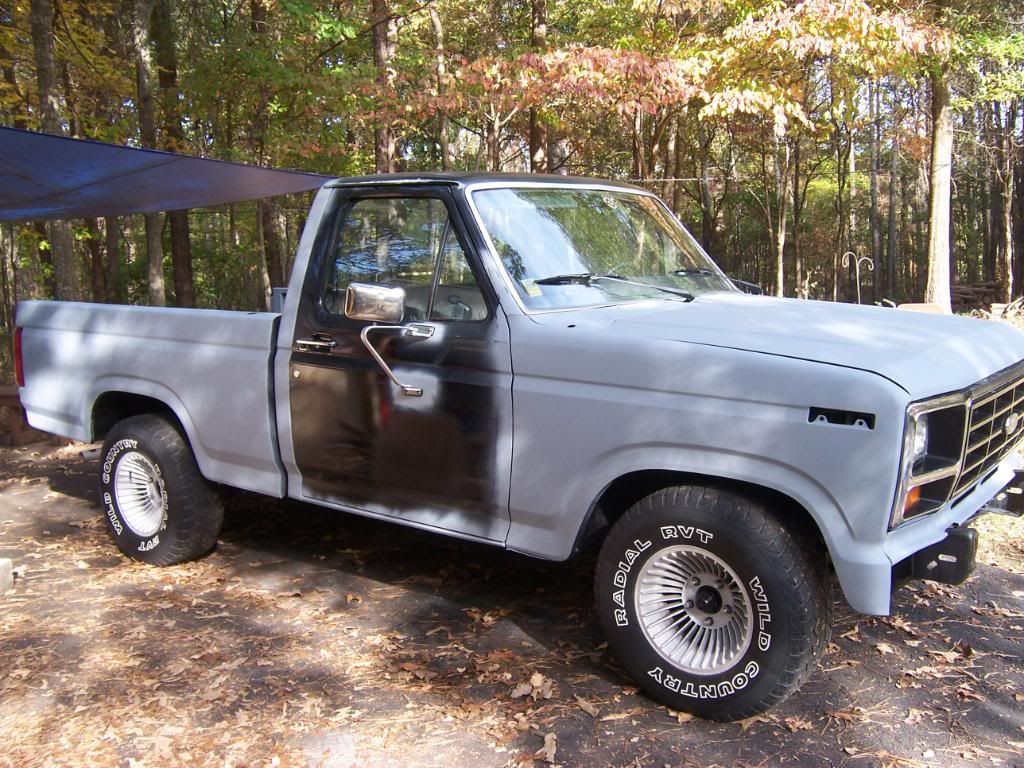
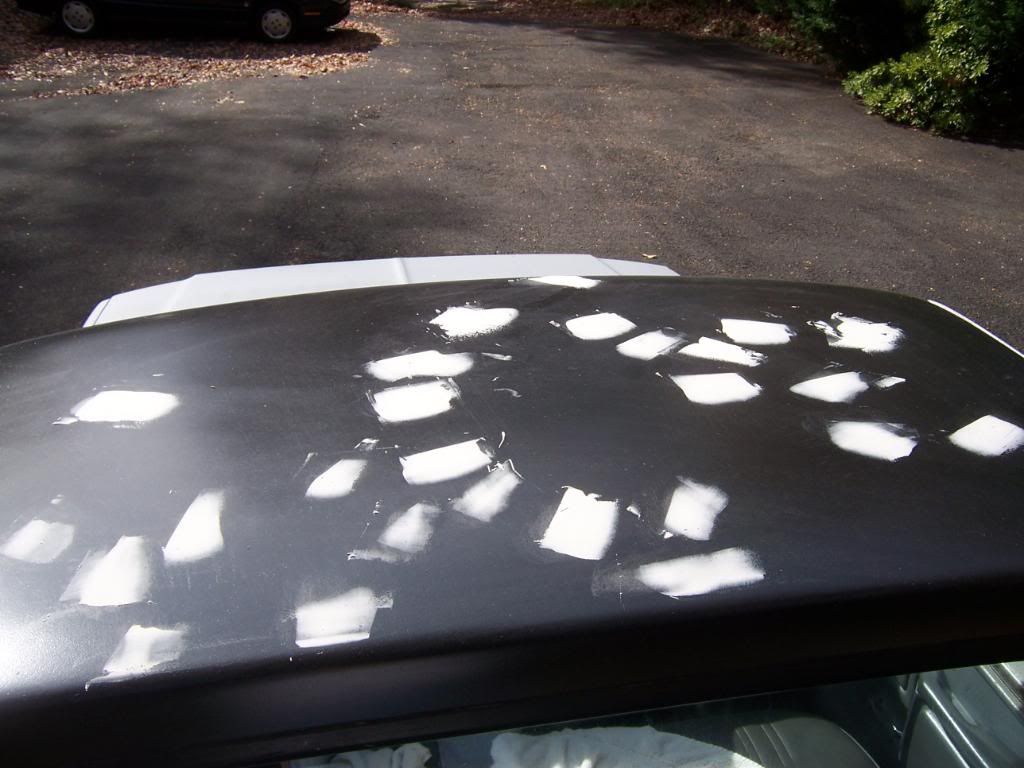
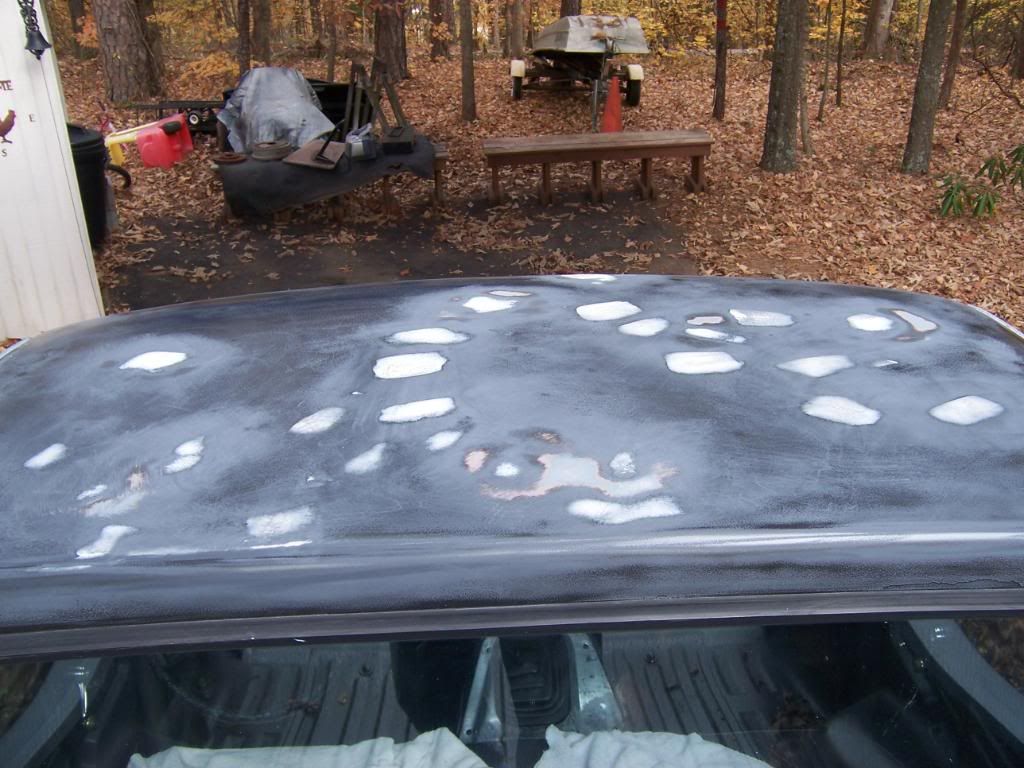
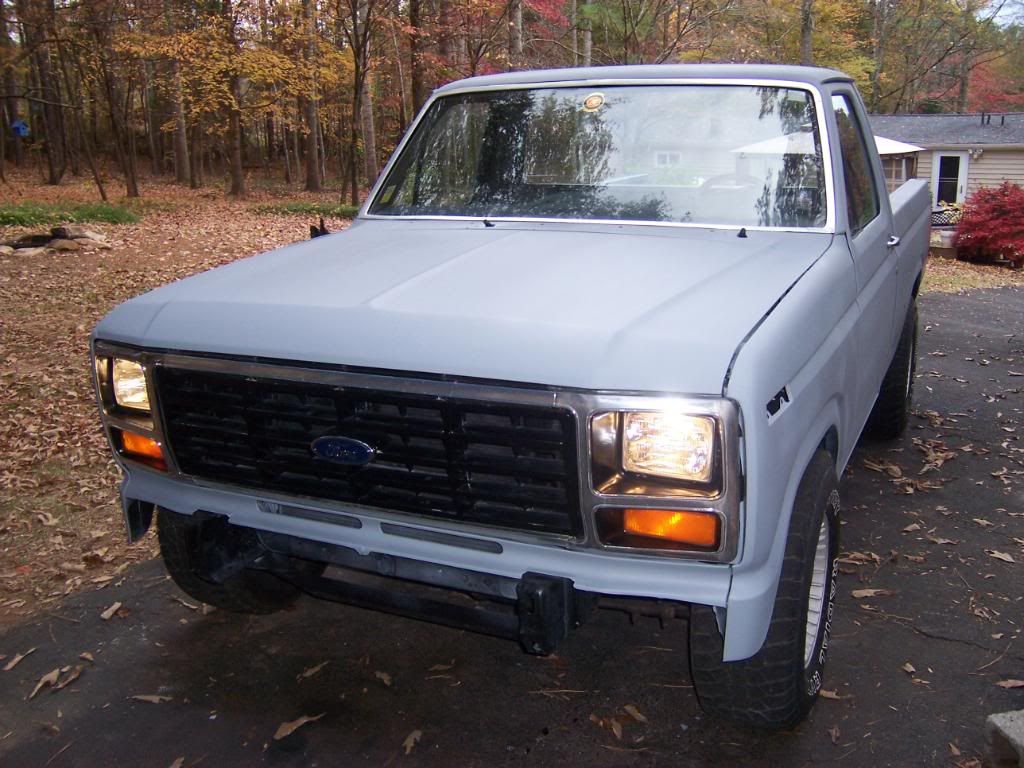
Not really. We had a Maaco paint job put on some years ago, and it was deteriorating quite a bit. The replacement fenders had some crappy kind of coating on them. There was some rust repair and metal work done. There are a bunch of hail dings on the hood and roof that I need to address. There were some issues with the drip rail. And I am going to paint it the original black color again. Needless to say, the body has to be very clean and straight before it goes into paint. I am an amateur, but I do not want it to look like an amateur did it.
#83
11-14-2011, 07:03 PM
This weekend I accomplished a few things.
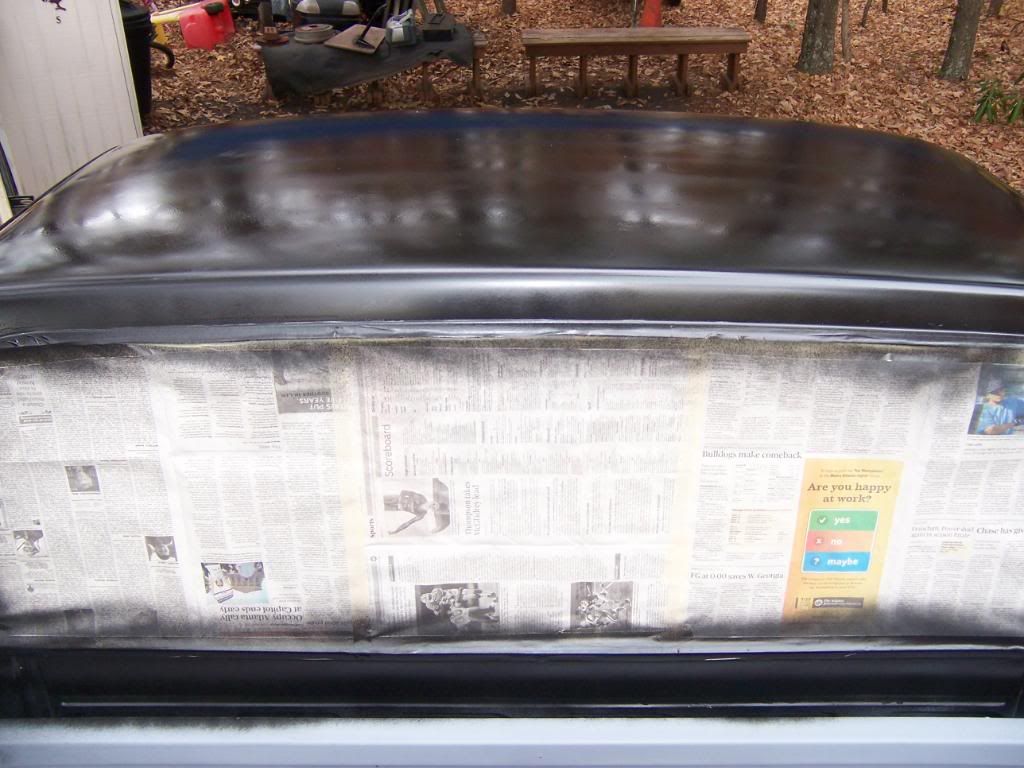
I did a little bondo on the roof;
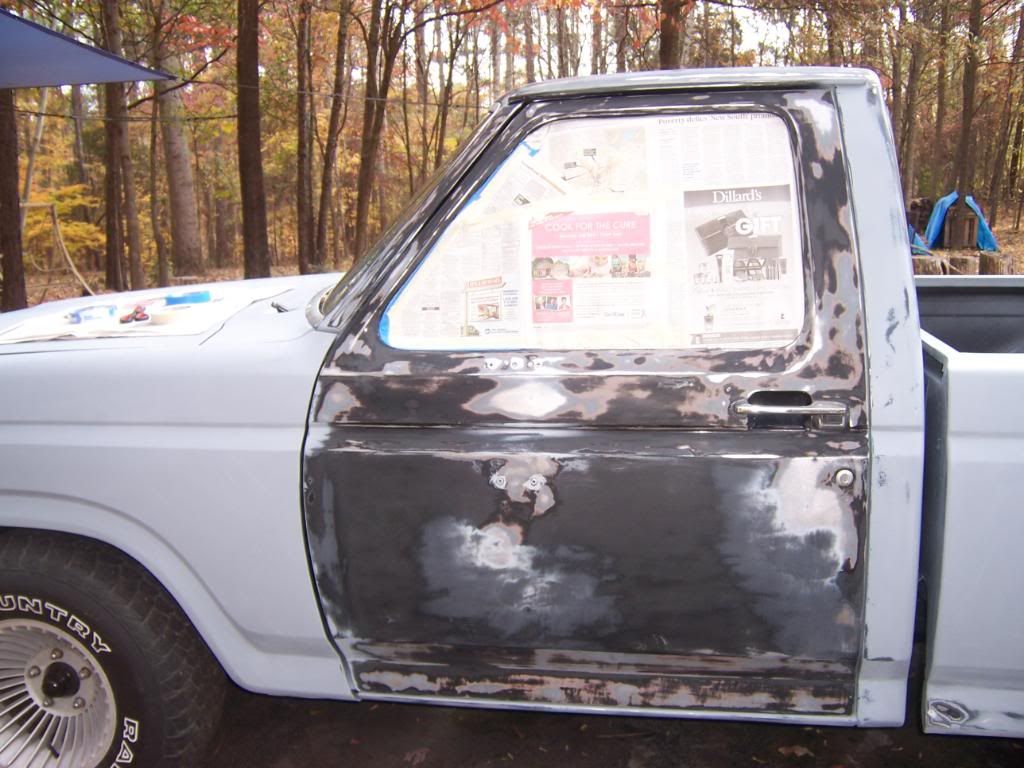
Then I sanded the roof;
And both doors;
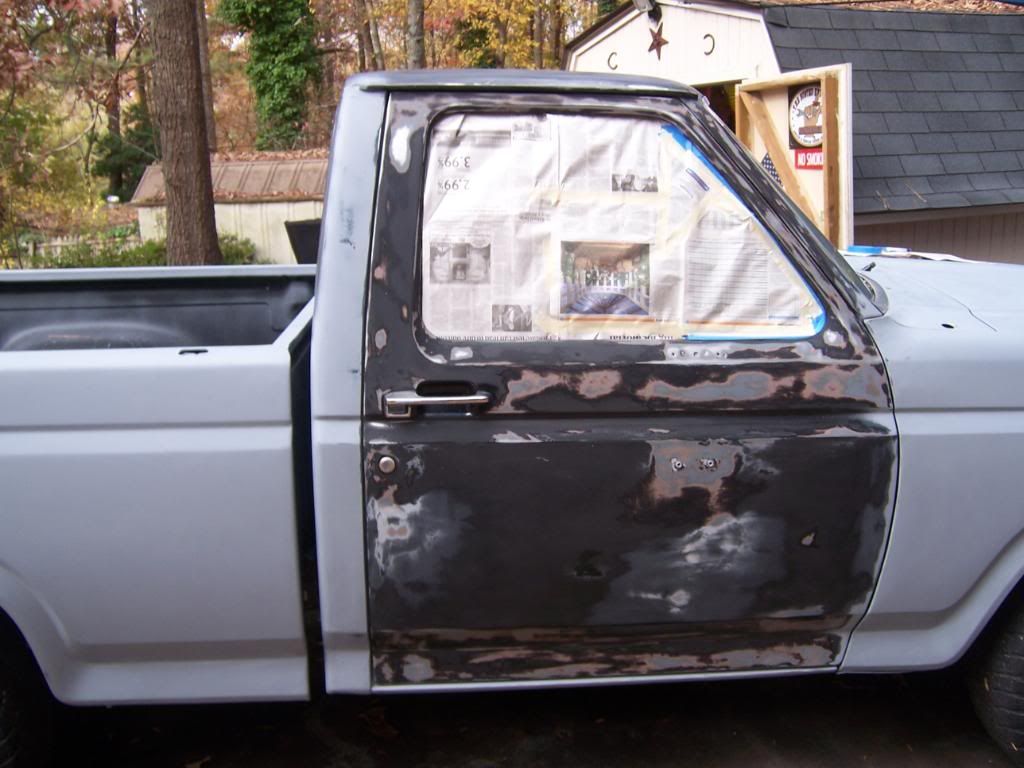
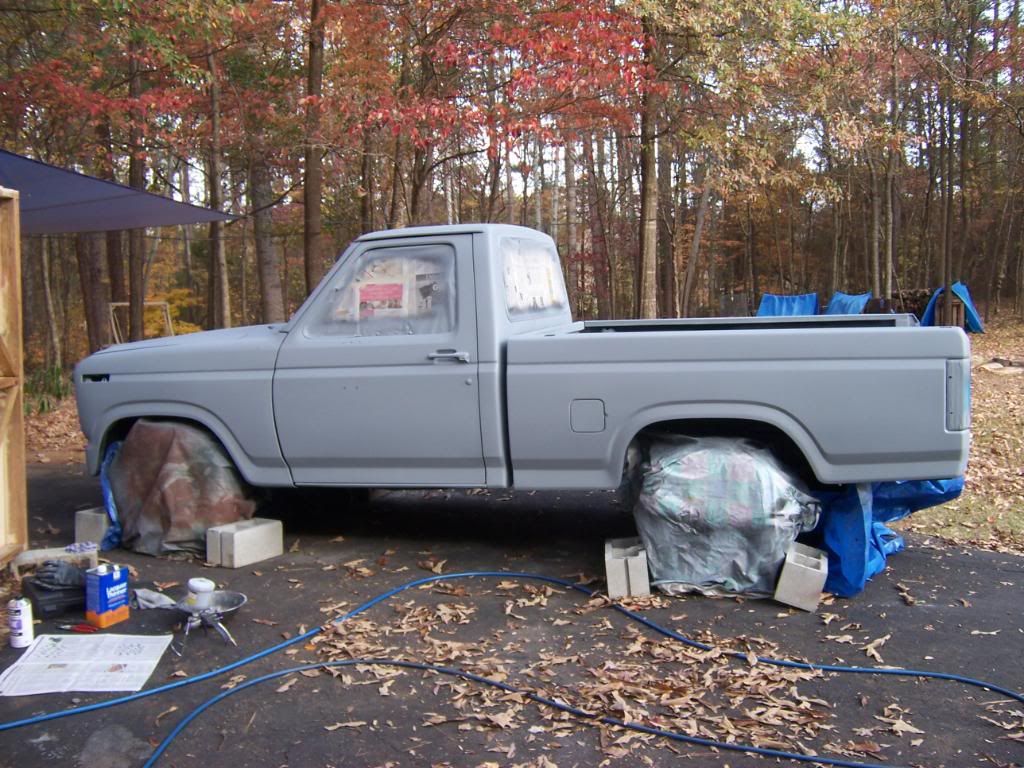
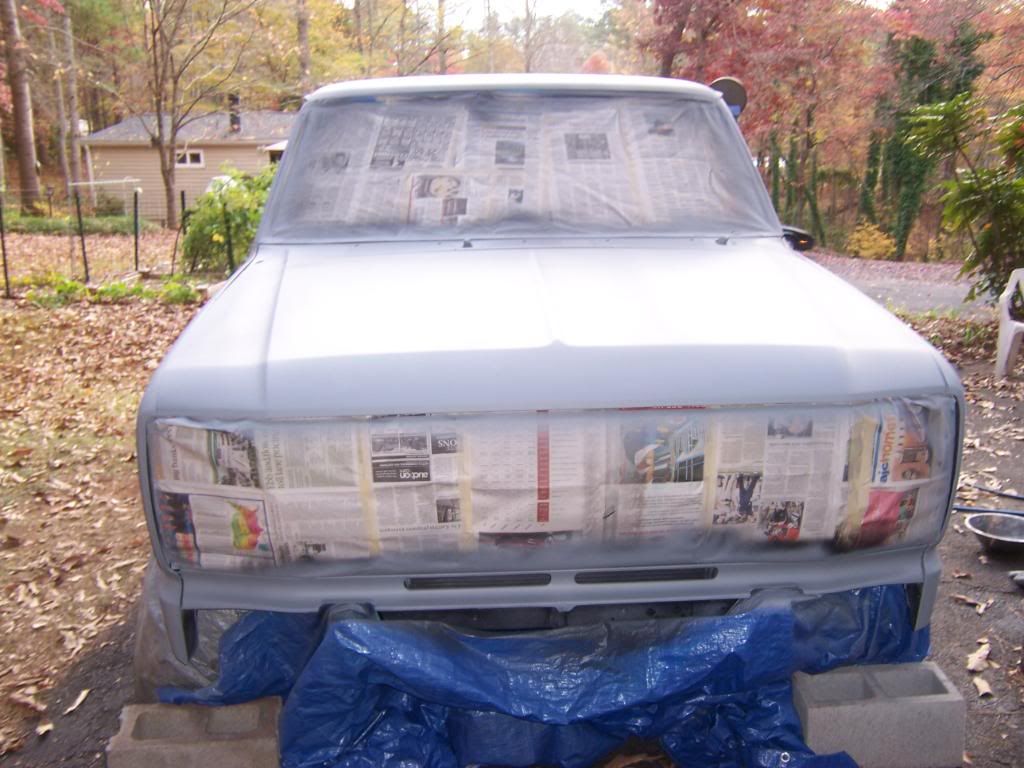
After 2 coats of epoxy primer;
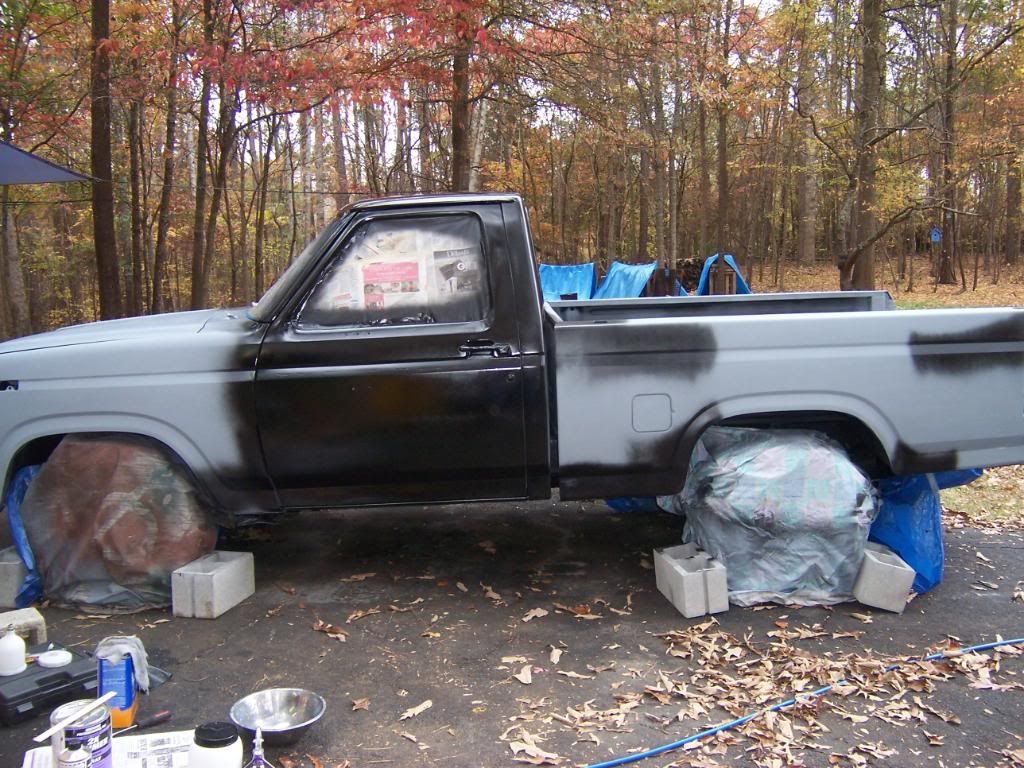
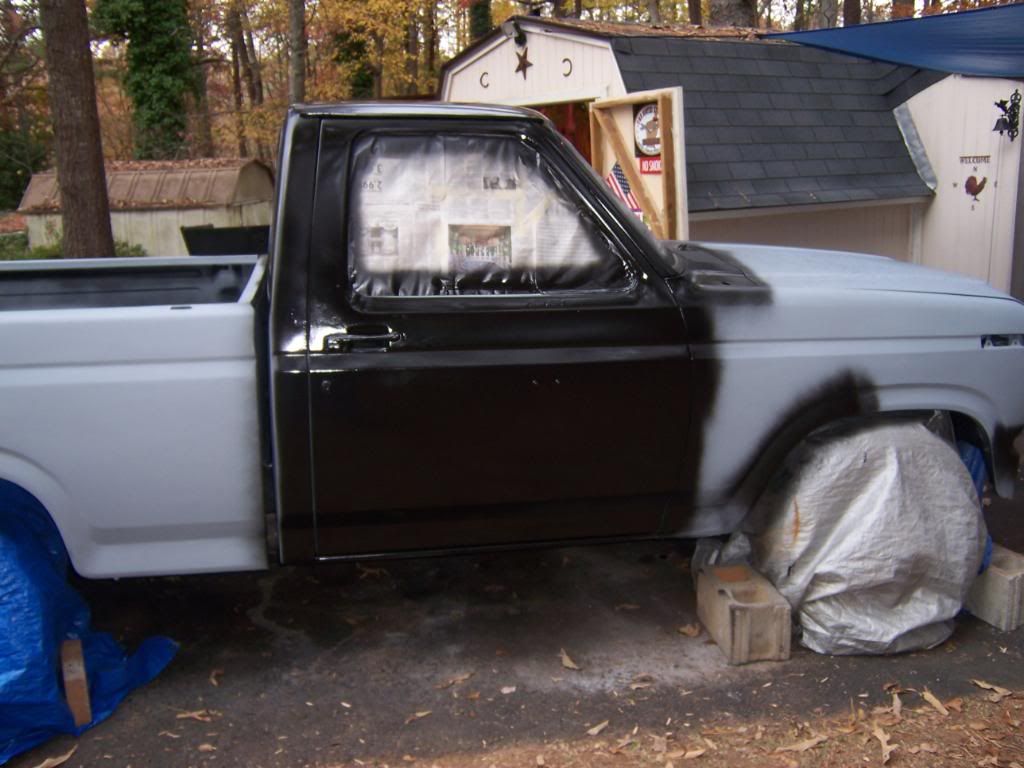
After about 1-2 hours, I sprayed the whole truck with the 2K build primer.


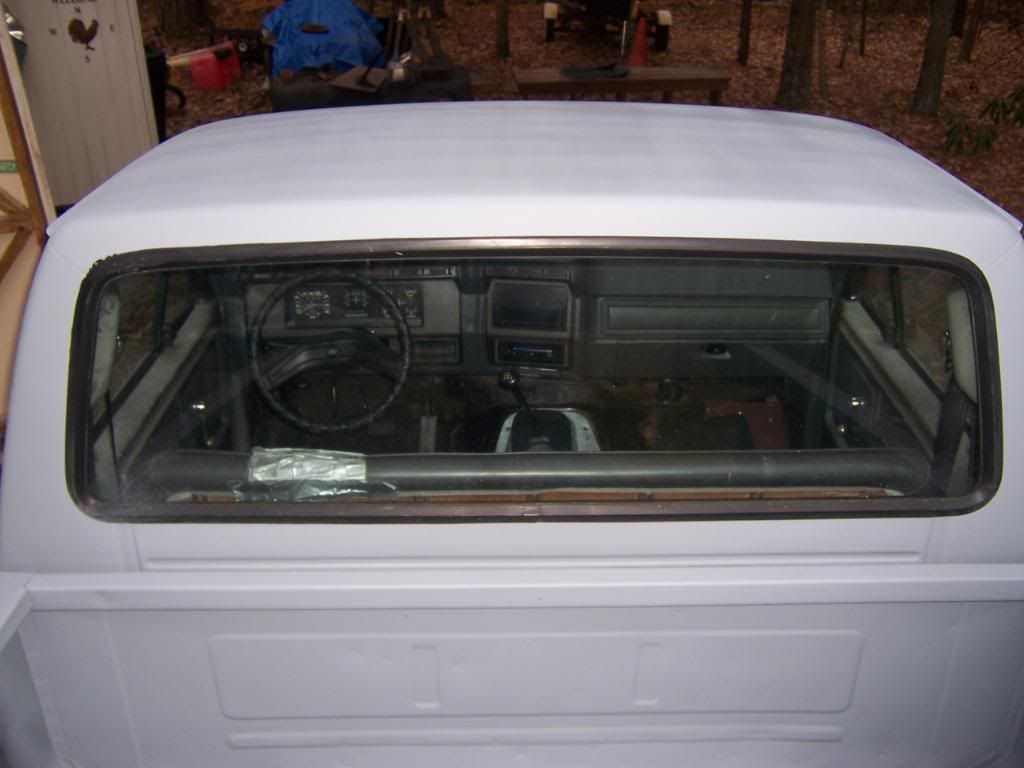
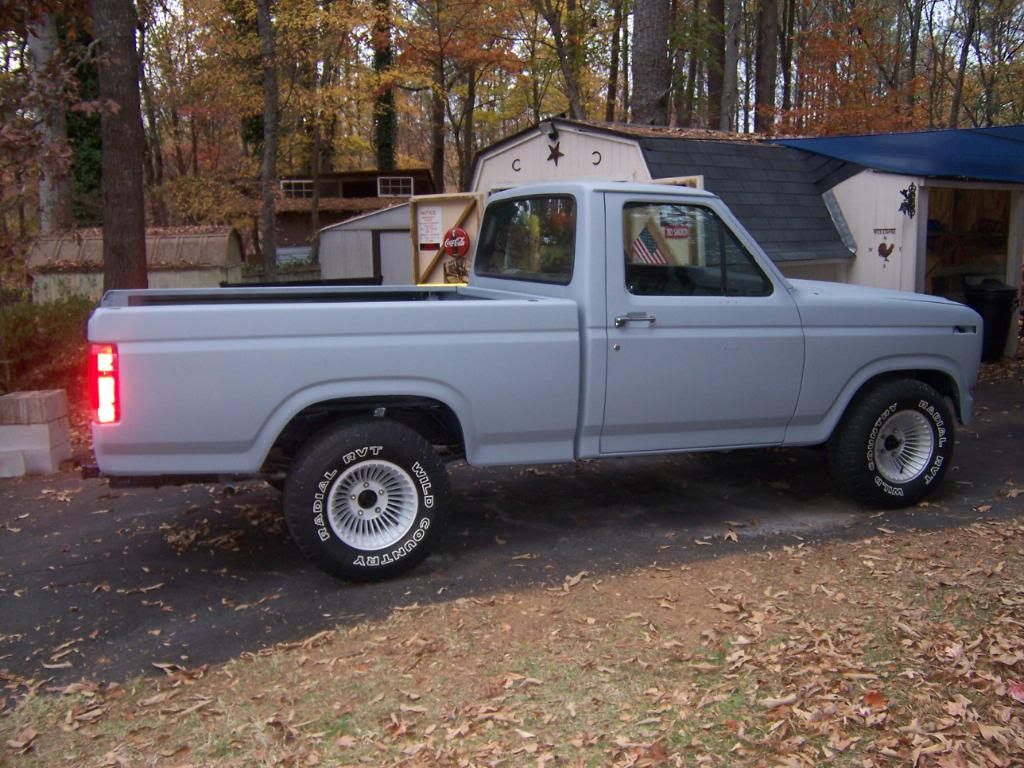
I think I have finished with all of the body work that I am going to do till the spring. Over the next several weeks I will be putting the mirrors, bumpers, windshield wipers and other assorted pieces back on. I may also start on the floorboard.
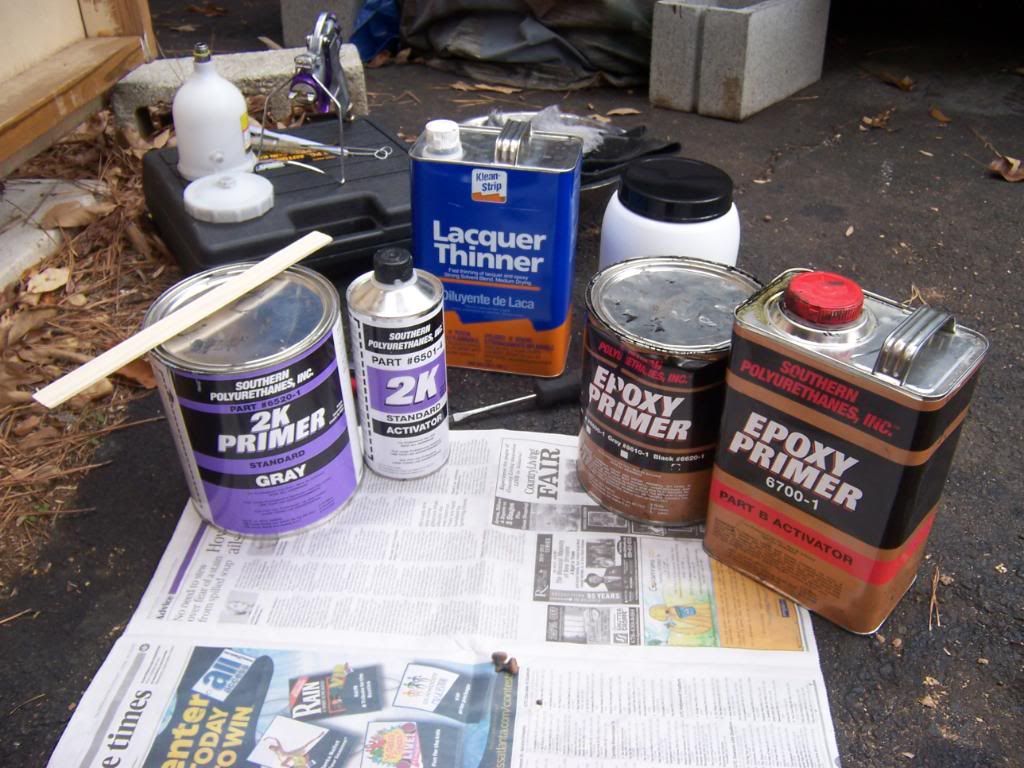
And one other thing. I just wanted to show the products that I am using on this project;
I did a little bondo on the roof;
Then I sanded the roof;
And both doors;
After 2 coats of epoxy primer;
After about 1-2 hours, I sprayed the whole truck with the 2K build primer.
I think I have finished with all of the body work that I am going to do till the spring. Over the next several weeks I will be putting the mirrors, bumpers, windshield wipers and other assorted pieces back on. I may also start on the floorboard.
And one other thing. I just wanted to show the products that I am using on this project;

#85
12-04-2011, 07:03 PM
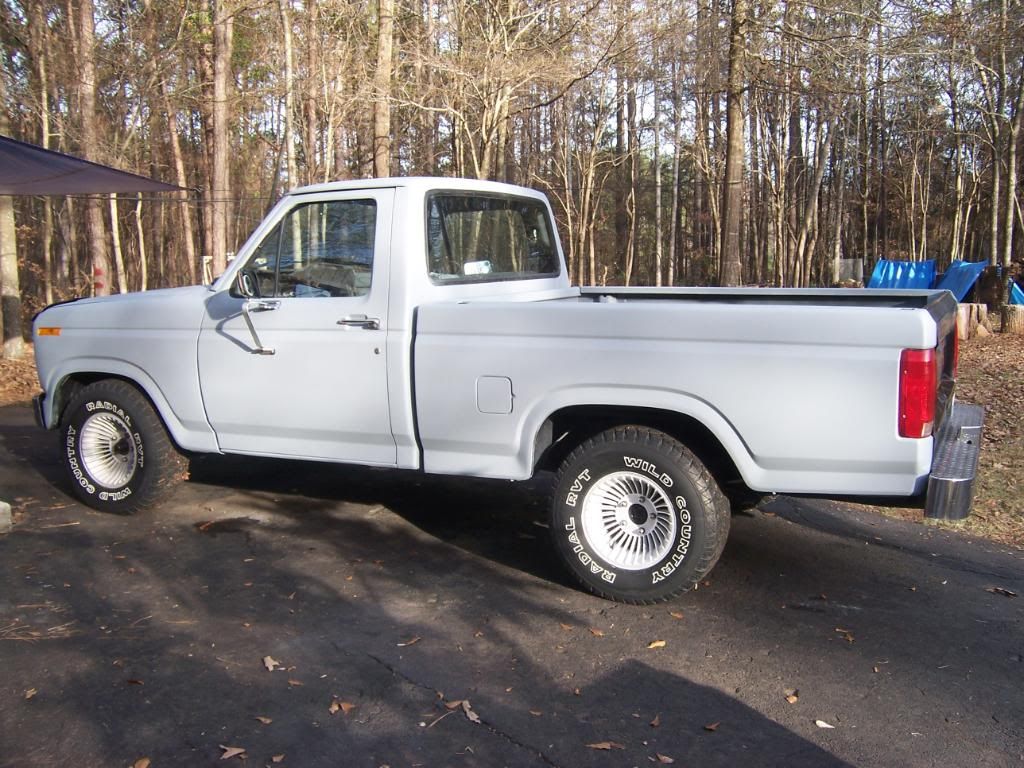
PIDI, I tried to maintain the truck so that I was no more than a day or two from it being available at any time if we needed to press it into service. That in itself is not that easy to do. I just have to take my projects on a little at a time, and try to complete them in stages or in a day or two or three as the case may be. I hope that answers your question. If you need a better explanation just let me know and I'll try again, and thanks for the compliment on the truck.
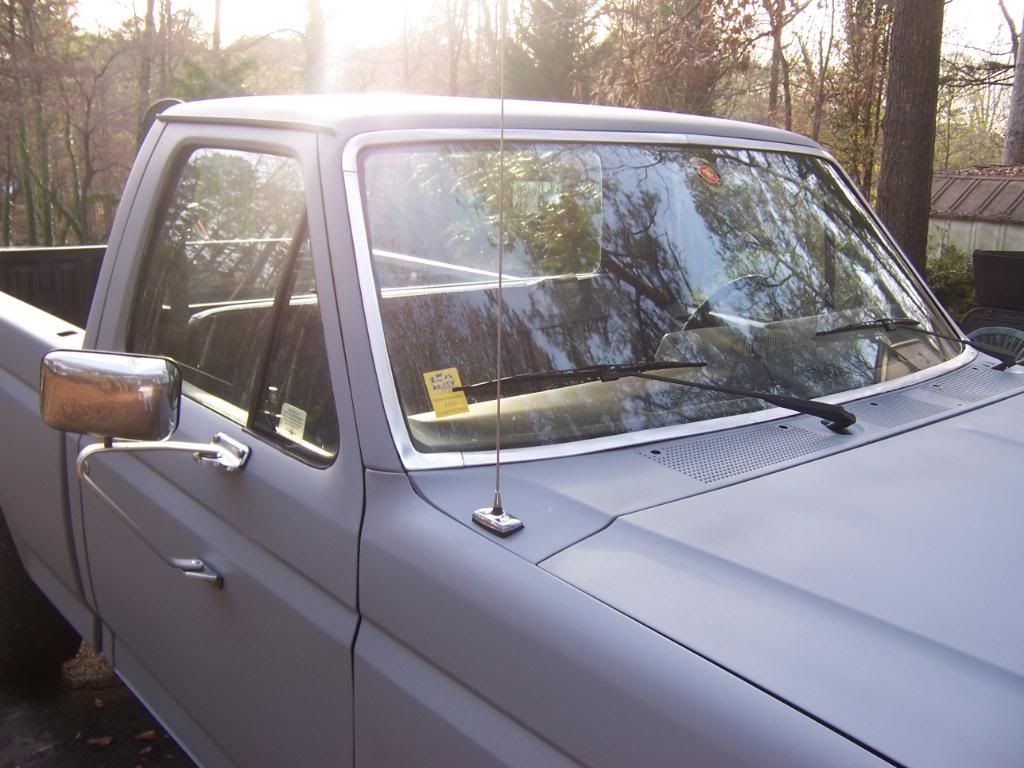
Now then, I accomplished a few more things this weekend. I put the two new front side-marker lights in, and the tailgate hardware and tailgate back on for now.
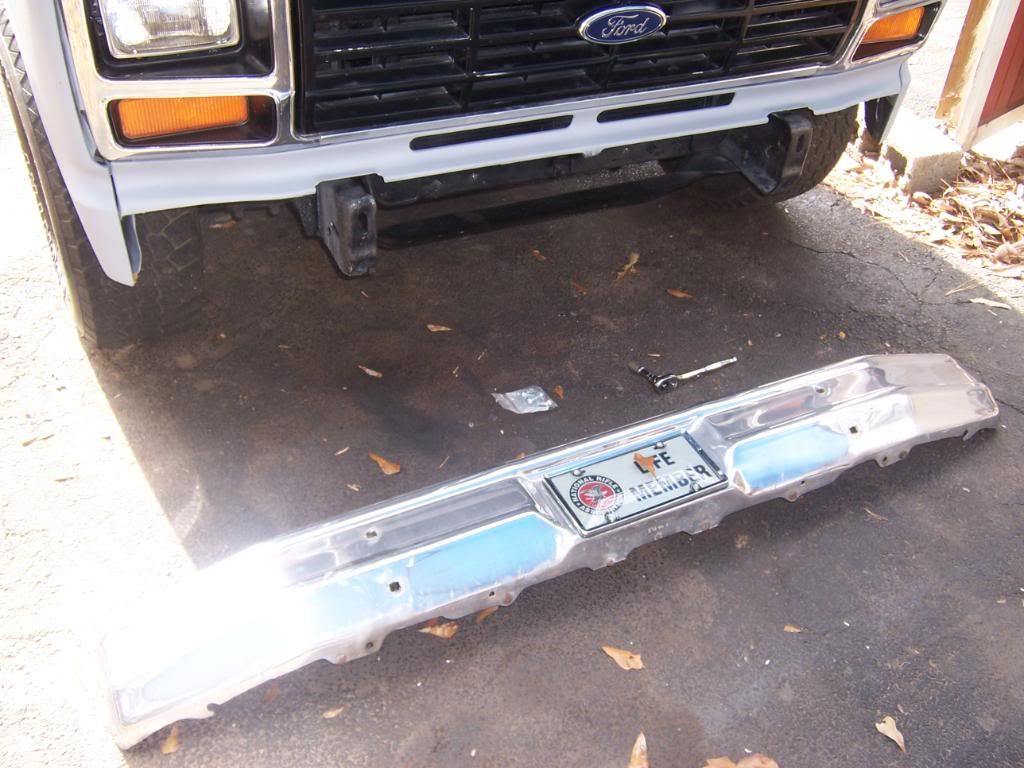
I put the rear bumper back on;
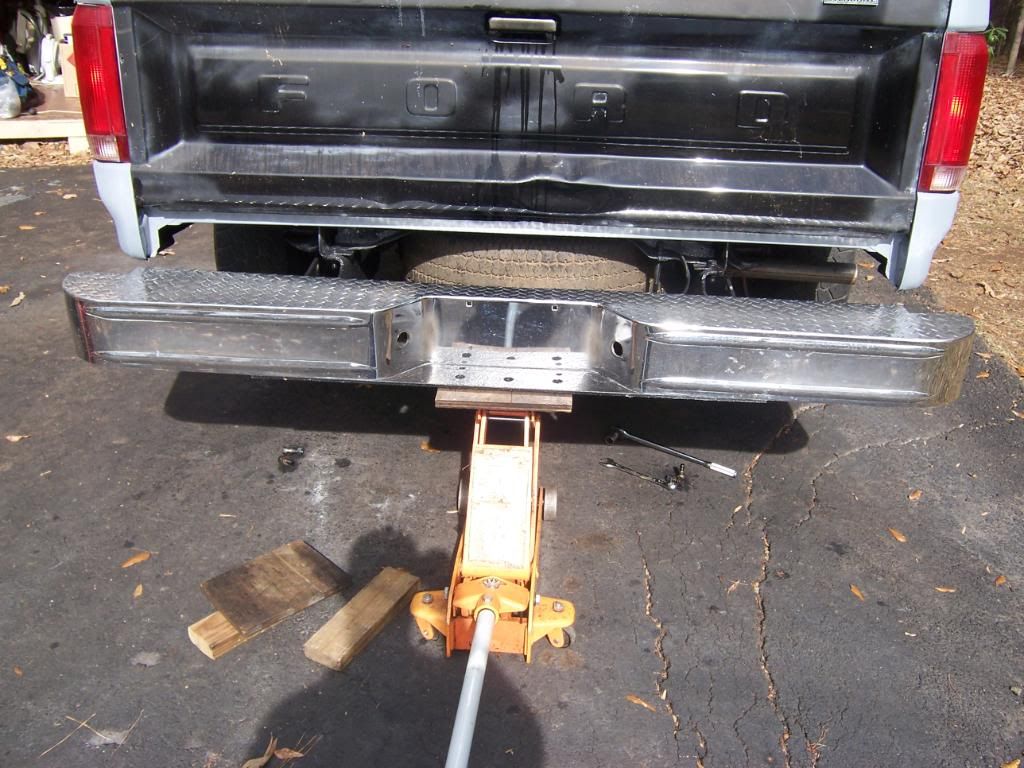
the front bumper back on;
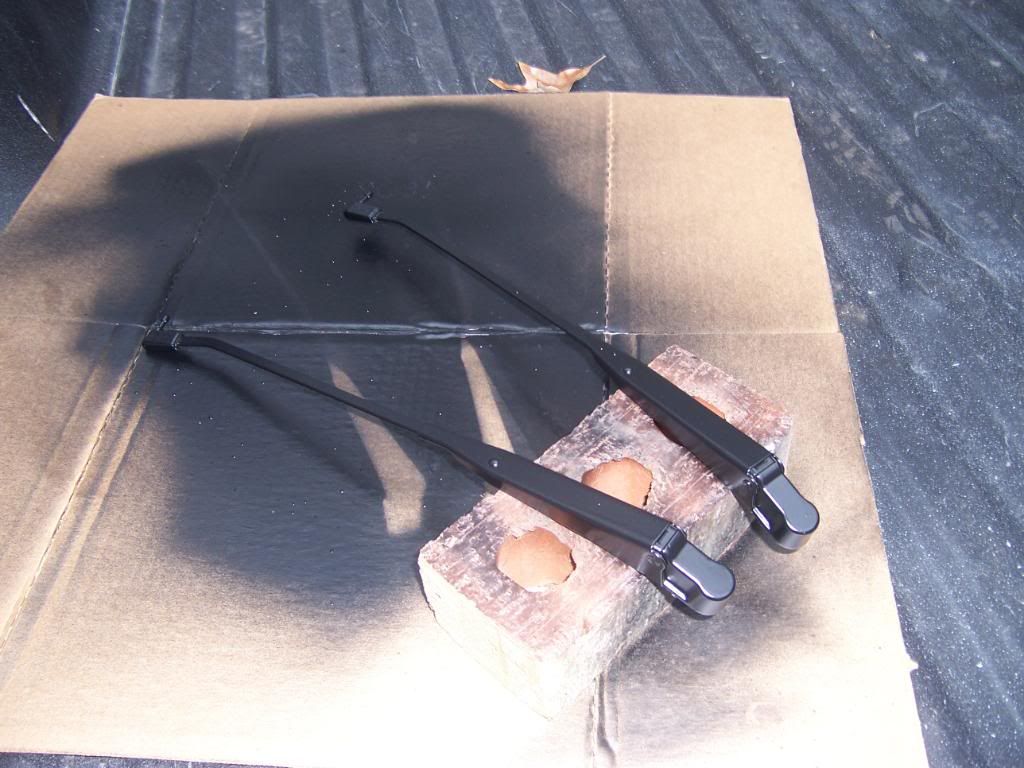
I put the windshield wiper arms and wipers back on, and the side mirrors on. I also put the antenna on, although I don't know why since I don't have a radio for the truck yet. I'm guessing it was to cover the holes in the new cowl.
I also started putting my new AVS Bug Deflector II (supplied by Lund) on. I am supposed to do a write-up on the product for Lund, so here goes. Here are some pictures of the install.
First off, this is how the AVS Bug Deflector II comes packaged. Once removed from the box, you can see how it is wrapped in plastic;
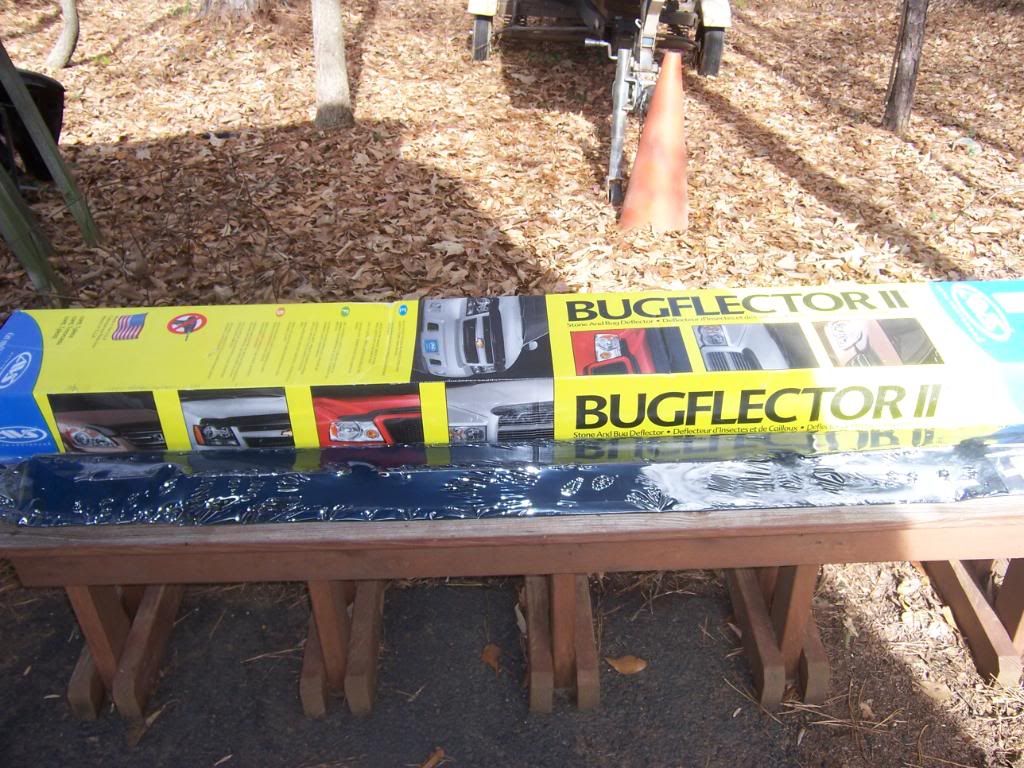
When you remove the plastic, you will see the Bug Deflector II;
And a plastic bag containing the screws, washers, alcohol wipes, bumper stops, instructions, and an AVS logo sticker;
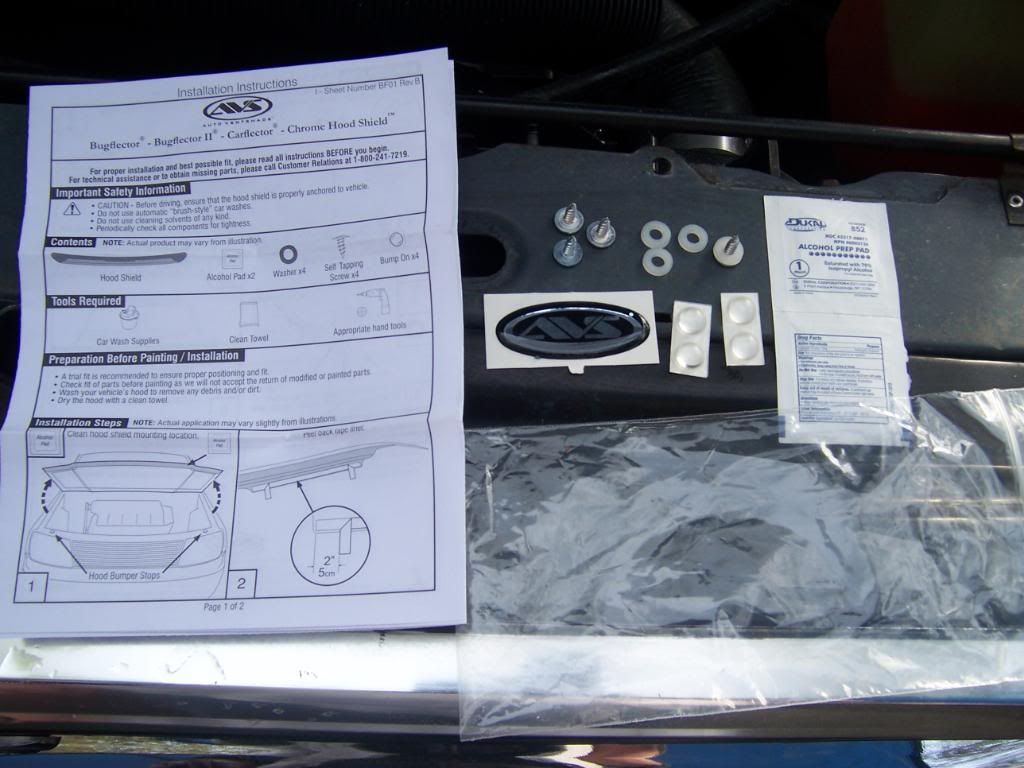
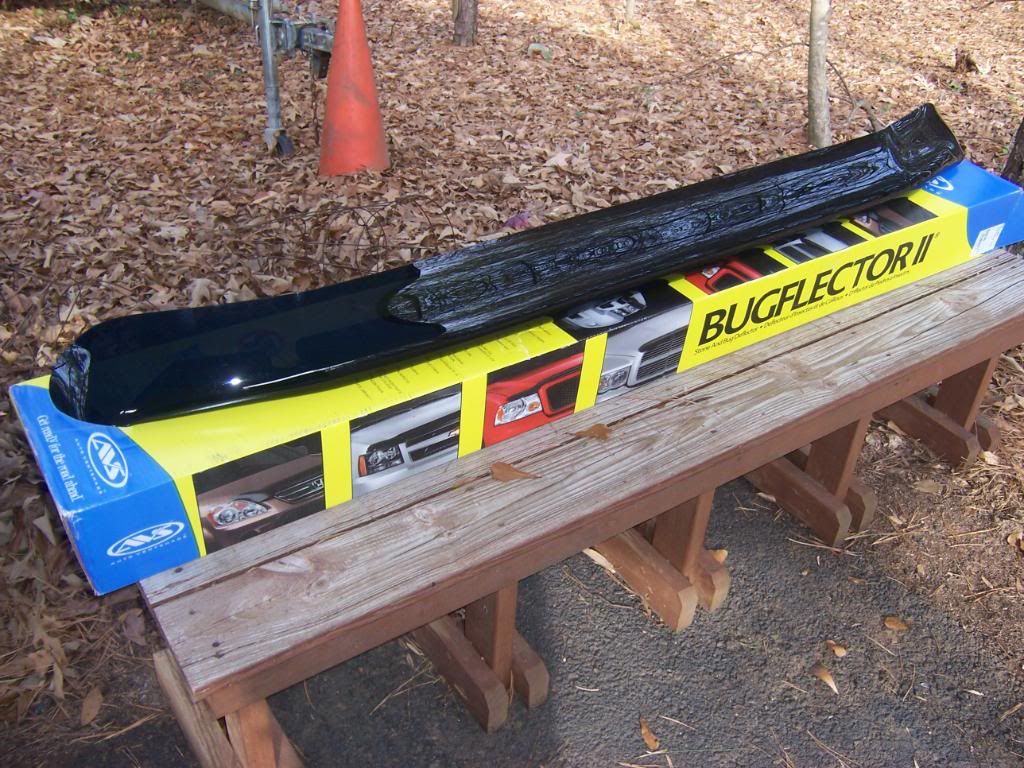
I am actually not ready for my AVS Bug Deflector II to be on the truck, since I have not painted the truck yet. But, I am going ahead and install it for the most part. It will be coming back off and going into storage soon, until the final install after paint.
A shot of the hood prior to install;
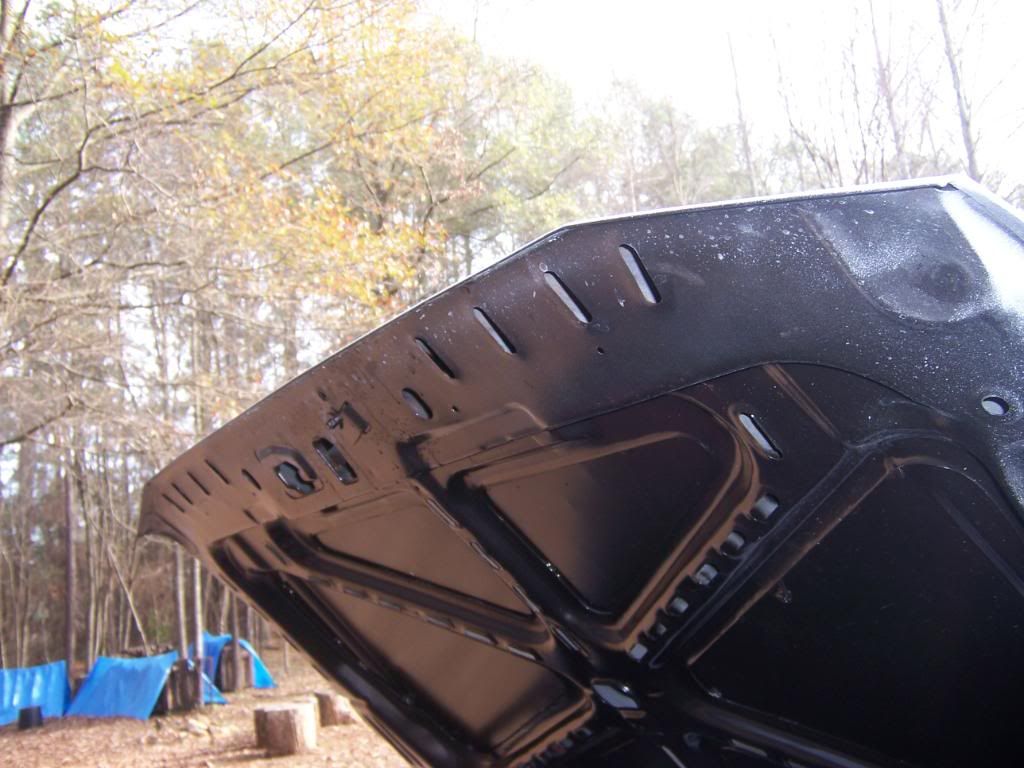
The instructions were simple and easy to read. Once I had the Deflector in the correct position, I drilled four pilot holes and secured it in place. It actually has some two-sided tape prefastened to the Deflector that you can use to install it. I think it would be a very secure installation if you used both tape and screws. I will be using the screws until the final install, at that time I will use both the tape and screws for a complete and secure installation.
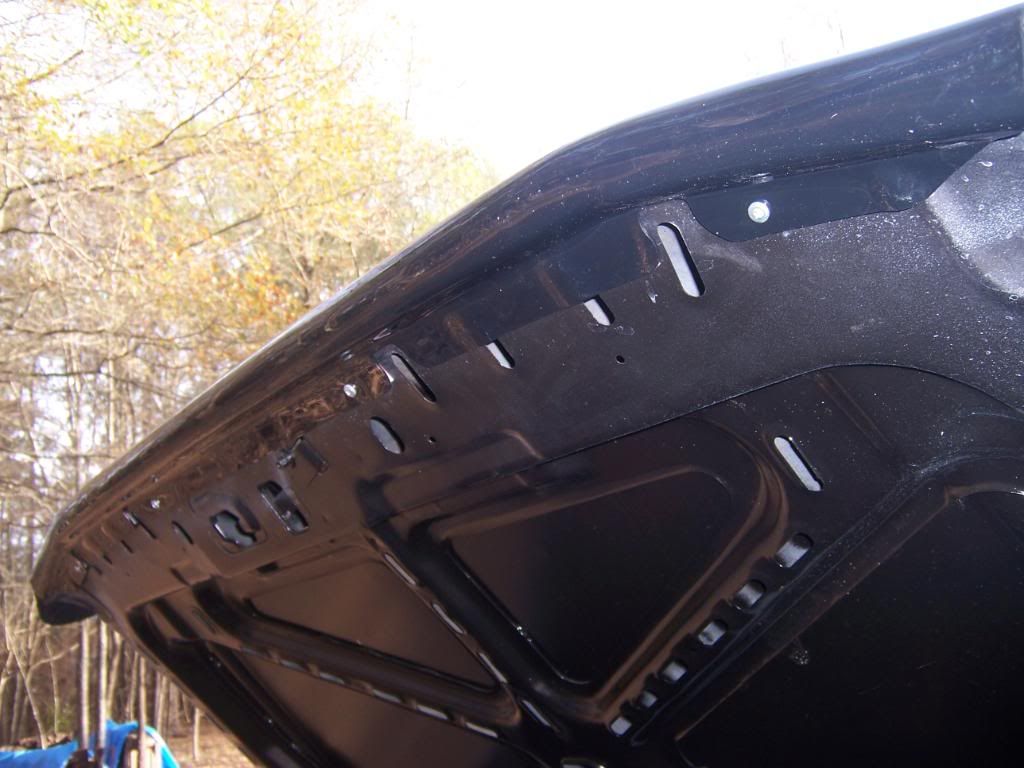
Overall I found it to be a very easy installation, although I did have my wife help to hold it in place while I drilled the holes (since I wasn't using the tape at this time).
And several after pictures;
I have to give some thanks to my wonderful wife for coming to my aid and holding the AVS Bugdeflector II for me during the install. But, more importantly, I have to thank her for helping me to install both of the bumpers back on the truck. She also found a split vacuum hose while she was checking under the hood (which I promptly replaced). All of this to make the truck drivable and street legal till the next time I need to do more body work, which won't be until spring and the temps warm up.
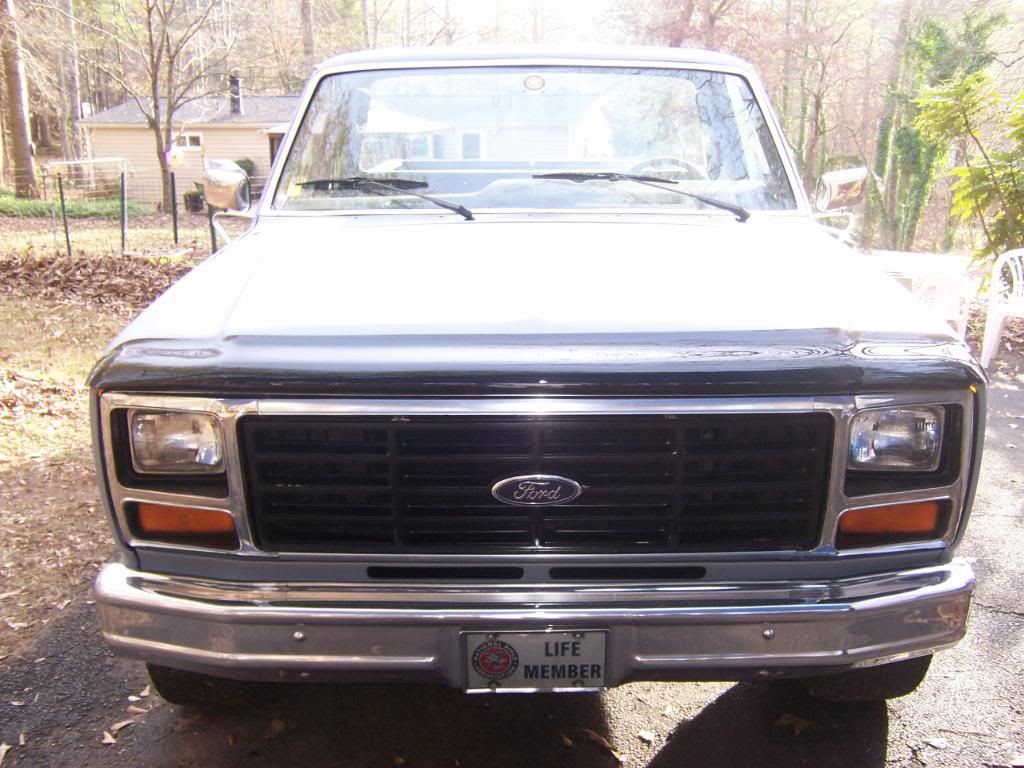
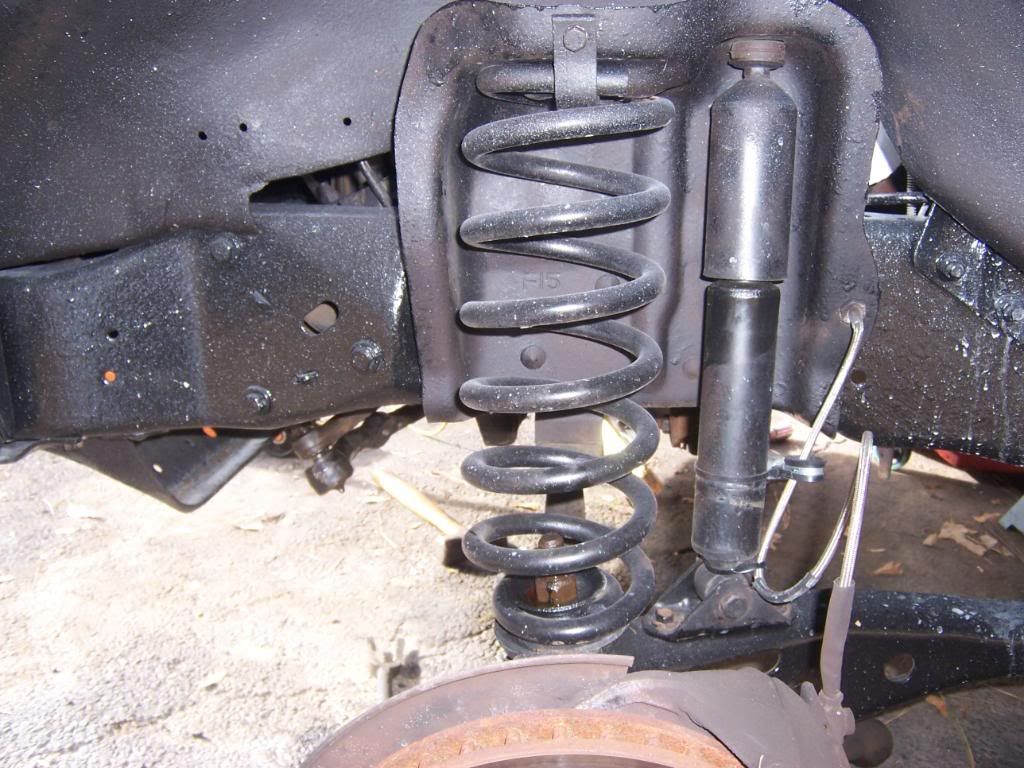
While I was under the front bumper, I found this;
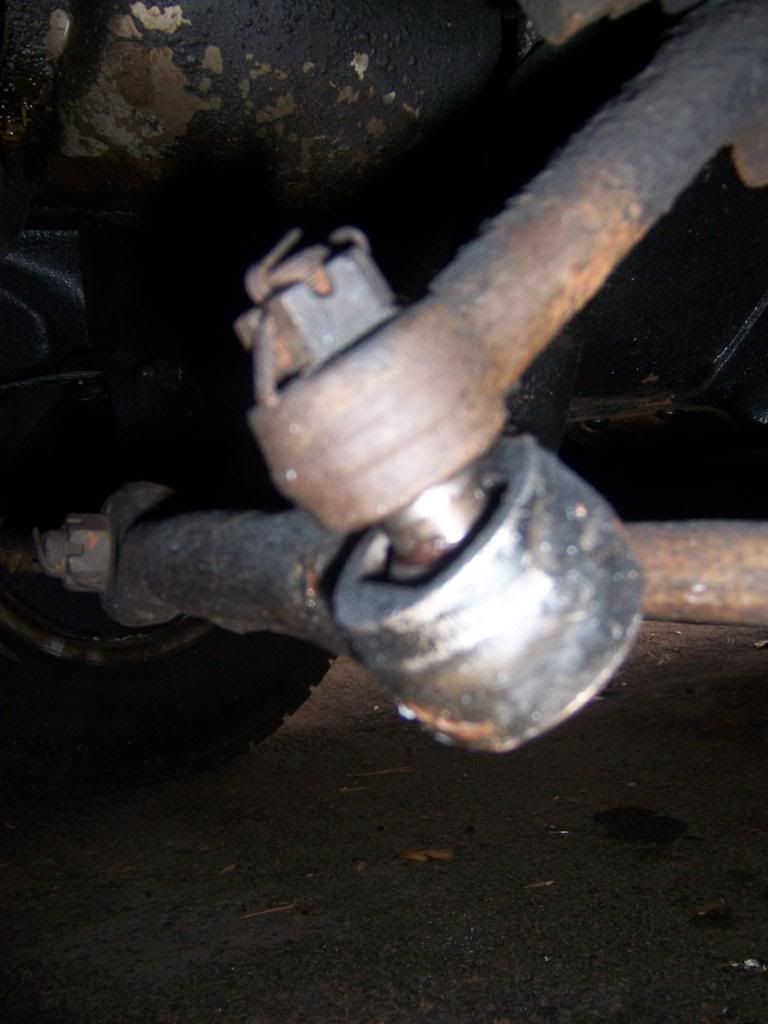
That drag link looks like my next project. I might even get to it this coming weekend. I'm also considering putting some new Moog CC844 coil springs on at the same time that I do the drag link. I want to give the front end just a little lift, but not too much. After all, it's only a two wheel drive.
Comments and suggestions are always welcome.
Now then, I accomplished a few more things this weekend. I put the two new front side-marker lights in, and the tailgate hardware and tailgate back on for now.
I put the rear bumper back on;
the front bumper back on;
I put the windshield wiper arms and wipers back on, and the side mirrors on. I also put the antenna on, although I don't know why since I don't have a radio for the truck yet. I'm guessing it was to cover the holes in the new cowl.
I also started putting my new AVS Bug Deflector II (supplied by Lund) on. I am supposed to do a write-up on the product for Lund, so here goes. Here are some pictures of the install.
First off, this is how the AVS Bug Deflector II comes packaged. Once removed from the box, you can see how it is wrapped in plastic;
When you remove the plastic, you will see the Bug Deflector II;
And a plastic bag containing the screws, washers, alcohol wipes, bumper stops, instructions, and an AVS logo sticker;
I am actually not ready for my AVS Bug Deflector II to be on the truck, since I have not painted the truck yet. But, I am going ahead and install it for the most part. It will be coming back off and going into storage soon, until the final install after paint.
A shot of the hood prior to install;
The instructions were simple and easy to read. Once I had the Deflector in the correct position, I drilled four pilot holes and secured it in place. It actually has some two-sided tape prefastened to the Deflector that you can use to install it. I think it would be a very secure installation if you used both tape and screws. I will be using the screws until the final install, at that time I will use both the tape and screws for a complete and secure installation.
Overall I found it to be a very easy installation, although I did have my wife help to hold it in place while I drilled the holes (since I wasn't using the tape at this time).
And several after pictures;
I have to give some thanks to my wonderful wife for coming to my aid and holding the AVS Bugdeflector II for me during the install. But, more importantly, I have to thank her for helping me to install both of the bumpers back on the truck. She also found a split vacuum hose while she was checking under the hood (which I promptly replaced). All of this to make the truck drivable and street legal till the next time I need to do more body work, which won't be until spring and the temps warm up.
While I was under the front bumper, I found this;
That drag link looks like my next project. I might even get to it this coming weekend. I'm also considering putting some new Moog CC844 coil springs on at the same time that I do the drag link. I want to give the front end just a little lift, but not too much. After all, it's only a two wheel drive.
Comments and suggestions are always welcome.

#87
12-09-2011, 05:53 PM
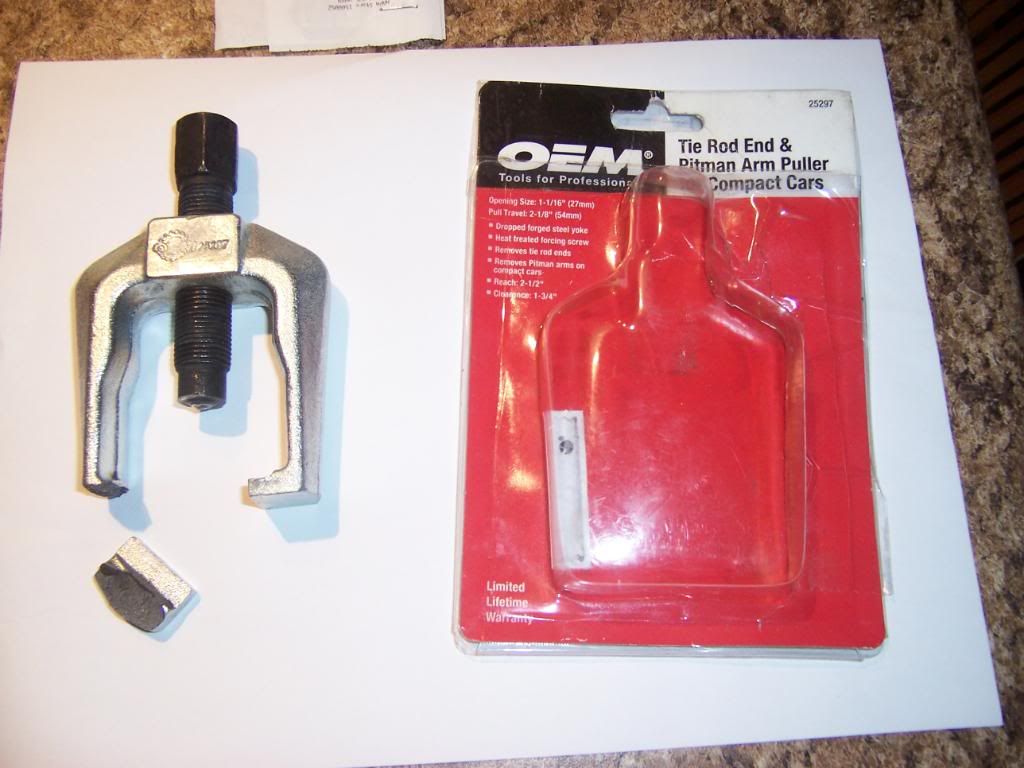
Today I started working on my bad drag link. I am having a time removing the rod end. I first removed the middle rod end from the drag link with no problem. When I started on the rod end my tool broke. Off to the store for a replacement, and ended up with the same type from the same manufacturer.
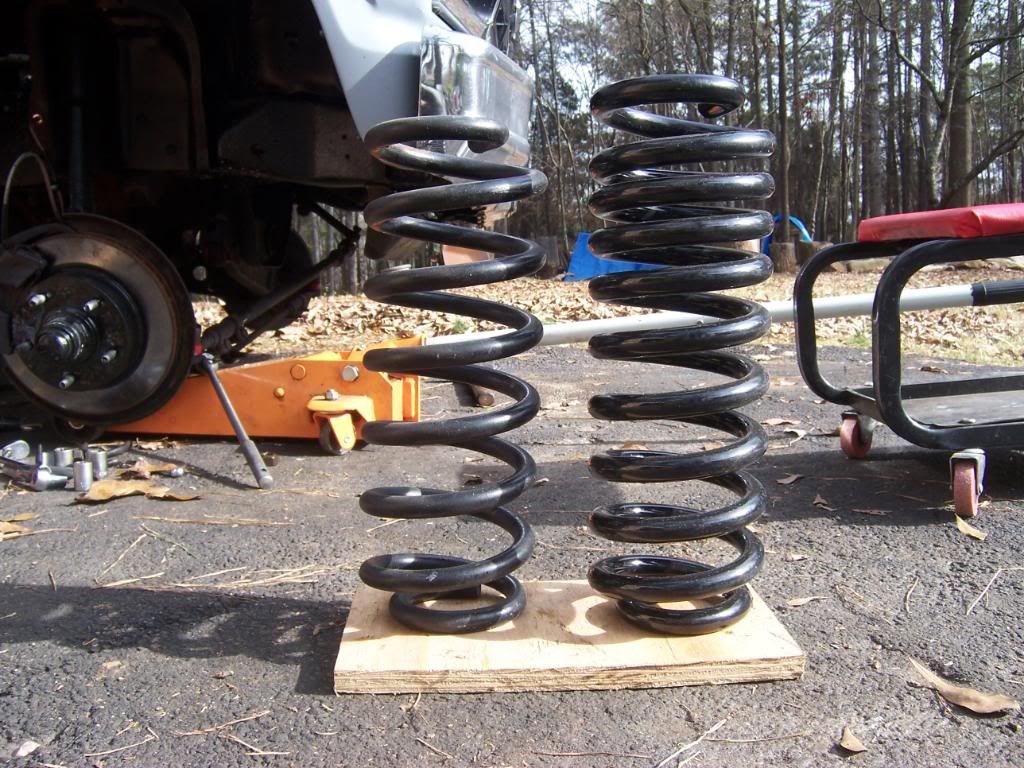
I still couldn't get it to remove that one drag link rod end. So I decided to do a few other things while I was there. I put new poly boots on both of the tie rod ends (the removal tool worked fine for them), and lubed them up. Then I put my new springs in. I decided to replace my original coils with a pair of the Moog CC820's. I believe the originals to be the equivalent of the CC818's.
Here you can see the height difference between the two springs.
I had no issues with replacing either of those, not a difficult job.
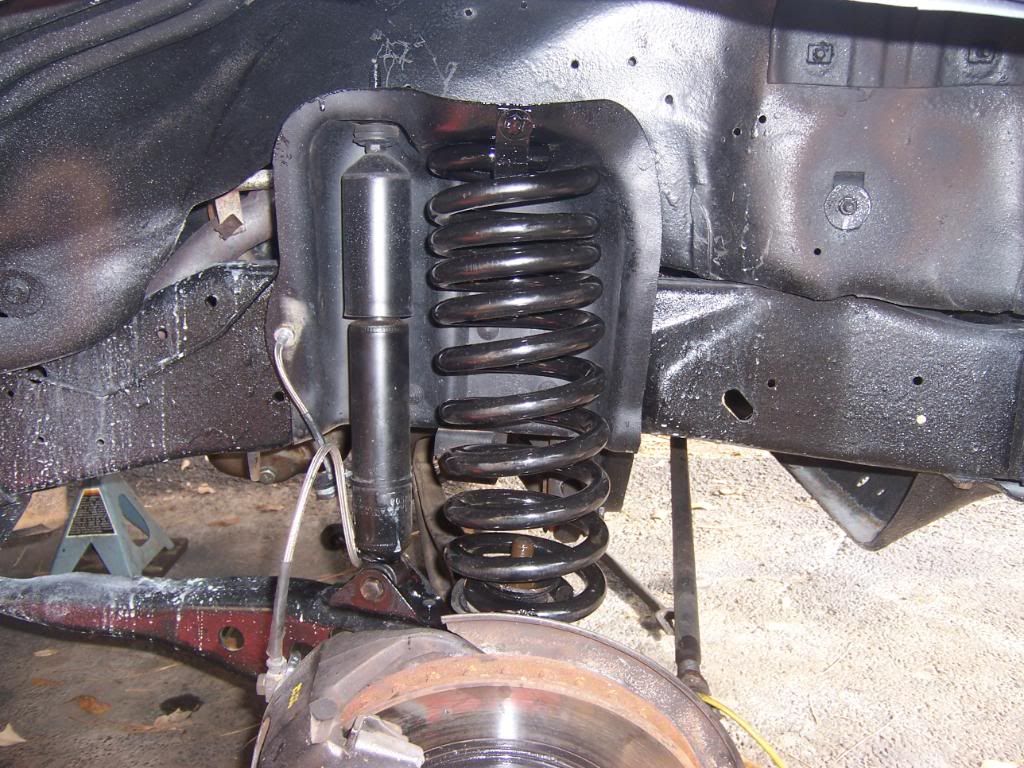
Now then, back to the drag link rod end (that just won't come off), I even tried my pickle fork.
That picture was obviously a before I took anything apart shot. I am ordering a different new tie rod end removal tool from Napa right now. They say it won't be in until Tuesday. Oh well, I guess no work on the front end until next week.
I still couldn't get it to remove that one drag link rod end. So I decided to do a few other things while I was there. I put new poly boots on both of the tie rod ends (the removal tool worked fine for them), and lubed them up. Then I put my new springs in. I decided to replace my original coils with a pair of the Moog CC820's. I believe the originals to be the equivalent of the CC818's.
Here you can see the height difference between the two springs.
I had no issues with replacing either of those, not a difficult job.
Now then, back to the drag link rod end (that just won't come off), I even tried my pickle fork.
That picture was obviously a before I took anything apart shot. I am ordering a different new tie rod end removal tool from Napa right now. They say it won't be in until Tuesday. Oh well, I guess no work on the front end until next week.
#88
12-12-2011, 08:17 PM
#89
12-12-2011, 08:32 PM
Posting Legend
The new springs look like progressive units since the coils are closer together at the top than at the middle.
As for the end that won't come off, I had to use my gear puller to get drag link off the pitman arm the other day as my puller that looks just like yours wouldn't budge it. And even with the gear puller it took everything it/I had. I tightened it, hit the end with a hammer, tightened, hit, etc. In fact, I was looking for a bigger hammer when it went POP and came off.
As for the end that won't come off, I had to use my gear puller to get drag link off the pitman arm the other day as my puller that looks just like yours wouldn't budge it. And even with the gear puller it took everything it/I had. I tightened it, hit the end with a hammer, tightened, hit, etc. In fact, I was looking for a bigger hammer when it went POP and came off.
#90
12-12-2011, 09:37 PM
Did you get 2 or 3 degree camber bushings to go along with the springs?
P.S. now might be a good time to change the oxygen sensor if it's old, you can reach it through the wheel well pretty easily. It would have been really easy a few months ago when you had the passenger side fender off the truck
 .
.