Coolant Flush Notes - with pics
#1
 07-17-2010, 04:01 PM

Coolant Flush Notes - with pics
I did my second coolant flush this morning, and took a few pics. This won't be a "how to" post, because we've got several of those threads already. These are intended to be answers to questions I had before I started, and maybe others have the same questions.
This time I removed the thermostat. Last time I did not. So I have done it both ways, and my advice is that you definitely want to remove the stat. It is so much faster and easier.
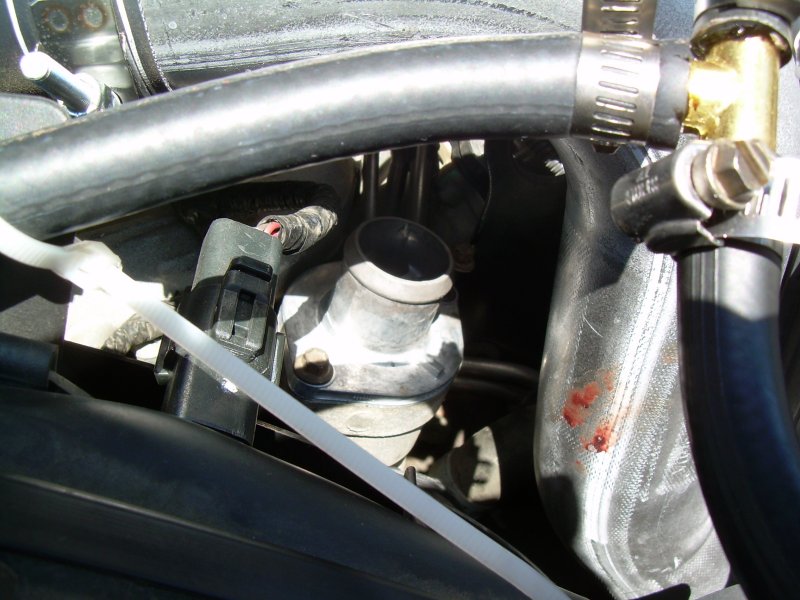
Here is a shot of my t-stat housing. On my very early '06, pre-commonization motor, the t-stat pops right out with no clearance problem at all. It's a bit easier if you remove the radiator hose first, but it would come out either way. I understand that others have a hard fuel line in the way, so if someone wants to post a follow-up picture of how theirs is different that would be great. Then we could show both styles. Mine could not have been easier. Yes, that is my blood on the CAC duct.
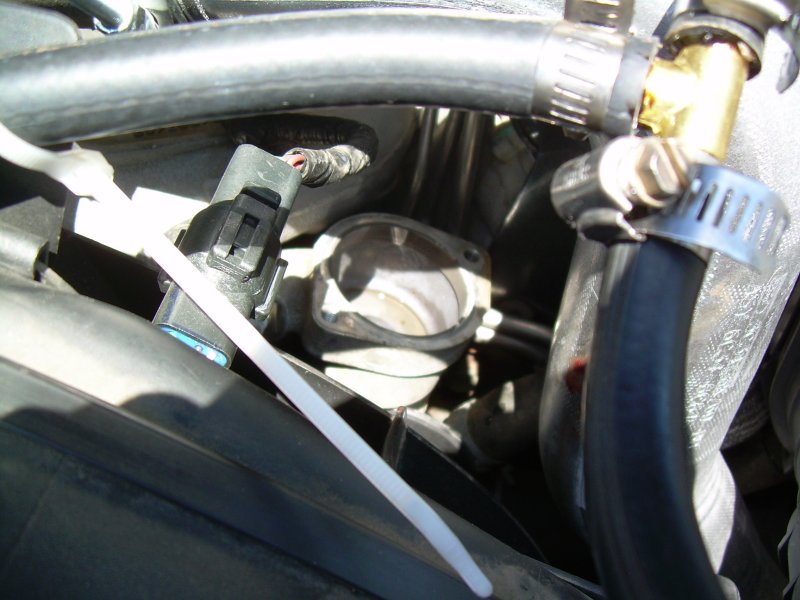
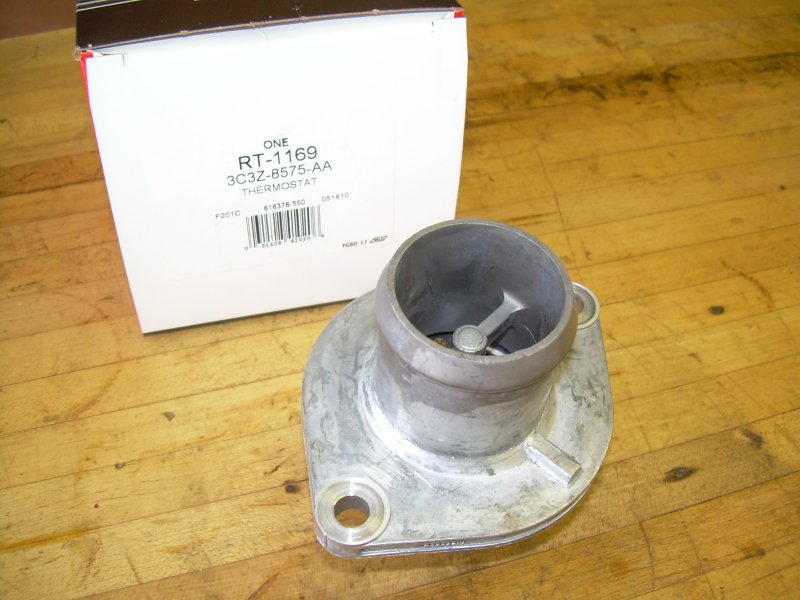
Here is a shot of the port after the t-stat has been removed.
I did not remove the block plug. Unless you enjoy golden showers (I don't want to know), or have a lift, don't mess with the plug. By the time you have sent 20 gallons of distilled water through the system, whether or not you drained the block won't matter. Just my opinion here.
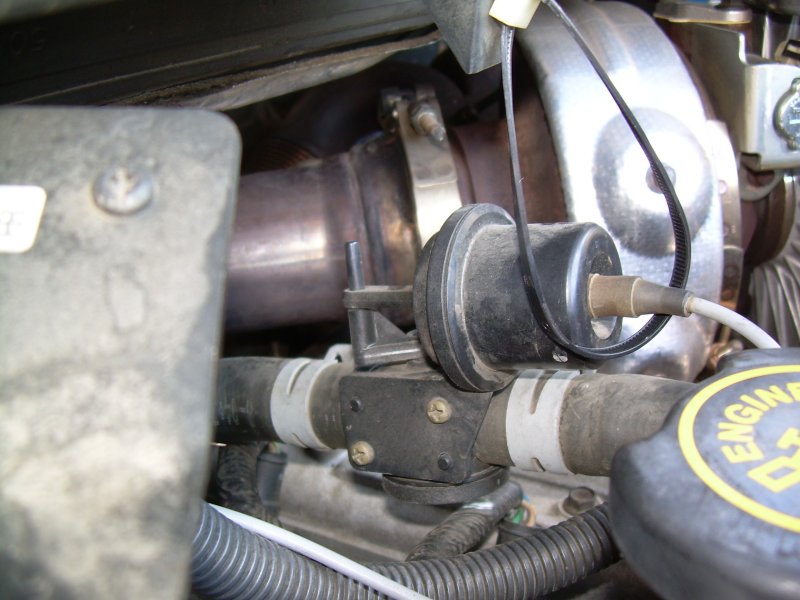
If you have a later model truck you will have a heater control valve. You want to make sure that valve is open so that the heater core gets flushed too. But it is not readily apparent when the valve is open versus closed. This photo shows the valve in the open position:
And this photo below shows it in the closed position:

This valve is actually spring loaded in the open position. The only time it is closed is when the dash switch is in the OFF position, or is in the MAX-AC position. You can also just remove that vacuum line and the spring will open the valve. I don't have the electronic temp control, but I believe the above is the same for all trucks, and the temp control is done with the blend doors. I could be wrong, but regardless just look at the valve to know if it is open.
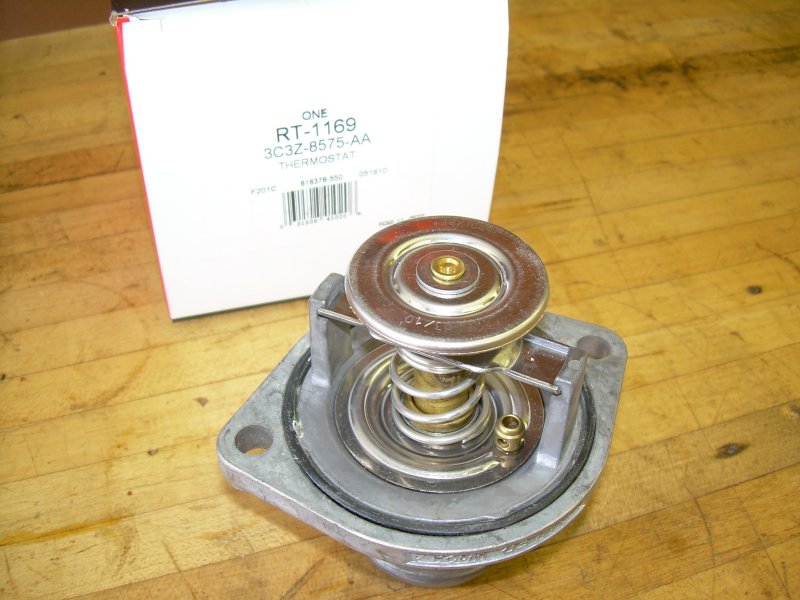
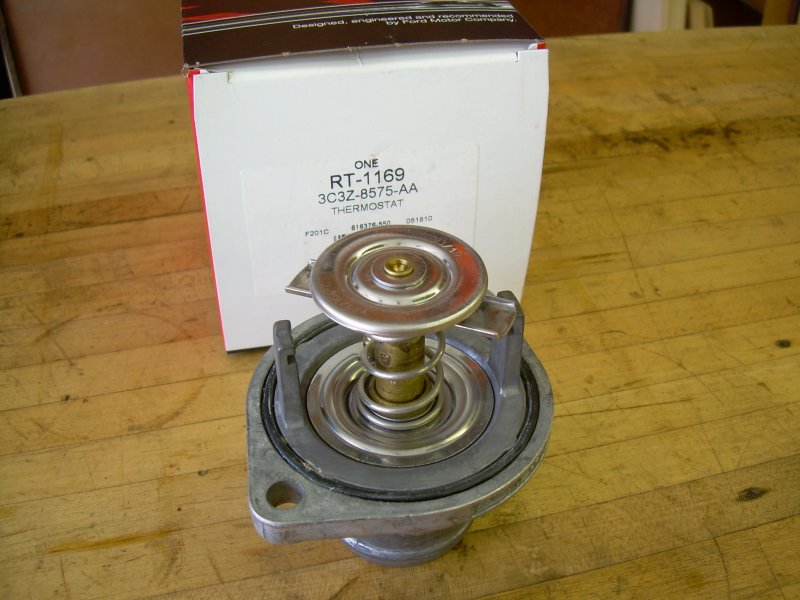
The photo below is the t-stat. It comes from Ford with the housing and O-ring included. My dealer didn't even carry just the t-stat alone, so I don't know if an OEM is available without the housing. The whole thing lists for about $35, and is cheaper from sponsor vendors.
You will need to remove the t-stat from the housing, then reinstall the housing on the engine to do your coolant flush. Just push down on the t-stat wings and rotate out of the grooves. The pic below shows it rotated and ready to be removed.
And lastly is a shot of the top side of the unit.
The t-stats are stamped "89-104C", which converts to 192�F to 219�F. So it begins to open at 192� and isn't fully open until 219�.
When draining, I found it faster to just remove the lower radiator hose. Don't bother using the rad drain. It's too slow, and it also is not as low as the hose outlet so not as much will drain. Remove the degas bottle cap, and you won't need it again until you are all finished. After the radiator has drained each time, just stick the lower hose back on the radiator and don't tighten the clamps. That is the suction side, and as long as you leave the degas cap off there won't be any system pressure so it won't blow off while idling in your driveway. Obviously you don't want to do that if you go for a drive, and you don't want to leave the upper hose clamps loose. The upper is the pressure side and it would blow off. I just idled using the high idle switch for 5-10 minutes between each drain. It's pretty warm here today, but my coolant temp only got as high as 150� with the t-stat removed. After shutdown I waited another 5 minutes before draining and the water was only lukewarm on my hand.
This time I removed the thermostat. Last time I did not. So I have done it both ways, and my advice is that you definitely want to remove the stat. It is so much faster and easier.
Here is a shot of my t-stat housing. On my very early '06, pre-commonization motor, the t-stat pops right out with no clearance problem at all. It's a bit easier if you remove the radiator hose first, but it would come out either way. I understand that others have a hard fuel line in the way, so if someone wants to post a follow-up picture of how theirs is different that would be great. Then we could show both styles. Mine could not have been easier. Yes, that is my blood on the CAC duct.
Here is a shot of the port after the t-stat has been removed.
I did not remove the block plug. Unless you enjoy golden showers (I don't want to know), or have a lift, don't mess with the plug. By the time you have sent 20 gallons of distilled water through the system, whether or not you drained the block won't matter. Just my opinion here.
If you have a later model truck you will have a heater control valve. You want to make sure that valve is open so that the heater core gets flushed too. But it is not readily apparent when the valve is open versus closed. This photo shows the valve in the open position:
And this photo below shows it in the closed position:
This valve is actually spring loaded in the open position. The only time it is closed is when the dash switch is in the OFF position, or is in the MAX-AC position. You can also just remove that vacuum line and the spring will open the valve. I don't have the electronic temp control, but I believe the above is the same for all trucks, and the temp control is done with the blend doors. I could be wrong, but regardless just look at the valve to know if it is open.
The photo below is the t-stat. It comes from Ford with the housing and O-ring included. My dealer didn't even carry just the t-stat alone, so I don't know if an OEM is available without the housing. The whole thing lists for about $35, and is cheaper from sponsor vendors.
You will need to remove the t-stat from the housing, then reinstall the housing on the engine to do your coolant flush. Just push down on the t-stat wings and rotate out of the grooves. The pic below shows it rotated and ready to be removed.
And lastly is a shot of the top side of the unit.
The t-stats are stamped "89-104C", which converts to 192�F to 219�F. So it begins to open at 192� and isn't fully open until 219�.
When draining, I found it faster to just remove the lower radiator hose. Don't bother using the rad drain. It's too slow, and it also is not as low as the hose outlet so not as much will drain. Remove the degas bottle cap, and you won't need it again until you are all finished. After the radiator has drained each time, just stick the lower hose back on the radiator and don't tighten the clamps. That is the suction side, and as long as you leave the degas cap off there won't be any system pressure so it won't blow off while idling in your driveway. Obviously you don't want to do that if you go for a drive, and you don't want to leave the upper hose clamps loose. The upper is the pressure side and it would blow off. I just idled using the high idle switch for 5-10 minutes between each drain. It's pretty warm here today, but my coolant temp only got as high as 150� with the t-stat removed. After shutdown I waited another 5 minutes before draining and the water was only lukewarm on my hand.
#2
07-17-2010, 04:18 PM
Lead Driver
#3
07-17-2010, 04:35 PM
#4
07-17-2010, 04:38 PM
#5
07-17-2010, 04:51 PM

#7
07-17-2010, 08:16 PM

I'll add my pictures and comments to your post. My truck is a late build 2004. Most everything was the same but there were a few notable differences. Picture is attached and labeled.
First, the Fuel Return Line is directly above the bolt. You can't put a socket on the nut to remove the EBP sensor bracket. I removed the nut with a wrench and then found out that I couldn't lift up the bracket at all.
I removed the EBP sensor and then discovered that it was the line to it that was the problem. I disconnected the line from the bottom of the bracket and was able to lift it off. I didn't need to remove the sensor.
Then I proceeded to use a wrench to remove the bolt. I soon discovered that the bolt came up and hit the Fuel Return Line. I finally disconnected the line and moved it out of the way.
When I do it again. I will remove the Fuel Return and EBP sensor lines first. Then I can remove the nuts with a socket. Remove the bracket. Then remove the bolts with a deep socket.
Trending Topics
#8
07-17-2010, 08:24 PM


#10
07-17-2010, 10:44 PM
Posting Guru
#12
07-18-2010, 08:21 AM
That all depends on the truck apparently. My 05 was built in Dec, 04 and I didn't have to remove either of the lines. There was enough play to pry the bracket off.
#13
07-18-2010, 08:24 AM
#14
07-28-2010, 07:57 PM

Thread
Thread Starter
Forum
Replies
Last Post
mattnj
Pre-Power Stroke Diesel (7.3L IDI & 6.9L)
1
10-30-2016 10:09 AM
Skydivelout
1999 - 2003 7.3L Power Stroke Diesel
3
08-26-2016 05:30 AM