
Finally doing my 08 Leaf Spring Conversion
#16
 06-20-2010, 12:00 AM

#17
06-20-2010, 12:06 AM
#18
06-20-2010, 12:10 AM
#19
06-20-2010, 12:15 AM
#20
06-20-2010, 12:49 AM
#21
06-24-2010, 09:52 PM
OK, I got some work done on the driver's side today. I was working against mother nature and I wasn't winning. Plus it was IPhone 4 Launch day so I had to go take care of that!!! LOL
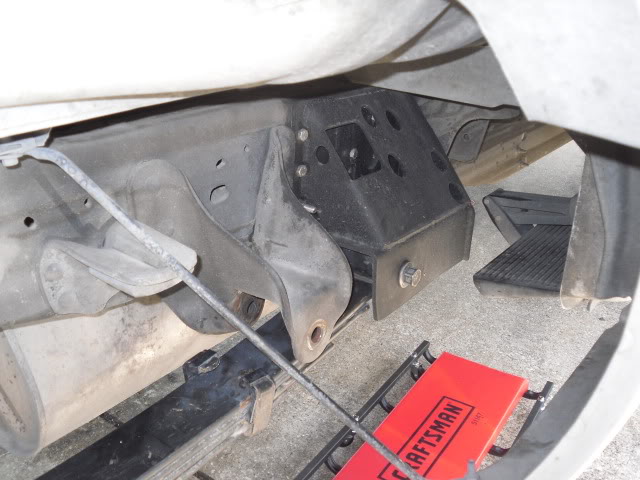
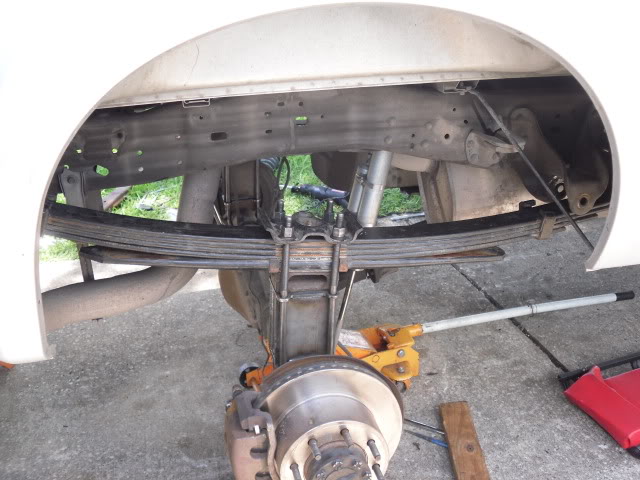
Anyway, I did get the driver's side hanger installed. Here are a couple of pictures of how it started before I touched anything:
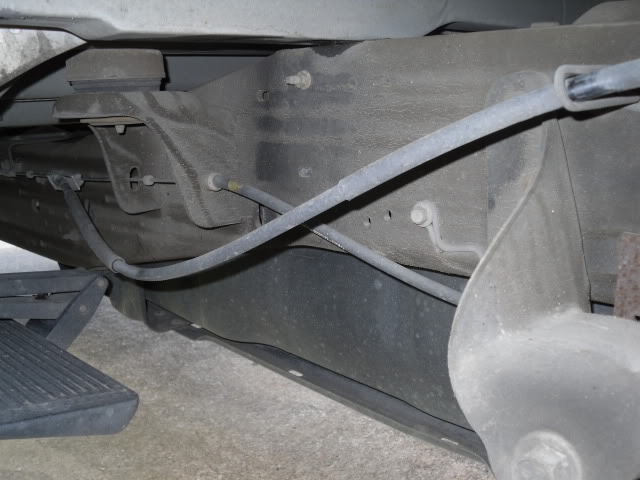
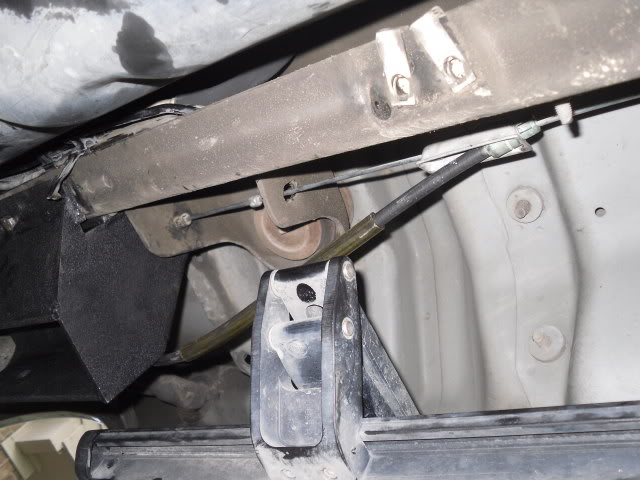
The parking brake cables had to be unhooked. This is on my 2005 model, I believe the early models may be a little different. What I did is go to where the cable goes through the body mount under the drivers door. I pulled slack on the cable (as much as I could) and then clamped it behind the body mount with a pair of vice grips, which keeps it from going back through and leave slack in the cable to allow it to be unhooked.
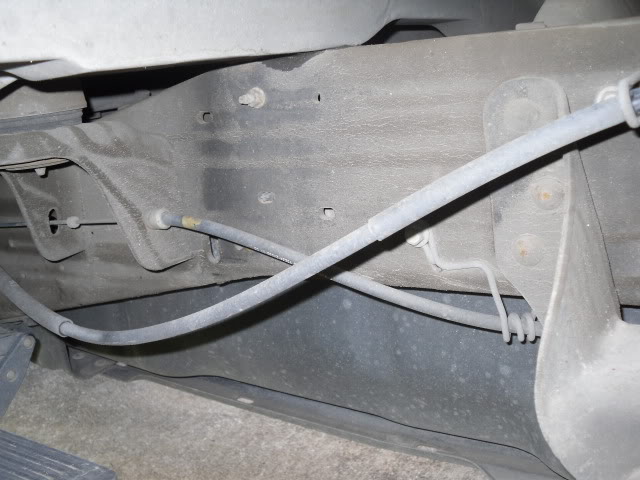
Here is a picture of where the cable goes through the body mount:
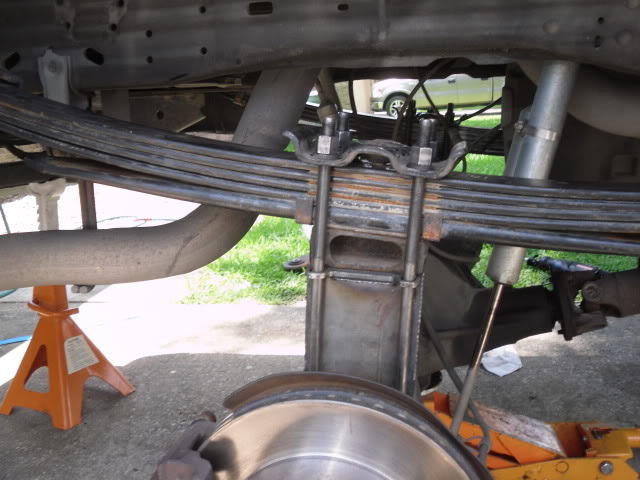
Here is a picture of it clamped off to allow the slack:
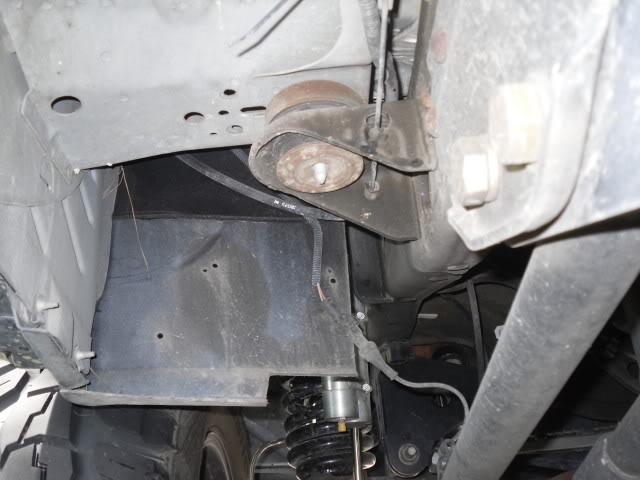
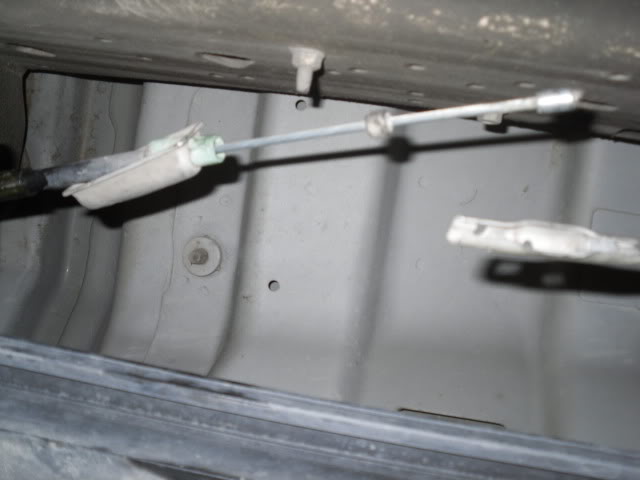
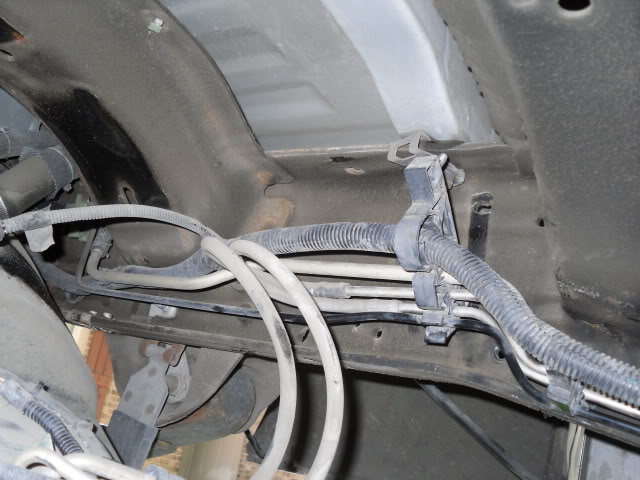
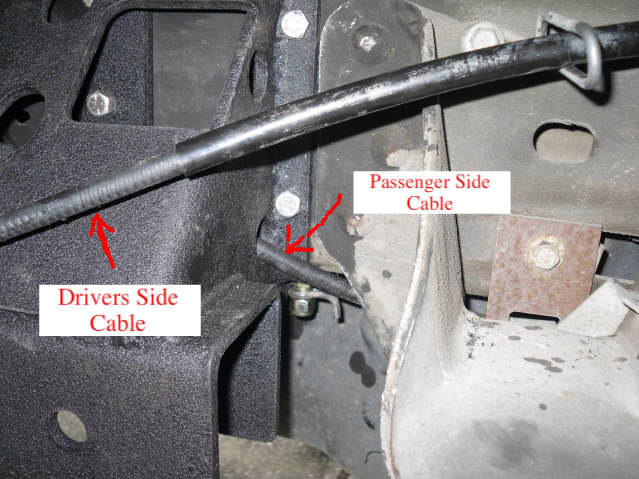
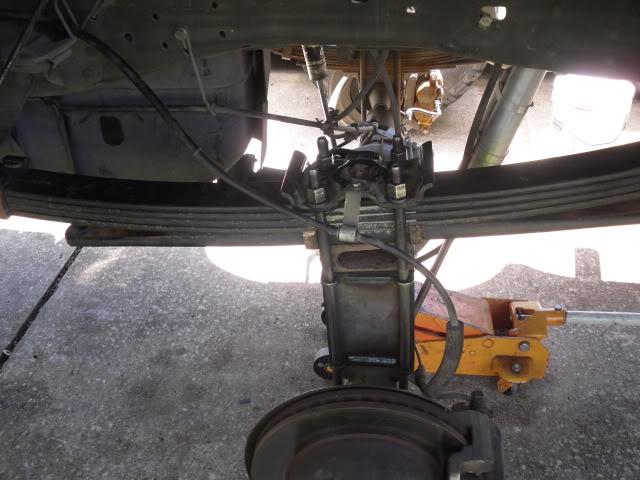
Once it was clamped off, I went back to where the passengers rear brake cable and drivers rear brake cable come together along the frame just under the rear door. Here is a picture of where they come together:
Just forward of that is a coupler that you can unhook to separate it from the main cable:
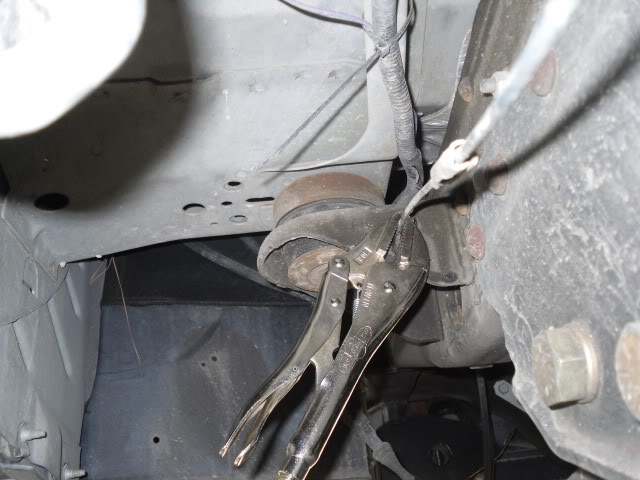
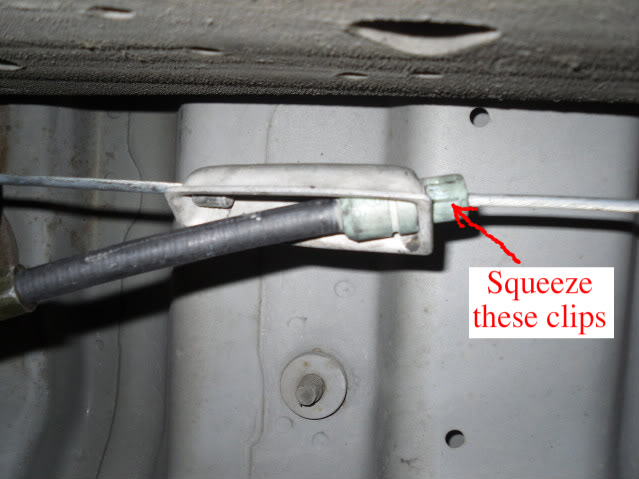
Next step is to unhook the metal bracket from the drivers side cable. The plastic fitting that goes through the bracket has little clips that you just squeeze or push in with a screwdriver:
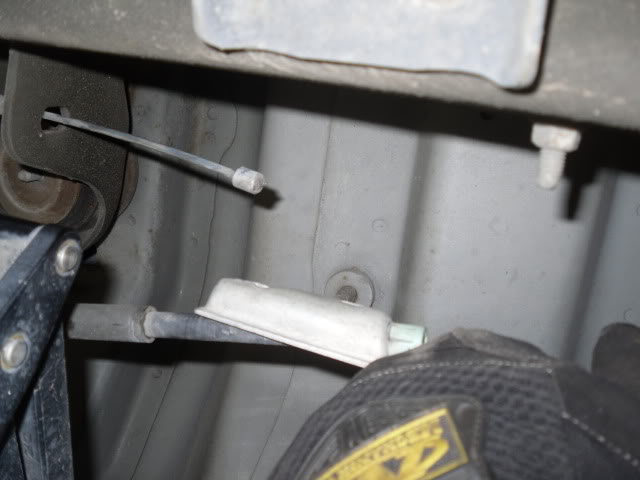
Once thats unhooked, then unhook the cable that goes to the pass side by sliding it out of the bracket:
I did drop the fuel tank, just to give myself some more room. Its not hard at all and definitely makes things easier to get to. Once the tank was dropped, I unbolted the plastic mount that holds all of the brakelines and fuel lines so I could pull them away from the frame to keep from hitting them with the drill when I drilled through the frame.
Here's the bracket that holds the lines:
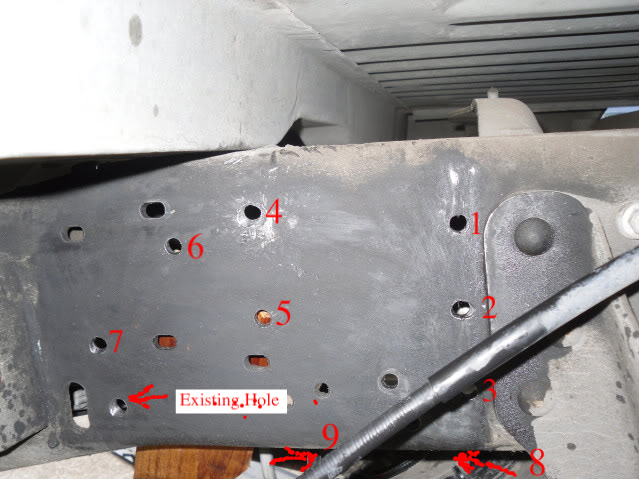
After that is was basically the same process as the passenger side. There is one hole already on the frame that you use for alignment. So you just slide the bracket up against the frame, put the bolt in the existing to alignment it properly. Then I just used my drill bit the go through the holes on the bracket and drill just enough to mark the spots to drill. Then I removed the bracket and drilled all of my holes.
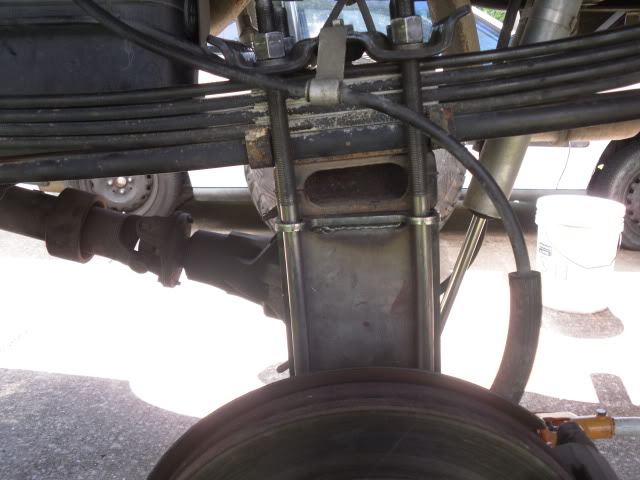
Here's a picture after the holes were drilled:
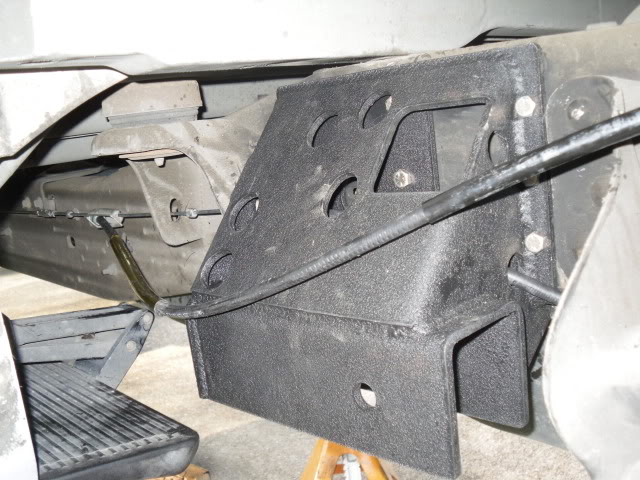
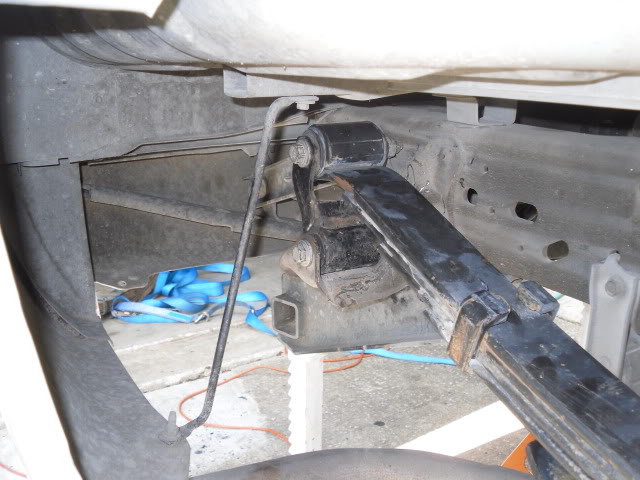
Then I put the hanger back against the frame and bolted it all down, and re-ran the parking brake cables.
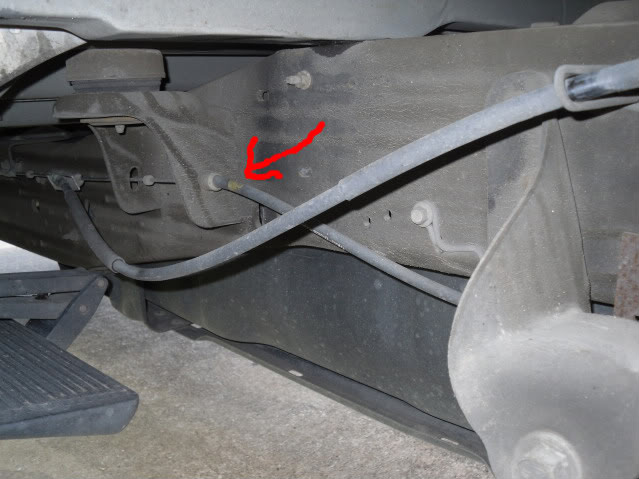
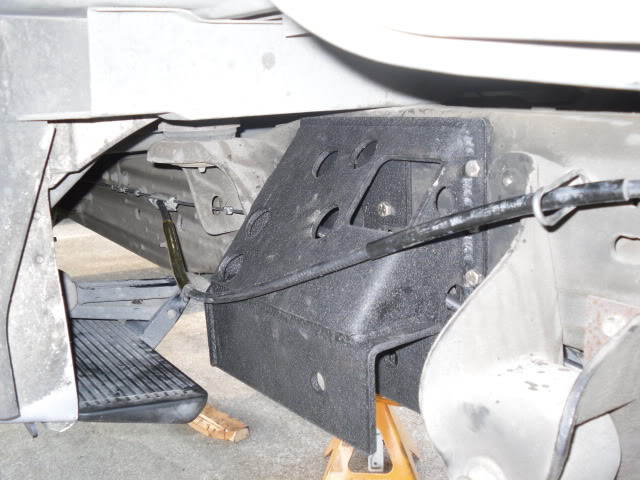
The passenger side cable goes through the lower hole on the rear of the hanger, passes through the hanger, then comes out of the front hole on the hanger and has to go through the body mount bracket. When it passes through the body mount bracket it has one of those plastic fittings with the little clips that holds it in. Here is a picture without the hanger installed so you can see the body mount bracket I'm talking about:
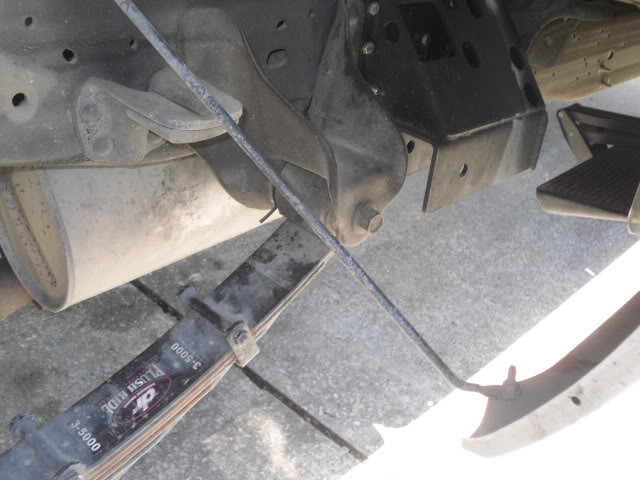
Here are the two cables:
Then they just hook back up, just like they were before starting.
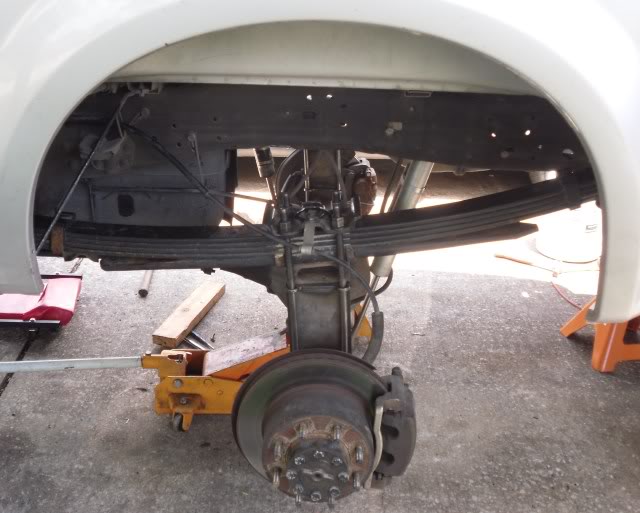
Here is a final finished pic of the hanger mounted, bolted in and all brake lines hooked back up:
I'm hoping this weekend I can get the leaf springs pulled off, the 08 leaf springs installed, and mocked up with blocks to figure out exactly what size traction block I need so I can get them ordered.
Anyway, I did get the driver's side hanger installed. Here are a couple of pictures of how it started before I touched anything:
The parking brake cables had to be unhooked. This is on my 2005 model, I believe the early models may be a little different. What I did is go to where the cable goes through the body mount under the drivers door. I pulled slack on the cable (as much as I could) and then clamped it behind the body mount with a pair of vice grips, which keeps it from going back through and leave slack in the cable to allow it to be unhooked.
Here is a picture of where the cable goes through the body mount:
Here is a picture of it clamped off to allow the slack:
Once it was clamped off, I went back to where the passengers rear brake cable and drivers rear brake cable come together along the frame just under the rear door. Here is a picture of where they come together:
Just forward of that is a coupler that you can unhook to separate it from the main cable:
Next step is to unhook the metal bracket from the drivers side cable. The plastic fitting that goes through the bracket has little clips that you just squeeze or push in with a screwdriver:
Once thats unhooked, then unhook the cable that goes to the pass side by sliding it out of the bracket:
I did drop the fuel tank, just to give myself some more room. Its not hard at all and definitely makes things easier to get to. Once the tank was dropped, I unbolted the plastic mount that holds all of the brakelines and fuel lines so I could pull them away from the frame to keep from hitting them with the drill when I drilled through the frame.
Here's the bracket that holds the lines:
After that is was basically the same process as the passenger side. There is one hole already on the frame that you use for alignment. So you just slide the bracket up against the frame, put the bolt in the existing to alignment it properly. Then I just used my drill bit the go through the holes on the bracket and drill just enough to mark the spots to drill. Then I removed the bracket and drilled all of my holes.
Here's a picture after the holes were drilled:
Then I put the hanger back against the frame and bolted it all down, and re-ran the parking brake cables.
The passenger side cable goes through the lower hole on the rear of the hanger, passes through the hanger, then comes out of the front hole on the hanger and has to go through the body mount bracket. When it passes through the body mount bracket it has one of those plastic fittings with the little clips that holds it in. Here is a picture without the hanger installed so you can see the body mount bracket I'm talking about:
Here are the two cables:
Then they just hook back up, just like they were before starting.
Here is a final finished pic of the hanger mounted, bolted in and all brake lines hooked back up:
I'm hoping this weekend I can get the leaf springs pulled off, the 08 leaf springs installed, and mocked up with blocks to figure out exactly what size traction block I need so I can get them ordered.

#23
06-25-2010, 12:24 PM
#25
06-25-2010, 04:09 PM

Senior User

#26
06-26-2010, 05:12 PM
08 Spring Conversion is Complete!!!!!
Well I finally got it finished up and man those springs ride GREAT!!!
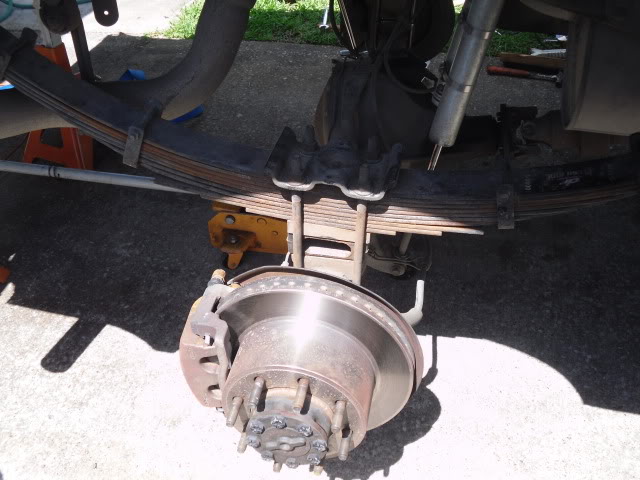
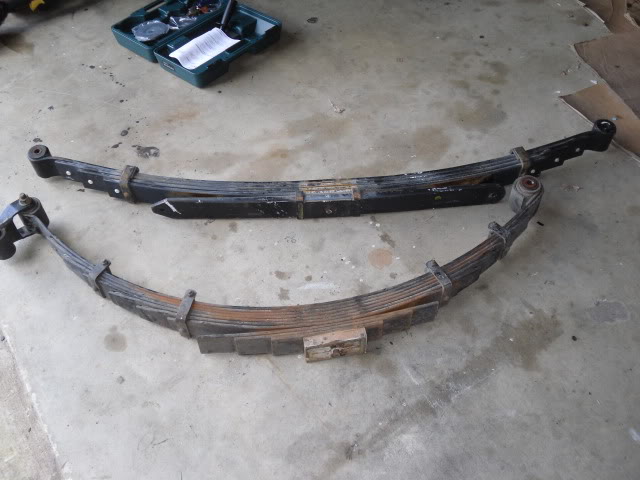
Not a whole to write about on installing the leaf springs. Here are some before pictures with the 5" ICON leaf springs and 3" of blocks that it had:
Passenger Side:

Here is a side by side picture that shows the difference in length between the 99-07 spring and the 08+ spring. Remember its 8" longer.
Once the UBolts were all off and the leaf spring bolts out it was just a matter of hoisting those things out!! I took the factory shackles off of the ICON springs and put them on the 08 leaf springs
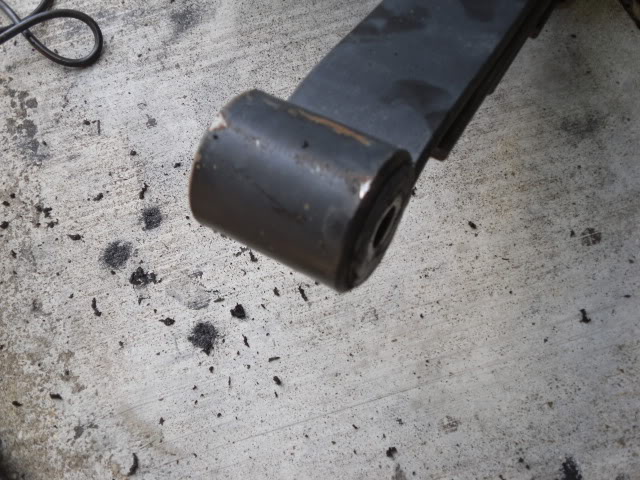
It was a little too tight for the leaf spring to go in the hanger but nothing the angle grinder couldn't take care of. I ground a little off of the bushing/metal sleeve, enough to make it clear and fit in the hanger:
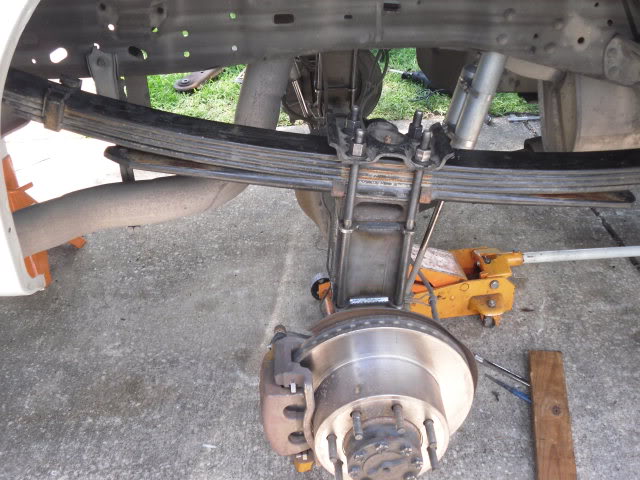
Then it was just a matter of sliding the rear shackle into its hanger and then jacking the axle up, watching to make sure it cleared the hanger as it goes in. It does take a little convincing to make sure it goes where it needs to go. May need a few "taps" with a good size hammer. It takes a little wiggling, prying, pushing, among other things to get it where it needs to be to slide the leaf spring bolt in. This is the Passenger side but the Drivers side is the exact same procedure:
Here are finished pics. No the blocks are not in there crooked. I needed to find out exactly how much block I need before I order my traction blocks. I mocked it up and ended up with a 7" PMF fabricated block (tapered), and a factory 2" F250 block, for a total of 9" in the rear (recently went to 8" on the front).
Drivers Side:
Passenger Side:
Well I finally got it finished up and man those springs ride GREAT!!!
Not a whole to write about on installing the leaf springs. Here are some before pictures with the 5" ICON leaf springs and 3" of blocks that it had:
Passenger Side:
Here is a side by side picture that shows the difference in length between the 99-07 spring and the 08+ spring. Remember its 8" longer.
Once the UBolts were all off and the leaf spring bolts out it was just a matter of hoisting those things out!! I took the factory shackles off of the ICON springs and put them on the 08 leaf springs
It was a little too tight for the leaf spring to go in the hanger but nothing the angle grinder couldn't take care of. I ground a little off of the bushing/metal sleeve, enough to make it clear and fit in the hanger:
Then it was just a matter of sliding the rear shackle into its hanger and then jacking the axle up, watching to make sure it cleared the hanger as it goes in. It does take a little convincing to make sure it goes where it needs to go. May need a few "taps" with a good size hammer. It takes a little wiggling, prying, pushing, among other things to get it where it needs to be to slide the leaf spring bolt in. This is the Passenger side but the Drivers side is the exact same procedure:
Here are finished pics. No the blocks are not in there crooked. I needed to find out exactly how much block I need before I order my traction blocks. I mocked it up and ended up with a 7" PMF fabricated block (tapered), and a factory 2" F250 block, for a total of 9" in the rear (recently went to 8" on the front).
Drivers Side:
Passenger Side:

#28
06-26-2010, 05:40 PM
I hope that yours come off easier than the ones on my son's 1997 F150. He wanted to lower it 2" in the front and 4" in the rear. Removing the old front coil springs and replacing them with the lowered springs was a piece of cake. Removing the rear hangers was a bear. I used an air chisel to remove the rivit heads on both ends. Then I tried to using a hammer to knock them off. Nothing happened. Since I did not have access to a welding torch I used a propane torch to try to expand the holes so I could knock them off. Nothing happened. I swear I thought they were welded to the frame. So I put the springs and wheels back on the truck and the next morning I drove it to the Ford dealer. I explained what I needed to do to the service guy and he said no problem. He said they could take off the old hangers and put the new ones on in about two hours including adjusting the pinion angle with the shims that were provided. Four hours later and they were still working on getting the old ones off. Finally they got them off and were able to get me out of there. The service guy was apologetic and held to his earlier estimate so I was a happy camper.
#29
06-26-2010, 06:45 PM