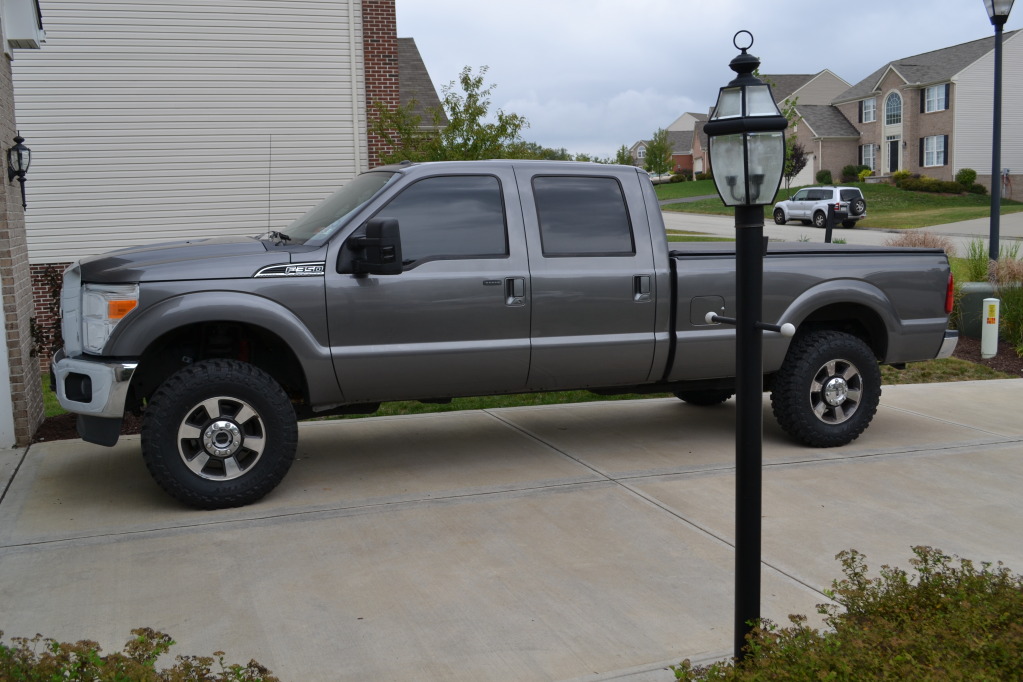
2 inch front leveling kit - before and after
#136
 05-02-2012, 07:39 PM

Elder User
Join Date: Mar 2007
Location: at the truck pulls
Posts: 879
Likes: 0
Received 0 Likes
on
0 Posts
Thanks for all the replies. I too have zero tolerance for rattles and squeaks, it's like I have dog ears anyway so I hear everything.
Plus I'm an engineer and can generally make anything to suit. I actually made my own lift kit on my leaf spring front axle of my old 2002 F250.
I saw Epic's truck pic and I new the kit had to be butt simple but thought I'd just get a "custom fabricated solution". All that it is, is a 3" OD x 1/8 wall steel tube with two 6 inch rings welded to it. So much for spending $85 bucks for something special. But I didn't want to pull it all apart and then design it, put it back together, make the parts, then pull it apart again. Guess I'm getting old. LOL
My new Nitto Trails are going on tomorrow, size 295/55/20 if I remember right, maybe the aspect ratio is 60?? Lift is going in Saturday, can't wait!! Okay maybe Friday night.
Oh yeah Graphics, there is an HDPE (High Density Poly-Ethylene) that you might be thinking of, but it may not hold up in this application over time. There's also a high impact Nylon, I think Nylon 66 or something, but don't know the load of that right now.
I'll just go with the basic install as the history is proving itself to be good as is.
#137
05-05-2012, 02:22 PM
Elder User
Join Date: Mar 2007
Location: at the truck pulls
Posts: 879
Likes: 0
Received 0 Likes
on
0 Posts
Spacers installed, truck looks great. Took about 1 1/2 hours and that included finding 4x4 blocks to raise thing higher, but wound up taking the tires off because my jack wouldn't go high enough. A trip to the store today now finds a new 4 ton floor jack in my shop.
I will say this about the install instructions, you don't have to remove the top shock mounting nut. It's a pain to do anyway and when I was half way done loosening the first one I stopped and just unbolted the bottom.
I also only unbolted the sway bar top nut and left the bottom connected. Saves about 10 minutes maybe.
Drives great, no alignment needed, although I may spring for the adjustable panard bar. Exactly 2" of lift at the front wheel well. Measuring between the front and back door, the cab steps went up 1 7/8". Rear wheel well remained unchanged.
#138
05-05-2012, 03:07 PM
Join Date: Apr 2004
Location: North of Salt Lake City
Posts: 5,159
Likes: 0
Received 26 Likes
on
24 Posts
Spacers installed, truck looks great. Took about 1 1/2 hours and that included finding 4x4 blocks to raise thing higher, but wound up taking the tires off because my jack wouldn't go high enough. A trip to the store today now finds a new 4 ton floor jack in my shop.
I will say this about the install instructions, you don't have to remove the top shock mounting nut. It's a pain to do anyway and when I was half way done loosening the first one I stopped and just unbolted the bottom.
I also only unbolted the sway bar top nut and left the bottom connected. Saves about 10 minutes maybe.
Drives great, no alignment needed, although I may spring for the adjustable panard bar. Exactly 2" of lift at the front wheel well. Measuring between the front and back door, the cab steps went up 1 7/8". Rear wheel well remained unchanged.
I will say this about the install instructions, you don't have to remove the top shock mounting nut. It's a pain to do anyway and when I was half way done loosening the first one I stopped and just unbolted the bottom.
I also only unbolted the sway bar top nut and left the bottom connected. Saves about 10 minutes maybe.
Drives great, no alignment needed, although I may spring for the adjustable panard bar. Exactly 2" of lift at the front wheel well. Measuring between the front and back door, the cab steps went up 1 7/8". Rear wheel well remained unchanged.
#139
09-02-2012, 10:19 AM
Lead Driver
Bumpin' Epic's thread with some new pics.
Threw a Readylift Stage 2 2.5" leveling kit on yesterday and 285/75-18 Toyo M/T's installed today. Tires are equivalent to a 35x11.50. Alignment was still spot on (had to adjust the toe to get the wheel centered again). I almost opted for weights on the inside of the wheel only, but they were pretty far off and I'd rather have them balanced correctly than "this was as close as we could get". Pics below...
Threw a Readylift Stage 2 2.5" leveling kit on yesterday and 285/75-18 Toyo M/T's installed today. Tires are equivalent to a 35x11.50. Alignment was still spot on (had to adjust the toe to get the wheel centered again). I almost opted for weights on the inside of the wheel only, but they were pretty far off and I'd rather have them balanced correctly than "this was as close as we could get". Pics below...
#140
09-02-2012, 11:04 AM
#141
09-02-2012, 05:07 PM

#142
09-02-2012, 07:26 PM
Lead Driver
#143
09-02-2012, 10:44 PM
Think Im just gonna go with a 2.5 kit and run 35x12.50x20s. Ive seen a couple of trucks around town this way and they look good. Id like to go with 37s, but I think 35s is PLENTY. Im still gonna run some KILLER shocks though.
#145
10-02-2013, 05:20 AM

#146
10-02-2013, 06:08 AM
A 1.5" spacer with the F350 rear block is perfect! That will give you about 3/4" rake with 5600 lb springs or put you exactly level with the 6000 lb springs in the snow plow package. As I have stated before, I am running a 2" spacer on my F350 and it is between 1/4" rake to dead level. I had a 2.5" kit on my 2006 F350 and I always felt that it was at least 0.5" too much.
#147
10-02-2013, 06:14 AM
A 1.5" spacer with the F350 rear block is perfect! That will give you about 3/4" rake with 5600 lb springs or put you exactly level with the 6000 lb springs in the snow plow package. As I have stated before, I am running a 2" spacer on my F350 and it is between 1/4" rake to dead level. I had a 2.5" kit on my 2006 F350 and I always felt that it was at least 0.5" too much.
Your one of the few that understand that! Wish I spoke with you before I have the snowplow prep package and ive been sweating over this lift. The 2 1/2" front and 5" rear blocks is rediculous. Im taking it all out but was worried about stock f350 3 1/2" blocks rearvand a 1 1/2" spacer up front on the plow prep pkg. If your running 2" and yours is level then mine should have very slight rake but look level.

#149
10-22-2013, 05:43 PM
Your one of the few that understand that! Wish I spoke with you before I have the snowplow prep package and ive been sweating over this lift. The 2 1/2" front and 5" rear blocks is rediculous. Im taking it all out but was worried about stock f350 3 1/2" blocks rearvand a 1 1/2" spacer up front on the plow prep pkg. If your running 2" and yours is level then mine should have very slight rake but look level.

