King Pin Removal Made Easy
#1
 02-25-2017, 06:17 PM


#2
02-25-2017, 06:25 PM
King Pin Removal Made Easy
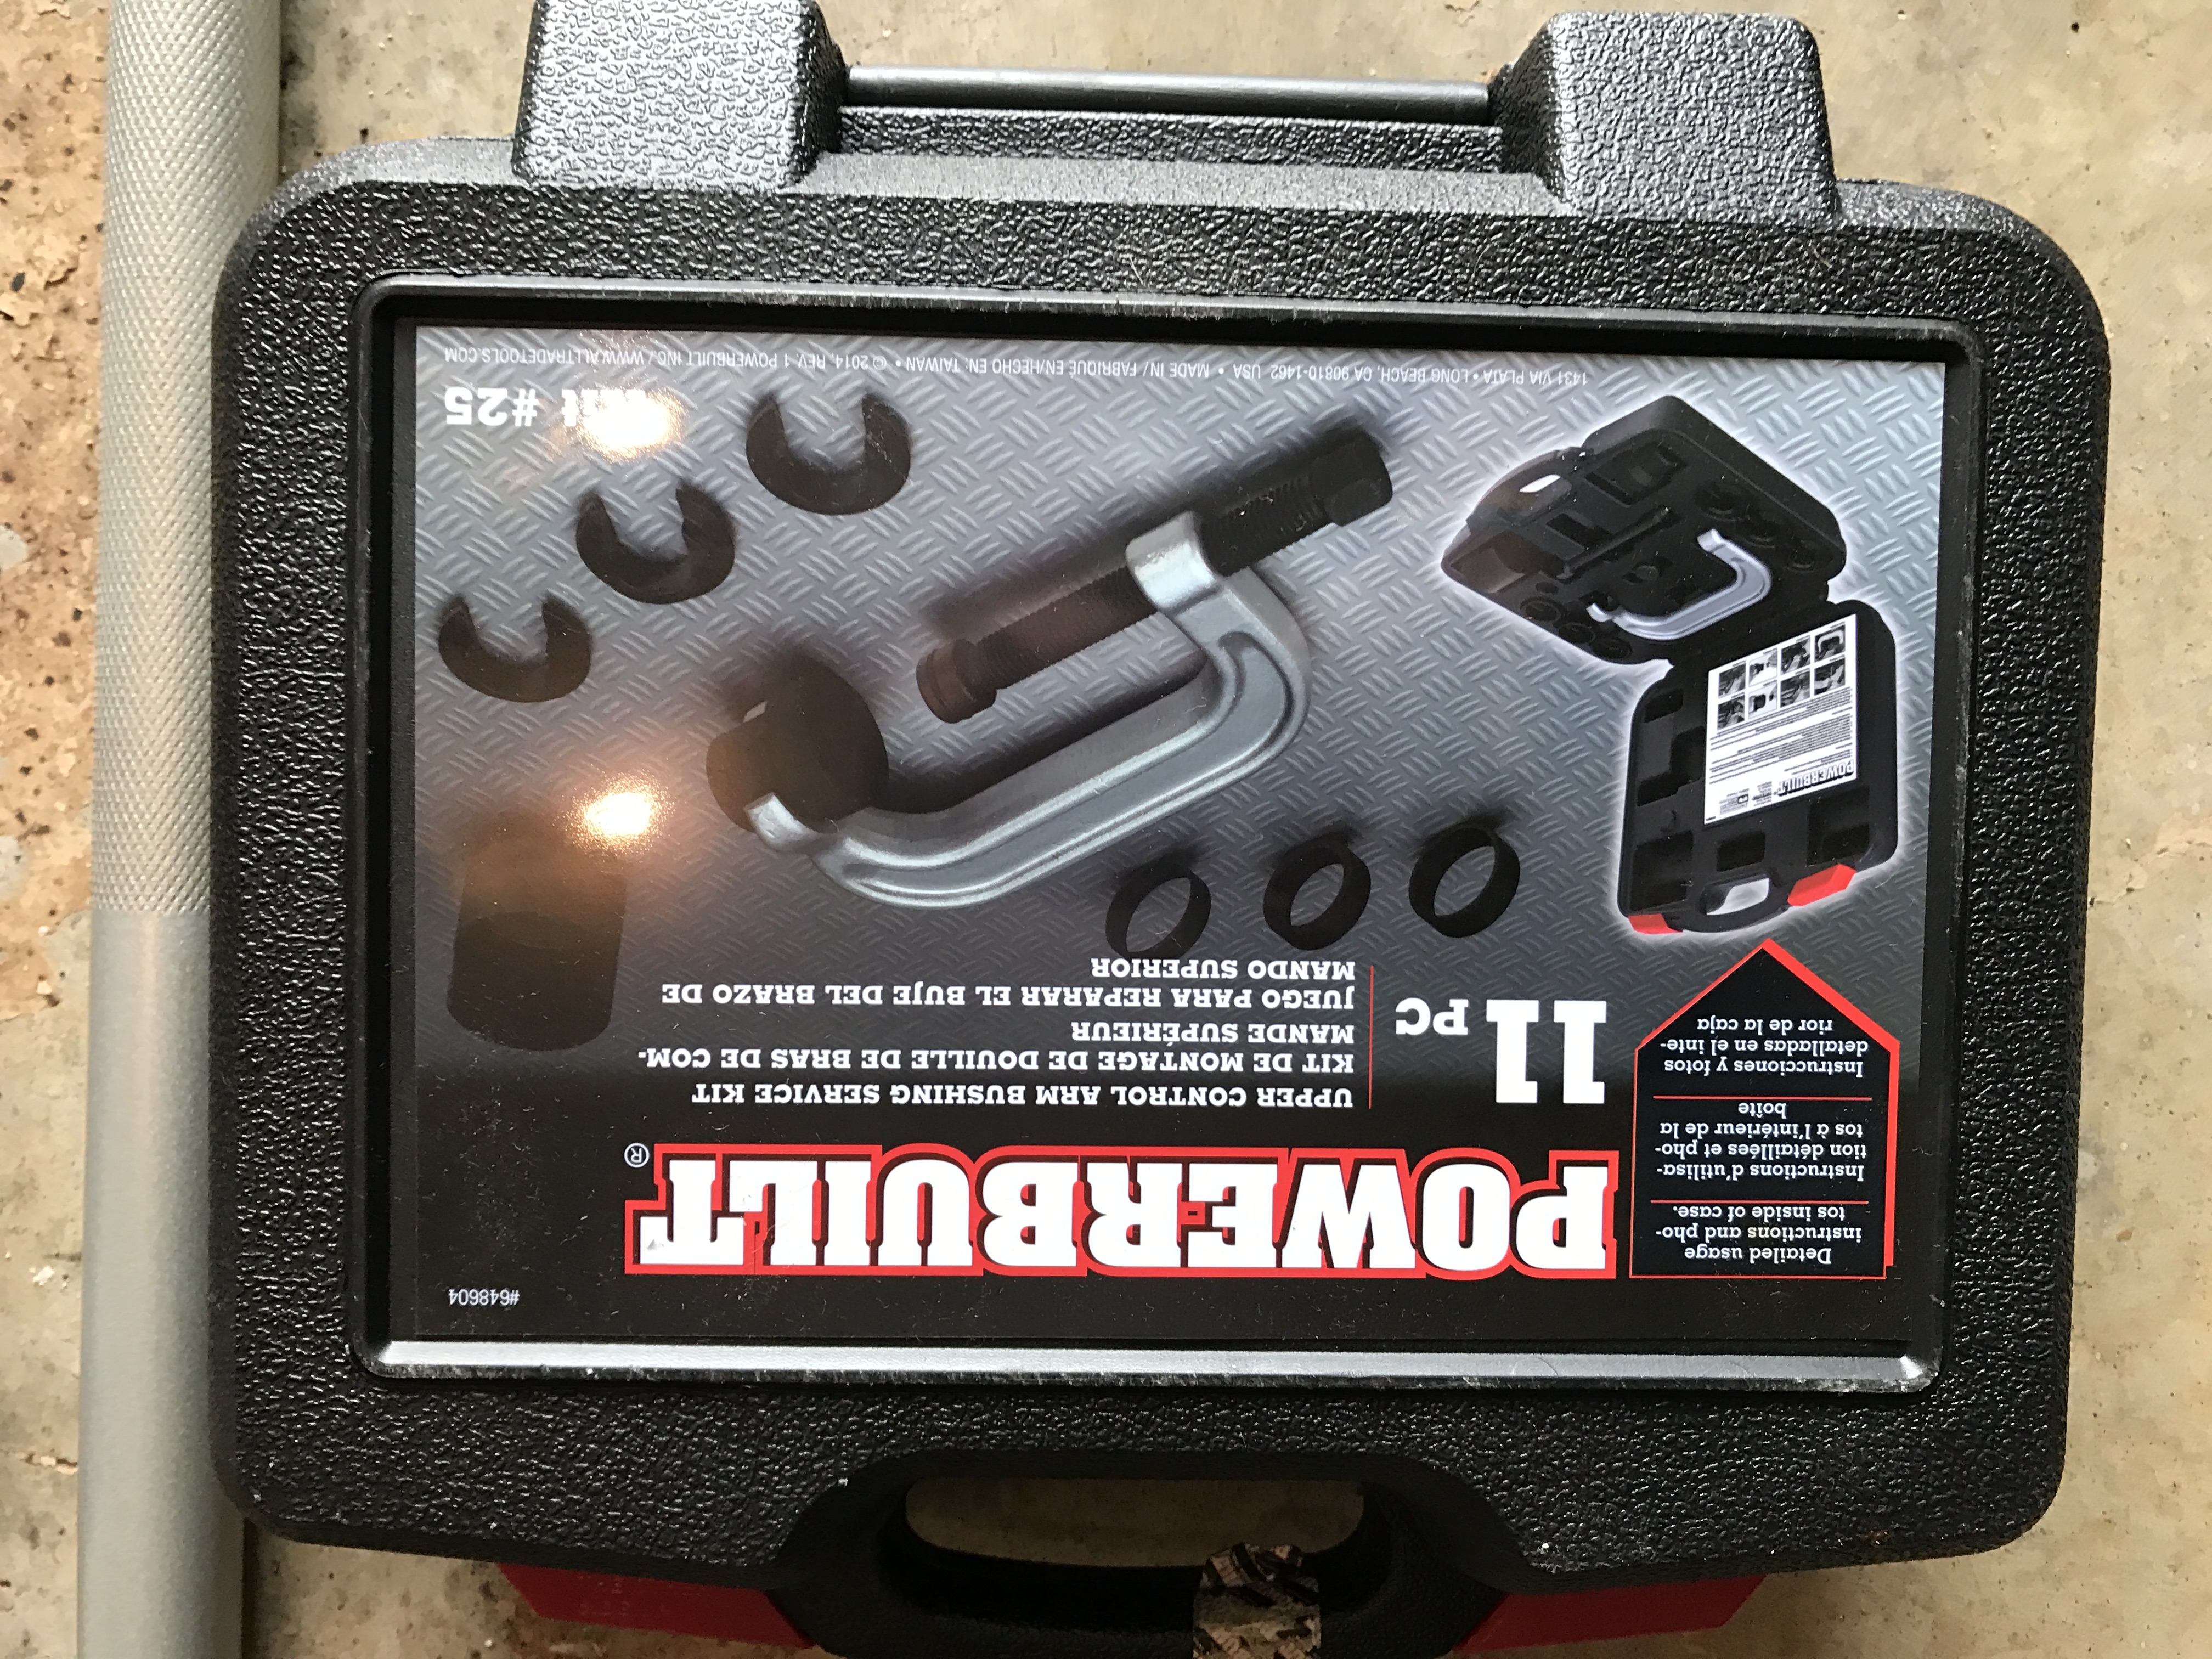
I needed to replace my king pins on my 53 F100. I heard all the horror stories about getting them out but, being a gluten for punishment, I decided I'd give it a shot. Worse that can happen is I have to pull the axle and take it to a machine shop. After removing all the brakes, drag link and tie rods, I went at it. Busted my butt for about two hours, and shed a minor amount of blood. Used hammers and jacks to no avail. I knew there had to be better way. I took a ride to Advanced Autoparts to see if they had a king pin puller. They did not but they do have a host of loaner tools so I looked at them all and found a c-clamp tool for upper control arms. It looked like the mouth of the clamp would be big enough to fit over the spindle.
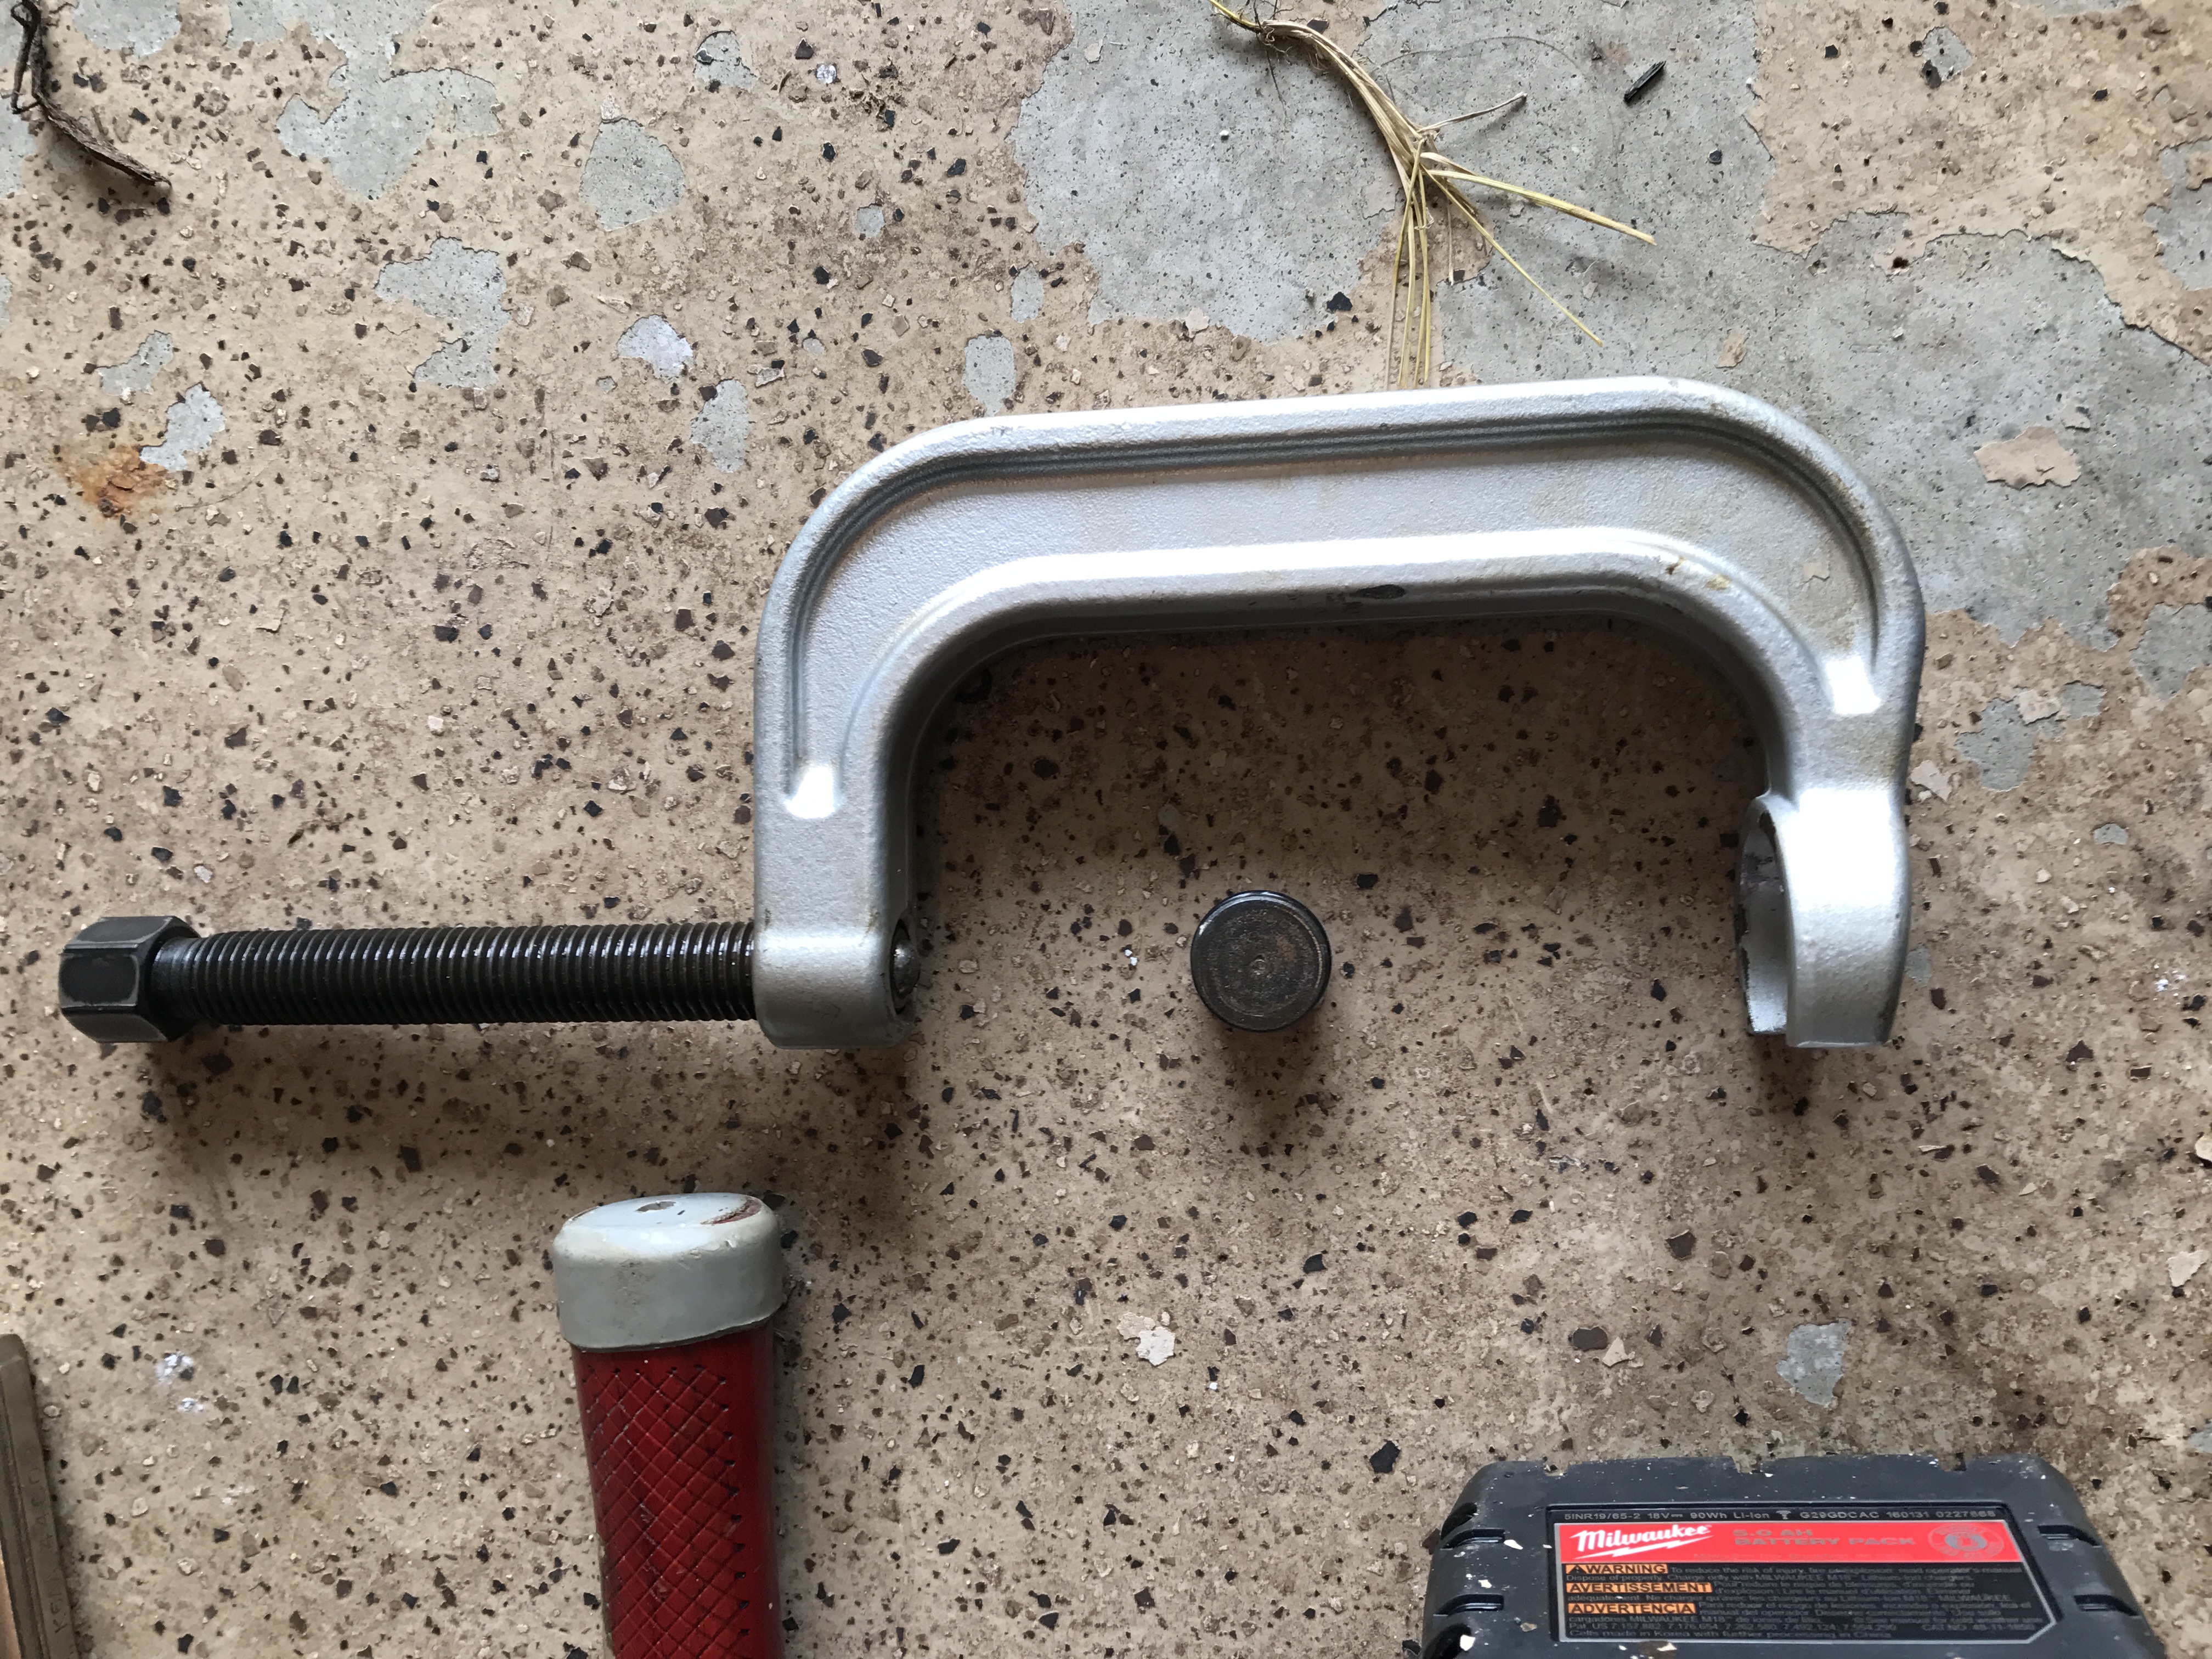
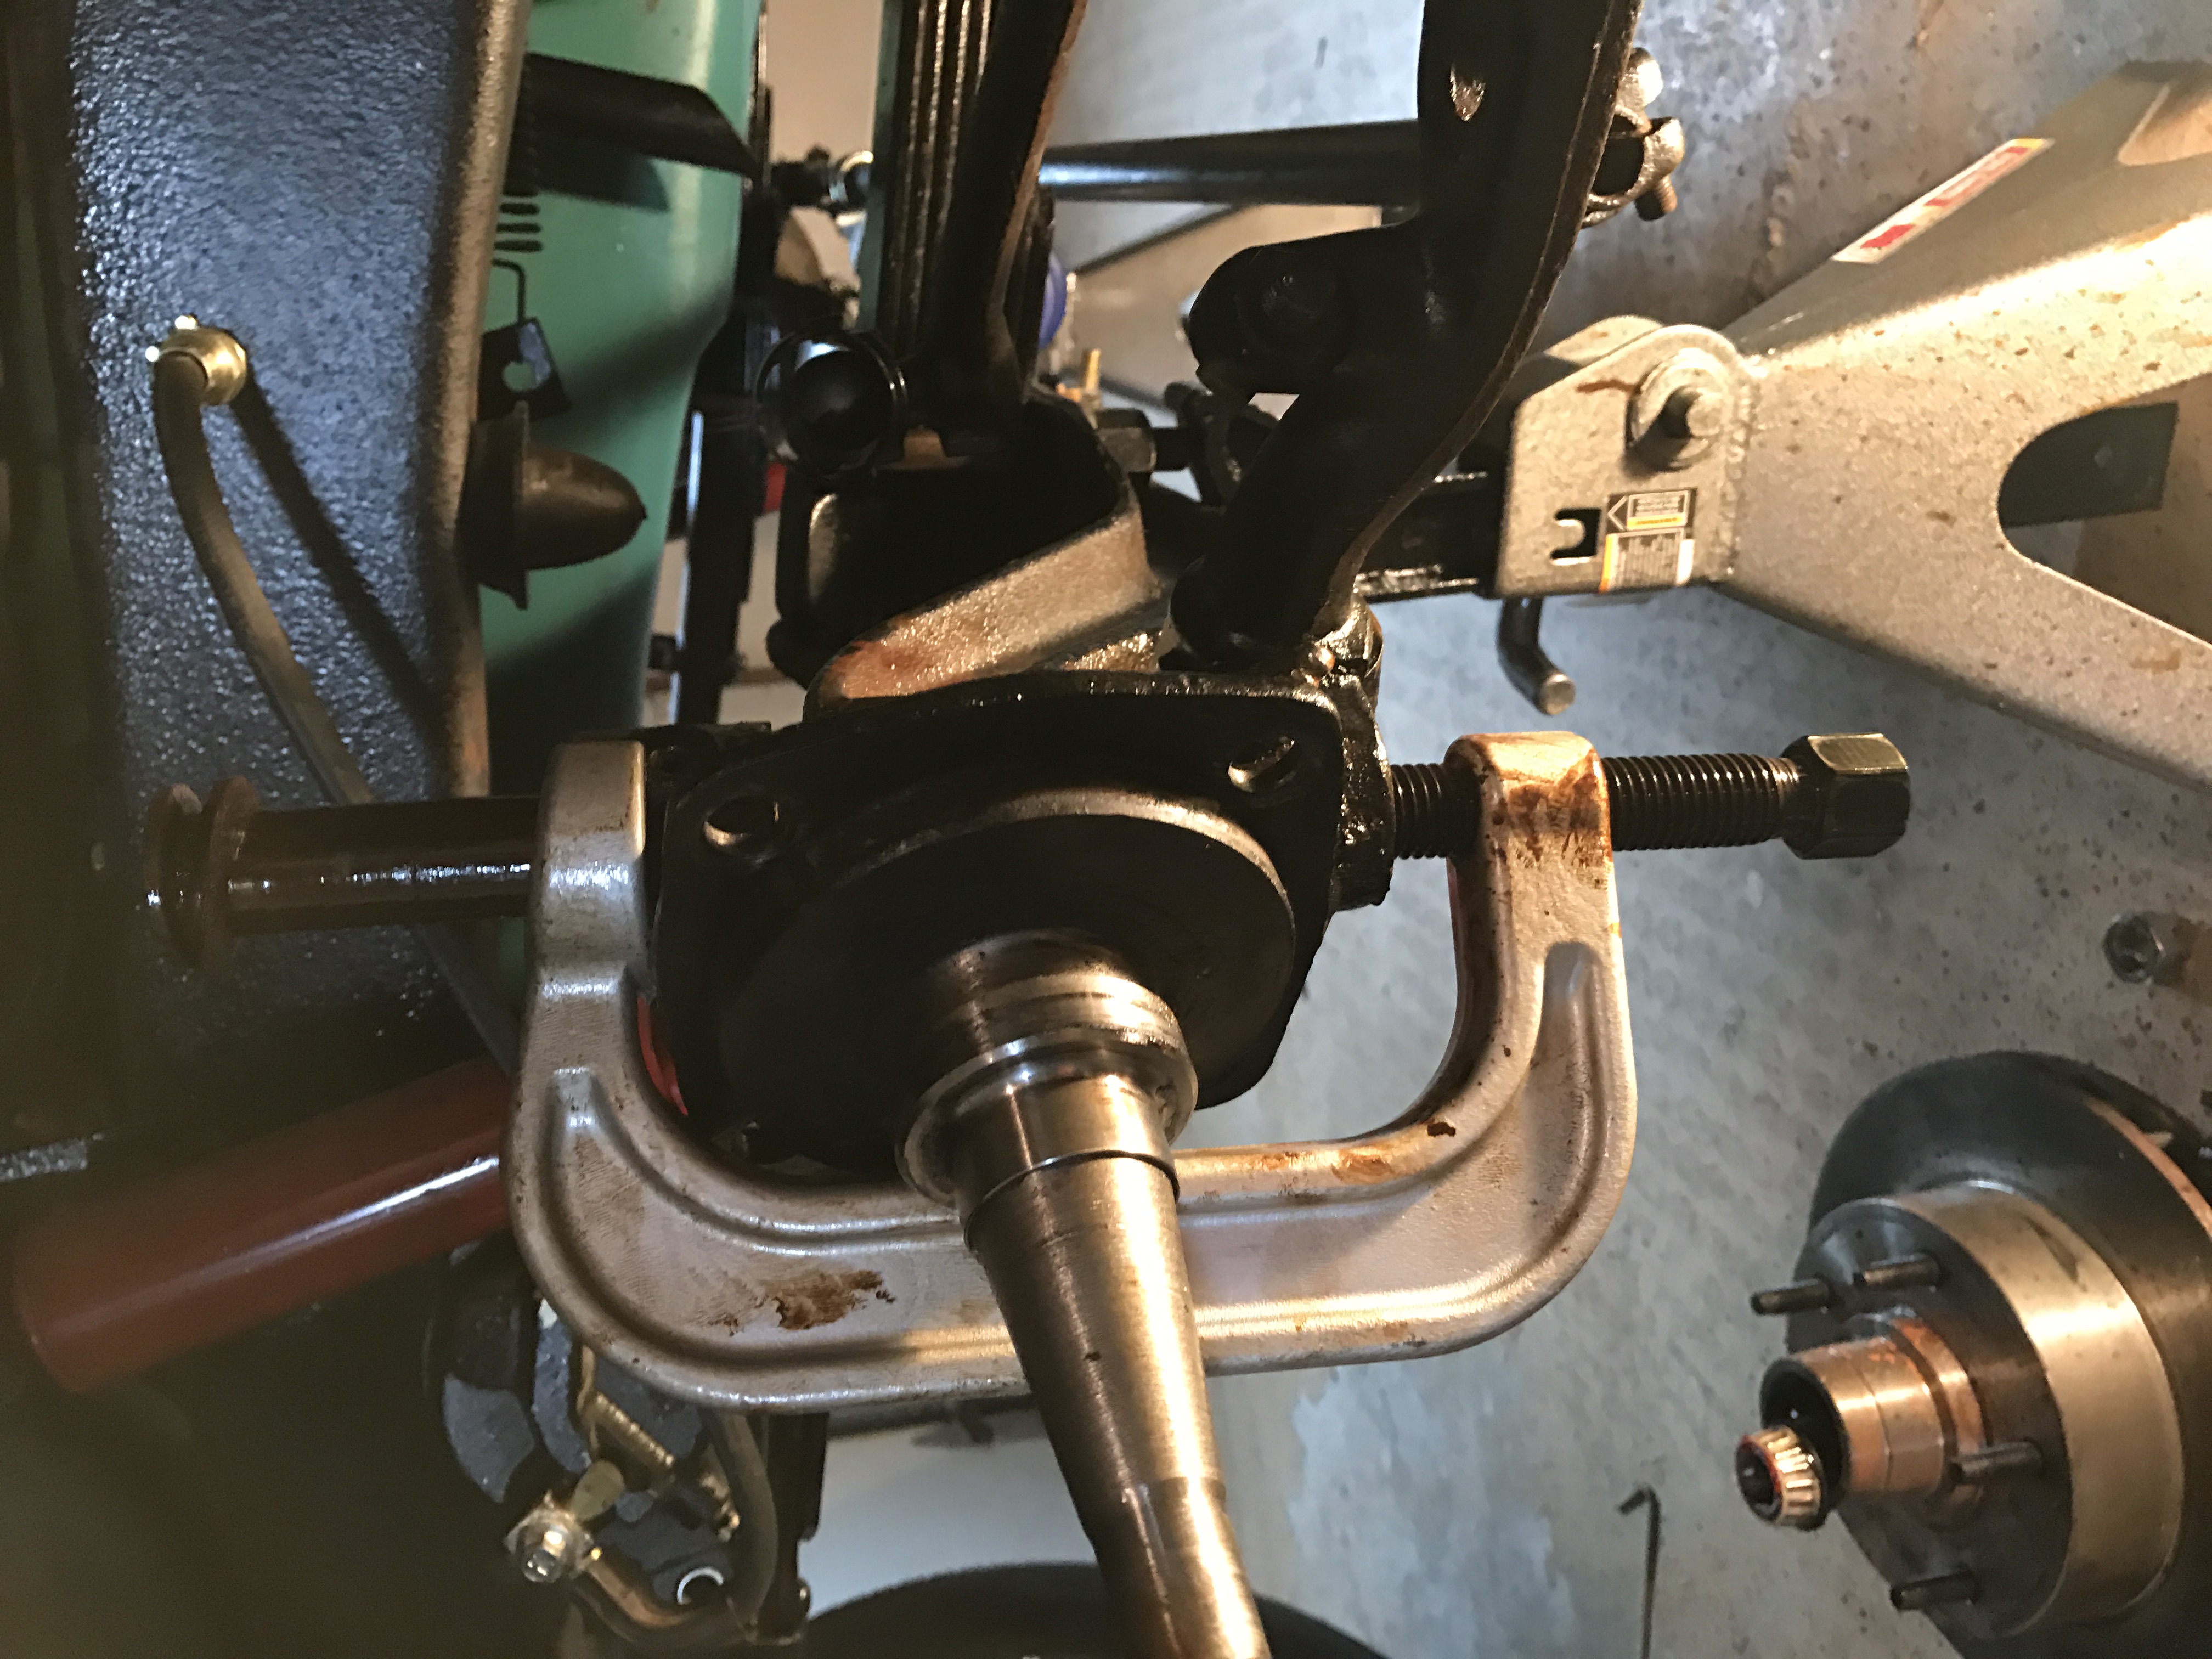
Turns out the clamp "just" makes it. It's almost as if the clamp is designed to do king pin removal on this truck. The top of the clamp has an opening that is just a little bigger than the king pin yet small enough to fit on the spindle. The screw on the bottom has a cap that needs to be pushed in the gap between the screw and the spindle before you start to apply pressure. Its a real tight fit but with a a little wiggling it makes it fine.
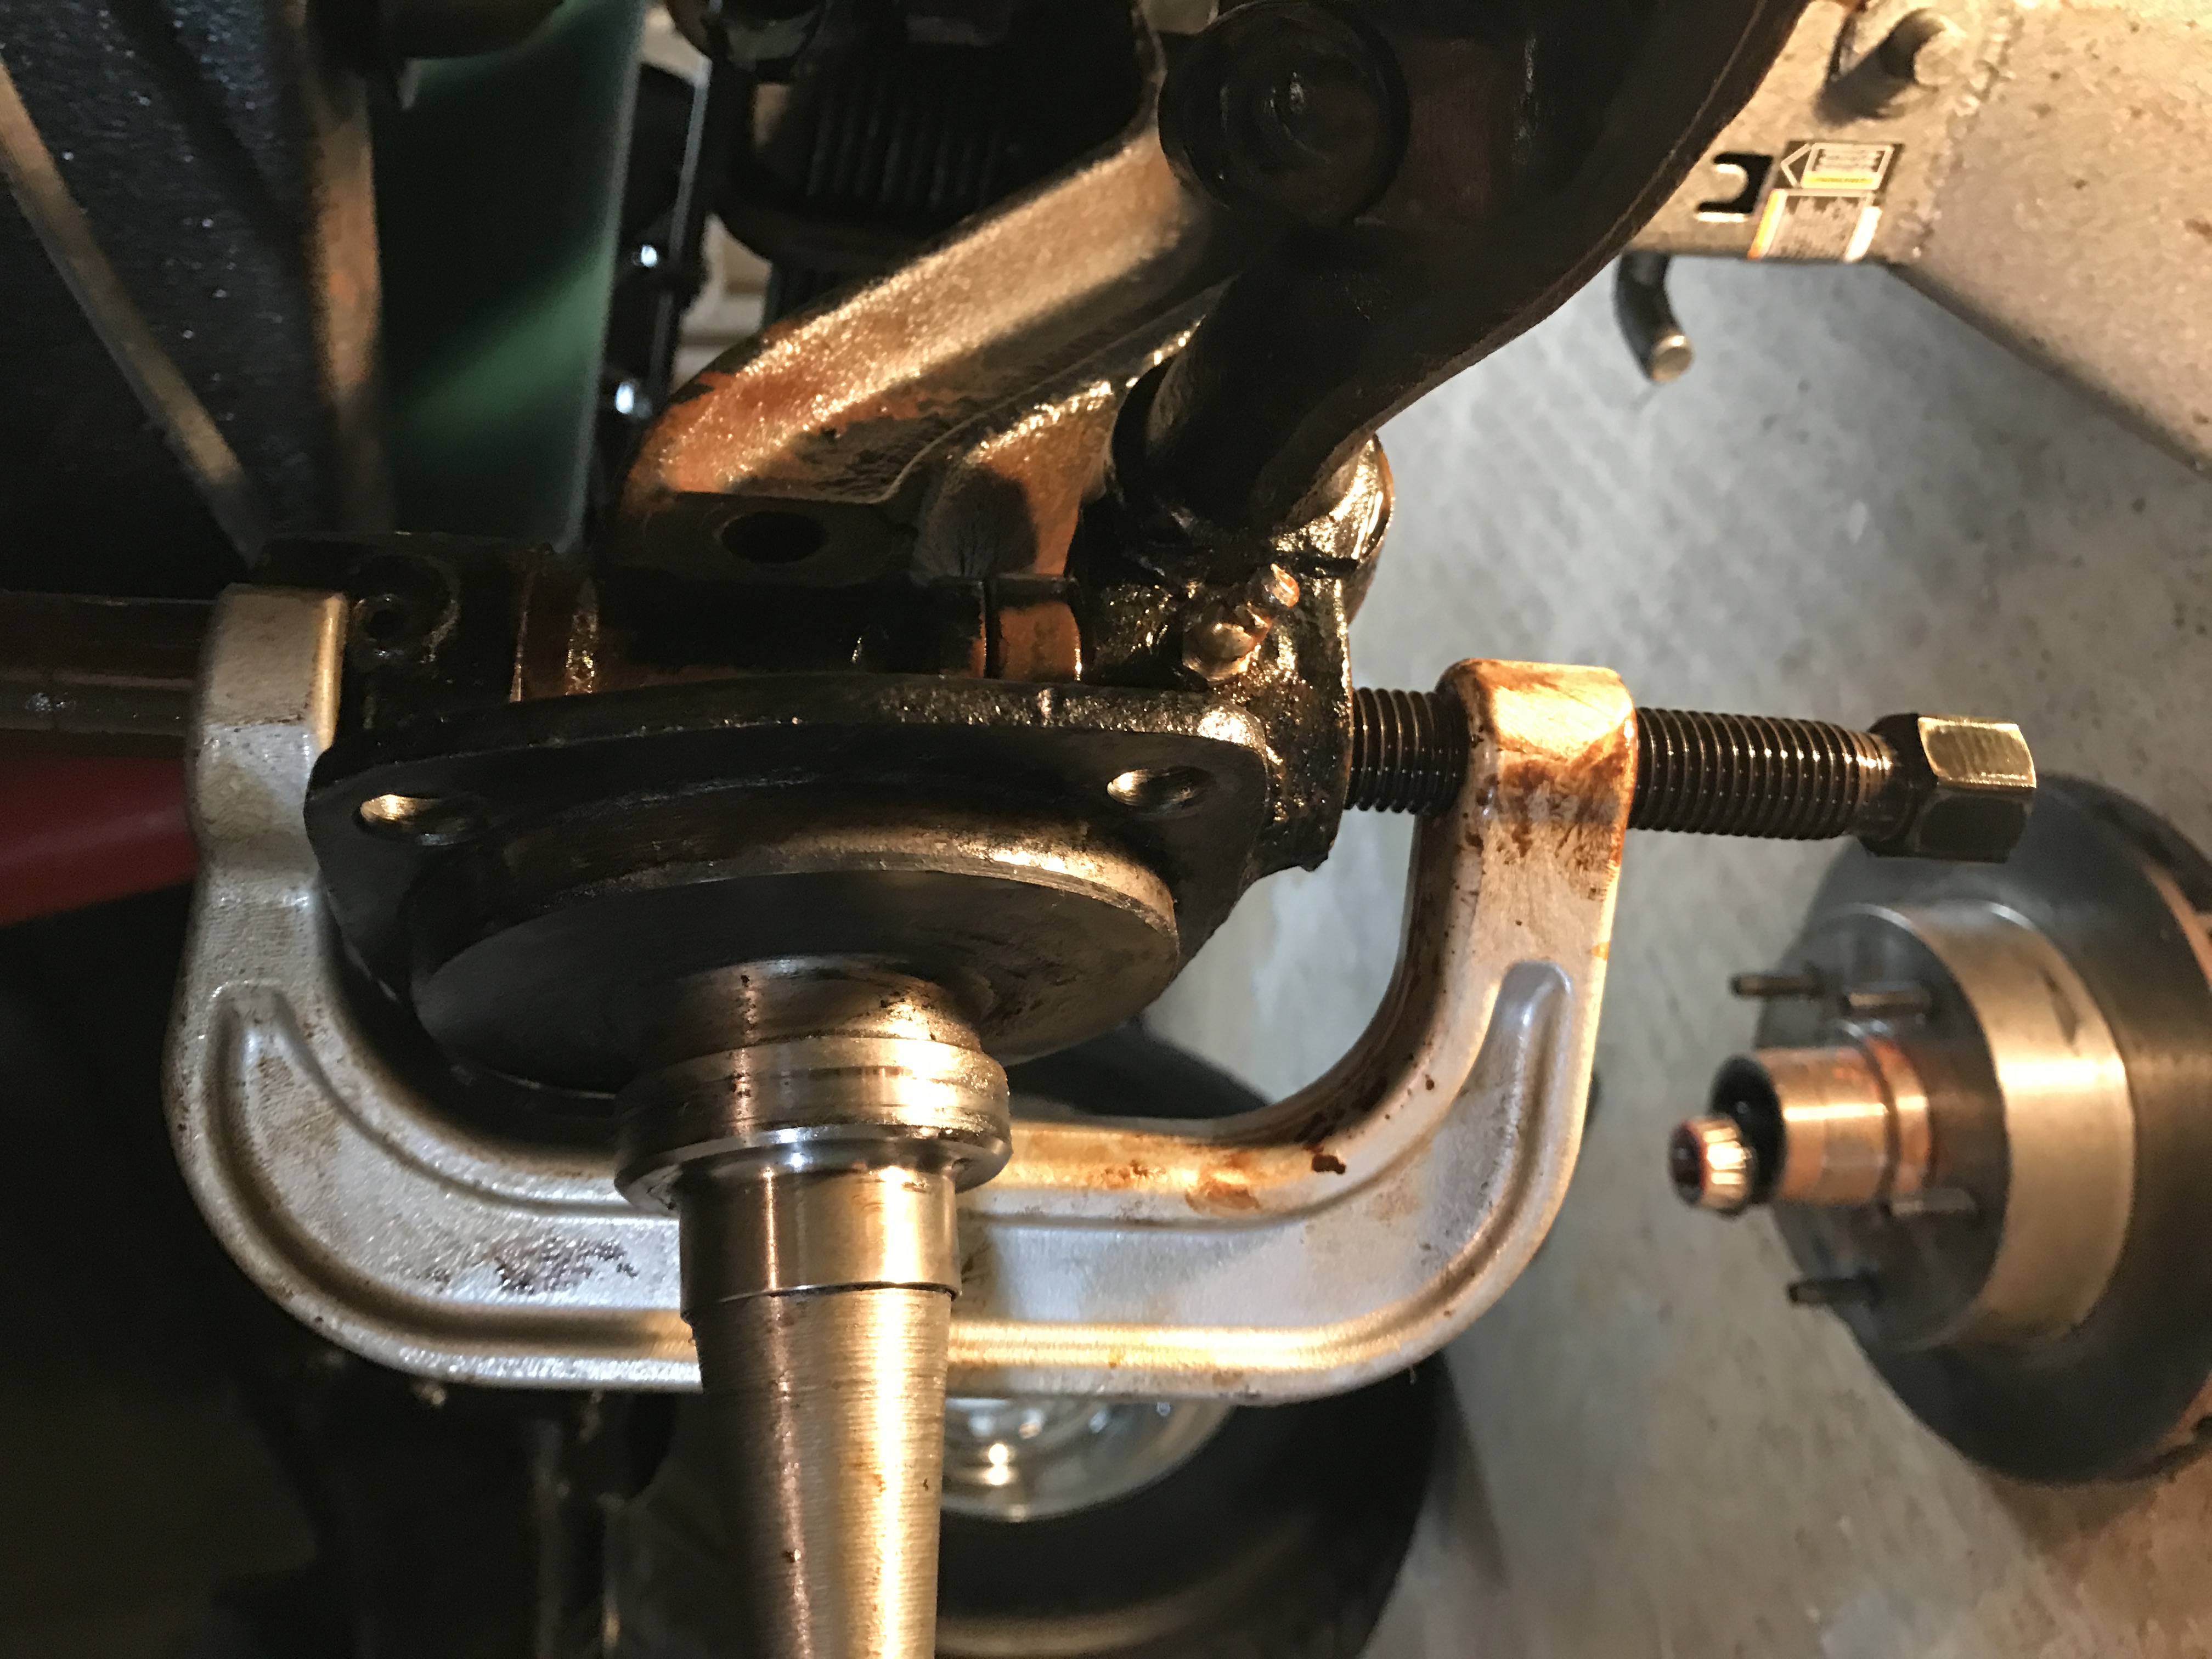
Make sure you install the clamp tight against the spindle and that you get maximum contact between the top of the clamp and the spindle. I did bust off the grease fitting on the first one because I wasn't paying enough attention.
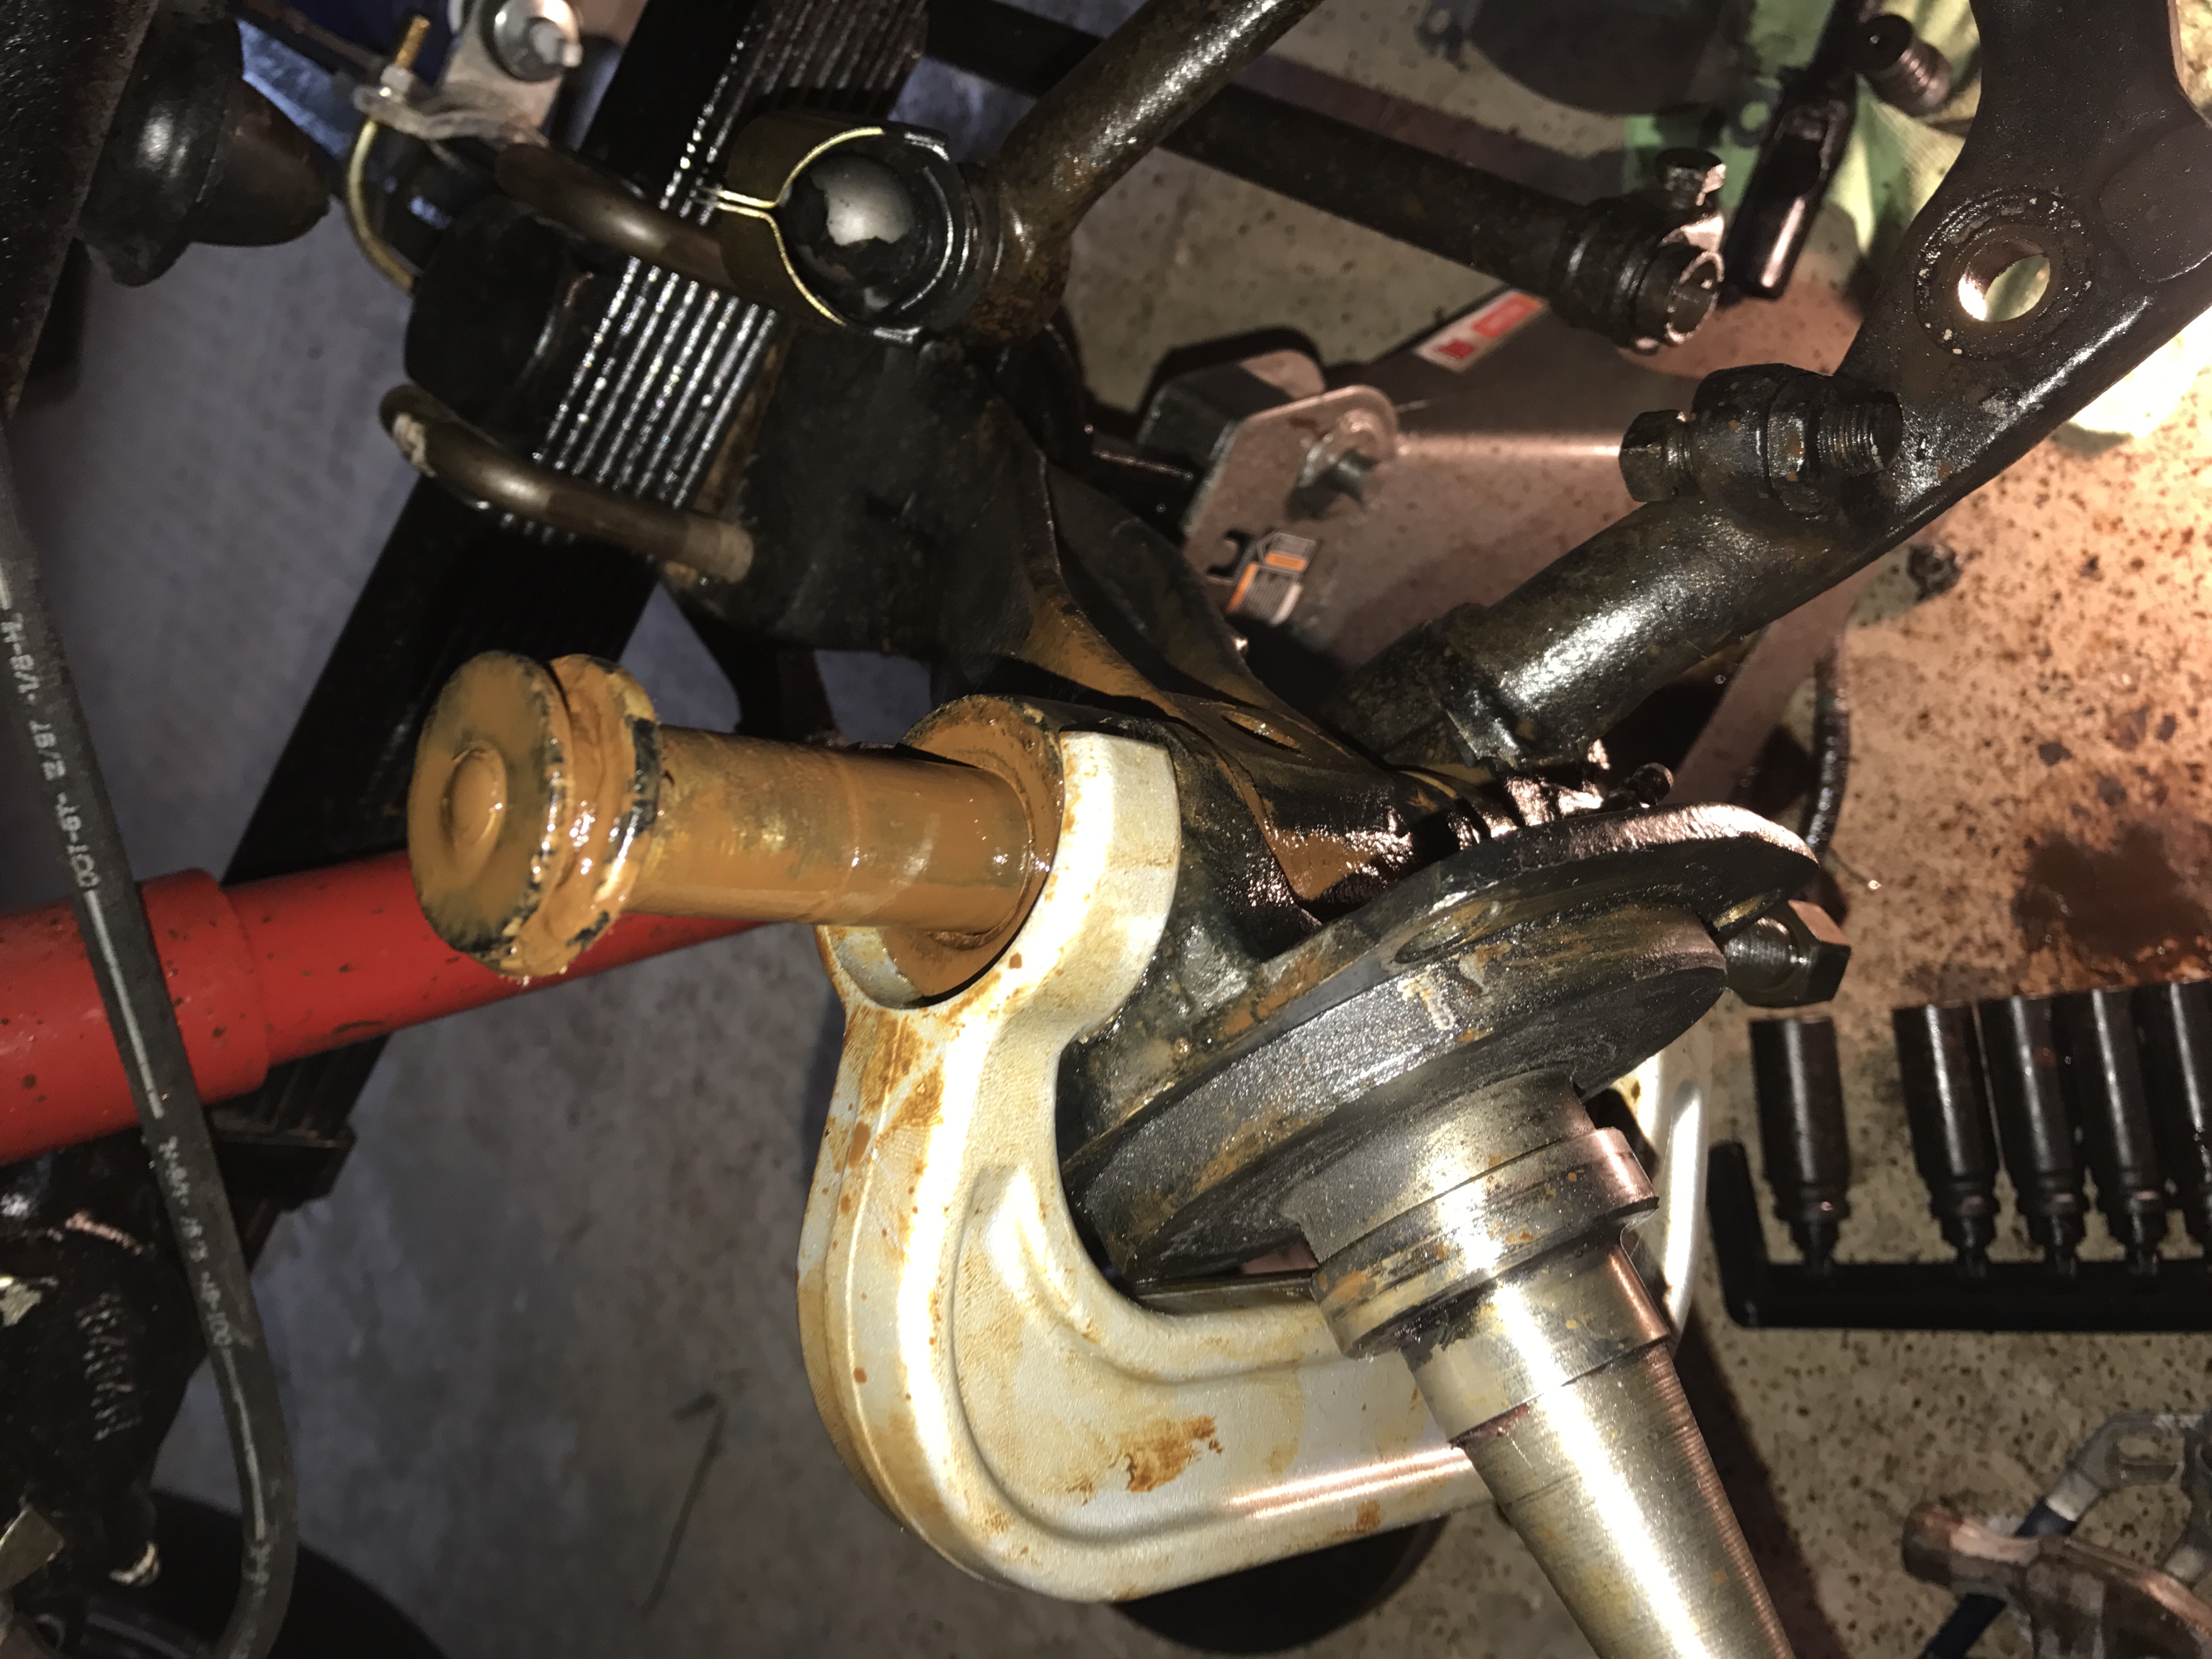
Once it is in place I used an impact gun to tighten it up and apply as much pressure as the gun could do. Watch the screw and cap while tightening to make sure it is centered. It does have a slight tendency to wander. When the gun maxes out I put a socket wrench on the screw and used the handle from a floor jack to continue to apply pressure. I was a little cautious on the first one as I didn't know how much pressure this thing would take. After a couple turns I whacked the bottom of the screw one time with a hammer and "POP", the pin moved about 1/4". At that point you need to back out the screw and pull off the cap. The cap is just a little too big to continue up through the spindle. Pull the cap, turn the screw back in with the impact gun and when it maxes out again go back to the ratchet and jack handle and it pushes right out.
First one took me about an hour because I was figuring it out as I went. Second one took all of 10 minutes. Seriously 10 minutes! Oh, and don't forget to use some good penetrating oil. I sprayed it liberally the night before and let it soak.

hopefully the photos uploaded. First time trying this.
Turns out the clamp "just" makes it. It's almost as if the clamp is designed to do king pin removal on this truck. The top of the clamp has an opening that is just a little bigger than the king pin yet small enough to fit on the spindle. The screw on the bottom has a cap that needs to be pushed in the gap between the screw and the spindle before you start to apply pressure. Its a real tight fit but with a a little wiggling it makes it fine.
Make sure you install the clamp tight against the spindle and that you get maximum contact between the top of the clamp and the spindle. I did bust off the grease fitting on the first one because I wasn't paying enough attention.
Once it is in place I used an impact gun to tighten it up and apply as much pressure as the gun could do. Watch the screw and cap while tightening to make sure it is centered. It does have a slight tendency to wander. When the gun maxes out I put a socket wrench on the screw and used the handle from a floor jack to continue to apply pressure. I was a little cautious on the first one as I didn't know how much pressure this thing would take. After a couple turns I whacked the bottom of the screw one time with a hammer and "POP", the pin moved about 1/4". At that point you need to back out the screw and pull off the cap. The cap is just a little too big to continue up through the spindle. Pull the cap, turn the screw back in with the impact gun and when it maxes out again go back to the ratchet and jack handle and it pushes right out.
First one took me about an hour because I was figuring it out as I went. Second one took all of 10 minutes. Seriously 10 minutes! Oh, and don't forget to use some good penetrating oil. I sprayed it liberally the night before and let it soak.
hopefully the photos uploaded. First time trying this.
#4
02-25-2017, 07:18 PM
Fleet Mechanic

#6
02-25-2017, 08:01 PM
#7
02-26-2017, 07:40 AM

another helpful hint
Had to remove the kingpins in my 51 F-1.............what I found was taking a heat source (I used a plumber's torch) applied enough heat to warm up the spindle without getting it red hot. Made a 50/50 mixture of acetone and automatic transmission fluid....as these don't mix you have to agitate them solution. using an oil squirt can and ran the solution down the top. Gave it couple of good taps, did it again, waited 24 hours and then drove the pins right out.
Trending Topics
#8
02-26-2017, 08:48 AM
Senior User
Join Date: May 2016
Location: San Francisco, CA
Posts: 210
Likes: 0
Received 0 Likes
on
0 Posts

#9
02-26-2017, 10:16 AM
Camber shouldn't be that big of an issue. The only adjustment there is to bend the axle. The bigger issue after replacing the king pins should be toe and that you can get pretty close. I haven't pressed in the new bushings yet but the clamp will do that also. As for reaming I'm going to use a break reaming tool, if needed. It will be slower than a bushing reamer but it should do the job. I've seem the bushing reamers at a number of car show swap meets. I should have picked up a set then. I'll let you know how that goes when I get back to it.
#10
02-26-2017, 10:46 AM

Junior User
Join Date: Sep 2016
Location: Sudbury ontario
Posts: 59
Likes: 0
Received 0 Likes
on
0 Posts
#11
02-26-2017, 02:27 PM

Camber shouldn't be that big of an issue. The only adjustment there is to bend the axle. The bigger issue after replacing the king pins should be toe and that you can get pretty close. I haven't pressed in the new bushings yet but the clamp will do that also. As for reaming I'm going to use a break reaming tool, if needed. It will be slower than a bushing reamer but it should do the job. I've seem the bushing reamers at a number of car show swap meets. I should have picked up a set then. I'll let you know how that goes when I get back to it.
#12
02-26-2017, 03:02 PM
I actually tried a bottle jack first. I had read the weight of the truck had been successful by others. Didn't work. I also beat on it while on the jack and nothing. I then used a 3" wide tow strap which I secured to the jack and wrapped around the top of the spindle so that the truck wouldn't lift with the jack. Basically creating a bottle jack press. The piston was too wide so I placed a short socket on top. I cranked the crap out of that jack and put so much pressure on it that I was afraid I was going to shatter the socket and shed some more blood from the sharpnel. I think it would have taken it but the whole setup was a little sketchy. In my younger days I probably would have gone for it but I'm much older and wiser now and it takes longer to heal!
This clamp is fool proof, easy, and free if you return the loaner tool and SAFE.
This clamp is fool proof, easy, and free if you return the loaner tool and SAFE.
#13
03-21-2017, 11:15 PM

The last problem kingpins I tackled, I put an 8 inch 1/2 inch drive ratchet extension bar under it and dropped the jack until the weight of the truck was on it (but not all the way down) & let it sit 2 days after I soaked it with PB Blaster. When I got back to doing it, the pin came out easily after that.
#14
03-22-2017, 09:23 PM

Senior User
JLamb29010,
I just used your tip and had the easiest time ever! I actually owned the same tool (different manufactuer) My only issuewas that the head on the screw type driver does try to get under part of the bushing. I put a smaller socket on it and it pushed right out! I have never had such an easy king pin removal....
Thank you! Now to figure out what to use to drive out the old bushings and find my dad's old model A kig pin reamer! Miss my dad so often! He just passed last November.
Doc
#15
03-24-2017, 07:49 PM