When you click on links to various merchants on this site and make a purchase, this can result in this site earning a commission. Affiliate programs and affiliations include, but are not limited to, the eBay Partner Network.
I'm kinda new at this posting thing. Usually just read and learn getting new ideas. Here goes. Well, the engine is a little of this and a little of that. The block is from a 5.0 1996 Explorer. I rebuilt it with stock bore forged pistons with ARP bolts and studs throughout. The heads are GT40 with a B303 Ford Racing cam for a little better air flow. The blower is an Eaton M112 that I machined an adapter to fit the GT40 lower intake. Also used the Explorer water pump as it is 1 1/2 shorter than other water pumps. The I had to machine a short extension on the blower shaft to get pulleys to align there too. From billet aluminum I machined alternator and power steering pump brackets to mount 1 1/2 shorter to align the pulleys. Then modified the crank pulley and others to use 8 rib serpentine belt instead of stock 5 rib. I put in #42 injectors and used a Quarterhorse programmable chip to tune it all. That is run through a hydraulic operated Ford racing clutch and a Tremec T5 transmission. Then on into a 9" Posi-trac rear with 4:10 gears. It has all worked out well. Other than needing some slightly smaller injectors it runs real well. It's completely dependable as my daily driver and gets 21 M.P.G. highway on road trips running 2300 RPM at 70 M.P.H.. Merges real well getting on the interstate too. Always a trip to see peoples faces.
The parts I made for the engine in my shop.
Built to be a dependable daily driver.
I'm a retired cnc machinist/programmer. Now I do my thing at home in my shop.
Hey Dee,
You have your own home CNC machine!! That's definitely a first on here!
Love it that you can manufacture your own parts - that's an amazing looking engine. You've got us
beat on MPG by like 50% - we have a 351W with a gas guzzling Edelbrock 650cfm carb.
I'm kinda new at this posting thing. Usually just read and learn getting new ideas. Here goes. Well, the engine is a little of this and a little of that. The block is from a 5.0 1996 Explorer. I rebuilt it with stock bore forged pistons with ARP bolts and studs throughout. The heads are GT40 with a B303 Ford Racing cam for a little better air flow. The blower is an Eaton M112 that I machined an adapter to fit the GT40 lower intake. Also used the Explorer water pump as it is 1 1/2 shorter than other water pumps. The I had to machine a short extension on the blower shaft to get pulleys to align there too. From billet aluminum I machined alternator and power steering pump brackets to mount 1 1/2 shorter to align the pulleys. Then modified the crank pulley and others to use 8 rib serpentine belt instead of stock 5 rib. I put in #42 injectors and used a Quarterhorse programmable chip to tune it all. That is run through a hydraulic operated Ford racing clutch and a Tremec T5 transmission. Then on into a 9" Posi-trac rear with 4:10 gears. It has all worked out well. Other than needing some slightly smaller injectors it runs real well. It's completely dependable as my daily driver and gets 21 M.P.G. highway on road trips running 2300 RPM at 70 M.P.H.. Merges real well getting on the interstate too. Always a trip to see peoples faces.
The parts I made for the engine in my shop.
Built to be a dependable daily driver.
I'm a retired cnc machinist/programmer. Now I do my thing at home in my shop.
VERY nice Dee! You got skills and tools. Hope you drive the wheels off that sweet truck.
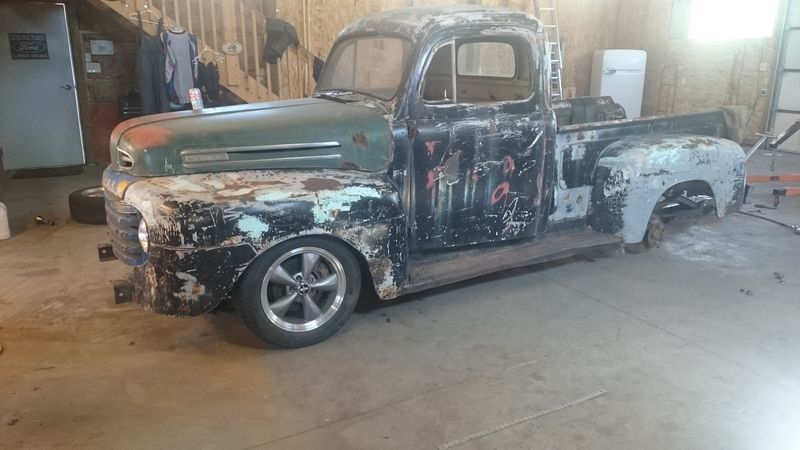
A friend at work gave me this 49 F1 in trade for some mowing about three years ago. After a lot of research on this site, I bought an xj12 and a Lincoln Mark VII as donors. I've never attempted a build before, but with fte and its members wealth of knowledge and experience available I finished in about three years. It is not the custom job many are doing, but for only $4000 invested it is an awesome ride. Jag IFS & IRS, 5.0 HO (MAP), AOD.
Checking ride height again after finishing the lexus ifs
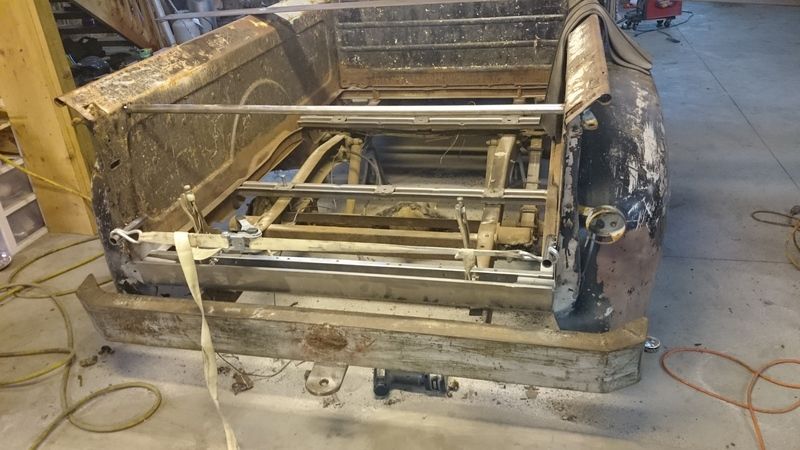
Then on to the rear to fix the bed before removing
Bedsides are straight but the crossmembers and stake pockets were pretty jacked up.
and some interesting use of a ratchet strap. The bedsides were so floppy from the rusted through crossmembers and broke stake pockets that I had to do a lot of pulling here and pushing there to make my square and level happy.
and where Iam at now
Not working too fast on Dollie, but here is where I am at today
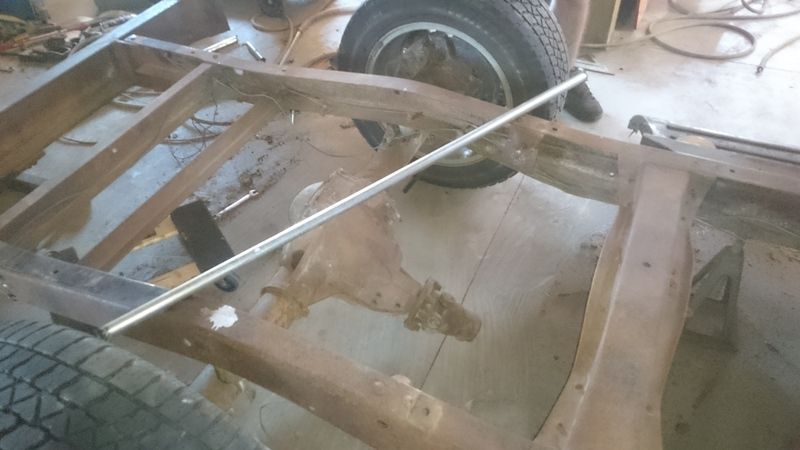
The lower back of the cab has some damage..<br/>The rear bumper is welded to the frame, but I think it has a bit of character so I may keep it on the truck.
The back half of the frame looks to be in good shape, just needs some cleaning up and paint.<br/>The shocks and bushings are shot, but will all go anyhow.
When I lifted the bed off, the wood floor, crossmembers and bed strips stayed behind. The plate steel floor welded in kept the rest of the bed together.
This bed is very restorable and the tailgate though not perfect is in fairly good shape.<br/>The removed floor was placed in the bed, it will need a couple new crossmembers, and new wood, or just the crossmembers if somebody wants to leave the steel floor, either way the bed is very useable.
How about some pics of that step bumper and how it is mounted. I really like vintage step bumpers and would like to find a good design for my 1949 F-1.
Thanks! These are TRUCKS and I often think that those shinny chrome or stainless bumpers I see on so many restored/modded trucks are just not right for a truck. As a kid, I recall a lot of trucks with front "push bumpers" and rear "step bumpers" and I have started to document bumpers that I see, like yours.
Broke down and bought a repop hood and of course there are a few fitment issues that required me (it was just me actually) to take the complete front end off, engine and trans out to make some adjustments, The hood is about 1/4 to 3/8 to wide in distance between the hinge pts. I will make a jig and attempt to pull them in slowly, hopefully I can get a little but there are two braces in the area I need to adjust so we will see. I will than start the final panel fitting, using hammers, dollies filler and what ever I can come up with.
 06-14-2015, 12:35 PM