Excursion System rebuild.
#46
 02-21-2010, 11:42 AM


No worries on the windows. It would require way more pressure then what I could provide in that truck. Anyone who says their store bought system broke their window is full of crap. At shows we get those stories from people all the time. They then follow it up with they sold it or got rid of it because it was too loud or they didn't want to replace the windows anymore 
For this truck it looks like I will be using the LVL 4 XL's
Here is how she was back in the day:
YouTube - kingsuv00's Channel
For this truck it looks like I will be using the LVL 4 XL's
Here is how she was back in the day:
YouTube - kingsuv00's Channel
That's crazy.. I love it!! Hope I can see/hear your truck in person someday..
#47
02-21-2010, 08:37 PM

Join Date: Jun 2005
Location: North west La
Posts: 7,047
Likes: 0
Received 0 Likes
on
0 Posts
Hows the build going? Its gonna be nice I can tell. I am gonna use Second skin to do my F250. I plan to buy 5 gal of the spray & under coat the truck & then spray the inside floor & inside the doors. ANT said it was good plan. I'll add the pad over the spray. I'll add more when I get the money but doing the floor will really help.
#48
02-21-2010, 08:45 PM
Join Date: Jan 2004
Location: Rio Linda, Ca
Posts: 763
Likes: 0
Received 0 Likes
on
0 Posts
Hows the build going? Its gonna be nice I can tell. I am gonna use Second skin to do my F250. I plan to buy 5 gal of the spray & under coat the truck & then spray the inside floor & inside the doors. ANT said it was good plan. I'll add the pad over the spray. I'll add more when I get the money but doing the floor will really help.

Can't go wrong with the SS products. i have been very happy with them even without a system in the truck.
#49
02-21-2010, 11:09 PM
Join Date: Jun 2005
Location: North west La
Posts: 7,047
Likes: 0
Received 0 Likes
on
0 Posts
I agree on the sound deadening. I've done 2 trucks real well. The cab was completely covered &I filled the cab voids with expanding foam. The quiet & noise reduction were worth the time ,labor & cost. Plus it made my stereo sound twice as loud. Its a great mod. I know about putting a build on hold. Its just part of building on a budget. I just keep adding parts as I can afford them. I keep my trucks for many years so I have time.
#50
03-25-2010, 08:39 PM
Join Date: Jan 2004
Location: Rio Linda, Ca
Posts: 763
Likes: 0
Received 0 Likes
on
0 Posts
So I did some thinking out loud today. Was trying to decide what I was going to need for wire so I can order some up. But I need to decide how it is going to enter into the truck and where. 16 subs will eat up a good amount of room in the back so it will really limit on where I can put the amps. I was thinking of dividing them 4 and 4 on the front and rear of the box molded into the box. The front won't be too bad, but the rear may be a pain with the addition of the port. The other idea is to do them under the box. Not the best way to show them off but I was thinking about a pull out tray for the 4 in the rear.
8 HF-2500.1 really don't take up too much room once I laid them out.
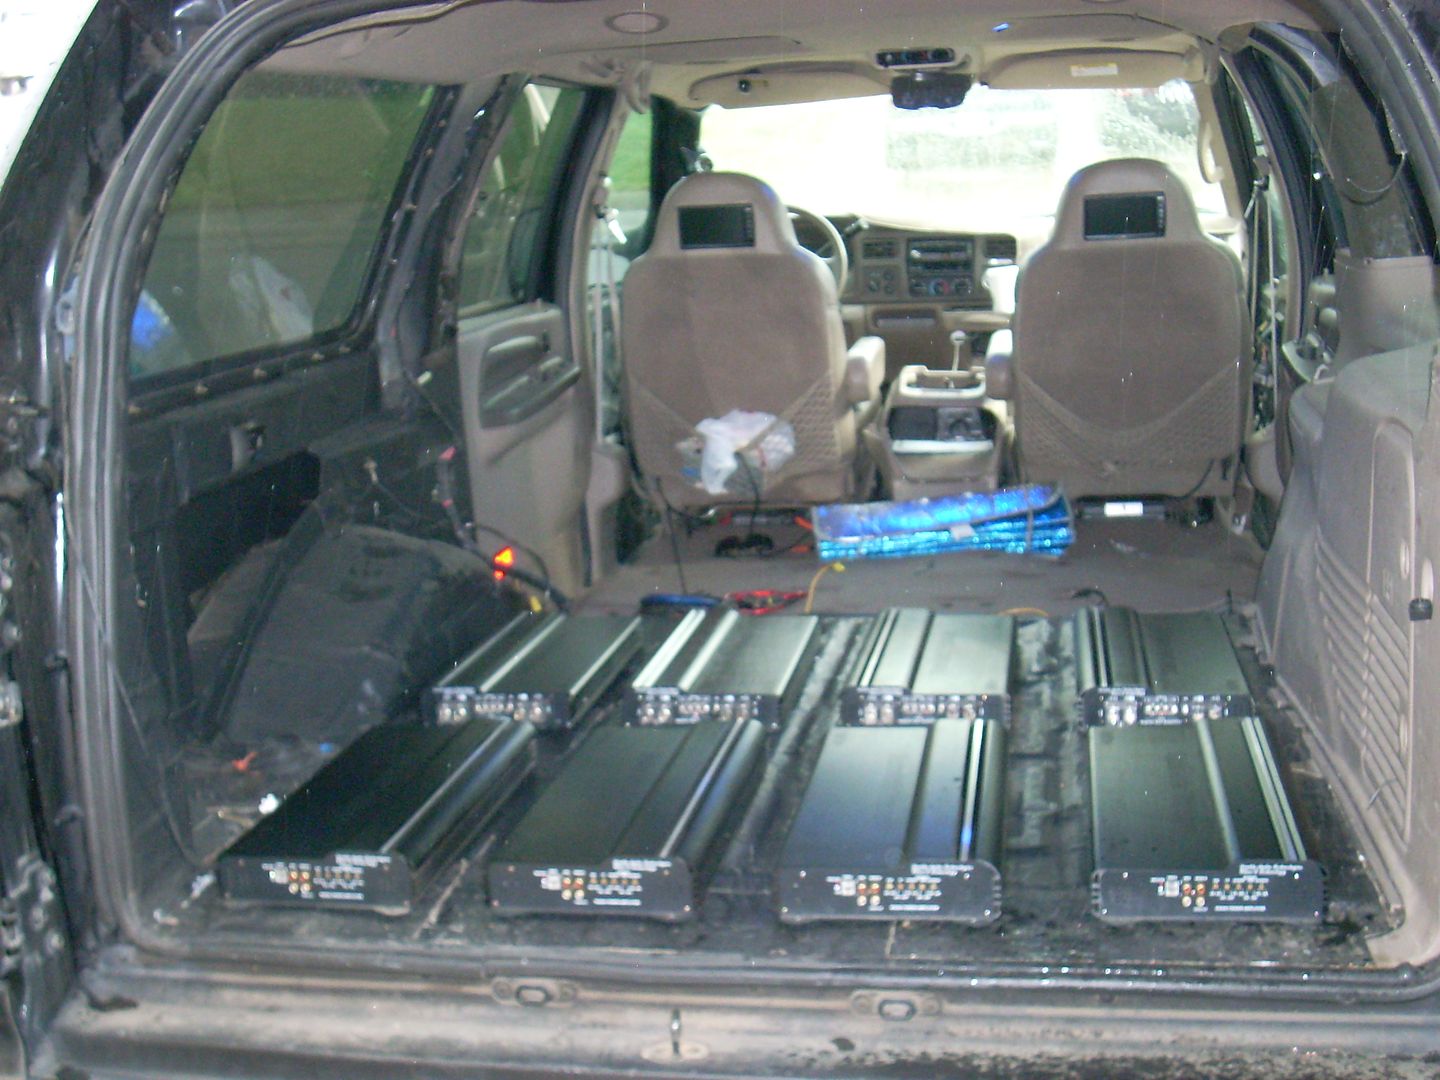
At any rate, it's a good amount of wire from the alts to the battery racks and then to the amps. The trick will be figuring out how to feed all 8 amps from the batteries under the truck along the frame rails.
8 HF-2500.1 really don't take up too much room once I laid them out.
At any rate, it's a good amount of wire from the alts to the battery racks and then to the amps. The trick will be figuring out how to feed all 8 amps from the batteries under the truck along the frame rails.
#51
03-25-2010, 08:53 PM
Senior User
Join Date: Jun 2007
Location: Rogers, MN
Posts: 459
Likes: 0
Received 0 Likes
on
0 Posts
Are you making the enclosure out of fiberglass or MDF?
I always thought it would be cool to put the amps down the center kinda stacked on eachother at an angle (like scales on a reptile), then have the subs face the center (even number on each side). From the back it would look kinda like a valley down the center with the amps starting higher (towards the front of the vehicle) and ending about floor level (at the back of the vehicle). It would be a very intricate box.
Two others would be the amps on the ceiling (PITA to mount), and amps in the window openings (ther is about a 6" space that you could do some fancy fiberglassing to recess them in there).
I know that these ideas are over the top, but from what I have seen with the rest of your build you should be able to handle anything you really want to do.
Thanks for keeping us updated.
#52
03-25-2010, 09:52 PM
Join Date: Jan 2004
Location: Rio Linda, Ca
Posts: 763
Likes: 0
Received 0 Likes
on
0 Posts
The box is going to be a combo of birch and glass. Going with as many subs as I am, I need all the airspace I can get. I want to grab as much space around the wells and AC unit as I can. I am sure I will change my mind about 100 times on the placement of the amps as I get the box going.
Each of the amps have dual power and ground inputs so that's a whole bunch of wires all over the place. I might try a few tricks with some buss bars I have and the fuse holders to make some sort of power race track.
Each of the amps have dual power and ground inputs so that's a whole bunch of wires all over the place. I might try a few tricks with some buss bars I have and the fuse holders to make some sort of power race track.
#53
03-26-2010, 11:02 AM
Senior User
Join Date: Jun 2007
Location: Rogers, MN
Posts: 459
Likes: 0
Received 0 Likes
on
0 Posts
 . I think a buss bar would be the way to go.
#54
03-26-2010, 06:30 PM

Have you thought about using HPDE Conduit under the truck. It comes in any size from 1" to 12" and many wall thicknesses. It is plastic pipe, but somewhat flexible. Electrical Nonmetalic Tubing(ENT) would be another alternative. It is corregated and flexible, also plastic, but would not offer as much protection as a thick wall HDPE. You could run all your power through it and not be concerned with shorts. You could hang it somewhere in all that space along the frame. Also there is ample room under the EX to bulid a batttery rack.
#55
04-01-2010, 11:09 PM
Join Date: Jan 2004
Location: Rio Linda, Ca
Posts: 763
Likes: 0
Received 0 Likes
on
0 Posts
Have you thought about using HPDE Conduit under the truck. It comes in any size from 1" to 12" and many wall thicknesses. It is plastic pipe, but somewhat flexible. Electrical Nonmetalic Tubing(ENT) would be another alternative. It is corregated and flexible, also plastic, but would not offer as much protection as a thick wall HDPE. You could run all your power through it and not be concerned with shorts. You could hang it somewhere in all that space along the frame. Also there is ample room under the EX to bulid a batttery rack.
The rack will take up most of the run under the truck then each side will have 2 runs each of 4/0 wire from the alts to the racks and then 4 runs of 4/0 from the battery racks to the amp racks. The last part I need to decide on is where my pass through bolts will be in the back
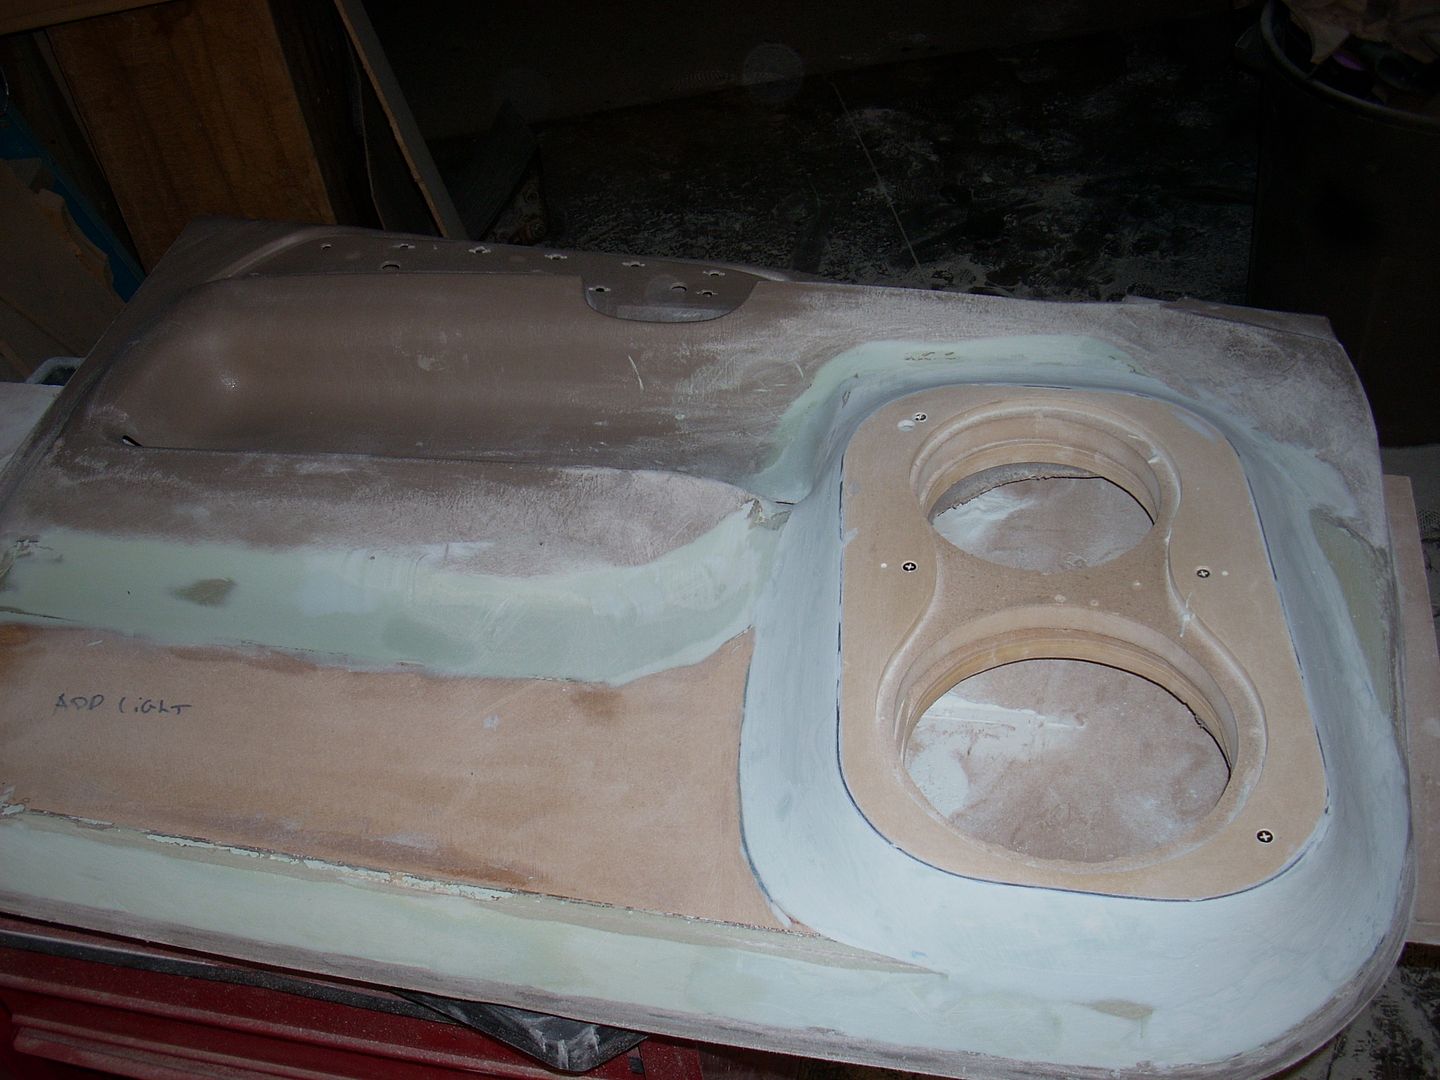
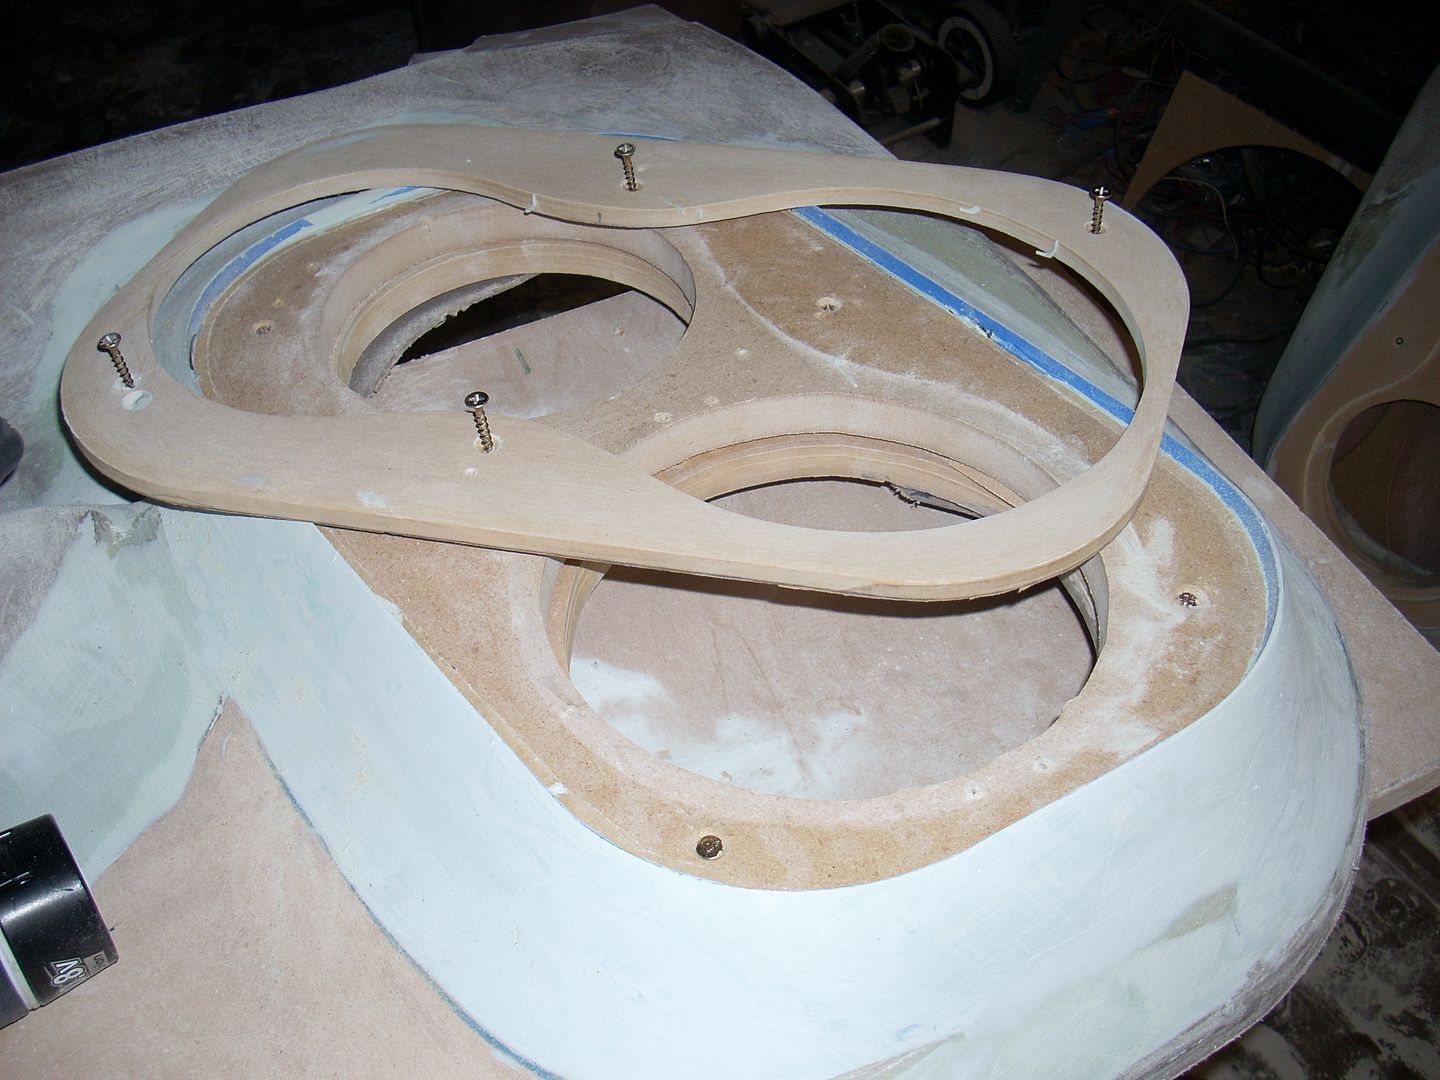
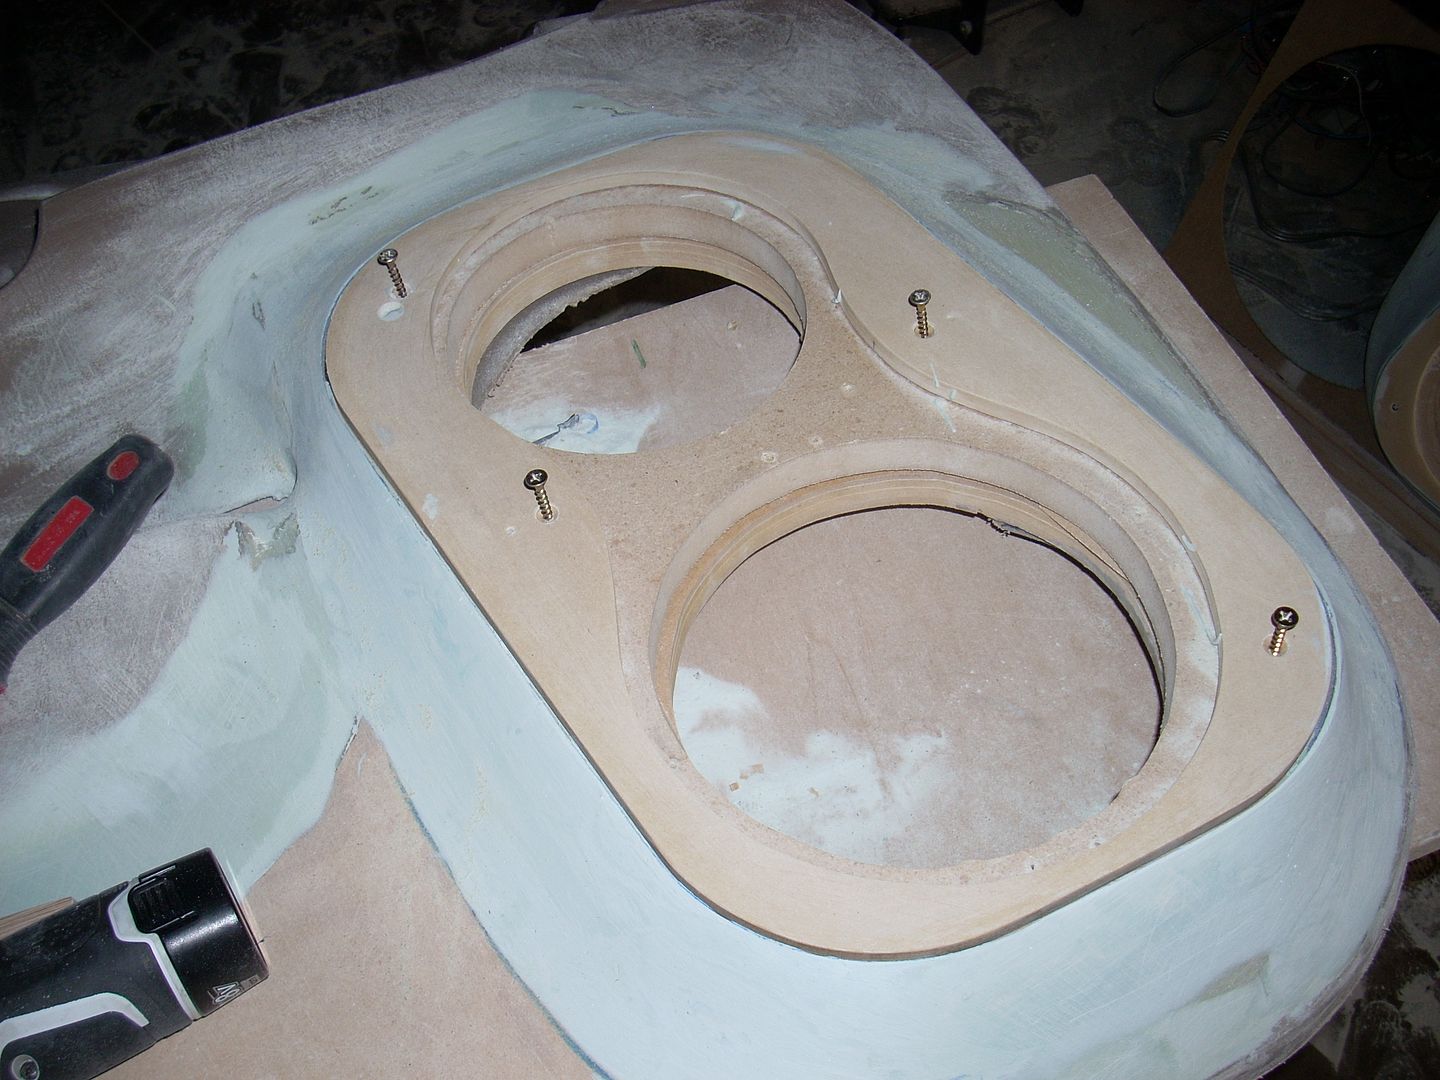
I finally got over being pissed about the doors and decided to get working on them again. I ended up redoing the whole damn thing because the speakers bottomed out before sitting in the holes .
I took a few days off to help a member of another forum install his system.
Blackedout's DAT 08 Civic SI trunk rebuild (56K... Probably not) - SMD Forum
#56
06-24-2010, 06:55 PM
Join Date: Jan 2004
Location: Rio Linda, Ca
Posts: 763
Likes: 0
Received 0 Likes
on
0 Posts
Well after much dickin around on other projects, I decided to put some time in on the truck again.
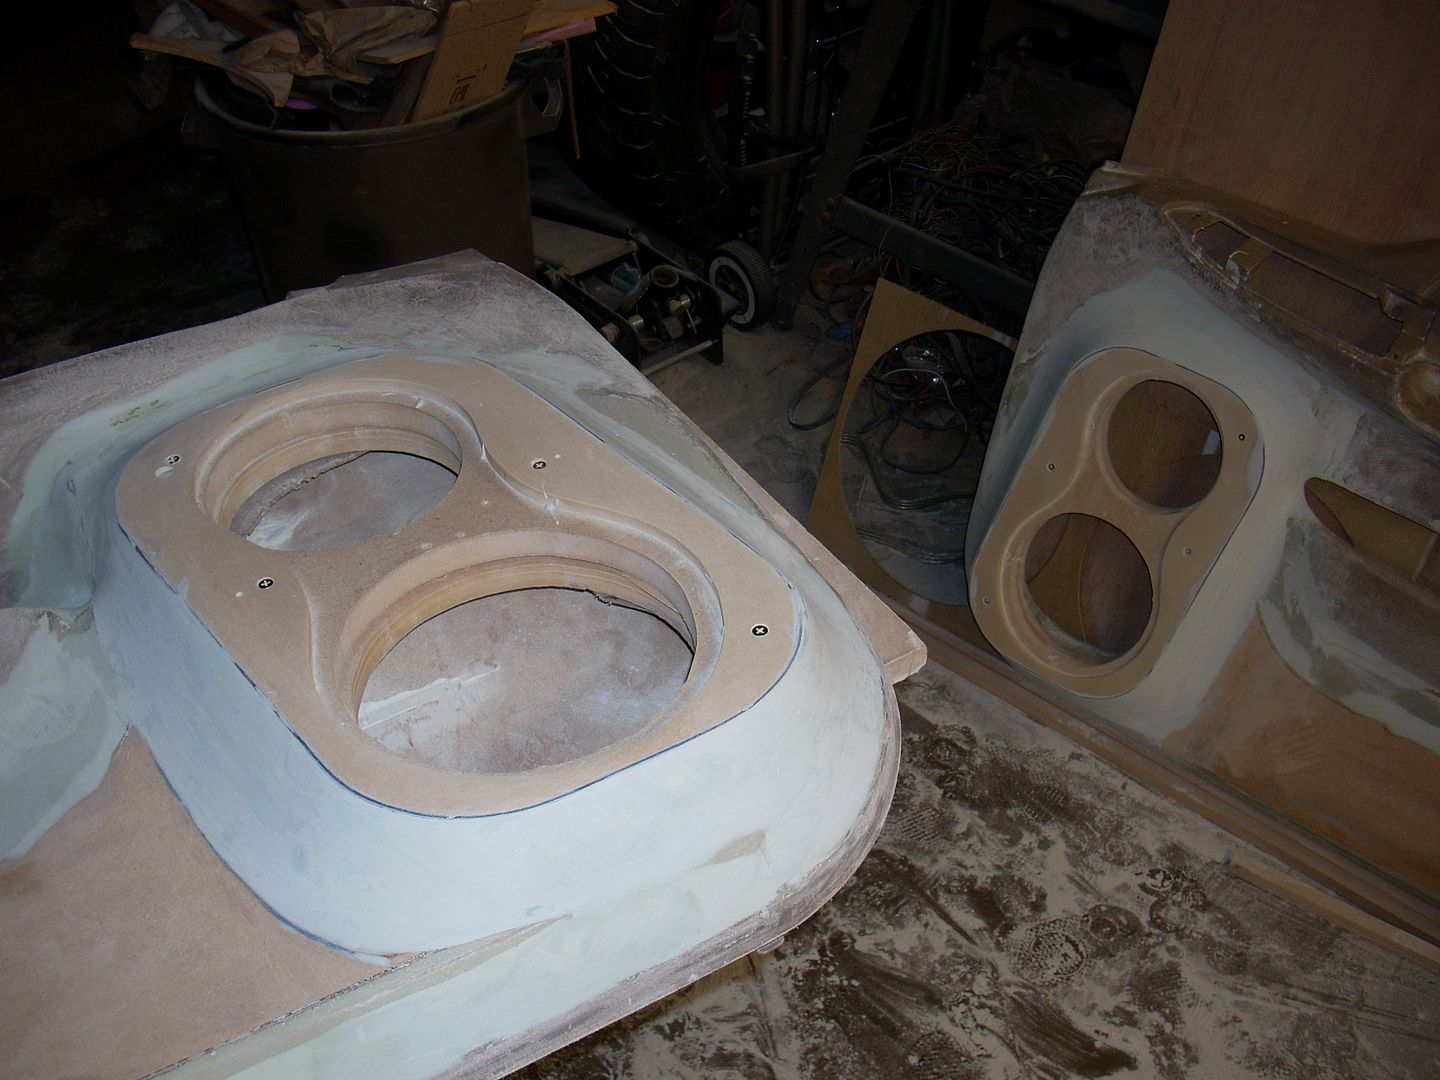
So I spent some time sanding these down and really working them over for some paint. As well know wrapping is way easier to cover the crap you didn't want to take the time to smooth out

I also decided to add some Second Skin LLP where the factory foam was on the back of the doors. It makes for a tight fit, but takes all the rattle out.
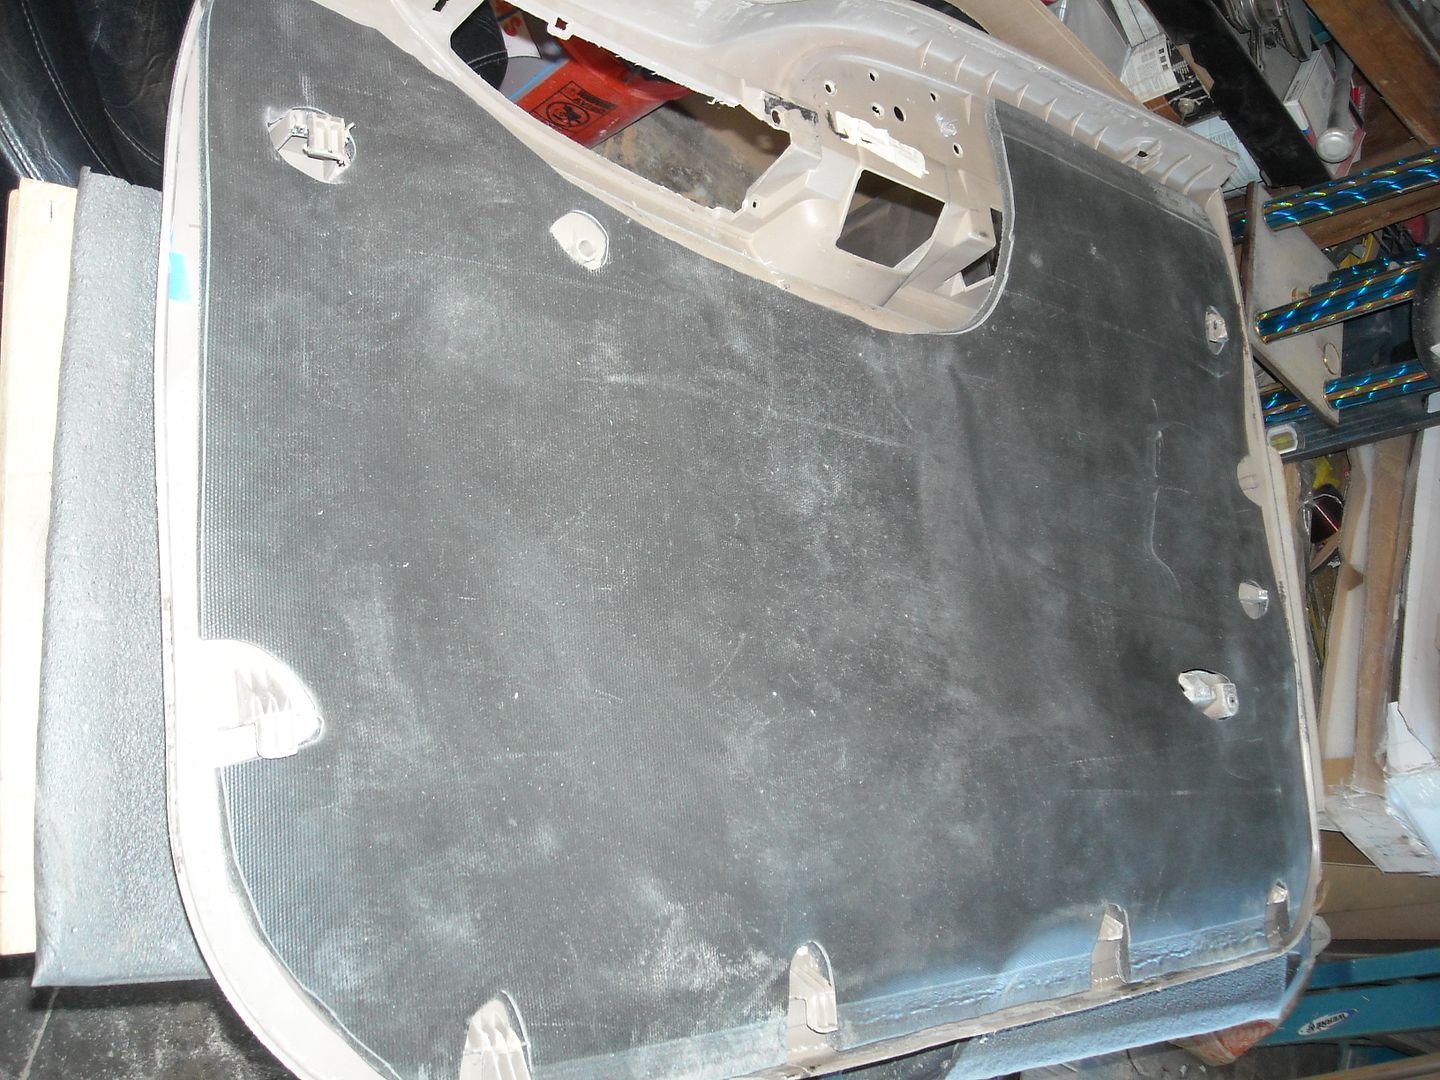
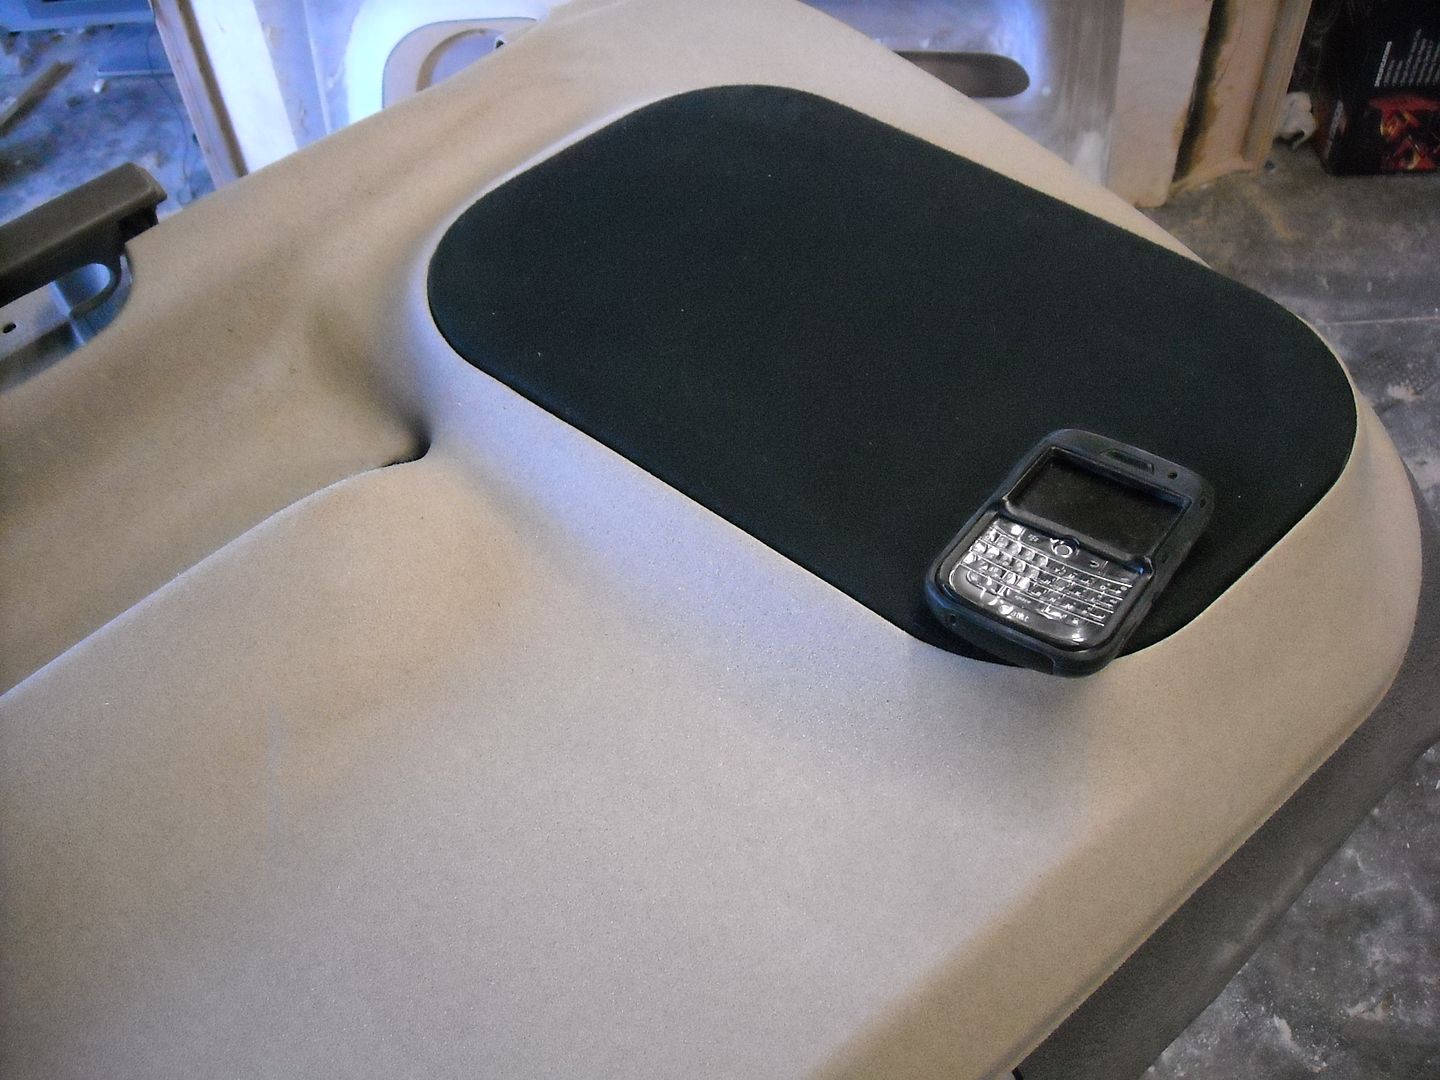
Figures I would have a pic of it all done up and it already be dirty.
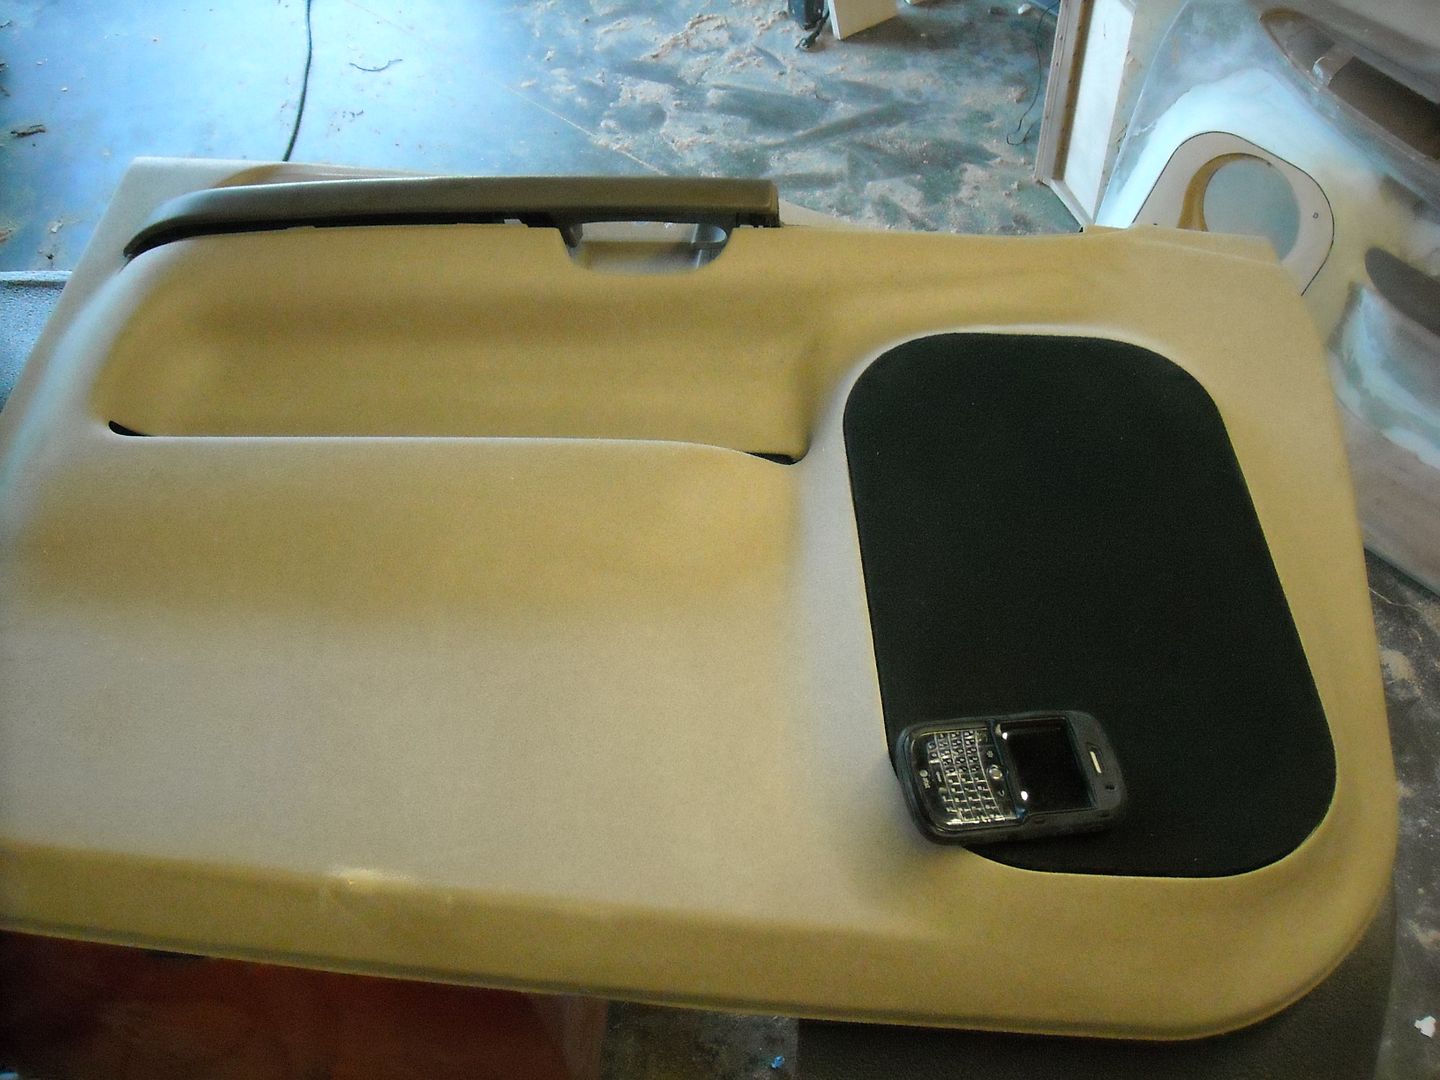
I left off the arm support covers as these will get rewrapped.
Now the black grille cloth is all I have right now. Once I find a tan to match, I will re cover them.
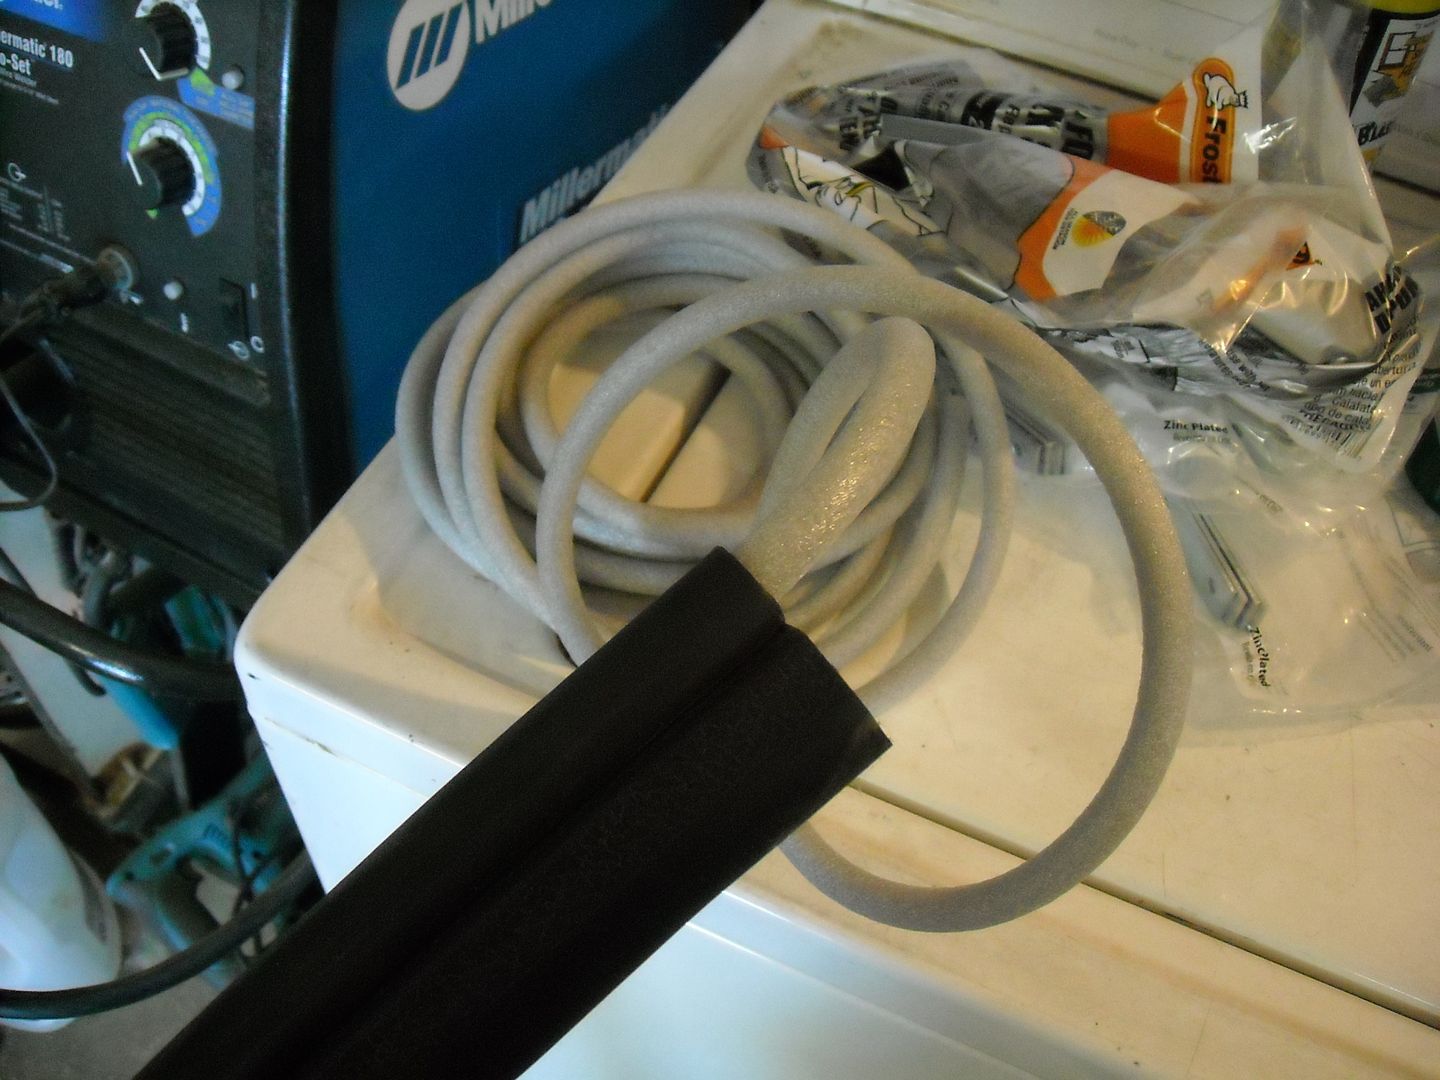
Now the last little trick to do to help seal the doors is to fill the gap in the weather stripping with backer rod window sealant. It's a tricky process and I find it easier to do with fish rods to help pull the material through. The other thing to do is use a silicone spray to help it through.
These doors shut like a brand new truck again
So I spent some time sanding these down and really working them over for some paint. As well know wrapping is way easier to cover the crap you didn't want to take the time to smooth out
I also decided to add some Second Skin LLP where the factory foam was on the back of the doors. It makes for a tight fit, but takes all the rattle out.
Figures I would have a pic of it all done up and it already be dirty.
I left off the arm support covers as these will get rewrapped.
Now the black grille cloth is all I have right now. Once I find a tan to match, I will re cover them.
Now the last little trick to do to help seal the doors is to fill the gap in the weather stripping with backer rod window sealant. It's a tricky process and I find it easier to do with fish rods to help pull the material through. The other thing to do is use a silicone spray to help it through.
These doors shut like a brand new truck again
#57
06-24-2010, 07:12 PM
Senior User
Join Date: Jun 2007
Location: Rogers, MN
Posts: 459
Likes: 0
Received 0 Likes
on
0 Posts
Well after much dickin around on other projects, I decided to put some time in on the truck again.
So I spent some time sanding these down and really working them over for some paint. As well know wrapping is way easier to cover the crap you didn't want to take the time to smooth out
Now the last little trick to do to help seal the doors is to fill the gap in the weather stripping with backer rod window sealant. It's a tricky process and I find it easier to do with fish rods to help pull the material through. The other thing to do is use a silicone spray to help it through.
These doors shut like a brand new truck again
Also, what made you use the foam door seal stuff in the weather stripping instead of the vinyl tubing (3/8" OD x 1/4" ID)? I am getting ready to do that mod.
By the way, welcome back, and I am glad that you didn't forget about this awesome build thread.
Have a good one,
GregN
#58
06-24-2010, 07:30 PM
Join Date: Jan 2004
Location: Rio Linda, Ca
Posts: 763
Likes: 0
Received 0 Likes
on
0 Posts
Greg.
Thanks.
Every time i get to working on this, 10 more things come up to take me back off it.
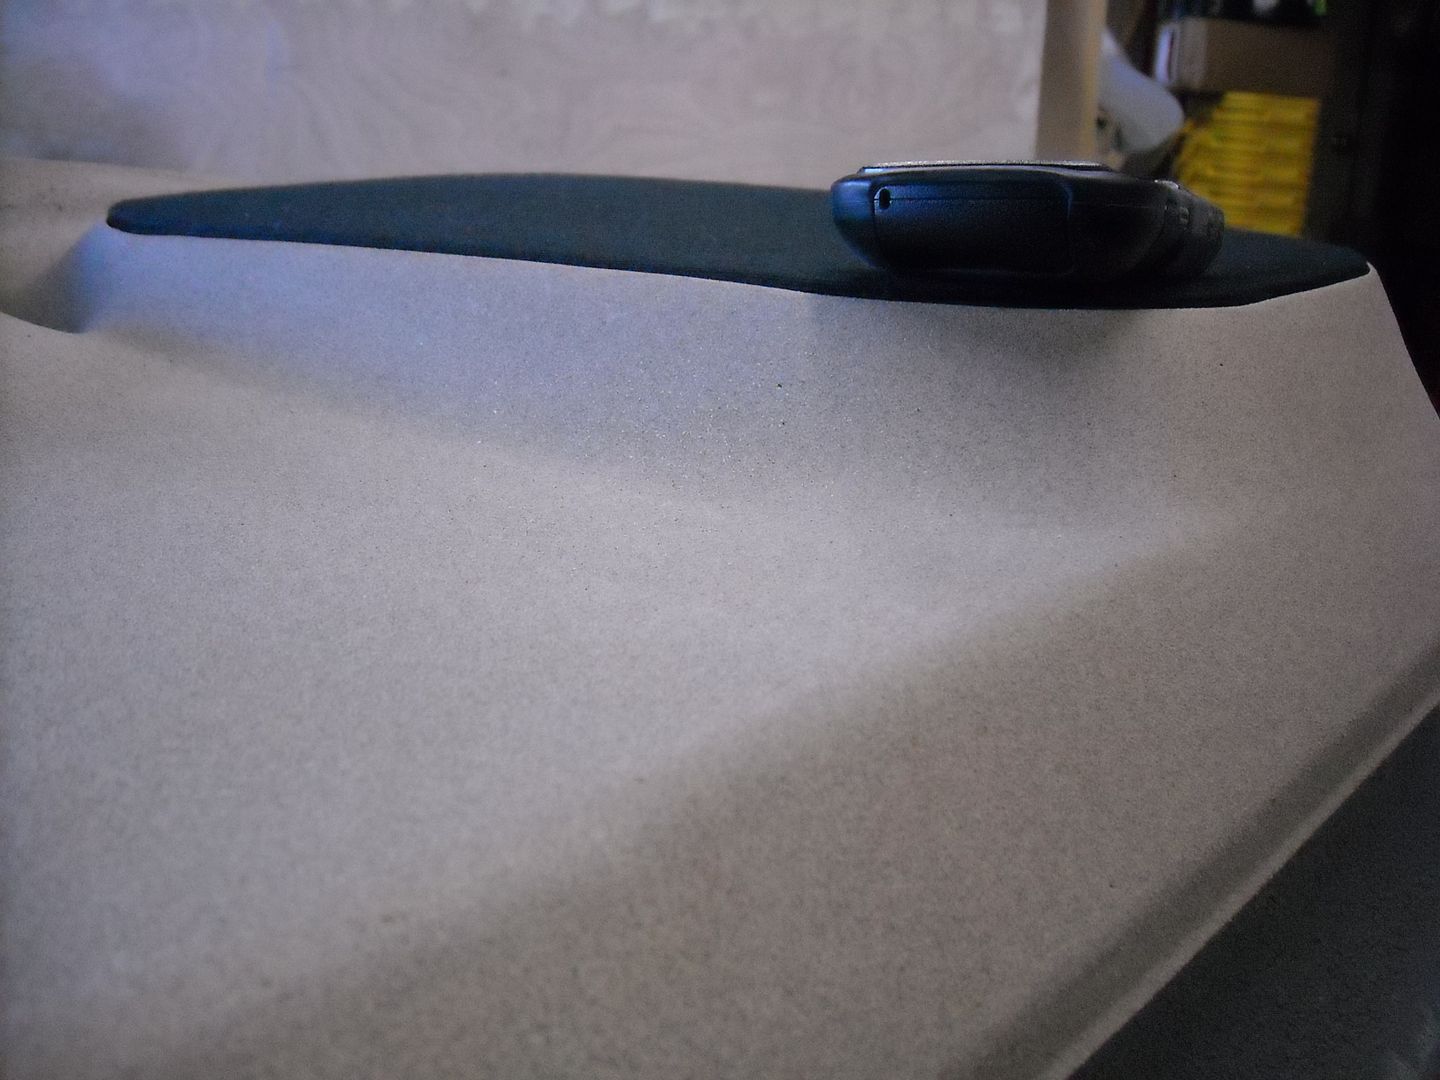
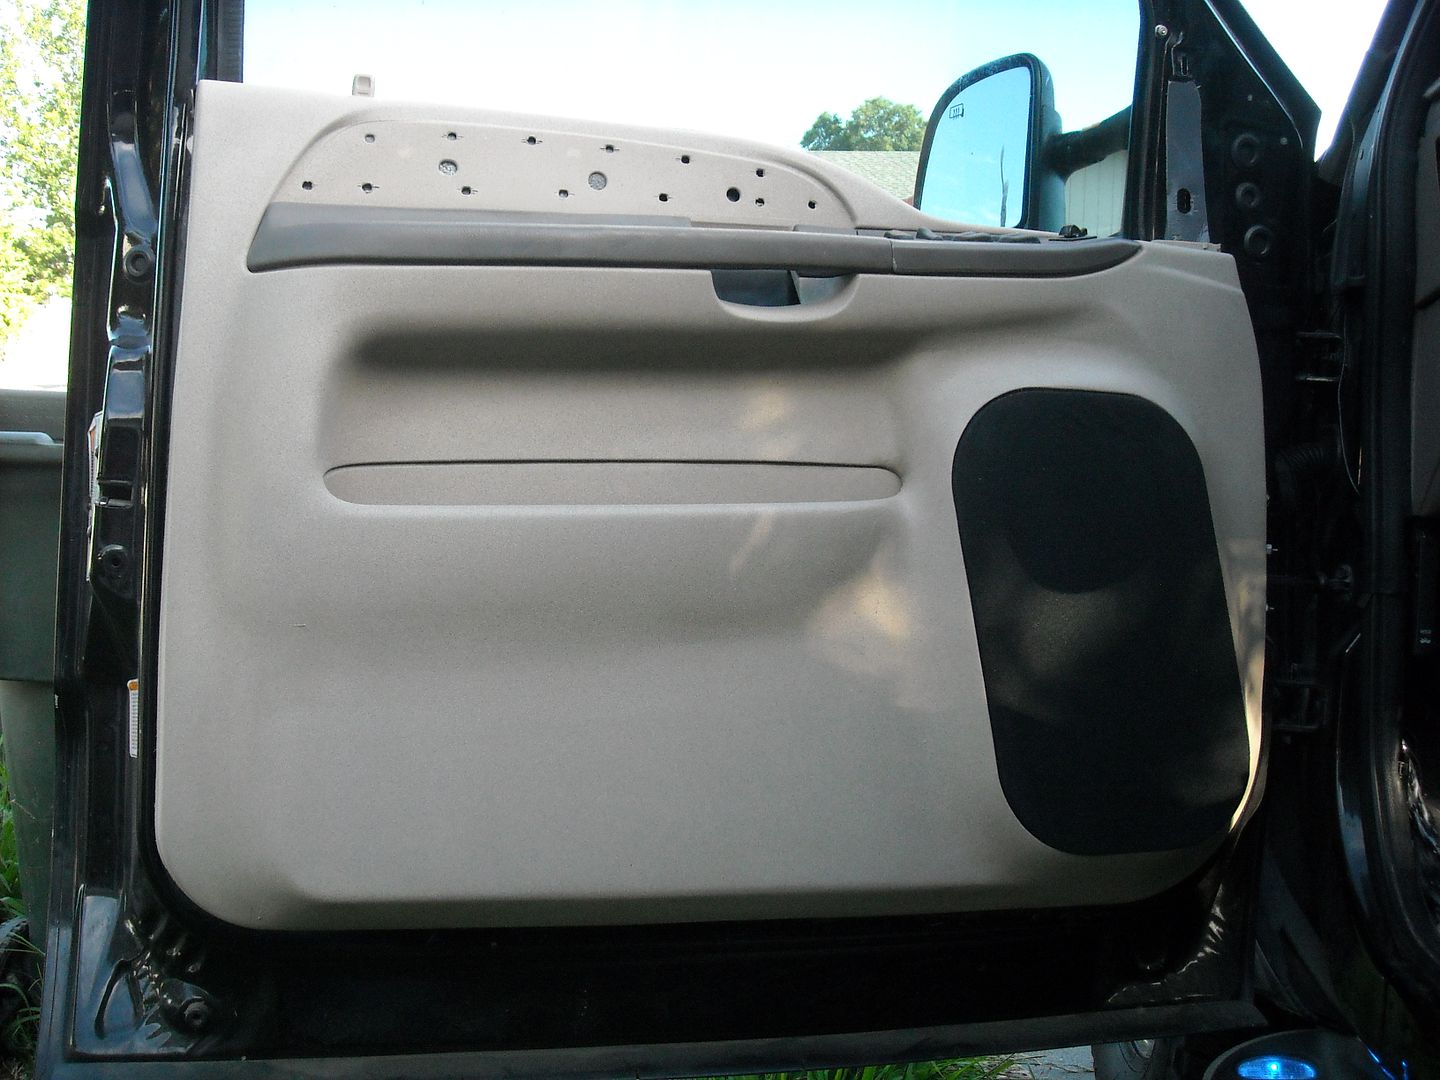
I went ahead and painted them. I had covered one in vinyl from a stock color and pattern, however once it was on, I wasn't too happy with it. So I pulled it and there it sat for awhile. I started working with some textured paints as well as about a mixture of 3 different colors to get this sand finish I was looking for. It's for sure a one of a kind, but will require me to match the rest of the plastic in the truck. It's very time consuming so I will do it as time permits.
I haven't wrapped the arm rests yet because I have misplaced one. So if I can't find it in the next few weeks I will head down to the wreckin yard for new ones. Haven't decided if I will do a material wrap on them or get the hard plastic and have them dipped in a custom pattern.
I used the foam because its a little more rigid then the tubing. However the tubing is way easier to slide in then the foam
Thanks.
Every time i get to working on this, 10 more things come up to take me back off it.
I went ahead and painted them. I had covered one in vinyl from a stock color and pattern, however once it was on, I wasn't too happy with it. So I pulled it and there it sat for awhile. I started working with some textured paints as well as about a mixture of 3 different colors to get this sand finish I was looking for. It's for sure a one of a kind, but will require me to match the rest of the plastic in the truck. It's very time consuming so I will do it as time permits.
I haven't wrapped the arm rests yet because I have misplaced one. So if I can't find it in the next few weeks I will head down to the wreckin yard for new ones. Haven't decided if I will do a material wrap on them or get the hard plastic and have them dipped in a custom pattern.
I used the foam because its a little more rigid then the tubing. However the tubing is way easier to slide in then the foam
#59
07-16-2010, 04:33 PM

Freshman User
Join Date: Aug 2005
Location: Palm Beach,FL
Posts: 39
Likes: 0
Received 0 Likes
on
0 Posts
So I did some thinking out loud today. Was trying to decide what I was going to need for wire so I can order some up. But I need to decide how it is going to enter into the truck and where. 16 subs will eat up a good amount of room in the back so it will really limit on where I can put the amps. I was thinking of dividing them 4 and 4 on the front and rear of the box molded into the box. The front won't be too bad, but the rear may be a pain with the addition of the port. The other idea is to do them under the box. Not the best way to show them off but I was thinking about a pull out tray for the 4 in the rear.
8 HF-2500.1 really don't take up too much room once I laid them out.
At any rate, it's a good amount of wire from the alts to the battery racks and then to the amps. The trick will be figuring out how to feed all 8 amps from the batteries under the truck along the frame rails.
8 HF-2500.1 really don't take up too much room once I laid them out.
At any rate, it's a good amount of wire from the alts to the battery racks and then to the amps. The trick will be figuring out how to feed all 8 amps from the batteries under the truck along the frame rails.
#60
07-22-2010, 12:34 PM
Join Date: Jan 2004
Location: Rio Linda, Ca
Posts: 763
Likes: 0
Received 0 Likes
on
0 Posts
The box will be similar to the style in the past install. Under the window line, and this time, molded into the sides for a tighter fit. Molding the amps into the headliner would work better if it was just for show. With the amount of bass, shaking, and flexing that is going to happen, it would make it hard to support the weight as well as support it all with the conditions that the amps will encounter on a daily basis. It would look sick to have them up there like that, but fiber-glassing over head would really suck.
I haven't fully decided on how the amps will fit in the whole setup. In one way or another, they will be on display when the truck is open.
I haven't fully decided on how the amps will fit in the whole setup. In one way or another, they will be on display when the truck is open.