
Just put LEDS in the dash!


#167
 04-29-2013, 11:02 AM

#168
04-29-2013, 11:12 AM
Senior User
Join Date: Feb 2007
Location: Albuquerque 87107
Posts: 122
Likes: 0
Received 0 Likes
on
0 Posts
I removed the gauge needles and then removed the gauge faces, once you have them removed then the fun pain staking part starts by scrapping the green tint off the back of the numbers and letters...the first time I did it I didn't removed the green tint from behind the odometer and this time around I did and it looks great. The ***** I did paint those, the gauge needles I painted too, and the center console I built, holds two 10" subs and I upholstered and memory foamed the console, installed cup holders that I ordered out of a boat/marine catalog that had the red LED's built into them already, the cup holder LED's and all the LED's in the cluster work of the light switch and also dim/brighten with no issues at all

The floor board areas work off the door switches, so when I open the drivers side door the floor boards light up and when I turn the dimmer switch to the dome switch setting the floorboard area lights up too.
Last edited by sonsila; 04-29-2013 at 11:31 AM. Reason: forgot some information
#169
04-29-2013, 11:27 AM
Senior User
Join Date: Feb 2007
Location: Albuquerque 87107
Posts: 122
Likes: 0
Received 0 Likes
on
0 Posts
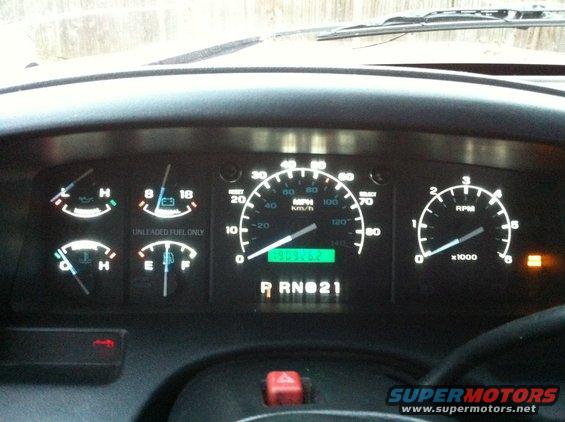
I left the clear plastic cover off so I could set the gauge needles back at their correct settings.
- the first gauge I started with was the temperature gauge, started up the truck and then I set the gauge needle at cold.
- next I put the tachometer gauge needle on after the truck was at idle and if memory serves me correct our trucks should normally be idling around 700-800 rpms so that's where I set the needle.
- next I set my oil pressure gauge needle in the middle, I also double checked my oil level to make sure I was good.
- I drove to my local gas station and filled up my gas tank and then I set my gas gauge needle at full.
- my battery gauge I made sure that I took a picture of where that gauge was before I pulled and I checked the picture and set my gauge accordingly.
- the fun gauge was setting the speedometer gauge, I found a good stretch of road and with my cell phone I opened my gps and clocked my speed according to that and when I was satisfied I put the needle in its place. I just happen to know where at speed check sign was and cruised by there just to see if I was close on my speedometer setting and as luck would have it I was right on the money.
#175
04-29-2013, 06:41 PM
Looks good y'all... I just got my LED's in tonight. Ordered (7) of the 194's, 5 for the gauges and 2 for the HVAC. Broke one (maybe it was already broken?) but I got the gauges done and can't do the HVAC panel anyway til I get to the yard and get a new faceplate decal. Screwed up my factory one trying to get the green color off the back.
For the gauges you can take the green off with some lacquer thinner and a q-tip. It seems to work alright for the HVAC panel too but the black tends to want to come off easier than it does on the gauges. I tried chlorinated brake cleaner first and it instantly dried out the plastic and the durn thing crumbled into dust right there on my work bench... hence why I need to make a trip to the yard lol.
Also got (2) warm white LED's for the map lights, and (1) red LED for the dome light. I disconnected the door switches so it's only controlled by the main light switch. The red color won't hurt night-adapted vision like other colors do, and if I want natural color I have the map lights.
I'll try to take some pics tonight.
Next lighting mod is to do running and signal lamps, and get a silent flasher module. Then maybe do the warning light bulbs and after that it's time for some LED floodlights for them dark trails!
#176
04-29-2013, 07:43 PM
Ifyou look at the needle of your tach closely you will see that it doesn't actually rest on the lower peg when the truck is off. I know mine didn't. I noticed is rested JUST above the peg. So I just kinda guessed when I put it back on.
#178
04-29-2013, 10:40 PM
You have to remove the black bezel around the cluster. There are two screws, one under each of the trim pieces that are on the bezel. Once those are removed, you take the bezel off, unscrew and unplug your fuel selector(if you have one), and then there will be 4 more gold screws on the cluster holding the clear lens on.
#179
04-29-2013, 10:59 PM
Posting Guru
Join Date: Jan 2013
Location: VA
Posts: 1,933
Likes: 0
Received 0 Likes
on
0 Posts
#180
04-30-2013, 09:52 AM
Senior User
Join Date: Feb 2007
Location: Albuquerque 87107
Posts: 122
Likes: 0
Received 0 Likes
on
0 Posts

